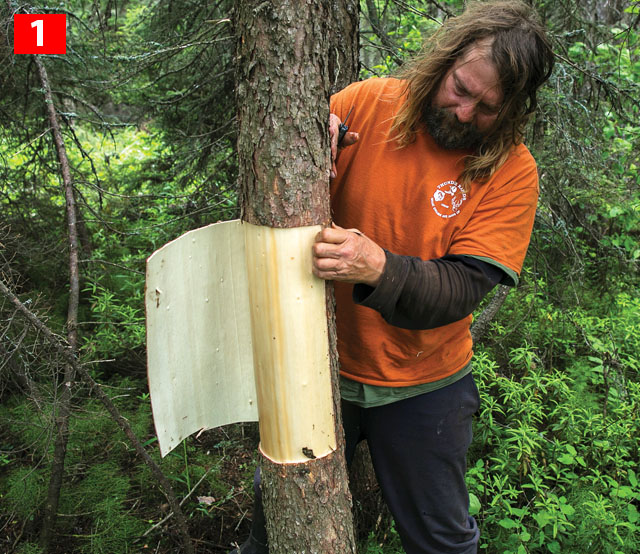
Canada’s modern-day voyageur is windbound in a spruce swamp on the edge of Cedar Lake, Manitoba. Windy days have been a theme on this trip, which is Ranta’s attempt at a third coast-to-coast solo canoe expedition. Time is running out with each crashing wave during the stormy summer. Ever the optimist, Ranta is keen to put his time on shore to good use and spends the afternoon making one of his iconic bark hats. “The sap is still running,” beams Mike Ranta as he licks his finger clean of the sticky, sweet ooze.
For those who dream of building a birch bark canoe, Ranta’s signature hat is a great way to learn how to work with natural materials. And while you might never wear yours on a seven-month cross-continent canoe trip, you’ll still have a functional hat to connect you to the land and protect you on long days under the sun.
How to make a hat from a tree
1. Gather two pieces of bark, one about 18 by 18 inches and the other four by 12 inches. Lay them flat.
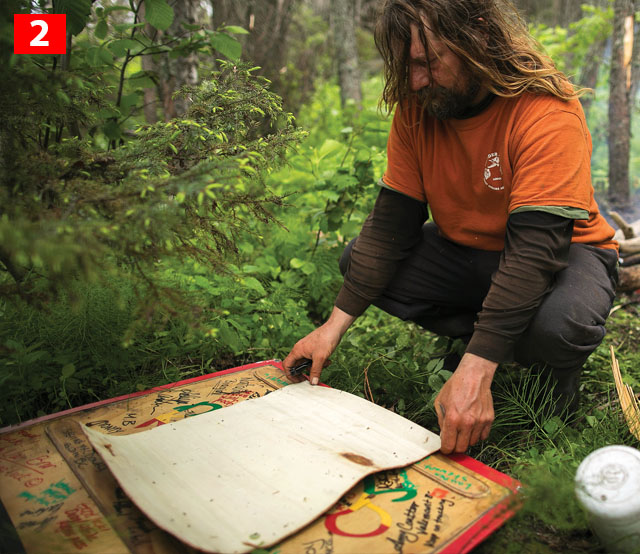
2. Wrap a string around your crown to get a rough measurement of your head’s circumference. Translate this measurement onto the bigger piece of bark. Use a knife to cut out the circle. This cutout will serve as the top of your new hat. The remaining piece is the hat’s brim; trim its edges as desired.
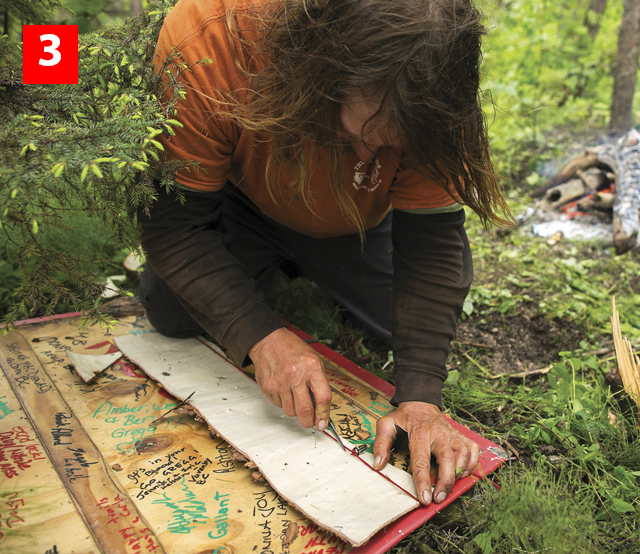
3. Trim the long and narrow strip of bark an inch longer than your head’s circumference. This will be the bucket of the hat. That extra inch creates the overlap needed to use spruce lashings to bind the strip together.
4. Gather two lengths of spruce root about four feet long and a quarter-inch thick. Working delicately with a knife, split the root down the center lengthwise. Splitting the root adds flexibility. For a quarter-inch thick piece, Ranta might split the root four times, before coiling the pieces into warm water. Spruce root becomes very pliable when wet.
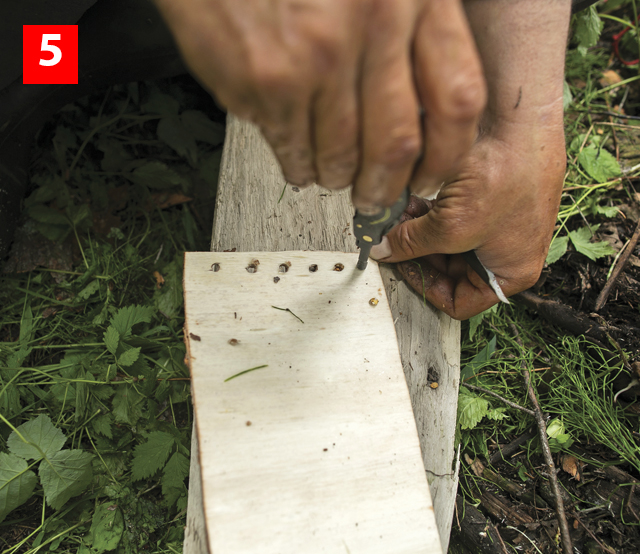
5. Using a carving knife, create a series of tiny holes around the inner edges of the brim, about a half-inch apart. Holes should be only large enough to accept the diameter of the root. Make more holes along the top, bottom and seam of the bucket piece, as well as the edge of the piece that creates the top of the hat.
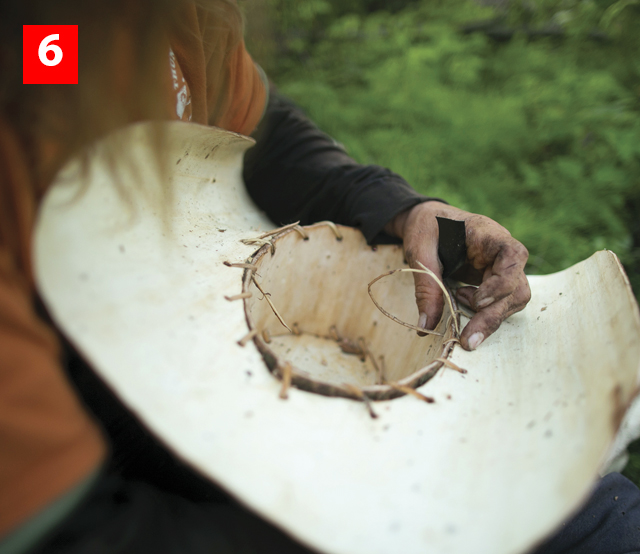
6. Feed the spruce root through the punctures, first lashing the seam of the bucket and ensuring the fit is right for your head. Next, lash bucket and brim together, and affix the top piece in the same manner.
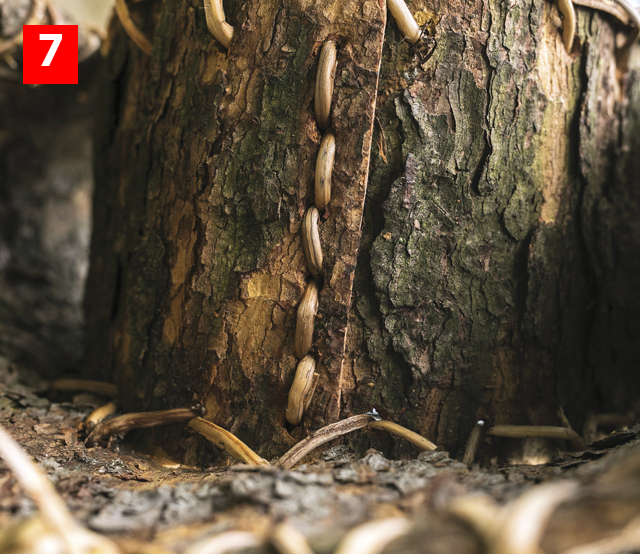
7. Make a final series of holes on the outer edge of the brim. Cut a thin strip of bark, notch it with holes along both edges, and bend the strip, bark out, around the brim. Lash in place. This step is crucial for keeping the edge of the brim from fraying once the sap dries and the hat begins to harden.
8. Traditionally, First Nations and voyageurs would use a mixture of bear fat, pine pitch and ash to seal the seams on their bark canoes.
While Ranta did this in the early days of his hat building, the modern voyageur now uses a black automotive silicone to seal all the lash seams. Without bear fat or silicone, Ranta skipped this step in the swamp. Once sealed, the hat becomes completely waterproof.
HELPFUL HINTS
- Harvesting natural materials is a laborious task. Bark is easiest to harvest in the spring when the sap is running, however improper techniques can damage the tree. Bark takes 10 to 20 years to grow back.
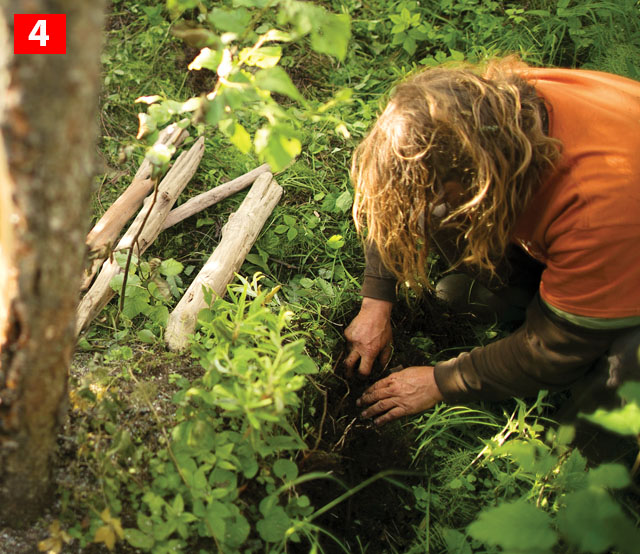
- Harvesting roots involves finding a suitable stand of spruce, penetrating the earth, and pulling at stringy roots in hopes of finding a long enough piece to allow for long runs of lashing. Ranta favors looking for roots in wet swampy areas—without the burden of rocks and other trees crisscrossing roots, extraction can be much easier.
- Ensure harvesting bark and roots is legal in your area before you begin. Most provincial, state and national parks have rules prohibiting it.
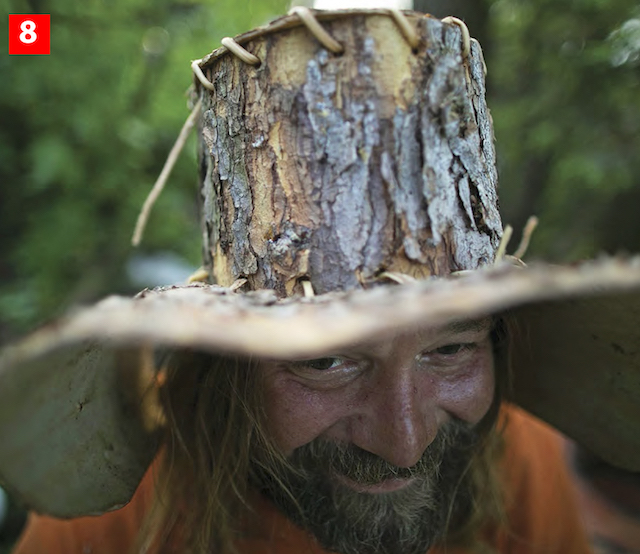
- While the hat is still damp with sap, use a string to tie the hat into the shape you like. Ranta shaped this one into a cowboy hat. If the bark is already hardened when you begin, heat up a pot of water and begin pouring it on the pieces. The bark will soften under the moist heat and will become workable. This allows you to reshape the hat whenever you choose.
Author: David Jackson. Feature Photo: David Jackson
Modern-day voyageur Mike Ranta is from Atikokan, Ontario, and has paddled across Canada three times. Read “Hat Trick,” the feature story on his 2017 journey here.
 This article first appeared in the 2015 Paddling Buyer’s Guide. Subscribe to Paddling Magazine and get 25 years of digital magazine archives including our legacy titles: Rapid, Adventure Kayak and Canoeroots.


You just killed that tree by girdling it for 1 goofy hat! You even cut the sheet of bark into strips so you didn’t need to girdle it, you could have harvested the strips vertically off of the tree and let it survive. This is just dumb.