

To build your own kayak is to take part in a 4,000-year-old tradition beginning when the first Inuit hunter pieced together driftwood and sealskin and took to the Arctic sea. The process can be as simple or as complex as you like, ranging from assembling pre-cut pieces of a stitch-and-glue kit to creating a museum-quality craft of strips of cedar. We review three of the top techniques to get you started on a DIY boat-building project, plus five myths about wooden boats that don’t hold water.
3 Top Techniques to Build Your Own Kayak
1 Skin-on-frame
For thousands of years, kayakers stretched and sewed sealskin over a skeletal frame of driftwood to create sleek, seaworthy crafts used for hunting in icy circumpolar waters. About the only thing distinguishing a modern skin-on-frame kayak from its Inuit origins is a newfangled, rot-resistant nylon skin. A lashed or pegged frame creates an edgy, hard-chined hull. A sculpted masik—the deck rib immediately ahead of the cockpit—locks the paddler in the boat. The characteristic low back deck enables unlimited options for rolling.

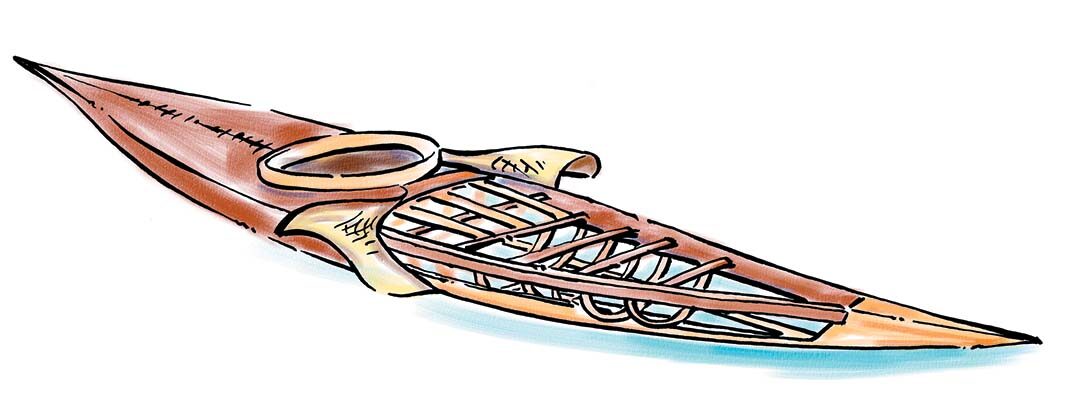
Challenge: Builders need basic woodworking skills and the patience to take on the finicky tasks of joining the frame with mortises and tenons and sewing the skin. But don’t be intimidated. Building involves many little steps, very few of which can cause irreparable damage should you make a mistake.
Commitment: 60–120 hours, depending on whether the DIYer cuts a few detail-oriented corners.
2 Woodstrip-epoxy
A well-built cedarstrip kayak has the sheen of a fine piece of furniture. It’s no wonder many builders are tempted to hang their creation on the wall and never let it touch water. Beneath the glossy surface is a brawny fiberglass-wood composite that’s surprisingly tough. The hull and deck of woodstrip-epoxy kayaks are built on a strongback—a series of plywood forms over which narrow strips of bead and cove are fastened. Once hull and deck are attached, the entire structure is covered with fiberglass and epoxy resin, and finishing details like the cockpit and hatches are installed.

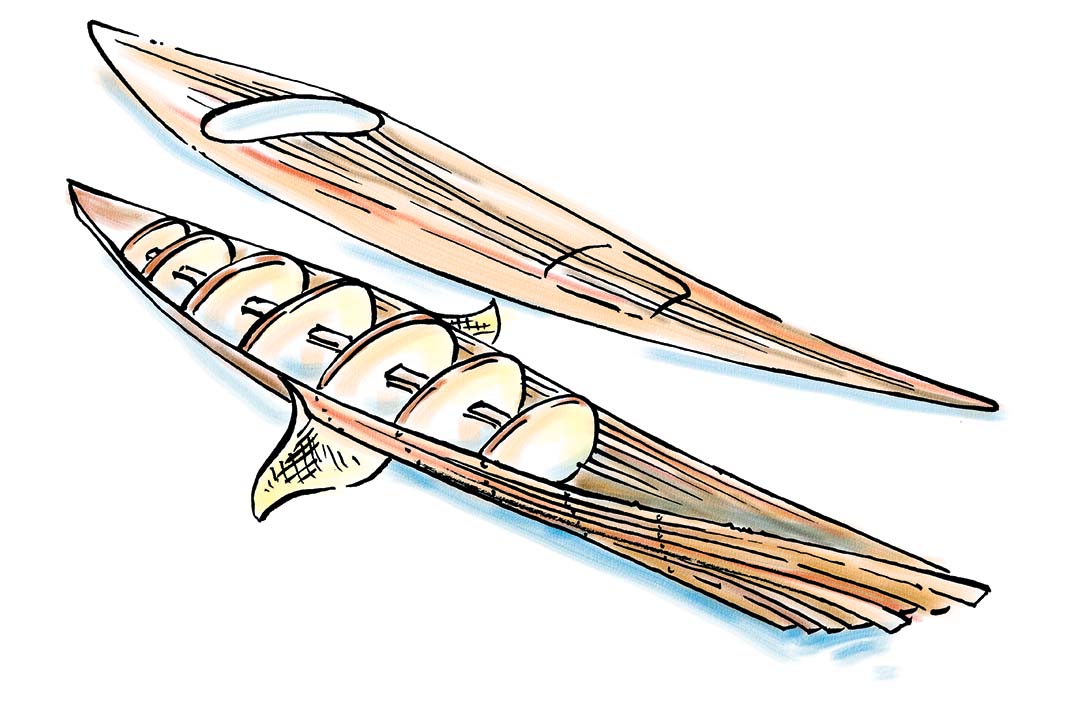
Challenge: Though not quite as foolproof as stitch-and-glue, complete kits and detailed instructional manuals like Ted Moores’ book Kayakcraft make strippers a reasonable project for novice woodworkers.
Commitment: About 150 to 200 hours.
3 Stitch-and-glue
The precision-cut plywood panels of kit boats from designers like Chesapeake Light Craft, Getonthewater.ca and Pygmy Boats make stitch-and-glue the easiest technique for first-time DIYers. The panels are temporarily sewn together with wire, seams are locked into place with thickened epoxy fillets and the entire structure gets fiberglassed inside and out. Most models use temporary jigs in the stitching stage to ensure a properly aligned hull. At least two pieces of plywood go into the deck, which is then fastened to the multi-chined hull with epoxy or a gunwale-like strip of wood known as a sheer clamp. It’s also possible to combine a stitch-and-glue hull with a woodstrip-epoxy deck to create a more aesthetically pleasing hybrid eliminating the awkward process of bending plywood.
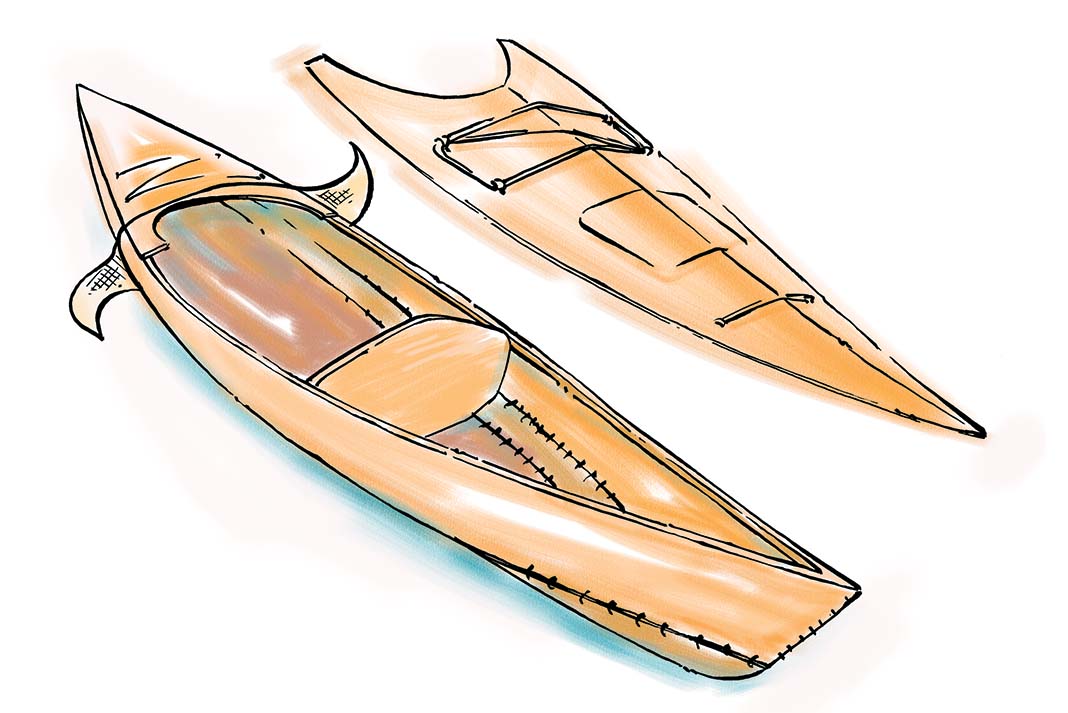
Challenge: Precision-cut plywood panels and detailed instructions make kit boats well within the reach of first-time woodworkers. It’s really just a sewing and fiberglassing job.
Commitment: The average builder can produce a stitch-and-glue kayak in 45 to 80 hours.
5 Wooden Boat Myths Busted
1 Wooden kayaks are fragile
Plywood panels and strips of cedar are just as durable and impact-resistant as store-bought composite kayaks when sandwiched between layers of fiberglass and epoxy resin and coated in UV-resistant varnish.
2 Wooden kayaks are high-maintenance
Wood-fiberglass kayaks require light sanding and a quick coat of varnish every three or four seasons—a small investment to maintain a beautiful watercraft.
3 Wooden kayaks are difficult to build
The simplest pre-cut stitch-and-glue kit boat can be built in 45 hours with minimal tools and no woodworking experience. By signing up for a boat-building workshop, reading instructional manuals and joining an Internet kayak-building forum, just about anyone can build a wooden or skin-on-frame kayak.
4 Wooden kayaks are heavy
A full-size stripper or stitch-and-glue touring kayak weighs about the same as a carbon-Kevlar boat.
5 Wooden kayaks lack performance
Wood-fiberglass construction yields ultra-stiff, efficient to paddle hull shapes; and the tight fit of Greenland-style skin-on-frame kayaks make them effortless to roll.


This article originally appeared in Paddling Magazine Issue 65. Subscribe to Paddling Magazine’s print and digital editions here, or download the Paddling Magazine app and browse the digital archives here.
To build your own kayak can be as simple or as complex as you like. | Feature photo: Adobe Stock


Built my first kayak, Kia Ora, back in 2008, a skin on frame, though it was a modern take on the idea. My second kayak, Leo, a stitch and glue for my wife (a Wood Duck 12) in 2009… and a dozen or so paddles. Built my first canoe, Ursa, last summer… something the article does not touch on is the pleasure one gets from paddling a boat they created. While every builder sees every little flaw, there is nothing to replace the feeling of paddling your own boat.
On the maintenance, last year I revarnished Leo and Kia Ora’s rub-rail… the only real maintenance since they were built… and yes, they are on the water lots. Even spent a couple years outside, hanging under deck.
For Ursa, I did a blog if you are interested in learning more: https://builds.capefalconkayaks.com/2021/07/daves-tandem-66-canoe-belfoutnain-ontario-canada/
I’ve only been designing and building S&T kayaks for 40 years plus selling plans. Don’t glass over the plywood as that doubles the weight and makes repairs, if ever needed, harder to do.
Jigs – only two “V”s for the bottom planks to sit in are needed. They should be placed where the bulkheads are fitted.
“…fastened to the multi-chined hull…” why multi-chine? Single chine works well or no chine also works.
“At least two pieces of plywood go into the deck,” – two because the kayak is longer than one sheet of ply. The decks do not have to be cut accurately as they can hang over the sides and be cut back after gluing.
“fastened to the multi-chined hull with epoxy or a gunwale-like strip of wood known as a sheer clamp.” – doesn’t actually make sense. It should simply be “fastened to the hull sides, with epoxy, to a gunwale-like strip of wood known as a sheer clamp.”
“eliminating the awkward process of bending plywood.”, – nothing awkward about it. Very easy and quick which strip building a deck definitely is not.
“The average builder can produce a stitch-and-glue kayak in 45 to 80 hours.” – I’d suggest allowing 100 hours for a first time builder.
Fragile – No. Sandwiched between layers of fiberglass – No.
When I go paddling do I ever hit rocks? I usually do and damage has only been done on land when dropping from a great height on to something sharp.
Maintenance, paint them as then there will be no UV problems.
Weight can be down to under 20 kg if suitable plywood is used and no glass all over.