This is the year my kayak turns ten. I bought her when she was three years old at a demo sale and I’ve since put on thousands of kilometres. If she were a car, it would be time to trade her in, but she’s not a car—her only moving part is a rudder—and I’m aging faster than she is. A few repairs, upgrades and routine maintenance were all it took to make her better than new.
Below are five safety-oriented upgrades and DIY projects that I chose to celebrate my kayak’s diamond anniversary and prepare for my next West Coast expedition. Read on to find out how to build a new bulkhead, install an electric pump, add storage bags to your cockpit, make your kayak shine in the dark, and keep the sun from eating away at your dream machine.
The quick fix: 5 DIY kayak projects to get trip ready
1 Reduce cockpit volume with a new bulkhead
My stock front bulkhead was seven inches ahead of where I needed it, resulting in less dry storage space in my front hatch and more wasted space in my cockpit. Moving the front bulkhead as close as possible to my feet reduces the amount of water I have to pump out after a rescue. It also gives me a place to rest my feet, mount a foot-operated bilge pump or a foot switch for an electric pump. Most supplies are available at any marine supply store.
Here’s what you need:
- About 10 feet of four-inch fiberglass tape
- Fiberglass resin
- High-density adhesive filler
- Cleaning solvent (acetone)
- Sheet of one-eighth-inch marine plywood
- 80-grit sandpaper
- Disposable brushes, gloves, mixing containers, Popsicle sticks, paper towels, cardboard, scissors, markers, hacksaw blade, knife and scraper
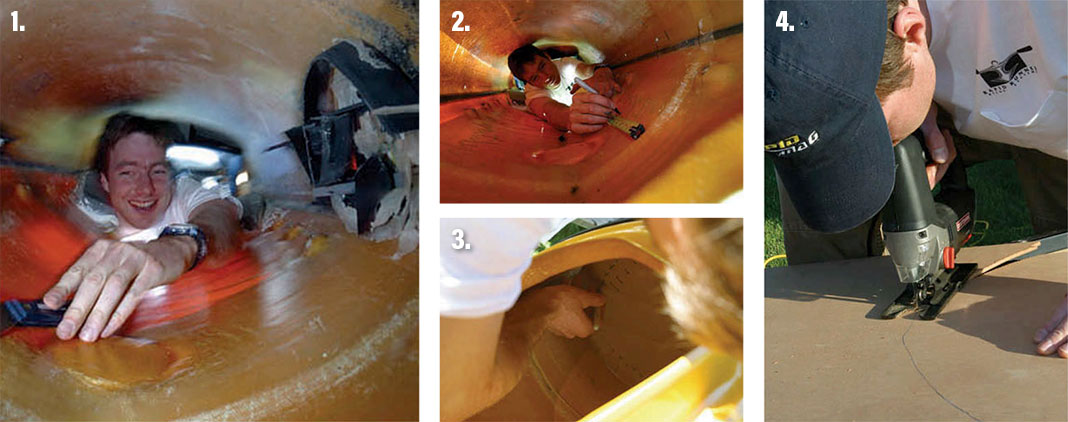
Photo 1: Begin by getting your boat up on a set of cradles at waist level and arranging your tools. Trace a line on the hull to mark the location of the old bulkhead. Then get to work removing your old bulkhead. My plastic bulkheads are sealed in with silicone, so I made a hole to insert a hacksaw blade and cut out the centre of the bulkhead. There’s nothing like the demolition phase to commit you to seeing the job through. I used a scraper and pliers to hack the bulkhead rim off of the hull.
Photo 2: I used the location of the old bulkhead as a reference point to mark out the location of the new one. I moved my bulkhead back almost seven inches. Think about your foot peg rail placement and foot room. I will move the foot pegs to the end of the rail and re-drill and remount my rails 67 mm back from their present location. This allows me to move the bulkhead back as far as possible, but it means nobody taller than me (6’2”) will ever be able to paddle my boat!
Photo 3: Making a template for the new bulkhead is time-consuming but very important. Getting it right will give your bulkhead a strong, snug fit, and save you time when you cut and shape the plywood. Draw +/– symbols on the cardboard to show where to trim and where to cut less on the next template.
Photo 4: Trace your cardboard template onto a piece of plywood and cut out your new bulkhead with a fine-toothed jigsaw or handsaw blade. Trust your template and resist the temptation to cut outside your line. Eighth-inch-thick marine grade plywood works well; consider using quarter-inch if you’re using the bulkhead as a foot brace or a mount for a foot-controlled pump. Marine plywood is waterproof, has a nice “teaky” finish and can sometimes be purchased in smaller pieces.
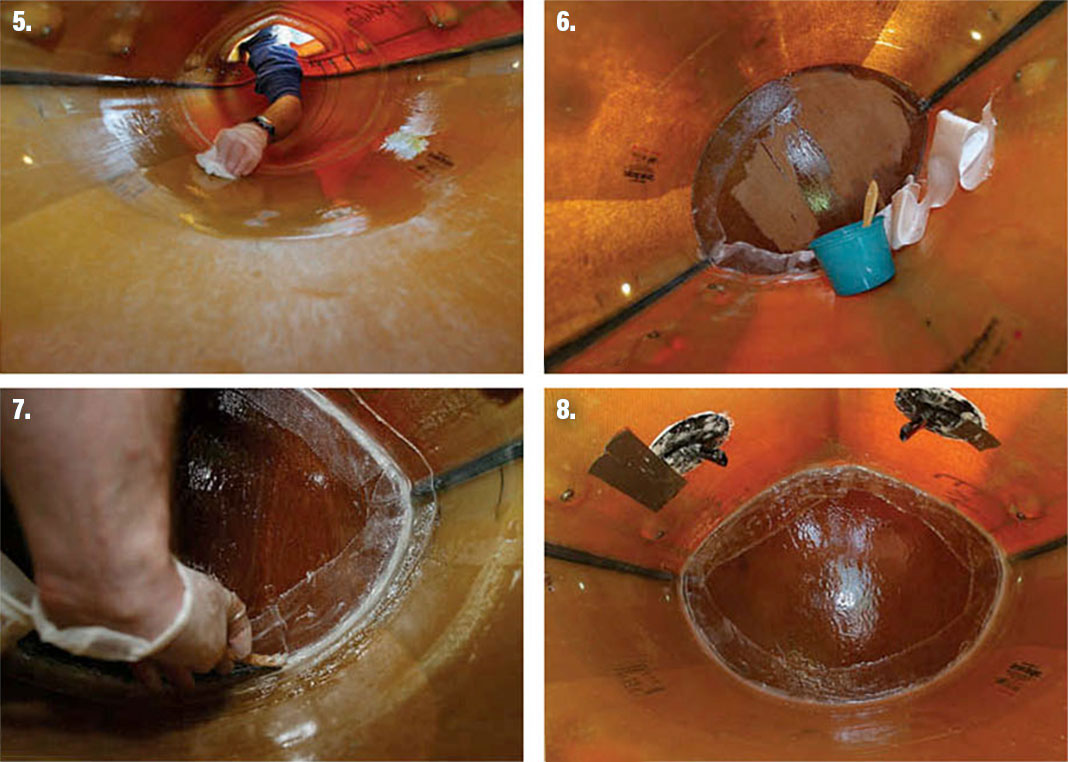
Photo 5: Wash the inside of your boat with dish detergent or boat soap to remove any contaminants. Do this before sanding to avoid sanding dirt into the surface. Then use 80-grit sandpaper to rough up a strip a few inches on either side of your new bulkhead location. Then wipe the area with Acetone to remove the sanding dust and prep the surface for bonding.
Photo 6: Fit your new plywood bulkhead snugly—don’t force it in place or it may bulge out your hull and deck. Glue your bulkhead in place with a few drops of epoxy. This is a good time to practice mixing your resin and observe how quickly it cures.
You’ll want to apply two or three coats of epoxy consecutively, waiting just until the preceding coat is tacky—have a few hours to kill. Fiberglass saturates and sticks better if you place it on a pre-epoxied surface, so begin by spreading epoxy on either side of the rim of your bulkhead. Then apply the tape, working your way around the rim, working in additional epoxy to saturate the tape as you go. Use scissors to snip the overlapping pleats on the bulkhead side of the tape, and overlap the ends. With my boat up on cradles, I was able to rotate the boat so the loose tape is always at the bottom. Finally, paint your entire bulkhead with a thin layer of epoxy to seal the wood. Do the other side of the bulkhead.
Photo 7: When the first layer of epoxy is still tacky, recoat your bulkhead and seam with a second thin layer of epoxy and add a fillet to your seam on both sides of the bulkhead for extra strength. A fillet is a bead of epoxy thickened with high-density adhesive filler, applied along the seam like a strip of caulking. For a lightweight installation, it’s possible to skip the fiberglassing stage entirely and just use an epoxy fillet to glue your bulkhead in place. I opted for both for maximum strength. I used West System 404 High-Density Adhesive Filler to make my filleting compound. Mix the epoxy first; add plenty of filler powder until the epoxy is the consistency of peanut butter. Use the end of a Popsicle stick cut flat or V-shaped to spread the fillet. Optional: when tacky apply a third coat of epoxy both sides of the bulkhead.
Photo 8: Tada! Eight inches less wasted space in my cockpit and seven inches of extra dry storage space in my front hatch thanks to a shinier, newer, stronger bulkhead.
2 Get the water out with an electric bilge pump
A hands-free, built-in pump system is a must-have add-on for the serious paddler. It allows you to have your sprayskirt on and be bracing and paddling while you pump out a flooded cockpit. The state-of-the-art electric pump system from Rapid Runner Bilge Systems is one of the easiest hands-free pumping systems to install and to use. The main components are a 1,000 gallon-per-hour Johnson-Mayfair Proline bilge pump and a polymer lithium ion (LiPo) battery in a pre-wired waterproof case. The LiPo battery weighs less than 300 grams (10 ounces) and can power the pump for about 50 minutes.
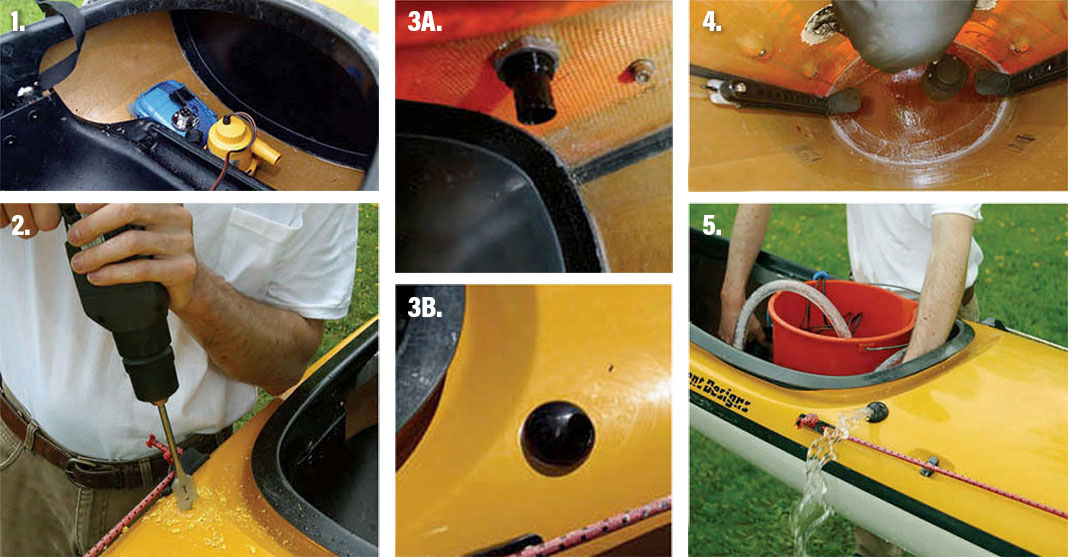
Photo 1: The pump system is super-easy to install because the pump and battery both strap to a Hypalon pad that glues to the hull. Attach the battery pack and pump to the vinyl pad behind your seat so that the pump will be against the hull at the lowest point. Rough up the hull with 80-grit sandpaper and clean with solvent. Glue in place using Shore adhesive or Vinyl Bond. Alternatively, the bilge pump can be bolted separately to the seat or bulkhead.
Photo 2: Drill the hole for the through-hull fitting (where the water will come out). The long hose allows you to put it anywhere in the cockpit but somewhere behind the paddler is recommended. Make sure you won’t knock your elbow on the fitting and that it won’t interfere with a paddle-float rescue.
Photos 3A & 3B: Leave enough clearance under the deck around bulkheads, cockpit and deck hardware to screw on the nut that holds the through-hull fitting in place. Secure the hose to the fitting with a zip tie. Aim the outlet and seal the fitting to the deck using a marine adhesive (such as 3M’s 5200 Marine Adhesive Sealant).
Photo 4: Rapid Runner provides a foot switch that either bolts to a foot pedal mounted on the rail behind your existing foot pegs, or attaches to the front bulkhead. I glued a foam pad behind the foot switch and fixed it toe height on my bulkhead to bring it within easy reach.
Photo 5: We couldn’t wait to try it. The 1000 GPH pump puts out an impressive stream of water. Tilting your boat just so, you’ll be able to hose down your buddies. No more excuses—get out there and practice your rescues.
3 Apply UV protection for decks and gaskets
Gel coat, plastic or rubber hatch covers and rubber hatch seals all take a UV beating. You wouldn’t forget it for your skin, so don’t forget sunscreen for your boat! Apply before every paddling season or long trip.
Note: It’s way easier to wash and wax your boat when you’re replacing your deck lines and bungees. Pick up some 3/16” bungee for your front deck and a 1/4” for your rear deck paddle float attachment. Use 5 mm cord for deck lines.
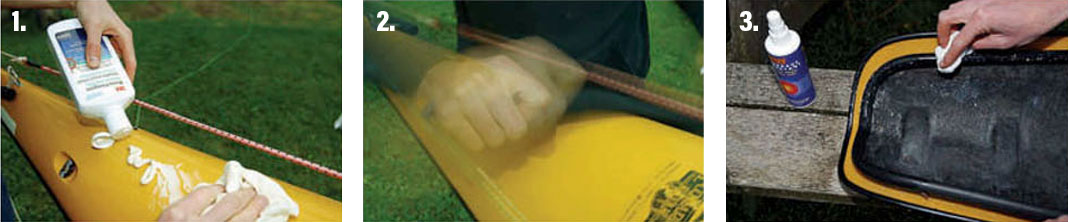
Photo 1: Wax on! Pre-wash the boat and then find a specialty marine wax such as 3M’s Marine Fiberglass Cleaner and Wax, which helps to remove scratches and restores and protects your boat’s finish.
Photo 2: Wax off! Remember Karate Kid? Use a soft cloth to buff your boat to a shine and you’ll have your black belt before you know it.
Photo 3: Treat rubber, plastic and vinyl with 303 Protectant. Just spray on, wipe off, and repeat every several weeks. Prolongs the life of rubber hatches and hatch seals. Also restores the colour of faded plastic hatch covers.
4 Be visible with reflective tape and deck line covers
For night paddling in areas of boating traffic, or just to be more visible in the event of rescue, adding reflective strips to your boat is an easy upgrade that you can do in minutes.
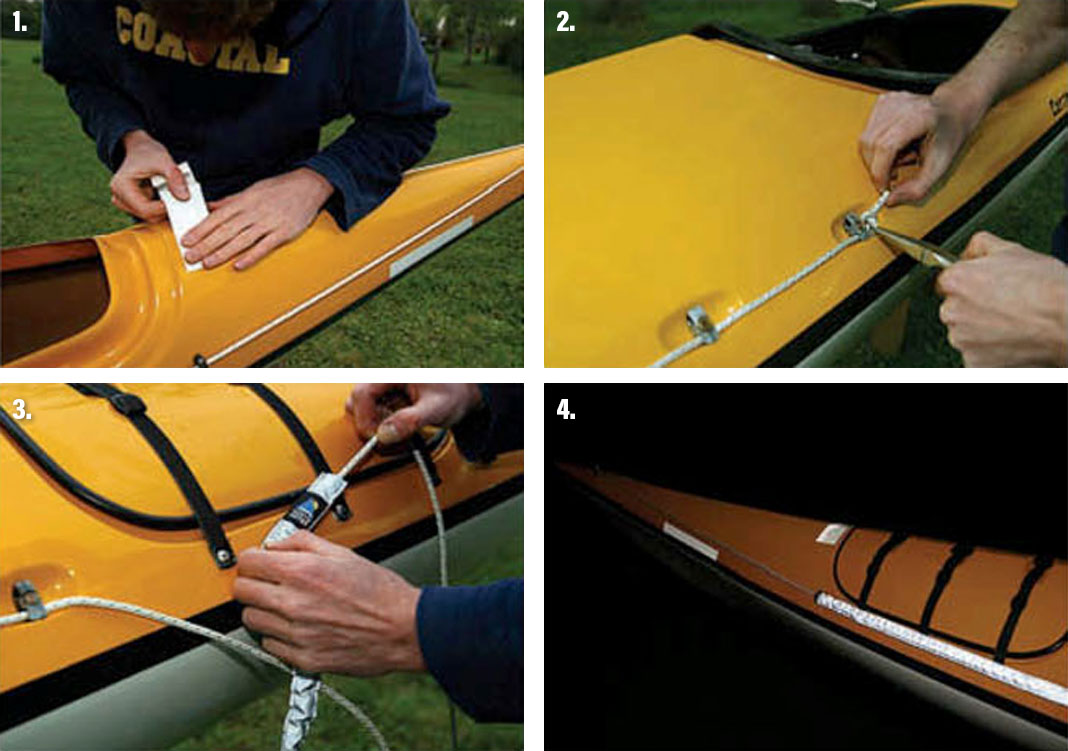
Photo 1: 3M reflective tape is like one long license plate registration sticker—super-sticky and easy to put on. Getting it off is another story, so put it where you really want it. Look for a spot that’s not likely to be covered or get scratched. If you’re feeling pessimistic, put tape on the underside of the hull.
Photo 2: Needle nose pliers are helpful for removing tight deck line knots, if you don’t want to cut and replace the lines.
Photo 3: Once you get your deck lines off, install North Water Reflective Deck Line Covers. These can go on deck bungees too. You don’t have to cut them—they scrunch to fit.
Photo 4: Behold, it works! The North Water covers are more reflective than the 3M tape, possibly because the scrunched fabric reflects lights from all angles. They are also easily removed if you want to switch boats or morph into stealth mode.
5 Add North Water cockpit storage bags
Making use of a sea kayak’s ample cockpit space for storage keeps the deck free of paraphernalia that can wash off in the surf or get snagged during rescues. The Under-Deck Bag from North Water Paddle Sports Equipment hangs from the roof of the cockpit in the place of a traditional knee tube—it’s a kayak glove compartment.
And North Water’s Interior Mount Cockpit Bags provide convenient storage along the sides of the cockpit. They double as thigh padding for a better fit and also help displace water from the cockpit.
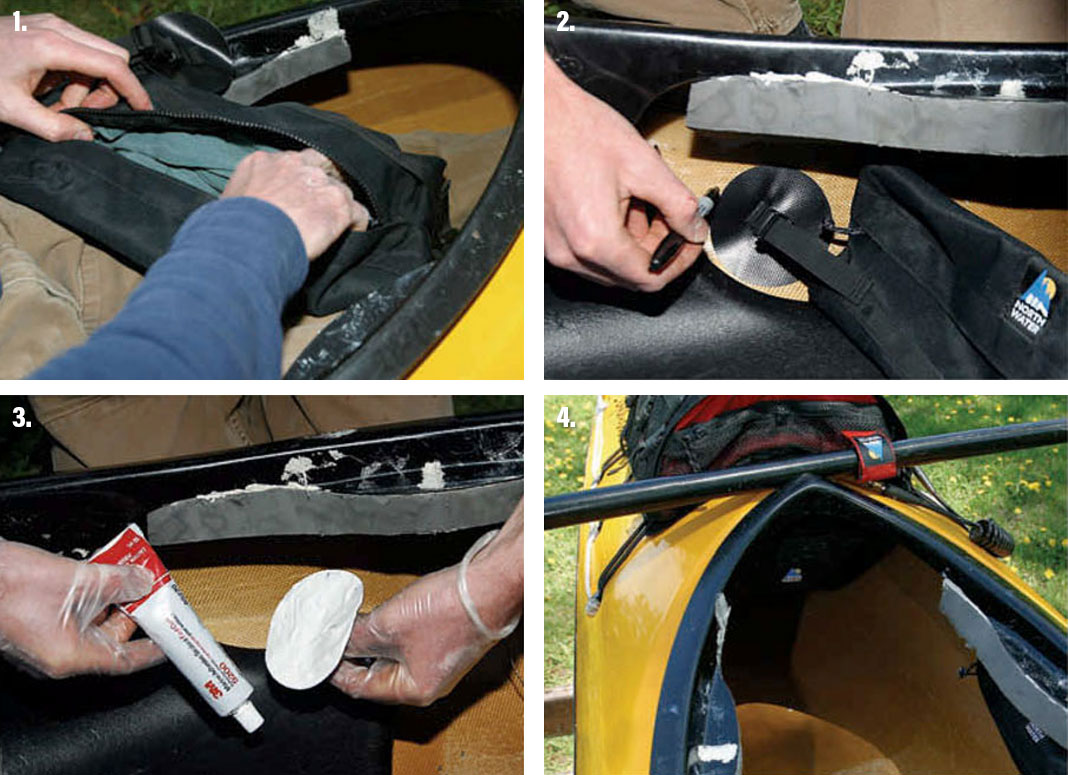
Photo 1: Sit in your cockpit and line up your Interior Mount Cockpit Bags in a place where you’ll be able to access them and they’ll be out of the way, or provide some desired padding beside your thighs. Don’t forget to stuff them when you’re positioning them.
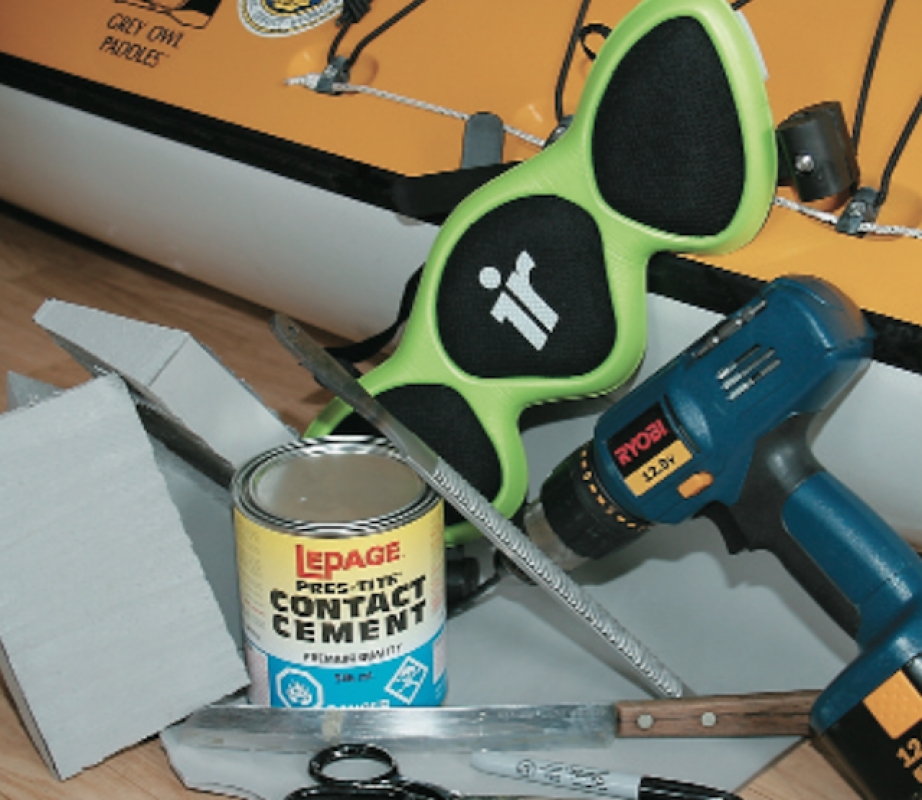
Photo 2: The cockpit bags attach in one of two ways—clipping to glued-in vinyl patches or hanging from your rudder cable on a Velcro sleeve. My cable doesn’t extend far enough. I marked the location of the vinyl patches beyond the edges of the cockpit bags, so they’ll hang taught to the side of the hull.
Photo 3: Prepare the surface of the boat by roughing it with 80-grit sandpaper and cleaning with a mineral spirit such as Toluene. Use a vinyl adhesive such as Vinyl-Tec 2000 or Vinyl Bond to secure the patches.
Photo 4: With the Interior Mount Cockpit Bags and the Under Deck Bag installed, there’s so much storage space, you’ll never have to leave the cockpit! North Water’s Expedition Deck Bag provides even more. The bags can all be quickly unclipped for packing, cleaning, or carrying around the campsite.
 This article was first published in the Late Summer 2004 issue of Adventure Kayak Magazine.
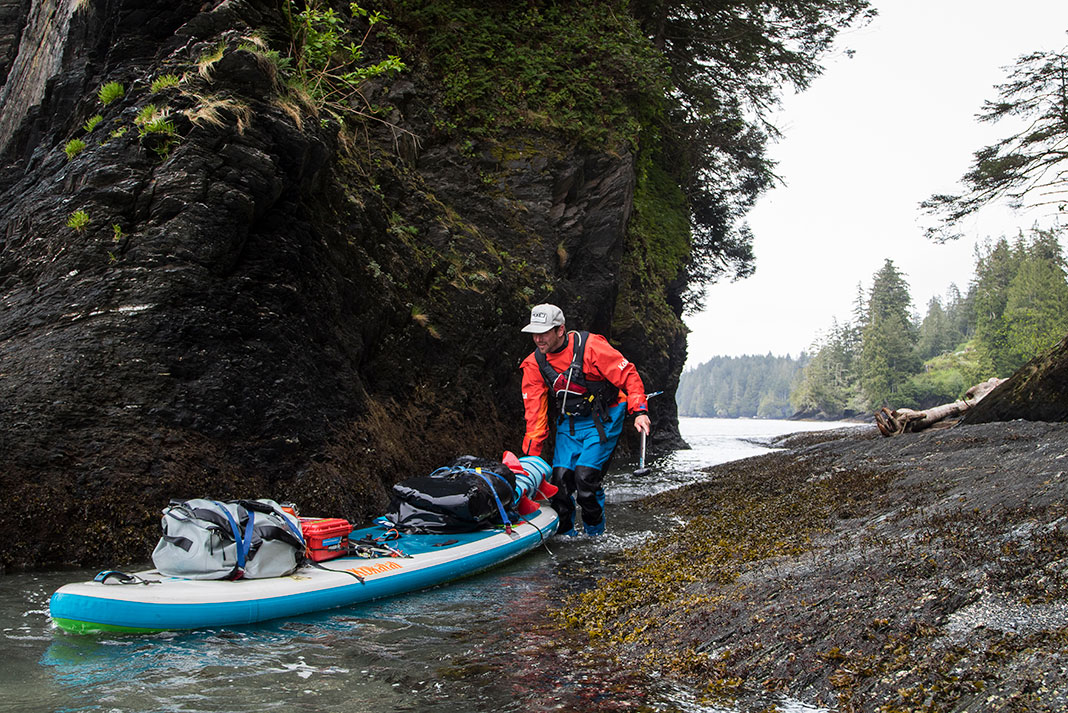
 Feature Photo: Adventure Kayak staff


