Home Blog Page 445

Explore Lunenburg, Nova Scotia By Kayak

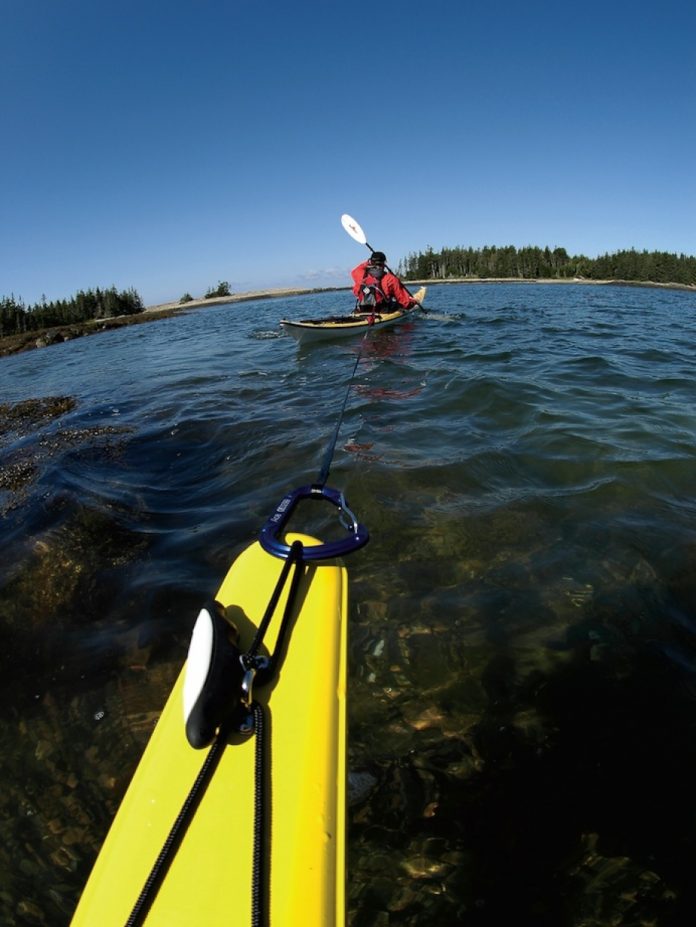
Photo: Ian Pineau
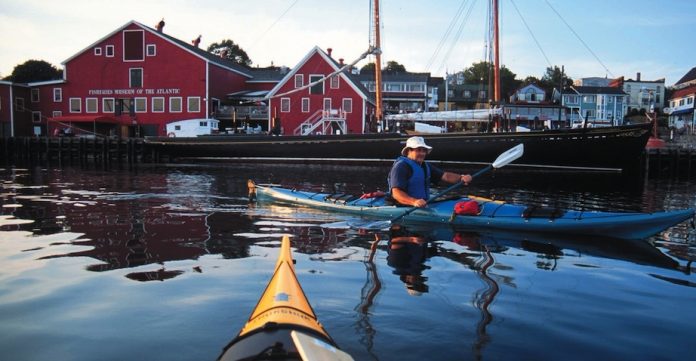
Discover the rich history of Lunenburg, Nova Scotia by kayak

Settled in 1753 and declared a UNESCO World Heritage Site in 1995, Old Town Lunenburg is an outstanding example of early British Colonial settlement in North America. For kayakers, the colourful seaside town has added significance as a gateway to some of the most picturesque and accessible sea kayaking in the Maritimes. It is the start/finish point of the new Nova Scotia Water Trail route to Halifax, and a convenient base for shorter forays.

Kayaking the historic boundary of Lunenburg’s harbour is a grand way to combine heritage, adventure and nature observation in a short trip. For a full-day trip, you can put in at the public access at the east end of the Fisheries Museum parking lot. Use caution as you depart, as this is a working port with fishing and sailing vessels of all types on the move. The law of gross tonnage applies here and sea kayaks are low on the food chain.

Paddling southeast out of the harbour, you will pass the boatyards where many of the famed sailing schooners were built, not the least of which were the Bluenose and the Bluenose II.

Rounding Battery Point you head into the outer harbour. A four-kilometre paddle along the shore past landmarks such as Front Rum Point, Meisners Reef and Red Head takes you to the scenic community of Blue Rocks. This is one of the few remaining villages in Nova Scotia that retains the individual fishermen’s wharves, which were widely replaced by communal government wharves in the late 1940s and ‘50s.

Plenty of lunch spots and exploring possibilities are available in this area. Birdwatchers will find many species to keep them entertained. You’re also likely to spot seals and harbour porpoises.

Your return trip can take a couple of different routes. Retracing your morning paddle brings you back into the Inner Harbour via Battery Point for a spectacular view of the town. A more adventurous option if the weather remains favourable would be to cross the bay and head west-southwest to the opposite shore. The return paddle here takes you along the western shore, past Masons Point, Puffycup Cove and around Kaulback Point. You can wind your way deep into the Inner Harbour amongst the myriad of sailboats at anchor and return to the slipway at your leisure.

The entire loop is about 20 kilometres, depending at what angle you cross the bay. An abbreviated half-day version would see you proceeding to Battery Point, crossing to Masons Point (watch for boat traffic) and returning along the western shore. This is just one of the innumerable paddling options in this scenic area.

Off the water, be sure to sample the host of après paddle options. A cruise, a carriage tour, a visit to the museum or a chat with the friendly locals before or after you paddle will surely teach you more about what you see from the seat of your kayak. And by the time you’re done, you should have worked up an appetite for a big lobster feast.

How to get there

Take the Lighthouse Route, Highway 103, into Lunenburg and follow signs for the Fisheries Museum. The public access slipway is at the east end of the parking lot behind the Star Charters reservations building.

This article originally appeared in Adventure Kayak, Early Summer 2004. Download our free iPad/iPhone/iPod Touch App or Android App or read it here.

Daily Photo: Fireworks

Photo: Nashville Motion
Kayaks

The best way to watch fireworks—get a front row seat!

This photo was taken at Fontana Lake in the Smoky Mountains by Nashville Motion. Want to see your photo here? Send to [email protected] with subject line Daily Photo

For The Love Of Canoes

Photo: Al Witham
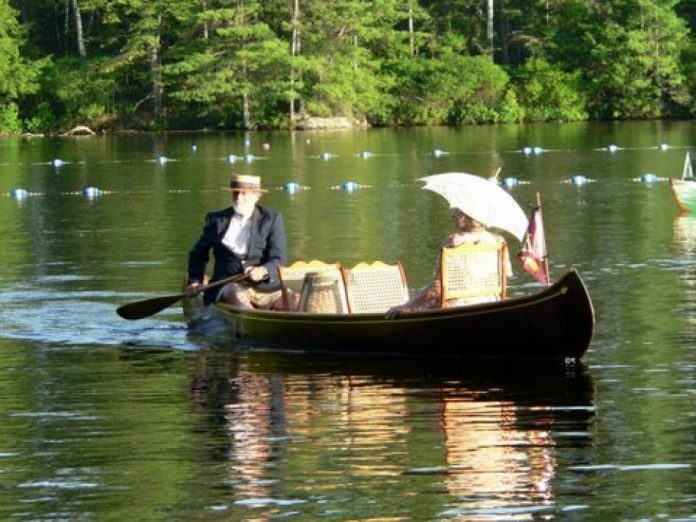
The Wooden Canoe Assembly draws many people to the annual event

Canoe aficionados from across Canada and the United States gathered earlier this month at Paul Smith’s College in Paul Smith’s, New York to admire a vast collection of canoes, take part in workshops, and most importantly, discuss all things canoeing.

The Wooden Canoe Assembly is an annual event, hosted by the Wooden Canoe Heritage Association (WHCA), a non-profit organization, whose focus is – you guessed it – wooden and bark canoes.  The event celebrated its 34th year, and folks travelled from as far away as Texas to come admire the several hundred vintage canoes that were on display throughout the five day event.

“This year, 365 members and friends attended,” says coordinator Rob Stevens, “there were about 50 first time Assembly attendees and several drop-ins from the local area.”

A smattering of boats were spread out on the college green, including those from Chestnut, Robertson, Old Town, Gerrish and the Thompson Brothers Canoe Company, to name a few, which kept  attendees buzzing.

“There were newer -modern and vintage wooden canoes,” say Stevens, “they ranged from Indian built, to the whole gamut of wood-canvas, all wood and cedar strip construction.”

Beautifully restored wooden canoes aren’t the only draw to the assembly, several workshops and activities took place throughout the week. Participants can pre-register for a variety of workshops, including paddle making, digital photography workshops or even quilting. 

There are of course, paddling clinics as well, with instruction ranging from beginner tandem, to more focused clinics such as the traditional Northwoods style paddling strokes. Highlights this year included a presentation on boat building, and observing some sailing canoes.

“There were several sailing canoes which enjoyed Lower St. Regis Lake when the wind was up,” Stevens says, “we also had a presentation on traditional construction of Adirondack guideboats.”

Over 12 vendors attended the event this year, ranging from booksellers to canoe builders.  Several displays were also set up by organizations such as the Canadian Canoe Museum, which is based out of Peterborough, Ontario. The Adirondack Museum of Blue Mountain, New York, also offered a guided tour of some of their warehoused canoes at the site of the assembly.  Attendees also had the opportunity to hike nearby Mount St. Regis, or take part in a guided tour of the Paul Smith College Visitor Interpretive Centre.

Next year marks the 35th anniversary of the event, which promises to be another enjoyable experience as they celebrate WHCA members who build and paddle their own vessels, and in turn, are keeping wooden canoe building alive.

For more information visit http://www.wcha.org/annual-assembly/

Daily Photo: Gone Fishing

Photo: Ontario Tourism
Canoes

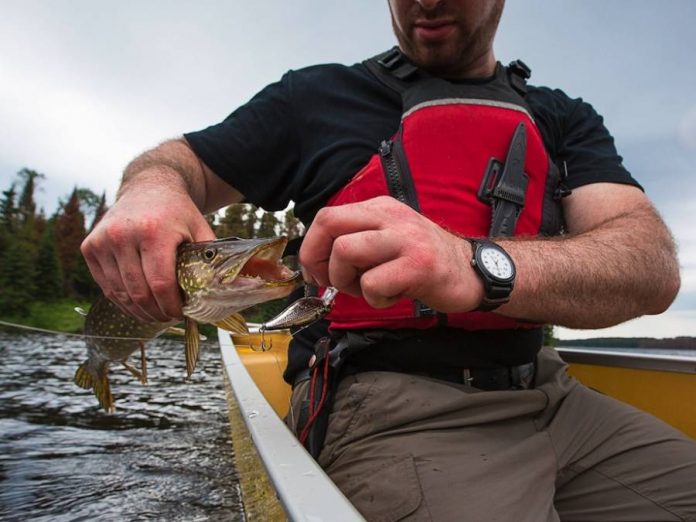
Is fishing a part of every canoe trip? What’s your favourite catch of the day? 

This photo was taken in Woodland Caribou Provincial Park and is courtesy Ontario Tourism.  Want to see your photo here? Send to [email protected] with subject line Daily Photo

Daily Photo: Setting Out

Photo: Nashville Motion
Kayaks

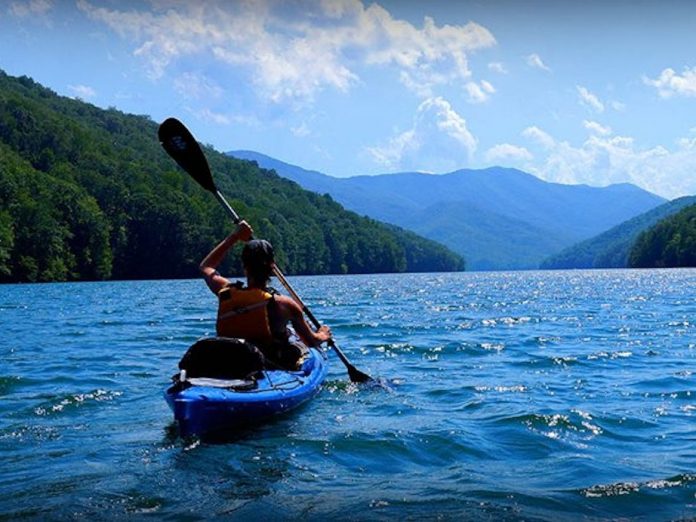
Where will you next paddling trip take you?

This photo was taken at Fontana Lake in the Smoky Mountains by Nashville Motion. Want to see your photo here? Send to [email protected] with subject line Daily Photo

Basecamp: Back in the Saddle

Photo: Scott MacGregor
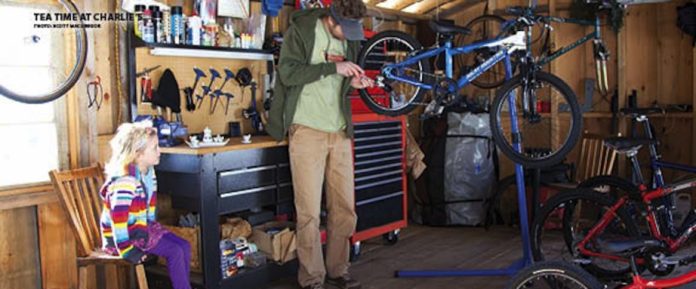
Charlie's Bike Shop

“How are you today, Charlie?” asks my six-year-old daughter Kate as she bounces through the open door of our shed. except out here, she’s not my daughter and i’m not her dad and this isn’t our shed. last fall i became Charlie, the owner of Charlie’s bicycle Shop. in our game, Charlie has a daughter about Kate’s age, but it’s not Kate. they always seem to miss one another when Kate drops by the shop. She stops by quite frequently, sometimes like today for tune-ups and to drink tea—apple cider served in petite flowered pink china.

 I pulled our eldest around for a summer in a Chariot bike trailer, but with two babies it somehow became just too much, not too much to pull but just too much to pull together. My tired, almost vintage Gary Fisher mountain bike lay mothballed with a half restored cedar canvas canoe in my neighbor’s barn. 

 “Whose old bike is that?” Kate asked one day when we were rooting around the barn for spare paddles. 

“It’s mine,” i said. 

 “Why don’t you ride it?

 “I don’t know,” I admitted.

 “Why don’t you ride your bike?” 

 “I don’t know how.”

 That night i booked us for a weekend at Lake of Two Rivers campground in Algonquin Park. We weren’t taking canoes… 

This article appeared in Canoeroots & Family Camping, Spring 2013. Download our free iPad/iPhone/iPod Touch App or Android App or read the rest here.


Keep Your Raft Cooler Cold

Photos: Maxi Kniewasser
River trip food

KTFLC is the ultimate rule of Raft Cooler Management (RCM). RCM is an obscure yet evolved science, and the rule stands for Keep The F’ing Lid Closed, often yelled loudly from camp kitchen to beer-getter. Here is a summary of the science to date: air and water = melting, so eliminate both from the cooler.

Line the bottom with block ice—it stays frozen longer than cubes (although you’ll need some of those for mixed drinks). Drain the coolers when the ice starts to melt. Freeze food in advance and pack the coolers tightly. Duct tape an inventory to the lid so items are easy to find (remember KTFLC), and pack smart so coolers are emptied top-down, one at a time.

Keep the lids strapped down at all times, and lay a wet wool blanket or reflective sheet on top during day hikes so they don’t heat up in the sun. Leave a cheap thermometer inside each cooler to ensure it stays below 7°C/45°F. If it gets warmer than this, redistribute the important items to other coolers and scarf the rest. A bout of food poisoning swiftly dampens the communal enjoyment of rafting. Certificates and diplomas are available in RCM. Contact your local degree-granting institution for details.


This article originally appeared in Rapid, Summer/Fall 2011. Download our free iPad/iPhone/iPod Touch App or Android App or read it here.

How To Do An Eddy Turn

Photo: Scott MacGregor
Use an eddy turn in tidal currents

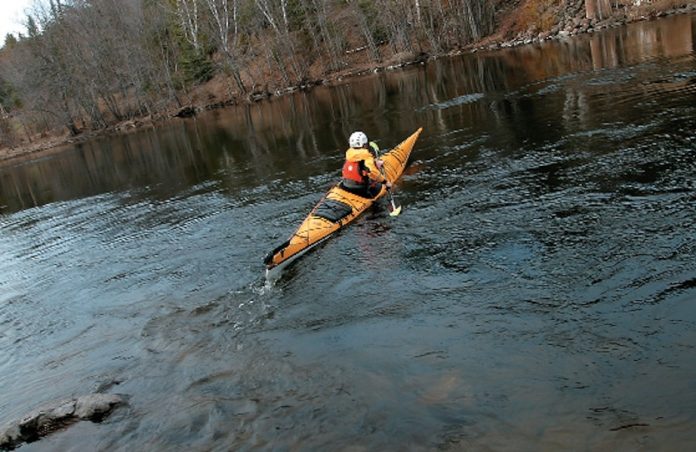
Eddy turns are the foundation for paddling in current, enabling you to enter and exit river and tidal currents safely. Unlike rivers, tidal rapids change speed constantly and change direction every six hours or so. But tidal currents have the same features and require the same paddling skills as rivers. The eddy turn combines the stability of the trusted low-brace sweep turn with the three basics of controlling your boat in current— angle, speed and tilt—allowing you to go from paddling downstream in the current to facing upstream in an eddy or vice versa. When you get it right, the opposing currents of the eddy line do most of the turning work, resulting in effortless, exhilarating and snappy eddy turns.


Reading the Water

Tidal rapids are caused by constrictions or obstructions in the path of rising or falling tides. As the main current flows past obstructions such as rocks, islands or points, sheltered areas known as eddies are formed. In French, eddies are called contrecourants, which is exactly what they are—counter to the main current. Water flows upstream behind an obstruction to fill in an area that the main current is passing by. The dividing line between the main current and the eddy’s more subtle upstream flow is an area of turbulence called an eddy line. To paddle safely and smoothly into the main current from the shelter of an eddy, or leave the main current and enter an eddy, we must cross the eddy line using an eddy turn.


Getting Ready

The eddy turn is basically a low-brace lean turn performed as you cross the eddy line. Begin by learning and practising the low-brace turn in flatwater until you get the timing and feel comfortable tilting the kayak. (See Adventure Kayak V3 I2 online for a description of this technique.) Then choose an area with mild currents, say one or two knots, and ensure that the area downstream is clear of obstructions and hazards in case you happen to swim. Designate a rescuer to wait at the downstream end of the eddy to help swimmers get back into the eddy. Wearing a helmet protects your head if you flip in shallow water.


Eddy Turns—Angle, Speed, Tilt

To “peel out” of an eddy into the current, position yourself at least a few paddle strokes back from the top (upstream end) of the eddy, with your bow at an angle of about 45 degrees to the eddy line. This is called “setting your angle,” and the amount of angle depends on the speed of the current—faster current, less angle; slower current, more angle. If you cross the eddy line with not enough angle, you can end up stalled on the eddy line, or out in the current facing upstream. If you leave the eddy with too much angle, say 90 degrees to the eddy line, you will most likely be spun around on the eddy line instead of turning out into the main current.

Next comes speed. You’ll want to cross the eddy line with speed to minimize the time spent exposed to both currents. Entering into stronger currents usually requires more speed. With your angle set, paddle aggressively toward the eddy line and just as your bow crosses into the main current, do a sweep stroke to give a final burst of speed and initiate the turn.

As you cross the eddy line, you’ll need to tilt downstream. Just like riding a bike and just like practicing your low-brace lean turn, you must tilt your kayak into the turn. Shift your weight to your inside butt cheek while simultaneously lifting your outside knee. To add stability in your eddy turns, place a low brace behind you with the paddle shaft at a 45-degree angle to your kayak.

Tilting does two things: it improves the shape of your boat in the water for turning; and it lifts the upstream edge of your kayak away from the oncoming current. If you don’t lean enough, the main flow piles up against the upstream side of your kayak and tries to flip you over. The faster the current, the more aggressive your inside tilt and the sharper and quicker the turn. Get into the habit of always tilting as much as you can.

Re-entering an eddy, or “peeling in,” is the exact same manoeuvre. Approaching the eddy from upstream, set up your angle at 45 degrees or so to the eddy line. Paddle toward the eddy. As you cross the eddy line, sweep on the outside of the turn and tilt to the inside. You always tilt “downstream” relative to the current you are entering. The current in the eddy is moving against the main current, so this means leaning into the turn again, even though this time you’ll be leaning upstream relative to the main flow.

The rush of the opposing current grabbing your bow and pulling it around is highly addictive. Like a kid, you will find yourself heading back to the top of the eddy for another eddy turn. Once you’re comfortable crossing eddy lines and controlling your angle relative to the current, you’ll be ready to master other exciting manoeuvres like ferry glides and surfing. Understanding angle, speed and tilt, you’ll begin to view  idal rapids not as hazards to be avoided, but as playspots to be sought out.


This article originally appeared in Adventure Kayak magazine, Summer 2003. Download our freeiPad/iPhone/iPod Touch App or Android App or read it here.

How To Scout Surf For Kayaking

Kayaker in surf
Learn to assess beaches to determine where to land | Photo: Paul Villecourt

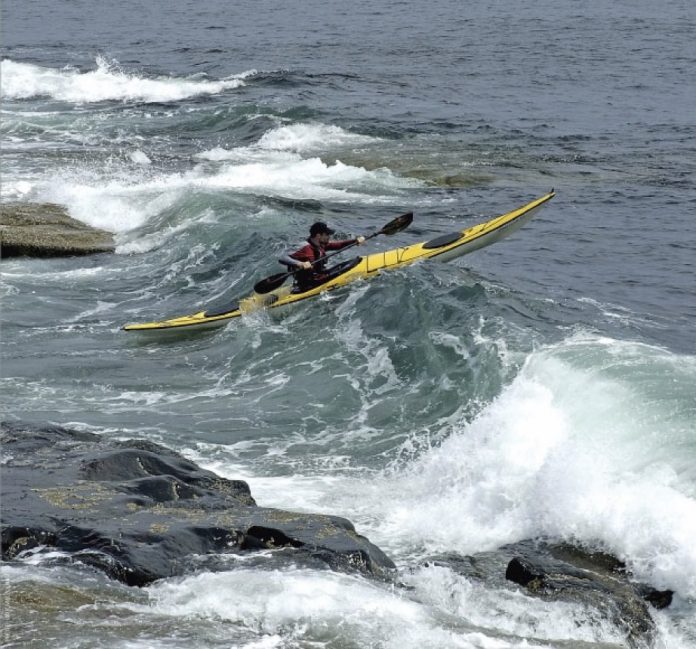
If you choose to paddle in exposed coastal areas, you’ll have little choice but to launch or land your kayak in a surf zone. Breaking surf represents one of the greatest challenges to any paddler. It’s vitally important to choose the right beach for prevailing conditions because surf is an incredibly dynamic and powerful environment that offers both amazing play possibilities and potentially devastating beat-downs.

To assess a beach landing, consider the size, direction and frequency of the swell, the slope and composition of the beach, the tide level, and local currents. The overall size of the waves is one very major concern. Sitting in a kayak, the top of most paddlers’ heads will be roughly one metre (three feet) from the surface of the water. With practice, breaking waves up to this height feel fairly manageable, but larger surf is far more intimidating and challenging.

Wave frequency will also have a profound effect on your surf experience. Waves come in “sets”—groups of similar-sized waves alternating with periods of relative calm. If waves are nicely spaced apart and there is a bit of a lull between sets, a paddler will have plenty of time to react to incoming waves. If waves are closely stacked and rolling relentlessly in one after the other, conditions will be far harder to manage.

The slope of the beach is also important. A long, evenly sloping beach will generate surf that builds gradually. Wave faces will tend to get steeper and break predictably, spilling from the crest of the wave. Waves are relatively forgiving on this type of beach.

Waves that crash very close to shore rather than farther out are one sign of a dangerously steep beach that will not be suitable for launching or landing. There is incredible power in these waves which jack up suddenly and collapse or “dump” with tremendous force, expending their energy in one explosive crash rather than breaking progressively as they head toward shore.

Of course it’s always preferable to land or surf at a nice sandy or pebbly beach. A rocky shoreline strewn with big logs and other debris will make getting in and out a lot more difficult and dangerous. Having said that, opting for a sandy beach being pummelled by violent surf instead of a sheltered rocky shoreline would be a serious mistake. The direction of the swell will determine which areas of shoreline will have the largest surf and which coastline features will provide shelter.

It’s also important to be aware of currents and tides. A change in tide height can seriously alter the character of a break—sharp rocks might become exposed or beaches that provide a safe landing at some tide levels may disappear altogether at others. Riptides are a hazard that forms when water that has been pushed up on a beach by breaking waves is pulled back out by gravity. Because waves continually push more water up the slope of the beach, there can be a lot of water searching for the quickest way out.

Rips are tricky to spot, but at any popular surf spot they are well known, so take the time to search out local knowledge. A river draining into the sea may generate a similar current.

To escape from a rip, paddle (or swim) perpendicular to the current— generally parallel to the shore—until you are out of the grip of the current and can start heading to shore. If you simply try to go straight in, you will be fighting the powerful current the whole way.

No landing or launch site is ever perfect. Sometimes landings are very difficult, but you can still strive to make the best choice from a less than ideal lot. The key is to carefully inventory conditions and choose the path and timing where the waves are consistently weakest and the terrain is the best for exiting or entering a kayak.

Towing The Line

Photo: Paul Villecourt
Use these tips when executing a tow

Sometimes the best way to assist another paddler is to give them a helping hand in the form of a tow. Towing another boat isn’t always part of a rescue scenario. You may decide to put a kayak under tow simply to help a tired paddler make headway against strong current or high winds. Towing is also a great way to deal with an injured or seasick paddler. Other times, a tow can be just the ticket for quickly extracting another kayaker from a dangerous situation.

The most basic towing formation is the in-line tow. In this system, the towing paddler simply clips a line to the bow of the boat to be towed, and then pulls it along behind their kayak. To effectively tow another kayak using an in-line tow, you will need some dedicated gear in the form of a towline. Towlines consist of a length of webbing or line with an attachment system at each end. Most towlines have a carabiner on one end, ideal for quickly clipping onto a kayak’s grab loop, and a quick-release belt or deck cleat on the leading end, designed to allow the rescuer to ditch the whole system with a simple flick of the wrist.

My favorite tow set-ups are those integrated into a PFD. With this approach, the tow system is always on your body, and not an extra bit of gear that you can forget or decide not to don. The PFD-mounted tow also keeps the quick-release buckle solidly fixed in one place where it is always within easy reach, while waist-worn tow belts tend to rotate on the torso, making it difficult to locate the quick-release buckle in an emergency.

Boat-mounted systems are the most comfortable for really long-distance tows because they are much easier on the towing paddler’s body—the kayak takes the strain rather than the rescuer. The leash portion of the tow system can be short or long. Short towlines or “cow tails,” around one to three metres long (three to 10 feet), are very quick to deploy but are only suited to very short distance tows as they usually result in frequent and potentially violent collisions between boats.

Long leashes, around ten to 15 metres (30 to 45 feet) long, are far better for towing over longer distances. For distance tows, it is important to have enough space between the lead boat and the one being towed to reduce the risk of collision, particularly in following seas when the towed boat can surf down a wave and into the lead kayak. Many tow systems also integrate some shock absorption into the system, often in the form of shock cord, that yields a much smoother tow with far less violent jerking or yanking transmitted down the line.

Towing is very physically taxing, and the decision to tow another kayak over a long distance should not be taken lightly. In rough conditions or when fighting current or wind, it is truly exhausting. Also be aware that deploying long towlines in breaking surf or powerful rapids should be strongly discouraged due to the risk of possible entanglement with the line.

This article originally appeared in Adventure Kayak, Early Summer 2006. Download our free iPad/iPhone/iPod Touch App or Android App or read it here.