Home Blog Page 496

Kokatat WoolCore Gear Review

Photo: Kokatat
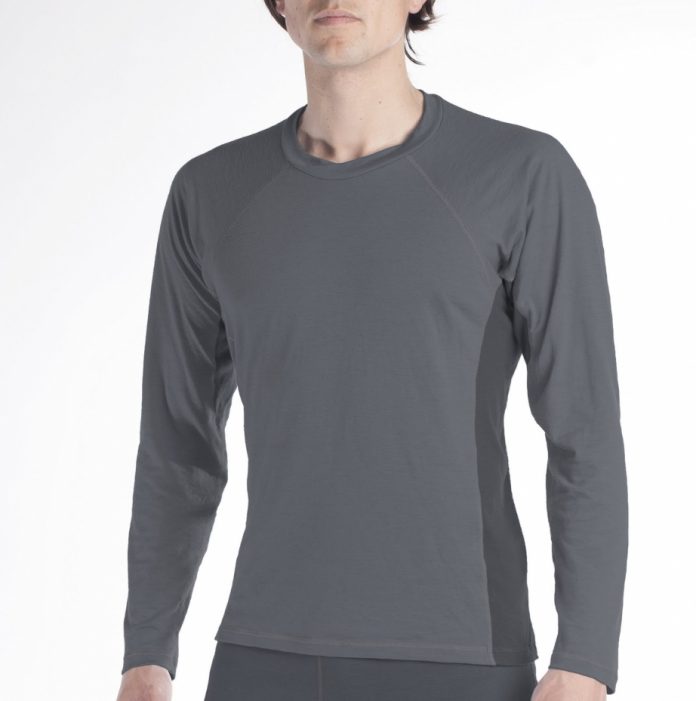
Kokatat Woolcore.

All-round has its place, but Kokatat knows that sport-specific gear allows for better paddling performance. Cut and sewn with paddler ergonomics in mind, these base layers aren’t run-of-the-mill long johns. The bottoms feature a gusseted crotch for comfort while seated and added height in the rise so your lower back stays covered when you lean forward. The tops have slightly shortened arms to accommodate wrist gaskets and a collar that won’t interfere with a neck gasket. A short-sleeved version will also be available. New for 2012, WoolCore base layers are made from a blend of 100 percent recycled polyester for moisture wicking and durability, and rocky Mountain grown, extra-soft wool for comfort and warmth. 

www.kokatat.com 


This article originally appeared in Adventure Kayak, Spring 2012. Download our free iPad/iPhone/iPod Touch App or Android App or read it here.

Seals Athena Sprayskirt Gear Review

Photo: SEALS
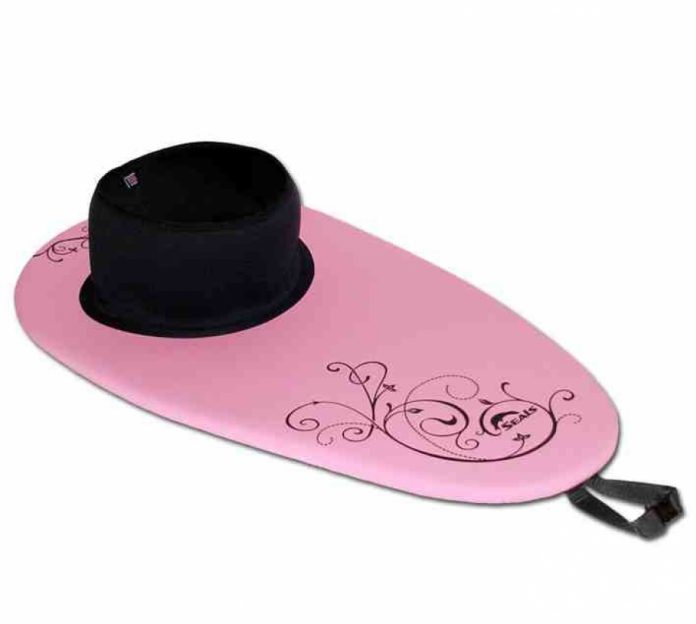
SEALS Athena sprayskirt.

This gear review was originally published in Adventure Kayak magazine. 

Hot on the heels of women’s-specific paddles, dry wear, PFDs and boats comes the Athena sprayskirt—another practical and pretty piece of gear paying homage to the greek goddess of wisdom, courage and heroic endeavor. Seals has offered custom-built skirts for nearly 30 years, but the Athena combines everything a woman wants in a ready-to-wear package. A floral print, 3.5- mm neoprene deck available in a range of attractive colors is mated with a watertight, easy-stretch bungee and a low-fit neoprene tunnel cut for a lady’s figure. The six-inch high tunnel is a full three inches shorter than a standard skirt, which means petite women can wear it around their midriffs as intended, rather than in an anaconda embrace around their busts. Chests everywhere will breath a sigh of relief.

www.sealsskirts.com • $100


This article originally appeared in Adventure Kayak, Spring 2012. Download our free iPad/iPhone/iPod Touch App or Android App or read it here. 

Family Friendly Whitewater Canoe Trips

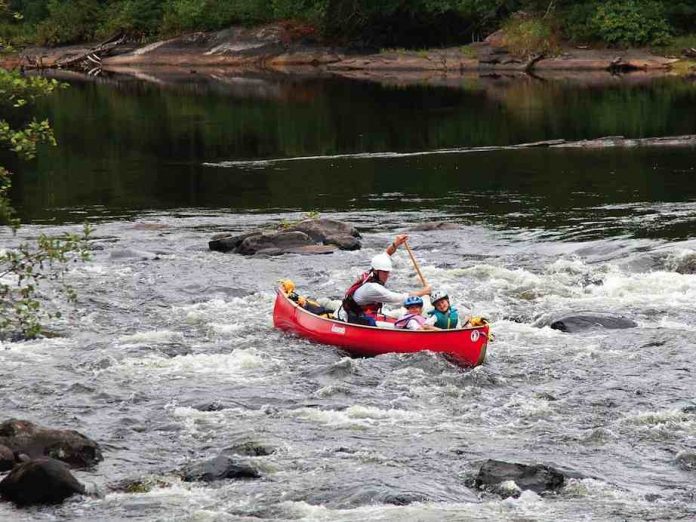
Family friendly whitewater on the Madawaska River, Ontario. Photo: Tanya MacGregor
Whitewater on the Madawaska River.

This canoe trips destination article originally appeared in Canoeroots and Family Camping magazine.

Remember surfing your first wave? That rush of adrenaline, the roar of the river, the intoxicating smell of fast-moving water? Add the quieter joy of each river’s natural beauty, historical significance and special secrets, and it’s no wonder that every year thousands of people seek out river trips to reconnect with the natural world and each other. Plenty of stunning and accessible rivers throughout North America offer a taste of whitewater canoeing or rafting with no age limits. If you’re experienced with paddling, swimming and rescues in moving water, you can rent equipment; otherwise, join a reputable outfitter who will organize all the necessary logistics. So get out there—exploring whitewater rivers with your family helps develop self-confidence, good judgment and a deep love for the outdoors.


ST CROIX RIVER, New Brunswick and Maine

Flowing gently from the Chiputneticook Lakes to the craggy shores of Passamoquoddy Bay, the St. Croix River forms the inter- national boundary between New Brunswick and Maine. The St. Croix is designated a Canadian Heritage River for its historical significance, rich natural heritage, excellent wildlife viewing potential and, of course, great canoeing and camping. With relatively easy paddling conditions—mostly class I and II rapids, minimal portaging and very few hazards—it’s a great choice for family outings. The geography of the St. Croix River watershed is a diverse mix of sparkling lakes, rolling Appalachian hills, ecologically rich wetlands and a large tidal estuary. Paddlers can plan for a half-day, weekend or up to four days of adventure. Easily accessible from urban centers in the northeastern United States and New Brunswick, the
river is dam controlled and can usually be paddled throughout summer and fall.

Outfitter
Sunrise Canoe and Kayak www.sunrisecanoeandkayak.com
More Info


MILK RIVER, Montana & Alberta

Originating in the mountains of northern Montana, the Milk River winds its way across the border into Alberta, carving its way through grasslands and canyons, past majestic sandstone cliffs and precarious hoodoo pinnacles. Deriving its name from the suspended sediment in the water, the Milk is a warm, shallow class I–II river with gradual gradient and a handful of rapids and rock gardens to negotiate. With easy access from Calgary, paddlers can enjoy a four-hour float, or up to four days drifting through the unique badlands landscape. A terrific weekend route starts in the town of Milk River, Alberta, and concludes 72 kilometers later in Writing-On-Stone Provincial Park, where you can swap river shoes for hiking boots and explore the impressive display

of Aboriginal pictographs and petroglyphs. Low water levels can make travel on the Milk hazardous, so be sure to check with local outfitters before embarking on your trip.

Outfitter & Instruction
Calgary Outdoor Centre www.calgaryoutdoorcentre.ca
More Info
www.paddlealberta.org


BONAVENTURE RIVER, Quebec

A sparkling gem in the crown of la belle province, the Bonaventure is known as the prettiest river in Quebec. Starting high
in the Chic Choc Mountains of Gaspésie National Park, the river flows south for 125 kilometers before entering the Baie de Chaleurs near the New Brunswick border. With moose and caribou loitering along the shore, paddling the Bonaventure evokes an atmosphere reminiscent of much more northerly rivers. Surprisingly accessible, the Bonaventure is an excellent option for families with previous whitewater experience. The steadily dropping gradient creates an almost continuous class I rapid from mountains to sea, interspersed with class II rapids and class III ledges in the gorge section. Thanks to its crystal clear waters, the Bonaventure has one of the largest salmon runs in the Gaspésie, making it an incredible destination for fly fishing—or for young explorers seeking to spot river monsters from the bow seat.

Outfitters
Cime Adventures www.cimeaventures.com
Missinaibi Headwaters Outfitters www.missinaibi.com


BIG SALMON RIVER, Yukon Territory

Dreaming of taking your family on a northern adventure? Accessible by road from Whitehorse or the Alaskan border, the Big Salmon River offers 300 kilometers of swift water through spectacular, larger-than-life Yukon scenery. Most paddlers begin their journey on Quiet Lake and end 13 days later at Carmacks, though this trip can be extended a further two weeks down to Dawson City along the Yukon River. Much of the Big Salmon River is narrow, fast flowing and ice cold, requiring technical paddling abilities and confidence in up to class II waters. Paddlers should also be pre- pared for remote camping and be familiar with grizzly bear protocol. After setting up camp on a sand bar, pull out your rods and fish for Arctic grayling or even huge Chinook salmon during the fall run.

Outfitters:
Ruby Range Adventure Ltd. www.rubyrange.com
Up North Adventures www.upnorthadventures.com


GREEN RIVER, Utah

Snaking through steep canyons, towe
ing spires and red rock cliffs, Utah’s Green River is a world-class paddling destination. Experience the exhilaration of dozens of class I–III rapids, camp on sandy beaches, explore famous outlaw hideouts and marvel at Native American petroglyphs along the Desolation & Gray Canyon section. Self- guided options for Desolation Canyon require permits and are only recommended for families with previous whitewater rafting experience. From the put-in at the Sand Wash Boat Ramp south of Myton, most groups spend four to seven days paddling the 85 miles to the town of Green River. For a half-day taster, try the popular nine-mile jaunt down the lower portion of Gray Can- yon, just north of the town of Green River. This lively section has seven class I–III rap- ids and is suitable for self-guided rafting.

Outfitters
Tag-A-Long www.tagalong.com
O.A.R.S. www.oars.com


MADAWASKA RIVER, Ontario

Whether you’re looking to hone your white- water canoeing skills or simply enjoy a lazy float by raft, the Madawaska River is one
of the best whitewater learning rivers in
the east. Divided into the spring-run Upper and more family-friendly Lower sections, the Madawaska originates in the Algonquin Highlands and flows for 230 kilometers to its confluence with the Ottawa River. In summer, the dam-controlled water is delightfully warm, making this a great place to spend full days on—and in—the river with- out risking an ice cream headache. Go for an adrenaline-filled afternoon at Palmer Rapids or stretch your vacation to a long weekend by continuing down to Buck Bay, negotiating easy portages and class I–III rapids, and camping at beautiful riverside sites.

Outfitters & Instruction
Paddler Co-op www.paddlerco-op.com
Madawaska Kanu Centre www.owl-mkc.ca/mkc/
This article originally appeared in Canoeroots & Family Camping, Spring 2012. Download our freeiPad/iPhone/iPod Touch App or Android App or read it here.

Top Whitewater Parks

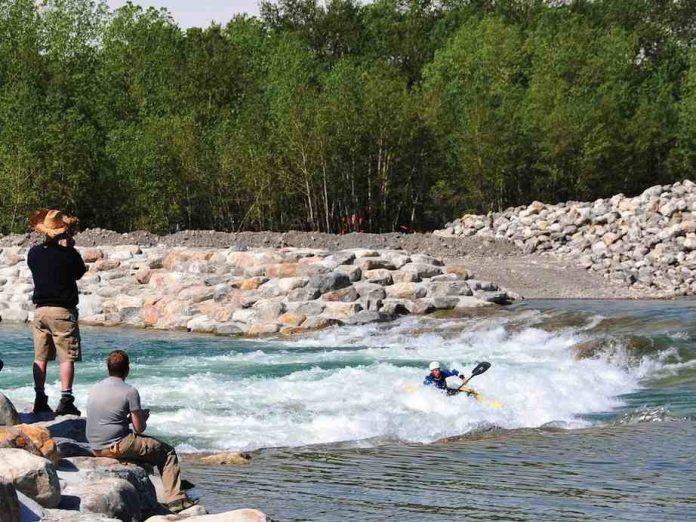
Harvie Passage, Calgary, AB. Photo: Jeff Germaine

These class III whitewater parks guarentee a good time and they’re close to major urban centers. 


Riverfront Park

Charles City, IA

This brand new artificial whitewater playground opened up on a 1,200-foot section of Iowa’s Cedar River last July. The first of three features offers a glassy wave with an easily accessible foam pile great for surfing. The second is a more powerful hole ideal for practicing aerial moves. Front surf some more at the final feature, another freestyle-friendly wave. Easy eddy access from both river left and right make this well-designed park a top pick for playboaters. Ideal levels are between 800 and 4,000 cfs.

YOUR RIDE

Dagger Agent

SHUTTLE ROUTE

From the I35, take high- way 218 east into Charles City. Exit east onto Gilbert Street then turn left on Main Street. The park is just over the bridge on the left-hand side. There are many access points in the park as well as up- and downstream.


Harvie Passage

Calgary, AB

This project was undertaken to turn a deadly weir on the section of the Bow River near downtown Calgary into a navigable, more natural waterway. After over 10 years of planning and construction, the whitewater park is slated to open this spring. The reconstructed passage includes 12 features with an independent channel for novices. Testing is under- way to determine ideal water levels for running and surfing the series of man-made holes, foam piles and waves that will make up Canada’s biggest fabricated whitewater park.

YOUR RiDE

Liquidlogic Freeride

SHUTTLE ROUTE

Harvie Passage is located between the 17th Avenue and 12th Street Bridges. At press time, construction was ongoing and surrounding parking and access facilities were yet to be established. Check www.parksfdn.com for up-to-date information.


Casper Whitewater Park

North Platte River, WY

Inaugurated in 2003, this section of the Platte River Parkway is made up of four artificial rock structures. Normal levels flow between 500 to 3,000 cfs. Find optimal surf conditions when the gauge reads on the high side, anytime from early spring until late fall. The run starts with a clean surf wave followed by a hole, a gradual drop and wave train, and finally another hole. Use this park as a warm up for one of the many nearby runs the North Platte River has to offer.

YOUR RIDE

Pyranha Loki

SHUTTLE ROUTE

Exit the I25 south on North Poplar Street. Hang a right onto West First Street and look for the park on the left- hand side.


This article originally appeared in Rapid, Spring 2012. Download our free iPad/iPhone/iPod Touch App or Android App or read it here.

How to Hang a Hammock

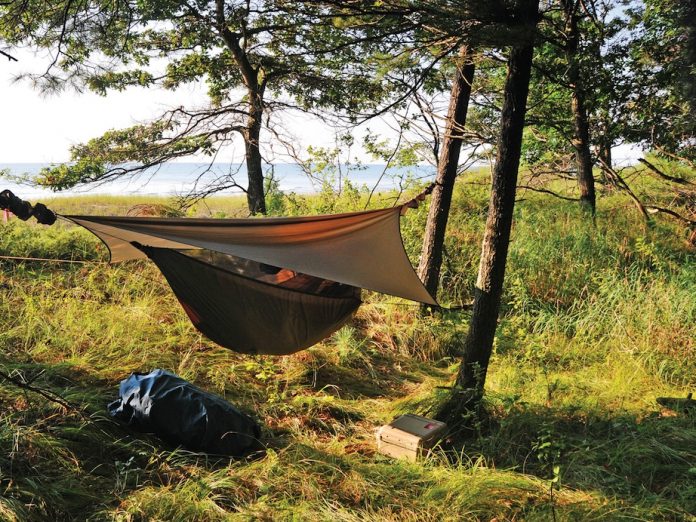
Sleep right in a hammock. Photo: Stephen Brede
Catch a breeze in a hammock.

The best reason to move up to the trees is the elevation in comfort. The logistics of hammock camping are similar to tarp camping, except the sleeping area is off the ground. Gone are problems with uneven or wet rain, roots and rocks. The cocoon structure is cozy, and lying diagonally flattens the hammock so you can sleep on your back or side.

The basic setup is simple: You need two trees, 12 to 15 feet apart. They should be alive with no overhanging widow makers. They need diameters of at least six inches, as the force exerted isn’t simply your weight divided by two, but hundreds of pounds at each end. The hammock attaches to the trees with 1-to-1.5-inch nylon straps, which prevent damage to the bark.

Hammocks ideal for this application are sewn of lightweight nylon. A high-tensile line stretching from the head of the hammock to the foot establishes the hang. It also forms a ridgeline for draping an attached or removable bug net. Access is usually through a zipper or Velcro opening along the hammock/net interface, or through a slit in the bottom. Guy lines can be rigged from each side to keep the net from sagging, and to reduce swing. A tarp suspended from the pair of trees and guyed out over the hammock weatherproofs the setup.

The downside of hammock camping is, well, the downside. It’s colder sleeping in the air than on the ground. Your body compresses the bottom of your sleeping bag to the thickness of a tortilla, so you need to insulate. Some campers use traditional sleeping pads, but these slide around and most are too narrow to hug your hips and shoulders. One fix is to attach a second layer to the hammock bottom, into which you can sandwich a wider pad, clothing or tortillas. Another option is to suspend a down quilt—known as an underquilt—beneath the hammock.

It’s usually easy to find a pair of suitable hammock anchors. But what to do if the trees don’t cooperate? If you have to go to ground, suspend one end of your tarp from a paddle, trekking pole, stick or single tree, and stake and guy the rest. Then hang the hammock underneath, attaching the head to the vertical support and staking the foot. A hammock with attached netting will keep the bugs at bay. The ridgeline will be slack, so shorten it with a loop to keep the netting from sagging.

Before you pitch your tent, Google “hammock camping” or ask around at your local outfitter—you’ll find several hammock manufacturers and lots of uplifting advice.

Stephen Brede honed his hammock hanging skills during a three-month canoe circumnavigation of Lake Michigan. He prefers cedar trees, with a view of the water.


This article originally appeared in Canoeroots & Family Camping, Spring 2012. Download our freeiPad/iPhone/iPod Touch App or Android App or read it here.

Smooth Dock Landing Canoe Technique

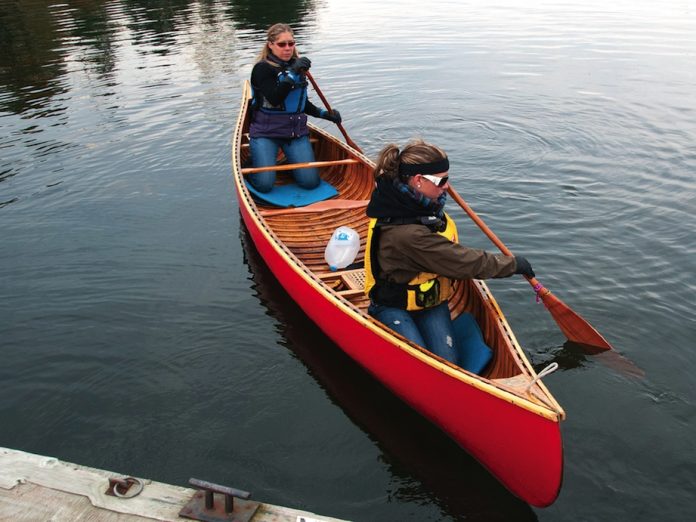
Smooth dockside landings. Photo: Marty Tannahill
Smooth dock landings.

This article on smooth dockside landings from the seat of your canoe was  originally published in Canoeroots and Family Camping magazine.

Gracefully bringing your canoe to rest adjacent to a dock or deep rocky shoreline is the aim of a well-executed landing. In this position, paddlers can more conveniently exit the boat, stabilizing themselves by using the dock or shoreline for support.

The ideal landing is completed with the canoe under constant motion, stopping it snuggly against the dock. To make this happen, approach a fixed target on the dock in a straight line, roughly 45 degrees to the landing. As the boat nears the landing point, the stern paddler initiates the turn by using a draw or pry. If the landing is on the stern person’s paddling side, he or she should use a draw. The stern person should use a pry to initiate the turn if the landing is on the opposite side. 
Immediately after the stern paddler initiates, the bow paddler reciprocates with a complementary stroke. If the stern paddler uses a draw, the bow paddler can assist with a draw or bow cut. If the stern paddler uses a pry, the bow paddler should choose from a pry, bow jam, crossbow draw or crossbow cut. Just before reaching the target, both paddlers provide well-timed reverse strokes usually followed by some subtle draws or pries to stop the canoe at the intended spot.

Practice the timing of your strokes. Initiating the maneuver too soon will leave you too far from your target. However, waiting too long could result in a collision with the dock.

As you develop this skill, communication be- tween paddlers is important, especially when changing partners. Plan the landing out verbally before you begin. It’s best to start at slow speeds so you don’t ram the dock or damage the canoe. Increase the speed only after you can competently complete the maneuver. Try slightly different approach angles to see what works better for you and your partner. Knowing how your boat responds to the strokes is important as all canoes maneuver differently.

Marty Tannahill is a Master Canoe Instructor with the Ontario Recreational Canoeing and Kayaking Association. When he’s not paddling you’ll find him fly-fishing Ontario’s remote rivers.

This article originally appeared in Canoeroots & Family Camping, Spring 2012. Download our freeiPad/iPhone/iPod Touch App or Android App or read it here.

Wave Wheel Kayak Technique

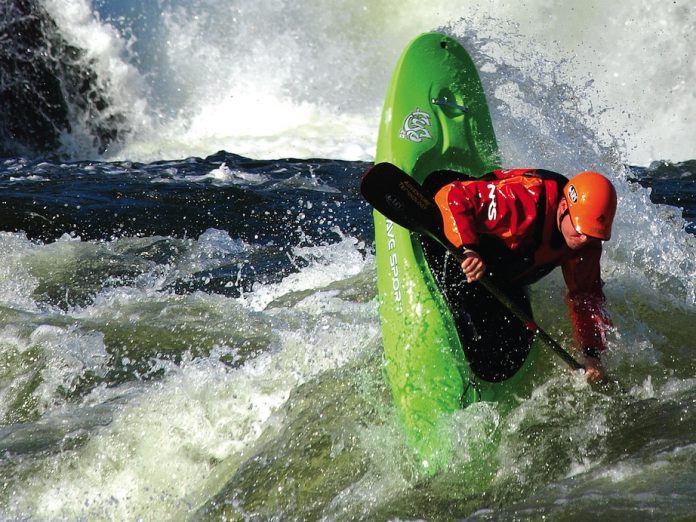
Demonstrating the wave wheel. Photo: Kelsey Thompson
Demonstrating the wave wheel kayak technique.

Learn how to perform a wave wheel with this technique article from Rapid magazine.


The wave wheel lets you style almost any wave train and is one of the most basic downriver freestyle moves you can add to your arsenal. Resembling a downriver cartwheel, it involves using the face of a standing wave like a ski jump to throw your boat vertically into the air.

Find a steep standing wave that is deep on its backside—wave wheeling into shallow water can be extremely painful. Choose a green wave, as breaking waves will slow your downriver momentum too much. Although it’s possible to wave wheel on any sized wave, a larger wave will make this move easier.

Approach the steepest part of the wave with speed; the faster you go, the higher you’ll launch. Speed also helps your boat break free of the water, making the move easier.

As you reach the wave and begin climbing its face, take a powerful forward stroke with your boat edged toward the blade you’ve planted. Time your stroke to finish when the peak of the wave reaches your hip. This will wind your body up for the next step and pull your stern underwater, allowing your bow to rise off the backside of the wave.

Keeping your boat on edge, begin reversing your forward stroke into a back stroke on the wave’s peak—this pushes your bow down into the trough behind the wave and your stern free of the water into the air. The power for this move comes from unwinding your torso to bring your bow under your body. Rotate your upper body down towards the water, thinking about getting your paddle shaft parallel with an imaginary plane extending off the wave’s face.

Timing is everything. If you unwind too early, you’ll drive your bow into the face of the wave; too late and you’ll plant your paddle into thin air.

As you back stroke, think about pushing your feet under your body and keeping constant pressure on your planted blade. If you finish your stroke before your boat reaches vertical, your momentum will end abruptly and you’ll fall back to the water.

As your boat approaches vertical, lift your knee to flatten your boat and switch to the other edge. Keep your weight forward as you fall onto your hull facing upstream. Finish the move with a back stroke that acts as a brace to assist in returning your boat and body to an upright position.

Wave wheeling is an excellent way to spice up a mellow section of river or drop into a wave or hole to front surf. Once you’ve mastered wave wheeling forwards, try it backwards. On bigger waves you can even wave wheel your creek boat. 


 This article originally appeared in Rapid, Spring 2012. Download our free iPad/iPhone/iPod Touch App or Android App or read it here.

Jet Ferry Open Canoe Technique

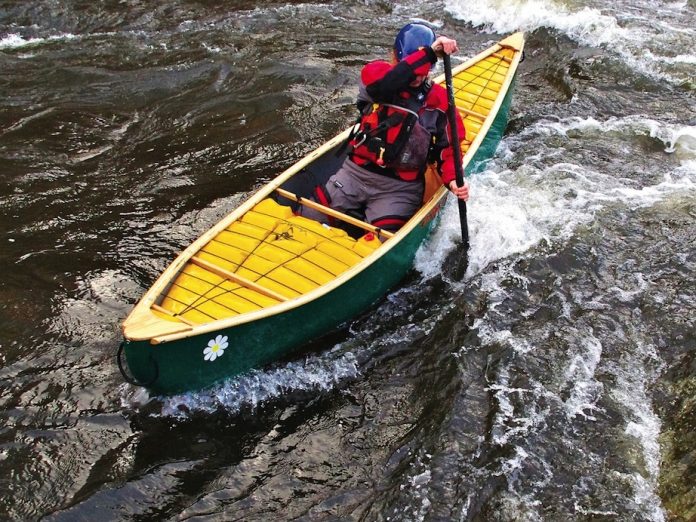
Demonstrating the jet ferry technique. Photo: Andrew Westwood
Open Canoe Technique Jet Ferry

I’ve long used the jet ferry as a reliable meth­od for crossing wide expanses of current, or reaching mid-river surf waves. But the incred­ible speed and efficiency of this move wasn’t fully revealed to me until last summer.

Paul Mason and I were teaching out West on Alberta’s Red Deer River and were impressed with the many spectacular surf waves. Front surfing, back surfing, spinning on waves—on this river you could do it all! Paul commented curiously on the remarkable speed of his jet fer­ries. Could it be that there was something differ­ent about these waves compared to ours back east, or was there something different about Paul? (Some of you may know the answer al­ready if you’ve read his Bubble Street cartoons.)

To solve the mystery, I watched Paul and oth­ers tackle some challenging jet ferries. Most kept an active paddle or ruddered throughout their move. But not Paul. He kept his paddle vertical, practically side slipping on a draw. When I asked him to rudder instead, he claimed the magic was gone and the surf felt slower. It turns out that the secret to Paul’s accelerating jet ferry is to use the paddle blade as a foil to sail across the wave. When he ruddered, the blade no longer had the foil effect, making the move feel sluggish in comparison.

To understand how this works, imagine a min­iature sailboat upside down on a jet ferry wave. The inverted boat would have its sail catch­ing the current instead of the wind. A paddle blade acts in much the same way. Just as with a sail, a paddle catches the rushing current and redirects it behind you toward the stern of the canoe. With the water deflected to the stern, the paddle is propelled forward increasing the speed of a jet ferry—just like a sailboat tacking across the water on a windy day.

Similar, too, is how the hull of a sailboat or ca­noe tracks the boat to prevent sideways move­ment. A sailboat needs a keel to grip the water so that the force of the wind will move the boat forward. A canoe uses its chine in the same way. The edge of the canoe carves aggressively into the wave face—that plus gravity pulling the canoe down the wave keeps the canoe on a for­ward path so it doesn’t slide downstream and off the wave.

To gain the most momentum from the paddle sail, angle the blade so that the leading edge points slightly in the direction of the ferry. Simi­larly, point the canoe across the wave but with just enough upstream angle to cause it to surf down the wave face. For sailing, the best jet ferry waves are ones positioned perpendicular to the flow of the current.

Mystery solved. As it turns out, Paul is differ­ent, at least in how he jet ferries.


Andrew Westwood is an open canoe instruc­tor at the Madawaska Kanu Centre, member of Team Esquif and author of The Essential Guide to Canoeing. www.westwoodoutdoors.ca.


 This article originally appeared in Rapid, Spring 2012. Download our free iPad/iPhone/iPod Touch App or Android App or read it here.

Feathercraft Heron Kayak Review

Photo: Virginia Marshall
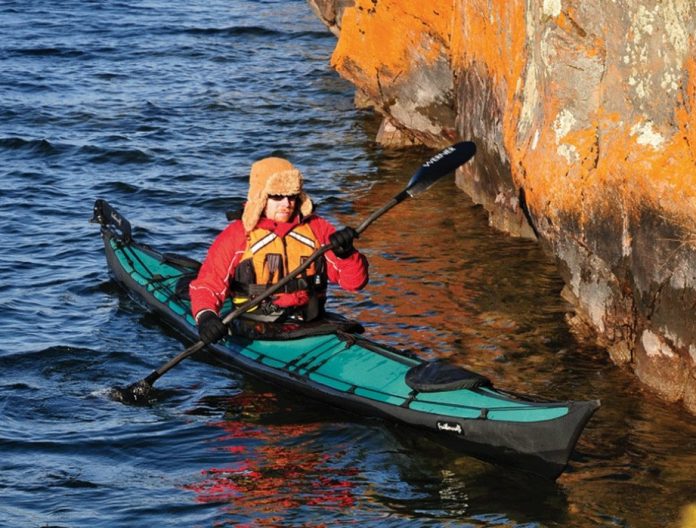
Feathercraft Heron Folding Sea Kayak. Photo: Virginia Marshall

A review of the Feathercraft Heron folding sea kayak from Adventure Kayak magazine.

Feathercraft’s first new long haul tripper since launching the K1 Expedition in 1981, the Heron is for paddlers “with a weeklong or multi-week expedition in mind who want a high performance boat in terms of speed and agility,” says designer and company founder Doug Simpson. Hand built on Granville Island in Vancouver, B.C., it’s positioned as the new premier choice for travelers needing a fast, high volume folding kayak capable of handling the world’s most demanding environments.

With tent pole-style, aluminum bow and stern frame assemblies, six donut-shaped crossribs, nine additional frame poles and a myriad of subsidiary pieces, it isn’t the quickest to assemble folding kayak on the market. Nor is it the cheapest. But the Heron does benefit from the same full-featured outfitting and durable construction as the legendary K1.

Three dry bag-style, roll closure hatches access two cavernous storage compartments; there’s enough capacity for several weeks worth of food, fuel and gear. No day hatch means you’ll likely want a deck bag for on-water essentials. Like its Feathercraft forebears, the Heron doesn’t have bulkheads and utilizes a sea sock—a waterproof cockpit cocoon that attaches to the coaming—to keep the storage areas dry, and an unloaded boat floating in the event of capsize.

Our six-foot-plus testers enjoyed the roomy fit and accessibility of the deep, extra-long cockpit and found the slender thigh brace tubes adequate for a dialled in fit. At 5’6”, the high coaming and backrest hindered my torso rotation, and just my kneecaps made contact with the thigh braces. Adding foam or an inflatable booster seat improves fit for smaller paddlers, but this is really a big-boy boat. Simpson recommends the capable, lower volume Feathercraft Wisper for petite paddlers (see Inside Out, Spring 2006, www.adventurekayakmagazine.com/0035 for a full review).

The long waterline combined with a Swede form shape and clipper bow make the 17’7” Heron significantly faster than the shorter, beamier K1 Expedition. It accelerates quickly to a cruising speed comparable to many composite touring kayaks.

The hard-chine, V-shape hull provides less initial stability but edges with aplomb. Rock solid secondary stability is enhanced by small-diameter, integrated sponsons above the chines. When inflated, the sponsons fill out the skin, stretching it drum-tight and adding a cushion of support when the boat is edged aggressively.

Dropping the rudder or heeling the hull onto its windward edge easily corrects weathercocking. Rough water paddling is a pleasure, with the generously rockered hull dampening rather than slapping the waves. For those coming from a plastic or composite kayak, paddling a Feathercraft is a unique way to experience an even closer connection with the water.

The capacity of the Heron favors long distance touring over day paddling. It’s ideal for medium to large paddlers whose travel plans demand mile-chewing performance, proven durability and unparalleled portability.


ELBOW GREASE
Assembly is straightforward, but significantly easier with a helper. Our first attempt took one and a half hours. Practice and watching the provided DVD—which we neglected to do in the spirit of a remote field assembly—would cut this in half.
MISSION CONTROL
Gas pedal-style rudder controls adjust to a wide range of leg lengths and provide a solid platform for power transfer and bracing. Comfort touches include an inflatable backrest and calf plates for under-leg support.
TOTALLY TUBULAR
A combination of long waterline, Swede form shape, pronounced V hull, hard chines and internal sponsons stretch the cruising speed of the hardwearing, reinforced welded urethane hull while enabling aggressive edging and surprisingly nimble turning.


A VIDEO REVIEW OF THE FEATHERCRAFT HERON FOLDING SEA KAYAK


FEATHERCRAFT HERON SPECS

LENGTH: 17′ 7″
WIDTH: 24″
WEIGHT: 54 LBS
PACKABLE SIZE: 36″ x 18″ x 12”
MSRP: $6,200 CAD / $6,112 US
www.feathercraft.com


This article originally appeared in Adventure Kayak, Summer/Fall 2012. Download our free iPad/iPhone/iPod Touch App or Android App or read it here.

Mohawk Maxim Canoe Review

Photo: Neil Wright
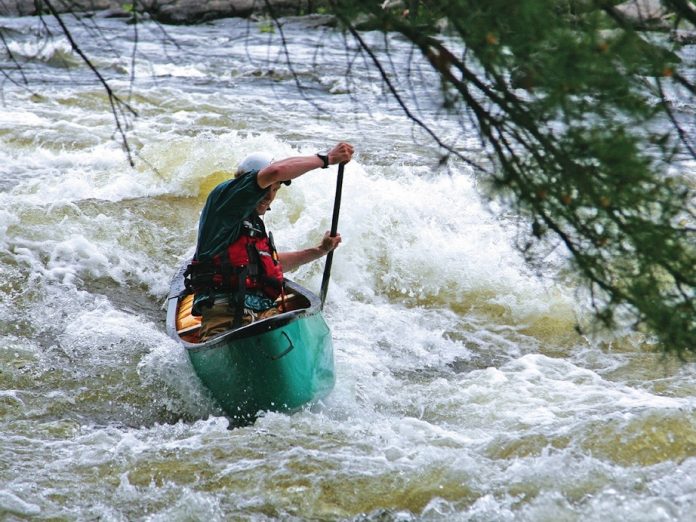
Mohawk Maxim whitewater canoe review.

Ten years ago I met Maxwell Johnston testing a prototype of the Maxim. He told me that Mohawk Canoes was going to build a production model. I should have jumped in it then, I had no idea how much fun it would be and how long I’d have to wait for another chance.

Before the Prelude, Taureau and L’Edge came along, Johnston was paddling the Gull River, a pushy technical run.

“I loved catching the very last eddy right at the top of Whitehorse Falls, but it’s a tiny eddy, requiring a very fast entry and exit,” remembers John­ston. “I wanted a boat that was quick to roll so I could play in Earl’s Hole above the falls. It needed a high-volume, blunt bow to keep dry when running the dam and the first drop.”

At just under nine feet with sharply rockered ends and a flat bottom, the Maxim’s top speed doesn’t begin to approach that of, say, an XL 13, but it gets there so much faster. The Maxim takes only a stroke or two to reach its top speed. It also hops on small waves and planes across small currents, giving you the illusion of greater hull speed. On steep creeks, all of these elements are more important than speed, which just slams you into micro eddies harder.

Our Maxim came ready to go with Mohawk’s factory outfitting includ­ing a Mohawk saddle, lap belt, thigh wedges, knee pads, foot braces and PVC bags and lacing. Mohawk told me that 95 percent of the boats they sell are ordered with factory installed outfitting.

This was my first go with Mohawk outfitting and I’m afraid I’m not a big fan, especially in a high performance boat like the Maxim. I’m not weirded out by a lap belt for safety reasons, I’ve used a similar rig in my C1 outfit­ting for 15 years. I have long legs and this lap belt system didn’t keep my hips or knees down in the boat. To take advantage of the performance of the Maxim, I’d suggest spending the extra $80 and an afternoon to install Mohawk’s Extreme Outfitting or another double strap system.

I asked Richard Guin, the production manager at Mohawk, why they install such ridiculously beefy thwarts and deck plates in the Maxim.

“I build boats to take a licking and keep on ticking,” Guin explains. “I am a class V creeker and if my boat won’t handle what I like to paddle, then it’s a sucky boat.”

Okay, time for full disclosure. I love the Maxim, but you may not. At least not at first.

The secondary stability is awesome. You can hang it out there with the gunwales in the water. The bad news for some is, with very little primary stability, that’s the way the Maxim likes to be paddled; you’re either carv­ing one way or the other.

The sharp chines are wicked for snapping offside tilt turns to kill for­ward speed and sticking small eddies. The rocker profile allows you to boof almost anything and, combined with the carvey edges, makes the Maxim one of the most fun boats to surf.

The boys at Mohawk know they have a winner and are working on another—the Phiend. Guin stretched the Maxim four inches longer and two inches wider in the center, and softened the chines to make it more user-friendly. Mohawk plans to blow-mold this polyethylene boat, which they say will be stronger and lighter than rotomolded boats like the Pre­lude and L’Edge.

“I feel that the canoe has not hit the limit of what it can do but has been restricted by the manufacturing process,” says Guin. “We plan on chang­ing that.”


MOHAWK MAXIM

MATERIAL: Royalex

LENGTH: 8’10”

WIDTH: 27.6”

HULL/OUTFITTED WEIGHT: 32/41 lbs

ROCKER: 4.5”

DEPTH: Center 15.5” Ends 18”

MSRP: Hull only $1,233 Factory outfitted $1,563

www.mohawkcanoes.com