Step 1. Choose site
The ideal sauna site is right next to a good deep-water jumping spot or swimming beach. You also want to be as close as possible to the spot where you will heat your rocks.
Step 2. Collect rocks
Gather several rocks that will withstand extreme heating and cooling. Rocks with moisture-containing cracks or pockets can explode dangerously when heated. For this reason, and to avoid blackening local rocks in a fire, the Bureau of Land Manage- ment in the U.S. advises campers to pack in their own sauna rocks. If gathering your own, look for crystalline igneous rocks or metamorphic rocks that are formed from igneous rock. For the geologically fluent, experts recommend peridotite, olivine, vulcanite and basalt. Stay away from sedimentary rocks such as sandstone or shale and collect your rocks from a dry area.
Step 3. Build sauna
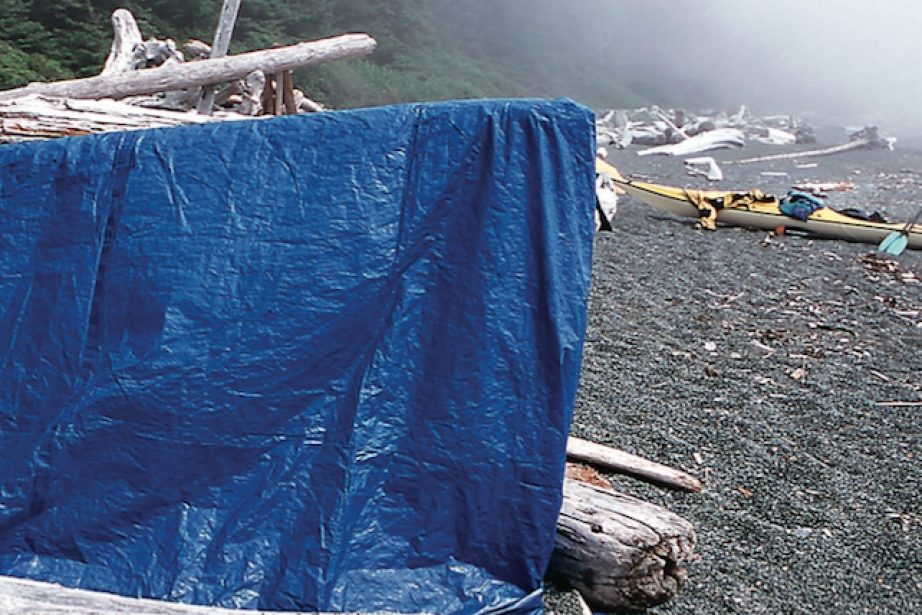
Using a cheap plastic tarp that you don’t mind getting dirty, set up your sauna so there is just enough room for your group to sit inside without touching the hot rocks. Anchor the edges with rocks, logs or sand to create a good seal. Dig a pit in the centre for your rocks. Aim to have only one opening that you can quickly roll closed to keep the heat and steam inside.
Step 4. Light fire
Collect a lot of firewood and light a large fire in an existing fire pit or a low-impact spot. Let the fire burn down to a good bed of hot coals and place your rocks in the coals until they are red hot. Transfer the hot rocks into the sauna using a metal pot or bucket or pairs of strong, forked sticks.
Step 5. Get high
Strip down as bare as you dare, crawl into your sauna and seal the door. To make it a sweat in the native tradition, enter clockwise and exit the way you came in. Don’t forget to bring in water for drinking and extra for sprinkling on the rocks. When you’re ready for a break, make a dash for your swimming spot to complete the thermotherapy routine—hot and cold immersion gives you a natural high and is said to strengthen the immune system. The hot rocks should be good for two or three repeats. If it’s cold out, crawl back inside the lukewarm sauna to dry off after your final plunge.
Step 6. Erase evidence
The beach sauna is not a low-impact technique. Save the sauna for special occasions and suitable places—think ocean beaches, not alpine lakes. Make sure you’re getting rocks from a place where they won’t be missed and throw any blackened or cracked rocks out of sight into deep water. Burn your fire down to white ash and put it out before you leave.
