Even the best of drysuits can spring a leak. When it does, it can be tricky to conduct a leak test and find the exact spot. When you were wearing the suit, you probably noticed a leak in a general area—the left foot, perhaps, or the right side under the armpit—but when you take the suit off, there’s enough moisture spread around so that you can’t tell exactly where the water came in. And if you can’t do that, you can’t fix it.
Here’s an easy, DIY method to test a drysuit for leaks and identify their exact location.
How to leak-test your drysuit
Step 1: Prepare your workspace
Work on a flat hard dry surface. On a nice day, a paved driveway works best. Otherwise, a garage floor will do. Cover a large area with clean, dry corrugated cardboard. Open the drysuit’s entry zipper and close the relief zipper if it has one. Turn the suit inside-out and lay it flat.
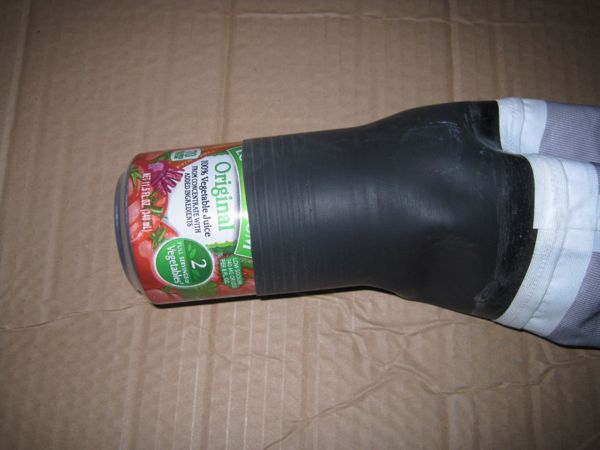
Step 2: Plug the wrists
Plug the wrist gaskets with FULL 12-oz. cans. (Empty cans will crush and won’t work.) If your suit has ankle gaskets, treat them the same way. If it’s a slightly loose fit, you can use a larger can or tighten up the seal by wrapping it with painter’s tape. If your gaskets have very small openings, use a smaller can like the kind tomato paste comes in.
Step 3: Add hose
Put the end of a garden hose through the neck gasket. A hose nozzle with an on-off control that you can operate through the fabric is nice to have. If you don’t have one, just the plain hose end will do.
Step 4: Close entry zipper
Reach into the suit through the neck gasket and close the entry zipper. Pull it tight and make sure it’s completely closed.

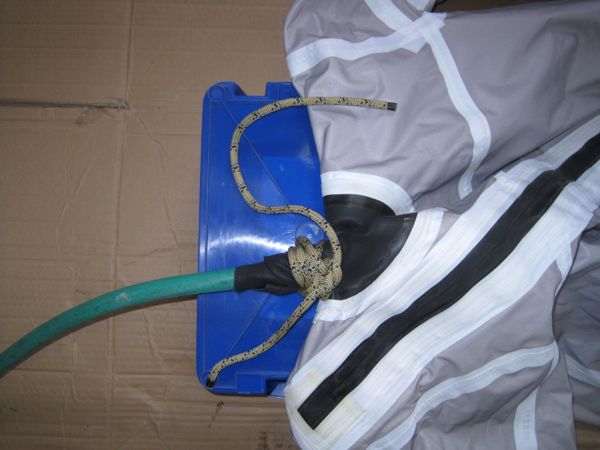
Step 5: Tie off the neck
Wrap the neck gasket tightly around the hose, then tie it in place. If you use string, take several wraps around the gasket before tying the knots: this will help prevent the string from cutting into the latex. Heavier cordage, like the 3/8″ rope shown, is less likely to cut. Prop the neck up off the ground 6″ to 8″. A plastic tub works well for this.
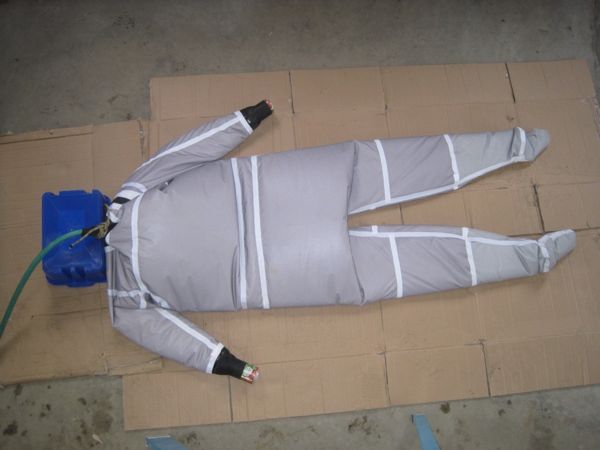
Step 6: Start watering
You’re ready to go. Turn on the water and watch carefully for any major leaks where the gaskets or zippers might not have been closed off completely. Small leaks in the suit itself are not likely to show up immediately.
Step 7: Fill half way
Let the water run until the drysuit is 1/3 to 1/2 full then turn it off. Do not fill the suit completely—that will make it too heavy to move.

Step 8: Check for leaks
As the suit is filling, gently lift the areas where leakage is suspected. If the suit isn’t torn, then leaks are most likely to occur at the seams.
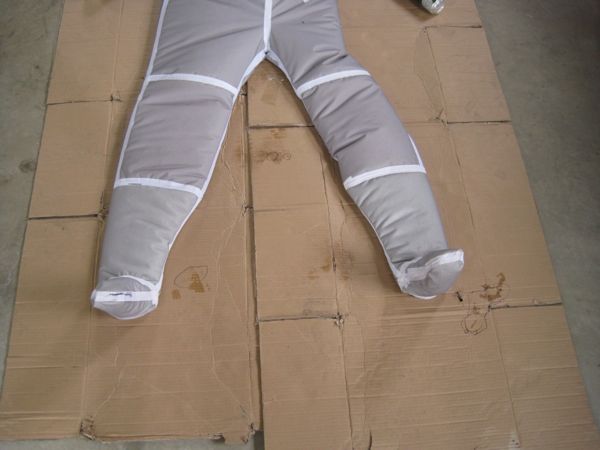
Step 9: Expose the seams
Lifting all around the suit, exposing the seams on the underside and checking for leaks. Be careful not to move the suit around at this point. After you lift a section, let it settle back to the same spot.
Step 10: Be patient
Leaks will be obvious when water drips onto the cardboard. It may take several minutes for the water to inch its way through the seam, so take your time.

Step 11: Mark the leaks
Mark the area of the leak with a permanent marking pen like a Sharpie.
Step 12: Mark the cardboard
Go over the entire suit, lifting it gently in small sections to check for leaks at all the seams on the underside. Draw circles around the wet spots on the cardboard so that when you turn the suit over, you’ll be able to distinguish them from any new leaks that occur.
Step 13: Check the other side
Turn the suit over. This isn’t as easy as it sounds, since there is a lot of weight in water in there. Lift the right leg to drain the water out, then cross it over the left leg. Lift the neck and chest to drain water toward the legs, then shift the left arm under the suit toward the right side. Pull the right arm over to the left side, then gently roll the body of the suit and reposition it on the cardboard. If there were any leaks on the first side, position the legs, arms, and main body seams so that they are not over the marked wet areas.
Again, take your time and wait several minutes for water to work its way through any dubious seams. Lift the entire suit gently, in small sections, looking for new wet spots on the cardboard. Mark the offending seams and circle the wet spots on the cardboard.
Step 14: Drain the suit
When you’re sure you’ve found all the leaks, pull one of the cans from a wrist gasket to begin draining. If you’re working inside a garage, the whole setup—suit and cardboard—should be dragged outside before you drain.
Step 15: Hang to dry
Hang the suit inside out (out of direct sunlight) to dry the inside, then turn it rightside-out to dry the outside before repairing the seams.
Bob Holtzman is the president of Mythic Drysuits, makers of affordable drysuits for recreational paddlers.


