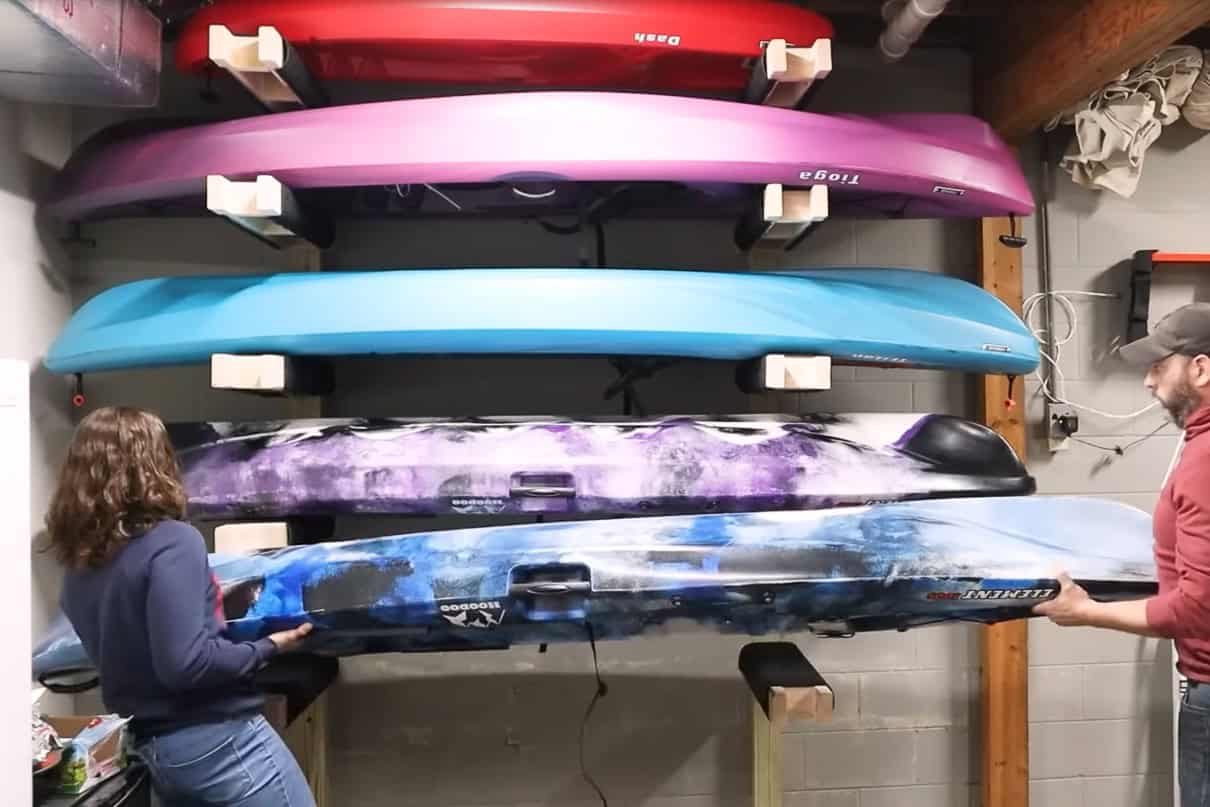
Are your kayak and canoes bundled on top of each other on one side of your garage? Perhaps they are stacked up against a fence in your backyard? Either way, if you’re looking to preserve the life of your boats, make space for more gear, or just make it easier to regularly access your boats—then this simple and budget-friendly DIY kayak rack tutorial is for you.
Materials for DIY Kayak Rack:
- 3/4″ Forstner Bit
- Bessey Quick Clamp
- 1/4” Drill Bit
- 48″ Level
- Hammer Drill
- Masonry Bits
- Tapcon Masonry Anchors
- Table saw/ Circle saw
- Center Punch
- Three 12-foot two by fours
- Four 10-foot two by fours
- Two 10- foot four by fours
- Three-inch construction screws
Instructions for DIY Kayak Rack
The design of this rack is just one idea for storing your kayak. It can be adjusted for canoes and paddleboards too, just be cautious of how much distance you leave between each shelf. To make this rack yourself, you will need some power tools and knowledge of how to use them.
Step One:
Cut all two by fours to length, making 12 of the two by fours 36 inches long and eight of them 32 inches long. In the video, MWA Woodworks is working to make a kayak rack to store five kayaks, so he needed 20 pieces of wood at this length in total. The shorter pieces correspond to the smaller kayaks MWA Woodworks needed to store.
Step Two:
Step Three:
Assemble ten support arms by placing two boards against one of the four by fours. Place a cross brace piece in the middle and clamp these pieces to the four by four. Using three-inch construction screws, fasten the pieces together. Flip and repeat the process on the other side.
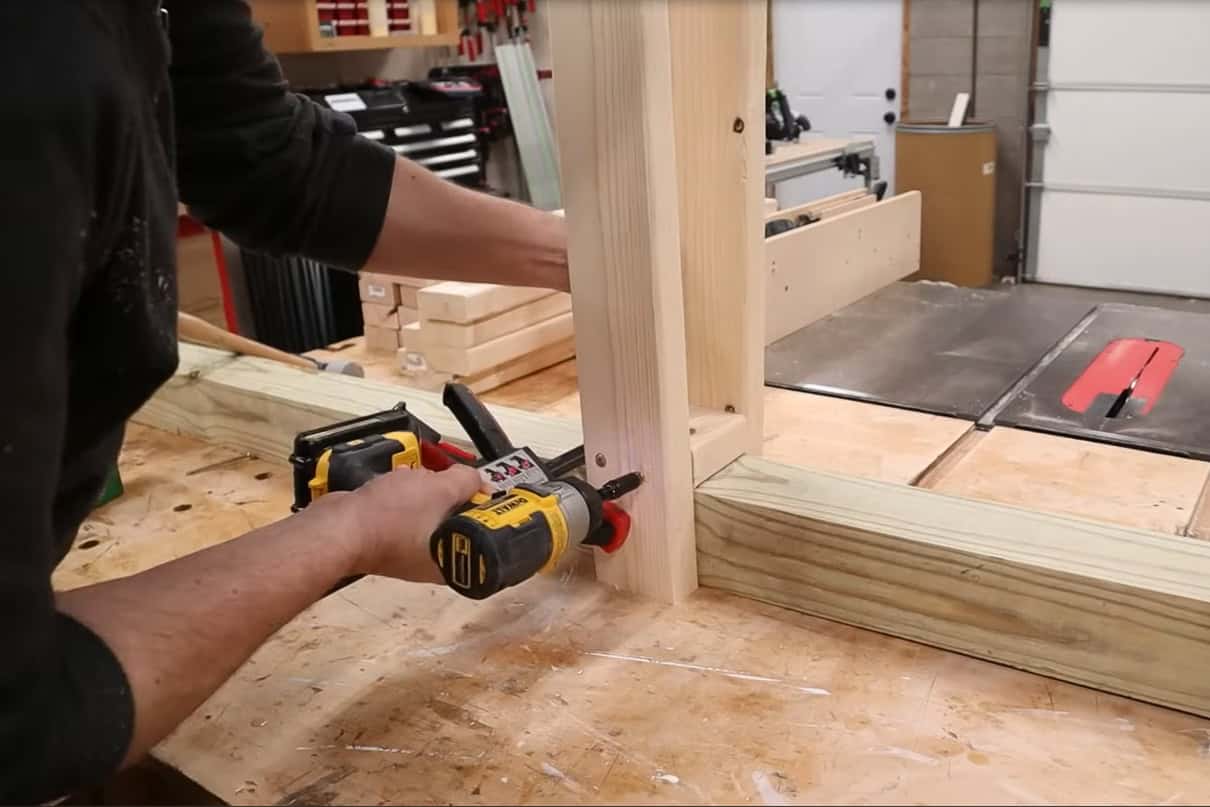
MWA Woodworks builds cross brace pieces for a DIY Kayak Rack.
Step Four:
Add and fasten an additional cross brace approximately in the middle.
Step Five:
Create ten total support arms.
Step Six:
On the four by fours, mark out screw locations at two-foot intervals. Mark the center with a center punch.
Step Seven:
Use a three-quarter inch forstner bit to countersink a hole halfway through the four by four. Then use a quarter-inch drill bit to drill the rest of the way through. Knock out all the shavings. Make a total of four of these holes, evenly and symmetrically spaced, on each four by four. These holes are where you will anchor your rack to the wall.
Step Eight:
Mark out where you want your four by fours, and thus kayak rack, to go and fasten to the wall using the appropriate method for your wall material. Space your four by fours at a length appropriate for the length of your kayak.
If your kayak has bulkheads, make your kayak racks so that the support beam lies underneath the bulkhead, or the strongest part of the boat, to minimize damage. If your kayak is shorter and does not have bulkheads, you’ll want to choose a distance that is neither too close together, which can cause the kayak to bow down at the bow and stern and oilcan the hull, or too far apart, which can cause the kayak to warp sagging in its center.
Step Nine:
Mark the desired location of your first support arm. Consider how high off the ground you would like your closest support arm to be, or how high off the ground you would like your lowest kayak. Line up the support arms with your lines on support beams (four by fours) and attach. Use one screw in the middle and two on each side to start with. MWA Woodworks recommends doubling up later if needed.
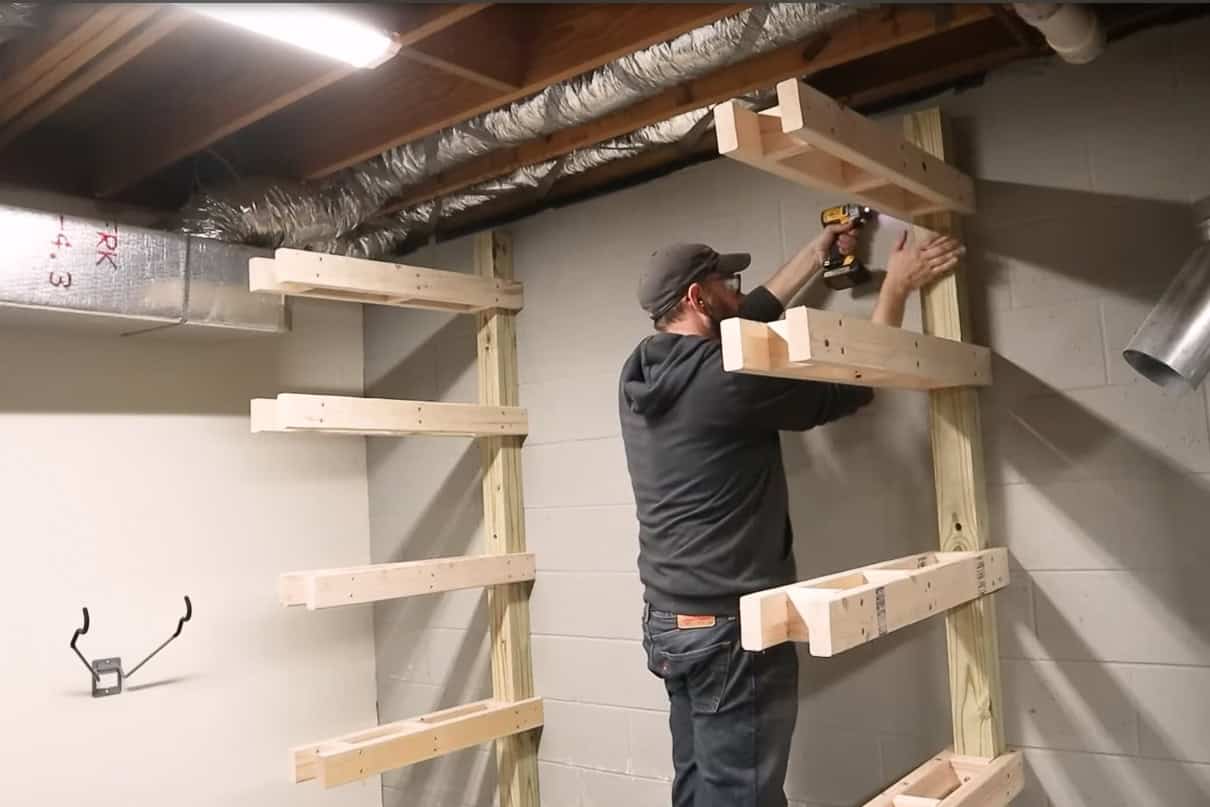
Step Ten:
Repeat this process working your way up adding in support arms at the desired interval of space you would like between your kayaks.
Step Eleven:
For the finishing touch, consider adding something to the parts of your wood frame that will have a kayak sliding over it to protect your kayaks from getting scratched. MWA Woodworks used utility mats and fastened this to the rack using a staple gun.
Rather than utility mats, you could also use a yoga mat or cut up pool noodles.
Video courtesy of MWA Woodworks

Waaaay above and beyond here. 4 pack of padded, rounded kayak arms on amazon is $24, including the hardware.