As the owner of a specialty kayak retailer, AQ Outdoors, my team and I are often the first information source for many people who are considering kayaking for the first time. When we chat with people, one of the most common discussion points is how to get in and out of a kayak.
For those of us who have kayaked before this may seem to be a trivial question, but it is one that causes concern for many potential paddlers. It’s an awkward skill to learn, yet it is essential. There are many different scenarios for entering and exiting recreational and touring kayaks. You could be on a rocky beach, a dock or a sandy beach. The technique we have chosen to share here is simple, it works well for sit-on-top or sit-inside kayaks, and it can easily be adapted to most locations.
How to get in and out of a kayak
1. Carry kayak to the water
Carry your kayak to the water’s edge or utilize a kayak cart if that is appropriate.
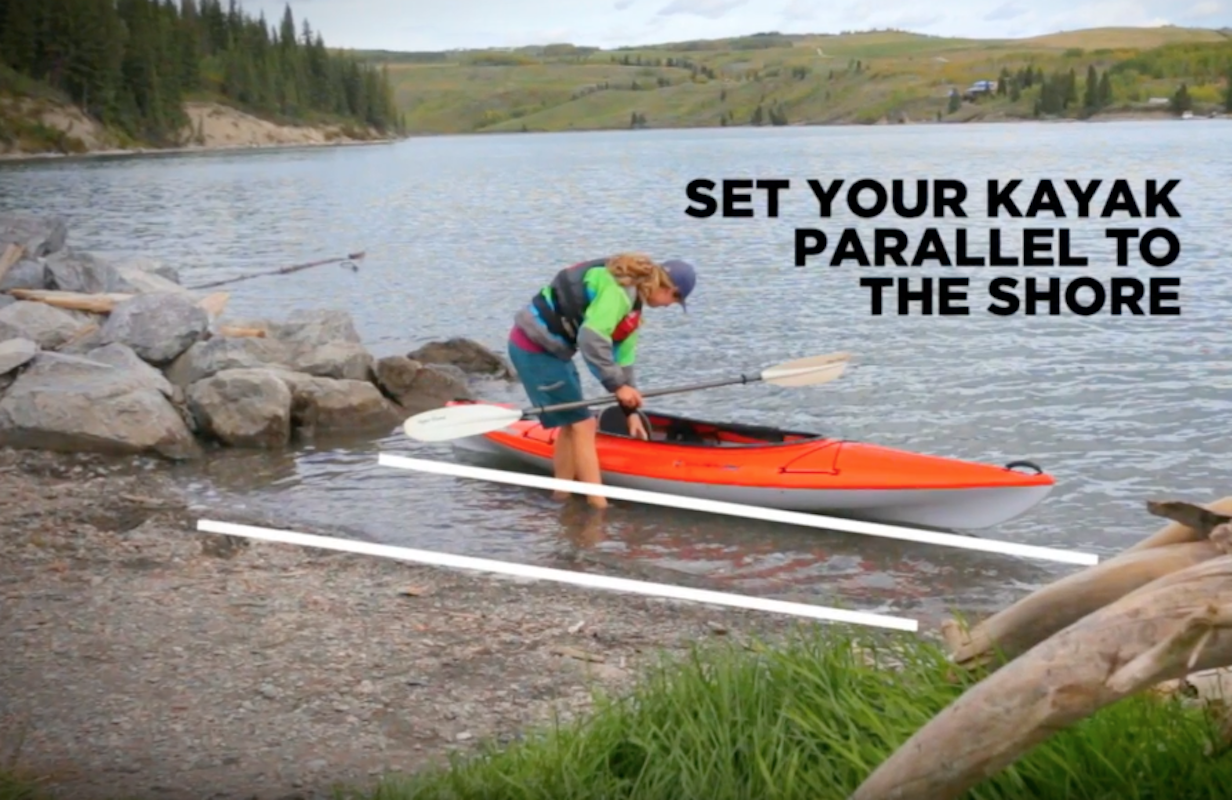
2. Place boat parallel to shore
Place your kayak in the water parallel to the shore and just deep enough to float.
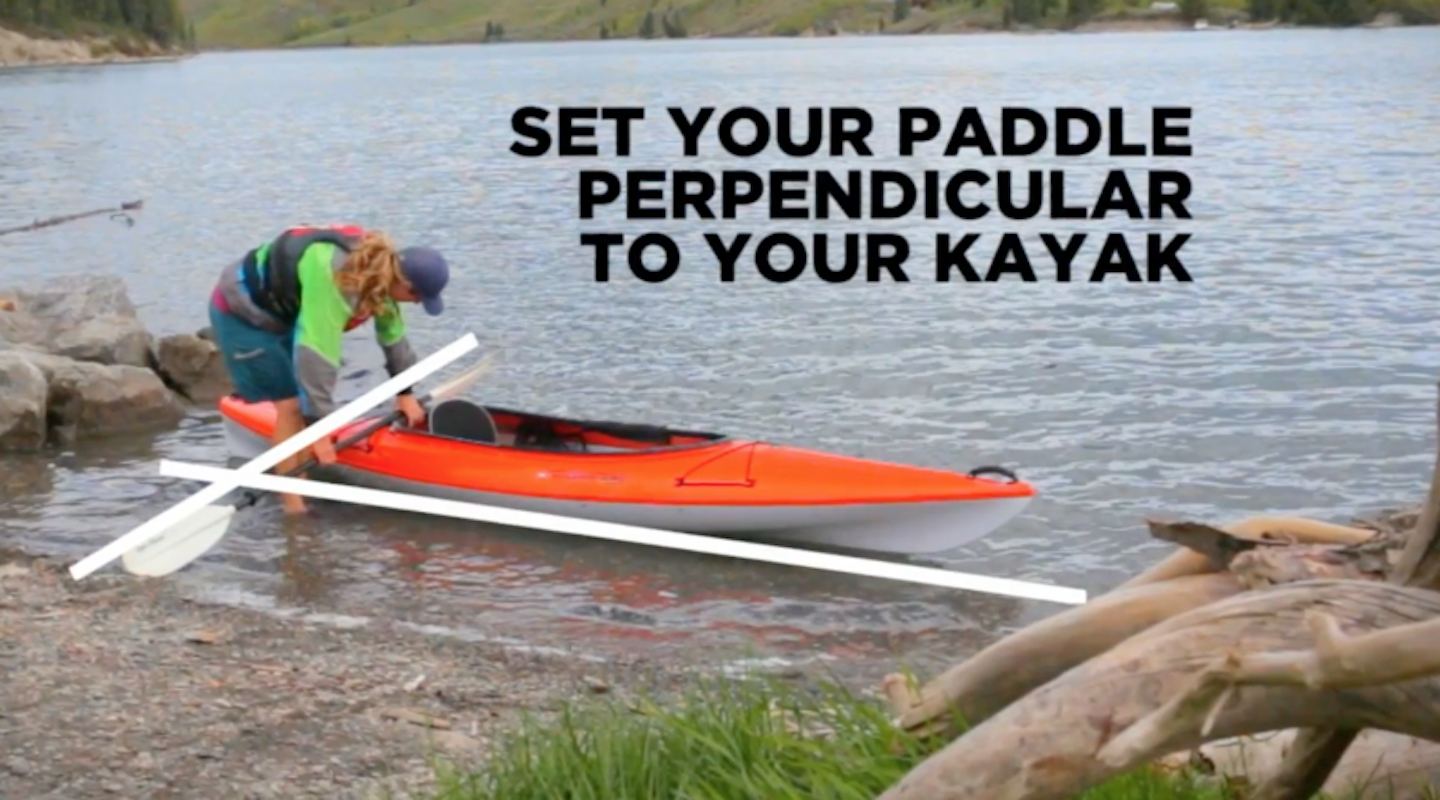
3. Set your paddle as an outrigger
Now place your kayak paddle over the deck of the boat behind the cockpit at a 90-degree angle to the boat. This creates stability and improves your balance by bracing the paddle on both the shore and deck of the kayak.
4. Place hands across paddle and lower yourself
Stand in front of the paddle facing the front of the kayak and put one hand at each end of the paddle shaft. The hand behind your seat should clasp both the paddle and the cockpit rim of your kayak. Bend your knees to lower yourself to a squat.
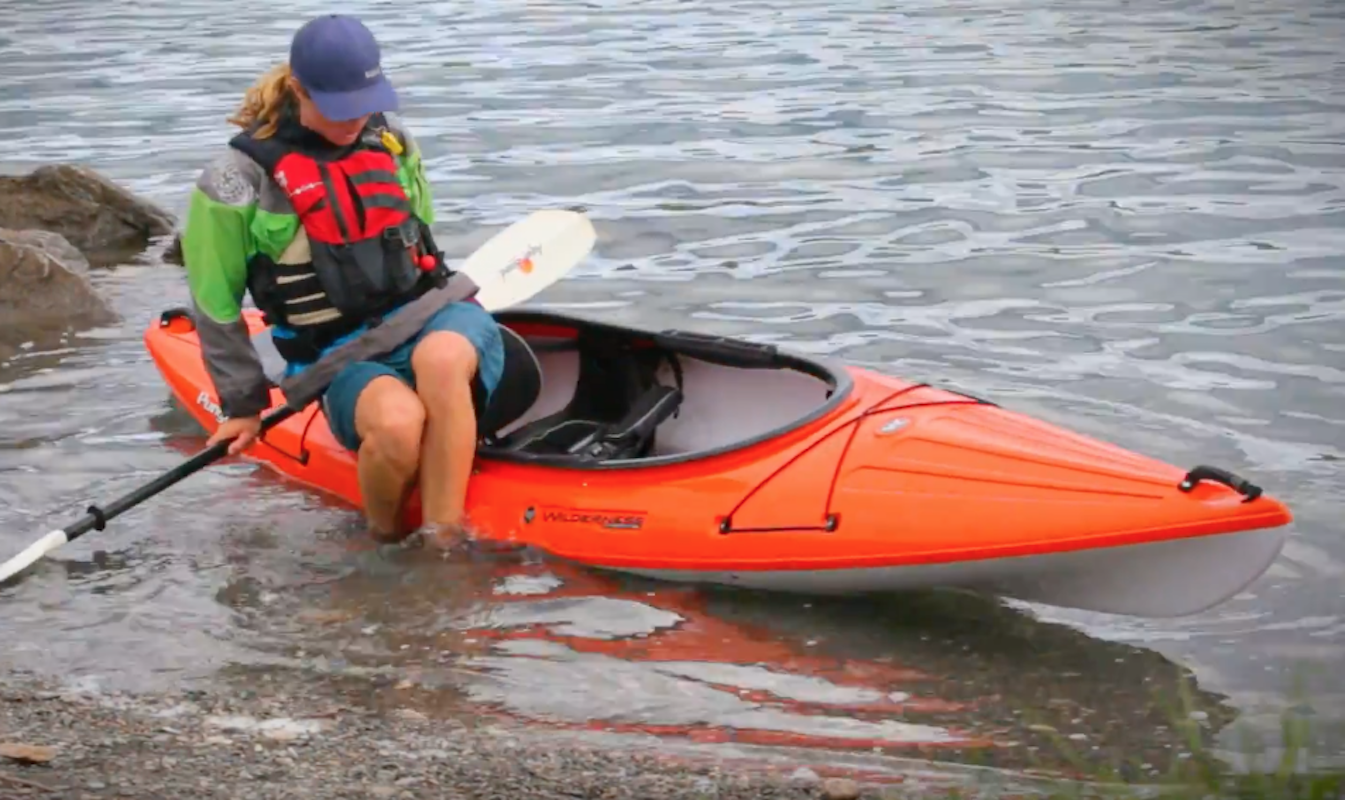
5. Step closest leg into kayak
Using your hands and paddle as support, take your leg closest to the boat and step into the cockpit (all the way to the far side if possible). Make sure to use your paddle and hands to keep the boat balanced.

6. Step second leg in
Once balanced, step your other leg into the boat and lower yourself down into the seat. The first few times this may feel more like a “flop” into the seat. However, as you practice you will find yourself getting into the seat with ease.
You are now ready to set out!
Getting out of a kayak
To get out of the kayak, simply mirror the steps you followed to get in but in reverse.
- Position your kayak parallel to shore.
- Lay the paddle on the deck behind you and perpendicular to the kayak so one of the blades leans on the shore as an anchor.
- While clasping the paddle, slide yourself from the seat into the low squat position leaning slightly toward the shore.
- Swing one leg out at a time on shore.
Benefits of this technique
- It’s a versatile and easy way to get in and out of most types of kayaks.
- It prevents unnecessary scratching and damage to your boat. Some methods have you get in on shore and slide into the water which can cause needless wear and tear on the boat.
- With practice it is an easy and controlled way to get into your boat.
- It doesn’t require any gear other than what you will have available on any paddling outing.

Getting into a kayak from a dock
Docks can be tricky because they often sit higher than your kayak on the water. This is one reason launching from shore is preferred, but this isn’t always an option. Here are a few tips to help if a dock provides a better or only choice for you to get into your kayak.
- Similar as in the from shore method, place your kayak in the water parallel with the dock while keeping a foot or hand on it so it doesn’t float away.
- Also lay your paddle on the dock next to you so it will be accessible to grab once you’re in your boat.
- Sit on the edge of the dock over your seating area and put your feet on the inside floor of the kayak.
- Facing toward the bow, use the dock to lower yourself. Slide your feet forward into position as you lower onto the seat.
- Once you are seated and stable grab your paddle and either push away from the dock or pull yourself along it out to the end.
The instructions provide in this article are intended to be useful and concise. After a few rounds of practice this will put your mind at ease about how to get in and out of a kayak.
Feature Photo: Simon Coward / AQ Outdoors


