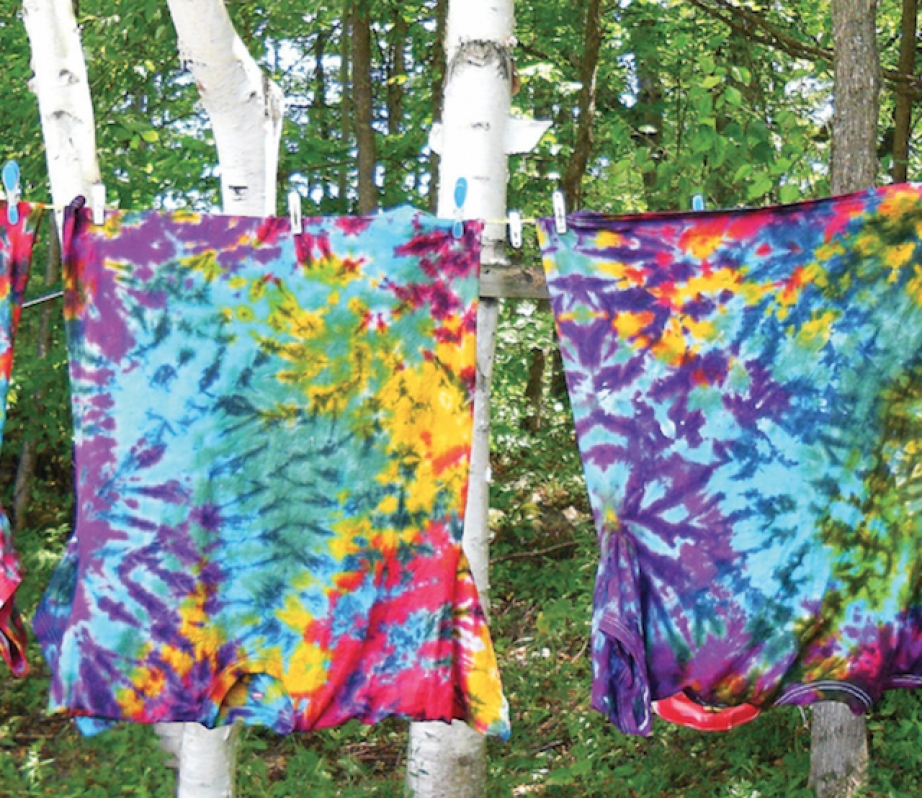
It may bring back memories of Janis Joplin, shag carpet and lava lamps but tie-dye is actually an ancient art that’s been around for thousands of years. Making your very own tie-dyed clothing is the perfect backyard or lakeside activity because, like most things that are fun, it’s messy!
WHAT YOU’LL NEED
-
A t-shirt or other plain white, 100% cotton cloth to decorate
-
Fabric dye
-
Soda ash
-
Elastic bands or string
-
Squeeze bottles
-
Rubber gloves and smock or apron
-
A disposable tablecloth or garbage bags and tape
-
Buckets or dish tubs
-
Sealable plastic bags
-
Marbles or smooth, round stones
Keep in mind that the dye will stain everything it comes into contact with—clothes, skin, hair, table tops and buckets!
INSTRUCTIONS
Prepare your station. A picnic table is perfect for this. Cover it with the tablecloth or garbage bags and tape them in place.
TIE.
Soaking the shirt in water first will make it easier to work with. Try one of these tying methods for a classic design.
Classic Spiral
Lay your shirt out on a flat surface.
Pinch the cloth where
you want the center
of the spiral to be and turn it until it’s com- pletely wound, keeping it as flat as possible.
Using your ties, divide the spiral into pie-pieces.
Bull’s Eye
Place a marble or smooth rock on the shirt where you’d like the center of the bull’s eye to be.
Place a tie around the shirt with the marble inside.
Continue to place marbles and ties for as many rings as you’d like.
Stripes
Loosely scrunch your shirt into a long tube. The stripes will run perpendicular to the tube.
Place ties as far apart as you want the stripes to be. Make sure the ties are very tight.
PRE-TREAT.
Dissolve the soda ash in a bucket of water and soak your tied shirts for 15 minutes. If your dye didn’t come with soda ash, pick some up at a craft store and mix one cup per gallon of water. This will help the dye bond and provide brighter, longer-lasting designs. Soda ash is caustic so be sure to protect yourself.
DYE.
Put on your gloves and aprons, mix your dyes according to the manufacturer’s direc- tions and fill your squeeze bottles. Squirt the dye onto the tied-off sections of your shirt.
Be creative mixing colors for a unique look. Try to avoid letting complementary colors touch—when they mix they’ll turn brown. Saturate the shirt completely without letting the dye pool.
BAG IT.
When you’re happy with your dye job, place the shirt in a sealable plastic bag and let it set overnight.
RINSE, WASH, REPEAT.
Put your rubber gloves and apron back on and remove the shirt from the bag. Rinse the shirt until the water runs clear, starting with warm and
then cool water. Remove the ties as you rinse. Machine-wash the shirt in cold water. When you’re finished, run an empty wash cycle with warm water and soap to ensure there’s no leftover dye in your washing machine.
You now have your very own, one-of-a-kind, cheerful, colorful masterpiece to wear on your next canoe trip!

This article first appeared in the Early Summer 2012 issue of Canoeroots Magazine.


