You don’t need a trailer to transport your kayak, but sometimes kayak trailers are the right tool for the job. Heavy fishing kayaks can be next to impossible to lift onto a roof rack solo. Smaller paddlers might be challenged to get their kayak onto a tall SUV. Friends heading to the river together might prefer to carpool and load all their boats onto a trailer for simplicity.
Whatever the reason, there are times when a trailer is the best solution to kayak transport. Here are some details to keep in mind if you’re thinking of adding a trailer to your fleet.
[ Paddling Buyer’s Guide: View all kayak transportation products ]
Types of kayak trailers
We’re used to choices when we go looking for outdoor gear, and kayak trailers don’t disappoint. There are dozens of different designs and configurations of trailers to choose from, from DIY specials to sophisticated ultralight folding trailers. You’ll find kayak trailers made of aluminum and galvanized steel, kayak and bike trailers, hybrid kayak trailers with storage, and massive trailers for commercial deliveries. The choices can be bewildering, but if you keep your eye on what you really need it’s easy to cut through the confusion.
A note on tongue length
One thing that almost all kayak trailers have in common is a long tongue. Tongue refers to the part of the trailer that sticks out the front and connects to your vehicle. Kayak trailers need to have longer tongues than conventional utility trailers so your kayaks won’t hit the rear of your vehicle when you turn. The shortest kayaks can be transported on a trailer with a conventional length tongue. Anything longer than about 10 feet requires the extended tongue that comes on a dedicated kayak or canoe trailer.
Traditional kayak trailers
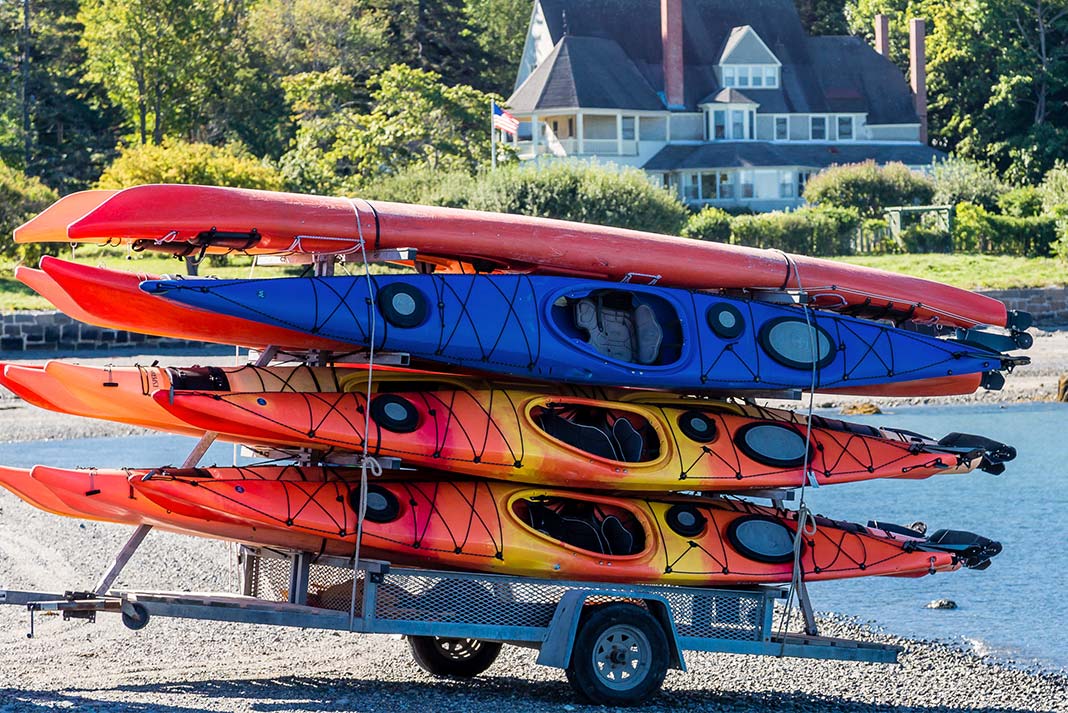
Traditional kayak trailers are the ones we’re used to seeing at canoe rental shops. They typically have two upright posts with horizontal crossbars. Depending on the number of crossbars, trailers like this can carry from two to eight canoes. The largest of these trailers can transport as many as 16 canoes! Since kayaks are shallower than canoes, it’s possible to stack kayaks together on their edge and double the capacity of the trailer.
Traditional kayak trailers may be made from galvanized steel or aluminum. Aluminum trailers are lighter but are more expensive. Crossbars are often rudimentary and should be padded to protect your kayaks.
Traditional kayak trailers are favored by livery operations, kayak manufacturers and clubs that need to transport a lot of kayaks at a time.
Ultralight kayak trailers
Ultralight kayak trailers are smaller and lighter than traditional kayak trailers. Their light weight makes them appropriate to tow behind lighter vehicles and passenger cars.
Like traditional trailers, ultralight trailers can be made from both aluminum or galvanized steel. Ultralight trailers typically feature lighter springs and smaller tires. Some are equipped with lightweight wheels that are similar to bicycle tires. Some ultralight trailers feature the ability to fold for compact storage.
Many ultralight trailers feature conventional roof rack crossbars. These crossbars make it possible to mount a wide range of kayak saddles and cradles for secure kayak transport. They also make it possible to create a hybrid trailer that will transport kayaks, luggage boxes and bicycles at the same time.
Ultralight kayak trailers are the most popular option for most kayakers.
Hybrid kayak trailers
Hybrid kayak trailers carry boats and gear. The simplest type of hybrid trailer might be a traditional kayak trailer with a mesh basket welded underneath the boat racks. This configuration makes it possible to stash wet gear and bags under the boats.
More sophisticated hybrid trailers use roof rack crossbars to create a platform that can be customized to transport kayaks, canoes, luggage boxes and bicycles. Some hybrid trailers offer the option to fit a fold-out tent or camper to the top of the trailer.
Most hybrid trailers are of the ultralight design. The versatility of this type of trailer makes it a top choice for paddling enthusiasts.
[ Paddling Buyer’s Guide: View all kayak trailers ]
How do you transport a kayak on a trailer?
If you’ve never towed a trailer behind your vehicle, the whole process might seem a little intimidating. Once you have the hang of things, it’s a snap.
Vehicle requirements
Before you select your trailer, you should make sure your vehicle is set up for towing. For many vehicles, this means adding a receiver hitch and a trailer wiring harness.
Receiver hitches bolt to the vehicle frame and take a hitch ball insert. Different vehicles are rated for different sizes of receivers. Smaller vehicles can be fitted with a 1.25-inch receiver. Trucks and SUVs typically take a 2-inch receiver. Bigger means stronger, but either receiver size is appropriate to tow a lightweight kayak trailer.
Kayak trailers use a four-pin trailer wiring harness. This harness connects your vehicle’s electrical system to the trailer and synchronizes the trailer lights with your vehicle lights.
Depending on your vehicle and your skills, installing a receiver hitch and wiring harness could be a DIY project. If not, you’ll have no problem finding a local business that can complete the install for you.
Once you have the appropriate receiver and wiring harness mounted to your vehicle, you’ll want to purchase a ball that is matched to your trailer. Most conventional trailers use a 2-inch ball. Many ultralight trailers use a smaller, 1-⅞ size. Make sure to purchase the right size ball for your trailer.
Hooking up
Hooking up a trailer is simple. Here are the basic steps:
1. Attach the tongue coupler to the ball
The tongue coupler is at the front of the tongue. This coupler fits over the ball on your trailer hitch. There is a lever on top of the coupler that locks and releases the coupler clamp.
To attach the coupler to the hitch, first squeeze the release on the coupler latch lever and lift the lever. Next, drop the coupler over the top of the ball. Finally, press the coupler latch lever downward to clamp the coupler to the hitch ball. There is a hole through the coupler latch lever that should be fitted with a pin or lock to prevent the latch from accidentally opening.
2. Attach the safety chains
Your trailer will have one or more safety chains. These are a backup in the event your hitch coupler should disconnect from your hitch. Attach the chains to the chain loops on your hitch receiver. If you have two chains they should be crossed under the tongue. This way the chains will catch the tongue and prevent it from dragging on the ground if the coupler disconnects. If the chains drag on the ground, twist them once or twice to shorten them.
3. Connect the wiring harness
Connect the four-pin connector on the trailer to the wiring harness on your vehicle.
4. Check your lights
Once you are all hooked up, it’s a good idea to make sure all your trailer lights are working correctly. Check the function of your running lights, turn signals and brake lights by turning on your vehicle headlights, placing your foot on the brake and switching on your turn signals. You can check running lights and turn signals by yourself, but it’s nice to have a helper to check your brake lights. If you’re on your own, you can check your trailer brake lights by placing something close behind the trailer light and looking in your mirrors.
5. Check the load
Make a final walk-around of the trailer to ensure your kayaks are secure and there are no loose straps that could catch on the axel or tires. If your trailer has a jack or kickstand, make sure it is fully retracted before driving off.
On the road
Now that you’re hooked up, it’s time to roll. Be careful at first when learning to drive a trailer. Take turns wider than you normally would. Check your side mirrors frequently. Watch what the trailer does as you change lanes. Make sure to leave LOTS of extra room if you pass. Drive a little slower and leave extra room for braking. When you’re towing a trailer, it’s best to be a cautious, defensive driver.
Backing up
Most folks get the hang of driving a trailer after a few trips. One thing that can be tricky is skillfully backing a trailer into a parking place or down a boat ramp. Here are a few tips that will help you step up your backing game.
1. Put your hand on the bottom of the steering wheel
This is an old trick that makes backing a trailer more intuitive. Put your hand on the bottom center of the steering wheel before you begin to back the trailer. The direction your hand moves is the direction the trailer will move. Move your hand right and the trailer moves right. Move your hand left and the trailer moves left.
2. Use your side mirrors
Sometimes it’s hard to keep a trailer moving straight while you’re backing up. If you use your side mirrors you’ll be able to make small adjustments without veering the trailer from left to right. Here’s how the trick works. As soon as the trailer appears in one side mirror, make a slight correction in the other direction. If the trailer appears in the other mirror, adjust accordingly. Using your mirrors will help you make small corrections to keep your trailer on the straight and narrow.
3. Back to the sight side
It’s much easier to control a trailer when you turn it toward the driver’s side of the vehicle. In fact, it can be so hard to tell what’s happening on the passenger side that truckers call it the “blind side.” Experienced trailer drivers avoid the blind side and back toward the sight side whenever possible.
If you need to maneuver your trailer into a tight spot, set yourself up for success before you back up. Approach the turn so you can look over your shoulder out the driver’s side window and see exactly how far the trailer is turning. This will allow you to make small corrections to the trailer’s path and help you to avoid the dreaded jackknife—which happens when you turn too far and the tongue of your trailer hits the rear of your vehicle. Ouch.
How to choose a kayak trailer
When choosing a kayak trailer, first decide how many kayaks you’ll need to carry at one time. Next, consider whether you’ll want to carry bikes or a luggage box as well as boats. Do you need a trailer that folds for compact storage against the wall of your garage? Are you towing with a small vehicle that requires an ultralight trailer? These are some of the questions you should have in mind when you talk through trailer options at your local shop or explore things on the web.
If you’re looking for the most economical option, a traditional kayak trailer made from galvanized steel is likely the best bet. If you place a premium on light weight and versatility, lean toward toward ultralight hybrid options.
How much does a kayak trailer cost?
Most kayak trailers start at about $1,000. Aluminum trailers aimed at livery use can top $3,000. Commercial grade trailers for heavy loads are more expensive still.
Most hybrid and ultralight trailers start at $2,000 for the basic trailer, plus the cost of any accessories you might choose to mount.
DIY kayak trailers
Quality kayak trailers can be pricey, so it might seem like a good idea to build your own using an affordable utility trailer as the foundation. Advanced DIY enthusiasts will certainly be able to put a workable solution together, but most folks will be better served with a specialized trailer designed specifically for hauling kayaks. The two main reasons are tongue length and suspension.
As we mentioned at the beginning of this article, kayak trailers require a longer tongue than conventional utility trailers. The longer tongue prevents the kayaks from hitting the back of your vehicle during turns. Some DIY projects get around the problem of a longer tongue by using a small boat trailer as a foundation. Others might extend the tongue on a utility trailer. Either way, such a modification likely requires welding and fabrication skills. Not a simple fix.
Suspension is another concern when adapting a boat or utility trailer for hauling kayaks. Kayak trailers are designed for lighter loads. Stouter trailers with heavier springs won’t ride as smoothly down the road as kayak trailers. In the worst situations they may bounce down the road with enough force to damage lightweight kayaks. If you’re working on a DIY trailer project, make sure you consider how your trailer’s suspension will impact your kayaks.
Is a trailer right for you?
Trailers aren’t right for everyone, but they are the perfect solution to some difficult kayak transport challenges. Maybe your kayak is too heavy to be lifted on top of the vehicle by yourself. Maybe your car doesn’t have a good roof rack fit. You could be taking the whole family out for a paddle and have more boats than you could fit on your car.
In any of these situations, a kayak trailer is the right tool for the job. Trailers make it easier to paddle alone or with friends, eliminate the need to lift a kayak over your head and offer a good option for additional cargo storage on long road trips. If you’re looking for a better way to move your kayaks, be sure to give kayak trailers a look.


Looking sport trailer with J-Style Carriers for 2 Kayaks 400 lbs