Can CPR restart a heart? Where is the safest place in a lightning storm? Should you always play dead during a bear attack? These are just a few of the questions our editors regularly hear debated and pontificated about around the campfire. Here’s the lowdown on 21 quintessential skills, tips, tricks and facts any aquaphile with a single blade should know, but probably doesn’t.

21 things every canoeist should know

1 What to do in a lightning storm
Lightning is essentially a huge spark, balancing the electrical charges between sky and Earth. Everyone knows not to take shelter under a single tall tree or on a high peak, but to stay safe you’ll also want to get off the water, away from shorelines and avoid meadows.
Most people aren’t struck directly by lightning. In fact, direct strikes only account for between three and five percent of lightning related fatalities. Between 50 to 55 percent of fatalities are from ground current, according to the National Oceanic and Atmospheric Administration. This happens when the bolt hits a nearby object, and current passes through the ground.
[ Discover the best gear of the year in the Paddling Buyer’s Guide ]
Canoeists aren’t safe on the water either
Lightning can strike water, and water is an excellent conductor of electricity. Think hair dryer in a bathtub. And contrary to what some people think, the hull of your plastic canoe won’t protect you.
The bottom line is there’s no completely safe spot in a lightning storm. It’s best to seek shelter when you hear thunder. If you are caught out in a storm, “You definitely don’t want to be lying down on the ground, spread out, which could maximize the current going through your body,” according to John Gookin, research manager at the National Outdoor Leadership School (NOLS). If lightning is striking nearby, get into lightning position—crouch on your sleeping mat with your feet together to minimize your exposure to ground current.
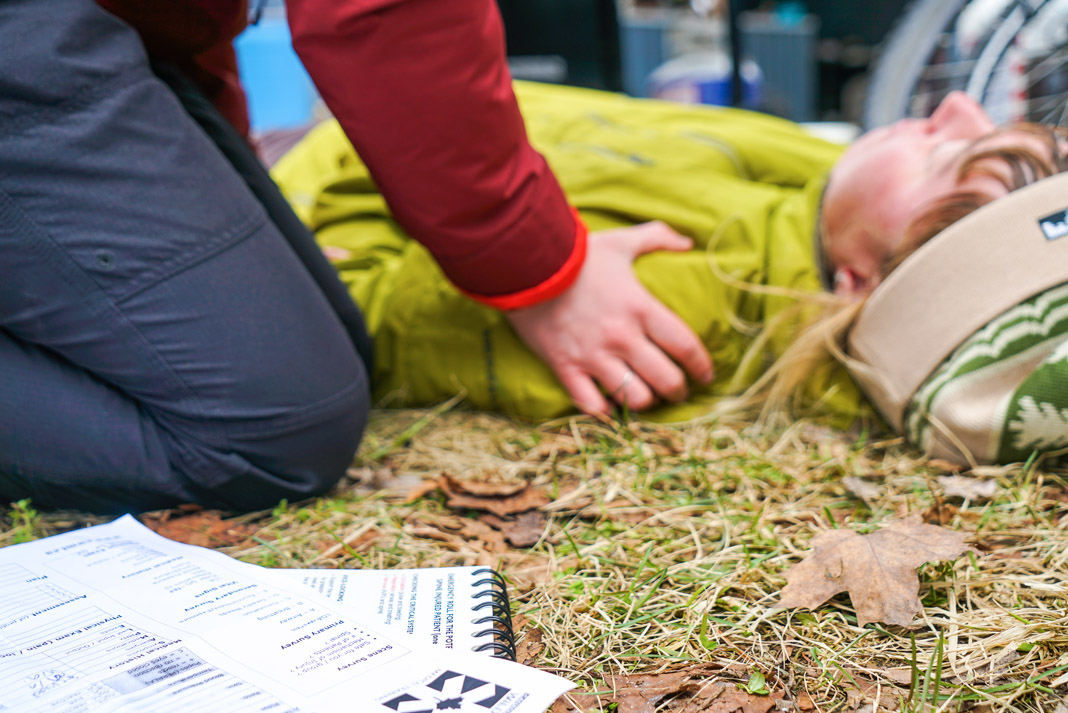
2 New standard for CPR
In 2015, the American Heart Association (AHA) updated its guidelines for performing cardiopulmonary resuscitation (CPR). The updated recommendations call for 100 to 120 chest compressions per minute, with the rescuer depressing the chest by at least two inches, but no more than 2.4 inches.
Sound familiar? It is. The old rules recommended at least 100 compressions per minute and at least two inches of depth. The refinements were based on data suggesting excessive compression rate and depth decreased effectiveness.
The standard procedure—to begin with two rescue breaths followed by 30 compressions and repeat until help arrives—remains unchanged. According to the AHA, 326,000 people experience cardiac arrest outside of a hospital each year, and approximately 90 percent die. Bystanders often don’t know how to perform CPR and are afraid to make matters worse by getting involved. However, immediate CPR can double a person’s chances of survival, according to the AHA. CPR helps circulate oxygen through the body during cardiac arrest until an effective cardiac rhythm can be reestablished, often only through the use of a defibrillator, which shocks the heart back into a working rhythm.
[ Find a Wilderness First Aid course in the Paddling Trip Guide ]
Despite a handful of news reports detailing herculean CPR sessions lasting for more than three hours with positive outcomes, the rate of success varies from just two to 18 percent, according to the American Journal of Emergency Medicine.
3 Tip your guide
Though tipping 15 percent at a restaurant is customary, the question of how much to tip a wilderness guide mystifies many. While some guides are paid a living wage others may depend on tips. Too often it’s left up to the hapless client to suss out who is who without asking too many awkward questions.
The industry standard for tipping on day trips is typically 10 to 20 percent of the total cost of the trip. When it comes to big-money northern wilderness tips, “Consider $150 per person per guide—$300 per couple per guide—as a starting point,” says Neil Hartling of Nahanni River Adventures. While no client should ever feel compelled to tip, Hartling says guides work harder than the best staff in the finest restaurant and it’s a 24/7 job.
“To compare, salmon or steelhead fishing guides may be tipped $1,000 per client for a week of fishing,” adds Hartling. “These businesses are a labor of love for all involved and the guides are highly skilled leaders who could be earning more in many things they are qualified for—why not share the love?”
Tipping standards on international trip varies, so save yourself the worry of wondering what’s appropriate by simply asking when you book your trip. Most remote outposts lack a bank or ATM and we guarantee your guide would prefer to receive a tip in cash, so plan ahead and have some Benjamins on hand.
4 Safest place in a forest fire
Approximately 100,000 wildfires burn each year in the United States, decimating an average of 7,500 square miles. Sadly, 90 percent of wildland fires are caused by humans, often the result of negligence, like a campfire left unattended or improperly discarded cigarette butts.
A wildfire can move at speeds up to 14 miles an hour and burn at 700°C to 1,000°C. The first sign of a forest fire an unsuspecting camper might notice is ash in the air. If you catch a whiff of an approaching fire, beat a hasty retreat. Flames lick upward and so it’s best to head downhill and avoid tinderbox areas—grasses, pine needles and blowdowns go up quickly.
Water sources create a natural barrier against forest fires, but a canoe doesn’t equal safety. Embers can drift as much as a mile and light up far shores, and flames may be forced to leap across water by super-heated winds. Last August, more than 250 canoeists were evacuated from the 116-kilometer Bowron Lakes circuit when wildfires in British Columbia’s interior roared within a mile of the canoe route. According to a local operator who helped evacuate paddlers via motorboat, it was “three days of chaos.”
5 Real rules for hypothermia
Research from the University of Manitoba’s Dr. Gordon Giesbrecht shows 50 percent of people believe the average person would become hypothermic if immersed for just five minutes in zero degree water.
In fact, it takes much longer. The actual time it takes for a paddler’s internal body temperature to drop dangerously low depends on a variety of factors, including water temperature and body fat. However, on average, it takes roughly 30 minutes for adults to become hypothermic in icy water, which means their body temperatures have dropped below 95°F. This knowledge is important because it may help people panic less in those critical first few minutes after a capsize, according to Dr. Giesbrecht.
Remember cold water immersion rules with the handy 1-10-1 principle. The average person will experience one minute of cold shock response upon immersion, which is characterized by involuntary gasping and hyperventilation. This is dangerous—every year, there are cold water drownings when paddlers and recreational boaters capsize without wearing PFDs and drown due to this involuntary gasp reflex. In the cold shock response stage, it’s important to focus on calm breathing and maintaining a clear airway.
This stage is followed by 10 minutes of meaningful movement, when a paddler has the best chance of getting themselves to safety. After 10 minutes in icy water most people won’t be able to swim effectively.
Even after swim failure, if the swimmer is able to maintain a clear airway—perhaps by wearing a Type 1 life jacket—the average person may stay conscious for an hour or more. So long as a clear airway is maintained, Giesbrecht’s research estimates lean men and women might survive for two hours in freezing water, while overweight men and women might survive for four hours before dropping core body temperature eventually leads to heart failure and death.
But here’s the bottom line: The vast majority of cold water deaths do not occur from severe hypothermia and heart failure, but from drowning. The best way to protect yourself is to always wear a PFD and dress for the water temperature.
6 River signals
The roar of rapids makes hand signals crucial for communicating on the river. These six signals are widely understood in the paddling community and endorsed by the International Rafting Federation. Stop: Paddle held horizontally above the head; Go: Paddle held up vertically; Eddy out: Circling a single raised finger and pointing to the eddy; I’m okay: Thumb and index finger joined in an O and tapped on the top of helmet. Any kind of X formed with arms or paddles means first aid required. And remember to always point in the direction you want a paddler to go, never point toward danger.
7 The real hierarchy of needs
In a survival situation, there’s only one pyramid that matters. The SAS Survival Handbook places shelter as the most fundamental need, then water, then food. Without shelter, people can die of exposure even at relatively mild temperatures. Hypothermia can occur in temperatures as warm as 60°F—all it takes is getting lost in the woods on a cool, damp or windy night.
In more extreme temperatures, exposure can lead to death within hours. Mountaineers use the rule of three to order their priorities—humans can survive three hours without shelter, three days without water and three weeks without food. Paddlers in remote areas should keep a small survival kit on them at all times, in case they’re ever separated from their boats and gear.
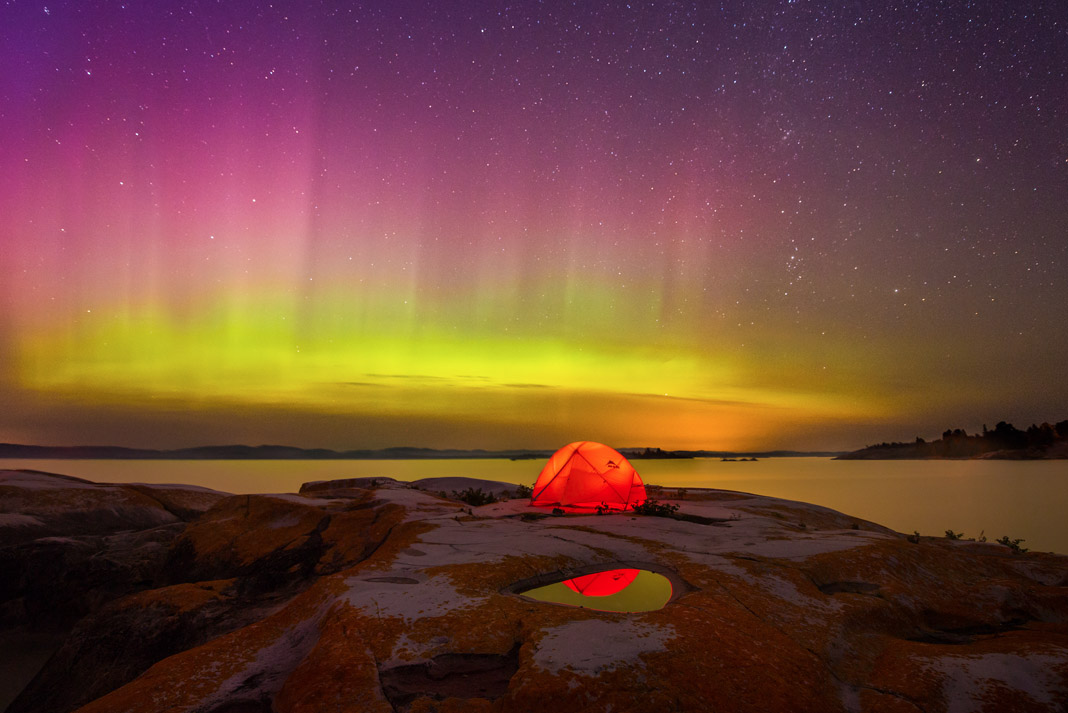
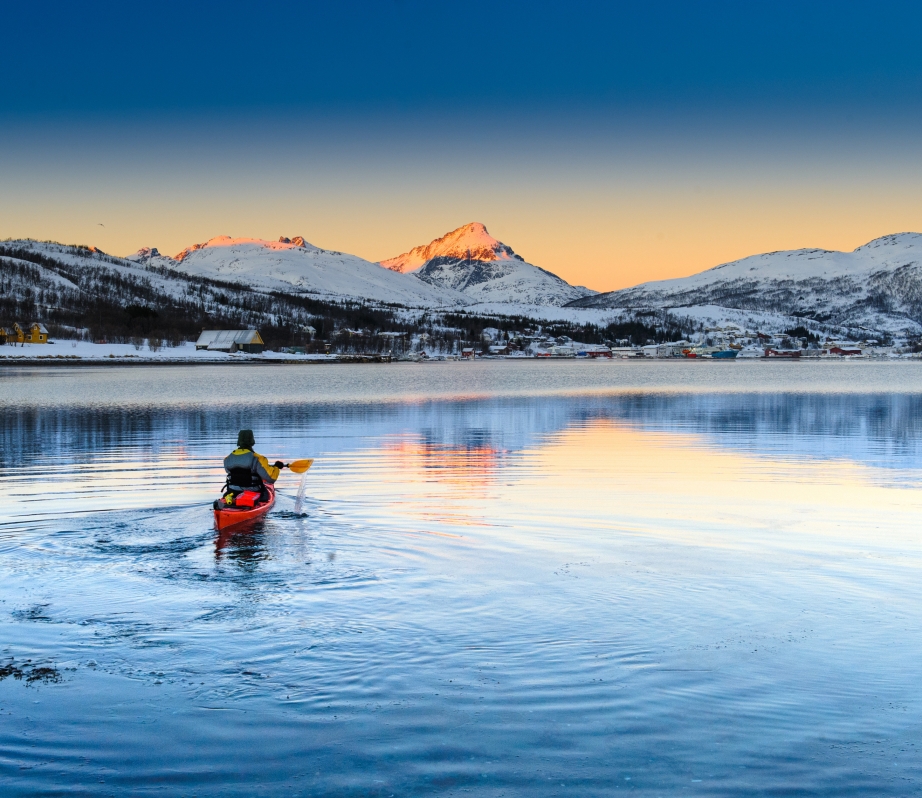
8 Where to see the northern lights
The best chance of viewing the awe-inspiring northern lights is during the long nights of winter. Unfortunately, winter in the north doesn’t come with much liquid water for paddling.
Not to fear, the northern lights may be seen at any time of year providing the skies are dark enough. Wilderness trips in Canada’s North, northern Scandinavia, Iceland and Alaska offer good chances of aurora viewing during late summer and fall trips. Outfitters tout classic canoeing and rafting rivers like the Nahanni, Alsek, Mountain and Thelon rivers as some of the top contenders for spotting the aurora borealis.
[ Discover once-in-a-lifetime northern river trips in the Paddling Trip Guide ]
The dancing lights of the aurora are the result of electrically charged particles from the sun colliding with the Earth’s atmosphere. Aurora displays correlate with an 11-year solar cycle, and 2018 and 2019 correspond with a minimum in solar activity. The next maximum in will happen around 2023. Less predictable solar storms, which can sometimes lead to aurora visible as far south as Ohio and Indiana, can be tracked at Aurora Watch.
9 Syphon gasoline
Knowing how to syphon gas is a valuable skill for overlanders, preppers and wilderness canoeists. Despite what Hollywood heists would have you believe, syphoning gas mouth-to-hose is actually pretty dangerous. Inhaling gas fumes can cause unconsciousness and swallowing gasoline requires immediate medical attention—problematic if you’re far from civilization, which was the reason you needed to syphon gas in the first place. So forget about this method.
Instead, prepare for a fuel emergency on long, remote road trips by carrying a coiled six- to 10-foot piece of clear rubber tubing. If you find yourself driving on empty, here’s what to do next.
- Cut a third of the hose off. Take the longer piece and put one end in the fuller gas tank of an accompanying vehicle. Put the other end in a fuel-safe container on the ground below the level of the vehicle’s fuel tank.
- Next, put one end of the shorter piece of hose in the gas tank and keep hold of the tail. Seal the fuel filling area with a rag. This will keep pressure from escaping.
- Now blow air into the end of the shorter hose. Do not inhale. The pressure will push the gas out of the tank and into the long hose. Once the fuel is flowing, no further pressure is needed and the flow will continue until the tube is removed.
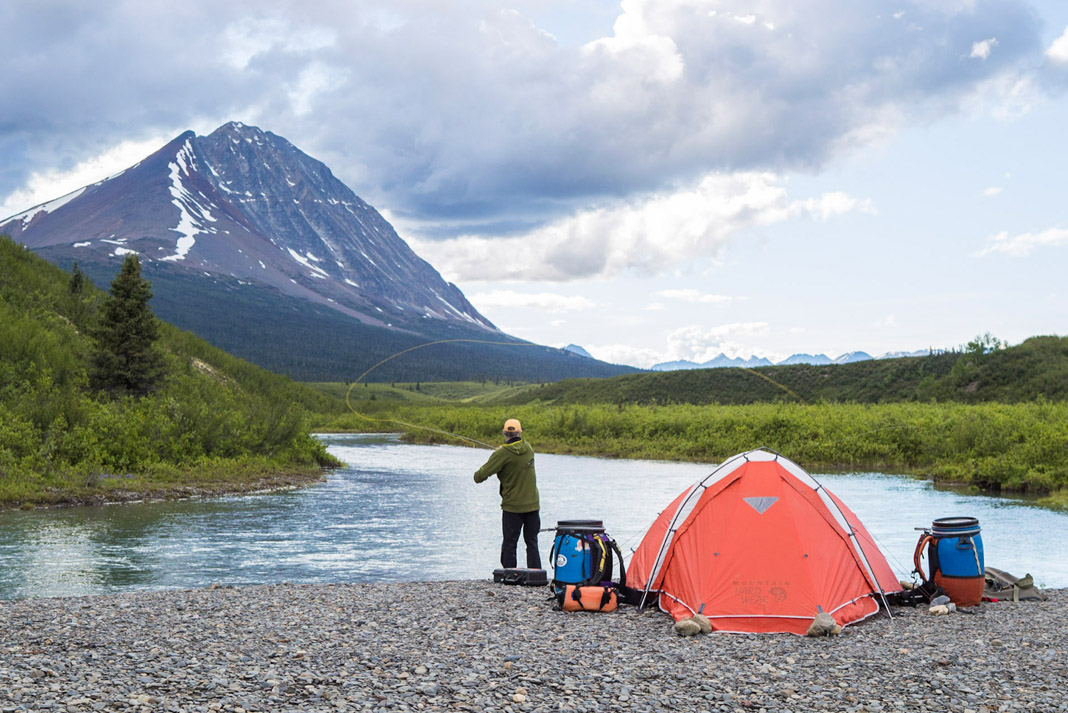
10 Three ways to make your tent last longer
When your gear stands the test of time it not only saves money, it conserves resources and minimizes your carbon footprint. Tents take a beating while sheltering us from the elements and providing a home away from home. Increase your tent’s longevity by camping in the shade. UV rays won’t do much harm on a handful of weekend trips a year, but a full summer under the sun will fry a tent’s fabric.
Remember to dry out your tent after every trip. Every. Single. Trip. Mold is a big culprit contributing to damaged waterproofing. Plus, mold smells. Set up the tent outside to fully dry or hang in the living room and only repack when it’s dry and clean. And to repack, roll or stuff the tent instead of folding it. Over time, folding a tent the same way can create creases that affect the waterproofing.
11 Paddling Magazine’s top 7 uses for duct tape
The miracle material was invented by Johnson & Johnson during WWII. The military needed a waterproof tape to keep moisture out of ammunition cases. Since then, we’ve discovered 100 more uses—and counting—but here are the ones canoeists will find most helpful.
- Mending holes in everything from puffy jackets to tent walls.
- Mending zippers on the same.
- First aid uses, including stabilizing a splint, making a sling, wrapping a sprain and taping down moleskin.
- Rope for non-weight bearing activities. Just twist a length of tape around itself, or braid several lengths together for a more durable version. Ideal for non-load bearing uses, like a tent guy line or a clothesline.
- Reseal food packages to keep chips fresh.
- Seal a crack in a water bottle or cup—maybe even a hull if you’re really unlucky.
- Fix a paddle, broken tent pole, fishing rod or eyeglasses.
12 Best tarp knot
A taut-line hitch lets you adjust the tension on a rope, making it a perfect knot for taut guy lines on tarps and tents.
- Start by passing one end of your rope around an anchor object and then crossing it over the long part of the rope. Leave a long tail.
- Bring the tail of the rope up through the loop from behind.
- Bring the tail of the rope up through the loop a second time, from the same direction.
- Bring the tail alongside the long part of your rope and cross it underneath, creating a new loop.
- Bring the tail around the long part of your rope and pass it down through your new loop.
- Pull your hitch tight. The knot should slide easily up and down the rope until its under tension when it should grip the rope and stay tight.
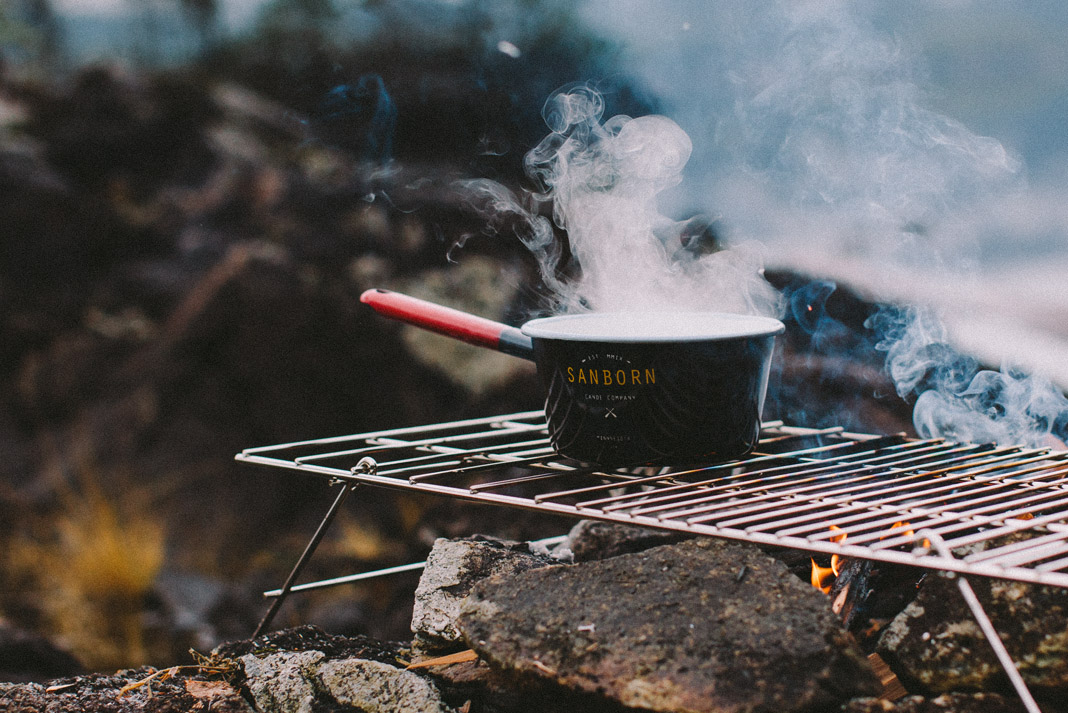
13 Give fish eyes some fish eye
When heating up water, tiny bubbles will form at the bottom of a pot before the water begins to boil. These bubbles are often called fish eyes and some campers think fish eyes mean the water is hot enough to kill off any harmful bacteria and is safe to drink. Not so.
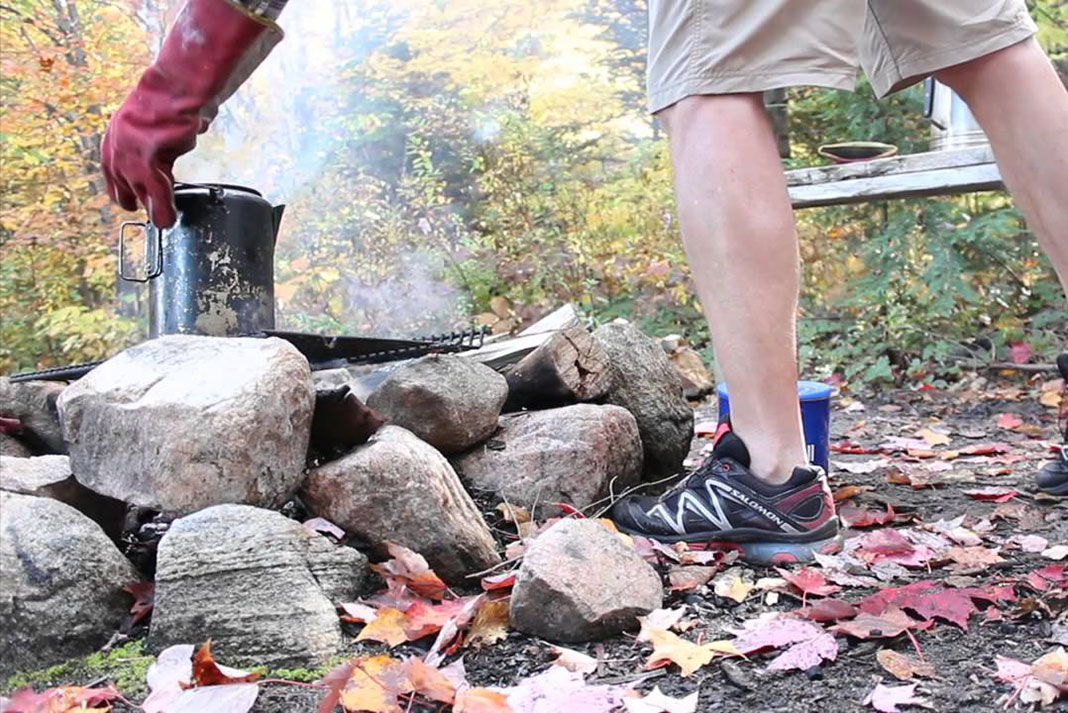
Fish eyes can form in water as cool as 104°F, which isn’t even close to the recommended 185°F needed to treat H2O. While there’s been many dissenting opinions on the subject over the years, nowadays most organizations, including the Center for Disease Control and the National Outdoor Leadership School, recommend a rolling boil for at least a minute to kill off harmful waterborne bacteria like giardia and cryptosporidium. Boil water for three minutes at elevations higher than 2,000 meters.
14 When to pop it
There’s a common misconception all blisters should be left intact and never popped. According to the NOLS Wilderness Medicine handbook, if a blister is larger than a nickel, firm and in an area likely to experience friction—like on your foot, for example—it’s likely going to pop anyway. Better to pop it using a sterile tool, clean it and dress it well. This makes for better wound care than allowing the blister to pop inside a boot.
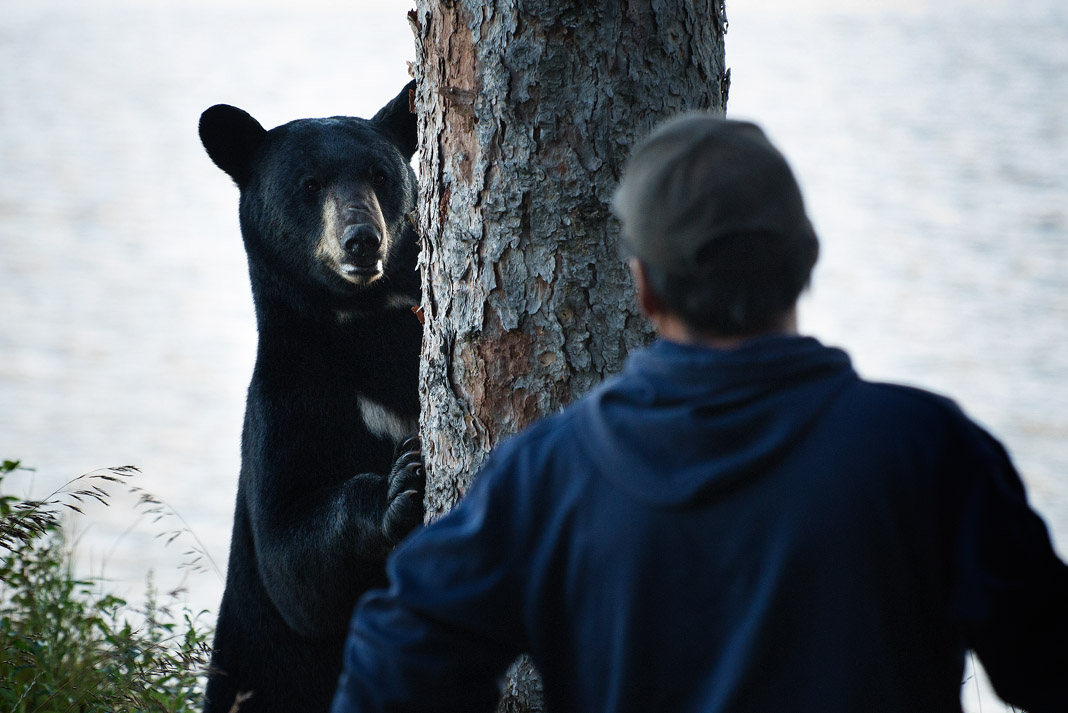
15 Don’t play dead
Playing dead is good advice only if you’re the victim of a defensive bear attack. However, 88 percent of North Americans killed by black bears during the last century were the victims of predacious attacks. That sobering stat is the finding of University of Calgary professor Stephen Herrero and it means paddlers can’t simply lay down.
“If predation is the motive for an attack, people who act passively or play dead are simply inviting the bear to continue the attack,” Herrero writes in his book, Bear Attacks: Their Causes and Avoidance. The book is recommended reading for anyone paddling in bear country—though it may kill your appetite.
In a predatory attack, a bear is often silent as it stalks its prey. It won’t exhibit defensive behaviors, like huffing or slapping the ground. When a predacious bear attacks it is to eat, and the victim must fight back.

Healthy black bears rarely attack defensively, according to Herrero’s research. Instead, they prefer to retreat or intimidate by bluff charging. Grizzly bears are more likely to attack defensively to protect their cubs, a food source, or when they’ve been surprised. In a defensive attack, playing dead can be an effective strategy—lay on your stomach, legs together, with hands clasped behind your neck.
In either case, bear spray is the only effective protection against an attack. The Journal of Wildlife Management reports bear deterrent spray is effective 92 percent of the time in brown bears attacks, and 90 percent of the time in black bear attacks. Herrero’s research backs this up, confirming people who defended themselves with pepper spray escaped injury most of the time, and those who were injured experienced shorter duration attacks and less severe injuries.
16 Remove a barbed fish hook
Oops, you’ve accidentally hooked up with your paddling buddy. Once he’s stopped cursing you, Kayak Angler editor Ric Burnley offers these instructions to set him free as painlessly as possible.
- Attach a foot-long piece of fishing line to the curve of the hook.
- Push down on the eye of the hook to disengage the barb. Continue the pressure while simultaneously sharply tugging the string—be sure the string is in line with the shank of the hook. The hook should come out easily.
- Wear glasses to protect your own eyes from a flying hook. If this method doesn’t work or if the barb is right below the skin, you may have to push the point of the barb up through the skin. Gross. Once the barb is out, you can snip it off and back the hook out. Clean, dress and elevate the wound, and monitor for signs of infection.

17 Moon phases 101
As the moon orbits Earth, one half of the moon is always illuminated by the sun. From Earth, the portion of illumination we see changes. The fractions of illumination have names and are called the phases of the moon—full, new, first quarter and last quarter.
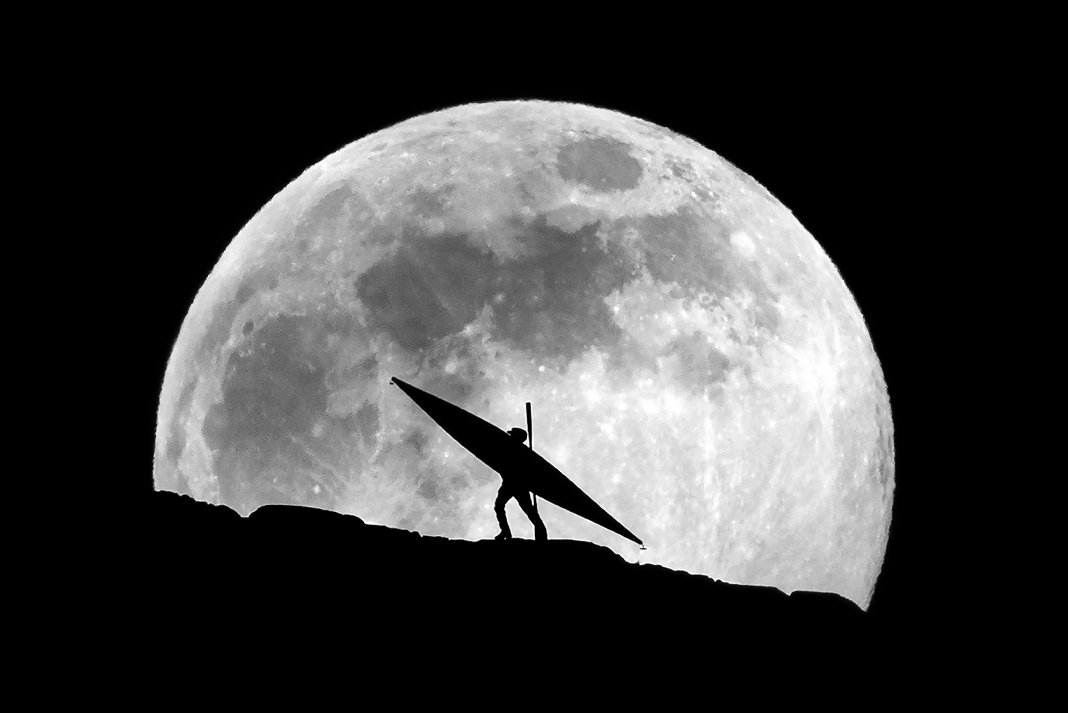
A new moon is when the sun and the moon are on the same side of the Earth, so we can’t see any illumination on the moon at all. A full moon is when the moon and sun are on opposite sides of Earth, so we can see the moon lit up. It takes 29 days for the moon to complete one orbit of Earth, and due a combination of the speed of Earth’s rotation and the moon’s orbit, the moon rises approximately 50 minutes later each day.
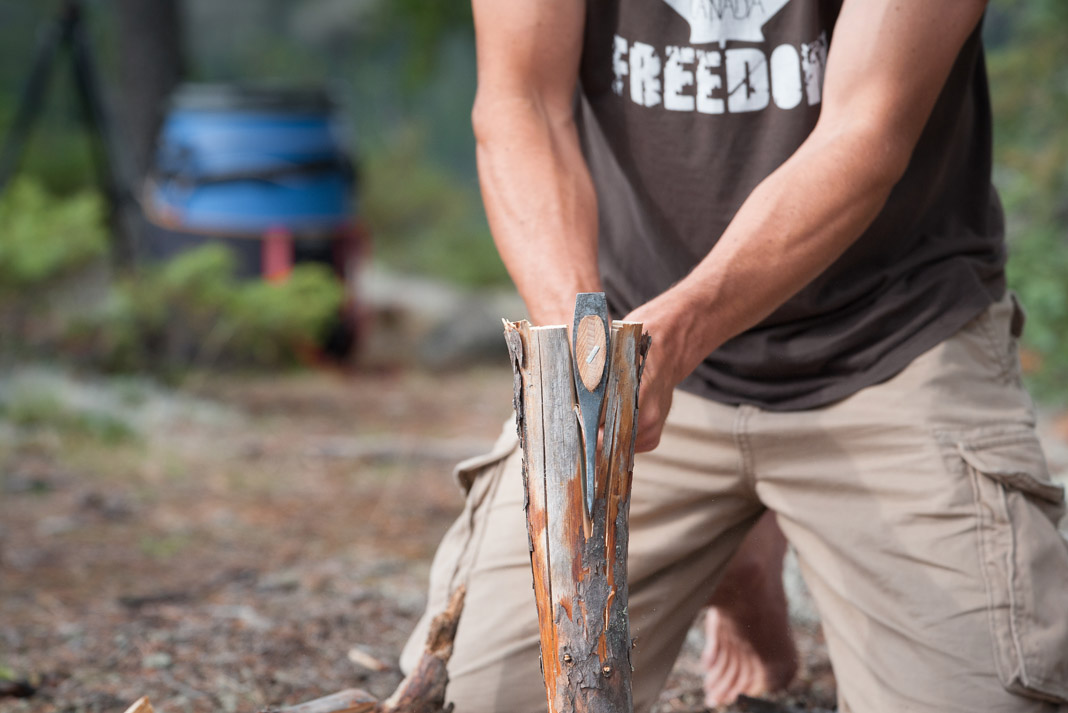
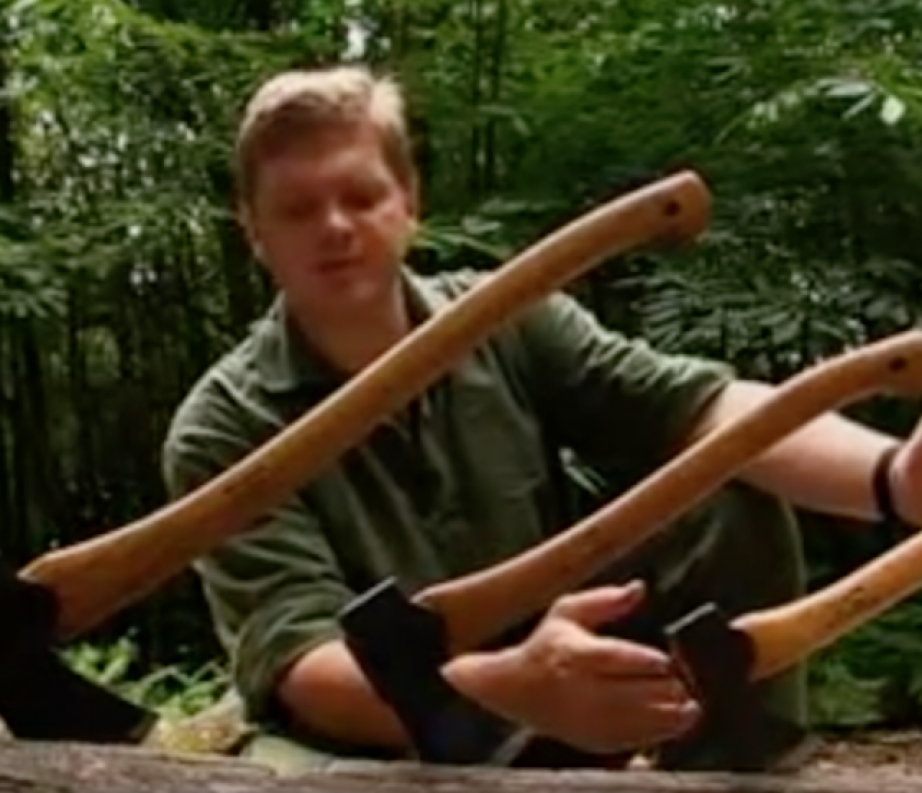
18 Safest way to split wood
Kneeling is the safest position to split wood from, according to bushcraft expert Ray Mears. When kneeling, a missed swing will hit the ground instead of burying its head deep into your kneecap.
You will lose some of the power to your swing when kneeling instead of standing, so opt to split logs about the diameter of an adult’s calf, an ideal size for low-impact campfires. First, find a fallen log to us as a block. To split a piece of wood for firewood, place the axe onto the firewood log, then bring both axe and log down onto the block simultaneously. One or two blows and the wood will split. This is the safest way to use an axe in the backcountry.
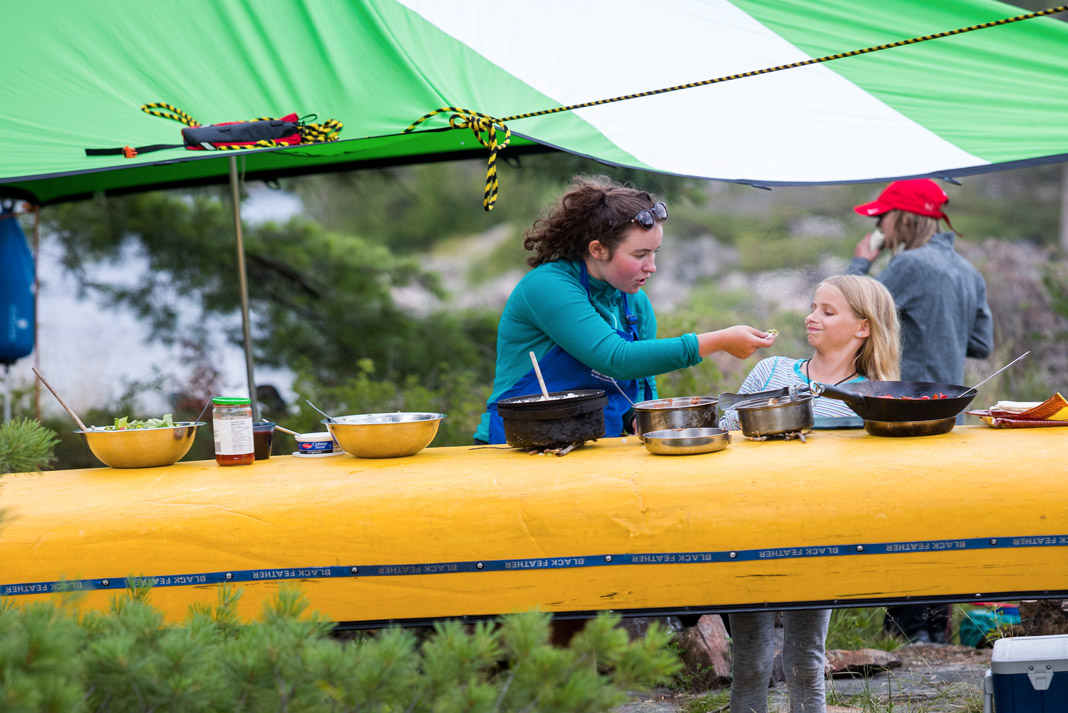
19 Make bannock
This fluffy backwoods treat is the best thing since before sliced bread. Mix the ingredients before you leave home and package in a Ziploc bag. For a fireside breakfast, mix the dry ingredients with a half cup of water and roll out the dough into a half-inch thick length, then wrap it around a stick. Rotisserie your dough over hot coals. Remember, the key to baking is consistent heat. You’ll know it’s done when the dough easily slides off the stick—usually about 10 minutes. Slather in butter and jelly.
[ Paddling Buyer’s Guide: View all camp kitchen gear ]
Ingredients:
- 1 cup flour
- 1 tsp baking powder
- 1/4 tsp salt
- 1/4 cup dry milk powder
- 1 tbsp shortening
20 Save money for your dream trip
Whether it’s a $2,000 Ontario fly-in fishing trip or $8,000 northern river adventure, dreams don’t come cheap. Fortunately, you don’t need to be rich to take the trip of a lifetime, you just need to be creative and scrupulous with savings. We asked expert vagabond Matt Karsten, who’s been traveling the world full-time for eight years, for his savings advice.
First of all, start tracking your spending, says Karsten. “Put aside a day this weekend and go through all your accounts to find out exactly what your finances look like, down to the dollar.” You need to find out where all your money is going before you can hope to stem the leak.
Once you have a clear idea of everything you’re spending, start budgeting. To start, find out how much your trip is going to cost you. “You’ve got 12 months before you leave? Your monthly savings goal is 1/12th of that total,” says Karsten.
Some items on your budget will be inflexible—rent, insurance and saving for your trip. Other expenses are flexible, like the money you spend on food every month, or socializing. The goal is to figure out how much money you have left after taking care of your inflexible expenses, and then not exceeding the set amount.
As a final exercise, Karsten recommends listing all of the items you spend money on under two columns: wants and needs. Be honest about which is which. Netflix is a want, not a need. So are Friday beers with buddies. Then put dollar values next to each item under the wants column. “Now, total them up. That’s how much extra you would save this month if you cut them out,” says Karsten.
21 Cotton thrills, occasionally kills
Though the drama of “cotton kills” is catchy, it’s not always true. Typically, paddlers and campers avoid the cotton boogeyman because once the hydrophilic fabric gets wet it stays wet, making its wearer work harder to stay warm. Bad news in cool and damp environments. But, in summer—prime paddling season, remember—a light, loose and long sleeved cotton shirt provides sun protection and breathability. And if you start to overheat, wet cotton cloth on the skin does wonders to cool off.
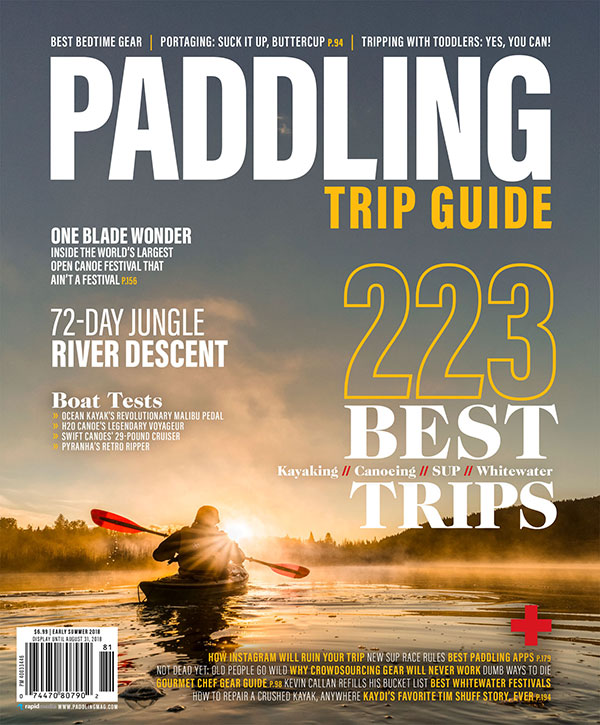 This article was first published in the Early Summer 2018 issue of Paddling Magazine.
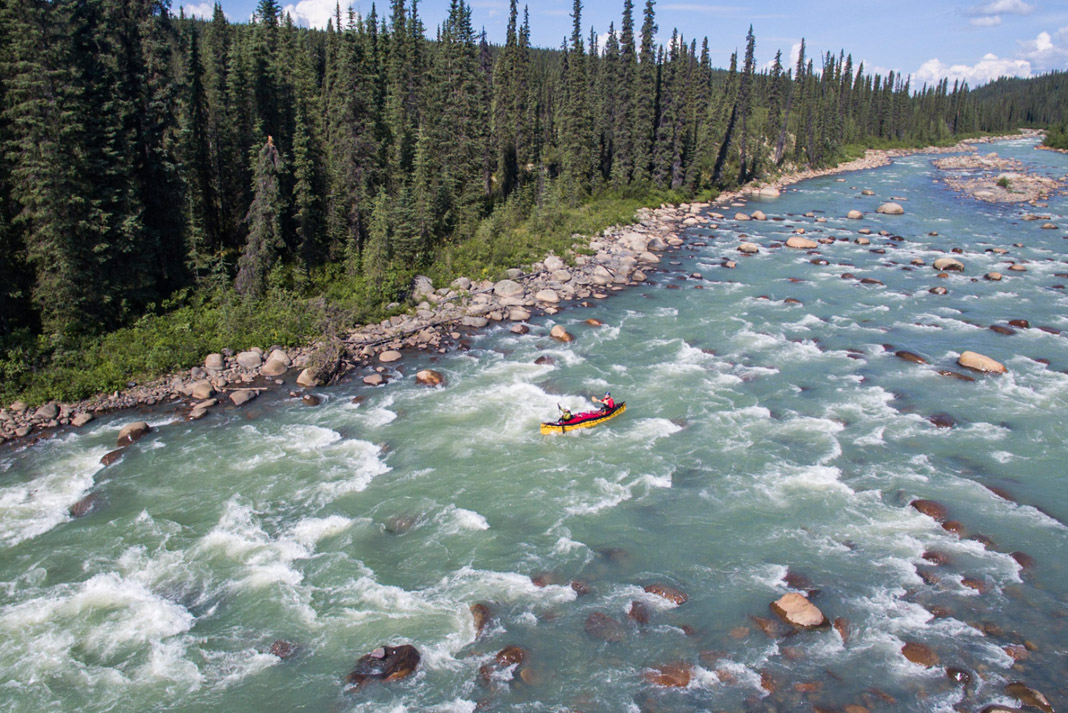
 Bonus tip: Always tie down your canoe. | Feature photo: Graeme Owsianski


The moon illusion is not an optical illusion. If it was it would fool a camera as well. It is a psychological illusion. When you see the moon near the horizon and close to features such as mountains or buildings it looks close to the earth. Your mind tells you if it is close to the earth it must be really big and that’s how we “see” it.
Three years ago i was certified for Marine first responder. I was surprised at the new instructions for CPR. No breathing into the mouth what so ever. The explanation I got was that with the compressions cover all the breathing needs. It sucks in the air.
I would like to hear from others. I had to do CPR on a best friend, but unfortunately I got there too late to be successful. This was 15 years ago and I did use the breath technique.
OK, 3 things in this article I didn’t know, and one really important thing that the article got wrong. Didn’t know that CPR has such a low success rate (depressing, but would do it anyway), safer way to syphon gasoline (excellent advice), or how to make bannock (who cares).
But hypothermia info is dangerously misleading. I have participated in Cold Water Boot Camp – in person and virtually – several times, I have Wilderness First Aid certification from SOLO, and have been kayaking in New England 12 months of the year for at least a decade. I practice my kayak rolls every time I go out — so far, the coldest water in which I have done so was 35F. Here are what I consider some important corrections/clarifications:
In the first minute (see 1-10-1 principle), you may experience a gasp followed by hyperventilation, and it is important to calm your breathing. That is true, but the biggest danger is that the gasp, if it occurs, is just as you hit the water, and if you’re face is under water when you gasp, you’re sucking water into your lungs. Bye-bye.
“…it takes 30 minutes or more for adults to become hypothermic in icy water.” “Hypothermic” is not an either/or condition, it occurs in stages. I can tell you from personal experience that very significant loss of muscle coordination (an early stage – the “10” in the 1-10-1 principle) can occur in a lot less than 10 minutes, depending on various factors.
“…on average it takes 30 minutes or more for adults to become hypothermic in icy water.” Same comment – what stage of hypothermia are they referring to?
“Even after swim failure, the average person will stay conscious for at least an hour, providing they are wearing a PFD.” Dangerously misleading. Of course, the PFD does provide additional insulation, but not more so than a dry suit (we are not talking about wetsuit conditions here), so it doesn’t make sense to imply that a person will stay conscious for an hour only if wearing a PFD. I believe that the point they are making here is that you will stay conscious “if wearing a PFD” because it will prevent you from drowning due to loss of muscle coordination. That is not entirely true. A Type III PFD, which is what the vast majority of paddlers wear, will NOT keep you face up in the water without your assistance. A Type I PFD is the most reliable for keeping you face up, but they are too bulky to use for paddling.
Discussion of how long various people can tolerate cold water “before experiencing heart failure.” See above re: effectiveness of a PFD in keeping your face above water. The VAST majority of cold water deaths do not occur from severe hypothermia and heart failure, but from drowning. If you experience severe Stage 2 hypothermia (loss of muscle coordination), or loss of consciousness, you will drown long before experiencing heart failure.
The moral of this story: cold water = “liquid death”. ALWAYS DRESS FOR IMMERSION.