Spending time in whitewater? Whether you are rafting, kayaking, paddleboarding or canoeing, a swiftwater rescue class is absolutely essential. Instructors will teach you how use a throw bag and provide an opportunity to practice this key rescue technique. Doing so could save your own life or that of another paddler, so sign up today and don’t shirk your duty to paddle safely. We provide some tips below to help you prepare for class.
[ Paddling Buyer’s Guide: View all safety and rescue gear ]
How to use a rescue throw bag
A throw bag is a necessary piece of safety equipment that should be carried on the river at all times. It is essentially 70 feet (or around that length) of rope stuffed into a bag, with the end of the rope attached to the bag. The bag is thrown to a person in need who is swimming in whitewater. The swimmer then grabs the rope and their rescuer pulls them to shore.
Important: Take a swiftwater rescue class!
This cannot be stressed enough. A water rescue throw bag is useless if you haven’t received the proper training for how to use it and haven’t practiced with it. Not only will a swiftwater rescue class teach you the proper techniques for using throw bags, but you will get lots of practice with rescue scenarios of all types.
[ Plan your next whitewater rescue course with the Paddling Trip Guide ]
Practice, practice, practice
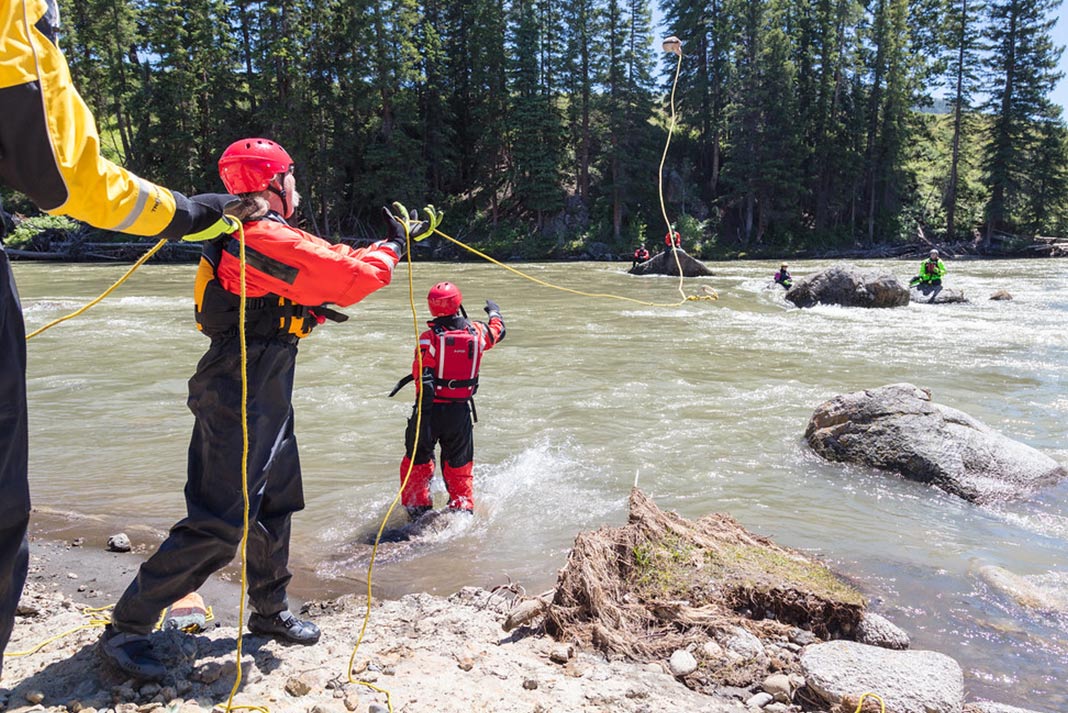
If you are practicing rescue scenarios, the best place to do so is in swift, moving current without any notable hazards. You will want at least three people in the scenario: one victim and two rescuers.
With the two rescuers on shore, have the victim begin swimming down the current. Make sure to tell them to swim on their back with their feet up and facing downstream. This is the defensive whitewater swimming position, which will allow them to push off any rocks with their feet rather than their head. One of the rescuers on shore will be handling the throw bag, while the other rescuer is there as backup.
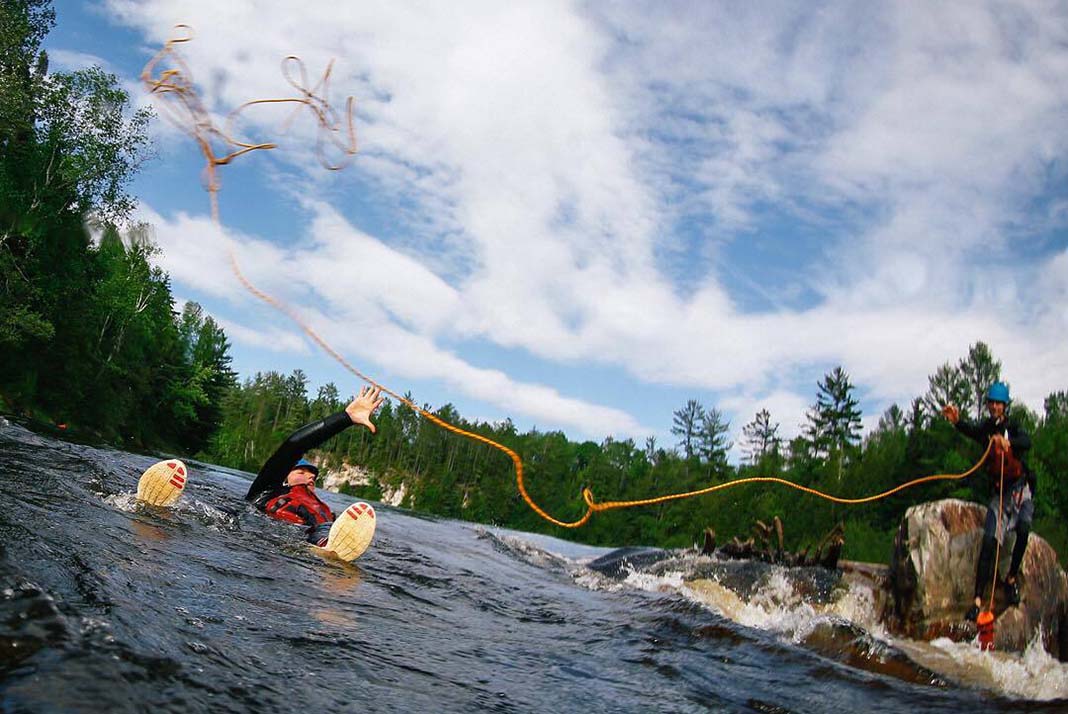
The rescuer with the throw bag will open up the throw bag, take out a few meters rope to keep as slack (just in case), hold the rope with their non-dominant hand, and throw the bag (with the rest of the rope stuffed inside it) to the victim. As the bag is thrown, the rope will release from the bag, and provide a throw bag rescue line from the rescuer to the victim.
Aim to throw the throw bag past the swimmer so the rope lands on the victim between their head and the hip, ideally right on their chest. Practice your aim so you’re a good shot.
The victim will grab the rope, not the bag. If the victim grabs the bag, they will keep floating for 30 to 40 more feet as the rope continues to release from the bag.
The victim grabs the rope with their hands, turns on their back with the rope swung over their shoulder, and is towed to shore by the rescuer.
The backup rescuer will wrap their hands around the main rescuer’s PFD, and hold on tight, so the main rescuer does not get pulled into the water by the rope. This is important, as the main rescuer will be pulling the victim’s weight plus the extra force added by the current in the river.
Important throw bag notes
- If you are the rescuer, make sure you have a wide, solid stance, so you don’t get pulled into the water yourself. The most important thing in a rescue situation is keeping yourself safe and not creating more victims.
- Neither the rescuer nor the victim should ever wrap the rope around themselves. Never around your wrist or body. Simply hold it in your hands. This is so that in the event that the rope becomes tangled around a hazard in the river, the victim can escape and does not also get tangled in the hazard.
- The rescuer can throw the bag overhand or underhand. Just make sure to practice both techniques to find out what works best for you!
- If the rescuer misses the victim on the first throw, it is advisable to quickly coil the rope up in one-foot diameter coils, and throw the coils at the victim for a second try. This is quicker than re-packing the bag, but still allows for a long length of rope to be thrown.
- Practice using the particular throw bag you will be taking with you on the water. Kayak rescue throw bags are smaller than rafting throw bags, so plan and practice accordingly!
How to pack a throw bag
The goal with packing a throw bag is to make it as simple a process as possible. You want to stuff the rope in the bag in small bits at a time, stacking the rope on top of itself as you go, to reduce the possibility of any knots or tangles forming.
To do this, hold the throw rope bag with the last three fingers of both hands. Place the rope over your shoulder so the remaining rope is laying on the ground behind you. Use your thumb and forefinger on each hand to gently stuff the throw bag, one hand on top of the other.
Once all the rope is back in the bag, secure it with the buckle (or whatever securing device is included). Make sure to leave the end of the rope out, so you can access it as quickly as possible.
How to make a throw bag
Yes, it is possible to make your own throw bag, and yes, it will be cheaper. However, it is not advisable to do so.
A throw bag is a vital piece of safety equipment for any whitewater paddler. It is not a piece of equipment where you can cut corners to save money. Buy the best throw bag out there and be there for your paddling partners.
This article originally appeared in Paddling Magazine Issue 65. Subscribe to Paddling Magazine’s print and digital editions here, or download the Paddling Magazine app and browse the digital archives here.
It’s essential to take a swiftwater rescue course so you know how to properly use a throw bag. | Feature photo: Yellowstone National Park/Flickr


Another take on whether better to miss upstream or downstream. If the rope lands downstream of the swimmer, the swimmer must change position to swim downstream AND must swim faster than the current to catch up to the rope since the current continues to move the rope downstream at roughly the same speed as current moves the swimmer. If the rope lands upstream, the swimmer need only back stroke a few times while the current brings the rope downstream. The swimmer can remain in the defensive position. So, practice and hit the target, but if you miss, I think it better to miss upstream.
Thank you for explaining that a throw bag is approximately 70 feet of rope stuffed into a bag, with the end of the rope attached to the bag that is thrown to a person in need who is swimming in whitewater. My friend loves paddleboarding, and I want to gift him something useful for his hobby. I think a throw bag is a perfect gift for him, hopefully, I can find a local store that sells it.