Here’s an astonishing number for you: People in the U.S. spend over 100 billion dollars per year on low back pain relief (trying to get it). What is most astounding about this statistic is that most, if not all, low back pain is avoidable. We don’t need to suffer unnecessarily. With a little knowledge and discipline, we can prevent and decrease most low-back pain and discomfort.
Most low back pain has nothing to do with your low back. Tight hip flexors from sitting (in kayaks, canoes, at desks, in cars) are what most often lead to low back discomfort, pain and injury in paddlers. In fact, tight hip flexors, over time, can lead to severe injuries such as disk herniations and bulges. SUP paddlers also experience tight hip flexors from balancing and hinging at the waist when paddling.
Lower back issues can stem from a lot of different causes, however, such as:
- Weak glutes
- Overcompensating movement with other muscles
- Injury
- Imbalances
- Decreased flexibility
- Inactivity
- Sitting
Typically it isn’t until someone can barely move, their roll deteriorates, or pain intensifies that they start a rehab program to fix it. Having back pain makes you age much quicker or feel older, which makes paddling more uncomfortable.
However, implementing certain practices into your daily life and incorporating certain exercises into your training routine will act as preventative care for your back as you continue to paddle, or assist in improving the health of an already “bad back.”
[This article is part of The Ultimate Fitness Guide For Paddlers. Find all the resources you need to stay healthy and fit for paddling.]
Kayak back pain solutions
1. Always practice good posture
When sitting, choose to sit on an exercise ball. This forces good posture. Think about contracting your core (laugh out loud and feel what happens to your core—this is core contraction); pulling the shoulder blades back and down; and lifting your chest upwards.
2. Stretch it out
Read our article about Post-Paddling Stretches.
3. Add these exercises to your weekly routine
- Double knee to chest stretch
- Flutter kicks
- Four points
- Clam
- Abduction with band
These simple exercises are important even if you don’t feel the burn you’d get from a different workout—it doesn’t mean you’re not improving. Strengthening these smaller muscles and increasing their movement will make you stronger. You are not necessarily strong if you have big biceps, glutes or deltoids, as these are just the “show” muscles. The muscles that make you stronger are the tiny ones deep inside a joint. Strengthen these and you’re well on your way to being injury and pain free.
The best stretch for lower back pain
Since lower back pain is often attributed to tight hip flexors, if you can only do one stretch it should be one that targets your quads and hip flexors. As they lengthen, the hip flexors release their grip on the pelvis and spine and allow the body to come back toward alignment. When the body moves toward optimal alignment, we can experience relief from pain in the low back.
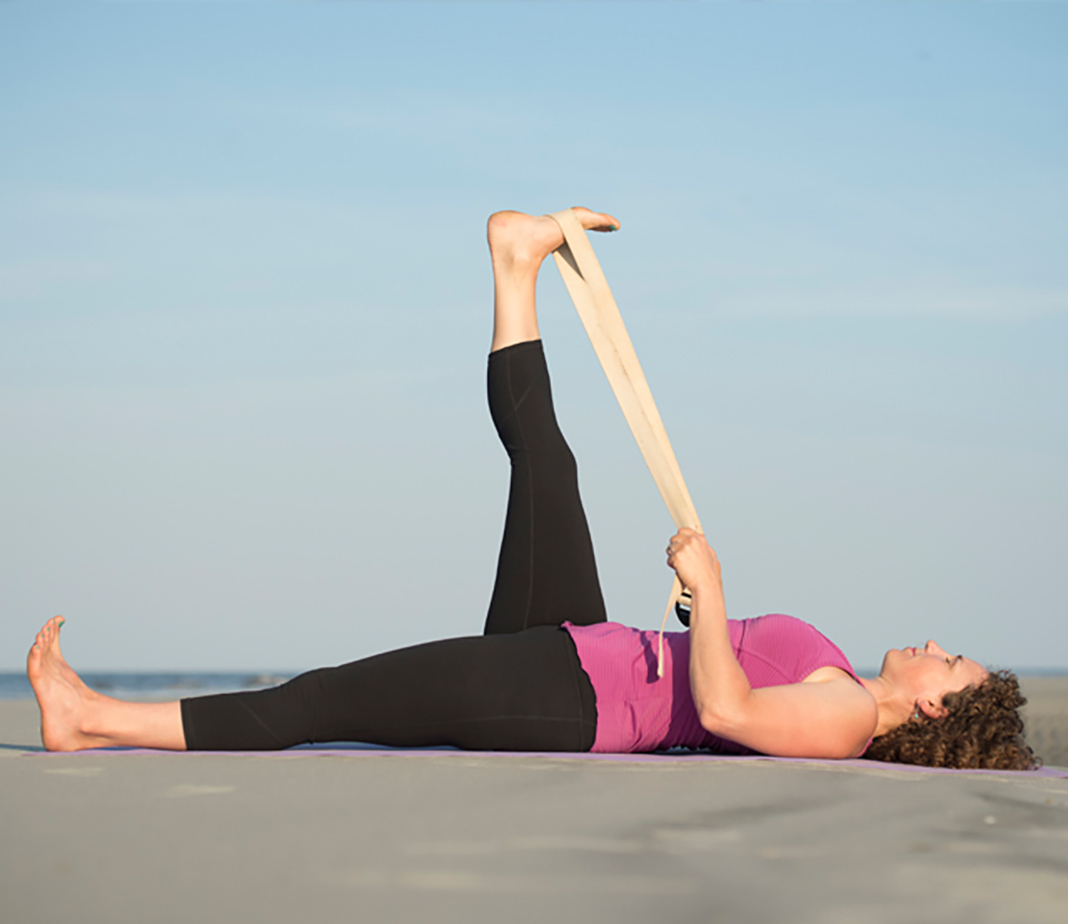
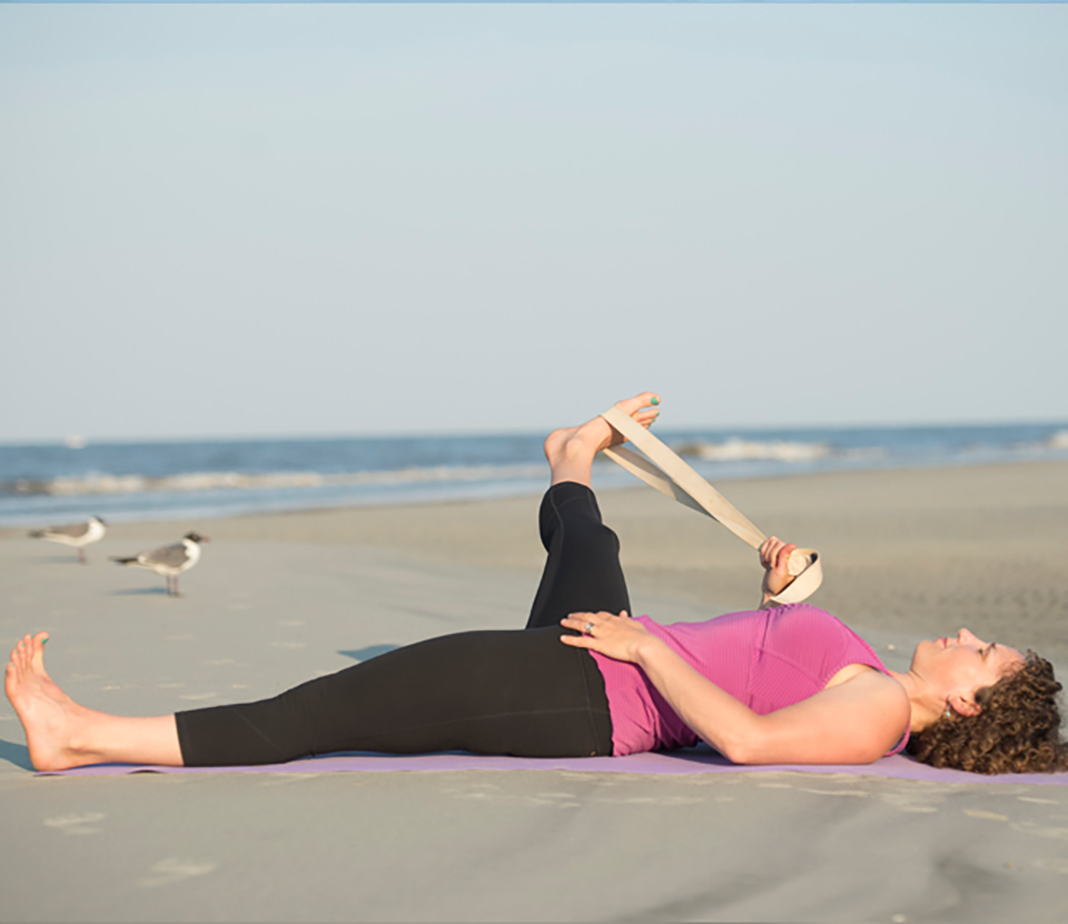
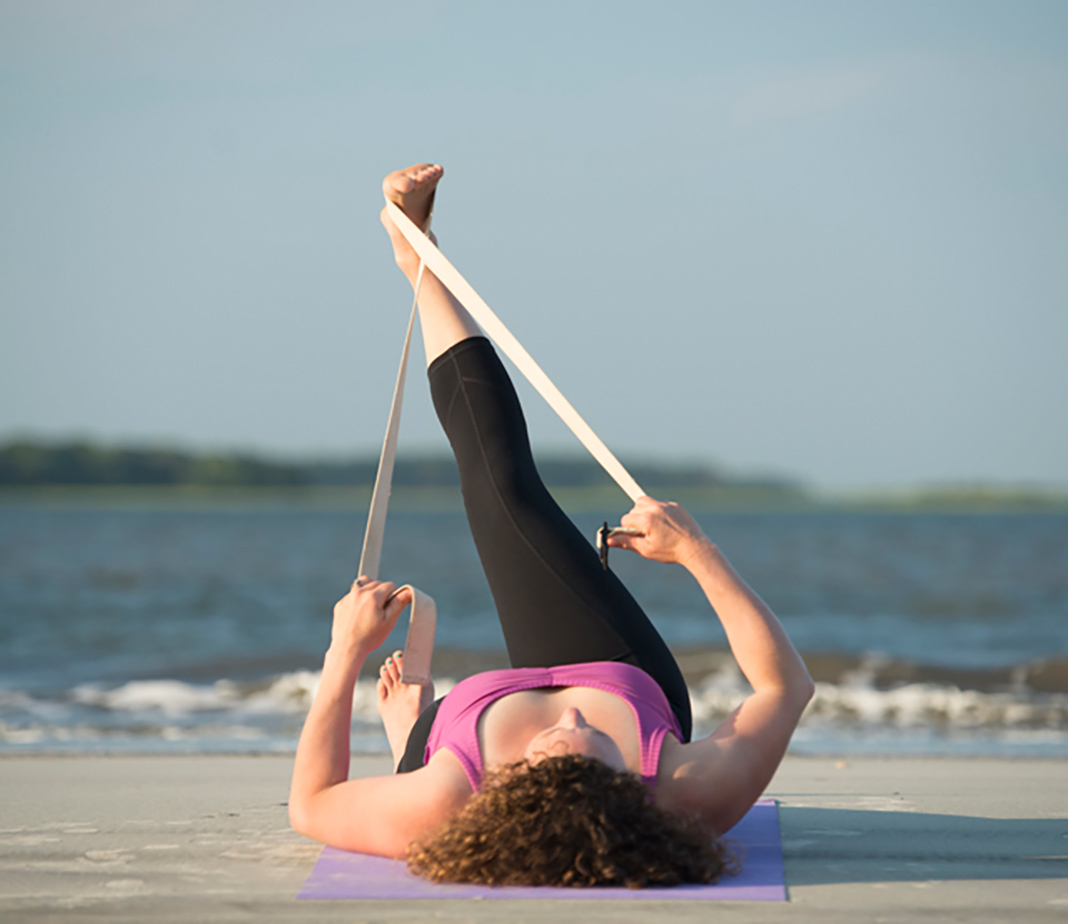
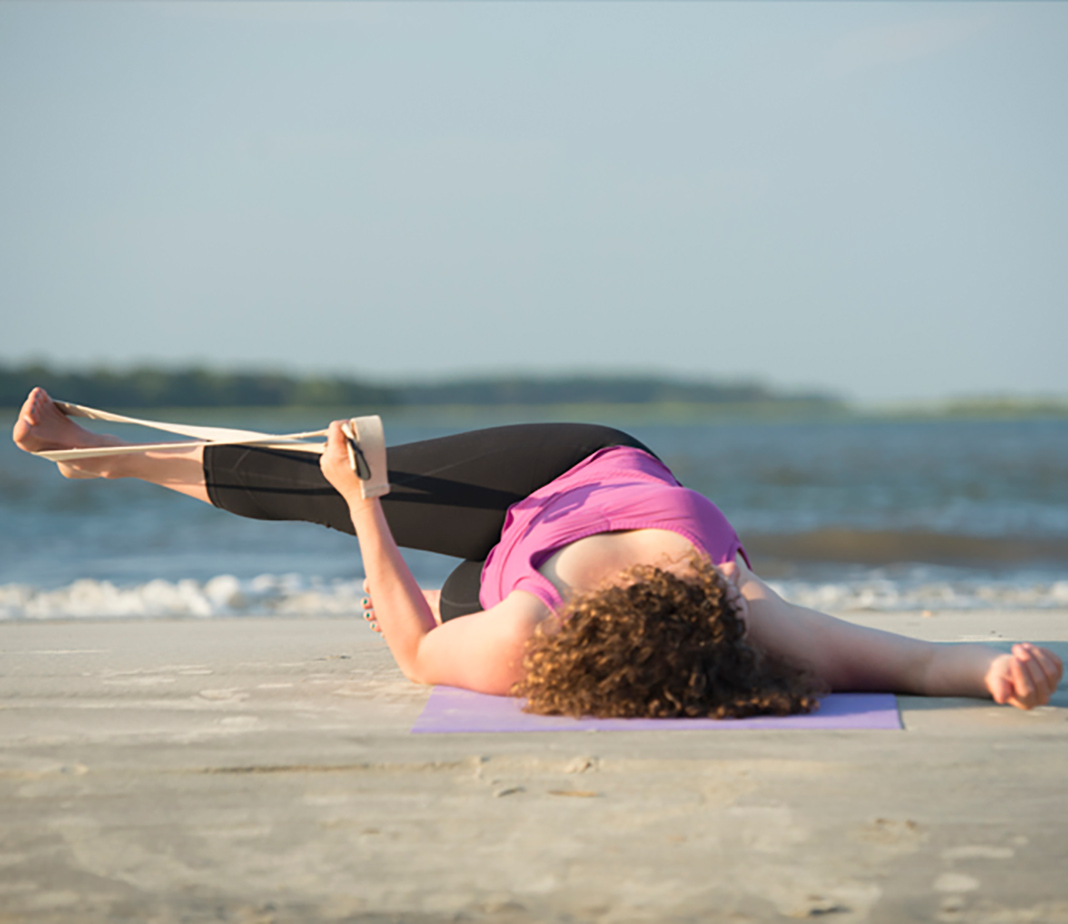
If we could only give one stretch to all padders it would be this one: the Hand to Big-Toe Pose Variation. It has four parts and it targets the hips and hamstrings while keeping the spine in alignment. You’ll need a strap of some kind for this stretch, whether it be a resistance band, skipping rope, towel, etc.
Step one
Lie on your back with your knees bent, feet flat on the mat and your strap within reach.
- Take your strap, lift your right leg and place the strap around the ball of your right foot letting equal amounts of the strap drape from either side of the foot
- Cross the strap and hold one end in each hand
- Extend the right leg up toward the sky while maintaining a soft bend in the knee
- Draw your shoulder blades toward one another to create a gentle lift in the chest
- Press the ball of the foot firmly into the strap and spread the toes
- Your leg may not be at a 90 degree angle to your torso and that’s okay
- Hold for five deep and easy breaths
Step two
- Take both ends of your strap and hold them in your right hand
- Keep your sit bones moving back and apart and slowly take your right leg out to the right. Go only as far as you can without lifting your left hip off the floor.
- Hold for five breaths
Step three
- Bring the leg back to center
- Cross your straps again holding one end in each hand
- Take the right leg across the midline to the left about 10 degrees
- Take the sit bones back and apart
- Hold for five breaths
Step four
- Finally, hold both ends of the strap in your left hand and take the right leg all the way across the body toward the floor. You can keep holding on to the strap and extend your leg in this reclined twist, or you can release the strap and let the leg relax in the twist.
- Hold for five breaths
- To finish, bring the leg back to center and extend maintaining a soft knee before releasing the strap and allowing the leg to float down
- Pause for a few breaths and notice the difference between both hips and legs before moving on to the other side
This program is not for everyone. Please see your doctor prior to this exercise program. Depending on your back pain and/or mechanism of injury, some exercises will feel better than others. If any pain is caused by these movements, please stop.
Heather Herbeck has a B.Sc. in Exercise Science and is a pro-kayaker, Certified Personal Trainer and Level 1 Crossfit Trainer with over 15 years experience. Check out her website for personal training or fitness consultations and trainings via Internet or phone.
Anna Levesque is the leading expert on paddling instruction for women and yoga for paddling. She is the author of the book Yoga For Paddling.
