
They say you never forget your first time. This is true for whitewater rafting as much as anything else. Rowing my first-ever class IV on the recreation stretch of the Rogue River, I was heading slow and sideways into the biggest drop on the run. On impact, my left tube shot up to what felt like an 80-degree angle just as the pins-and-clips on my right oar blew out. I couldn’t believe my boat didn’t flip. Four seasons of guiding, 10,000-plus river miles and dozens of class IV rapids later, that rapid still feels like the first time, every time—and that’s exactly what I love about rafting.
If you are just beginning your journey on the river, don’t be intimidated by my personal anecdote. Overall, a rafting trip can be challenging or laid-back depending on the stretch, though you always need to be prepared to handle spicy circumstances. And, since the river is never the same twice for any rafter, in a way each of us goes back to basics every time we are out there. Here are a few such lessons to get you started on a lifetime of river running.
Oar rigs vs paddle rafts
There are two main ways a raft is human-powered: by oars or by paddles.
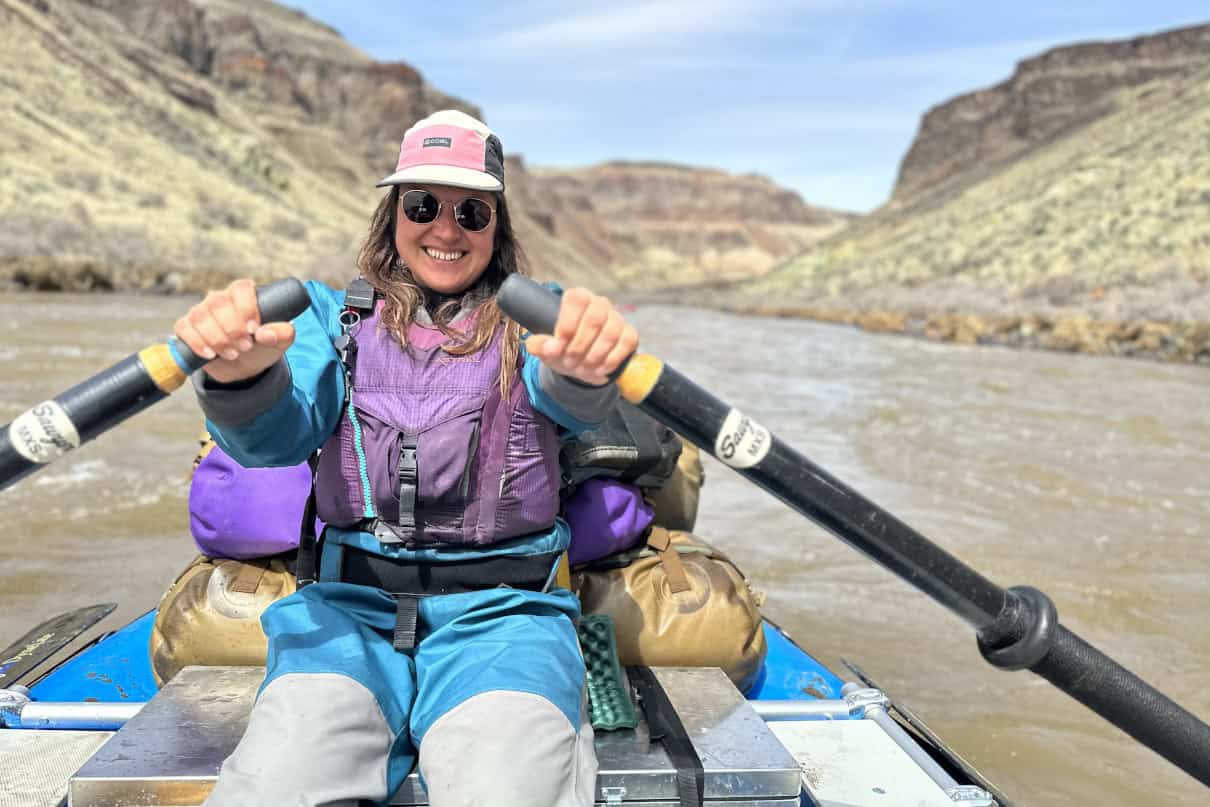
An oar setup uses long rowing oars attached to oar locks on a metal frame that is secured to the raft. The oars are generally positioned around the center of the raft. A single rower uses the oars to row the raft.
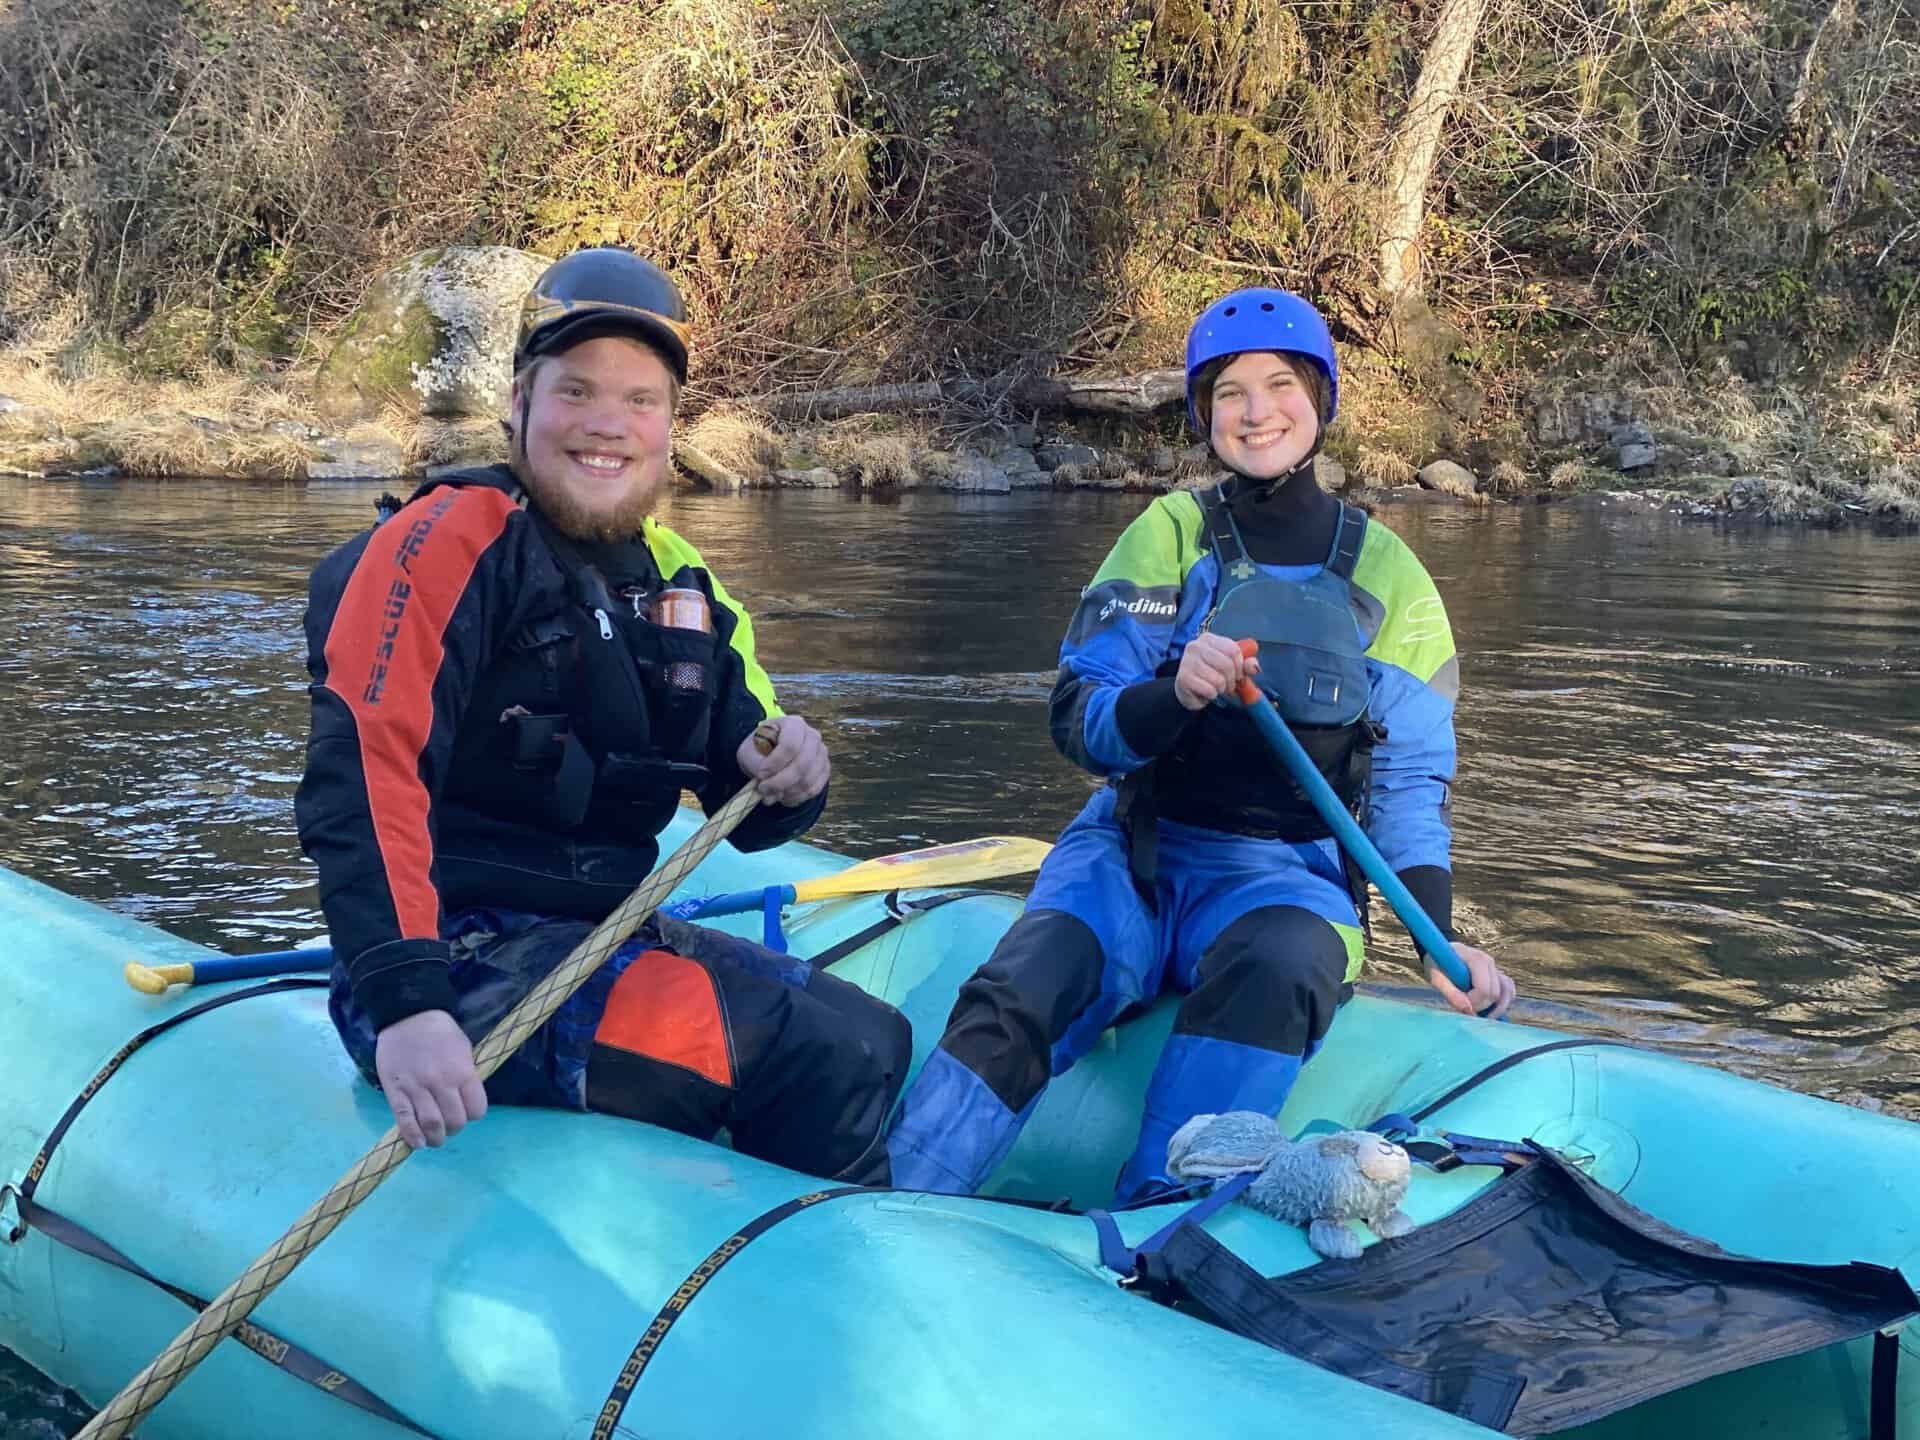
Paddle rafts instead have no frame attached to them, and the crew uses single-bladed paddles (similar to a canoe paddle) to propel the boat with strokes. You’ll even see some hybrid setups with stern-mounted oars and a crew of paddlers toward the front.
Oar rigs are popular for multi-day river trips because a single person can row a large raft full of gear down the river. Paddle rafts are popular for day trips, especially down exciting stretches of river, and allow everyone in the raft to take part in the action.
There are other differences in their benefits and nuances too. One teacher explained it this way: paddles are like hammers, oars are like sledgehammers. The reference reflects the damage both can do when not securely under the paddler’s control. For this reason, you may want to start out paddle rafting before becoming a rower.
For example, a free-wheeling T-grip on a paddle can knock someone’s teeth out and sucks to lose during an involuntary swim, while an independently operating oar can do even more damage. The weight of the oar and the force of the water on the blade can easily rip an oar grip right out of your hand. Consequences can include the grip sliding through your life jacket, losing your footing and getting thrown out of the boat, or the oar grip launching forward like a baseball bat and hitting a passenger in the back with the force of the water multiplied by the oar’s weight. No bueno.
Round rafts and catarafts
There are also two main types of rafts that are either rowed or paddled: round rafts and catarafts.
Round rafts are elongated in shape. They have outer tubes to create their round perimeter, inflated thwarts across the inside, and a floor. Round rafts provide a lot of flexibility for carrying gear and passengers.
Catarafts are two separate inflated pontoons held together by an oar and gear frame. Paddlecats are another type of pontoon raft with inflated thwarts that are smaller and intended to be paddled instead of rowed. Catarafts are fun and fast to row since there are only two pontoons in the water.
What to wear whitewater rafting
There are a few basic components of the rafting uniform. At the top of the list is a personal flotation device (PFD) that is rated for whitewater and fits properly. Next is a whitewater-specific helmet. Without these, you shouldn’t go rafting.
You should also always dress for immersion. For colder weather or winter rafting, this means a dry suit is imperative. Otherwise, most people wear various styles of neoprene, perhaps a dry top and dry pants. On warm water runs during summer, sun protection is the name of the game. Well-constructed water shoes are another part of looking the part and being rescue-ready. Wearing old, grippy sneakers works too.
You’ll also carry a few additional items for safety purposes, including a whistle, a river knife, a personal flip-line, and a personal throw rope. Dry bags should come along as well to cover extra layers, food and water.
For more details on a rafting costume, check out our article on what to wear kayaking. Although kayaking is slightly different than rafting, the basics on dressing for success are essentially the same.
Basic rafting skills
Rowing an oar rig
Just like any sport, it’s all in the technique. It will also take time to learn proper oar management, so watch the boaters around you. Whoever makes it look smooth and is working the least is likely a good rower to mirror.
For the basics, rowing a raft uses two types of strokes: push and pull strokes. Unlike the way an Olympic rower will face away from their direction of travel, rowers in rafts generally face downstream to see what’s ahead—though that can change in a stretch of flatwater or during a move in a rapid.
When holding the oars, keep the grips in front of your chest and rotate forward from the waist rather than bending your arms at the elbows like two chicken wings.
To go forward or backward, you push strokes or pull strokes in unison on each side.
To turn, if you pull a stroke on the right, the boat will turn to the right, and vice versa. It can feel unnatural at first, but you will get the hang of it the more time you spend doing it.
Paddling a raft
Paddling a raft is generally a team sport with crews of two or more people. You generally sit across from one another on the outer tube, with boat feet inside the raft and braced against the tubes ahead of and behind you. When holding the paddle, you have one hand on the shaft down near the blade. The other hand covers the T-grip at the top at all times for safety.
Sometimes one of the paddlers sits in the rear of the raft as raft captain, and acts as the boat’s rudder with powerful steering strokes. If you have gone on a commercial trip, this is the position the guide takes. Since this is a team activity, communication is key, and either one person needs to provide commands to the crew as to what to do or the crew needs to communicate together decisively.
For a paddling team, here are a few of the most basic strokes to use:
Forward strokes
Forward strokes are the most-used stroke and propel the raft forward. To do a forward stroke, you rotate your torso to reach out in front of you, plant the entire paddle blade vertically in the water, and, using your torso rather than your arms, unwind and pull yourself to the planted blade.
It’s important for forward strokes that the blade travel vertically alongside the raft rather than sweeping out, and most importantly that you paddle at the same cadence and strength as the person across from and in front of you.
Back strokes
At most basic explanation, a back stroke is the opposite of the forward stroke. Back strokes are often taken on one side in order to turn the raft in that direction. Or, if everyone in the raft takes back strokes together, it can act like a set of brakes to slow the raft, and even move it away from certain river features.
Sweep strokes
Another basic turning stroke is the sweep stroke. These are helpful in a raft with just two people sitting across from one another. For the sweep stroke, you take your forward stroke on just one side of the raft, and rather than traveling vertically along the raft, you trace an arc away from it as you unwind your torso.
Raft captain job and strokes
As we mentioned before, there is often one person giving commands for which strokes to take and when to do so. This could be one member of the paddlers, or they may also be sitting in the back of the raft with a different job than the crew and using their paddle as a rudder to help the raft track on a course. The latter is the case if you are on a guided trip. If the captain is in the back, they will also use powerful turning strokes, including what are called draw and pry strokes.
Delivering a Safety Talk
I can’t stress enough how important communication is on the river whether you are sharing a raft or in separate boats. A team safety briefing is a big part of this. Typically, this is done at the put-in and led by the most experienced boater on the stretch of water you are prepping to raft. The talk should include what hazards to be watching for, what to do if you find yourself out of the boat (involuntary swim), where first aid and pin kits are located, and a review of river signals.
Scouting rapids
Scouting and reading rapids is a major skill to develop in whitewater rafting. If you are coming up on the sound of roaring whitewater and wondering whether to take a look, or can’t see a clear line well from top to bottom, or don’t remember the line, or the guidebook or map says to, you can’t go wrong by pulling over to scout a rapid. Once pulled over in an eddy, be sure your boat is properly tied off before hiking to the overlook for a scout.
Your goal during a scout is to find your intended line down the rapid and memorize your route with recognizable river markers. How to choose that line goes further into the skill of reading whitewater.
How to flip a raft
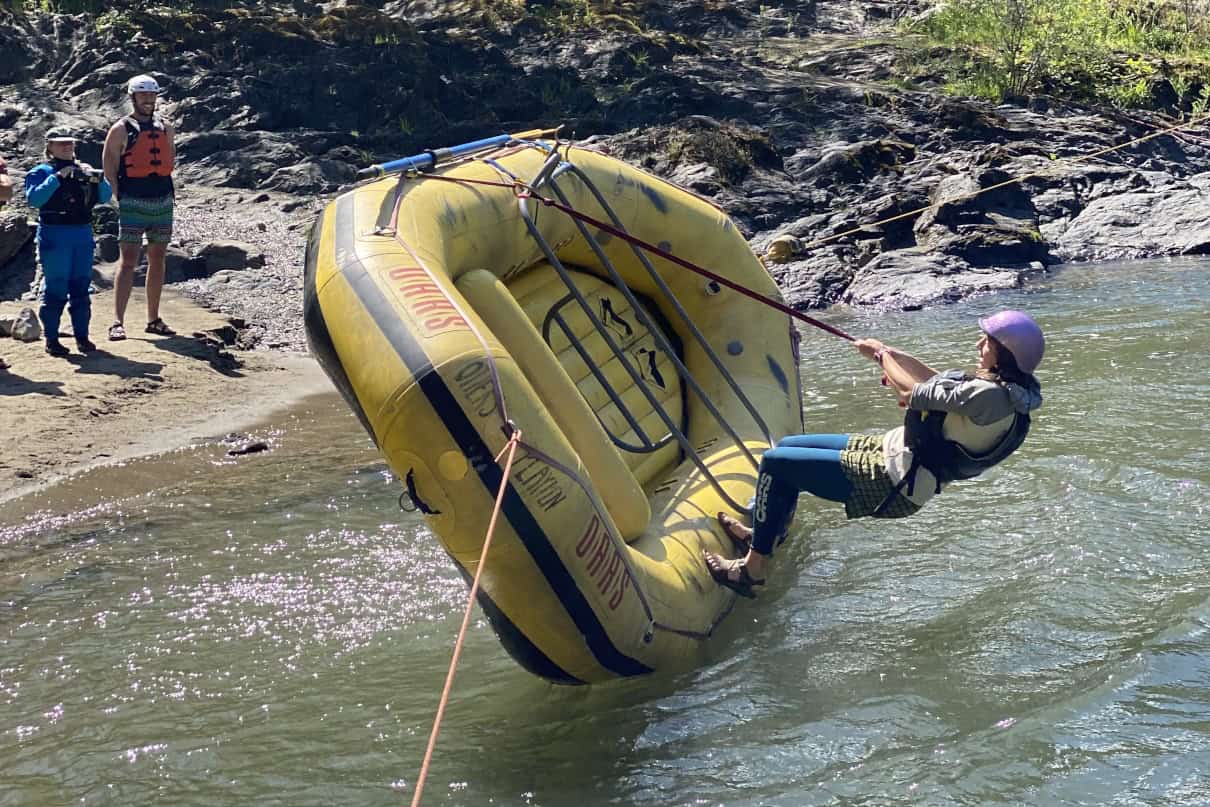
Even if you do everything right through a rapid, a flip is still in the realm of possibilities. This is a skill that is taught in most ACA swiftwater rescue courses. There are a few approaches you can use to flip a raft, but one of the most standard ways is with the use of a flip line. A flip line is a length of webbing that you attach to one side of the raft. You then climb up onto the bottom of the raft, grab the line, stand on the opposite side from where it is attached, and lean back to flip the raft toward you. Once righted, you and your crew can pull yourselves back into the boat.
Rescue skills
Speaking of swiftwater rescue, if you are planning to run whitewater rivers on your own without guides, then it is a must to start learning rescue techniques in order to help both others and yourself when things don’t go as planned. There are various opportunities to take courses through organizations such as the American Canoe Association, along with local outdoor clubs, college courses, and others.
A few starting topics you should seek to understand include: how to swim in a rapid, how to use a throw rope, and how to unpin your raft with mechanical-advantage methods such as a Z-drag system.
Rafting logistics
A rafting trip doesn’t start when you hit the water. Half the fun (or struggle) is in getting your boat to the water.
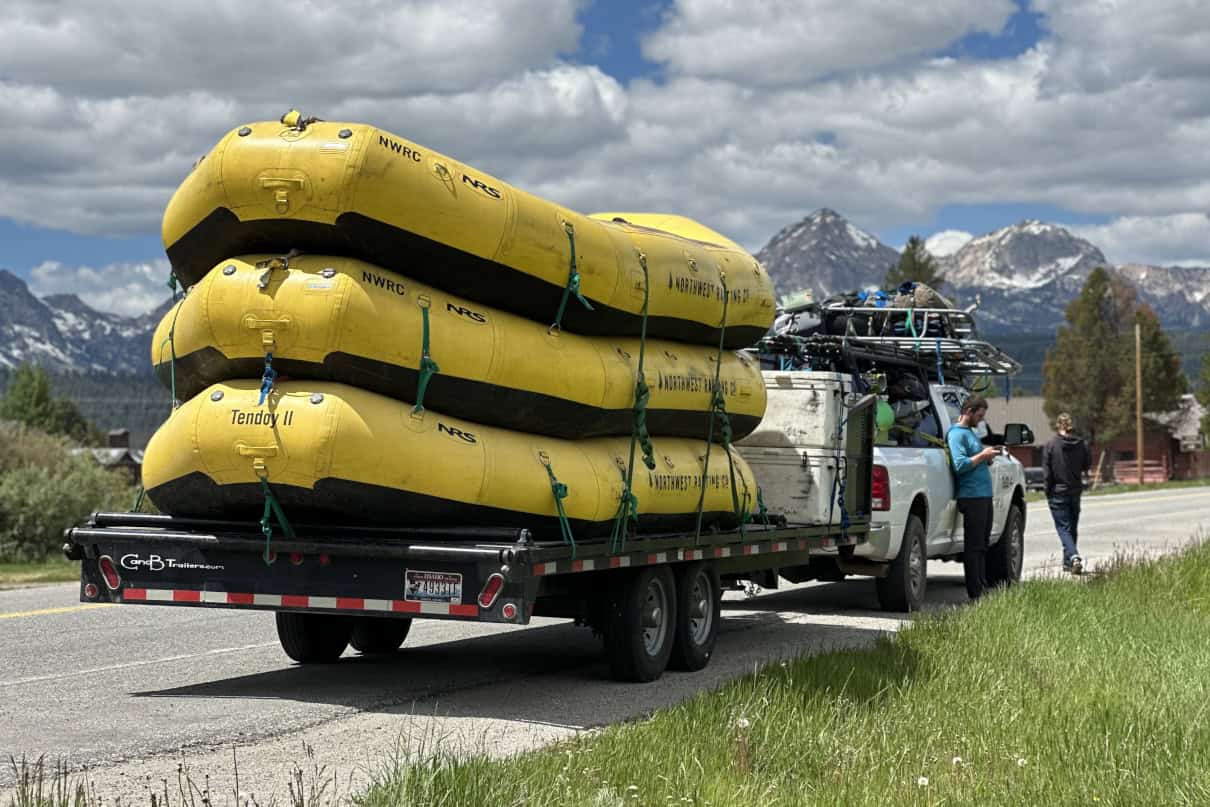
Transporting a raft
Raft transport comes down to trailering or rolling. Trailering is usually ideal. It’s often the quickest and easiest method. There are all sorts of trailers. Flatbeds, trailers with storage, double-axle trailers that can support big raft stacks. Stacking rafts could be advantageous when shuttling.
If you don’t have the storage space and/or cash flow required for a trailer purchase, deflating and rolling up your raft between trips is a great alternative. With a hatchback wagon, you can fit a raft and fixings plus still have four seats for passengers. Some folks put their rolled raft on top of their vehicle in a cage or basket secured to racks. A rolled raft also fits nicely in the bed of a truck. If you have an oar frame, it can also be broken down to fit in a vehicle or strapped to your car’s roof rack.
Running shuttle
Especially with rafts, you often head to the put-in spot first. After you dial in a plan to get to the put-in, with a raft, you might be wondering how you will get home from the takeout. Easy. You can run a self-contained shuttle or hire a shuttle company. To run your own shuttle you will need two people and two vehicles, minimum. If someone needs to wait at takeout with the equipment while a vehicle is retrieved, three people will be needed, minimum. Usually it is best to have the whole crew meet at put-in. From there, some people can set up rafts while others run vehicle(s) down to the takeout.
Sometimes shuttles aren’t convenient, especially when there aren’t direct routes from put-in to takeout. In this case, many river stretches have paid shuttle companies that will transport your vehicle downriver. Google is your friend when searching out shuttle services, as well as local guide services and online groups.
When researching the stretches of river you will raft, be sure to check the current conditions of the put-in and take-out you plan to use.
Carrying a raft
If the put-in has a boat ramp that allows you to pull up to the edge of the water, then you are fortunate to be able just drop your raft right in the water. However, many rivers are remote and don’t have developed put-ins and take-outs. If this is the case, the best thing to do is rally all your friends (depending on the weight of the raft) and have everyone lift from the handles at the same time, then carry in one hand like a suitcase and proceed forward.
If the trails are narrow, you may have to get more inventive. Removing all gear from the boat can let you manipulate the raft through tight spaces. Lifters can also put the raft above their heads and stand under it while transporting so as to make the width narrower. Carries are another reason to think twice before choosing access points or what sort of raft and gear you are bringing.
Setting up a raft
If your raft isn’t trailered, the first thing you’ll have to do is inflate it. Barrel pumps are great, but a DeWalt or Milwaukee rechargeable battery-operated blower is even better. They come with attachments (or buy them separately) that allow inflation and deflation. A handheld K-pump can help with fine-tuning inflation and is the smallest and most compact pump to bring on the river.
If you are running a paddle raft, and all the chambers have been inflated to your desired firmness, you are good to load your drybags and safety gear and get going. If you have an oar frame, you’ll have to piece and secure that next. This isn’t something you should do for the first time at the river.
Some frames are modular and break down into cross bars and rails, while others are welded and don’t break down at all. For ease of reassembly, it helps to leave U-bolts and nuts in place (just loosen them) and mark setting locations with a thick marker. Same goes for modular oarlocks and towers. On welded frames, oarlocks and towers often can’t be adjusted and therefore won’t need to be reset.
Once assembled, you’re ready to lash the frame down with cam straps. At least 4 opposite and opposing points (the corners) should be lashed to D-rings on the outside of the tubes. After that I would throw two longer straps on the frame and rig it directly to opposite sides of the floor. Cat boat tubes will require several more straps and an extra set of hands for steadying the frame and the tubes.
Open oarlocks or pins and clips will sit on the top of your oar towers. Pins and clips are generally used for big water boating while open locks are fairly mainstream and universally used by most folks. If you are new to boating you may also have oar rights and leashes.
Raft trip planning
Finding rivers for rafting
To zero in on river stretches to run, you’ll want to have a complete understanding of the whitewater classification system as well as the inventory of river reaches you have an interest in traveling to.
When it comes to river difficulty, don’t jump into difficult and dangerous rapids class IV or above right out of the gate. Take your time learning the basics on easier whitewater.
As far as knowing which rivers and sections are out there, shops, outfitters, online groups, online databases, and guidebooks are all great resources. Soggy Sneakers is the rafting bible for the state of Oregon, where I reside. Most states have a similar book. Alternatively, sites including American Whitewater are comprehensive resources for finding all the most up-to-date details on every raftable section of river in the United States, usually including a link to check river flows. Checking river flows before a trip is a must-do critical step. River conditions dictate how difficult a run is, whether it is above a safe level, or if it even has enough water currently.
One other aspect to rivers to keep in mind are permit systems, and whether the river you would like to raft requires securing an allocated spot or not. Many of the most popular multi-day river trips in the western U.S. have systems that operate with the use of a lottery or reservation approach. However, there are also countless river reaches in these same areas that you can launch on anytime.
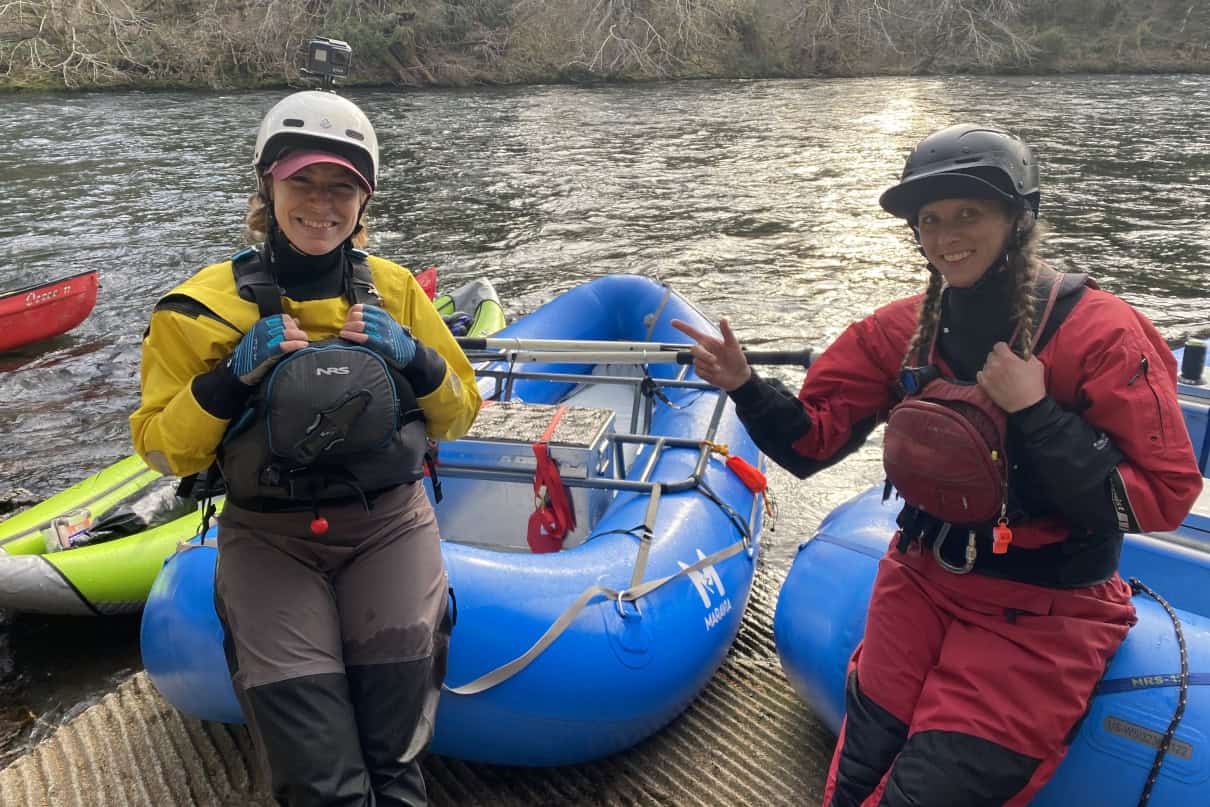
Day trips
Whitewater rafting trips can either be a single-day outing or multi-day excursions. Even for one day on the river, the basics of planning any rafting trip include answering the following questions: Who am I going with? What are my safety essentials? Do I have extra layers? Do I have food? Do I have water? And, what are my contingency plans?
Who am I rafting with
Guided Trips: Selecting a guided trip to go on with a reputable company is a great way to get your feet wet, especially before you have a chance to start developing a crew.
Friends and Family: Some folks have friends and family who are long-time boaters who want to pass on their knowledge. This can be a great avenue for rafting exposure. If you and your friends and family are novices, it is important to play it safe and select more conservative trips until either you or new members of your crew have more experience.
Finding groups online: If you are right out of the box, a brand-spanking-new rafter without boating homies yet, I have a suggestion for you. Regional, state-wide, watershed-specific and even experience-level-based whitewater meetups on Facebook and through paddle hubs are a good way to get connected. Within the an online group, be sure to ask about specific groups for your skill level.
The way I started rafting was through guiding and working at a kayak shop. And I regard these as solid ways to find people to boat with, as well.
Food and hydration
Fat, sugar and carbohydrates should be your focus on the water. I prefer easy to consume and more snacky than mealy. In other words, I don’t love stopping for lunch. I prefer to eat on the fly. But every group is different and it’s important to be flexible.
For hydration, I recommend two water bottles. One for drinking during the drive and one for on the water. I like my car drinking container to be 1 liter minimum and my on-the-water bottle to be 2 liters minimum. On top of these, consider a coffee or tea thermos with warm fluids for colder days, and the possibility of electrolytes, especially in heat. Remember, drive times on raft trips can really add up, and it’s nice to think ahead and be comfortable in the inevitably cramped shuttle vehicle.
Contingency plans
When I mention contingency plans, what I mean are that alternate plans for worst-case scenarios should be thought through and considered for every rafting trip. These plans should address the following questions:
- How remote is this river, and is this a good fit for our experience level?
- Will there be cell service? If not, do our iPhones have satellite texting capabilities? Do we have a satellite messenger or other remote communication device?
- In the event a medical evacuation is needed, how will we accomplish this? In other words, is the river roadside? Is it in a deep canyon? What escape routes are possible?
- Who are the land managers and authorities that should be contacted in an emergency? What are their phone numbers?
Multi-day trips
Imagine rafting all day, then setting up camp and sleeping on the river—for days on end. In my book, that’s about as good as life gets. Multi-day river trips require additional planning with meals, camping gear and logistics. As much as I love multi-day trips, this article primarily focuses on day trips. But cross your fingers for a follow-up piece.
Alright, I have imparted all I can to get you started, now get after it. See you upright and downriver.
Feature Image: KM Collins