After a slide show for some paddling friends, a woman asked me how I got the paddler in one of the photos to stand out from the background. It took me a minute before I realized that she was talking about soft-focus backgrounds. I told her she could get the same results if she learned how to control depth of field.
Depth of field refers to the size of the zone of sharpness in your image—that is, how much sharpness there is in front of and behind your subject or focal point. Controlling the depth of field is especially useful for outdoor photographers. You can make better photos by reducing depth of field to eliminate distracting backgrounds—creating mood or soft focus to make your subject stand out from the back- ground—or you can increase the depth of field to show incredible detail or textures. Depth of field is determined by two things—lens aperture and focal length.
Controlling depth of field with aperture
Choosing a wide aperture—low f-stop like f 2.8 or f 4—creates a shallow depth of field. This shortens the foreground and background details that may clutter or distract your eye in the image and leaves only your subject sharply focused. Conversely, a small aperture—a high f-stop like f 11 or f 16—creates large depth of field and packs in lots of detail or texture—the whole image could be in focus.
For example, take a look at the main photo accompanying this article. One damp, early fall day near Huntsville, Ontario, we carried our boats down an overgrown trail to put in on a small lake. I was interested in how the foliage framed and enclosed the paddlers but I didn’t want to lose them in the overall scene. Using an aperture of f 2.8 produced a shallow depth of field, isolating the paddlers from the background and foreground and softning the greenery around them. The out-of-focus background com- plements the subjects, drawing your eye back to the sharp area instead of drawing attention away.
I took photos 2 and 3 while exploring the Rideau Canal, south of Ottawa, where we found the bird life very habituated to boat traffic. Drifting in close with a 200 mm lens, I was able to get almost full- frame shots of the many great blue herons. Again using a shallow depth of field, the background is softened and much less distracting.
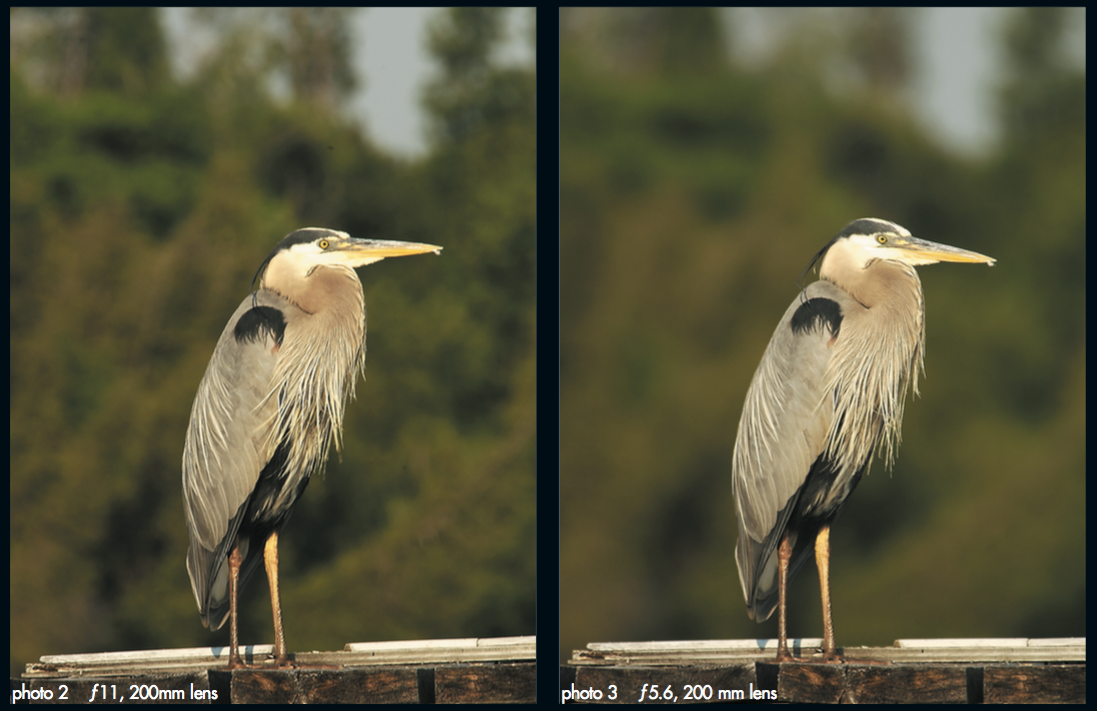
Notice the difference in the background between the two otherwise identical images of the heron. The first image was shot at f 11. The background in the second image, shot with a shallower depth of field at f 5.6, is softer and less distracting.
Controlling depth of field with focal length
The other factor affecting the zone of sharpness in your images is the focal length of your lens. The rule of thumb here is that a wide- angle lens will give a larger depth of field and a telephoto lens will give you much less. You can use this knowledge to your advantage, switching lenses or zooming in or out to achieve the desired results.
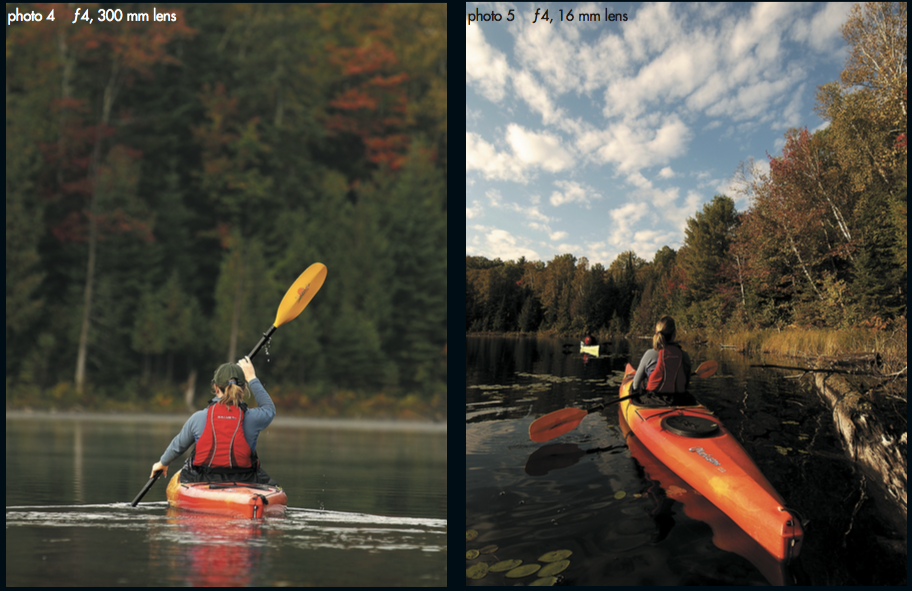
I shot the two autumn paddling images, photos 4 and 5, with an aperture of f 4 but with two very different lenses. The paddling shot, done with a long 300 mm lens, shows a very shallow zone of sharp- ness, leaving just the paddler and paddle and a small portion of the kayak in sharp focus. The rest of the image—water in the foreground and trees behind—is softened, adding a more peaceful mood to the shot.
In the extreme wide-angle, 16 mm shot of photo 5, the complete image is in focus (even with the large aperture of f 4) from the lily pads in the foreground to the blue sky and trees in the distant back- ground. Instead of snapping the paddler out of the scene, plenty of depth of field encourages your eye to wander throughout the image absorbing all the details and colour.
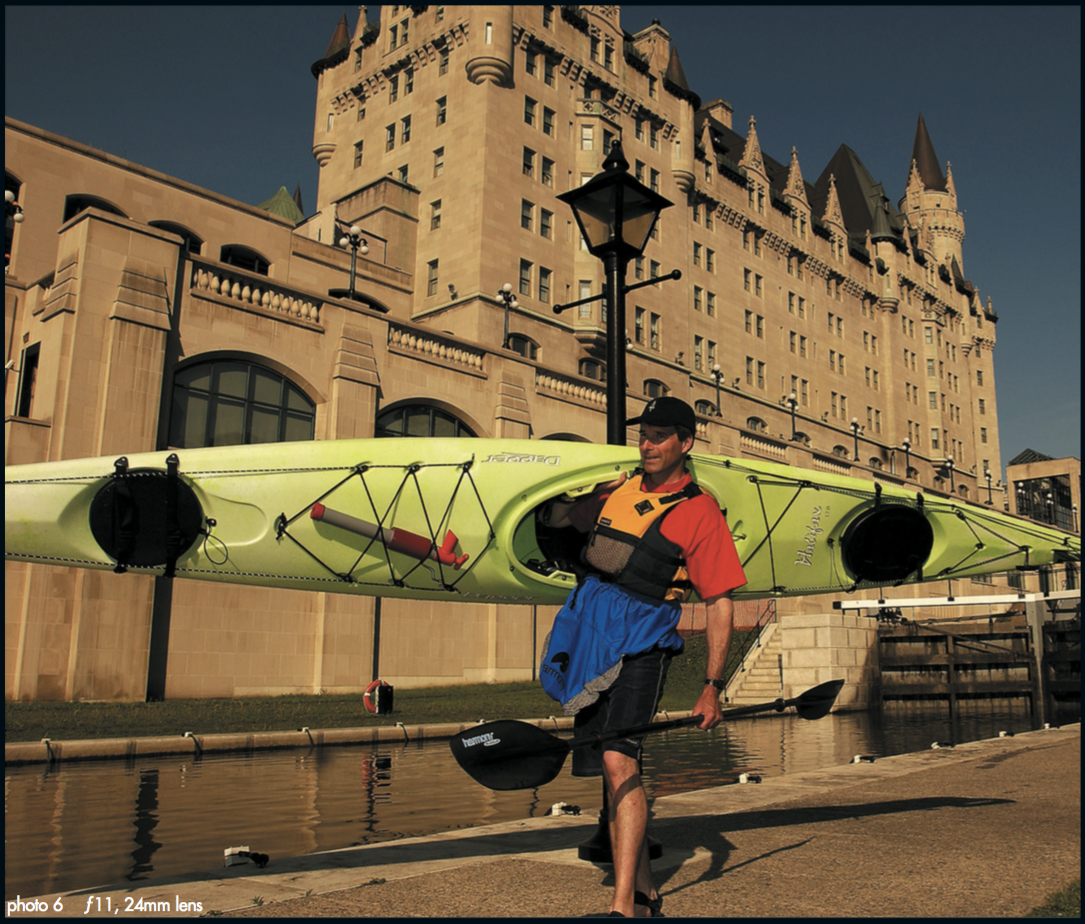
In the final photograph, photo 6, the magnificent Chateau Laurier in downtown Ottawa makes the location equally as important as the paddler, so I wanted to ensure the entire image was sharp and in focus. I combined a 24 mm wide-angle lens and a high f-stop (f 11) for incredible depth of field to bring out maximum detail in foreground and background. This combination keeps the happy paddler, the canal and the Chateau, in the far background, all in sharp focus.
Try experimenting by varying your depth of field. Begin by shooting at the extreme ends of the scales and getting as shallow or as much depth as you can. Playing with the extremes of depth of field, you will easily see your results and get a feel for how it affects the look of your images. Remember these general rules: if your main subject is a paddler, keep him sharp and lose the distracting foreground and background; and if the photo is mainly scenic, maximize your depth of field for incredible detail and applause at your next paddling club slideshow.
 This article first appeared in the Spring 2004 issue of Adventure Kayak Magazine. For more great content, subscribe to Adventure Kayak’s print and digital editions here.


