Home Blog Page 172

Regional differences in canoe design persist despite forces of homogenization. Here’s why.

Not From Around Here
I spy with my little eye a red canoe. Must be the Northeast. | Photo: Gary McGuffin

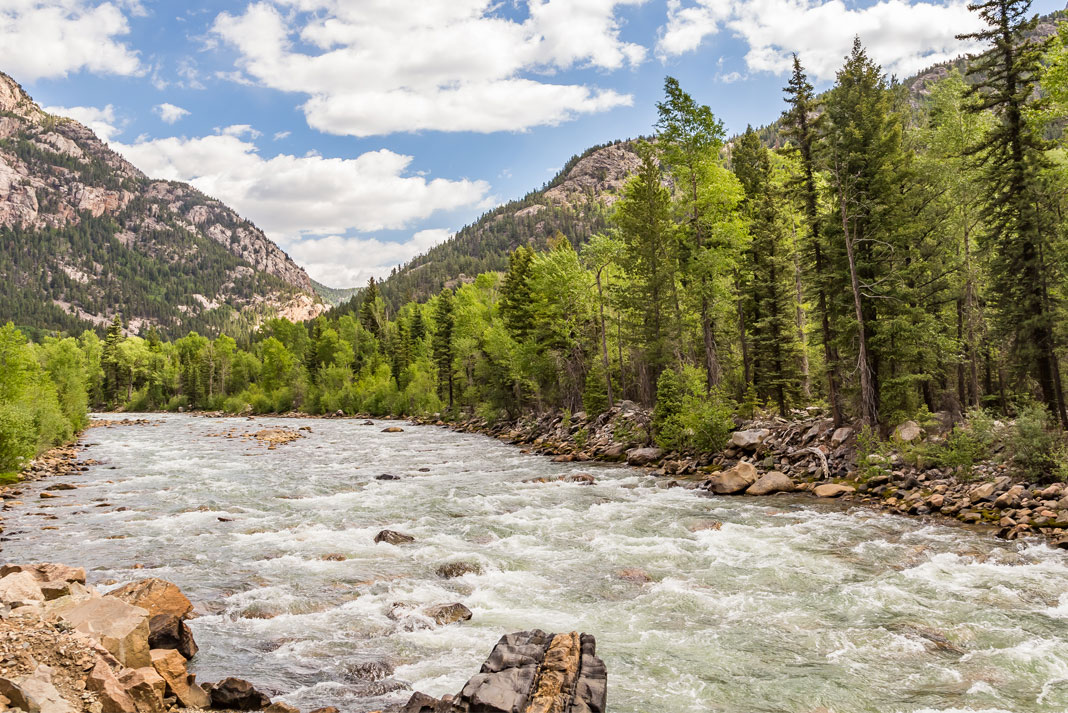
Travel anywhere in North America and you will notice the shape and color of canoes shift with the landscape. The reasons why are not always logical.

On a recent two-week trip in northern Ontario’s Quetico Provincial Park, I was hard-pressed to spot a single canoe not plain Kevlar. All the tripping canoes I paddled by seemed to come from the same marathon-racing-inspired mold—lengthy, ultralight and beige. It wasn’t until well into my 18-hour drive home I noticed canoes with color and rocker gracing roof racks of passing vehicles.

I had lots of time to ponder why.

The canoe is of indigenous origin, and it’s easy to understand how the first designs would have evolved to fit local needs. “All the performance lines, whether it’s tumblehome, extreme rocker, straight keel, V, flare sides—we see those also in birchbark and other indigenous watercraft,” says Jeremy Ward, curator at the Canadian Canoe Museum.

Less obvious is why, in the age of industrial manufacturing and intermodal shipping, regional differences persist. While sea kayakers globally race to embrace the latest British, Danish or Swedish designs, and SUP racers upgrade to keep up with ever-narrower boards, canoeists stubbornly stick with local formulas that have worked for decades.

Bill Kueper, vice president of Minnesota-based Wenonah Canoe, which claims to build two-thirds of the world’s Kevlar canoes, sees the sales data supporting canoeing’s distinct regional trends. “We have minimal rockered boats going into the Boundary Waters. We make an identical reproduction of the Chestnut Prospector—the majority of those sales go to the U.K. and Australia. But forget about them in the U.S.”

[ See all canoes in the Paddling Buyer’s Guide ]

Venture east and he says you will find 16-foot and shorter canoes popular for the meandering rivers of the Northern Forest Canoe Trail. Inexpensive plastic hulls are favored in the South where portaging is a rarity. The short, light pack canoes of the Adirondacks are perfect for hopping from pond to pond.

Journey west from the Adirondacks or southern Ontario into Wenonah’s homeland of Minnesota, and the tradition of wilderness canoe marathon racing, like the historic Ely-Atikokan Canoe Race, influences tripping canoes to be longer, lighter and less rockered. They also tend to have bucket-style seats on aluminum rails to favor sitting in the middle of the canoe and switching sides with a bent shaft paddle instead of J-stroking.

Not From Around Here
I spy with my little eye a red canoe. Must be the Northeast. | Photo: Gary McGuffin

To simplify the geographical fault lines, Bear Paulsen of Minnesota’s Northstar Canoes suggests a divide somewhere around Madison, Wisconsin. “Once you go east from there, all the boats are short from our perspective,” he says. Everything to the west is 17 feet long or more.

Sales manager Wayne Docking of Souris River Canoes in Atikokan, Ontario, confirms this length distinction. “People in the southern part of the province often opt for a 14- or 15-foot canoe. In this part of the country, 16-footers are the minimum.”

In explaining why this difference persists, however, opinions differ. Paulsen posits, “The combination of long boats and ultralight grew together. If you are going to portage an 18-foot boat, it better well be lightweight.” It’s also possible the aging and, ahem, “expanding girth” of the population is prompting the demand for lighter canoes to compensate for reduced fitness, he muses.

According to Kueper, canoes in the Boundary Waters need to be faster because people are taking shorter trips, and the competition for campsites close to access points is driving the race to get deeper into the wilderness in less time. Both Kueper and Paulsen confirm paddlers in the Boundary Waters favor flatwater-specific canoes for their big lakes while those further east paddle a wider variety of conditions, including smaller lakes and rivers.

[ Plan your next adventure with the Paddling Trip Guide ]

These regional differences don’t make the canoe industry so different from other outdoor industries, according to Kueper. Companies sell bikes or skis for different terrains and conditions—narrow carving skis for icy eastern slopes and mid-fats for smearing buttery arcs in western pow.

“It’s really about having the right tool for the job. Trail running would have a different shoe than marathon running. The modern canoe has been around for 100-plus years, but the refinement is to address a different situation in a different location on a scale to make it marketable,” says Kueper.

Whatever the explanation, builders’ assessments of regional “needs” too conveniently match the types of canoes they build for these reasons to be entirely practical. Wenonah thinks speed is critical; Atikokan-based Souris River says canoes need to be “kickass” tough. The real reasons may be more cultural than practical.

It’s probably no coincidence Mike Chichanowski, the founder of Wenonah, which is undoubtedly the most influential builder in the Midwest, started out as a canoe racer and set the aesthetics of speed as the standard by which generations of locals have judged their canoes.

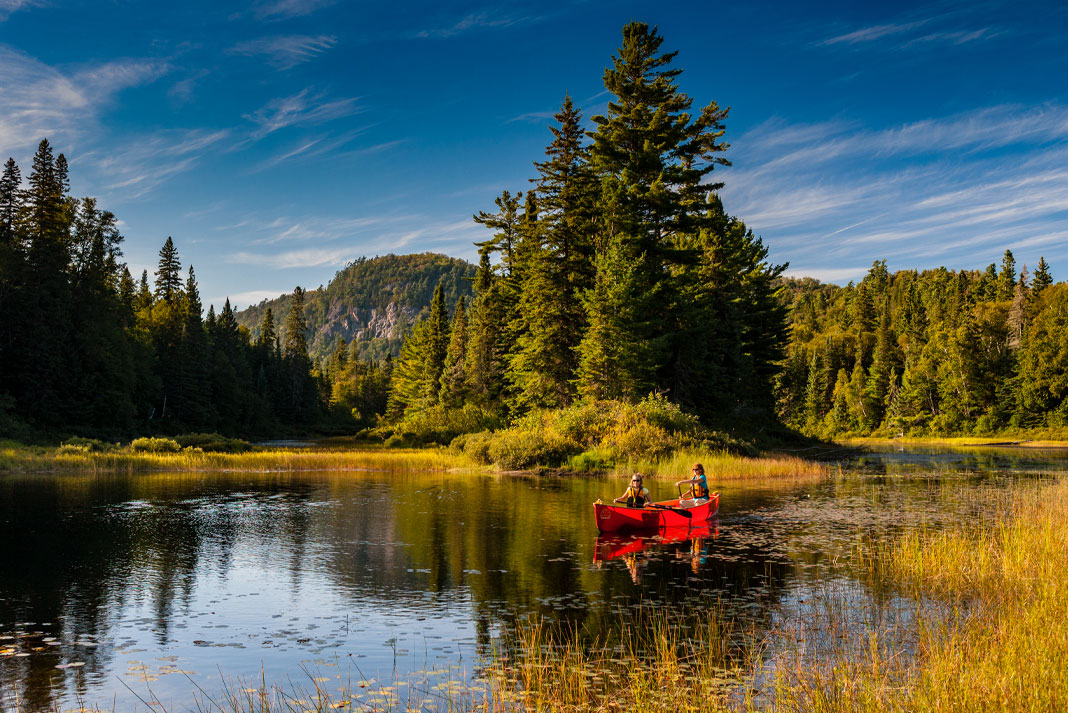
There’s no reason why a flatwater canoeist in Algonquin Park should be any less interested in speed than one in Quetico, unless perhaps they took their influence more from artists than athletes. Which is probably why everyone in my part of the country seems to favor red canoes—much to the frustration of Hugh Stewart, founder of Quebec-based wood-canvas builder Headwaters Canoes. Red is a harder paint color to work with on canvas, he says.

“The Group of Seven always used red canoes,” says Stewart, as did the iconic Ontario canoeist, painter and filmmaker Bill Mason: “[Bill’s daughter] Becky Mason says until she was 15 she thought every canoe was red.” Such differences harken to traditions preexisting the Internet’s influence or the rationale of industrial manufacturing. People base their idea of a canoe on what they see around them.

“The Midwest has got its own kind of outdoor culture,” says Stewart. “You go to the outdoor books section in a bookstore and you’ve never heard of half the authors. And the people in Maine, when they build a wood canoe like ours, they still put shellac on the bottom instead of paint.”

Headwaters is just one of hundreds of small shops meeting the demand for local needs. Even for manufacturers like Souris River and Wenonah who ship globally, regional distinctions aren’t going away.

“We’ve been a canoe company now for 52 years and we’re not any closer to the universal answer,” says Kueper. “We’ve done a good job making it difficult. We’ve got a lot of models. Every year we sit down and talk about eliminating something, and we can never come to a consensus because we find some part of the world where it’s needed.”

For now, canoeists can be proud to have canoes atop their cars that somehow match their license plates. And perhaps, when traveling, have an incentive to embrace local traditions and rent, or else just paddle their own canoes—literally and figuratively—at the risk of sticking out from the crowd.

I spy with my little eye a red canoe. Must be the Northeast. | Featured photo: Gary McGuffin

Tips For Buying & Using A Standup Paddleboard Pump

Three people paddleboarding down narrow waterway
The right pump will get you out on the water faster. | Photo: Courtesy Ontario Tourism

The best part of owning an inflatable standup paddleboard is the fact that you can throw your board in the trunk of a car, drive to the beach, pump up the board and be on the water without ever having to worry about tying your board to the roof.

The worst part of owning an inflatable paddleboard? That third step: using a paddleboard air pump to inflate the board from completely flat to rock hard. It’s one of the things that scares people away from buying inflatable paddleboards. The good news, however, is that modern  SUP pumps are designed to make the task a little bit easier. And, since there’s an industry standard on the inflator port, you can easily upgrade if the pump that came with your board isn’t getting the job done for you.

SUP pump basics

Without getting too technical, a SUP inflation pump is just that: an air inflator that’s similar to what you would use to pump up a bicycle tire. We’ll talk about electric pumps shortly, but nearly every inflatable paddleboard on the market today will come with a high-volume hand pump that looks a bit like a bicycle floor pump on steroids.

When you look at a pump you’ll see four main parts: the handle, the main cylinder, the feet and a detachable hose. Most pumps will have an air gauge built into the handle that will tell you how much pressure you’ve inflated your board to. Most good pumps will also have a “plug” of sorts that allows you to switch between high-volume inflating and high-pressure inflating. We’ll get into that in a moment. When it comes to SUP pumps, size does matter as a dual cylinder pump (where it looks like two silos instead of one) will allow you to get air into the board faster.

Three people paddleboarding down narrow waterway.
The right pump will get you out on the water faster. | Photo: Courtesy Ontario Tourism

Why recommended air pressure matters

Every inflatable board manufacturer will provide a recommended air volume which will be listed in PSI (pounds per square inch). This number will vary by brand, length and type of board, but will usually be in the 12 to 18 PSI range.

This is a critical number because it’s what the board manufacturer deems to be the ideal pressure you should pump your board to in order to have the most rigid and stable platform to stand on possible.

Think of the PSI recommendation in the same way you think of vehicle tires: the manufacturer has put lots of time and money into developing the product based on a very specific pressure parameter, so stick with what they’re suggesting. The board will perform much better if you do. Underinflate and the board will feel like you’re paddling a piece of soggy cardboard. Overinflate and you risk putting too much pressure on the seams and board construction.

One important note is that just because a board has a higher recommended pressure, doesn’t mean it’s guaranteed to be a more rigid ride. Many factors go into the rigidity of an inflatable board, and the wider the board often means the less pressure required.

The key point here is that accurately inflating your board to a particular PSI is important, so if your paddleboard pump doesn’t have an air gauge on it, it’s likely worth upgrading.

High volume vs. high pressure

As mentioned earlier, most air pumps for inflatable standup paddleboards will have a plug or switch that allows you to change from high-volume pumping to high-pressure.

When you’re manually inflating something as big as a SUP, having this feature will make life much easier and will cut down on pumping time dramatically. Think of it like a water hose: The high-volume setting is like a garden hose with no nozzle on it that allows a large amount of water to flow out quickly. The high-pressure setting is like when you cover the end of the hose with your thumb. Far less water is coming out of the hose, but you’re able to shoot it like a water gun.

Unlike a hose, however, where the amount of water flowing is controlled by a tap, when it comes to a manual SUP pump, you’re the tap. It’s your effort that fills the board.

As you start inflating the board, make sure your pump is on the high-volume setting. This will allow you to make quick work of getting lots of air into the paddleboard. As it fills up, the pumping action will start to get more difficult. At this point, switch it over to high-pressure, and you’ll notice that you won’t be adding as much air, but you’ll be able to hit the high pressure required with less effort.

How to inflate a standup paddleboard

Pump up a standup paddleboard once and you’ll be a pro because there’s not much to it. Here’s the process:

  1. Set your SUP on the ground face up and unroll it as much as you can. Don’t put your fins in yet.
  2. Make sure the release valve is not pushed in. This is a mistake everyone makes at least once. You’ll be able to fully inflate the board, but as soon as you go to release the hose, all the air will come shooting back out.
  3. Assemble the pump by threading the hose onto the handle and then twist the other end of the hose onto the valve, making sure it’s locked on tight.
  4. Put at least one foot on the pump feet to keep it stable and start pumping in the high-volume setting.
  5. When it starts to feel very difficult to add more air, put the SUP pump into high-pressure mode and finish pumping until you reach the recommended PSI.
  6. Remove the hose from the paddleboard and replace the valve cap.
  7. Install the fin(s) and leash and head to the water!

How long will it take?

When it comes to using a SUP inflation pump, the harder you work, the faster you’ll inflate the board. Of course, it also depends on how big the board is, and what type of pump you’re using. A large volume, dual chamber, dual cylinder pump is going to allow you to inflate the board in a much shorter amount of time.

In general, however, expect that it will take you somewhere between five and 10 minutes to inflate your board and another five minutes of prep time between getting the board out of the car, getting it unrolled, and then getting the board ready to go into the water. So if your group paddle starts at 10 a.m., expect to arrive 10 to 15 minutes before your friends if you’re the only one on an inflatable and you don’t want to be the reason the paddle starts late.

Electric

Not feeling the desire to get a workout before your workout by pumping up your inflatable SUP?

Electric paddleboard pumps are also a great option. Plug them into your vehicle’s 12-volt outlet, insert the hose into the paddleboard and turn on the switch. Some pumps will inflate your board in as little as one minute, and some allow you to preset the desired PSI so it pumps to exactly the level you want it.

The other benefit to electric pumps is that many have a deflate option, which will allow you to suck the air out of the board, making it easier to roll or fold to pack away after using it.

Will SUP pump X fit my inflatable paddleboard?

The vast majority of inflatable SUPs use a type of inflation insert known as a Halkey-Roberts valve. This refers to the technology where the valve allows air to go in, but not escape, unless you depress and lock the release valve in. This is what releases the air in the board rapidly, leading to the loud and sometimes alarming sound of air rushing out of your board post-paddle.

Paddleboard inflation pumps have fittings for the Halkey-Roberts system on their hoses, and don’t require any sort of adaptor. SUP-specific electric inflators also typically use this type of hose. More generic electric pumps may come with the adaptor, or you may need to buy an aftermarket piece.

What’s it going to cost me?

Fortunately if you’re buying an inflatable standup paddleboard, you’re likely going to get a quality pump included. But if you’re looking to upgrade to something a bit more beefy or that can help you inflate the board faster, you could spend anywhere between $50 and $150 for a manual pump and $75 to $300 for an electric pump.

Oops, I broke it

Considering they’re almost entirely plastic, the pumps that come with most inflatable boards are surprisingly durable. If anything is going to break, it’s likely going to be a hose, which is easily replaceable, or the gauge, which can be more of a challenge. A local outdoor or paddling gear shop can help you order replacement parts if needed.

When it comes to electric pumps, unless you have some mechanical expertise, disassembling them is discouraged. Most, however, are built to handle some abuse and come with good warranties.


Saying goodbye to a capeless canoe crusader

Bruce Hodgins was a believer that wicked hard canoe trips build wicked compassionate hearts. | Photo: Courtesy Hodgins Family

This is my second goodbye to my friend and mentor Bruce Hodgins, but sadly, this one is for keeps. The first was said in June of 1988 when Bruce was struggling to breathe. Word in the paddling community was his condition was serious, but there was a medical procedure to solve it. Like many lifesaving operations, it was not without dire risk.

So, when Bruce turned up at the Great Hall at Peterborough’s Trent University to a send-off dinner for the members of the Operation Raleigh Arctic Expedition, he was drawn, wan and decidedly out of breath. I remember saying so long with a hug and unable to stem the flow of tears, thinking this might be the last time I’d see him.

That was 31 years ago, and Bruce, who was a scant 57 years old at the time, was in his professional prime. He had established himself as a historian and author, and a professor at Trent University. He had distinguished himself as a leader in the paddling community as director of the canoe tripping camp Wanapitei, based in Temagami, Ontario. It was in this capacity he turned up at the Great Hall to wish the Operation Raleigh Canadian Arctic Expedition well.

This project was part of a four-year, around-the-world journey for science and service, roughly following Sir Walter Raleigh’s 1588 global circumnavigation. Its four-month Canadian phase included a canoe trip down the Kazan River, through what is now Nunavut. The aim was to do several scientific projects, including the first systematic archaeological survey of this northern river valley.

We had eight leaders from across Canada and 24 young participants from 16 different countries. All we had to do was teach them to paddle, negotiate whitewater, wilderness camp, get along with total strangers, survive in Arctic conditions and learn to gather benthic cores and conduct archaeological survey research too. Most of our participants had never done any of these things.

Bruce was one of the only people who didn’t wince when we told him what we were attempting. He was sure this was possible, worth doing and going to be a hell of an adventure. It would stretch everyone in ways we couldn’t imagine—particularly the expedition staff. Bruce embraced this kind of challenge. He knew wicked hard canoe trips build wicked compassionate hearts.

[ Plan your next canoe trip with the Paddling Trip Guide ]

As an activist, master paddler and scholar, Bruce was not neutral about anything. Sharing meeting tables with others as we built policies and teaching progressions for the Ontario Recreational Canoeing Association and Canoe Ontario back in the 1970s, I used to wait until he’d find a seat and then do my level best to distance myself. I was afraid of being “Bruced” at point-blank range.

Yes, that was the verb to describe what happened when Bruce got wound up and delivered a verbal tirade that could peel paint, cower dogs, and make grown people cry. Make no mistake—Bruce usually had a point. And he was often right. He couldn’t help his uncommon passion. I learned to love him for not leaving anyone standing around, wondering where he stood.

Bruce’s genius was to bring people together in common cause. Whether a square dance, a seminar, or beloved book projects, such as Canoeing North Into the Unknown and Nastawgan: The Canadian North by Canoe and Snowshoe. The zenith of Bruce’s vision for what could be when like-minded souls collaborate is the Canadian Canoe Museum. This remarkable collection of canoes would not have come to Peterborough from woods in Haliburton Country, nor would it have found the nourishment it needed to survive and grow without Bruce as part of the original team.

Bruce and the Canadian Canoe Museum founder Kirk Wipper knew each other through the Ontario Camping Association. As fellow camp directors, they had a history enriched and enlivened by their mutual love of canoes, history and wilderness. They shared the belief that to understand the geographic and cultural amalgam of Canada, one first needed to understand it is a nation of canoes. Bruce knew this in his soul.

Bruce passed away at the end of August, at 88 years old. Happily, he spent his last weeks at his beloved Camp Wanapitei. His legacy lives on in those who knew him, as well as Trent University and lore of Camp Wanpitei and, of course, in the ongoing evolution of the Canadian Canoe Museum.

So long, my friend. A parting cup to you, until we meet again.

Bruce Hodgins was a believer that wicked hard canoe trips build wicked compassionate hearts. | Featured photo: Courtesy Hodgins Family

Whitewater Rafting In The Poconos: Best Trips On The Delaware & Lehigh Rivers

Rushing river
The Poconos are what whitewater dreams are made of. | Photo: Nicholas A. Tonelli

The Pocono Mountains provide an outdoor haven to adventurers in the New York, Pennsylvania and New Jersey areas. Located mainly in Pennsylvania, but covering counties in all three states, the Poconos are home to the Delaware Water Gap National Recreation Area, among many other natural attractions.

With its sprawling floodplains, this area abounds with wildlife and bird watching opportunities, if you can remember to keep an eye out while you’re taking in the beautiful sights along the rushing rivers in the area.

Rushing river
The Poconos are what whitewater dreams are made of. | Photo: Nicholas A. Tonelli

The Poconos have two main river systems to provide you an adrenaline-filled whitewater rafting day: the Delaware River and the Lehigh River. The Delaware is a major river system in the Eastern U.S. and begins as two branches in the Catskill Mountains—the western at Mount Jefferson and the eastern at Grand Gorge. The branches meet in Hancock, New York and flows down to Delaware Bay on the Atlantic Ocean.

Whitewater rafting on the Delaware River in the Poconos is not an experience to miss—with low, rolling mountains, wide sections of river that narrow into heart-pounding rapids, and forests and flatlands that are home to many animals, it’s hard to go wrong in this spot.

A tributary of the Delaware, the Lehigh River is not to be considered second-rate. In fact, part of the Lehigh is designated a Pennsylvania Scenic River. And with plenty of rapids, it offers incredible whitewater rafting experiences.


Best whitewater rafting in the Poconos

Now that you have the lay of the land, let’s talk about what each of these spectacular rivers can provide you on your adventure whitewater rafting in the Poconos.

Delaware River

The Delaware River is the boundary between New York and Pennsylvania, and tour companies that operate on the Delaware are located on both sides of the river. The section of the Delaware River that runs through the Poconos provides class I to class III rapids. The Delaware has great options for paddlers of all skill levels, and there are numerous calm spots that make great picnic areas.

For more intense rapids, check out the Lackawaxen whitewater run. Lackawaxen is a popular choice because it runs when there are dam releases from the hydro-electric dam on Lake Wallenpaupack. This is a good option for visitors to the area who are looking for a whitewater trip in the Poconos that isn’t dependent on natural water flow.

Lander’s River Trips has a great selection of whitewater trips on the Delaware River for all skill levels. Their website is also a good resource for whitewater rafting in the Poconos in general—check out the river map on their website or the Google Maps version.

Tours

Lehigh River

The section of the Lehigh River that stretches through the Pocono Mountains includes class I to class III rapids. Families, or those looking for a more relaxing float day, will find many options available on the Lehigh. If you’re looking for more adventure, book on a dam release day! The Francis E. Walter Dam is located in Bear Creek Township, Pennsylvania, and is an embankment dam that governs water flow on the Lehigh. Similar to the Delaware, the dam release days allow for reliably higher water flow, giving more experienced or adventurous paddlers a bit of an extra rush.

Pocono Whitewater is a great tour company in the area that offers a wide selection of unique whitewater trips for seasoned paddlers and families. Check out their Pirate Rafting tour for an especially memorable family trip whitewater rafting in the Poconos. Keep your camera handy for this pirate-themed whitewater tour—there’s even a pirate ship raft! With a riverside barbecue lunch included, this is a perfect day of family-friendly rafting on the Lehigh.

If you like the family-style idea but can’t fit the Pirate Rafting tour into your schedule, have a look at Pocono Whitewater’s Family Tours—another exciting option that will suit all skill levels, and paddlers as young as four.

Take advantage of one of the most beautiful state parks while you’re in the area, and experience some heart-pounding whitewater in Lehigh Gorge State Park. This spot is home to awe-inspiring 900-foot canyons, roaring class III whitewater, and gorgeous surrounding scenery. Your best option for seasoned guides in this area is Jim Thorpe River Adventures.

Tours


What time of year to go

Head to the Poconos between May and Labor Day weekend for whitewater rafting season. This is a very popular tourist spot, in addition to providing wilderness adventures within easy driving distance for many residents of New York, New Jersey and Pennsylvania, so plan your trip accordingly if you’d like to stay away from the crowds. Most whitewater rafting companies in the Poconos have weekday deals, so this is a great option if your timeline allows.


What do you wear whitewater rafting in the Poconos?

Whitewater rafting tours don’t require any specialized personal gear. While you can bring your own PFD or paddle if your tour company allows, they’ll provide all the gear you need. Wear athletic clothes that are comfortable and allow for movement and you’ll be set.

Depending on the time of year you’re rafting, you may need to wear layers, a long-sleeve shirt or pants. As with any paddling activities, sticking to wool or other non-cotton fabrics is best. Cotton takes longer to dry than other fabrics and doesn’t keep you as warm when it gets damp. As a base layer, outdoor clothing with some stretch will be the most comfortable for you—think hiking shorts, swim trunks or board shorts, and tops that will fit well under a PFD.

For trips that involve a pickup and ride back after you’re out of the river, consider wearing a bathing suit under your over layer—you’ll be happier and more comfortable if you dry out faster! If you have longer hair, pull it back to ensure it’s not in your face when you get wet, and bring an extra hair tie just in case. For footwear, always wear closed-toed shoes that buckle or tie on. You don’t want to catch a toe on a stick or have your foot cut by a rock. You can wear neoprene water shoes or sandals with a covered toe. If you don’t have anything like that, runners will be fine as long as you dry them out properly after.


6 Of The Best Rivers For Whitewater Rafting In Tennessee

People in yellow raft raising their paddles in the air
Rafting is a great bonding experience for families, friends—and even strangers. | Photo: Razvan Orendovici

With the Great Smoky Mountains and the Appalachian waterway, Tennessee has no shortage of whitewater rafting for all experience levels. There are both Olympic-tested sections of river for those looking for all the thrills (and possibly spills) and calm stretches that will let you relax and take in the natural beauty of Tennessee.

Best whitewater rafting in Tennessee

East Tennessee

One of the gems of whitewater rafting in Eastern Tennessee is the Ocoee River. You might also hear the Ocoee called the Toccoa River—they are technically the same river, but the portion that runs through Georgia is referred to as the Toccoa, while the portion that runs through Tennessee is the Ocoee. The entire river is 93 miles long and is set in the beautiful landscape of the Appalachian Mountains.

Benton, TN boasts a few options for whitewater rafting trips. OAR has a varied selection of rafting options, with two different half-day sections of the Ocoee, and a full-day trip that combines the two sections. The middle section of the Ocoee includes class III and IV rapids, making for a great day of adventure.

Right on the North Carolina border, you’ll find Erwin, TN—home to three exciting options for whitewater rafting in Eastern Tennessee. The Watauga River, Nolichucky River and Wilson Creek boast scenic and adventurous rafting, as well as more beginner- and family-friendly sections of river.

OAR

    • Middle Ocoee: $39.50 per person
    • Upper Ocoee: $45 per person
    • Full River: $91 per person
    • Class V Ocoee: $54 per person

Wahoo’s Adventures

    • Wautaga River Rafting: $42 per person
    • Nolichucky River Rafting: $75 per person
    • Wilson Creek Extreme Rafting: $125 per person

Ducktown

Further east on the Ocoee from Benton is Ducktown, TN. Ducktown affords whitewater rafting and adventure lovers an array of activities including hiking, rock climbing and ziplining. The Upper Ocoee section of the river was showcased in the 1996 Olympics and is home to world-class rapids.

Rafting the Upper Ocoee will give you half-a-mile of class IV rapids in the Olympic section. It’s not all about the Ocoee, though! Whitewater rafting on the Pigeon River in Ducktown is a great option if you’re in Eastern Tennessee. There are some class III and IV rapid sets, but if you’re out with younger paddlers, the Lower Duck River is a fun but family-friendly option. Wildwater Rafting has a minimum age of 4 on this stretch of river, so bring your little ones!

Wildwater Rafting

    • Middle Ocoee Rafting: $49.95 per person
    • Upper Ocoee Rafting: $49.95 per person
    • Ocoee Upper and Middle Trip: $99.95 per person
    • Upper Pigeon Rafting: $39.95 per person
    • Lower Pigeon Rafting: $34.95 per person

Ocoee Rafting

    • Middle Ocoee: $40 to $49 per person
    • Upper Ocoee: $49 per person
    • Full River: $85 to $90 per person

Carolina Ocoee

    • Middle Ocoee: $35 to $49 per person
    • Upper Ocoee: $51 per person
    • River Combo: $92 to $99 per person

Cleveland

Whitewater rafting in Cleveland, TN is centered around the Ocoee River. If you’re in the Cleveland area seeking out a whitewater adventure, check out:

Big Frog Mountain Outfitters

    • Middle Ocoee: $35 to $38 per person
    • Full Ocoee: $85 per person

Quest Expeditions Ocoee River

    • Middle Ocoee: $36 per person
    • Upper Ocoee: $49 per person
    • Full River: $90 per person

OAR

    • Middle Ocoee: $39.50 per person
    • Upper Ocoee: $45 per person
    • Full River: $91 per person
    • Class V Ocoee: $54 per person
People in a yellow raft with their paddles raised in the air
Rafting is a great bonding experience for families, friends—and even strangers. | Photo: Razvan Orendovici

Pigeon Forge

In Pigeon Forge, TN, you can whitewater raft the scenic and engaging Upper Pigeon River. With class III and IV rapids, this area provides excitement on the river for beginner to experienced paddlers looking for a whitewater rafting adventure in Tennessee. Pigeon Forge is about an hour’s drive from Knoxville, so there’s plenty of entertainment off the river close by!

Outdoor Rafting Adventures

    • Upper Pigeon River: $44.95 per person

Hartford

Hartford is a little town with a roaring whitewater rafting scene. A perfect spot to set off on a whitewater day, Hartford has a number of rafting companies that run on the Pigeon River. For an even more exciting river day, check out mini raft tours! If you’re an angler, 5 Rivers also offers fishing tours in the Hartford area.

Rapids in the Hartford area are class I to class IV, and there are plenty of more relaxed floats for families and those looking for a less adrenaline-filled day.

5 Rivers

    • Upper Pigeon: $39.99 per person
    • Lower Pigeon: $39.99 per person
    • High Adventure Trip: $49.99 per person
    • Combo Trip: $59.99 per person

Nantahala Outdoor Center

    • Upper Pigeon Gorge: From $40 per person
    • Lower Pigeon Gorge: Youth from $28, adults from $35

Big Bear Rafting

    • Upper Pigeon: $39.95 to $45.95
    • Lower Pigeon: $31.95 for youth, $39.95 for adults

Smoky Mountain River Rat

    • Lower Pigeon: $32.95 +tax per person
    • Upper Pigeon: $45.95 +tax per person
    • Xtreme Upper Pigeon Adventure: $59.95 +tax per person

Gatlinburg & Smoky Mountains

The Great Smoky Mountains are famously beautiful and serene with endless natural features to be explored. An estimated 200 to 300 million years old, the Smoky Mountains have long been cultivating an impressive display of biodiversity. Flora and fauna that are mainly found in the southern states thrive in the lowlands of the Smokies, and species that are heartier in the northern states can be found in the higher elevations. If you want a preview of the real thing, check out the webcams the National Park Service streams live!

Gatlinburg is a popular place to begin whitewater rafting adventures in the Great Smoky Mountains. Most tours in the park are either in the class III and IV range, or are much quieter class I trips. Gatlinburg also provides many other activities to create an adventure-filled trip— check out kayaking, rock climbing, hiking and ziplining.

Rafting in the Smokies

    • Upper Pigeon: $42 per person
    • Lower Pigeon: $35 per person

Smoky Mountain Outdoors

    • Upper Pigeon: $46.95 per person
    • Lower Pigeon: $41.95 per person
    • Extreme Upper Pigeon: $99.95 per person

Nantahala Outdoor Center

    • Upper Pigeon: From $40 per person
    • Lower Pigeon: Youth from $28, adults from $35


Log chute beside a stream in the forest

Best time to whitewater raft in Tennessee

Tennessee has a fairly lengthy whitewater season; with some exceptions, April to September is a great window. With average temperatures of 30 degrees Fahrenheit in January and 90 degrees Fahrenheit in July, there’s a time in there to suit most peoples’ preferred travel style.

Aside from ambient temperature, water levels are the other main factor in your whitewater experience. The Ocoee River is one of Tennessee’s main whitewater rafting spots, and is more predictable than other river systems because it is a dam-controlled waterway. Because of this, the Ocoee has the same level of water flow all year. If you’re looking to avoid the crowds and have some flexibility in your timing, planning a whitewater rafting trip on weekdays or Sundays will be your best bet.

The Smoky Mountains boast the title of the most visited national park in the United States, so it’s wise to plan your timing well. Luckily, the season in the Smokies is longer than other whitewater rafting destinations in Tennessee. Visit My Smokies recommends booking rafting tours there from February to November.


What to wear whitewater rafting in Tennessee

Now you’ve got the scoop on where the best places to whitewater raft in Tennessee are, but what do you wear when you go?

Whitewater rafting tours don’t require any specialized personal gear. While you can bring your own PFD or paddle if your tour company allows, they’ll provide all the gear you need. Wear athletic clothes that are comfortable and allow for movement and you’ll be set.

Depending on the time of year you’re rafting, you may need to wear layers, a long-sleeve shirt or pants. As with any paddling activities, sticking to wool or other non-cotton fabrics is best. Cotton takes longer to dry than other fabrics and doesn’t keep you as warm when it gets damp. As a base layer, outdoor clothing with some stretch will be the most comfortable for you—think hiking shorts, swim trunks or board shorts, and tops that will fit well under a PFD.

For trips that involve a pickup and ride back after you’re out of the river, consider wearing a bathing suit under your over layer—you’ll be happier and more comfortable if you dry out faster! If you have longer hair, pull it back to ensure it’s not in your face when you get wet, and bring an extra hair tie just in case. For footwear, always wear closed-toed shoes that buckle or tie on. You don’t want to catch a toe on a stick or have your foot cut by a rock. You can wear neoprene water shoes or sandals with a covered toe. If you don’t have anything like that, runners will be fine as long as you dry them out properly after.

Your whitewater rafting trip in Tennessee is going to be amazing, so enjoy every minute of your adventure! Whether you’re running go-or-no lines in a mini raft on the Ocoee or Upper Pigeon, or having a more laid-back float day, Tennessee has all kinds of options for you to create a memorable and exciting rafting experience.


How To Plan Your Trip Of a Lifetime Rafting The Grand Canyon

River wraps around a rock formation in the Grand Canyon
Horseshoe Bend is an iconic landmark in the Grand Canyon.

Few places in the United States are as iconic as the Grand Canyon. Every year, millions of visitors make their way here, some to simply take in the legendary expanse, some to venture into the canyon on foot, some to explore from the back of a mule, and some—some to paddle.

Rafting, kayaking or canoeing the Grand Canyon is a trip of a lifetime for many due to the incredible array of wildlife, fascinatingly beautiful geology, and exciting rapids the area has on offer. Not to mention the exclusivity of a trip like this. This is an incredibly popular place, so be ready to book more than a year in advance—if you secure a spot on a trip at all.

Horseshoe Bend, Grand Canyon
Horseshoe Bend is an iconic landmark in the Grand Canyon.

Of the 1,450 miles of the Colorado River, 277 miles flow through the Grand Canyon. There are many different trip options available to paddlers, but all of these will fall under the categories of commercial and non-commercial. Commercial trips are those that are run by designated tour guide companies. There are only a certain number of companies that are authorized to operate river tours through the Grand Canyon. This is mainly to ensure the area doesn’t become overrun with commercial activity in a way that threatens the preservation of the natural landscape and ecology.

Noncommercial trips refer to those that are not run through a guiding company, and are organized by private individuals who have entered the permit lottery and have won a group permit. If you’re looking at this option, be prepared for a potentially long wait, or a happy surprise! There are people who have been entering the permit lottery to raft the Grand Canyon for years and have yet to win, and some lucky ducks who have only entered once before getting their permit for the adventure of a lifetime. Be ready for your trip, but also be ready to be patient!

This guide will take you through everything you need to know for your Grand Canyon rafting trip.

General questions

How many people raft the Grand Canyon?

According to Grand Canyon National Park Trips, “more than 20,000 people float through the canyon every year.”

In 2019, there were 463 permits made available for noncommercial trips running in 2020. There are 462 permits for 2021.

Grand Canyon National Park tracks traffic on the Colorado River by user days, not number of people. In 2019, the section from Lees Ferry to Diamond Creek saw 114,337 commercial days and 107,679 noncommercial. The section from Diamond Creek to Pearce Ferry saw 15,178 noncommercial days.

The annual weighted lotteries for Grand Canyon rafting permits allow approximately 20,000 people to experience this awe-inspiring trip each year.

How long does it take to raft the entire Grand Canyon?

Most commercial tours of the full Grand Canyon last around 13 days; however, some may be longer depending on what other activities are included in the trip. Noncommercial river trips are given permits for 12 to 25 days.

The Grand Canyon River Outfitters Association has the full list of guide companies.

Yellow raft splashing through rapids
Take a tour or go self-guided—either way, prepare for the trip of a lifetime.

How dangerous is rafting the Grand Canyon?

The Colorado River through the Grand Canyon is technical water. Guides that are authorized to run river trips here have many years of experience, both on this stretch of river and others. Commercial trips ensure that an experienced guide is with your group at all times to educate and monitor on- and off-water safety practices. They also carry communication devices with them should the need for emergency attention occur.

If you’re embarking on a noncommercial rafting trip on the Grand Canyon, the best thing you can do to ensure your safety is learn river safety rules for both on- and off-water. About 40% of the accidents that occur while running the Grand Canyon are off-water, so make sure you’re informed on these rules as well! The best way to ensure your rafting trip on the Colorado is successful is to gain experience beforehand. There are many places across North America where you can get your feet wet and learn the basics before you make this trip of a lifetime. Generally, the minimum wait for a Grand Canyon run will be a year—plenty of time for you to hit the whitewater in other beautiful spots!

Best time to raft the Grand Canyon

The commercial rafting season in the Grand Canyon opens in April and closes in October, but noncommercial trips run year-round.

The “best time to go” really depends on what you’re looking for. If you’re after the best whitewater, you’re better to go in the summer months. The flow rate of the Colorado River here is different from other areas in that it doesn’t rely on snowmelt and runoff for big water in the spring months. This section of river is dam-controlled, and the highest need for water in the Southwest is during the summer months for air-conditioning and irrigation for agriculture. This means that the biggest whitewater through the Grand Canyon is during the hottest summer months.

However, if you want the best chance of securing a permit for a noncommercial trip, the best time to go is in the winter as these are the less-coveted trips.

[ Paddling Trip Guide: View all rafting trips in the United States ]


Commercial river trips

If you’re not an experienced paddler, or at minimum a confident beginner with a few trips under your belt, a commercial rafting trip in the Grand Canyon will be your safest and most enjoyable option. A guided trip will let you fully take in your adventure of a lifetime, soak up the sights of towering canyon walls and appreciate the powerful Colorado River without anxiety about your river skills.

Best Grand Canyon rafting trips

Half-day

If you’re here for a quick stop, but want to see as much as you can, a half-day trip on a motorized raft will be just the thing.

Tours with Wilderness River Adventures will take you to Glen Canyon Dam, Petroglyph Beach, Horseshoe Bend, Lees Ferry and Vermillion Cliffs for $78.39 to $88.85 per person.

Advantage Grand Canyon also has a half-day option at $78.39 to $88.95 per person.

One-day

Unfortunately, there aren’t any one-day oar rafting trips through the Grand Canyon. There is an option for a one-day, self-guided kayak trip from Advantage Grand Canyon. The cost is $75 per person.

Rivers & Oceans offers a one-day, motorized rafting trip through class II to III rapids over 35 miles of river. Trips launch from Diamond Creek and cost $399 per person.

Three-day

For a three-day oar rafting trip in the Grand Canyon, the guiding company Advantage Grand Canyon has a great tour on offer. Their three- to five- day options go from Whitmore Landing or Mile 188 to Lake Mead and range from $1,247 to $2,315.

Four-day

Paddling trips on this section of the Colorado River generally fall in the one- to three-day or 6+ day range. If you’re interested in a motorized raft that guests don’t paddle, there are some four-day options available from guiding companies like Canyoneers.

Seven-day

Canyoneers guiding company offers week-long tours in the Upper Grand Canyon for $2,325 per person. These tours require a fairly high fitness level as you’ll be paddling throughout the days, and hiking out of the canyon for a full day.

Two-week

The longest trip that tour companies offer is two weeks. Raft Arizona offers 13-day rafting trips in the Grand Canyon for those 12 years old and over for $4,145. The full canyon tours are spectacular, with views each day that are unforgettable. If you can take the time, you won’t regret spending your hard-earned vacation time in this stunning place for two weeks!

Luxury Grand Canyon rafting trips

Luxury or all-inclusive rafting trips are a great option for seeing the Grand Canyon from the river in style. No roughing it here—your guides are boatmen that will do everything from loading and steering your raft, to cooking you first-class hot meals. Grand Canyon Expeditions offers a 14-day trip with transportation to and from Las Vegas included, luxury meals and sleeping accommodations, and comfortable rafts starting at $4,179. Bump up your experience even more by adding a helicopter trip to deliver you to the start of your trip!

Family whitewater rafting in the Grand Canyon

Planning a family rafting trip through the Grand Canyon is about customization and knowing your group. The elderly, those with injuries and special needs, and children under 8 are generally better off on trips under five days. Children over 12 could thrive and have the experience of a lifetime on some of the longer trips. You know your family best, so plan ahead and try to find a baseline for fitness, attitude and overall enthusiasm for a trip like this before committing to a timeline.

Grand Canyon rafting companies

Yellow rafts tied off on Colorado River
There are so many tour options on offer, it’s simple to find one that works for your group.

How much does a Grand Canyon rafting trip cost?

Trip costs vary vastly when you’re considering rafting in the Grand Canyon, from approximately $100 USD per person to over $4,000 USD per person. Your trip costs will vary mostly by length of time, with more luxury trip options to add on.

Is Upper or Lower Grand Canyon rafting better?

Popular opinion from those that are fortunate enough to have done both the Upper and Lower sections of the Colorado River through the Grand Canyon is that both sections are spectacular, and you can’t make a bad choice. Angel Bright Trail is a halfway landmark, and most guides split the river into sections at this spot. The Upper starts at Lee’s Ferry and ends at river mile 89, and the lower section starts at mile 89 and ends at mile 225.

How do you prepare for a rafting trip to the Grand Canyon?

Packing for a commercial trip might be simpler than you think. Essentially, pack for an active vacation in the sun. You can leave snazzy dinner clothes at home; think camping clothes, toiletries, cameras and GoPros. Most overnight trips will provide sleeping bags, tents and similar larger gear. Basically, if it would be tricky for you to take on a flight with you, it’s likely provided. Arizona River Runners has a more comprehensive list on their website, as do most tour companies.


Grand Canyon noncommercial river trips

How do I get a permit to raft the Grand Canyon?

The process to obtain a permit to raft the Grand Canyon can seem a little daunting. The volume of applications is so great each year that there is little incentive for NPS to make it too easy—if you want it, you’ll have to work for it! A little bit, anyways; it’s not too complicated once you get the lay of the land, so to speak.

First, you’ll need to create an account for lottery submissions through the National Park Service—you can do that here. Then you’ll wait for the release dates for the following year’s dates and trip sizes. This isn’t publicized beforehand, so you have to wait for the list to go live to find out what the available options are. You pay $25 USD once each lottery year, and that $25 allows you to apply for any lottery you want throughout that year. Then you’ll apply individually for each lottery as they open, and cross your fingers that you’re picked!

How does the Grand Canyon lottery work?

The lottery is called a weighted lottery. This means that when you create an account, you start with five points. Each year you apply and do not get selected, you gain an additional point. If you are chosen one year, the following year you’ll automatically go back down to one point. The purpose of this is to increase your odds of winning the Grand Canyon lottery the more times you enter without winning.

I got a permit—now what?

Success! You won a permit—what’s next? You’ll have to pay a trip deposit first thing. Each year, NPS will designate a certain range of trips, each requiring a different deposit. The definition of a “small trip” varies each year, but the current deposit is $200. “Regular trips” are similarly malleable year to year, but the deposit on these is $400.

The dates, length and number of people are the variables that go into the trip classifications. You’ll pay your trip deposit well in advance of your trip date, and it’s non-refundable. The next payment requirement is $100 per person—this is the balance of your permit fee and is due a minimum 90 days before your launch date.

For more resources on this part, Camping By Kayak is a privately run blog that has great information.

What do you need for rafting the Grand Canyon?

Non-commercial rafting, or private, trips on the Grand Canyon require you either have someone leading your group, or be someone who has previous experience gearing up for multi-day rafting or kayaking trips. This isn’t something you should read up on online and attempt with no experience. Within the U.S. and Canada, most airlines won’t accept kayaks or canoes, so if you want to bring your own, you’ll have to organize a private cargo shipment for your boat and gear. Costs for this vary enormously based on your location, and the size and weight of what you want to ship. Unless you have a very compelling reason to ship your gear, renting will be your best bet. Look at rental companies out of Flagstaff, AZ or Las Vegas, NV. Many of these companies will also offer a shuttle service.

Whether you’re going on a guided tour or a non-commercial rafting trip in the Grand Canyon, you’re in for a magical experience that you, and everyone you’re with, will never forget!

Kayaking In Colorado: How To Plan A Trip To This Whitewater Paradise

Rippling river through woods with mountains in background
Head to the Animas River to experience some whitewater kayaking in Colorado. | Photo: adifferentbrian

Did you know there are eight major river basins whose headwaters are in Colorado? The state is rich in natural gifts, from dense forests to rushing whitewater to towering cliff faces. Colorado is an outdoor playground. If you’re looking for the best kayaking in Colorado, you don’t have to look far.

Best kayaking in Colorado

Colorado Springs

Colorado Springs is about a one-hour and 45-minute drive from Central Denver. If you’re planning a few days in the area and want to rent a kayak from the Denver metro area, there are lots of companies to choose from. Find some adventure on the North or South Catamount Reservoirs, or Eleven Mile Reservoir near Colorado Springs.

Mountains and forest as background to a lake
Peaks over the South Catamount Reservoir. | Photo: Ethan Beute

About two hours southwest of Colorado Springs by car, you’ll find the Arkansas Headwaters Recreation Area. This is one of the most exciting and popular whitewater areas in Colorado, with rapids that are accessible for beginner to expert paddlers in most conditions. This is a popular spot, especially on summer weekends, so plan accordingly if you can.

Kayak rentals

Denver

Denver has a great selection of paddlesports outfitters in the city, so you can gear up and hit the road to one of Colorado’s many great kayaking destinations.

Just outside of Denver you’ll find the South Platte River—this is a very urban section of whitewater, making it as accessible as it is beautiful. With Confluence Kayaks close by to get all your rental gear from, you can’t go wrong with a day trip here.

Just over two and a half hours’ driving time out of Denver is Granite. Granite has some excellent whitewater kayaking on the Arkansas River, ranging from class I to IV rapids. American Whitewater says this stretch of the Arkansas is “widely considered the best class IV run in the state of Colorado.”

Kayak rentals

[ Paddling Trip Guide: View all kayaking trips in the United States ]

Aspen

Options are the name of the game if you’re looking for kayaking in Aspen. You have the mighty Colorado River, Roaring Fork River and the Arkansas River to choose from.

There are lots of options for differing skill levels here. If you are an adventurous beginner, consider a guided inflatable kayak trip on Roaring Forks. Inflatable kayaks, or “duckies,” are a great option for beginners and paddlers looking to build confidence.

Inflatable kayaks are popular in this area, and you’ll find most rental companies offer both tours and day rentals for inflatable kayaks.

Kayak rentals

Guided trips & lessons

Durango

Head out on the Animas River in Durango for some unforgettable kayaking in Colorado. Rentals in this area are more likely to be inflatable kayaks, as are the boats used by guide companies. If you’re looking for a whitewater kayak, you’ll have to rent outside of Durango.

Rippling river with mountains in background
The Animas River outside of Durango, Colorado. | Photo: adifferentbrian

Several tour companies in Durango offer the option of taking an inflatable kayak alongside the full size rafts, so you can get a whitewater kayaking experience while others in your group ride the rapids in a raft.

Kayak rentals

Guided trips and lessons

Boulder

If you’re more in the intermediate class of paddler, check out Boulder Creek in the late spring. When runoff is high, this isn’t a beginner-friendly time, but if you’re a more seasoned whitewater paddler, hit the river here. Eben G. Fine Park in Boulder also boasts a 20-slalom-gate course where you can work on technique and get some river time in.

There are several rivers to choose from for a whitewater kayaking day near Boulder. Clear Creek, Cache La Poudre and Boulder Creek  will set you up for some of the best kayaking in Colorado.

There are several tour companies in the area that specialize in package tours, canoeing and rafting experiences.

Kayak rentals

Guided trips and lessons


Lakes to kayak in Colorado

Evergreen Lake

Near Denver and looking for a pristine Colorado lake kayaking experience? Evergreen Lake won’t disappoint. With a gorgeous log lakehouse, boat rentals, golfing, restaurants and endless scenery to relax your senses, this is an ideal spot for a getaway that isn’t a long drive from Denver.

You can rent kayaks directly from Evergreen Lake House.

Navajo Lake

Navajo Reservoir spans the Colorado-New Mexico border and is an incredibly beautiful place to kayak in Colorado. Calm, blue water meets land that leans toward desert but hasn’t yet lost the evergreen trees of the mountains to the north. The reservoir is 35 miles long and offers kayakers plenty of room to play.

This is a great spot to set up a base camp for adventures in Southern Colorado. Slightly less than an hour’s drive from Durango, Navajo State Park offers campgrounds that are open year-round. If you’re an angler, you can expect to catch crappie, largemouth and smallmouth bass, northern pike, trout, bluegill and catfish in the reservoir.


Colorado kayak camping trips

Colorado has great kayak camping opportunities, and you should absolutely consider this option if your timeline allows. A few routes to consider would be:

Arkansas River

Take a trip down the Arkansas River and stay at one of the many campgrounds operated by the Arkansas Headwaters Recreation Area. Don’t want to book at an established campground? Dispersed camping is also an option. You can read more about how to find a place to camp and the rules to follow here.

[ Also read: How To Go Kayak Camping ]


Colorado kayak laws

In Colorado, manually propelled boats do not need to be registered with Colorado Parks and Wildlife. That said, all canoes, kayaks, paddleboards and non-motorized rafts must be marked with the owner’s name and current address.

You also need to make sure to have one Coast Guard-approved PFD for each person on board at all times. If your canoe, kayak or paddleboard is 16 feet long or more, you must also carry one Type IV throwable flotation device.

All vessels are required to display navigation lights between sunset and sunrise, as well as during times of restricted visibility.

All vessels less than 40 feet in length, except hand-propelled vessels when on whitewater, must have on board a sound-producing device for signaling.


4 Ways Of Treating Water In the Backcountry To Make It Safe To Drink

Person scooping up water using a green cup | Photo by Jens Johnsson from Pexels
Photo by Jens Johnsson from Pexels

Humans don’t actually need that much to survive: food, water and shelter. You can even skip food and shelter for a few days—but you can’t live long without water. So when you’re out in the backcountry, having a reliable water source is essential. Yes, I suppose you could drink water straight from a stream, but I tried that once—the next two days I suffered the worst stomach cramps and stinkiest gas of my life. Never again. Ever since then, I’ve made sure to filter my water, and I’ve had a lot more fun in the woods!

Why it’s a good idea to treat your drinking water

Drinking water from a stream is an unnecessary risk. Want to know why? There’s really only one reason: it could make you sick. Who knows what’s upstream? There could be a beaver living up there and that clear water you’re looking at could be full of its fecal matter. There could be a dead deer. You simply don’t know what’s in there.

This risk goes beyond avoiding drinking from water sources close to farms where runoff could occur, or from obviously polluted lakes. Almost every body of water is full of contaminants. Protozoa, bacteria and viruses are all the things you want to avoid putting into your body.

So what do those nasty little things do?

Protozoa

Protozoa are the largest pathogenic microorganisms, measuring in at one micron (one-thousandth of a millimeter) or more. Ingesting them causes things like giardiasis. Commonly known as beaver fever, the Coles Notes go like this: you don’t want it. Ingesting the giardia parasite can cause diarrhea, abdominal pain, nausea, etc. The complications from something like beaver fever can go on for months or even years if it becomes a chronic infection.

Bacteria

Bacteria are ubiquitous in most bodies of water and can generally be consumed without harm. The odd few, however, trigger diarrhea and dysentery. Most measure about one micron in size, though some particularly dangerous ones, like E. coli, are smaller.

Viruses

Viruses—which can be smaller than 0.1 microns in size—are less of a concern in North America. Polio is an example of a virus that can come from untreated water. They’re more of a concern in developing countries, but certainly nothing you want to mess with.

In conclusion? You don’t want any of these things in your body. Best to clean your water.

Ways to treat water

Making water potable in the backcountry is an essential skill, but there are many ways to do it. Things to take into account are cost of the equipment, speed at which water can be cleaned, the resulting flavor of the water, maintenance of the device, and what the treatment method is effective against.

Boiling

Tried and true, boiling water is a guaranteed way to kill any “bugs” in your water—meaning, it is effective against protozoa, bacteria and viruses. In my mind this is a last resort—it’s time consuming, fuel consuming and it still may taste awful. The guidelines have changed over the years, but these days they suggest boiling for at least one minute (three minutes above 6,500 feet altitude). It’s a solid backup plan if your filter quits working or you run out of chemicals. There is no gear required to do this other than a fire and a pot, so it’s easy on the wallet.

Chemicals

Aquamira - Chlorine Dioxide Water Treatment Two Part Liquid (1 oz Droppers Bottles)
Aquamira – Chlorine Dioxide Water Treatment Two Part Liquid (1 oz Droppers Bottles)

Adding chemicals to your water is another classic way of treating water in the backcountry. Common chemicals include bleach, chlorine, iodine and chlorine dioxide. All of these are highly effective in killing viruses and bacteria, but there are varying claims about their effectiveness on protozoa.

The official position of the Centers for Disease Control and Prevention (CDC) is that iodine, chlorine and bleach are not effective against protozoa such as cryptosporidium and have a low to moderate effectiveness against giardia.

Chlorine dioxide is unstable and is prepared by mixing two chemicals when needed. Some claim it is effective against protozoa, including giardia and cryptosporidium. However, the CDC maintains that it has a low to moderate effectiveness against cryptosporidium and a high effectiveness against giardia.

BUY ON AMAZON

It should be noted that bleach and chlorine destroy intestinal microorganisms known to aid in digestion, so they aren’t a great long-term solution. As well, iodine in particular (but possibly all chemical treatments) should not be ingested by pregnant women. Pregnant women, (parents on behalf of) young children and those with preexisting health conditions should consult a doctor before using chemicals to treat their water.

The effectiveness of chemical treatments is dependent on many factors, including the temperature of the water, the concentration of the chemical, the cloudiness of the water, the pH level of the water, and how long the chemical is given to treat the water before being ingested. For these reasons, the CDC recommends coupling any chemical treatment with water filtration to ensure full protection from viruses, bacteria and protozoa.

Chemicals do provide a cheap, simple and lightweight solution to water treatment. Make sure to closely follow the manufacturer’s instructions on how much to use and how long to wait before drinking the treated water. Another downside to using chemicals is that they can sometimes make the water taste undesirable. This can often be remedied by adding flavored powder to mask the taste. However, on a hot day you might not care very much about how the water tastes!

SteriPen Aqua UV Water Purifier

UV light

New to the world of backcountry travel is the UV light filter. Much like UV filters used in homes with wells and septic systems, UV light disrupts the DNA of bacteria, viruses and protozoa making them harmless. Generally, you dunk the light in your cup or bottle of water, turn on the light and let it run for the suggested amount of time (generally about 90 seconds).

Of course, the downside to UV light systems is they need batteries and they don’t remove particles from turbid water. As well, they will not be as effective in water that is very cloudy, which means it’s important to couple UV treatment with water filtration.

There are a number of options available and they seem to run anywhere from about $75 to $200.

BUY ON AMAZON

Filters

LifeStraw Go Water Filter Bottle with 2-Stage Integrated Filter Straw for Hiking, Backpacking, and Travel

Filters are generally the most popular way of cleaning water in North America. Water filters force water (by way of pumping or gravity) through microscopic pores.

According to the CDC, filters are highly effective at removing protozoa, including giardia and cryptosporidium, from water. When using a 0.3 micron (or smaller) filter, they are moderately effective at removing bacteria. However, they are not effective at all against viruses. Once again, this makes it necessary to pair filters with either UV light or chemical treatment.

Gravity filters involve very little work on your part, but some wait time. You simply fill the provided bag with water, hang it in a tree, and let the water filter down through a tube and into your water container. These types of filters generally cost $100 to $150. A hand pump filter will take less time, but requires more work as you’ll need to manually pump to run water through the intake tube, into the filter, and through the output tube into your water container (generally speaking). These filters can cost anywhere from $100 to $400.

There are variations on filters, such as straws that allow you to drink directly from a water source or squeeze filters.

Filters do require some maintenance. They will need to be cleaned after a given number of liters of water.

BUY ON AMAZON

[ Paddling Buyer’s Guide: View all camp kitchen accessories ]
Person scooping up water using a green cup | Photo by Jens Johnsson from Pexels
Photo by Jens Johnsson from Pexels

How to collect water

Once you know how you’re going to treat your water, there are some guidelines on where to collect that water from. Obviously standing pools of water are a no-no. Stagnant water is a breeding ground for all the things you don’t want to put in your body. You also want to avoid bodies of water that are close to grazing animals or other campsites.

Flowing water is the ideal situation. Try to get it from a higher elevation, or closer to the water’s source. Be sure to use a clean container and remember to wash your hands before collecting water. If you have to collect water from a lake, try to do so away from shore and collect from the top couple of inches of the water body.

Best practices

When it comes to cleaning your water in the backcountry, common sense prevails. If you’re worried about your water source, try to find another one. If that isn’t possible, you can always combine a couple of the above techniques to ensure your water is safe. It’s always best to start with the cleanest water possible; allow silty water to settle in a pot before pumping or treating.

Take Your Time Paddling Serene Waterways In Ann Arbor, MI

Calm lake with sun going down
Paddle out from Gallup Park on the Huron River. | Photo: Barbara Eckstein

Michigan State is known for its beautiful natural landscape and healthy, active way of life. Kayaking in Ann Arbor is a perfect example of just how serene and relaxing the paddling scene here can be. Ann Arbor is part of a group of towns that create a network of culture, activities and adventures to be had in this area.

The Huron River connects Ann Arbor with neighboring Ypsilanti and Dexter, giving kayakers plenty to see along the river, and many options for stops along the way. The Huron River was named the 18th National Water Trail, which is a U.S. National Park Service initiative to create a network of accessible waterways across the nation—think hiking trails, except on rivers, lakes, canals and coastline. The Huron River meanders 104 miles from Springfield Township to Lake Erie.

Calm lake at sunrise
Paddle out from Gallup Park on the Huron River. | Photo: Barbara Eckstein

Where to kayak in Ann Arbor

Located in the lower half of the Lower Peninsula, Ann Arbor is expectedly quite urban. Perhaps unexpectedly, though, when visiting here you’ll feel as if nature is right at your doorstep. The streets are lined with trees and there are an abundance of recreation areas full of established trails and tiny lakes a short drive away.

While there is always a certain kind of peace that comes with being on the water, you should know that you likely won’t forget how close you are to urban life when paddling in the Ann Arbor area. The upside of this is how accessible the paddling opportunities are. You’ll also see a new side of the cities and towns you’ve explored by foot or car, and be able to ease into kayaking and other outdoor activities.

Huron River

The Huron River is one of Michigan’s gems and provides paddlers a perfect stretch of river for a relaxing paddle on a spring or summer day. There are two boat liveries operated by Parks and Recreation: the Gallup Park Livery and the Argo Park Livery.

Both locations can get you kitted up and paddling on different stretches of the Huron River as well as on the still waters of Gallup Pond.

If you venture farther northwest, you’ll find Skip’s Huron River Canoe Livery & Outfitters. This company rents boats for two trips on the Huron River—a shorter route from Dexter to Delhi Metropark and a longer route starting at Hudson Mills.

Waterloo Recreation Area

Located a short half-hour drive west of Ann Arbor, Waterloo Recreation Area is the largest park on the Lower Peninsula. Here you can rent campsites and cabins, go hiking and mountain biking—and, paddle on the park’s 11 inland lakes.

Pinckney Recreation Area

Encompassing 11,000 acres, Pinckney Recreation Area is another great spot to get back to nature close to Ann Arbor. The paddling here can be a full day adventure as the park’s many interconnected lakes make it easy to cover a large distance.

Try launching at Halfmoon Lake and exploring Bruin, Woodburn, Patterson and Blind lakes. Keep in mind that all these lakes allow motorboats—for a more peaceful experience, go early in the morning or in the offseason.


What to wear

Ann Arbor is located in a relatively humid area being so close to the Great Lakes and the Huron River. When kayaking season in Ann Arbor opens for the year in late April, temperatures will normally be between 37 and 48 degrees Fahrenheit overnight, and 59 to 71 degrees Fahrenheit during the day. Summer temperatures are hot and humid, with an average of 84 degrees Fahrenheit during the day.

When you’re planning what to wear on your kayaking trip in Ann Arbor, think breathable gym clothes. Layers are a great idea for the mornings and evenings on the water if you’re visiting in the early fall or late spring. For true shoulder season paddling, be sure to wear the proper cold-water immersion gear, including a drysuit, pogies and neoprene booties.

In the summer, keep in mind that the sun gets extra hot on the water. While you won’t want long sleeves for warmth in the summer, you might want to consider UV-protective clothing, especially for little ones. Always wear closed-toed shoes, made of neoprene or hydrophobic material if you have them—if not, runners will do fine as long as you’re okay with them getting wet.


When to go

Paddling season in the Ann Arbor area can vary year to year based on the current season’s conditions; however, most tour companies will open late April or early May and wrap up their season in late October.

Paddling season in Michigan is fairly long, so plan your trip to Ann Arbor for your favorite time of year, and enjoy the beautiful Huron River and surrounding lakes.

Take Your Pick From Lakes, Rivers & Sea When Paddling In North Carolina

Manmade whitewater river
The U.S. National Whitewater Center is an adventurer's wonderland.

Paddling enthusiasts, ornithologists and those in search of reflective and serene landscapes—welcome to North Carolina. From rapids to floodplains, North Carolina has some incredible views to be seen from the water. We’ll go over some of the top kayaking spots—whether you’re looking to paddle river, lake or sea—as well as some general information about kayaking in the state to help you craft the perfect trip.


River kayaking in North Carolina

Asheville

If you’re heading to Asheville, North Carolina, consider a day trip through the majestic Biltmore Estate on the French Broad River. There are a few outfitters in the area that rent out canoes or kayaks for self-guided excursions down this stretch of river, which is all flatwater.

Kayak rentals

Tours & lessons

Charlotte

In the Charlotte area, make your way to the U.S. National Whitewater Center. This spot is an outdoor adventurer’s wonderland, with 1,300 acres of land adjacent to the Catawba River, where you can kayak, canoe, whitewater raft, deep water solo rock climb, bike and more. There is definitely something here for the whole family!

Manmade whitewater river
The U.S. National Whitewater Center is an adventurer’s wonderland. | Photo: Fritz at USNWC

For self-guided adventures, there are plenty of places to put on and take off the Catawba River. Try the boat ramp just south of Lake Norman, off Hwy 73, the Lucia Access Area, Mountain Island Kayak Access, the Riverbend Boat Ramp, or the Mt Holly Boat Landing. The section of river downstream of Normal Lake offers miles and miles of flatwater, flowing through various wide “lakes” as the rivers snakes over the border and into South Carolina.

Kayak rentals

Raleigh

About 50 minutes southwest of Raleigh is a popular spot to kayak in North Carolina: Cape Fear River. Despite its ominous name (and cinematic namesake), Cape Fear River is home to beautiful and exciting paddling. Choose from sections of flatwater to stretches of class I and II rapids. Cape Fear Adventures offers rentals, lessons and tours.

Slightly farther west of Raleigh, about a 1.5-hour drive away, you’ll find Greenville, North Carolina and canoe and kayaking opportunities on the Tar River. The Tar-Pamlico River System has some truly unique scenery—paddling forested areas into serene swampland and down the wide Pamlico River to the coast is some of the best canoeing and kayaking in North Carolina. Knee Deep Adventures and Riverside Recreation are great options for local kayak rentals.

[ Paddling Trip Guide: View all paddling trips in the Southern U.S. ]

Northern NC

Farther north, close to the Virginia border, you’ll find Danbury, North Carolina. Danbury has a number of paddling trip options on the Dan River, including in Hanging Rock State Park. You are only allowed to paddle on the lake that’s located in the park using boats rented from the park; however, private boats are allowed on the river. Look to Dan River Company for rentals down the river.


Lake kayaking North Carolina

Asheville

If you’re looking for a lake kayaking spot within a short drive from Asheville, check out Lake Lure. A 45-minute drive from downtown Asheville, The Town of Lake Lure has plenty of options for a full day of paddling, sightseeing and great food. Kayak rentals are available from Lake Lure Adventures.

Charlotte

Charlotte has an abundance of flatwater paddling opportunities. There are several lakes along the Catawba River that offer miles and miles of beautiful scenery, including Mountain Island Lake, Lake Wylie and Lake Norman.

Head to nearby Crowders Mountain State Park and paddle the serene Lake, accessibly at Sparrow Springs near the visitor center. There are no boat rentals at the park and swimming is prohibited.


View from back of tandem kayak with small boy in front.
Take a leisurely paddle in Kitty Hawk Maritime Forest. | Photo: Will Fisher

Sea kayaking North Carolina

Sea kayaking in North Carolina is plentiful all the way along the coast from Virginia to South Carolina.

In the north, check out the town of Kitty Hawk—there are some beautiful areas there with calm, reflective water.

Nags Head is home to an incredible natural ecosystem. Check out bioluminescent kayaking, alligator kayaking trips and Roanoke Island tours.

Beaufort, North Carolina offers an array of scenery and wildlife to see while kayaking. Find out why they call this area of North Carolina the Crystal Coast!

If you’re farther south, kayak fishing in Wilmington, North Carolina provides anglers with an array of options. Check out the North Carolina Kayak Fishing Association—a community run forum that has plenty of firsthand information on kayak fishing in North Carolina.

Kayak rentals & tours


Kayak camping in North Carolina

French Broad Camping Trail

See some of the best scenery kayaking in North Carolina has to offer on the French Broad Camping Trail. 140 miles of breathtaking natural beauty beginning in Rosman, North Carolina. The river connects many campsites and has a variety of flatwater and rapids. Check out the FAQ page French Broad Paddling for some great trip planning information.

Merchants Millpond State Park

Merchants Millpond State Park has a 760-acre millpond with surrounding trails and paddle-in campsites. Enjoy a relaxing base camping experience that will allow you to explore the lake and the park’s other fun activities and sights.


North Carolina kayak laws

North Carolina does not require a boat licence or registration for non-motorized vessels. PFDs are a requirement to have on board and children younger than 13 must be wearing them. “Vessels under oars” should carry an electric torch or lighted lantern with a white light that must be shone “in sufficient time to prevent collision.”