Home Blog Page 224

11 Alluring Things Paddlers Can Find In Toronto Harbour

aerial photo of the eastern end of the Toronto Harbour
Feature photo: Daniel Novykov/Unsplash

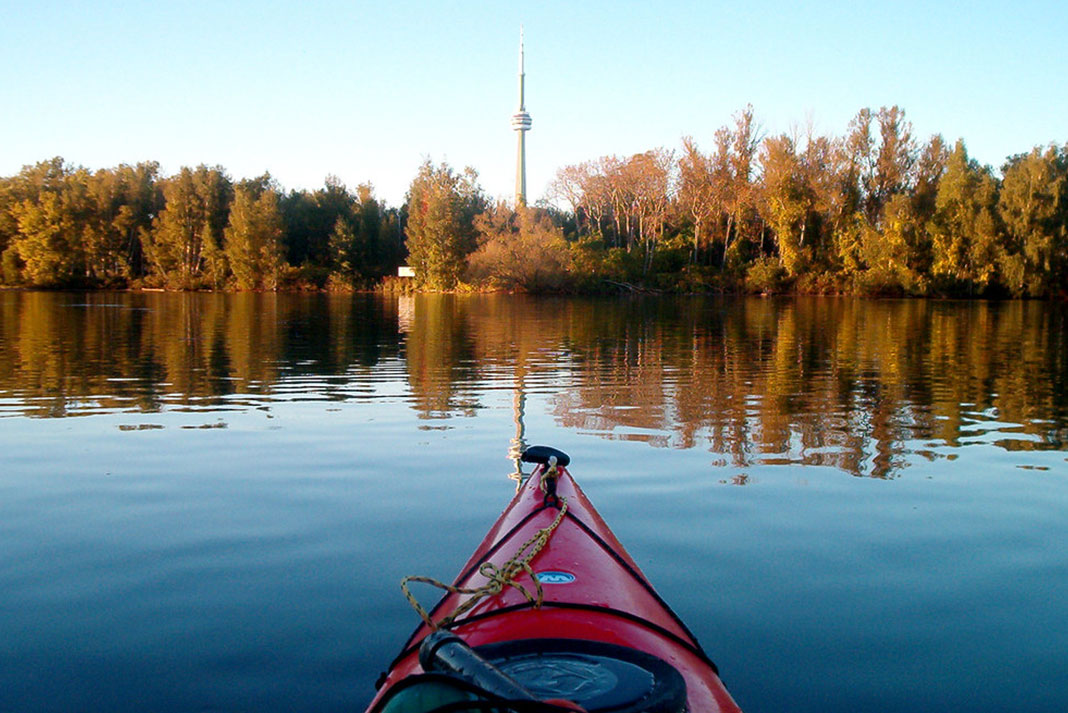
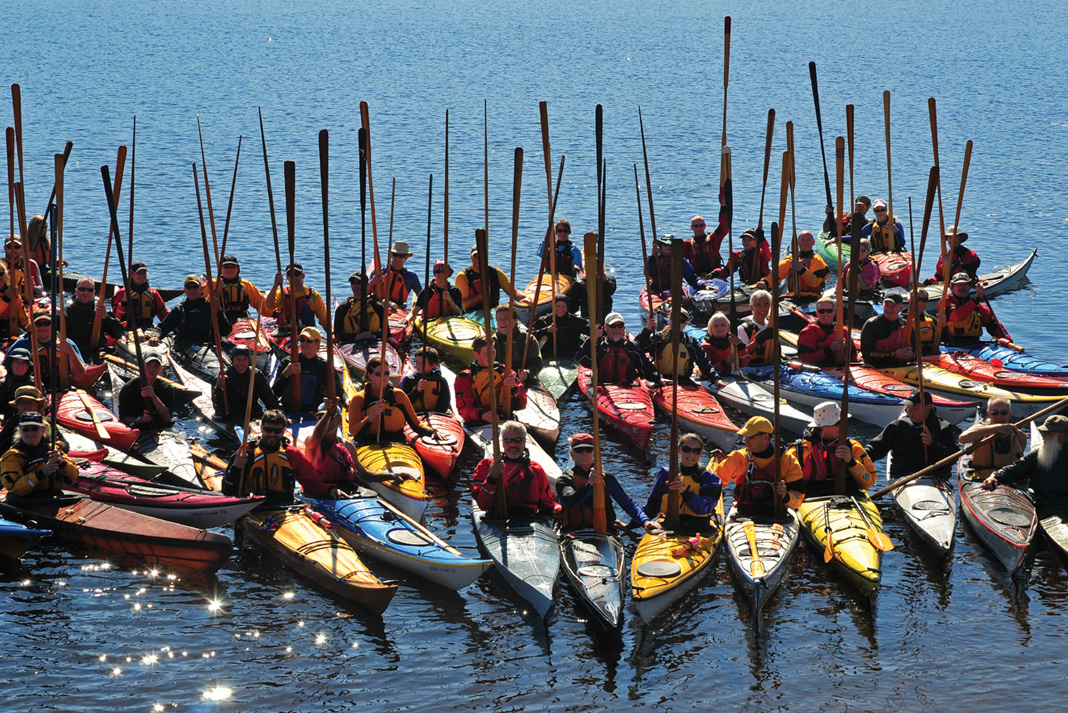
With a devoted corps of year-round paddlers, seasonal weather ranging from mild to wild, and a surprising diversity of environments and exposure, Toronto Harbour ranks among the top spots for urban kayaking in this major metropolis.

No one knows the city’s hotspots and secret stashes like a local, so we tracked down Smoke City kayaker David Johnston to get the goods. When he’s not hosting fitness and social paddles with Toronto’s Harbourfront Canoe & Kayak Centre, Johnston seeks out the explosive waves blown in by winter storms off Lake Ontario.

11 alluring things paddlers can find in Toronto Harbour

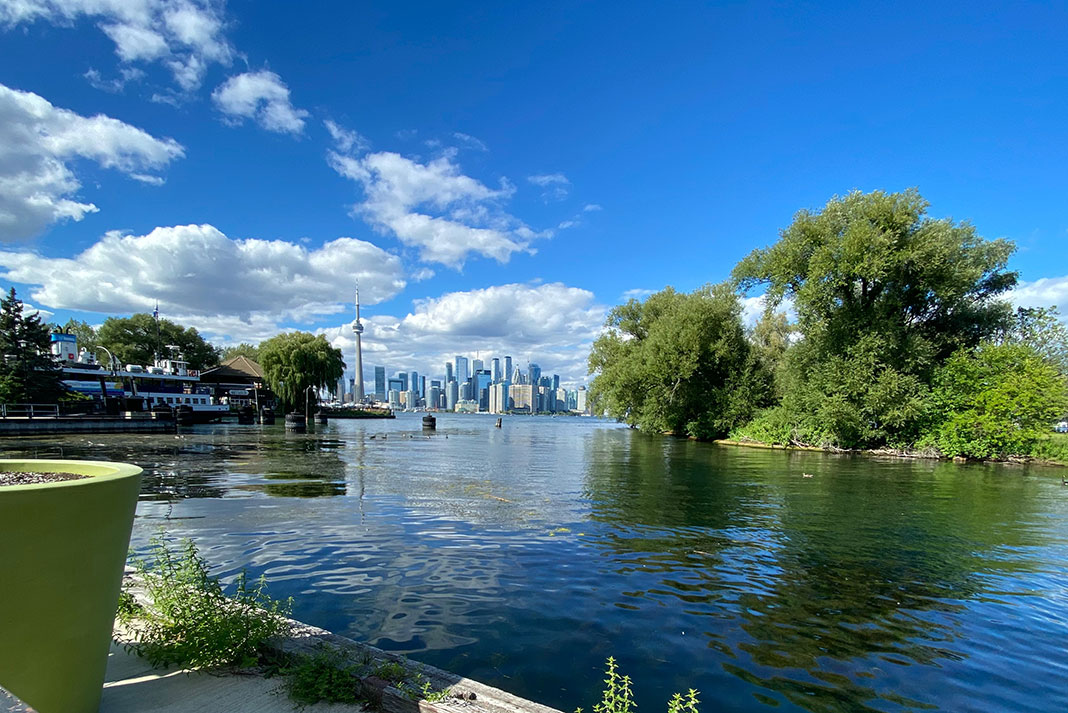
1 The Toronto Islands

Formed from one of Lake Ontario’s largest sandspits, and sheltering Toronto Harbour from wind and waves rolling in from the west, south and east, the Toronto Islands are the crown jewel in the city’s extensive park system. On summer weekends, the car-free islands’ charming picnic grounds, bicycle paths and beaches are chock-a-block. Spring and fall are quiet and restful—tourists drop off, and hippies and hipsters alike tend to their whimsical gardens and weather-beaten homes on Ward’s and Algonquin islands. Winter is a world apart.

summer view of the ferry terminal on Centre Island in Toronto
Photo: Yash Golwala/Unsplash

2 Ferries

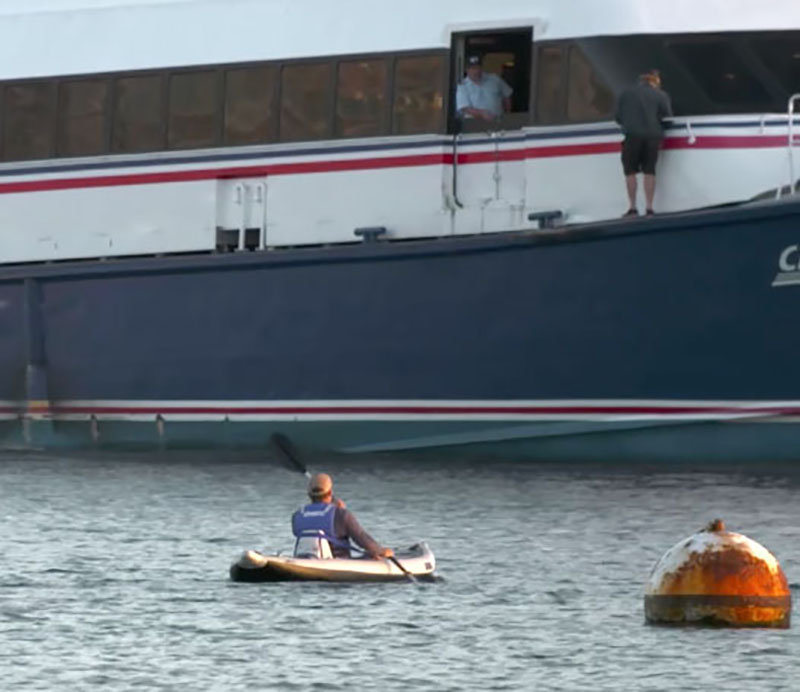
Ferries cross the harbor from Queen’s Quay to the islands year-round. When loaded with selfie stick-waving passengers, says Johnston, “they kick up a nice wake that you can surf behind. Just stay well away, as kayakers make the captains nervous.”

[ Plan your next Ontario paddling adventure with the Paddling Trip Guide ]

3 Classic little back route

Although most visitors are familiar with the three main islands—Hanlan’s Point, Centre and Ward’s—the archipelago is actually made up of 14 islands, some only accessible by boat. Linking these are narrow passages draped in magnificent cottonwoods and unexplored lagoons perfect for kayaking. Less than five kilometers from end to end, “the classic little back route takes you through the quietest parts of the islands,” says Johnston. “What’s not to like here? You paddle right next to a petting farm, a tiny train drives by with kids on it every 10 minutes, and you finish at a small beach on Ward’s Island where you can go get ice cream.”

4 Hidden Pond

“Hidden Pond is a very cool secret spot I like to take students into. It’s only accessible in spring and early summer, before the water drops and the entrance dries up.”

5 Lighthouse and Trout ponds

Birding enthusiasts should head for Lighthouse and Trout ponds to watch for swans, geese and more than a dozen species of ducks. The forest and wetland to the north of here is a wildlife sanctuary, and the songs of warblers, sparrows, vireos and thrushes can be heard from these still waters.

Aerial photo of the Toronto Islands and Toront Harbour
Photo: Peak Aerials

6 Gibraltar Point Lighthouse

Built in 1808, Gibraltar Point Lighthouse is Canada’s oldest standing lighthouse. Plus, as Johnston points out, “It’s haunted and that makes it awesome.” Legend has it the light is stalked by J.P. Rademuller, the first keeper and a reputed rumrunner, who vanished in 1815.

7 Trout Pond portage

To access the fine surf beaches on the south side of the islands without having to paddle all the way around, take the easy, 200-meter kayak portage from Trout Pond.

8 Surf zones

Just off the Island Public School and west of the breakwall is one of Johnston’s favorite surf zones. “This area gets very shallow, making it a great location for catching long, smooth waves when the wind is out of the southeast or east.”

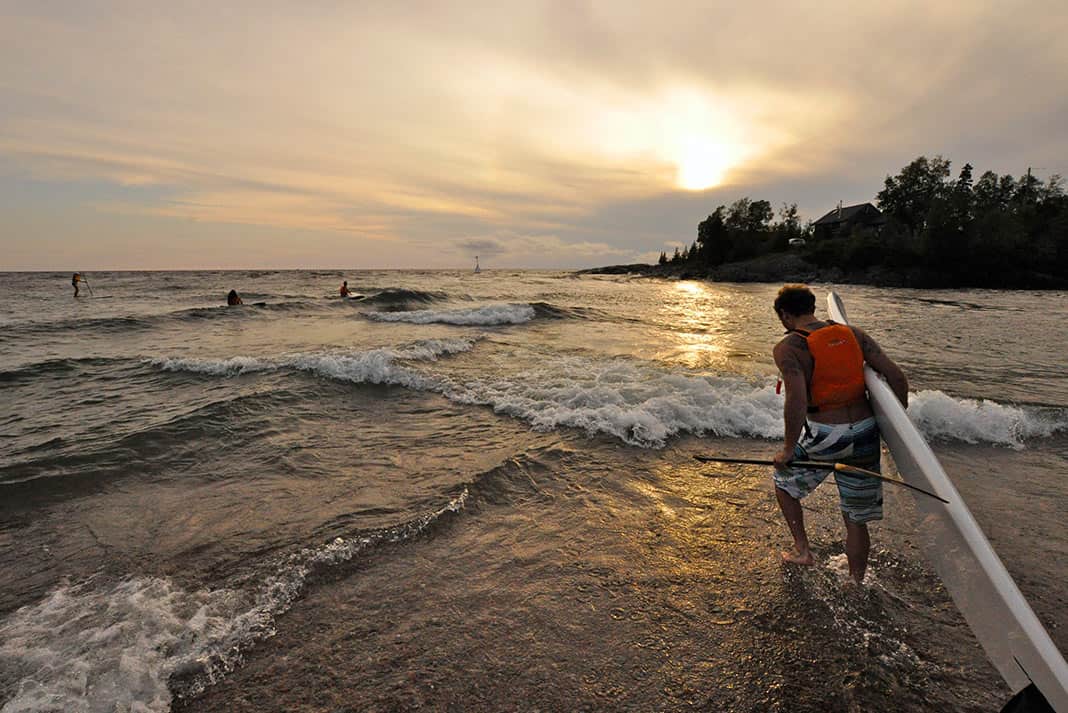
9 Gibraltar Point Beach

East of Gibraltar Point is a gentle surf beach that Johnston insists is “great with almost any wind out of the southwest to southeast.”

10 Western Gap

Put rough water paddling skills to the test in the Western Gap—a 120-meter-wide channel between the airport and the mainland that becomes a minefield of monster reflection waves and double-overhead haystacks in strong southwest winds. “Not for the faint of heart,” says Johnston, “but it’s our go-to location for playing around.”

signs on the Toronto Islands pointing out Hanlan's Point clothing optional beach
Photo: Alexandre Moreau/Wikimedia Commons

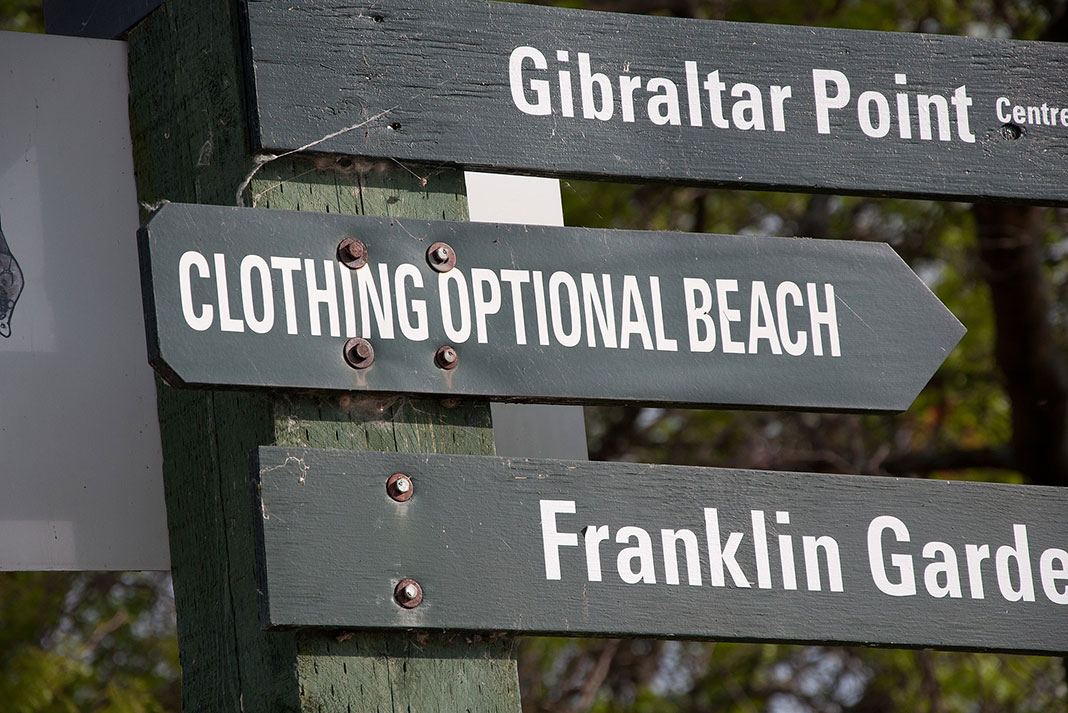
11 Hanlan’s Point Beach

When the wind is blowing west, Johnston heads for Hanlan’s Point Clothing Optional Beach, where the challenges are of a different sort. While the predictable waves make it a great place to learn surf skills, he says, “You have to keep your head down and not let anything on shore come into focus.”

Cover of the Spring 2017 issue of Adventure Kayak MagazineThis article was first published in the Spring 2017 issue of Adventure Kayak Magazine. Subscribe to Paddling Magazine’s print and digital editions, or browse the archives.


Feature photo: Daniel Novykov/Unsplash


Understanding Weathercocking And Skegs

Screen Shot | Neptunes Rangers
A sea kayaker, in a blue kayak, surfs on the ocean.

Bill Vonnegut is an ACA Level 5 instructor and teaches for River & Ocean, including regular rock garden classes and ocean rolling. He likes to get out on California’s open coast as much as possible and loves the freedom and challenges you can find there while rock gardening and surfing.  Bill also enjoys hot summer days paddling the South Fork American river.

Have you ever wondered what weathercocking is and how the skeg works in relation to it?

By use of these diagrams, I will explain what is happening to your kayak when it “weather-cocks.”

1.jpg

The photo above is a key to the symbols used in the remainder of this article.

2.jpg

Here, the boat is at rest and the paddler is not taking any strokes. The wind is blowing against the side of the boat (depicted by the blue lines). In this scenario, the kayak orients itself so it has even pressure from the wind down the entire side causing it to blow across the water sideways.

3.jpg

In this photo, the paddler is taking forward strokes and has the boat at the average paddling speed of three knots. The wind is still blowing against the side of the boat, which is causing the kayak to turn into the wind—this is called weathercocking.

Notice the boat still has even pressure from the wind along its side as it moves forward. But the pressure of the “bow wake” against the front of the kayak is holding the bow and not letting the wind push it sideways. Since there is nothing to hold the stern in place and the bow is locked; the wind blows the stern away causing the boat to turn into the wind.

44.jpg

To stop the boat from turning into the wind, the paddler has lowered the skeg. By lowering the skeg, the stern of the boat locks in and does not let the wind blow it sideways. Now, the kayak has restored even pressure against the wind and the boat straightens out.

5.jpg

Another common question I hear is: “My skeg is down and the boat still turns, why?!” Notice the bow wake is much smaller because the paddler has slowed their pace,  which decreases the pressure of the wake holding the bow in place. Since the skeg is still deployed, it is now locking the stern in tighter than the bow, causing the kayak to turn away from the wind.

This is the reason skegs are adjustable, they can be fine-tuned to equal the pressure of the bow wake. The rule of thumb for skeg adjustment: if you are turning into the wind, lock the stern in tighter by deploying it deeper and if you’re turning away from the wind, give it less skeg to decrease the hold on the stern.

6.jpg

“Do I put the skeg up or down when I paddle into the wind?”

The boat wants to naturally head into the wind and since that’s the direction you want to head, the skeg should be up so the boat is able to freely turn into the wind.

7.jpg

When paddling into the wind with the skeg down, it’s hard to stay on course. The boat wants to turn sideways in relation to the wind because it wants to even out the bow and stern pressure (see picture 3,) which causes it to turn away from the wind making it very difficult or impossible to stay on course.

This rule does not apply if you are lined up exactly into the wind, but then you don’t need the skeg!

8.jpg

9.jpg

“What happens if the wind is coming from behind?”

With the skeg down, the boat tracks nicely because the stern is held in place. Once the skeg is raised, the wind will push the stern around causing the boat to turn into the wind.

I have only mentioned skegs, but a rudder works the same way. The more turn of the rudder, the more lock on the rear of the boat.

With the knowledge in this article, you should be able to identify how the kayak will respond to the wind when you are out paddling in different conditions. Keep in mind that skegs are adjustable and can be fine-tuned to the position needed for the amount of wind, direction, and your paddling speed.

Watch Spring Cleaning With Kayaker Dane Jackson

Lucas Gilman
Dane Jackson carries garbage retrieved from the Nolichuky River to shore on his kayak.
Red Bull and Rokks Media

Dane Jackson, professional kayaker, teamed up with the local paddlers to lead a group down a section of the Nolichucky River in Cherokee National Forest in east Tennessee, cleaning the waters and shores for future generations of paddlers and all those that enjoy the beautiful waterway. Dane’s efforts come right as the country is about to celebrate National Park Week (April 15-23) and observe the diverse lands and wildlife found in National Parks nationwide.  

Dane and his team’s efforts to preserve the beauty and safety for those enjoying the Nolichucky River garnered real results, with dozens of tires removed the river and park, as well as loose metal, glass, and bottles dating all the way back to the 1960s. 

Dane Jackson is one of whitewater kayaking’s biggest names. Growing up travelling around the country with his dad Eric Jackson—professional kayaker and founder of Jackson Kayaks—Dane dominated nearly every junior world title early on in his career. By 2011, he starting winning pro-level contests like the Whitewater Grand Prix and the IFC Freestyle World Championships. Since then, the paddling prodigy has launched first descents of waterfalls in Mexico and beyond, while racking up over 80 first-place finishes in freestyle kayaking competitions.

In an effort to give back to the rivers he loves, 23-year-old Jackson recently helped organize a river cleanup project on the Nolichucky River in Tennessee. The focus was on making a local impact and cleaning up the natural playgrounds he loves. It also encouraged people to keep these rivers clean for future generations. Needless to say, Jackson is leading the way in another side of the sport, while helping minimize the negative and hazardous impacts trash can have on rivers.

Dane Jackson paddles the Nolichucky River in Tennessee searching for trash.

We caught up with him in between paddling sessions and asked about his motivations and experience cleaning up the Nolichucky.

RedBull.com: Tell us a little about the stretch of river you and your crew cleaned up.

Dane Jackson: We did the Nolichucky River in Tennessee—one of the more popular rafting destinations in the state. It’s a great river for rafting with the family, but also has a great section for lots of kayakers in the area. It’s just a super scenic and beautiful river. The locals are awesome and it’s just a great place to be.

Paddlers wheel out garbage from the Nolichucky River.

What other types of recreation happens on the river?

People love rafting and kayaking here almost year round. Plus there’s good fishing, swimming, a few parks, camping and lodging along the river. The easy access and beautiful scenery make the Nolichucky a great place to get outside. And the colours in the fall are unreal.

Why did you decide this cleanup project needed to happen?

I’ve spent my entire life in or around the river and it’s so mind-blowing that so many people just throw their trash in the river. Out of sight, out of mind, I guess. It doesn’t matter how beautiful a river is, it’s like people think it’s just something that’s there in their backyard but no one uses it for anything, which is crazy! Throwing trash in river affects everything—from wildlife to humans. And it can really affect people’s perceptions. When someone sees trash in a river, it makes it way easier for them to throw their trash in as well. It can become a negative cycle really quickly.

Paddlers collect tires from the Nolichucky River.

{loadposition PTG_Main_Midcontent}

What sort of issues does trash in the river present for wildlife as well as recreation?

Trash affects the entire ecosystem of a river. Some waste, like motor oil, is completely toxic and other stuff, like plastic bags, just sticks around forever. Old pieces of metal rust and get sharp, same with aluminum cans—both of which can end a fun day on the river for anyone. It really comes down to ignorance and laziness because it just doesn’t make any sense to throw trash in a river. People come from all over to be around the Nolichucky and it looks bad on the locals. Trash can ruin someone’s experience on the water which in-turn affects tourism, guiding outfitters and local businesses.

Tell us about your experience cleaning up the river and what the local impact was.

There were about 10 local kayakers and raft guides with us and this is these kayakers’ home, where they work year round, day in and day out. So for them, it must’ve been brutal to see so much trash at their home spot. But I don’t think they truly realized how much trash was in the river until they paid attention to it with us. I think it opened their eyes a little.

Especially on our second lap … seeing how different the river looked after cleaning it up. They were really thankful that we did it and they left talking about doing more regular cleanups and even going to the schools to talk about not throwing trash in the river.

With only two laps on a three-mile stretch of the river, we picked up about five full raft-loads of trash, including over 40 tires. It’s crazy how in just one weekend, with two laps down the river, you can see the difference of how clean and beautiful the Nolichucky can be.

Paddlers pull tires out of the Nolichucky River.

What was the weirdest piece of trash you found?

Hard to say because there was so much random stuff. I think the 60 pounds of roofing shingles was most surprising to me. Sometimes people accidentally drop bottles off a bridge or forget cans at a campfire. But those shingles showed just how much effort someone had to go through to throw them in the river. It was just clearly so deliberate. I mean, there’s got to be a dumpster somewhere within the same distance they had to drive to dump it in the river.

Dane Jackson ties up a garbage bag full of trash on the Nolichucky River.

If you could tell everyone one thing about helping keep rivers clean, what would it be?

It’s a pretty simple concept: Take out what you take in.

Putting trash in the river isn’t something that’s over the second you throw the trash in. It hurts families who go swimming there. It kills fish and other wildlife. It pollutes the water and evens hurt the local economy. 

A Beginner’s Guide To Safer Paddling

Paddlers, beginner or expert, should wear a lifejacket at all times.

It’s important for new kayakers to know how to paddle safely. Here is a list of tips and tricks to help any beginner get started.

Paddlers, beginner or expert, should wear a lifejacket at all times.

1 Always Wear A Lifejacket

It’s a rookie mistake not to wear a lifejacket out on the water.  Experienced paddlers wear them all the time.

Your lifejacket should be snug and comfortable. It should not lift up when you pull on the shoulders.

85% of fatal canoe accidents and 48% of kayaking fatalities involve people who were not wearing a life jacket. Don’t be a statistic.

For more information on fitting lifejackets, go to: safeboatingcampaign.com/life-jackets

It's important for paddlers to know their limits and when to turn back to shore.

2 Know Your Limits

Be honest with yourself. If you feel unsafe or uncomfortable in certain conditions, don’t be afraid to return to shore.

Part of this is knowing the capabilities of your craft. Most kayaks, canoes, and SUPs are designed for use in protected waters. Specialized boats are used for whitewater, surf, and paddling on exposed water. If you’re looking to improve your skills, it’s best to practice in safe conditions with expert paddlers.

If you shouldn’t be driving, you shouldn’t be paddling. Drinks and drugs are even more dangerous on the water. Coast Guard and state BUI laws apply to all vessels, including recreational canoes, kayaks, and SUPs.

Channel 16 on a handheld VHF radio will connect you with the Coast Guard during emergencies.

3 Carry The Paddling Essentials

Safety

  • Always bring drinking water with you.
  • Keep signaling devices, like whistles, mirrors, and flares, in your lifejacket pocket.
  • Sit-inside kayakers should carry a paddle float and pump.

Communication

  • A handheld VHF radio will connect you with the Coast Guard and commercial boat traffic. Use Channel 16 for emergencies.
  •  A Personal Locator Beacon or PLB will relay your location to rescue agencies if you’re in trouble.
  • Carry your cellphone in a waterproof case, and always tell a friend before you go.

Comfort

  • Carry extra layers of clothing in a dry bag.
  • Bring energy bars or lunch for longer outings.
  • Beginner kayak or not, your boat should be well outfitted

A stranded kayaker is beached on the rocks due to unpredictable wind and weather.

4 Plan For Changing Weather Conditions

The forecast may be calling for a perfect paddling day—but unpredictable weather is always a threat. Checking tides, river levels, and the time the sun rises and sets is also important.

For canoeists and kayakers, air temperature is less important than wind speed and direction. Rain can be a nuisance, but lightening is dangerous. Always be on watch for dark clouds on the horizon and changing temperatures and wind directions—these often precede a squall or thunderstorm.

You should always have an exit plan in the case of a fast-moving thunderstorm. Never wait for bad weather. If you suspect it to get worse, get off the water immediately.

Paul Kuthe makes sure he is seen by a large boat ahead.

5 Make Yourself Seen

Choose a brightly coloured outfit so other people can see you in the water. This can be improved by carrying a light. High visibility strobes and running lights are available at your local paddling shop.

Like driving, never assume that power-boaters can see you. Avoid high-traffic areas and be aware that factors like fog and glare make it more difficult for others to spot you.

The “Rules of the Road” govern all boat traffic. Knowing these simple rules will help you anticipate where other boats will go, and help you stay safe.

Always tell a friend when and where you're going.

6 Tell A Friend

Telling a friend where and when you are paddling will ensure that someone knows where you are in case you get into trouble. It’s a good idea to make a habit out of this and keep a “float plan” template on your phone or computer.

You should include the four Ws:

  1. Who: Your name and the names of any others paddling with you.
  2. Where: Where you will be going.
  3. When: When you are expected to launch and return, and at what point to notify the authorities if you don’t return as scheduled.
  4. What to do: A plan for what to do if you don’t return.

A dry suit will keep you dry, comfortable, and warm on or in the water.

7 Dress For Immersion

The human body loses heat about 25 times faster in water than it does when dry. Avoid cotton clothing (like t-shirts and jeans) as they retain water and accelerate cooling when wet.

Today’s paddling gear uses high-tech fabrics to keep you dry and comfortable. A wet suit or dry suit will keep you warm when immersed in cold water.

Remember: Children lose body heat faster than adults.

Instructor Kate Kuthe demonstrates how to paddle properly.

8 Take A Paddling Class

Taking a class will teach you the skills and technique necessary to make paddling safe and enjoyable. It’s the best place to meet fellow paddlers with similar skills and interests, and in a fun and safe environment.

Check with your local paddle shop for a list of paddle classes in your area. You can find a list of ACA-certified instructors at americancanoe.org/instruction.

A mother makes sure her child is safely buckled into their lifejacket.

9 Learn More

Watch the 8-part Safe Paddling Video Series, and find paddling tips, gear lists and safety resources from Canoe & Kayak magazine, the ACA Canoe-Kayak-SUP-Raft Rescue and the United States Coast Guard.

Visit: canoekayak.com/safety americancanoe.org/instruction uscgboating.org nasbla.org/education

View the full Safer Paddling Series PDF here.

Feel The Difference Of A Handcrafted Greenland Paddle

TOM FROESE HELPS ANYONE BUILD A WORKING WORK-OF-ART.| PHOTO: VIRGINIA MARSHALL

It’s a question I hear often when paddling with my well-loved Okume and Sitka spruce stick: “Did you make your Greenland paddle?” Oh yes, I tell my admirer, I crafted it with my own hands. Only here’s the thing: I didn’t.

Sure, I sanded a few rough edges and slapped on five coats of tung oil before taking to the water with my paddle. But it was my friends—and far more expert woodworkers—Torfin and James who laminated the woods, traced the shape, and drew forth from a chunk of lumber the graceful paddle for which I’ve shamelessly taken credit.

No more. After actually building a wooden kayak two years ago, I’ve felt a growing guilt about my handcrafted-but-not-by-me paddle. And, aside from my self-reproach, I was also curious. What exactly does it take to transform board into blade?

Feel the difference of a handcrafted Greenland paddle

I called up Tom Froese, owner and craftsman at T and J Paddles, a custom paddle maker tucked amongst the fertile vineyards, rolling escarpment and winding rivers of Ontario’s Niagara Peninsula. Froese is a third-generation woodworker who fell in love with the simple elegance and efficiency of traditional Greenland-style boats and paddles. His one-of-a-kind Greenland and Aleut paddles and paddle-making workshops have made him a familiar face in the trad kayaking community. Still, after nearly a decade shaping paddles, he remains humble.

“I don’t consider myself a ‘master builder,’” Froese laughs. “It’s just pretty cool that I’ve built probably a thousand paddles, and I can help my students make their own paddles look as good as the ones I build myself.”

Tom Froese helps us build a working work-of-art. | Feature photo: Virginia Marshall

The custom-fitted and artfully decorated paddles Froese shapes have been shipped to buyers far and wide, but many elect to join his one-day clinics culminating in high-quality, water-ready DIY paddles. His students have ranged from experienced builders to chronic butterfingers. I fall somewhere in between. I know what a spoke shave is, but I’ve never used one to transform a square block into an organic, feels-just-right loom.

A personal make your own Greenland paddle workshop

On a damp, late fall day I drive down to Froese’s woodshop, a tidy, brightly lit space in the garage of his home. Hanging on the wall behind a workbench are the traditional—many even antique—hand tools that I will use to shape my traditional paddle. There’s a trio of block planes—their wooden grips rounded into soft, organic shapes by a century of callused hands—and a razor-sharp draw knife passed down from Froese’s grandfather, who used its perfectly honed edge to build barrels for a local winery.

Resting on another workbench in the center of the space is the carefully selected piece of quarter-sawn, A-grade Western red cedar that will be my paddle. Froese shows me the perfectly straight grain running down the face and ends of the board, indicators of the wood’s strength and stability.

Over the next four hours, I carve away the wood between Froese’s chalk lines, shaping first the blades and then the loom. Under his expert guidance, it’s surprising how quickly my paddle emerges from the rough lumber. The dry cedar yields to the sharp tools in fragrant, honey-colored curls. After sanding every surface perfectly smooth, he helps me burn my initials into one of the blades. This time, I’ve earned it.

On the drive home, my paddle reclines on the seat beside me, catching my eye like a particularly charming passenger. It will be much later, when the spring thaw arrives at last, that a fellow paddler will finally ask, “That’s a beautiful Greenland paddle, did you make it?”

cover of Adventure Kayak Magazine, Spring 2017 issueThis article was first published in the Spring 2017 issue of Adventure Kayak Magazine. Subscribe to Paddling Magazine’s print and digital editions, or browse the archives.


Tom Froese helps us build a working work-of-art. | Feature photo: Virginia Marshall


How To Paddle a Kayak

How to Paddle a Kayak | Safer Paddling Series: Episode 4 | Rapid Media

In partnership with the U.S. Coastguard and the Water Sports Foundation, instructors Paul and Kate Kuthe of the American Canoeing Association teach three basic paddling movements in Safer Paddling Series: Episode 4.


Paddling in a kayak encompasses three different movements: going forwards, stopping or going backwards, and turning.

Kate Kuthe uses her core muscles to paddle in a straight line.

Paddling in a straight line is the most basic movement. Loosely grip your paddle with your arms shoulder-width apart. Reach one paddle blade towards your feet and pull it back through the water. Twist your body to pull the blade back towards your hips. It’s important to engage your core muscles—not just the arms.

Paul Kuthe demonstrates how to back up in a recreational kayak.

Backing up is the same motion, but in reverse. When you want to stop or go backwards, place a paddle blade in the water and gently push away from your body.

Paul Kuthe shows how to reposition with a C-stroke.

Occasionally, the forward-moving boat will veer off track. To correct this, use a sweep stroke. Reach out and away from your kayak, making a “C-stroke” in the water. This should reposition you properly.

Be safe. Be smart. Have fun.

As a United Stated Coast Guard nonprofit grant recipient, the Water Sports Foundation produces paddling safety outreach materials and distributes them through boating and paddling media providers. Paddle sports currently has an inordinately high rate of accidents and deaths that for the past five years has been increasing, while power boating stats have been decreasing during the same period. The goal is to create heightened public awareness of safer paddling making paddle sports safer and to ultimately reduce the total number of paddle sports related deaths annually.

Essential Paddling Gear

In partnership with the U.S. Coastguard and the Water Sports Foundation, instructors Paul and Kate Kuthe of the American Canoeing Association provide tips on what to bring paddling in Safer Paddling Series: Episode 3.

Every experienced kayaker has a paddling checklist. You should too. Here is a list of what you should bring.

1) The United States Coast Guard requires all paddlers to carry these three items: a properly fitted life jacket, a whistle or sound-signaling device, and a light in case you’re out past dark.

A paddler fills a dry bag with extra clothes.

2) Fill a dry bag with anything you may need. This could include extra clothing, a first aid kit, food, sunscreen, and water. Don’t forget to put your phone in a waterproof phone pouch too!

Before taking off be sure to tell a friend your plans.

3) Tell a friend about your trip. Let them know the four W’S: where you are going, who you are going with, when you will return, and what to do if you don’t return. The last thing you want is to get stranded without anyone looking for you.

4) Check the weather. This will help you choose when and where to paddle and can make the difference between a pleasant day on the water and a soaking, wind-whipped experience.

Be smart. Be safe. Have fun.

As a United Stated Coast Guard nonprofit grant recipient, the Water Sports Foundation produces paddling safety outreach materials and distributes them through boating and paddling media providers. Paddle sports currently has an inordinately high rate of accidents and deaths that for the past five years has been increasing, while power boating stats have been decreasing during the same period. The goal is to create heightened public awareness of safer paddling making paddle sports safer and to ultimately reduce the total number of paddle sports related deaths annually.

How To Size A Lifejacket

How to Size a Lifejacket – Safer Paddling Series: Episode 1 – Rapid Media

In partnership with the U.S. Coastguard and the Water Sports Foundation, instructors Paul and Kate Kuthe of the American Canoeing Association demonstrate how to properly choose and wear a lifejacket in Safer Paddling Series: Episode 1.

Three children wearing different lifejackets fitted according to weight.


Wearing a loose or unfastened lifejacket serves little purpose. This means even the best life jackets need to fit you properly in order guarantee a safe kayaking experience.

By law, there should be one lifejacket per person on a boat. Although adults are not required to wear lifejackets, children under 13 must wear them whenever they are out on the water.

Sizing is important. For children, lifejackets should be selected based on weight of the child. Adult lifejackets are for anyone over 90 lbs.

Three steps to staying safe on the water.

How to snuggly zip up a lifejacket.

Step 1) Zip it.

Clipping in a life jacket.

2) Clip it.

Tightening the straps on a life jacket.

3) Tighten the straps.

To ensure proper safety, check the back label to certify each lifejacket is Coast Guard Approved.

Be smart. Be safe. Have fun.

As a United Stated Coast Guard nonprofit grant recipient, the Water Sports Foundation produces paddling safety outreach materials and distributes them through boating and paddling media providers. Paddle sports currently has an inordinately high rate of accidents and deaths that for the past five years has been increasing, while power boating stats have been decreasing during the same period. The goal is to create heightened public awareness of safer paddling making paddle sports safer and to ultimately reduce the total number of paddle sports related deaths annually.

Video Review: The Sisu by Current Designs

L

ess than a year after the release of the Prana—one of the most exciting new designs of 2016—Current Designs (CD) is again turning heads. This year’s showstopper is the Sisu and, like its predecessor, the boat is a collaborative effort between CD and Danish designer Jesper Kromann-Andersen.

Current Designs’ Sisu Specs
Length: 16 feet
Width: 22.3 inches
Kayak Weight: 52 pounds
Price: $3,499
cdkayak.com

“It’s a privilege to work with Jesper,” says CD vice president, Bill Kueper. Growing up in a small, sea-locked nation to a family of sailors and boat builders, Kromann-Andersen, 46, has been designing kayaks for most of his adult life. He says his fascination with the boats traces back to his childhood, when he first saw traditional kayaks in paintings made by his great-grandfather in Greenland. The design ethos of those ancient craft became integral to Kromann-Andersen’s own approach: “The Inuit never thought of a kayak as complete without a paddler,” he says, “the fit and responsiveness is always in focus.”

STRONG IS BEAUTIFUL

“Made in the USA, these kayaks are in a class of their own thanks to Current Designs,” says designer Kromann-Andersen. The Sisu’s flawless fiberglass laminate is vacuum-bagged to reduce weight and maximize strength.

FOCUSED ON FIT

The ergonomically shaped front deck provides clearance for paddle strokes, with additional space for a positive fit in the knee area. The low back deck eases re-entry and rolling.

AMPHIBIOUS & AMBIDEXTROUS

Touring paddlers will appreciate the Sisu’s four storage compartments. The centered day hatch stays dryer in rough waters and is easier to reach with both hands than an offset hatch.

USER-FRIENDLY, EVEN WHEN THE CONDITIONS AREN’T.| PHOTO: VINCE PAQUOT

Kromann-Andersen describes this approach as dynamic efficiency, “meaning that the way the kayak responds feels like a natural extension of the paddler’s input.”

Where the Prana struck an ideal balance between touring speed, tracking and rough water responsiveness, the Sisu is optimized for lively play in surf, currents, waves and rock gardens.

At 16 feet, the Sisu is a foot shorter and slightly wider than its sibling. It also has even more rocker and the hull’s flat mid-section extends further in front of the cockpit, transitioning into a buoyant, flared bow. On a wave, this means the nose doesn’t dive and the boat stays loose and maneuverable while surfing. The Sisu’s hard chines are most pronounced at mid-ship, where the boxy profile makes for superb secondary stability when edging and carving waves.

Seeking a suitably dynamic environment to test our flawless, frost-white-and-royal-blue Sisu, I wait for a late fall gale to sweep across my local waters. Thirty-five-knot gusts out of the northwest plunge the wind chill well below freezing and send noisy breakers charging onto the rocky shore. Taking shelter behind the breakwall of a neighboring estate might feel a little like trespassing, but it offers a welcome rest between wild rides.

The Sisu’s nimble maneuverability isn’t the only advantage in challenging environments. Current Designs reinforced the deck to maximize stiffness and strength without adding weight. Those reinforcements extend to the outfitting: the seat supports are an integral part of the coaming, joining deck and hull through the cockpit where abuse is heaviest and paddler safety paramount.

On a very different day—this one unusually warm and calm—I explore another, unexpected aspect of the Sisu’s design: for a playful 16-footer, it’s rather fast. I’m cruising effortlessly across a wide bay when I glance up and see a V of migrating swans shining in the watery November sunshine, the graceful white arrow mirroring my kayak gliding beneath.

When the birds bank their impressive wingspans and veer east, I follow suit. A subtle weight transfer and turn of my head are cue enough—the chine carves deep into the water and the stern whips through the turn. Call it a natural extension of paddler input, but edging the Sisu feels like nothing so much as flying.


This article originally appeared in Adventure Kayaks
’s Spring 2017 issue.

Subscribe to Paddling Magazine and get 25 years of digital magazine archives including our legacy titles: Rapid, Adventure Kayak and Canoeroots.

The Exception: When It’s Okay To Paddle On The Same Side

TO STAY ON COURSE, YOU MUST BREAK THE RULES. | PHOTO: JAY KOLSCH

one of the first rules that paddling newbies learn is to always paddle on opposite sides of a tandem canoe. They are told that this provides the best stability and control. Indeed, the late freestyle paddler and canoe builder Mike Galt once wrote: “Decide at birth on which side of the canoe you want to paddle, then never, ever change.”

The exception: When it’s okay to paddle on the same side

There are many good reasons tandem teams should stick to paddling on opposite sides of the canoe—and going straight is just one of them. Still, there is a common exception to this rule.

To stay on course, sometimes you must break the rules. | Feature photo: Jay Kolsch

Consider this scenario when angling across a windy lake. You paddle harder as the wind tries to turn the canoe sideways. If the canoe broadsides to the waves, it may capsize. What to do?

If the stern paddler is on the down-wind side of the canoe and the bow paddler is on the up-wind side, the stern partner must paddle harder than the bow to keep the canoe on course. This is a fine solution in a moderate wind, but a big blow will wear you out.

Or, if the stern paddler is on the up-wind side and the bow paddler is on the down-wind side, the stern must hold a strong rudder or frequently apply a powerful correction stroke to prevent the canoe from broaching. This reduces power and forward motion. And, the out-of-sync bow and stern strokes reduce stability.

When angling across a windy lake, it’s better for both partners to stroke in unison on the down-wind side of the canoe. This method best stabilizes the canoe and makes for the most efficient forward progress. Paddling on the same side in this scenario is the most efficient way to power across a lake in a crosswind.

If waves have grown to an impressive height, however, having the stern paddle on the up-wind side and apply powerful correction strokes is the best option to avoid swamping, even though precious forward momentum will be lost.

Cliff Jacobson is a renowned author and wilderness guide.

Cover of Spring 2017 issue of Canoeroots MagazineThis article was first published in the Spring 2017 issue of Canoeroots Magazine. Subscribe to Paddling Magazine’s print and digital editions, or browse the archives.


To stay on course, sometimes you must break the rules. | Feature photo: Jay Kolsch