
Home Blog Page 163

The Paddler’s Greatest Debates

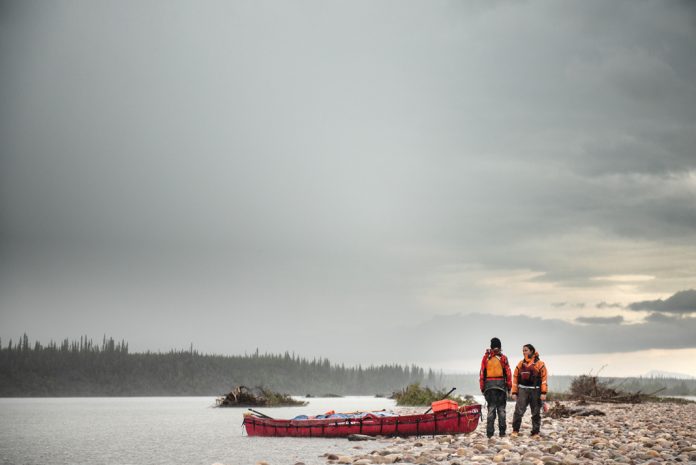
Two canoeists stand at the side of a lake against a grey sky
Looks like rain tonight: innie or outie? Answer on page 90. | Photo: Francois Leger-Savard

Few topics get backcountry paddlers more fired up than debating the ethics of burning garbage on trip, or contesting the best way to bear-proof your camp. Mention canoeing and firearms in the same breath, and some paddlers are apt to go ballistic. Ditto for sharing hidden gems on social media, or practicing survival bushcraft on public land. Should wearing a PFD be optional or mandatory? Does your groundsheet belong under your tent, or inside?

Explore paddling’s most enduring controversies, get advice from the experts, and then decide where you stand on these crucial issues.
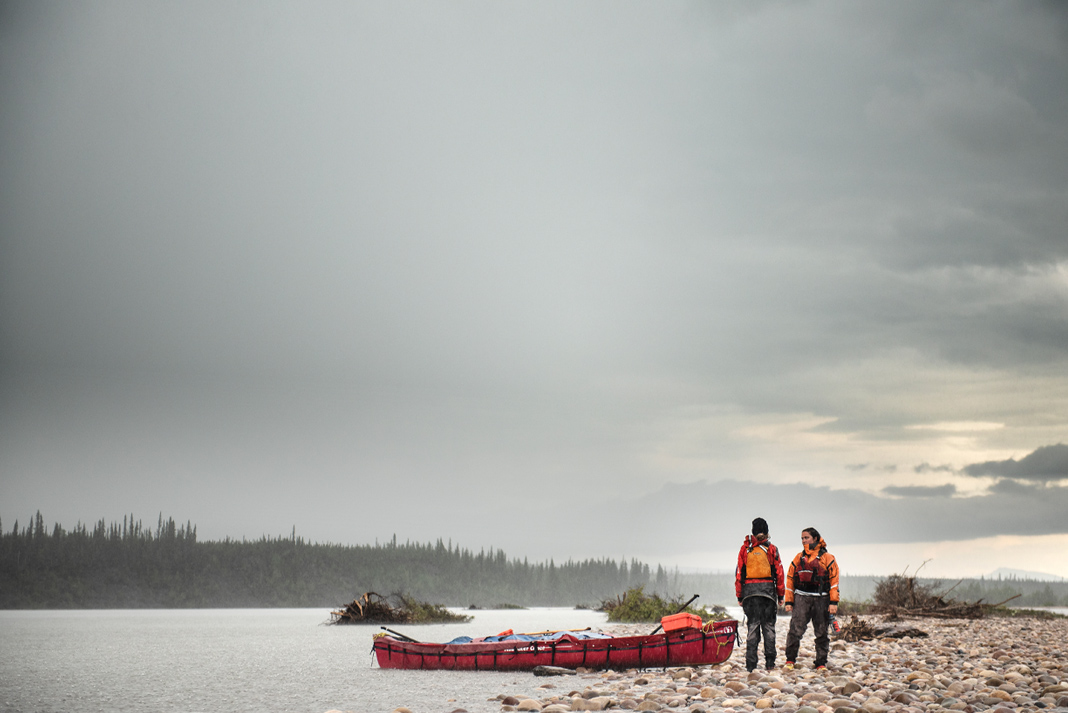
Two paddlers stand beside a lake with their canoe in the backcountry.
Looks like rain tonight: innie or outie? | Photo: Francois Leger-Savard

Controversy: Burning Garbage

Are there exceptions to the pack-it-in-pack-it-out rule?

Survey any group of backcountry paddlers, and the subject of burning garbage is sure to be a hot topic. Hard-line LNT (Leave No Trace) followers advocate packing out everything you pack in, while many wilderness users still adopt an “if it burns, burn it” attitude. Taking the middle ground, guidebook authors and veteran expedition paddlers Laurel Archer and Cliff Jacobson suggest burning food scraps and paper waste in a small, hot fire while observing minimum-impact camping practices.

Location

First, consider whether it’s safe (and legal) to start a fire. Check fire danger ratings and open-fire bans for the area you will be paddling. Also, check local camping regulations; for example, in Minnesota’s Boundary Waters Canoe Area Wilderness the burning of any garbage is prohibited. You’ll need a compact wood-burning stove to contain compost and rubbish fires in fragile ecosystems or on remote northern trips above treeline.

Trip Length

Campers on both sides of the debate cite the length of trip as a deciding factor. If you are only out for a few days, repackage food so scraps and trash are minimal and easily packed out. Waste management on extended trips is more challenging, argues Jacobson. “On a long trip, you will accumulate quite a bit of paper and plastic trash, some of which may contain grease or remnants of food attractive to animals. If you don’t burn this stuff, you’re asking for trouble!”

Bring the Heat

Any low-impact fire should burn hot enough to leave only fine, white ash—this includes your watermelon rinds and spaghetti leftovers. A well-built campfire can reach temperatures exceeding 600°C (1,112°F). This is approaching the threshold (650°C/1,200°F) recommended by the Nunavut Department of Environment, where burning household waste is practiced in remote communities. Generally, if your combusting rubbish produces visible smoke, your fire is not hot enough.

Dirty Deeds

A U.S. Forest Service study found significant traces of heavy metals and other toxins in the ash of campfires used to burn plastics, tin and aluminum foils. Rather than “burning clean” cans and foil, wash and pack out these items. Never burn plastics containing chlorine—most commonly PVC and Styrenes (numbers 3 and 6, respectively, in the plastic ID code)—which produces highly toxic, bioaccumulative dioxins and furans.


A group makes a safety plan in polar bear country.
Packing heat in polar bear country. | Photo: Virginia Marshall

Controversy: Bringing a Gun

Does a firearm make you safer in the backcountry?

Last summer, two American canoeists made international news when they were rescued from a barrenlands river in the Northwest Territories after a grizzly bear destroyed their tent and canoe. One of the wildlife officers involved in the rescue told reporters the couple seemed to do everything right—other than not having a firearm with them. Yet there’s ample evidence to suggest if they had, the outcome could have been far worse.

Bear Spray vs. Bullets

In Bear Attacks: Their Causes and Avoidance, Canadian bear biologist Stephen Herrero found a person’s chance of incurring serious injury from a charging grizzly doubles when bullets are fired versus when bear spray is used. While his research didn’t reveal a single case where spraying the bear with pepper made it more aggressive, evidence suggests shooting a bear can escalate the seriousness of an attack. These findings are echoed by a U.S. Fish & Wildlife Service review of human-bear encounters since 1992. “Even a skilled marksman with steady nerves may have a slim chance of deterring a bear attack with a gun,” concludes the report.

Other Considerations

“I stopped taking a gun on trip because of the weight and general nuisance trying to keep it from rusting,” writes author and wilderness guide, Hap Wilson. Cans of bear spray require no maintenance and are compact enough to be carried by each member of your party. “Leave guns at home if you are not well practiced with them, or if your friends don’t feel comfortable around them,” advises Cliff Jacobson. Know the law: Firearms are illegal in many parks and recreation areas.

Exception

Many paddlers, including Jacobson, choose to carry a shotgun or high-powered rifle for trips to Hudson Bay. Unlike the vast majority of black bear and grizzly encounters, which are defensive in nature rather than predatory, polar bears may view humans as a potential meal.

Whatever you do…

Don’t handle firearms without appropriate training and licensing. Plinking a few cans in the back forty doesn’t qualify you to bring a gun into the backcountry. In polar bear country, it’s safer to hire a qualified, armed “bear monitor” to accompany your group—a measure required by some northern parks.

A black bear sits in long grass.
A fed bear is a dead bear. Keep campsites clean and secure food and scented items by any means necessary. | Photo: Follow Me North Photography

Controversy: Bear Proofing

To hang or not to hang?

What’s the best way to bear-proof your food at camp? Don’t get hung up on one way of doing things, say the experts; outsmarting bears means adapting to the environment and following a few simple rules.

Many camping books, parks and publications advise hanging your food packs from a rope suspended between two trees or from a sturdy tree limb out of a bear’s reach—typically 12 to 15 feet (4 meters) off the ground and 8 to 10 feet (3 meters) from the tree trunk. Canoe guide Hap Wilson derides such tree hoists as “bear piñatas.” Expedition paddler Cliff Jacobson agrees, “In my experience, the outfitter- and government-recommended rigmarole of caching food packs in trees is a waste of time and energy. Most campsites don’t have a lot of good, high bear trees. There’s often only one suitable tree that’s used by everyone. Once a bear has discovered this special tree, he’ll tear apart whatever you hang in it.”

More Options

Alternatives to tree hangs rely on the idea that if bears and other animals can’t smell your food, they won’t get into it. “On the barrens, there are no trees; you have to cache your food on the ground,” points out Jacobson. Seal all food, pots/pans, eating utensils, garbage and toiletries in scent-proof sacks or bear-resistant canisters and stash these at least 300 feet (100 meters) from your sleeping and cooking areas. Standard blue canoe barrels—while more critter-proof than a canvas pack—are by no means bear-proof. Park staff in popular areas like the Boundary Waters report some bears now associate blue barrels as a source of food. Many touring kayakers store drybags of food in their boats’ watertight hatches, but consider this: if a bear does find your food, your kayak is history.

Whatever you do…

Keeping a clean, odor-free campsite and stashing food securely is done for the bear’s protection, not your breakfast’s. Once a bear becomes conditioned to human food sources, it’s potentially dangerous and must be relocated or destroyed. In 2017, conservation officers in British Columbia killed nearly 500 habituated and food-conditioned bears.

A cairn marks a coastal route in Newfoundland
A cairn marks a coastal route in Newfoundland. | Photo: Virginia Marshall

Controversy: Cairn-kicking

When is a cairn not a cairn?

The issue of building cairns in the backcountry may seem trivial, but there’s more at stake than a little rock geometry. Cairn-builders see themselves as helpful (marking a portage trail, for example) or harmless (leaving a stone figure to greet the next campers at a site). Those opposed have taken up cairn-kicking—the practice of toppling and scattering these stone homunculi—to better preserve the wilderness experience. Both are problematic; here’s why:

Location

On the tundra and in other remote areas, cairns may be centuries old, built by Indigenous peoples as way-markers or direction indicators. It’s both disrespectful and dangerous to alter these traditional structures—either by removing or adding rocks. Park staff and trail builders also use cairns to mark routes in treeless areas. Knocking these down or constructing your own in the same area could misdirect other backcountry users.

A Matter of Principle

Guidebook author Laurel Archer cites this principle of low-impact travel practices and ethics: “Don’t change the environment. Leaving rock cairns by the portage trail may seem like a grand and even helpful idea, but maybe the person behind you wants to find his or her way just like you did.”

Tear it Down

If you can’t resist building your own structure, do so on a beach and disperse the stones before you leave so the site remains as wild for the next visitor.

Be Considerate of Others

Moving rocks disturbs natural ecosystems—salamanders, insects, snakes and spiders may be sheltering beneath, and the delicate lichens on those stones may have taken hundreds of years to grow.
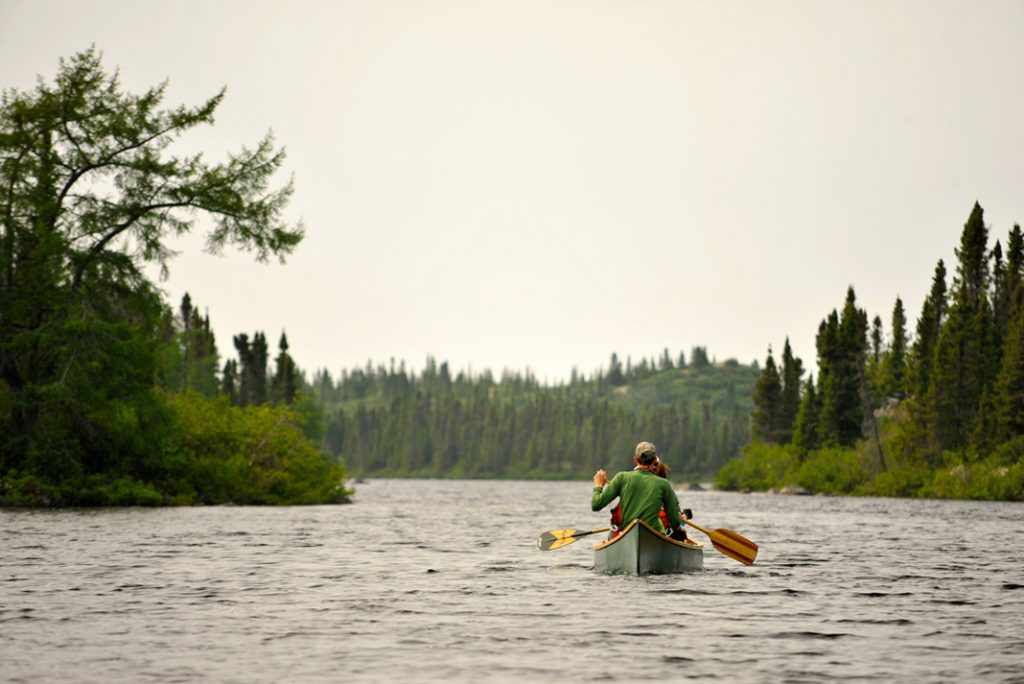
A canoe paddles down a river
What’s wrong with this picture? | Photo: Virginia Marshall

Controversy: Wearing Your PFD

On your body or in your boat?

In both the U.S. and Canada, the law requires carrying a life jacket or PFD for each person in your craft. Wearing it seems like a no-brainer, yet still 15 percent of participants surveyed in the Outdoor Foundation’s 2019 Special Report on Paddlesports & Safety feel personal flotation devices are generally unnecessary. That’s roughly 3.4 million paddlers taking needless risk on the water.

Trust the Numbers

The report notes “while paddling activities appear low-risk, an alarmingly high 29 percent of incidents reported from 2015 to 2017 resulted in a fatality.” Data published by the U.S. Coast Guard for the same period recorded 758 paddlesports deaths, with 79 percent involving drowning. Of those drowning victims, 74 percent were not wearing personal flotation devices. In a 20-year study published in 2016, the Canadian Red Cross estimated 85 percent of boating deaths were preventable if victims had been wearing life jackets.

Fair Weather Fallacies

More than three-quarters of reported paddlesports incidents occur when there is good visibility and benign water conditions.

Whatever you do…

Always wear a coast guard-approved life jacket or PFD. United States federal law requires children under 13 to do so. For the rest of us, it’s the smart choice. Modern, paddler-specific vests are comfortable to wear for all ages, and low-profile inflatable models provide a lightweight option for hotter climates. Learn more at www.saferpaddling.com.
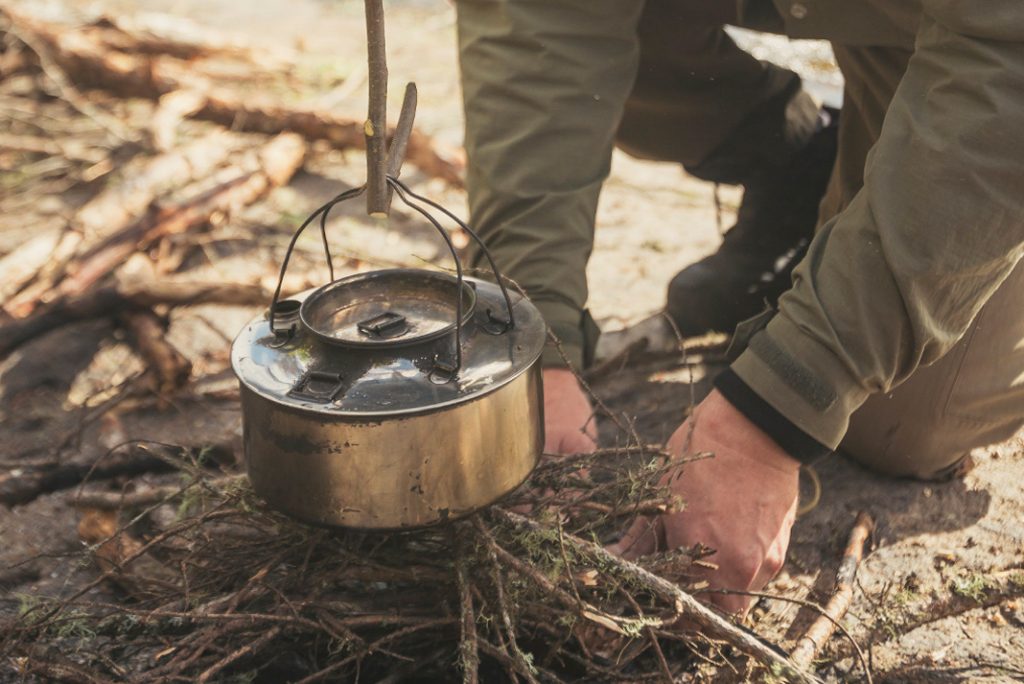
Cooking over a backcountry campfire
Bushcraft masters like Ray Mears demonstrate skills in an ecologically sustainable way. | Photo: Goh Iromoto / Ontario Tourism

Controversy: Bushcraft

Timeless skills or thoughtless thrills?

It seems wherever you look these days, there’s a wilderness survival series or Internet vlogger showing off his self-proclaimed proficiency in the woods. That’s led to a resurging interest in bushcraft, the use of traditional skills and available natural resources to live comfortably in the outdoor environment. Skeptics argue today’s brand of popular bushcraft is incompatible with low-impact practices, or worse.

The Good…

Bushcrafters like Ray Mears—founder of Britain’s Woodlore School of Wilderness Bushcraft—demonstrates these skills in a thoughtful, ecologically sustainable way. “Bushcraft is the term I employ to describe a deeper knowledge of the wild and of nature,” explains Mears in the film, We Belong To It. “It is a huge tree that branches out in many directions to botany, zoology, craftwork, outdoor leadership and countless other divisions. Everyone who visits wild places will benefit from bushcraft knowledge.”

The Bad and the Ugly

Pointless pillaging results when wannabe bushcrafters head into the woods without the requisite knowledge. In a forum debating bushcraft versus Leave No Trace on the outdoor site Trailspace.com, users highlighted some common offenses: using a hatchet or saw to cut down live trees, “especially when done for a brief Daniel Boone moment,” and creating additional fire pits at a campsite with an existing fire ring. One incensed camper described stumbling across such a setup in Tennessee’s Citico Creek Wilderness: “It looked like a weekend wet dream to emulate TV idiots.”

Location & Impact

In a time of diminishing wilderness and increasing use, how can bushcraft be reconciled with the low-impact guidelines established to protect these places? Christian Noble, founder of MasterWoodsman.com, argues both sides need better education. “There is no such thing as leaving no trace. No matter what you do, you will be making an impact,” he contends. Examples of low-impact bushcraft are using downed wood rather than harvesting live trees, and practicing responsible, low-trace fire building. Bushcraft should be practiced away from any areas experiencing heavy use, and is not permitted in many wilderness areas or national parks.

Whatever you do…

Don’t leave your ad-hoc construction for others to admire—especially if your idea of bushcraft involves miles of yellow utility rope and acres of blue poly tarp. Dismantle and pack out.
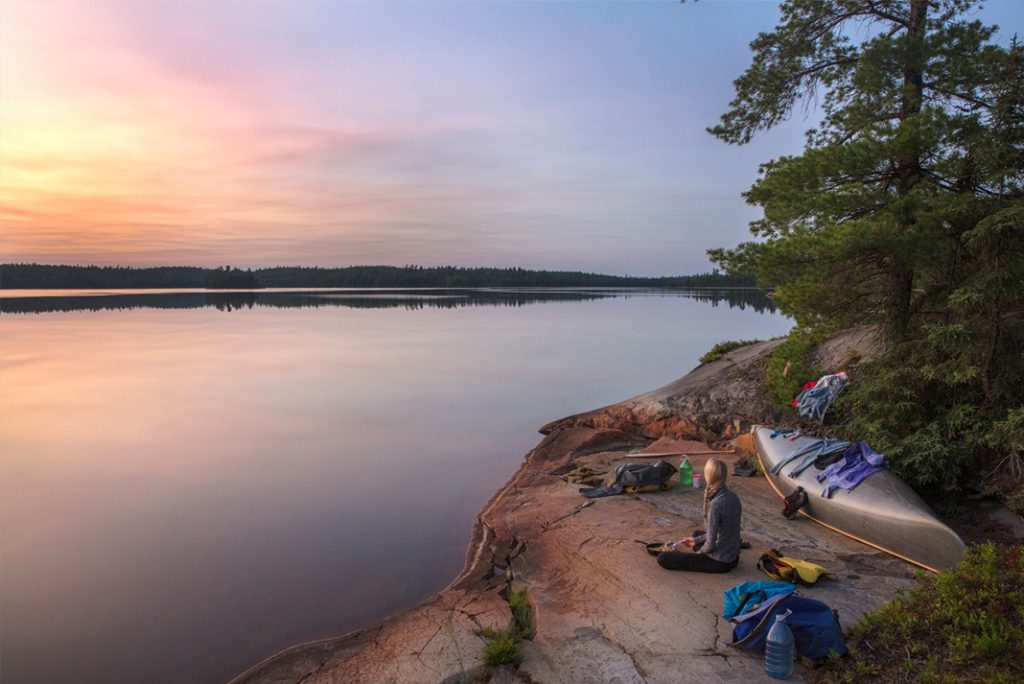
A woman sits with her paddling gear in the backcountry
A five million-star site. | Photo David Jackson

Controversy: Campsite Permits

Does backcountry site selection put paddlers at risk?

Depending on where you paddle, your backcountry permit may allow first-come camping on any available site, secure camping on a particular lake, or reserve a specific campsite for your group. While each system has its pros and cons, some backcountry paddlers believe site-specific permits come at the cost of spontaneity and, more importantly, safety.

Risk vs. Reward

Site-specific permits can offer paddlers peace of mind. You can plan a longer day or enjoy a late start, knowing “your” site will be vacant when you arrive. This system takes the guesswork (and the fun) out of campsite selection. But many scenarios could prompt paddlers to pull off the water earlier than anticipated. Declining or dangerous weather conditions—such as strong winds, poor visibility in fog, and thunderstorms—are especially problematic in exposed coastal areas with few safe landings. Injury, exhaustion or upsetting in cold water can curtail your plans no matter where you’re paddling. In such cases, pushing on to reach “your” campsite puts everyone at unnecessary risk.

What’s the Alternative?

Different parks have different approaches to managing backcountry use. Paddlers in Ontario’s provincial parks must negotiate all three systems: site-specific permits are issued in busy southern parks like Kawartha Highlands and The Massasauga; Algonquin and Killarney employ lake-specific permits; and canoeists on the French or Spanish rivers enjoy the freedom of first-come, first-served camping. While it makes sense parks with heavier use employ a more rigid approach than remote, lightly used areas—that isn’t always the case.

Before Booking Campsites

Be realistic about how far you can (or want to) travel in a day. A more conservative distance or route allows time for inclement conditions and rest days, without falling behind schedule.

Whatever you do…

Don’t keep paddling when it isn’t safe to do so, and don’t turn away a group who arrives at your site in treacherous weather.
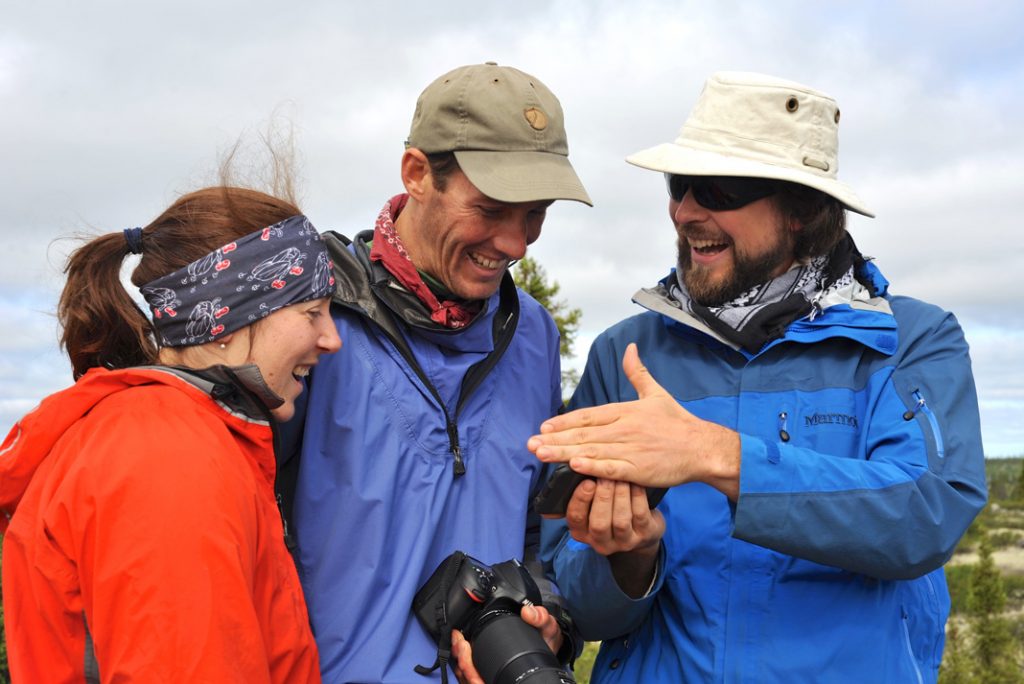
Three backcountry paddlers look at a picture on a cell phone.
Don’t do it just for the ‘gram. | Photo: Virginia Marshall

Controversy: Insta-damned

Is social media killing the backcountry?

Sharing a wanderlust-inspiring selfie on social media is hard to resist, but posts revealing too much about secluded lakes and obscure routes are harming the very places we love (paddlingmag.com/0078). In 2017, a group calling themselves Hikers for an 8th Principle launched a campaign urging the Leave No Trace Center for Outdoor Ethics to update their guidelines to address a growing 21st-century issue: Rapidly increased traffic to vulnerable places, driven by social media posts.

Finding a Balance

It’s no surprise there’s a heated debate around this issue, with social influencers, media outlets like The New York Times and Outside, conservation groups, tourism boards and users of all stripes joining the conversation. Those opposed to the group’s message say it amounts to elitist censorship. Supporters—among them users and land managers who have witnessed the damage resulting when a location goes viral—say it’s about striking a balance. Calling for “obscurity, not secrecy” proponents say sharing your experiences with friends and followers is fine, as long as you do it in a socially and environmentally responsible way.

The New Rules

Popular Instagram users are moving away from geotagging specific spots, and so should you. Avoid a stampede by naming just the park or region, rather than disclosing an exact lake, canoe route or fantastic campsite. Social media guidelines introduced by the LNT Center in 2018 also ask posters to be mindful of what their images portray—consider what your photo may encourage others to do, and set a good example.

Whatever you do…

Don’t give too much away. Geotagging images or providing turn-by-turn directions not only promotes overuse of fragile ecosystems, it also deprives other visitors of the sense of discovery that makes backcountry adventures so special.
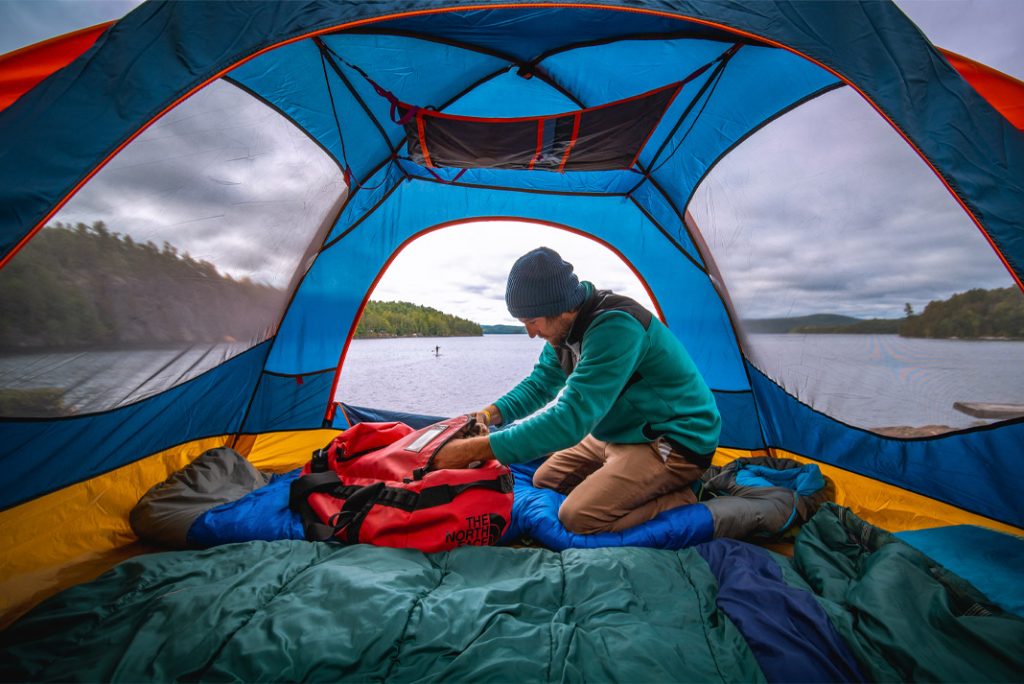
A man sits in a colorful tent open to the lake behind him.
Footprints are designed to go under the tent, but there’s more to the debate. | Photo: Caleb Gingras

Controversy: Innie vs. Outie

Should a groundsheet go inside the tent or underneath?

Most tent manufacturers sell a waterproof nylon footprint accessory for use under their tents. The footprint protects the interior from ground moisture and the bottom of the tent from abrasion. However, some argue optimal waterproofing is achieved by simply lining the interior of the tent with a plastic groundsheet.

The Dry Goods

A vocal proponent of the innie method, Cliff Jacobson is quick to say those who have camped out a lot and in a lot of rain understand why groundsheets should go inside. “Old ideas die hard. A ground cloth outside is the same as pitching the tent on a slab of concrete. It won’t keep you dry when the ground is flooded. Water will get in between the footprint and the tent and get inside.” Jacobson has camped out for thousands of nights and claims he hasn’t been wet in his tent since he was 12 years old.

Don’t Be A Wet Blanket

Instead of shelling out an additional $70 for a branded footprint accessory, Jacobson suggests cheap, clear hardware store plastic, about a foot larger than the tent all around. “You run the plastic up the sidewalls, like a bathtub,” he says. A benefit to the innie method is dirt and debris inside the tent are easily removed by pulling out the groundsheet, and so long as the topside of the groundsheet stays dry, you’ll have a dry floor at the next camp.

Some ultralight sil-nylon tents feel so delicate they should never directly touch the earth, but Jacobson argues zippers and UV proofing will fail on most tents well before the floor.

Whatever you do…

Know that if a river runs through it, no footprint will keep the interior of your tent dry. Campsite selection is the first step in waterproofing any shelter. However, “If you get days and days of rain, the only thing that will save you is a groundsheet in the tent,” declares Jacobson. —KP
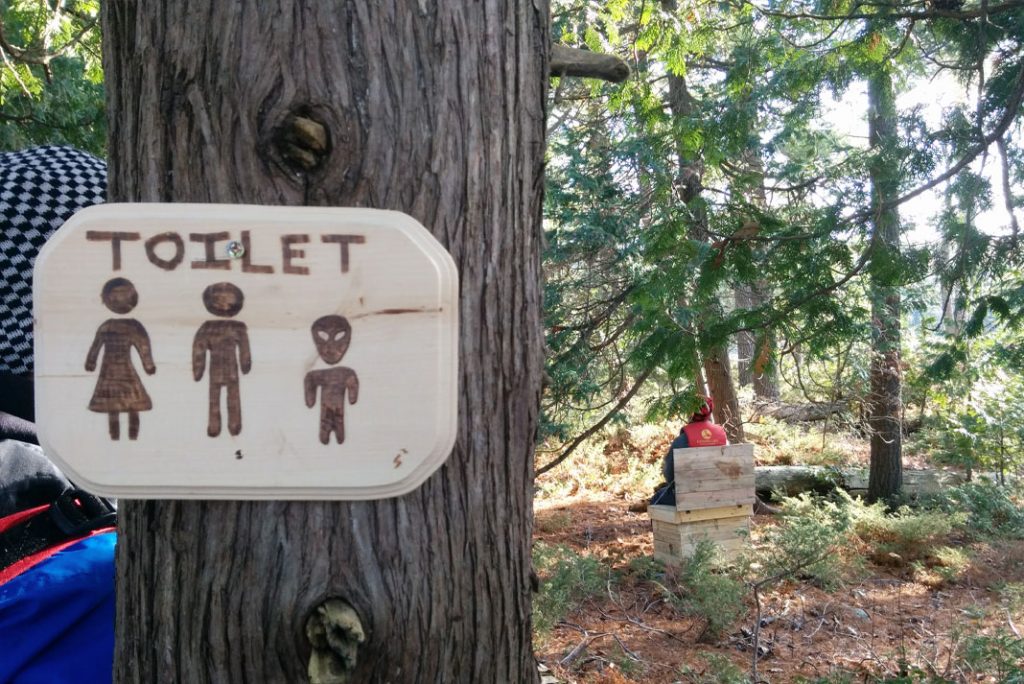
A person uses a backcountry toilet
All poopers welcome. | Photo: Sue Sheppard // suesoutdoorcrew.ca

Controversy: Potty Talk

What is the correct name for a backcountry toilet?

Which Way to the…?

The humble pit toilet may be known variously as a treasure chest, thunderbox, KYBO (Keep Your Bowels Open), squatty potty, privy, vault, boom box, long drop or latrine. To avoid controversy—and get where you need to go—learn the local dialect.

This article was first published in Paddling Magazine Issue 62. Subscribe to Paddling Magazine’s print and digital editions here, or browse the archives here.


Looks like rain tonight: innie or outie? | Photo: Francois Leger-Savard
Canoe Review: Abitibi Saugeen 16.6

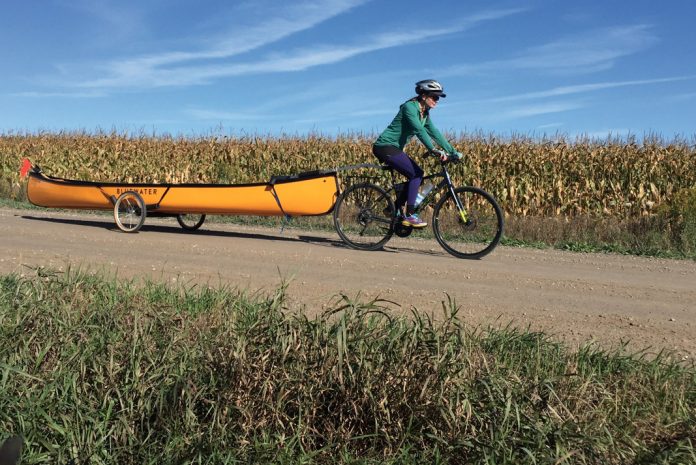
Woman on a bike shuttling a Bluewater Saugeen canoe

Many paddlers will remember the loss of venerable canoe brands Scott Canoe and Bluewater Canoe when parent company Mid-Canada Fiberglass went belly up and closed its doors in 2013. Well, Bluewater’s Saugeen fleet lives again in the Abitibi Saugeen canoe.

Abitibi Saugeen 16.6 Specs
Length: 16’6”
Width: 35”
Weight: 50 lbs
Capacity: 350-550 lbs
MSRP: $3,299 CAD

In early 2015, a pair of young Quebecois men, Guillaume LeBlanc and JD Petite, purchased the precious Mid-Canada moulds and assets—including the Saugeen—and formed the new Abitibi & Co. canoe company. Now entering its third year of operation, Abitibi & Co. is re-issuing classic designs from Bluewater and Scott with a modern flair—and they look better than ever.

Taking the Saugeen for a spin

Last fall, I had the opportunity to test a shiny new 16.5-foot Abitibi Saugeen, the mid-size version of the three Saugeens available once again.

Unable to travel far from home on a sunny September weekend, my partner, Geoff, and I added a bike shuttle twist to a local lazy river we’ve paddled a dozen times.

For the first 20 kilometers of our adventure, our sunny Saugeen was simply baggage, cradled gently by a canoe cart on loan from Wike Trailers.

The Saugeen trundled along behind us without complaint, our paddles gently ratatat-ing against its interior.

Ferry a heavy load

Midday found us riverside, disassembling our bikes and Tetris-ing them into the hull, taking care with derailleurs, and trying to slide frames under thwart or yoke. We were pleased to find two paddlers, two touring bikes, panniers, canoe cart and a backpack could fit inside the Saugeen’s beamy 35-inch wide hull just fine. On the water, the combined weight of paddlers and gear must have been approaching the Saugeen’s recommended max carrying capacity of 540 pounds.

With some of our awkward load riding high above the gunwales, we were always stable—even in swifts. An inch of rocker in the Saugeen’s profile creates enough maneuverability for tracing sharp bends in the shoreline and avoiding the odd downed tree, while maintaining excellent tracking.

At the end of 30 kilometers of twists and turns, I was sold.

Tandem or solo, the Saugeen 16.6 does both

The Abitibi Saugeen offers great versatility in an all-round package. I can understand why the design was one of Bluewater’s most popular traditionally shaped boats. The Saugeen is ideal for someone who does a little bit of a lot different things on the water, including wanting a tandem canoe offering solid solo performance.

I put this theory to the test a few weeks later on a solo, meandering creek excursion. Then we took the Saugeen out on a portage-heavy weekend trip, and on Christmas Day for a merry spin on a frigid ice-choked lake. It’s a friendly boat. Even on the 1000-meter-long portage from my house to the lake, the Saugeen’s 50 pounds rode easy thanks to a deep-dish ash yoke, which balanced well on my shoulders.

The cheery canary yellow exterior looks smart paired with the standard black anodized aluminum gunwales. Webbed seats, ash carry handles and thwarts, and protective composite skid plates round out the package. Vinyl and ash are trim options Abitibi & Co. also offers.

True to the original design, our Saugeen features a keel. The keel is primarily to protect the canoe against grounding, according to Abitibi & Co. “On a flat-bottomed boat, a keel will be damaged first and protect the rest,” adds LeBlanc.

Canadian-made with style and flair

Our Saugeen came to us straight from the manufacturing headquarters in Rouyn Noranda, Quebec, just inside the Quebec-Ontario border. Five years ago Guillaume LeBlanc was a paddling enthusiast and mechanical engineer looking for a career change. When he contacted Mid-Canada Fiberglass he was hoping to assist with reinvigorating their failing canoe brands. Instead he wound up purchasing their assets and molds with business partner and marketer JD Petit.

Marketing flair is visible in Abitibi & Co.’s attention to aesthetic in its boats, website and catalogs. Their moody and evocative images drip Instagram fame. The brand also produces an outdoor lifestyle magazine, Beside, and manufactures a line of heritage-inspired hand-painted canoes in collaboration with Montreal-based paddle maker Norquay.

“People talk about the features of a canoe—the weight and length—but they buy one because of the feeling they want to get in it,” says LeBlanc.

From products to digital properties, the Abitibi & Co. strategy is to stir up our wanderlust, transmuting what were utilitarian and purpose-driven canoe designs in the hands of Bluewater and Scott into art and inspiration on water. It’s kind of their thing.

When we took over production, we changed
the branding, layups, colors, finish and design

From the 100 or so Mid-Canada Fiberglass molds available when LeBlanc and Petit purchased the assets, Abitibi & Co. is now only manufacturing three-dozen canoe designs, including Bluewater’s Scout and Tripper, as well as 16-foot versions of the Peterborough and Prospector.

Abitibi & Co. bring start-up energy to the Saugeen

Despite building on the decades-long history of the canoe moulds and the Bluewater and Scott brand names, LeBlanc says Abitibi & Co. still feels a lot like a start-up.

“When we took over production, we changed the branding, layups, colors, finish and design,” says LeBlanc. The brands had 50 years of production behind them, but they were stagnant over the last 10 years, and so there was 10 years of catch-up to do while taking back production.

Color schemes have been updated and are more varied. Abitibi & Co’s construction process reflects sustainable and environmentally-friendly best practices. Like Bluewater before them, Abitibi & Co. offers the Saugeens in a Kevlar layup. Resin is infused into the fabric via vacuum bagging, then a gelcoat is applied.

“Without the gelcoat, you have a light boat but there is no repairability. We always want to be able to repair, so all our boats have gelcoat,” says LeBlanc. At 50 pounds and 16.5 feet, our loaner Abitibi Saugeen is not the heaviest or the lightest Kevlar canoe on the market. “We’re hoping to hit a sweet spot and make boats which will last for forever,” says LeBlanc.


Mike Ranta Shows You How To Whittle A Canoe

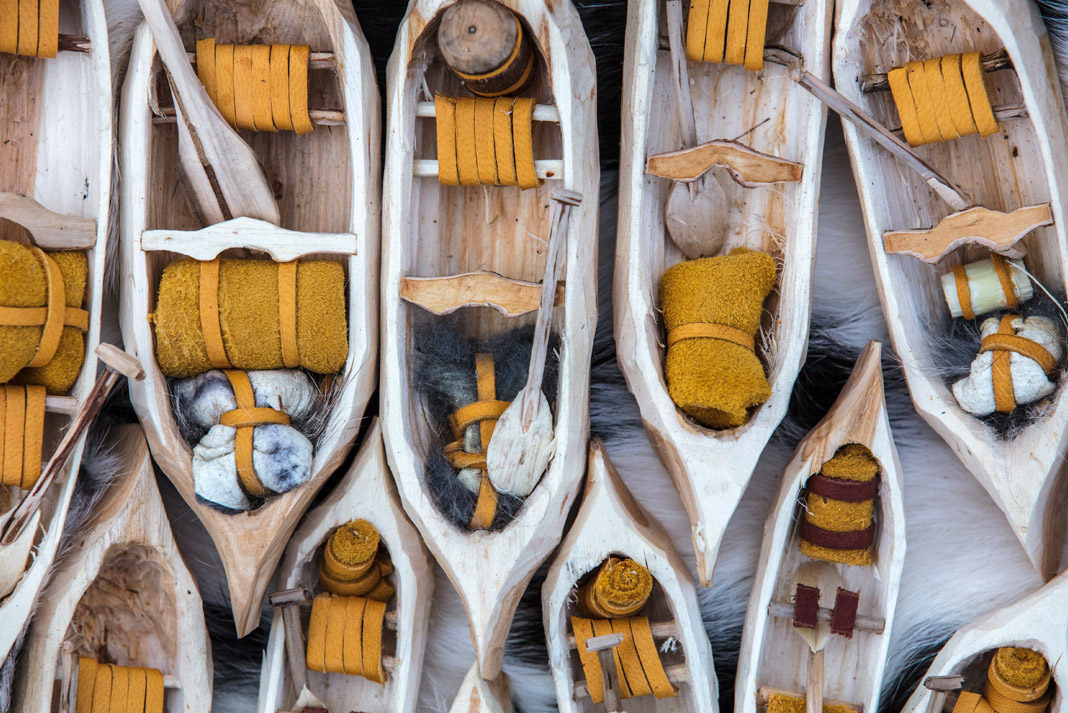
miniature whittled canoes
Feature Photo: David Jackson

Imagine this. There’s a roar approaching and a storm is near. Waves hammer the side of your boat—time to get to shore. Light a fire, eat some food, drink a tea, and stare at the towering waves. The squall lasts long enough that you’ve finished your book. Now what? To pass the time we suggest you partake in a time-honored skill and learn how to whittle a canoe.

[ Plan your next adventure with the Paddling Trip Guide ]

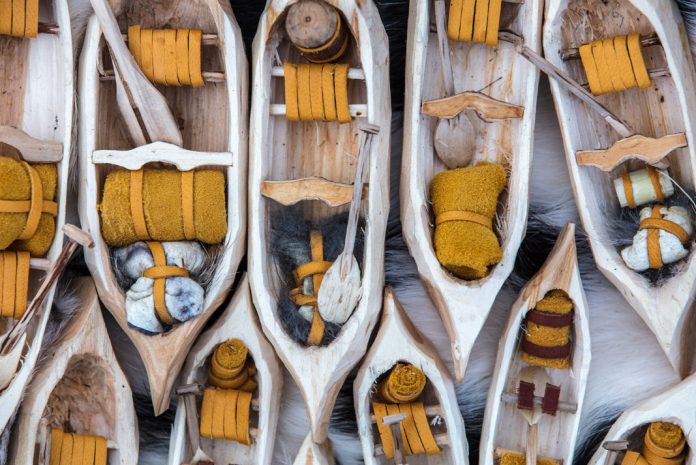
When canoe tripping, every extra luxury means added weight and space used. For Mike Ranta, Canada’s cross-continental voyageur, being pinned to a shore on some of the world’s biggest lakes means an opportunity to whittle away time by crafting his signature tiny canoes.

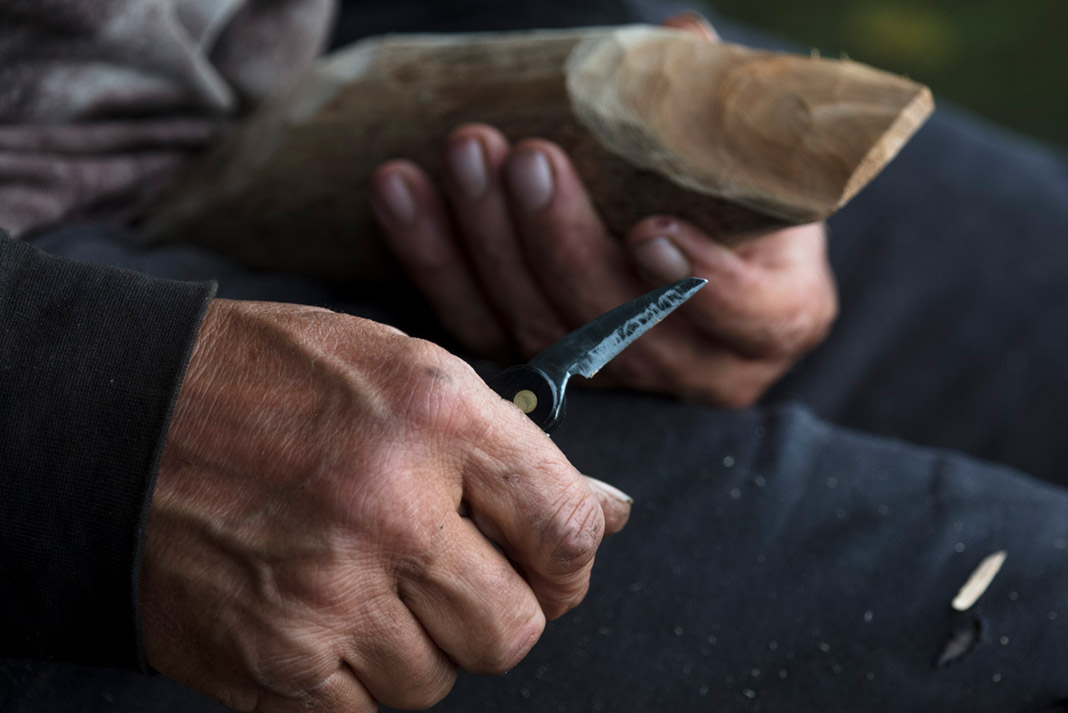
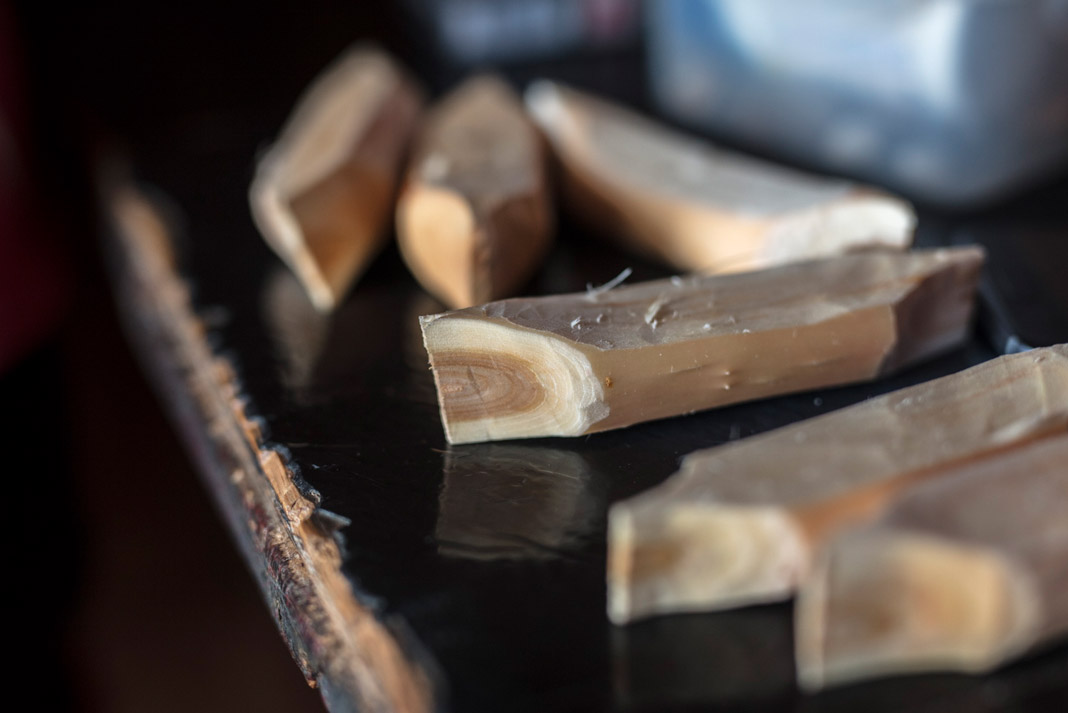
To whittle these tiny canoes, Ranta uses a Flexcut Carvin’ Jackknife. Any wood will do—from willow on the Saskatchewan River to a chunk of oak from Lake Winnipeg’s south basin. Here’s Ranta’s advice on how to make your own wood canoe in 60 minutes or less.

How to whittle a canoe in 6 steps

1. Select your stick

Using a hand saw, cut a portion of a small branch so it sits nicely in your palm. The bigger the piece, the more whittling necessary; start small and hone your skills.

Mike Ranta marks the bow and stern on his whittled canoe
Second step. | Photo: David Jackson

2. Make your marks

With your knife blade, notch the wood where the bow and stern positions should be.

Mike Ranta shapes the exterior of his whittled canoe
Third step. | Photo: David Jackson

3. Shape the exterior

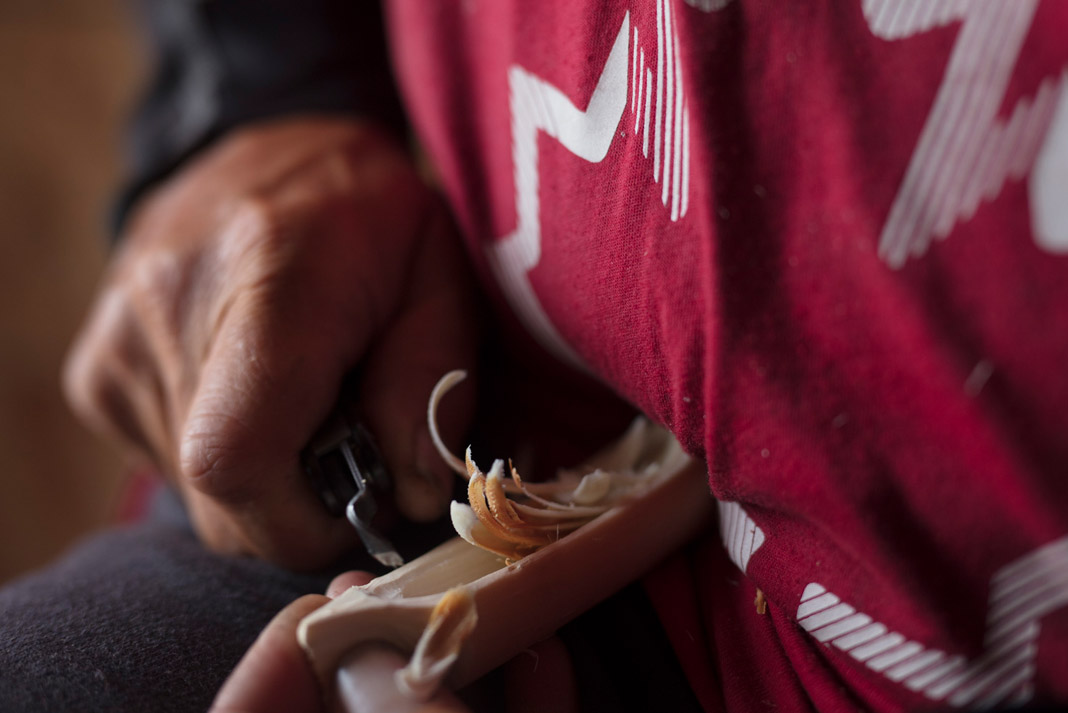
Ranta first flattens the bottom of the hull, then carves away at the bow and stern until he’s achieved as close as he can to a symmetrical line.

Using a flat blade, he carves what will become the inside of the boat, from bow to stern, revealing the first look of a pint-sized canoe.

Mike Ranta hollows out the interior of his whittled canoe
Fourth step. | Photo: David Jackson

4. Hollow out the interior

Once the line seems just right, Ranta switches to his digging blade and begins shaping the inside of the canoe. The trick is to make the hull as thin as possible, but not puncture through the wood and ruin the little creation.

Mike Ranta holds his whittled canoe up to the sun to check for thin spots
Fifth step. | Photo: David Jackson

5. Look to the sky

A great way to check if your walls are getting too thin is to hold the canoe up to the sky and see if there are any spots where the sun bleeds through the wood. This means the walls are getting too thin.

6. Finishing touches

When the canoe is dug out, make some final touches to fine-tune the design and fix any blemishes.

Mike Ranta adds tiny paddles, thwarts, seats, and voyageur sacks out of fur and hide
Extra steps. | Photo: David Jackson

Whittling a canoe: Extra steps

Ranta goes one step further and crafts miniature paddles, a thwart and seats, which he glues into position. When time permits, he adds little voyageur sacks, finished with tiny pieces of rabbit fur and lashed with hide.

When the waves have subsided, in your hand is a beautiful little piece of art for a mantle, or a tiny toy for a child dreaming of flowing rivers and sprawling lakes.

Safety first

Beware, whittling knives are exceptionally sharp, and a slip can lead to deep gashes. It’s imperative to be patient and have a first aid kit. Consider going one step further and purchasing a whittling glove. The last thing anyone wants is to be evacuated because of a carving accident.

This article was first published in Issue 55 of Paddling Magazine. Subscribe to Paddling Magazine’s print and digital editions, or browse the archives.


Video: The Mystery of Squirt Boating

There’s a subculture of kayaking known by few and understood by fewer. The paddlers don diving goggles and neoprene and slide into thin, uncomfortable boats not meant to float but designed to sink. Below the waterline, their goal is to stay underwater as long as they can. This is squirt boating.

[ Paddling Buyer’s Guide: View all rafting gear ]

After squirt boating’s heyday in the early 1990s, the scene has all but disappeared. But when it comes to the history of squirt boating, the legend starts with Jim Synder. The Mystery offers a rare glimpse into this obscure sport and the dedicated few who continue to keep the tradition alive.

Whitewater Technology Launches Debut Paddle Range

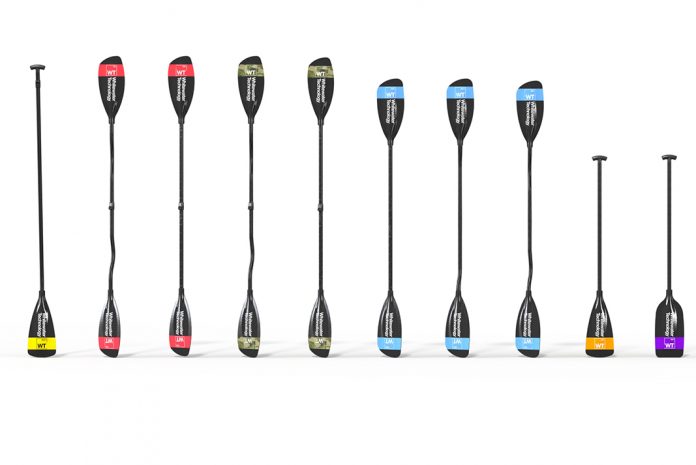
Whitewater Technology launches it’s debut paddle range featuring high performance paddles made with recycled carbon fiber & 5 year warranty. | Photo: Whitewater Technology

Greenville, SC – October 28th 2021 – Whitewater Technology, a new entrant to the high performance paddlesports market launches its first 100% made-in-USA, recycled carbon fiber paddle range with an exclusive pre-sale on ​whitewater-technology.com​.

The range which features paddles for all disciplines had been designed by leading advanced materials engineer and whitewater kayaker Ollie Wainwright. Using his composites background in the motorsports industry, WT’s first paddles are the result of 2 years of intensive R&D into the use of recycled carbon fiber in high performance outdoor & sporting goods.

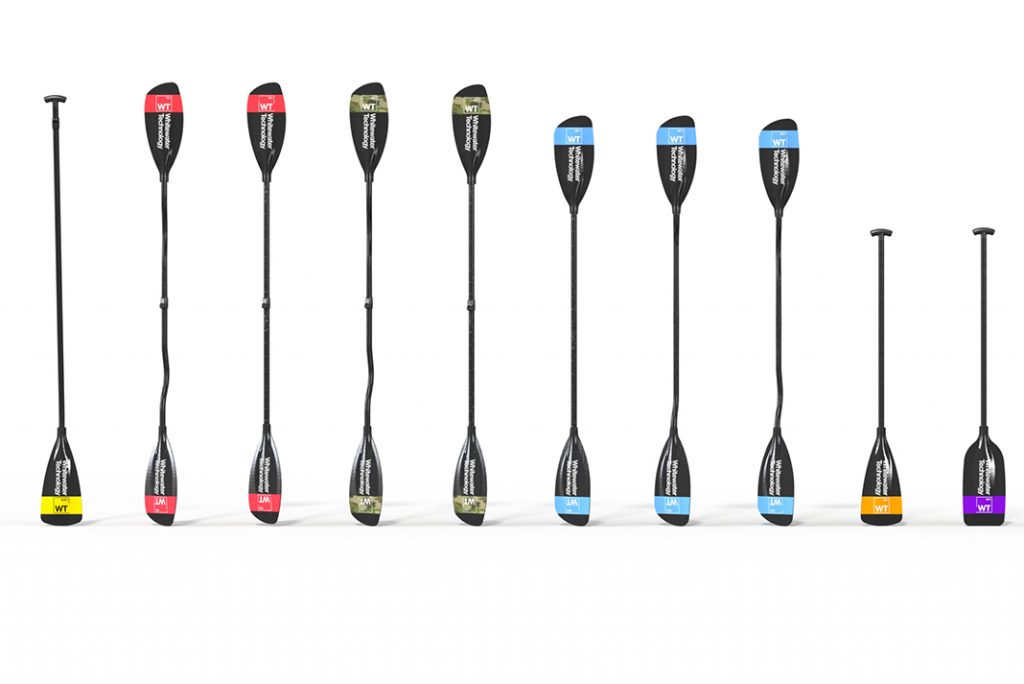
Whitewater Technology launches it’s debut paddle range featuring high performance paddles made with recycled carbon fiber & 5 year warranty. | Photo: Whitewater Technology

“As both a serious paddler and materials engineer I had grown frustrated with the lack of a sustainable high performance paddle option. We’re out there in nature every weekend using a product that ultimately ends up in landfill.. So a few years ago we set out to try and change this.”

Whitewater Technology launches it’s debut paddle range featuring high performance paddles made with recycled carbon fiber & 5 year warranty. | Photo: Whitewater Technology
Photo: Whitewater Technology

“We’re really pleased with the results and what we’ve been able to accomplish in designing a more sustainable paddle that performs and we’re stoked to share this with the paddling community”

WT’s paddles utilize a custom made, high impact, non-woven composite that combines 40% recycled carbon fiber with a thermoplastic resin system and an aramid puncture resistant layer. The result is a high performance paddle with identical weight, strength and stiffness properties to a non recycled product.

Whitewater Technology launches it’s debut paddle range featuring high performance paddles made with recycled carbon fiber & 5 year warranty. | Photo: Whitewater Technology
Photo: Whitewater Technology

Available initially as a pre-order via the WT website in addition to specialty retailers, the range includes paddles for; Whitewater, touring, fishing, SUP, rafting and canoe with a variety of adjustable length and shaped shafts.

Pre-sale pricing starts at $240 including free shipping, 5 year warranty and crash replacement.

Boat Review: Zephyr 160 Pro by Wilderness Systems

Person paddling a Zephyr 160 Pro kayak from Wilderness Systems
Feature Photo: Tim Shuff

Derived from the name of the Latin and Greek gods of the west wind, in English “zephyr” means “a gentle breeze from the west.” The Zephyr 160 Pro from Wilderness Systems adopts the name to suggest that this kayak, while sizeable, provides a light and airy ride for medium- to large-sized paddlers.

Wilderness Systems Zephyr 160 Pro Specs
Length: 16’
Width: 23”
Depth: 17”
Weight: 54 lbs
Capacity: 300 lbs
MSRP: $3,150 USD / $3,700 CAD

The Zephyr 160 is indeed light, being composite, and is airy in substance—like its namesake it can be everywhere at once and refuses to be nailed down on the spectrum of kayak performance. No kayak can do everything, but the Zephyr comes close to a quiver-of-one.

The Zephyr 160 is a big‑time performer

Its 16-foot length puts the Zephyr smack between day-touring and expedition classes, offering a mix of nimbleness for tootling about and storage capacity for ambitious trips. Similarly, the 23-inch width makes it neither torpedo nor tanker, swinging the needle just slightly to the side of playfulness by presenting a more rockered profile on edge. This tubby belly with a taste for rock-garden mischief spins like a dervish on a steep edge and makes room for paddler and gear.

Plenty of room to spare

The Zephyr’s cockpit is cavernous and welcomes rec kayakers making the transition to a high-performance boat. A six-foot-two paddler had the foot pegs four to five notches back from max and could barely toe the bulkhead. But there’s no sacrificing a snug fit, even for medium-sized seamen, thanks to the adjustable outfitting.

Smaller testers found the 17-inch deck a bit high, however, confirming that this is a performance punt for paddlers on the large side. We noticed that the cockpit opening seemed poorly positioned relative to the seat, or vice versa, with several inches of space behind the seat back making it harder to get a sprayskirt on.

On the go, the hull tracks straight on an even keel and holds its own, speed-wise, amidst a fleet of expedition boats. On a tilt, there’s a direct relationship between degree of edging and willingness to turn. The point-of-no-return is a point of mega-turns, providing you have a handy brace. Initial stability is more solid than its sister ship the Tempest, while secondary on this softer chine is less defined: the Zephyr 160 is friendlier to beginners, but its edging less precise.

Ride like the wind

Years ago, Wilderness Systems’ adjustable outfitting migrated over from its whitewater designs to sea kayaks and has been improving ever since, providing lickety-split customization of thigh brace position, hip pad width, and leg support height. We like.

Shallow-V hull and soft chine make for good initial stability and soft secondary—increasing degrees of edge give greater turning speed with no obvious point of resistance. When deployed, the plastic skeg felt loose and could be heard wiggling when rocking from edge to edge. Oddly, the Zephyr is available in Kevlar for the same price as fiberglass.

Attractive deck layout with generous bungee tie-downs and three waterproof rubber Kajak Sport hatches. The 10-inch bow hatch is less convenient to pack than an oval hatch, but provides greater security in rough seas. A compass mount is recessed ahead of the front hatch.

Ride like the wind with the Zephyr 160 Pro

On the Greek theme, the Zephyr 160 sticks to Aristotle’s golden mean in both capacity and performance. Also available in rugged plastic and a sportier 15.5 length suited to smaller paddlers, the Zephyr succeeds as the do-it-all high-performance kayak that Wilderness Systems claims it to be.

This article was first published in the Spring 2009 issue of Adventure Kayak Magazine. Subscribe to Paddling Magazine’s print and digital editions, or browse the archives.


Boat Review: Current Designs Squall GTS Kayak

Man paddling a Squall GTS kayak from Current Designs
Feature Photo: Virginia Marshall

Sharing many of the winning design attributes of the best-selling Solstice GT and its plastic counterpart, the Storm, the Current Designs Squall has been a reliable workhorse for outfitters and small- to mid-sized paddlers since its 1997 debut. Redesigned for 2012, the new Squall GTS is seven inches shorter yet actually accommodates a larger range of paddlers. Along with a larger cockpit and updates to the deck, the CD design team says the new hull “offers increased efficiency.”

Current Designs Squall GTS Specs
Length: 15’11”
Width: 22”
Weight: 55 lbs
Dry storage volume: 186 L
MSRP: $1,549 USD
www.cdkayak.com
[ Paddling Buyer’s Guide: See all sea kayaks for smaller adults ]

The Squall GTS is no slouch

When it comes to defining efficiency, CD’s designers evidently focused on speed over maneuverability. Despite being just shy of 16 feet, the Squall’s waterline carries the cruising speed of a longer hull thanks to minimal rocker in the bow and almost no rocker in the stern. On calm water, the miles slip past effortlessly. In rougher seas, expect a wet ride.

Consistent, reliable performance

Tracking is excellent, making the rudder unnecessary even with a tricky quartering tailwind. Which is just as well, given the challenges our testers had with CD’s SmartTrack foot braces. Taken on their own, the foot braces are a clever compromise between stability and ease of use. However, pair them with the leg position imposed by the molded-in thigh braces of the Squall GTS (more on that later), and it’s all but impossible to achieve the toe extension required to work the pedals. Those who enjoy using their rudder to aid steering may want to consider retrofitting adjustment plates available from CD.

The shallow V hull is nearly flat at the cockpit, but once again looks can be deceiving. Combined with a slender, 22-inch beam and rounded chines, the hull cross section results in a stability profile better suited to confident beginners and intermediate paddlers. Moderate initial stability leads smoothly into consistent secondary stability. Roll the Squall onto its side for more nimble turning and spinning.

Man paddling a Squall GTS kayak from Current Designs
Photo: Virginia Marshall

Limber up your toes

Discriminating bottoms are well supported by an elongated seat and plush, fully adjustable back rest. CD also redesigned the keyhole cockpit to improve accessibility and fit. Large thigh braces are placed low to enhance boat control for edging and rolling, allowing smaller paddlers to lock in while providing the length and foot room needed by larger folks. On longer tours, however, this configuration triggered leg cramps that had us wishing we hadn’t skipped yoga that week.

Current Designs’ new SmartTrack foot braces are designed to provide the stability of a fixed peg while facilitating rudder control. Elongated slider arms make on-the-fly adjustments a snap, but the toe pedals challenge all but the most dexterous feet.

The two-lid system in the Squall GTS does more than look good. The rubber hatch provides a more watertight seal than earlier models’ neoprene covers, while a polyethylene lid protects against UV damage.

The 2012 redesign includes hidden rudder haul cables and updated lines that do away with the old Squall’s distinctive peaked decks.

The Squall GTS has room for adventure

Current Designs bills the Squall GTS as a “sporty tripping kayak capable of extended tours.” Indeed, if you can’t fit all your gear and the collapsible kitchen sink in this 16-footer’s two voluminous hatches, then you should consider downsizing your kit, not upsizing your boat. A consistent performer with heavy loads or empty hatches, the new Squall is a predictable, all-purpose companion on longer tours and after-work jaunts.

[ Plan your next adventure with the Paddling Trip Guide ]
This article was first published in the Summer/Fall 2012 issue of Adventure Kayak Magazine. Subscribe to Paddling Magazine’s print and digital editions, or browse the archives.


Video review of the Current Designs Squall GTS Kayak:


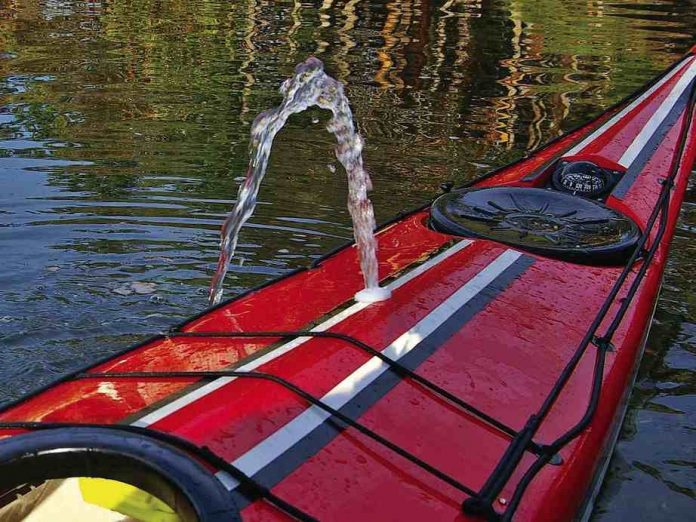
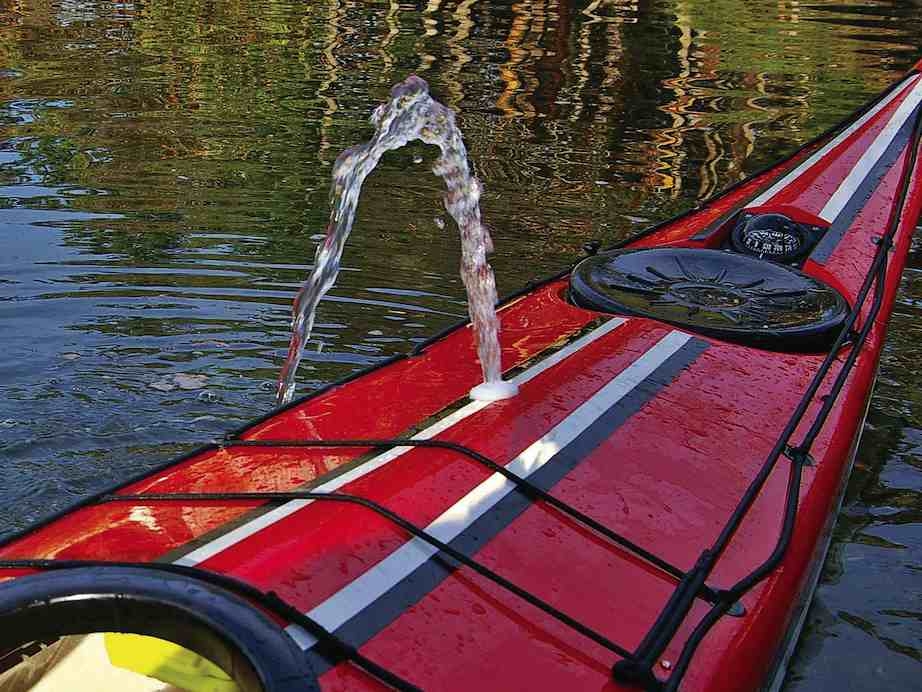
Build Your Own Battery-Operated Kayak Bilge Pump

battery-operated kayak bilge pump in operation
Make your own bilge pump. | Feature Photo: Doug Alderson

Having a hands-free means of pumping out a flooded cockpit has great advantages and I have always outfitted my kayaks with a foot-operated bilge pump. However, in the back of my mind has always lingered the desire to build my own battery-operated kayak bilge pump.

Recently I took on the challenge. My first limitation was a personal rule that all my kayaking electronics are powered by AA NiMH rechargeable batteries. Second on my list was a simple design and third was a modest budget. This pump setup uses parts that should all be readily available at an electronics or marine supply store for about $100.

The system has exceeded my expectations on all accounts. Most notably the battery power has proven to be more than adequate. Eight times I sat in the cockpit flooded so that the water level was over my thighs and eight times the pump cleared the water in about four minutes.

I learned that I did not need any fancy switching on deck. Held under the deck by two snug bungies, the switch on the battery box can be toggled left or right (on or off) by means of my shin.

The basic system is easily adapted to various locations for the pump and the battery box.

Instructions for your battery‑operated kayak bilge pump

Kayak Bilge Pump
Build your own bilge pump. | Photo: Doug Alderson

DIY Bilge Pump Assembly

The fully submersible pump, 600 gal/hr (38 L/min), is connected to the battery box with the wire provided with the pump. This pump came with an alternate 90-degree elbow. The rubber tricuspid one-way valve provided with the pump was of poor quality and was replaced with a new 3/4-inch one-way valve shown near the end of the clear plastic tubing. The toggle switch is covered with a rubber protective sleeve.

DIY Bilge Pump Wiring

Twelve 2500 mA, 1.2-volt NiMH batteries are held in a combination of one eight-cell and one four-cell battery holder wired in series to produce a maximum of 14.4 volts—well within the tolerance of the 12-volt pump.

An optional 2.5-amp fuse and a simple toggle switch are wired into place. The wires and toggle switch have been fitted snugly through holes drilled through the case. Inside the case the wires have been tied in a knot to prevent any tension on the internal wiring. The toggle switch is fitted with a supplemental rubber cover from the marine supply store.

Waterproof the holes drilled into the case with some seam seal or marine caulking. Wires can be connected with solderless connectors, or soldered and then insulated with shrink wrap. A small piece of foam sits on top of the batteries to keep them in place when the box is closed. The battery holders come out of the box easily by unsnapping the connector.

Parts List For Your Battery-Operated Kayak Bilge Pump

  • Pump, $25
  • Plastic box, $13
  • Toggle switch, connectors, fuse holder (optional), battery holders,
 waterproof case, $25
  • One-way valve, $12
  • 3/4-inch tubing, hose clamps,
 wire connectors, through-hull fitting $10

Note: Through-hull fittings vary greatly in cost. I use inexpensive nylon fittings that cost about $2.


Boat Review: Necky Chatham 16 Kayak

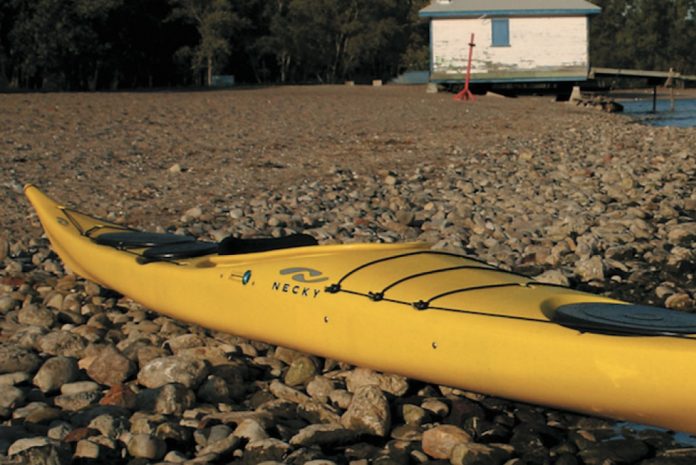
The Chatham 16 sea kayak from Necky Kayaks sits on a rocky beach
Feature Photo: Tim Shuff

A few new things going down at Necky this year: The  introduction of a new layup process called “resin infusion” that makes its composite boats lighter, and the surprising move to drop its Kevlar line entirely in favour of carbon. The venerable kayak builder has also joined the latest North American trend and put out a British-inspired boat, the Necky Chatham 16.

Necky Chatham 16 Specs
Length: 16’5”
Width: 22”
Cockpit: 31” × 15”
Weight:
58 lbs (polyethylene)
49 lbs (fiberglass)
44 lbs (carbon)
MSRP:
$1,449 USD / $1,999 CAD (polyethylene)
$2,699 USD / $3,399 CAD (fiberglass)
$3,199 USD / $3,999 CAD (carbon)

Necky’s Chatham 16 is no fad

The Chatham 16 comes complete with a skeg, gracefully upswept “Greenland style” bow and stern, a playful rocker, steep chines, a low, streamlined deck and whitewater-inspired outfitting. This so-called British trend is a lot like low-carb dieting: some say it’s just a silly fad that’s sure to pass, while others say it’s a sign that North Americans are finally smartening up.

[ Plan your next adventure with the Paddling Trip Guide ]

Paddle the Necky Chatham 16 and you’re likely to side with the latter. The Chatham is simply a joy to paddle in wind and waves and poking around in tight places. At 16 feet, she truly fits her billing as more of an ocean playboat than a long-distance tourer. Although our poly test model did not feel especially fast, it excelled in agility. On edge we could spin in place or carve 90-degree turns with one or two well-placed strokes.

The Chatham’s initial stability feels moderate; secondary stability is remarkably consistent in any degree of lean through to a complete roll, thus the Chatham is remarkable for practicing fancy sculling and rolling, almost as much fun underwater as above.

Shedding pounds and dollars

The composite Chatham that we didn’t test is likely all the more nimble at 49 pounds. Necky’s new layup technology goes a step beyond traditional vacuum-bagging to suck air out of the mould first, before injecting resin into the fabric. Necky claims there is significantly less resin in the finished product than with their old hand layups, arriving closer to an optimum resin-to-cloth ratio without the extra weight or strength-sapping brittleness of excess resin.

Amazingly, Necky’s fiberglass boats now weigh about the same as last year’s Kevlar. Prices have also slimmed across the board. Take the Tahsis, which this year dropped five pounds and about $200. Customers still happy to pay the Kevlar price can opt for the new carbon layup instead—allegedly lighter, stronger and longer lasting than Kevlar ever was.

Detail photos of the Chatham 16 sea kayak from Necky Kayaks

The Necky Chatham 16 is made for play

Necky’s robust outfitting suits the “ocean playboat” theme. The seat of fabric-covered minicell foam is very comfortable and easy to customize. Hip pads attach to the aluminium stays on either side of the seat. The slim 15-inch-wide cockpit is the Chatham’s limiting factor for larger paddlers. There is, however, plenty of room for long legs. Padded aluminium thigh braces provide secure contact and are easy to adjust in multiple directions. Ski boot-type ratchets on each thigh brace wrap around to micro-adjust the backband—oodles o’ hardware, but it does the trick. A smooth aluminium slider beside the cockpit controls the lifting and lowering of the skeg.

All three storage compartments stayed dry beneath the rubber hatches by Valley Canoe Products. Necky provided the unique advantage of a front hatch that’s as big as the 16-inch-long rear—much easier to pack than a standard eight- or nine-inch round British bow hatch. A low, flat deck and high bow show off Greenland provenance. A sunken compass mount graces the deck fore of the bow hatch. Comfortably moulded hand toggles hang loose according to the traditional British prescription that they be easy for a swimmer in rough seas to grab and to hold, even while the paddler performs a roll.

The Chatham 16 is outfitted with a plastic skeg that can be fully or partially deployed to aid tracking in following/quartering seas. Ours wagged a bit and sent a very slight vibration through the boat at certain speeds. But the skeg was quite effective at preventing weathercocking, which was noticeable in a crosswind if the skeg was not down. The paddler’s feet are free to be securely braced on the aluminium foot pegs.

[ Paddling Buyer’s Guide: See all sea kayaks with skegs ]

Go all day in the Chatham 16

For smaller to medium-sized folks who fit into it, intrepid beginners or energetic experts, the Necky Chatham 16 is a slim and sporty choice for most types of serious sea kayak play, from day trips to medium-length tours.

This article was first published in the Summer 2004 issue of Adventure Kayak Magazine. Subscribe to Paddling Magazine’s print and digital editions, or browse the archives.


Boat Review: Otto Vallinga Vuntut 10 Canoe

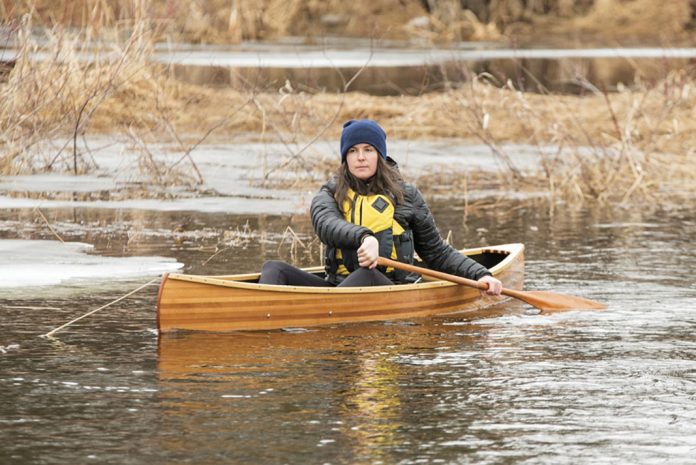
Woman paddling the Vallinga Vuntut 10 solo pack canoe
Feature Photo: Alyssa Lloyd

As a toddler Otto Vallinga would take his toy boats down to the nearby St. Clair River for impromptu buoyancy testing. Thanks to his boat designer father there was always a canoe around. Vallinga’s own canoeing career began to germinate at just twelve years of age when he and a pal embarked on their very first weekend canoe trip. Now a prolific boat designer himself, Vallinga releases the Vuntut 10 pack canoe.

The Vuntut 10 is a labor of love

Following a short stint as a foreman for one of the chemical plants near his home in Sarnia, Ontario, closures led him to pursue his real passion imprinted on him so long ago—watercraft.

After studying design at the Westlawn Institute of Marine Technology, Vallinga went on to work for a commercial powerboat manufacturer. After more than ten years designing and building custom sail and powerboats, Vallinga reverted to his labor of love designing canoes and kayaks.

Vallinga has an impressive boat designing record under his gunwale, with three dozen documented designs and numerous others under contract, not including standup paddleboards.

A dream to paddle and portage

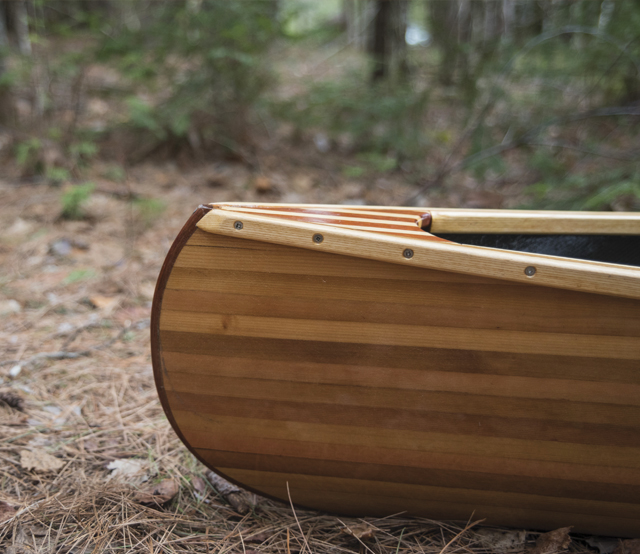
Close-up of the Vuntut 10 pack canoe
You can get the entire kit for $919, including all of the cedar needed to complete this intricate little pack boat. Have some fun with patterns, as Vallinga urges in his book. | Photo: Alyssa Lloyd

The Vuntut 10 is an impressively short and sweet boat for all the right reasons. It’s the newest and smallest in Vallinga’s popular Vuntut series of solo pack canoes that also includes 12-foot and 14-foot versions. He specifically designed the 10-foot for ease of just about everything.

Portaging? Nailed it. Pack canoes were born in the Adirondacks where early explorers and today’s adventurers need lightweight crafts they can effortlessly carry from small lake to small lake, ideally in one trip. Our epoxied cedar Vuntut 10 weighs just 26 pounds and is easily carried. As soon as I flipped the boat onto my shoulder, I realized I was eternally ruined for portaging. This is just too easy.

Paddling? Admirable. The boat’s maneuverability is that of a bicycle. You can essentially tilt to steer and if you didn’t need forward motion, your thoughts could practically propel this boat.

Transporting? Check. My first experience with loading the Vuntut 10 caught me with no canoe racks on my newly capped truck. So what did I do? All 10 feet of it fit on an angle in my six-foot, six-inch truck bed with only the bow laying on top of my closed tailgate. Less than a foot was overhanging—no red flag required. Try that with a 16-footer.

Go with the flow

The key to enjoying this 10-foot canoe, we learned, is minimizing all but the subtlest movements.

Typical solo canoeing strokes cause the Vuntut 10 to be squirrelly—like overcorrecting a vehicle that’s been sucked onto a soft gravel shoulder. Slow everything down and enjoy the view. Small strokes generate more than enough correction. I told you once already, thought control would almost work best.

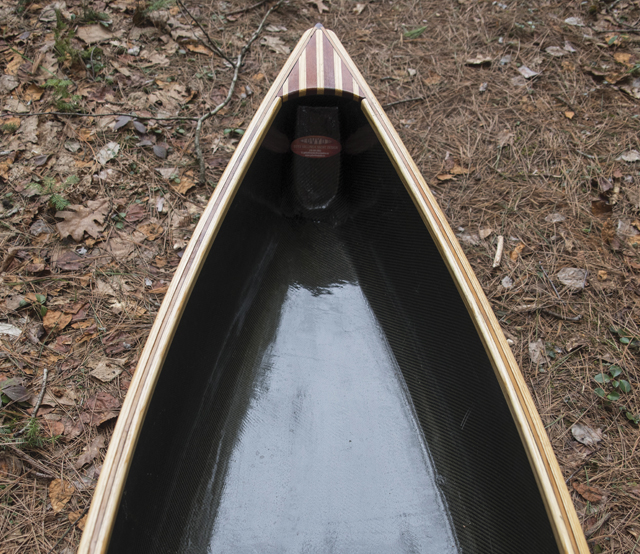
Close-up of the stern on the Vuntut 10 pack canoe
The stern allows for ample space for a solo backcountry night or lightly packed weekend trip. | Photo: Alyssa Lloyd

Best of both worlds

Those used to kneeling for solo paddling will find the sitting position in the Vuntut 10 foreign and awkward, like in a kayak. Pack canoes can also be paddled with both a canoe paddle and a kayak paddle.

Why design a canoe that is best paddled like a kayak miles from the region where it’s normal to do so? Vallinga wanted to accommodate those who have mulled over the idea of a kayak only to realize they would rather not get in and out of a cockpit. The Vuntut 10 is a great compromise between the two. Kayaks are great at many things but portaging is not one of them. The Vuntut 10 is a win for those of us always trying to convert kayakers into backcountry canoeists.

Choose your own adventure

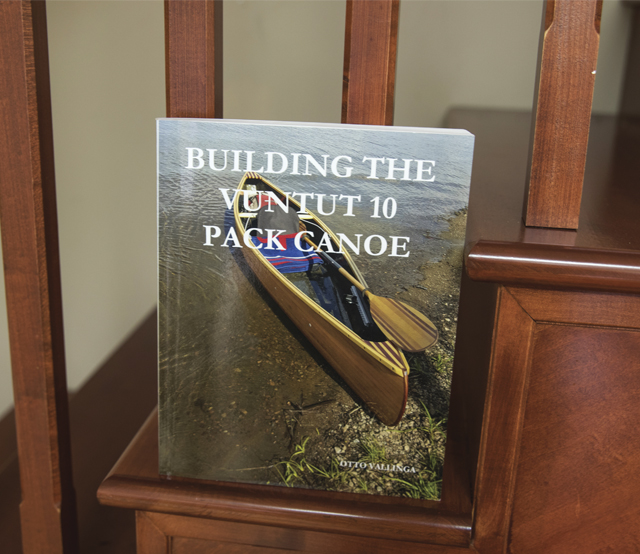
Building the Vuntut 10 Pack Canoe book by Otto Vallinga
Vallinga created an entire series of books, not just of designs, but details to help you every step of the way throughout your canoe-building journey. | Photo: Alyssa Lloyd

So far you’ve been reading about the Vuntut 10 as if it comes like any other pack canoe. But this clever designer has made his canoe and kayak designs available in their own publications. Building the Vuntut 10 written by Otto Vallinga is 192 pages detailing the construction of this wood strip and epoxy canoe so that you can build your own. Want to build a pack canoe but don’t have the time to source all the materials yourself? The Vuntut 10, and 12 and 14 for that matter, are available as a complete kit requiring only tools and time.

If you feel less inclined to channel your inner Otto Vallinga, you can get the Vuntut 10 by ordering the finished boat directly from Vallinga himself, like we did.

The Vuntut 10 is small but mighty

No matter how you get one, don’t be distracted by the novelty of such a small canoe. The Vuntut 10 pack canoe is no gimmick. It will allow you to access more places by being so light and nimble adding versatility to your solo adventures that you never dreamed possible.


This article originally appeared in Canoeroots
Early Summer 2017 issue.


Subscribe to Paddling Magazine and get 25 years of digital magazine archives including our legacy titles: Rapid, Adventure Kayak and Canoeroots.