ER: Is mission completion necessary for success?
JT: We all fail in life. You aim big, you fail bigger. Every failure teaches us something. In wilderness adventure, if you don’t know when to back down from danger, you’ll die. So you always need to be ready to back away—and that isn’t failure. There’s no dishonor in it. On Ellesmere I pushed myself literally to the brink of death. EO Wilson writes that ‘The moral imperative of humanism is the endeavor alone, whether successful or not, provided the effort is honorable and failure memorable.’ So as long as you honor the aim of what you and your companions set out to do, you can’t be blamed for factors either within or beyond your control that determine mission outcome. I know that this is a cliché, but success is ultimately what you learn from a mission and what you enjoyed while doing it.
ER: How do you see current trends in social media and corporate sponsorship? While the Internet brings an unprecedented level of money and visibility to wilderness adventure, it brings certain compromises. Short-burst extreme feats or speed records of North Face climbs or Grand Canyon kayak descents seem to circulate daily online. Red Bull executives rejoice, but the older tradition of sustained endurance pursuits inspired by scientific inquiry seems at risk of extinction.
JT: First off, I have nothing but admiration for waterfall jumpers, big wave surfers, and extreme rock climbers. These aren’t fads; they’re serious athletic feats and require serious coordination, bravery, strength, and skill. I’m not coordinated enough to do that stuff. There’s an intensity there that I admire. However, long distance athleticism isn’t at risk of eclipse. There will always be such people. Long-distance pursuits appeal to me because I love being out there for long periods of time. It’s a different scale of challenge. If this puts me at a disadvantage from a media and sponsorship perspective, that’s life. I’ve done well enough with a mixture of sponsorship, writing, and public speaking, and so have my friends. There’s always a way around the money-thing.
ER: You’ve done one major solo voyage (Cape Horn), the rest were accompanied. What are the pros and cons of solo versus group adventure?
JT: Well, you’re safer with others. Alone there’s no backup. But it’s very exciting to be alone. It raises the stakes; you ratchet up the level of vulnerability. It puts you closer to the edge, and you’re more careful and aware. Solo is great. There’s no particular reason I haven’t done more of it. That said, had I done Ellesmere alone I would have died. I needed Boomer’s strength. And traveling with others has other advantages. It speeds up many mundane processes; makes them safer. Dragging loaded boats over ice, or setting up and breaking camp. Plus, I like having company.
ER: Will you be writing about the Ellesmere circumnavigation? You’ve suggested in other interviews that you’re working on something.
JT: I’ll write about Ellesmere, yes. But it’d be boring to just recite details from the trip. I’m more interested in what grand journeys like Ellesmere, and the massive migrations undertaken by our ancestors—what do these teach us? What wisdom do they impart, and why have humans undertaken such journeys throughout history?
My Jomon book is about Paleolithic long-distance journeying and epic migration. Raven’s Gift is about shamanic healing. But some readers get hung up on whether or not the magic and healing I undergo are believable. So this time I want to rephrase my thinking on traditional wisdom, and try to reach its core. My new book is about ‘a Journey into Deep Wilderness’.
ER: Yes, there’s a refrain in your writing that hunter-gatherers have something to teach modern adventurers, and modern society generally. Is it their belief systems and cosmology, or their survival skills that are relevant to us today? Other endurance kayakers appropriate traditional practices by building their boats in the old ways, living off the land, and thus claim a kind of authenticity. That doesn’t seem to interest you.
JT: First of all, yes, I believe that the perseverance and skill of our ancestors has a lot to teach us in this internet-crazed, oil-soaked world. It’s the “journey into Deep Wilderness” theme. To answer the second part of your question, I have no criticism of revivalists. I am just not one of them. Traditional people used the best materials they could find. So do I, but mine happen to be from modern industrial materials. I’m just not the kind of guy to make a walrus skin kayak, although it is wonderful to bring those skills back. Obviously we can’t all start making walrus skin kayaks; the walrus would disappear. I’m comfortable with my high tech gear.
ER: Your interest is more in interacting directly with indigenous communities where you find them, and expanding on the insights that result from those encounters.
JT: Yes. I guess my message, or main thing I’ve learned from living with traditional peoples, is to approach the world in a softer way: to live with less, in order for human existence to be sustainable on the planet. So while I’ve never adopted their survival methods, navigation methods, or kayak construction techniques, I’ve tried to learn their forms of wisdom, of how they understand their place within their landscape.
ER: What are some examples of this wisdom, relevant to our modern condition?
JT: We have to reduce our impact on the world, reduce our carbon footprint. This means learning to spend less, acquire less, and consume less. I’m not saying we need to forgo modern technology; that would be a stupid thing to say. Modern technology improves our lives immensely. But if we listen to ancient wisdoms, perhaps we would not gorge on all that is available to us, to the point where we destroy our environment. In this society, we take and use way more than we need; the consequences are obvious.
ER: Why is that their wisdom and not just your philosophy; your view on how we ought to live?
JT: Good point. Aboriginal people lived in such a way that they must constantly communicate with nature. They needed to do that to survive. Our way of life removes us from nature. But if we lived closer to nature’s rhythms, I honestly believe that we would live simpler, more meaningful lives. We wouldn’t need to drive to the mall and buy a bunch of junk to have a good day.
ER: I agree that our consumerism and individualism take a toll on community and the commons. But we’ve chosen this retreat from nature, preferring near-total domesticity. Look at us—we seek permanent shelter from the elements with our dwellings, vehicles and clothing. My sense is that this insulation from nature and each other contributes to our alienation from nature and the dissolution of community. I don’t see how we can keep living this sheltered, buffered mode of existence and expect to understand nature or to restore any genuine, active community life. Think of Into the Wild (Jon Krakauer)—a young American enters the Alaskan wilderness unprepared and alone, and starves out of ignorance—and how well it captures our current state of alienation from wilderness and each other.
JT: You’re right— we can’t learn nature or traditional wisdom out of a book. But can the knowledge of traditional people correct the world’s failings? Well, it can help. If you ask, can my vision and my writings solve the world’s problems, of course I laugh. When Mother Theresa was asked if she thought was ending poverty in Mumbai, she answered something like: “That’s not the question I ask myself. Can I try to do something about it? Yes, I can.” So this next book I am writing is about how people reclaim control over immediate threats and risks, whether they’re hunter-gatherers in the Amazon, or citizens of the South Bronx.
ER: What do those two places represent to you; what’s so fitting about that contrast?
JT: Our individual impact on the way the world is evolving may be infinitesimally small, but we are still responsible for how we act, because collectively we have steered the world into a new geological epoch, the Anthropocene. The people I visited in the Amazon were first contacted in 1964; today their refrain is ‘the powers shaping our lives are so powerful that we have no control over our destiny.’ Destitute Americans in the South Bronx say the same thing. I want readers to see what people share in these two ‘jungles’, to see that sanity at the personal level is still within our control. So any ‘return to nature’ or ‘traditional wisdom’ is, at one level, only metaphorical. What’s important is a thinking humanity whose choices are independent of the power elite.
ER: Another unique dimension of your writing and exploration is that you pursue historical questions about human development from a scientific perspective. I’m thinking of the marine migration theory you pursue in the Jomon book and the scientific validity of shamanic healing in The Raven’s Gift. Couching these interests within a grand kayak adventure, they become gripping narratives. But how have scientists and anthropologists reacted to your accounts of magic medicine and theories of how our ancestors first reached North America?
JT: Yes, a few people have gotten hung up on the ideas I developed in the two previous books— early marine migration and shamanic magic in medicine. These are very different things. On the migration thing, anthropologists were critical of my proposal that migration was sometimes conducted out of a “spirit of adventure” rather than out of pragmatic interests. Actually, in retrospect, I think it is one of those arguments that you can get worked up about, but when you look at it closely, barriers and definitions break down. The bottom line is that humans migrated out of Africa and settled in every habitable environment on Earth, while chimpanzees, to say nothing of hippopotamuses stayed back home in Africa. That is an amazing story and part of our heritage. I believe that we are a romantic species, even when we are being pragmantic; even if that sounds contradictory.
The second issue, about shamanic healing, is another question that remains unanswerable. I think the important issue is that things do happen in this world, within and beyond human consciousness, which defy scientific logic. Let’s not argue about it; let’s bask in the wonder.
ER: In the Jomon book you relate that while we know from artifacts that a migration path connects Hokkaido to the Kamchatka Peninsula and across the Bering Sea to Alaska, we don’t know why they chose this direction or what motivated them. It could have been catastrophe, cosmology, etc. Elsewhere you’ve stated that what today we call ‘outdoor adventure’ has gone by other names throughout history. At its core, I think this impulse is a reaction to the tedium of the familiar, or a wish to improve one’s lot by risking the unknown. Bruce Chatwin in Songlines uses the Latin shorthand: Solvitur ambulando (‘It is solved by walking’). And still we see human migration all around us today, usually some combination of ‘seeking’ (wealth, opportunity) and ‘fleeing’ (poverty, misrule). So instead of emphasizing what’s been lost or corrupted as we lose touch with nature, why not focus on our constants with traditional or pre-modern peoples—our shared need for forward movement, innovation, motion versus stasis?
JT: We know that early Polynesian islanders felled huge tropical hardwoods with stone tools, fashioned them into 60-foot double-hulled catamarans and sailed 2000 miles across the ocean to find a spot of land, Hawaii. They returned to Polynesia and initiated a trade route between the two places. Hawaiian obsidian is found throughout Polynesia. If we look directly at this ancestral past, certain strengths emerge that we share. We are them and they are us.
Mind you, there’s nothing to romanticize there—life was difficult in the Stone Age, full of violence and privation; people died young. I only say we have to learn from aboriginal knowledge because we’ve stepped away from this mode of knowledge: the self-reliance to learn from direct encounter with nature and with others. In traditional Inuit society parents never tell their kids what to do. They let them model the behaviors of other children or adults and learn by themselves. Let your relationship with the world and your environment be your primary teacher.
Jon Turk is the author of Cold Oceans, In the Wake of the Jomon, The Raven’s Gift, several environmental textbooks and numerous articles. When not out on adventure, he divides his time between Fernie, British Columbia and Darby, Montana.

 This article first appeared in the Spring 2015 issue of Canoeroots and Family Camping magazine.
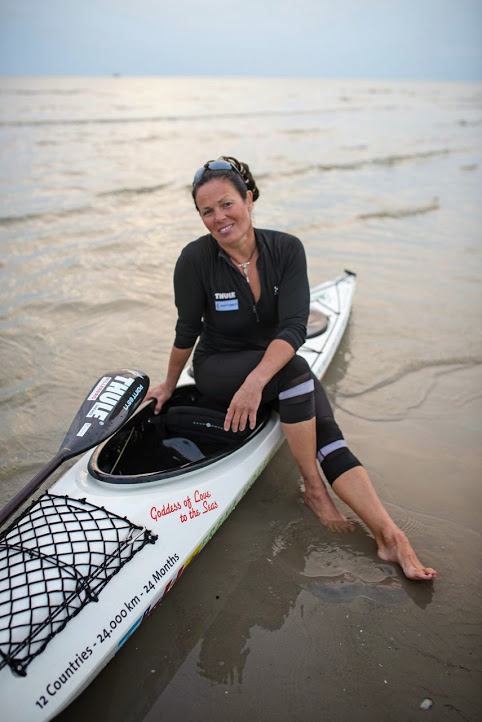 Heading north again, she travelled through the beautiful, wild but also windy fjords and channels of Patagonia/ Chile and on the big waters of the Pacific coast. Freya ended the first stage of her historical first circumnavigation in Valparaiso/ Chile, having paddled challenging and exciting 7,641 kilometers in eight months. In between legs, she had planned beforehand to return to her home in Husum, Germany, to spend some time with her teenage son and to look after her two ice cream cafés and her Christmas shop.


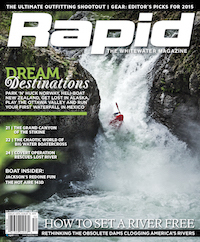 This article first appeared in the Early Summer 2015 issue of Rapid Magazine.

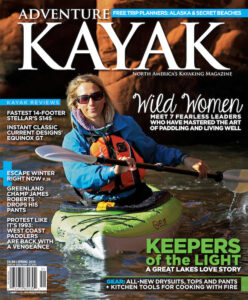 This article first appeared in the Spring 2015 issue of Adventure Kayak magazine.

 This article first appeared in the Early Summer 2015 issue of Adventure Kayak magazine.


