Home Blog Page 317

How to Use a Tumpline

Photo: Andrew Fergusson
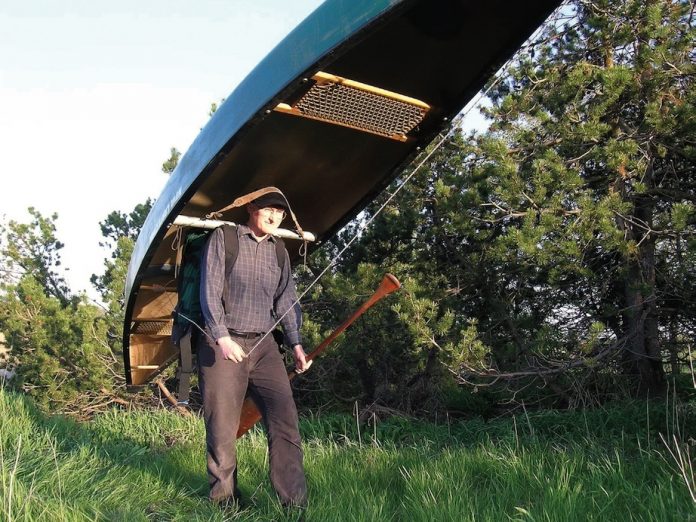
Tumpline carry.

This canoe technique originally appeared in Canoeroots and Family Camping magazine.

For too many, carrying a canoe means suffering through grinding shoulder discomfort and aching arms held high to balance the canoe. Make carries easier by adopting the tumpline method used by Aboriginals and early explorers.

Set up your tump by attaching a leather or nylon strap to either end of your centre thwart. For most canoes and carriers, the tump should hang to almost touch the bot- tom of the canoe when on the water.

Use your normal method to hoist the canoe so the centre thwart (rounded for com- fort, if possible) is resting on your shoulders. Position the tump over your forehead with one hand so that the weight pushes down with your head and neck in a comfortable position. The tump becomes a cushioning leaf spring that takes much of the weight off your shoulders and sends it straight down your spine, where it belongs.

The tump may take a few portages to tune and get used to but it will take you to the good places: canoe, pack and paddle in one trip

This article originally appeared in Canoeroots & Family Camping, Fall 2008.


How To Stash Your Food Safely Using A Bear Hang

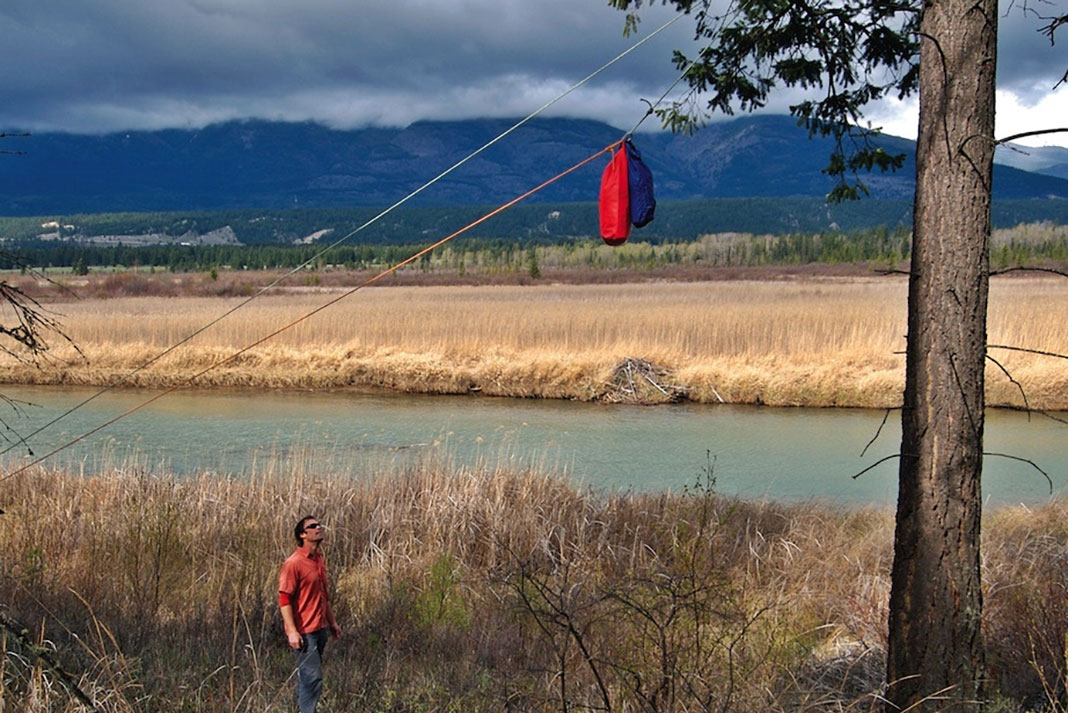
A man stares up at a bear hang on the side of a river
Far too many trippers have awoken on otherwise fine mornings to find a bear has stolen their food pack. | Feature photo: Dave Quinn

Making a proper bear hang the safe and easy way doesn’t have to be a skill learned from experience; take it from those who have hoisted more than a few packs themselves—and have the healed-up rope burns to prove it.

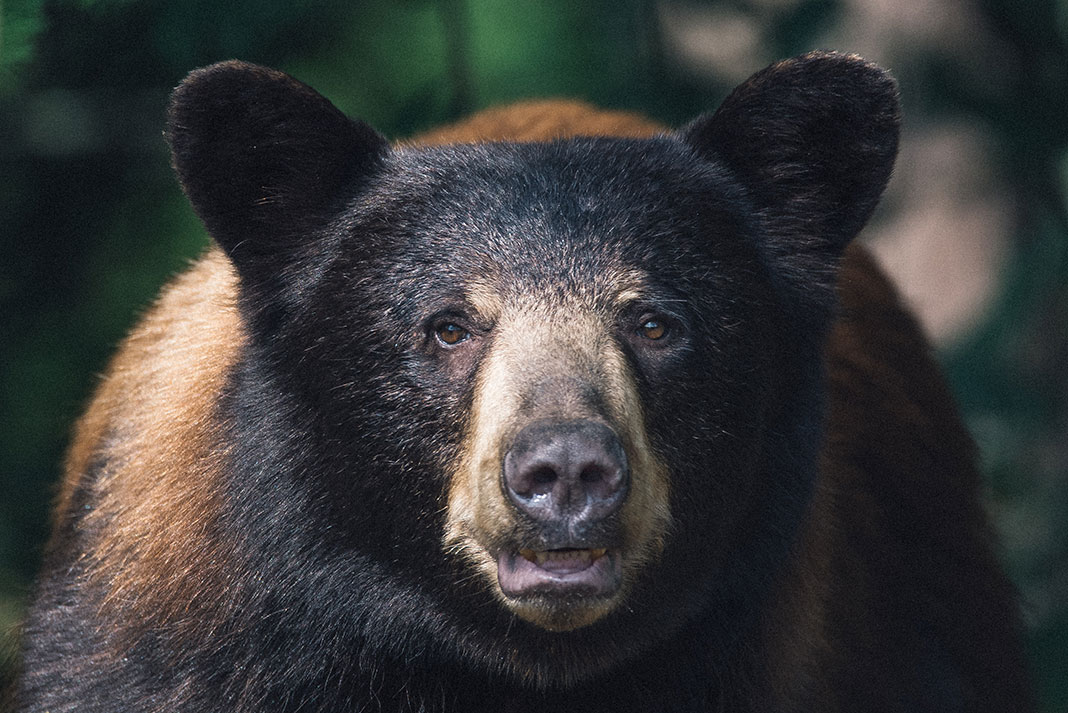
Far too many trippers have awoken on otherwise fine mornings to find a bear has stolen their food pack, peeled open a supposedly bear-proof food barrel like a tuna can or a clawed through an overturned canoe. This can wreck a trip and be fatal to the bear, since once a bear associates humans with food its fate is sealed.

4 tips to stash your food safely in a bear hang

Safeguard your provisions by stowing them out of reach of motivated claws and jaws. Raising the pack at least three meters off the ground is a good start, but too many campers leave their food close to tree trunks, serving up a boreal buffet for acrobatic bears.

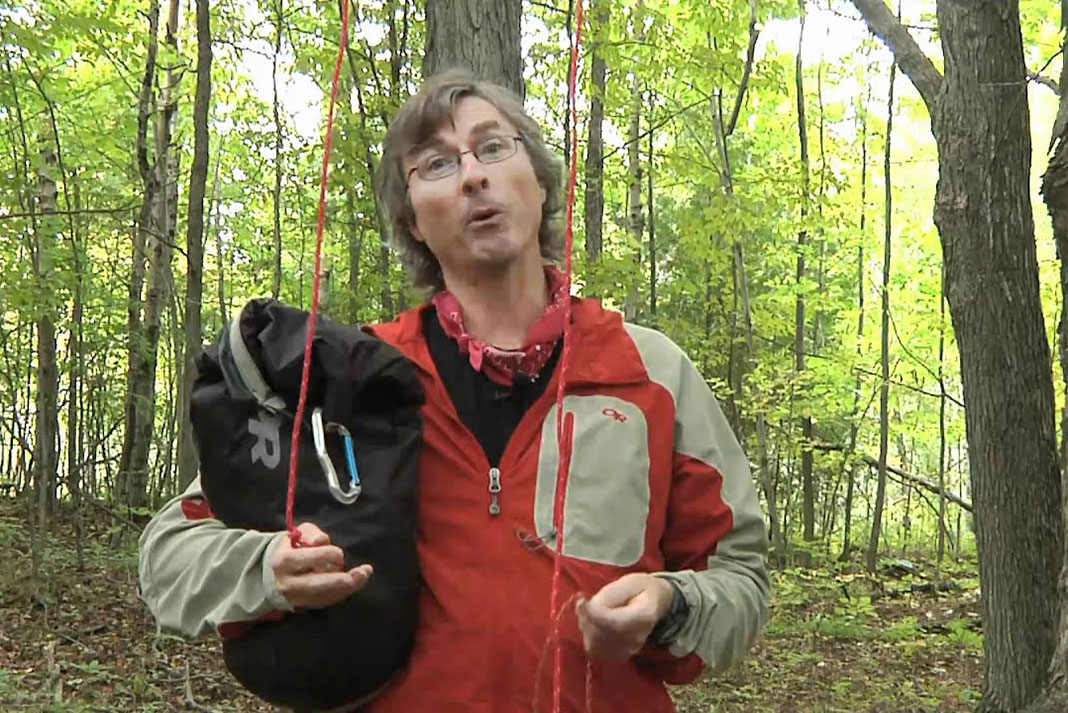
The important second step is to pull the pack at least two meters away from the tree trunk. All sorts of pulleys, Z-drags, balancing acts and feats of strength will accomplish this, but the simplest method is to use two ropes: one to hoist the load and the other to pull it away from the tree.

1 Don’t delay

Set up your hoist rope as soon as you arrive at camp, not after dark. A perfect tree is at least 200 meters from camp and has a stout branch four to five meters up, with no ladder branches below.

2 Be a rock star

Slip a fist-sized rock into a stuff sack and tie the sack to the end of your rope. An underhand lob will send the sack and trailing rope over the branch and back down to the ground.

A man stares up at a bear hang on the side of a river
Far too many trippers have awoken on otherwise fine mornings to find a bear has stolen their food pack. | Feature photo: Dave Quinn

3 Two ropes are better than one

Secure the food pack and a dangling second rope to one end of the hoist rope. Pull on the free end of the hoist rope while a partner helps from below (a paddle helps get it high). Tie the hoist rope off to a nearby tree.

4 Try the trucker’s hitch

Now use the second rope and a distant tree to pull the load away from the tree trunk—a trucker’s hitch offers some mechanical advantage. Secure this rope, and get back to the campfire!

With practice, and a little tree karma, it should only take a few minutes to keep your food, yourself, other campers and the bears safe.

Cover of Canoeroots Magazine Summer/Fall 2009 issueThis article was first published in the Summer/Fall 2009 issue of Canoeroots Magazine. Subscribe to Paddling Magazine’s print and digital editions, or browse the archives.


Far too many trippers have awoken on otherwise fine mornings to find a bear has stolen their food pack. | Feature photo: Dave Quinn


How to Trip with Toddlers

Photo: Hap Wilson

This technique article originally appeared in Canoeroots and Family Camping magazine.

One of the toughest quandaries I had to overcome when deciding to have kids was the fear that I would have to curb my outdoor pursuits. I soon learned that kids are malleable; they can adapt to, and enjoy, just about any outdoor adventure when their basic needs are met.

Route Choice: This is wholly dependent on the temperament of the toddlers. Start with short day trips, then lengthen them accord- ingly, but don’t be afraid to think big. I took my two- and three-year-old kids on a 450-kilometre trip on Ontario’s Albany River. During those two weeks, plenty of gorp breaks and beach stops kept the kids happy, even on some 50-kilometre days.

Diapers: I generally despise disposables, but admit they are a godsend on canoe trips. You’ll need a barrel lined with garbage bags for either soiled disposables or dirty cloth diapers. The key is a liberal sprinkling of baking soda to keep the smell down and bears away.

Toys: Make room in the canoe for another small barrel full of toys, games and stuffed animals. Having these diversions readily available is essen- tial. Kids drop stuff overboard constantly, so you may want to tether in any “on-the-move” play toys, or risk perfecting your pivoting strokes.

Tents: A larger tent is a must. It’s a great play-place for toddlers and kids and will be well worth the extra effort it takes to pack it and carry it around when the bugs or weather are bad. A “family-bed” of sheets and throw blankets works best when toddlers need the security of their parents. Introduce toddlers to their own sleeping bags, and eventually an adjoining tent when they are ready, but if you rush it you’ll find they would rather stay home.

Bugs: Some might say I was cruel, but when my kids were toddlers I let them get bitten a little just to strengthen their immune systems. Today, black flies and mosquitoes don’t bother them, at least not enough to ruin an outing. That being said, some measures are sensible. I used to set up a light mesh tent at the end of portages where my wife and ba- bies could escape to while I carried over the gear. Sheets of loose bug netting can be draped over kid-carriers, and bug jackets are essential once they are a few years old. Don’t slather your kids with caustic repel- lent! A light dab of Tiger Balm, orange rind or citronella on the exposed backsides of their hands works well.

Safety: Your job is to plan well and remain calm if things get tense; your kids will pick up on neurotic behaviour and it may sour the next trip. As usual, safety comes down to attentiveness and common sense—don’t tether your kids to the canoe thwarts! There are excellent baby and toddler PFDs on the market. Make sure they wear them at all times, even around the campsite.

Invest some energy in making sure your kids travel in comfort and security when they are young and by the time they are seven or eight they will carry their own packs, paddle with efficiency and be full partners in your outdoor pursuits.

This article originally appeared in Canoeroots & Family Camping, Fall 2009. Download our freeiPad/iPhone/iPod Touch App or Android App or read it here.

3 Tricks For Climbing Back Into A Raft

For when things get wild. | Photo: Destination Ontario

So you find yourself out of the raft and in the river. Getting back in ASAP is almost always your first priority. If the raft is upright and somebody is still inside, he or she can just haul you in, but climbing back in on your own is more of a challenge.

How do you get back into a raft? Follow these steps for two different scenarios.

[ Paddling Trip Guide: View all rafting trips ]

If the raft is upright

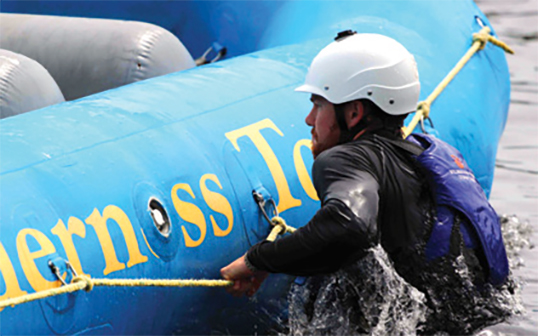
If the raft is upright, grab the side perimeter line on either side of a D-ring.

Trick #1

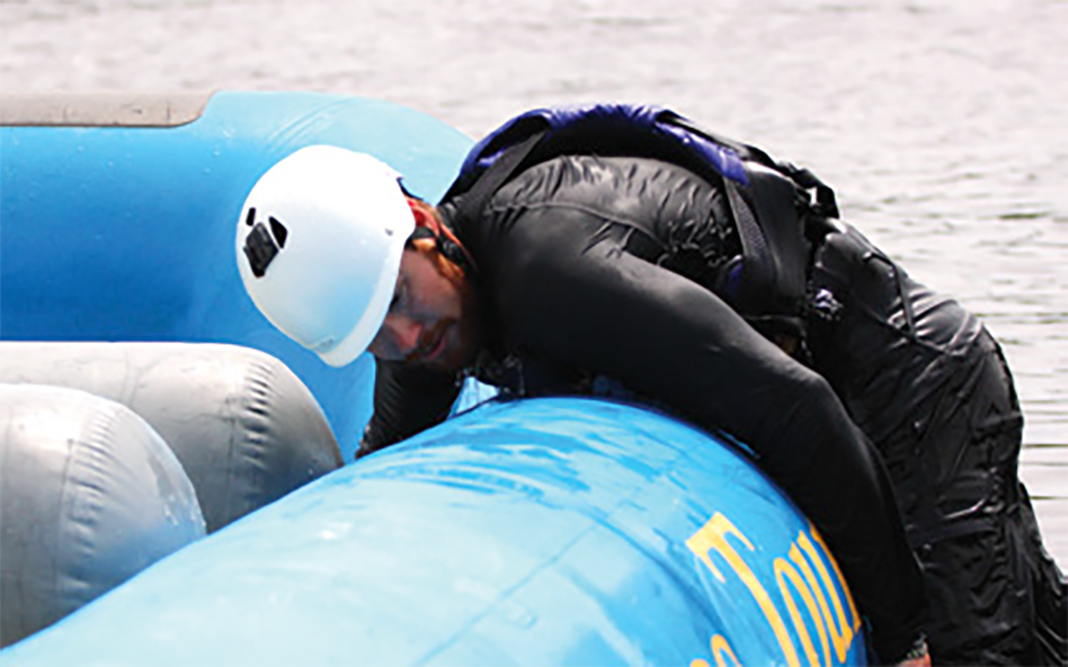
Push out with straight arms and kick your feet to get them to the surface. Don’t try to climb in until your body and feet are at the surface and your arms are extended. Then, with strong kicks and a swift pull, travel forward and up—you need momentum to get your upper body over the tube.

Trick #2

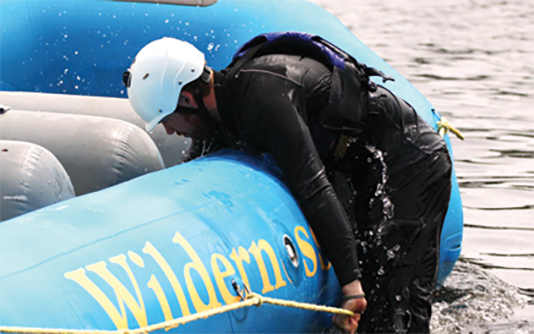
The other option is to turn your forward pull into a downward push, keeping your hands on the line until you are straight armed again, wrapping your upper body over the tube. Only then do you reach into the raft for a new handhold, likely grabbing a cross tube or the raft frame. Strong kicks this whole time keep you from stalling halfway.

Man leaning into raft

If the raft has flipped over

Your approach to how to climb in a raft when it’s flipped over is a little different. The trick is to work from the end where the floor angles down into the water like a ramp, using the floor lace as a handhold. Be warned: the hold isn’t great. Once you’ve climbed onto the bottom your job is to flip the raft over, but that’s another story.

This article originally appeared in Rapid‘s Summer/Fall 2012 issue. Subscribe to Paddling Magazine’s print and digital editions here, or browse the archives here.


In-text photos by: Dan Caldwell

Going Tidal Kayak Technique

Photo: Bryan Smith
Surfing Bay of Fundy tidal race.

This kayak technique article on how to paddle in tidal races was originally published in Adventure Kayak magazine.

On one of my early training trips to Anglesey, Wales, I was paddling out toward Penrhyn Mawr and the biggest water of my life when Nigel Dennis calmly paddled up beside me and said, “Remember, it’s the sea. It’s always worse than it looks.” Unsettled, I watched a two-meter swell roll through the Irish Sea and collide into four knots of current.

In the exploding waves my “highly maneuverable” 16-foot sea kayak felt like a fish in molasses. I’d sweep five or six times to get lined up with a wave; it would break and push me sideways and then I’d have to start all over again. I was all at once frustrated with my boat handling, nervous about the sea state and excited about being there.

The last few years have seen more and more paddlers enjoying tidal races like Penrhyn Mawr, Skookumchuck Narrows, Shubenacadie River, The Bitches, Deception Pass and others. Like paddling in the surf or wind, tidal water presents lots of mental and physical challenges and an equal amount of fun. Here are some basic concepts to ease you into the excitement of tidal rapids, including skills you can practice on flatwater anytime.

Paddle anything that moves

If you don’t have access to a tidal race—or even if you do—start out by paddling river whitewater at a moderate grade such as Class II. You’ll be surprised how accessible whitewater is and how much it improves your sea kayaking skill. This is one of the best ways to fast-track the water-reading skills you’ll need in tidal rapids.

Learn the environment

Perhaps the single most important skill in tidal race paddling is predicting how the water is going to affect your boat. Water- reading skill-level is directly proportionate to your cockpit time in moving water, so don’t get too frustrated if you can’t put your boat exactly where you want the first time.

Seek mentors to push you

To be an effective and efficient paddler in tidal races, you have to be comfortable and confident. The best way to safely increase your confidence is by paddling with coaches and peers who are capable of taking you into environments that are beyond your comfort level when paddling alone. With others covering the safety and leadership, you can experiment and learn.

Err on the side of edging

Get comfortable with spinning the boat 180 degrees with a series of forward and reverse strokes on flatwater. Edge the boat towards each sweep, using the stroke for support and balance. Increase the amount of edge as far as possible on flatwater. This will teach you to trust a more aggressive edge in moving water.

Chaos-proof your roll

When you add current to the equation, the potential for spending time in a low-oxygen, wet environment increases exponentially. A bombproof roll goes a long way to increasing your confidence and ability to perform. Practice by adding chaos to your flatwater roll practice: flip over mid-stroke and set up for a roll, but allow yourself to fail, capsize again and then switch to roll up on the opposite side; try flipping over with only one hand on the paddle—but first get a good pair of nose plugs.

Ease into leadership

Safe group management is critical in tidal races. Assuming that on the first several outings you have surrounded yourself with strong leaders and coaches, when your confidence increases it’s time to think about safety and leadership yourself. Assess the risks of the tidal venues you would like to paddle, considering the potential dangers as well as the best flows and tides, and whether you and your partners have the skills to resolve any situation that might arise.

BRYAN SMITH is a filmmaker and paddler in Squamish, British Columbia (www.reelwaterproductions.com).

This article originally appeared in Adventure Kayak, Early Summer 2009. Download our freeiPad/iPhone/iPod Touch App or Android App or read it here.

Matt Anderson’s Big Sheep

Matt Anderson's Big Sheep

Pirate of Lynnhaven, Matt Anderson, pulled this 11.75 pound sheepshead out of the pilings of Chesapeake Bay Bridge Tunnel.

Autumn Solitude

Photo: Brad Badelt

Long after you’ve paddled through the summer, as the warmest of seasons fades into your wake, the fall – perhaps anxious not to be forgotten – begins a visual celebration. Slowly at first, the earliest trees begin to yellow, eventually joined by those around them. Maples turn a vibrant red, reminding Canadians just where their national colours come from.

Though the waterways may be quiet, they are just as welcoming. For canoeists like Brad Badelt, a paddle along part of the Magnetawan Loop in Ontario is one of the many pleasures of the fall season.

Canoe Rescue Technique

While there is no one perfect way to deal with an swamped canoe there are a few techniques that work better than others depending on the situation. This parallel rescue is a great one to practice and learn because it can be adapted for a variety of situations.

Betcha Didn’t Know About…Crickets

Photo: istockphoto.com
Betcha Didn't Know About...Crickets
  • A cricket’s ears are located just below the knees on its front legs.
  • The higher the temperature, the faster a cricket chirps. Estimate the temperature in Fahrenheit by counting the number of chirps in 15 seconds and adding 37.
  • Jiminy Cricket was inspired by the Talking Cricket from the original Pinnochio book on which the Walt Disney movie was based. In the book, Pinnochio kills the cricket shortly after meeting him because he doesn’t like what the cricket has to say. A fine conscience he turned out to be.
  • Male crickets chirp by rubbing the top of one wing against teeth that run along the bottom of the other. Female crickets do not chirp.
  • In 1939, England played South Africa the longest cricket match ever—it lasted 14 days and ended in a tie.
  • Crickets are a symbol of good luck, wisdom and prosperity in Chinese, Japanese and Native American folklore.
  • Buddy Holly’s back up band was called The Crickets.
  • The practice of eating bugs is called entomophagy. Crickets are considered a tasty treat in many cultures and are an excellent source of protein, iron and calcium.
  • Despite having wings, crickets rarely fly.

This article was originally published in the Spring 2013 issue of CanoerootsThis article first appeared in the Spring 2013 issue of Canoeroots Magazine.


Mountain Biking for All Ages

Photo: Rob Faubert
Mountain Biking for All Ages

Whether mountain biking is your middle name or something you’ve discovered in middle-age, trail riding is a fun-for-the-whole-family activity that puts a spin on weekend camping. From behind the bars, kids will find navigating trails a new adventure. This go-to guide will help you choose the bikes, trails and gear to suit even the littlest rippers.

BIKE FIT: THINK LITE

Kids learn more quickly and enjoy riding more when they’re on well-designed, well-built bikes. Most major bike manufacturers, such as Specialized, Trek, Rocky Mountain and Norco, now offer decent kids’ bikes in 16-inch, 20-inch and 24-inch wheel sizes. Designers take height, weight, proportions and strength of kids into consideration. Being able to apply the brakes and shift the gears with smaller hands is key to enjoying the experience and being able to trail ride as a family. 

“When you’re choosing bikes for kids, weight is the biggest factor,” suggests Duncan Beard, bike guru and bike racer from Fresh Air Experience bike shop. Lighter bikes are simply easier to pedal and allow kids more control, which is especially important if you’re heading over the hills and far away.

As a guideline, Beard recommends bikes weigh no more than a third of a child’s weight. “If your kid is less than 100 pounds, their bike shouldn’t weigh more than 30 pounds.” He encourages parents to forgo shocks for kids under 10 years old to save weight. 

This, however, is easier said than done, found Canoeroots publisher Scott MacGregor. “The best kids bikes we could find weighed more than our adult-sized bikes. It hardly seems fair.” Frame size isn’t as much of a factor as the rest of the bike’s components. “There is a big difference between department store bikes and good quality, $500 kids’ mountain bikes,” says MacGregor, “but it’s still a far cry from what’s standard on a $1,500 adult mountain bike.” If you’re really serious about setting up your kids with lighter weight bikes, MacGregor suggests looking at racing BMX models or starting with an aluminum-framed mountain bike and making a hobby out of upgrading parts. 

It seems like a no-brainer, but Beard also advocates for selecting a bike that fits. “If you get a bike that you hope they’ll grow into, it will be hard for them to ride it and enjoy it now,” he says. 

Well-made bikes are worth the initial investment. They come with components that operate more smoothly and require less maintenance than anything from Walmart—think more riding and less tinkering with shifters and brakes. A good new bike will last to be handed down through siblings or can be sold or traded when the time comes to upsize. 

PUMP UP FOR TRAILS

Kids deal with frustration and fatigue differently depending on their endurance, ability and temperament. Figure out how fast, how far and how long your kids are ready to bike by taking interesting rides close to home. A few of these will help you plan realistic weekend adventures. With kids, distance is often less of a factor than time in the saddle. On days when there’s heat, rain, steep hills or bugs, assume that part of your children’s stamina will be spent on coping with their environment. 

It’s up to parents to keep an arsenal of distractions, diversions and motivation in their pack pocket to dole out and keep spirits high. Try sing-a-longs, games, snacks or exciting destinations along the way—anything to avoid hearing, “How much further?” 

Every child is different of course, but experienced kids around the age of six are usually able to last about 45 minutes on their own, over gentle terrain. Double that if they’re riding behind you on a trail-a-bike. For many experienced 10-year-olds, an hour and a half on their own bike is no problem. Almost everyone prefers a loop to the repetitiveness of an out-and-back route. 

“Most adults want to set goals, in terms of distance, time or effort and that’s not going to work with kids,” says Lee McCormack of Boulder, Colorado, author of Teaching Mountain Bike Skills. “The terrain shouldn’t be threatening at all,” he advises for newbie kids. “We want to imprint positive experiences, so keep it very mellow.” He adds that completely flat trails aren’t ideal because kids love to coast down hills, instead, opt for moderate grade, simple open track, with some rocks to make things interesting. 

McCormack is a father of twin three-year-old girls. He got his kids started on Strider bikes when they were just 18 months old. “They just chewed on them at first, but when they were two, they wanted to ride them.” McCormack advocates pump tracks—mini, circular, off-road routes that take riders over bumps and through tight corners and can even fit inside a backyard. “Parents don’t want to give up riding but can’t take their kids on a three-hour, cross country, Type A mission,” says McCormack. “Pump tracks are the answer. They’re a great place to hang out and there’s a huge benefit in terms of athleticism and fitness.”

Pump tracks are like a low-key BMX track from the ‘80s and they’re springing up in municipal parks everywhere. There’s probably one near you. Before hitting the trails, laps at a pump track can help your kids learn to corner on berms and pedal hard up steep rollers. No one gets left behind at the pump track and kids can stop for a snack or play whenever they want.

SMOOTH, FLOWING TRAILS ENCOURAGE ENW RIDERS


Now that there’s a trail the whole family can enjoy, trailbuilder Ted Ferguson has noticed a huge increase in the number of ski families out mountain biking at Mont Ste-Marie, north of the city of Gatineau, Quebec. 

“The very first trail the other dads and I built goes straight down a steep hill. It’s pretty advanced,” laughs Ferguson who obtained a grant to build a five-kilometer beginner mountain bike loop. “If a family is looking to mountain bike, trail conditions are an absolute priority. Rooty, swampy, rocky or too steep isn’t fun for a lot of young kids, especially if they’re just getting into biking.” Everything is to scale. Two-inch roots and rocks we roll over are a much bigger deal on a bike with small 20-inch wheels, he says.

In order to make the trail fun for kids and beginner riders while still offering challenges for advanced riders, Ferguson and trail builders across the country are making smooth trails and adding berms at every turn. 

“You need flow and fun. Challenging, but not too challenging,” says Ferguson who carries his younger son’s bike up hills to hook the boy on downhill thrills. “The berms turn the trail into a roller coaster that kids love. And it creates a beautiful, fluid sensation for experienced riders,” he adds. 

FUEL UP

Food that’s filling and delicious and stays appetizing after being jostled in a backpack works best. Hard-boiled eggs, hummus and veggies, apples, wraps and treats like cookies or granola bars will be favorites.

Don’t overthink your food selection, whatever you would usually bring on a hike works on a bike ride. Avoid energy goos or fancy sports bars that are marketed to endurance athletes. Many of these products contain caffeine as a performance-enhancing ingredient and are not appropriate for the younger set.

BIKE BASE CAMPING

The perfect bike weekend campsite offers lots of opportunities for the kids to relax and play. If you’re staying in a campground, choose a site close to a beach, a big soccer field, a playground with a fun set of monkey bars or any other interesting features. Especially after using a lot of balance and control on the bike, kids need to let loose and play in the evening. 

Choosing a campsite close to the trails means adults can take turns hanging out with the kids and heading out for their own quick, intense trail rides. 

Don’t put the bikes away after the trail ride. Riding the paths around the campground may be even more fun for them. “We set boundaries, remind them of cars, hand them walkie talkies and they’re gone,” says MacGregor. “Riding a bike is the closest to real freedom a kid can get.”

Kathleen Wilker and her family are avid cyclists. In 2010 Kathleen was awarded the City of Ottawa’s Bruce Timmermans Award for cycling education and promotion.
This article was originally published in the Spring 2013 issue of CanoerootsThis article first appeared in the Spring 2013 issue of Canoeroots Magazine.