Home Blog Page 326

Expert Tips on Expedition Prep

Photo: Bruce Kirkby
Expert Tips on Expedition Prep

Last summer, Minnesotans Lucas Will and Greg Petry fulfilled a dream five years in the making, to sea kayak around Lake Superior. Here’s how they found the 97 days to get it done: “It was easy for us to drop everything because we had little to drop. We work sea- sonally as outdoor educators, so getting time off meant we just didn’t apply for the next job on the list. In order to follow a dream it first needs to be identified. Then you can start making the choices to turn that dream into reality. In the end, we didn’t drop everything, we purposefully put things down in a place where we’d know where to find them when we got back.”

People looking at map for kayak expedition
Above photo: Ryan Creary

HANDLING INTERNATIONAL LOGISTICS

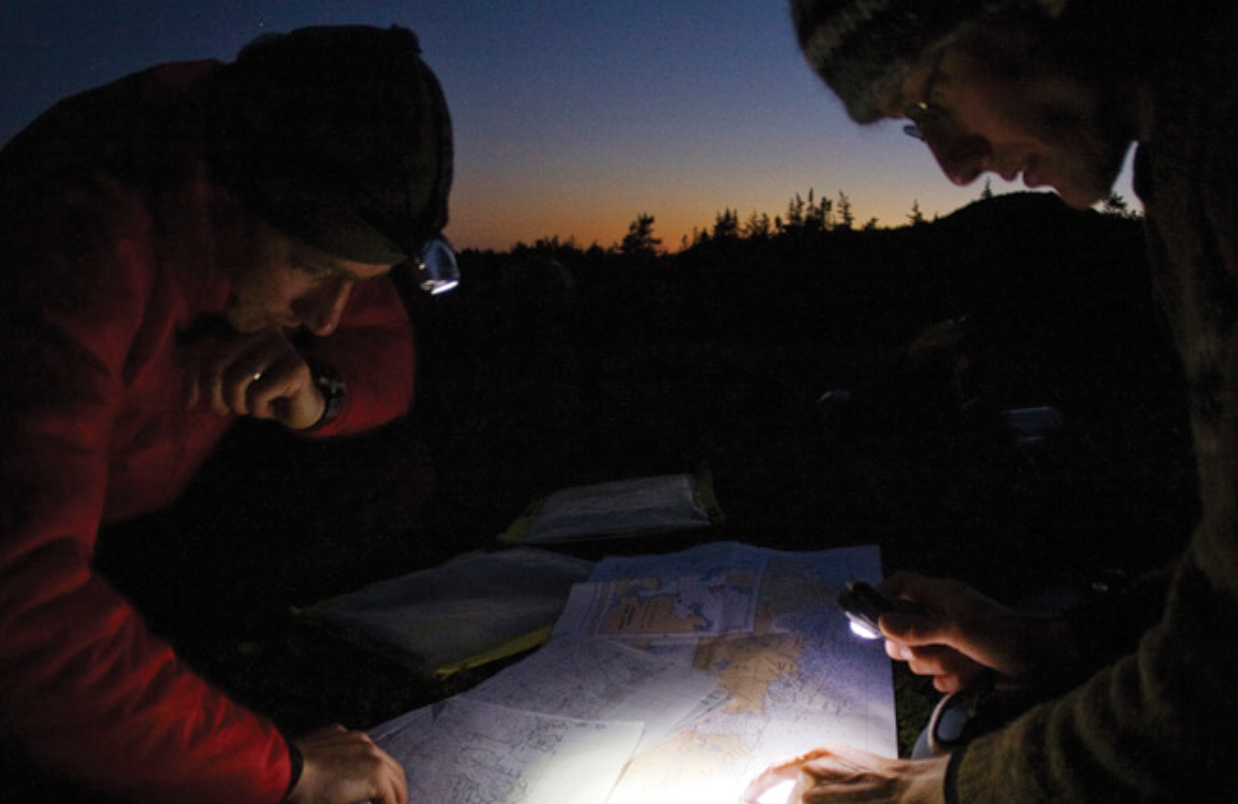
New York-based paddler Marcus Demuth makes a point of going to places where sea kayaks haven’t been, which throws a wrench into logistical planning. In the case of his 2010 expedition to Tierra Del Fuego,

Chile, it meant he and expedition partner Biff Wruszek had to practice their spanglish to figure out how to get sea kayaks to the tip of South America, find charts for an obscure coastline and secure travel permits.

“Until recently, three-piece sea kayaks could be transported on commercial flights. Now fiberglass boats aren’t allowed. This is something I’m willing to take a chance on— how is the baggage handler going to know my kayak isn’t made of plastic? The other option is to send your boat on a container ship. This works great if you don’t mind dealing with high costs and inevitable delays, which seem to range from weeks to months. Or you could use a folding kayak, but in my opinion they don’t offer the big water performance of a hardshell.

“In Chile we were lucky to hook up with a few local paddlers in advance through Facebook and they helped us out big time. We tend to think of the Internet as our best source of information but Biff found charts for our trip by writing letters with pen and paper. Of course you could always go to a more popular destination—my trips to Great Britain, Iceland and Ireland were dead easy to plan.”

{loadposition PTG_AK_Midcontent}

FILM YOUR TRIP, OR NOT

Newfangled digital camcorders, HD-capable digital SLRs, helmet cams and pocket-friendly point-and-shoot cameras make high-quality filmmaking equipment accessible for the masses. The real question is, do you want to do it?

Paddlesports filmmaker Justine Curgenven has made a living toting camera gear to the watery ends of the Earth. She offers this advice: “Small mountable cameras like the GoPro Hero and the Oregon Scientific ATC9K allow the keen kayaker to bring the experi- ence home to their friends in high definition. The challenge is getting the best out of these cameras and creating a story from the foot- age. You have to learn the limitations of a camera and work out ways to get around them: Don’t film into the sun. Treat your lens with a water repellent like Rain-X and have a cloth handy to wipe drops off. The main thing is to practice before you really want to film something. You will make mistakes, so make them when it doesn’t matter.

“The main downside of filming an expedition is that the process is tiring and it can take the focus away from the experience of the trip,” Curgenven admits. “When I’m exhausted I don’t want to pick the camera up and think about capturing a sequence of shots. When dolphins leap into the air beside me, it would be nice to just sit and watch rather than grab for my camera.”
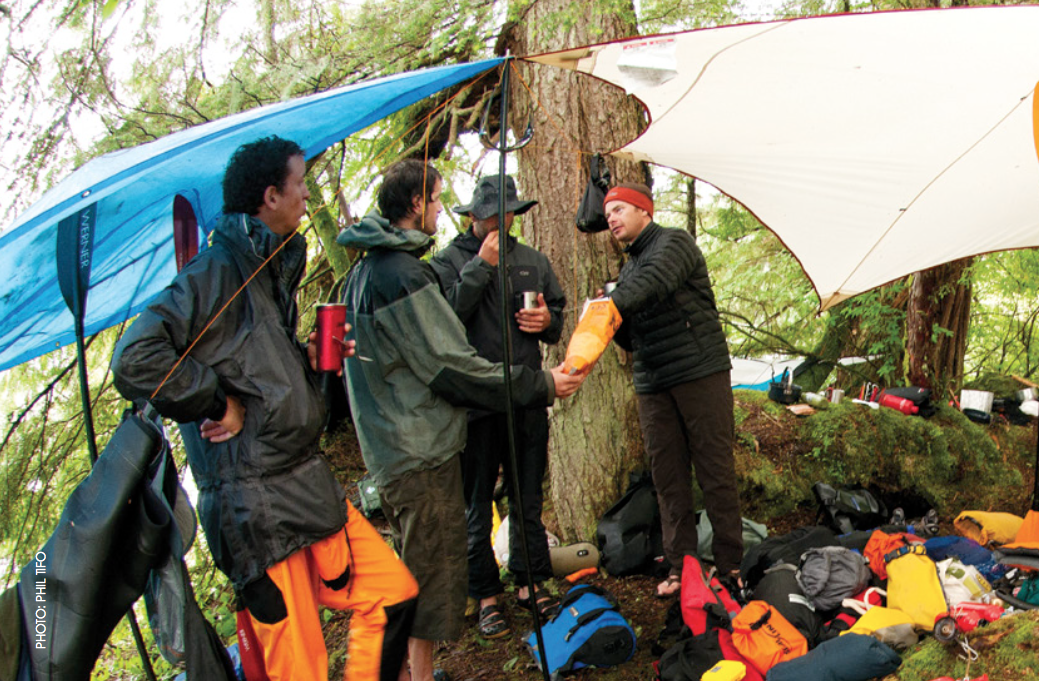
Campsite on a paddling expedition
Above photo:  Phil Tifo

GROUP DYNAMICS

When Norwegian sea kayaker Simen Havig-Gjelseth assembled a team of paddlers to attempt an unsupported circumnavigation of Antarctica’s South Georgia Island, personality trumped paddling skills according to his list of requirements. “It is more important that the person can work in a group, creating a nice atmosphere and not complaining, rather than being an Olympic champion in paddling,” notes Havig-Gjelseth, who went so far as to insist that all four paddlers sleep in the same tent to ensure decisions were made as a group. The strategy worked. In November 2010, the Norwegians became the first to paddle around South Georgia’s rugged 650-kilometer perimeter without external assistance.
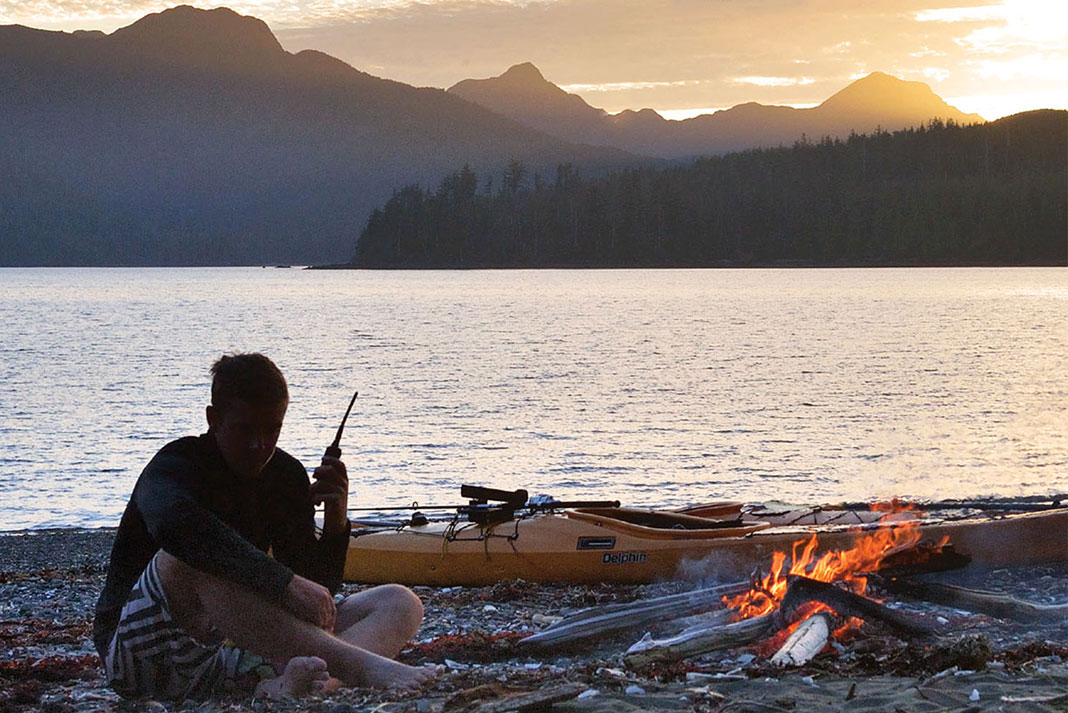
SAFETY AND RESCUE

I nstructors and expedition paddlers Shawna Franklin and Leon Sommé, co-owners of Washington-based Body Boat Blade International, like to divide safety gear into group (first aid kit, boat repair kit) and individual (VHF marine radio, flares) items. Franklin doesn’t hesitate when asked which piece of safety gear she’d never leave behind on an expedition: a tow system. “We use tows all the time. On the south coast of Iceland, Leon came out of his boat on a surf break. I was able to tow him and his boat through the break to perform a rescue. Later on the same trip, we used a tow to assist a seasick paddler. It is important that everyone on the trip has a tow system and knows how to use it; we wear ours on our waists.”

TRAINING AND FITNESS

Sea kayaker Joe O’Blenis knows a thing or two about making the most of limited vacation time. Last year, O’Blenis reclaimed his speed record for circumnavigating Vancouver Island, completing the 1,150-kilometer expedition in 16 days. What could’ve been agonizing was made enjoyable by a pre-trip training strategy. “I didn’t get to train as much as I wanted to,” says O’Blenis. “I planned on doing lots of long, eight- to 10-hour train- ing days. But in reality I didn’t have time to do that.” Instead, O’Blenis relied on intense two- to three-hour on-water sessions, including intervals and time trials. His secret weapon in developing speed, power and ultimately stamina was training with a wing paddle. “I had no intention of using it on the expedition,” he says. “The idea was that when I switched back to my normal touring Greenland-style paddle it would feel effortless.”

Campfire pizza on a camping trip
Above photo: Virginia Marshall

HAULING THE WEIGHT

Sommé insists that if you think like a backpacker you’ll never run out of space when packing your boat. Break down your tent into individual components; pack clothing and gear in small drybags; avoid doubling up on group gear like pots and stoves; buy the most compressible sleeping bag you can afford; and do a few dry runs at home so packing doesn’t take all day at the put-in. Sommé is not a big fan of packing things in his cockpit for fear of losing gear and hindering re-entry in the event of capsize. He makes an exception on ocean trips in arid regions where fresh water can be the heaviest item in the boat. Here, Sommé rigs a through-the-deck hydration system behind his seat, storing bags of water close to the bulkheads.

THE EXPEDITION PADDLER’S MENU

Food is often the distinguishing factor between a recreational trip and an expedition. True, you can go gourmet on a long-haul, multi-day journey, but “after paddling six to 10 hours a day the last thing you want to do is prepare a five-course meal,” says Sommé. Franklin and Sommé prefer easy to prepare, one-pot meals that they “can eat over and over,” without gagging or getting malnourished. Typically that means combining lots of carbs with a source of protein and fat like olive oil or gobs of peanut butter. Hard-boiled eggs and dried sausage are staples on Franklin and Sommé’s lunch menu. But that doesn’t mean you can’t eat fresh. “One of the best things we did on our Haida Gwaii trip was a cabbage salad,” says Franklin. “Cabbage keeps forever and by combining it with apples, carrots and an oil and vinegar dressing, it makes a great side dish.”

This article on expedition tips was published in the Early Summer 2011 issue of Adventure Kayak magazine.This article first appeared in the Early Summer 2011 issue of Adventure Kayak Magazine. For more great content, subscribe to Adventure Kayak’s print and digital editions here.

Rock the Boat: Confessions of a Cross-Paddler

Illustration: Lorenzo Del Bianco
Rock the Boat: Confessions of a Cross-Paddler

I am a man. But I have happily used a paddle with the super-girly name Athena. I have paddled a kayak called the Eliza that is allegedly designed specifically for women—although I happen to know firsthand that the Eliza’s male designers quite enjoyed her svelte lines and graceful handling.

I have worn a Lola: a PFD inspired by the bodice of a wedding dress. Alone at home, I have even tried on my wife’s Kokatat women’s Gore-Tex drysuit.

That’s right—I am a cross-paddler.

I rented the aforementioned Eliza from my local paddling shop. The young studly dude at the counter was concerned.

“You know this is a chick’s boat, right?” he asked.

I said I did. There was a prolonged uncomfortable pause. He shifted uneasily and eyed me suspiciously. A Village People song played on the radio. I’m sure you will find / Many ways to have a good time / It’s fun to stay at the Y.M.C.A. The hairy eyeball treatment was really getting to me.

So, with an easy smile, I lied that my wife was looking forward to trying it. The rental counter dude immediately relaxed. We chatted about hunting and hockey as he helped me load the Eliza on my Jetta.

At the beach, I quickly launched the Eliza before anyone else could witness my aberrant behavior. Frightened of being bullied by my male paddling buddies, I went alone. Scorned and misunderstood, the cross-paddler’s life is a lonely one.

What exactly is a woman’s kayak?

Why is it that we men are so hung up on avoiding anything that is marketed as women-specific? It’s just a kayak after all—we’re not talking about bras and tampons.

Try this: In a crowded outdoor store, offer a guy a fleece jacket to try on. It fits him perfectly and is both functional and handsome. He is pleased. Now casually mention that it is a woman’s jacket and watch as he rips it from his body before the vice squad can kick in the door and haul him away for gross indecency.

His reaction is the same as one might expect had he been caught wearing a silver lamé bustier, stiletto heels and heavy eye makeup.

What exactly is a woman’s kayak? What defines it and makes it women-specific? Is it pink and covered in bows? Must you lift its stern and peer under its keel to really be sure? Ridiculous, right?

Women are generally more than willing to try men’s gear. In the past, they had little choice because so few companies offered technical ap- parel and equipment cut for the female form.

So why are men so sensitive about using women’s gear?

I say there is no such thing as a gender-specific kayak or paddle. At least there ought not to be. There is only gear that may be better suited to smaller or larger paddlers, or folks with less or more upper body strength on tap. What paddler, male or female, doesn’t want a kayak or paddle that is light and appropriate for his or her size and paddling style?

Let’s be a little more accepting of those who enjoy cross-paddling. After all, every time you go sea kayaking, I bet you’re wearing a skirt.

Alex Matthews is dead butch. He lives and paddles in a manly way on southern Vancouver Island. 

This article on the confusing status of gender-specific gear was published in the Early Summer 2011 issue of Adventure Kayak magazine.This article first appeared in the Early Summer 2011 issue of Adventure Kayak Magazine. For more great content, subscribe to Adventure Kayak’s print and digital editions here.

Kayaking for the People

Boys paddling on Lake Malawi. Photo: flickr.com/fabulousfabs
Kayaking for the People

In this economically diverse world, paddling can possess a range of meanings for different people.

For westerners, kayaks are not vital. Despite being a passion or even a way of life, for us, paddling remains a recreational pursuit. On the other hand, for millions elsewhere in the world, human-powered watercraft serve as fundamental hunting or fishing tools, or as means of transportation critical to basic local economies.

Though our motivations to paddle may be worlds apart, the kayak shines as a starting point for us to reach out—common ground among different cultures. Traditional approaches to building a dugout pirogue, for example, take skills, tools and techniques passed on from generation to generation. Likewise, the craftsmanship of modern sea kayak builders is built on similar customs.

When we paddle at home, we often acknowledge our local waterways through conservation and management, protecting the places we love. However, when traveling to paddle in underdeveloped areas, we need to broaden our perspective on stewardship. The people should be of as much concern as the surrounding natural landscape. It seems deeply unfair to raise and spend thousands of dollars on an expedition and leave behind little positive impact on local communities.

By keeping informed of global issues, realizing our potential to make a difference and starting small within our kayaking clubs or weekend paddling groups, our awareness may inspire something more.

Distance and economic disparity can be overcome by celebrating a common denominator. Paddling is the perfect fit.

Lake Malawi, or Lake Nyassa as it is referred to locally, is the perfect proving ground for sea kayakers looking to accomplish more through their paddling. Straddling the borders of Malawi, Mozambique and Tanzania, Nyassa is the third largest lake in Africa, the eighth largest in the world. Its waters provide habitat for countless species of fish and its shorelines are home to hippos, monkeys, crocodiles and painted dogs. But in order to overcome the one-sided, consumptive nature of so many international trips, a truly successful expedition must focus on the people who inhabit the massive lake’s coastline.

The region could benefit greatly from navigation safety education to decrease a high annual drowning death toll. To bolster sustainable economic growth, area guides need training to establish a stable and reputable eco-tourism industry. These issues are important to boaters who value life on and around the water, be they western expedition paddlers who are passionate about their lifestyle or Africans who rely on the lake for sustenance.

Distance and economic disparity can be overcome by celebrating a common denominator. For the people of Lake Nyassa, the kayak is a perfect fit. Paddlers planning international expeditions have the potential to show solidarity in their endeavors. By doing so, they’ll give the world at large one more reason to get involved in kayaking—benevolence. 

Joao Simoes is the leader of Kayaking for the People (KFTP), a Portuguese not-for-profit organization founded to tackle third world medical, agricultural and educational projects. For more info on the KFTP project visit kayakingforthepeople.org

1AKv11i2.jpgThis article first appeared in the Early Summer 2011 issue of Adventure Kayak Magazine. For more great content, subscribe to Adventure Kayak’s print and digital editions here.

Editorial: Selfish Tripping – Enjoy Responsibly

Photo: Virginia Marshall
Editorial: Selfish Tripping - Enjoy Responsibly

When you hear about upcoming kayaking expeditions, the purpose of the trips as stated by those undertaking them—along with the standard entourage of bloggers and benefactors—typically fits into one of three universal motivations.

First up are the I’m-Doing-This-For-A-Good-Cause-People. IDTFAGCPs are paddling philanthropists, raising money, aware- ness or both in the name of making the world in which we paddle a better place. Causes that have benefited from the IDTFAGCP’s admirable activism have included children’s aid, the Red Cross, Arctic climate change and multifarious environmental, social, medical and educational organizations.

Those who fall into the next two categories are generally more self-serving. These are the I’m-Doing-This-To-Be-First-People and I’m-Doing-This-To-Be-Faster-Than-The-Last-Guy-People. Sometimes, however, IDTFAGCPs and IDTTBFPs or IDTTBFTTLGPs are found to be one in the same.

It shouldn’t be surprising that the lines defining expedition motives often blur together. After all, why can’t one be first or fast as well as philanthropic? I sincerely believe that most sea kayakers truly do want to make our watery world a better place. Besides, sponsors love first and fast and most causes require money as well as good intentions.

Every now and then, however, some paddlers will announce that their expedition to Shangri- La, Hades-on-Earth or a backyard coast is, well, for them. With frank sincerity, the I’m-Doing-This-Just-For-Me-People admit that the best reason they could come up with to go on trip is simply that they wanted to. I get where IDTJFMPs are coming from—I’ve been one myself.

“The I’m-Doing-This-Just-For-Me-People admit that the best reason they could come up with to go on trip is simply that they wanted to.”

Last summer, when I launched myself on a two-month, largely solo expedition through lakes Superior and Huron, it wasn’t to be first or fastest. The trip had been done many times before (ever heard of the voyageurs?) and I had no interest in being the fastest. Even if I shared their motivations, I could never match the IDTTBFTTLGP’s freakish appetites for masochistic training regimes and 50-mile days.

And it’s not that I don’t believe in helping out a good cause. I do, and I do. It’s just that I already had a good reason for going: I wanted to. Rather than writing appeals and bartering sponsorships for blog content, I called in favors from friends and saved paychecks. Outside obligation would only cramp my style: self-indulgent and carefree.

As we stroke into another tripping season, a slew of new expeditions are hitting the water. Most share the usual triad of motivations, but one stands out for its candid self-indulgence.

This summer, Leon Sommé and Shawna Franklin will depart on the “anti-expedition”— a laid-back, six-week paddle around Vancouver Island. Inspired to slow down by the increasingly speedy circumnavigations of the island (16 days, 12 hours at last count), Sommé jokes, “We want to set the record for slowest circumnavigation.” No o-blog-ations, no 50-mile days—unless they want to.

Now that’s something every IDTJFMP can celebrate.

This article on expeditions for you were published in the Early Summer 2011 issue of Adventure Kayak magazine.This article first appeared in the Early Summer 2011 issue of Adventure Kayak Magazine. For more great content, subscribe to Adventure Kayak’s print and digital editions here.

Freestyle Move: McNasty

Photos: Scott Sady
McNasty how-to

The venerable mcnasty has been around since 2002, when Eric Jackson invented the move—a bow pivot into a front loop—in his backyard rapids at Rock Island, Tennessee, and showcased it later that year at the IR Triple Crown.

For a long time, I studied footage of this move in awe, as the mechanics of it seemed way beyond me. I was finally able to demystify this trick by breaking it down into manageable parts.

1. Sidesurf in a hole with a foam pile. Rotate your body downstream to set up for a powerful reverse sweep.

2. Use the reverse sweep to push your bow into the foam pile so that your stern is upstream in a back blast. Your legs assist with the back blast: shift your weight slightly forward and push down on your heels, driving your feet under the foam pile. This will keep your stern from catching in the upstream flow.

3. It’s easiest to continue in the same direction started by your reverse sweep, using the spin momentum from that stroke. Look back upstream, rotate your torso and reach to your toes for a powerful forward sweep. This stroke pulls your bow deeper under the foam.

4. Drop your upstream edge slightly. This edge is going to catch, so there is a fine line between too much edge and just enough. The dropping of the edge allows you to pivot around your bow.

5. Hold the forward sweep as long as you can and keep pushing down on your heels.

6. When your boat pivots to where you are vertical and pointed upstream, jump forward to initiate a loop. If your loop lacks pop or your mcnastys are crooked, make sure you are facing all the way upstream before jumping.


This article originally appeared in Rapid, Early Summer 2011. Download our free iPad/iPhone/iPod Touch App or Android App or read it here.

Freestyle Move: Airscrew Clean Blunt

Photos: Patrick Camblin
Airscrew clean blunt

The wave won’t do you any favors on this trick. As with most combo wave moves, however, a well-defined shoulder helps, the steeper the better. Once you can do snappy hull-to-hull airscrews on small waves, you are ready to tackle this combo.

These steps outline a left airscrew to left clean blunt.

1. Get high on the wave.

2. Start down the wave, put in a paddle stroke and bounce. Tilt the boat with your hips to land on your right edge.

3. As you land, start rotating your shoulders to the left so your paddle is in line with your boat. Keep the boat on edge and look down at the water—this will start your rotation.

4. As your boat releases, keep looking down at the water between your arms. Fix your eyes on this spot until the moment just before you go upside down.

5. Okay, here’s the key to a snappy airscrew and landing flat and ready for the next trick: Right before you go inverted, look over your left shoulder and PUNCH out with your right hand.

6. Use your right paddle blade as a rudder to keep your boat straight for the landing.

7. Tighten up your right side abdominal muscles as if you’re trying to touch your left elbow to your right knee. Do that now. Feel that? This is what will finish your rotation and get you ready for the landing.

8. Touch down. Now, in one quick motion let go of the rudder, rotate 
to the left and smoothly transfer your weight from your right edge to your left. Initiating this release is the hardest part because you won’t feel like you have a good enough bounce to throw a clean blunt.

9. Pop up and hit the water with your feet as you throw your arms away from your body. Be really aggressive—even if you have no bounce, throw your arms into the trick and look downstream. You may wipe out or just flat spin 180, or you might throw a stylin’ clean blunt.


This article originally appeared in Rapid, Early Summer 2011. Download our free iPad/iPhone/iPod Touch App or Android App or read it here.

4 Types Of Clouds To Help You Predict The Weather

person holding up a glass orb to reflect the setting sun and some types of cloud
Use these tips on cloud types for a quick DIY weather forecast. | Feature photo: Guy Kimola

Using cloud identification to forecast weather is a skill that mariners have used for hundreds of years. Watching clouds is simple and easy, yet it has been empirically proven that cloud observation as a means to predict the weather yields an accuracy of 60–75 percent. Not bad for just looking up. See illustrations of the different types of clouds—and what they mean—below.

4 types of cloud to help you predict the weather

Seasonal weather follows fairly predictable patterns in each part of the world. Different types of clouds form in very different ways in the atmosphere, depending on pressure and the moisture available. Since certain weather produces certain cloud types, observing clouds can tell you how and when the weather will change.

The key here is learning the basic cloud groups. Clouds are classified by shape and height, with names derived from Latin words describing their form. There are three basic categories you should commit to memory, as well as a fourth variation that deserves special notice.

cirrus clouds over a seaside mountain
Photo: Simon Fitall/Unsplash

1 Cirrus

Appearance (above): White, feathery looking patches and strands; usually spreading across the sky.

Prediction: Cirrus are high level clouds. These thin wisps are often the forerunner of approaching bad or unsettled weather. A gradually increasing cover shows that an approaching weather system will bring wind and possible precipitation. By observing their movement, you can tell from which direction the weather is coming.

In much of North America, cirrus clouds in the west or southwest quadrant of the sky usually indicate that the weather will change for the worse within 24 hours.

6583986639 d006655ae9 b
Photo: Wisconsin Department of Natural Resources

2 Stratus

Appearance: Uniform pale gray or white layer, looks like cheese cloth spread across the sky; can be translucent so that the sun or moon shows through as a hazy disk.

Prediction: High or mid-level stratus usually follow cirrus clouds. When they cover the entire sky, weather change is 12–18 hours away.

cumulus clouds over a lake
Photo: Neda Astani/Unsplash

3 Cumulus

Appearance: Puffy white cotton balls; if they begin to tower—become taller than they are broad—with flat bases and tops that look hard like the head of a cauliflower, they are called cumulus congestus.

[ Browse the widest selection of boats and gear in the Paddling Buyer’s Guide ]

Prediction: When cumulus remain the same size and shape and do not show signs of vertical growth, they are called fair-weather cumulus, meaning the weather will remain the same for at least 24 hours. If towering cumulus continue to grow, they can develop into cumulonimbus clouds with showers or thunderstorms within the next few hours.

cumulonimbus clouds at sunset
Photo: Raquel Pedrotti/Unsplash

4 Cumulonimbus

Appearance: Large cloud mass with very dark base and bright top that may flatten into an anvil-head.

Prediction: The rapid vertical growth and anvil-like shape of cumulonimbus indicate high winds within and above the clouds. These clouds can forecast some of the most extreme weather on the planet including very strong wind gusts, heavy rain, hail and lightning.

In North America, when you see these on the western or southwestern horizon, get off the water and seek shelter. The storm is often as little as one hour away, particularly when you hear thunder as well.

Cover of the Early Summer 2011 issue of Adventure Kayak magazineThis article was first published in the Early Summer 2011 issue of Adventure Kayak Magazine. Subscribe to Paddling Magazine’s print and digital editions, or browse the archives.


Use these tips on cloud types for a quick DIY weather forecast. | Feature photo: Guy Kimola


Wanigan Packing Tips

Illustration: Lorenzo del Bianco
How do you pack your wanigan?

This article on how to pack your wanigan and what to put in it was originally published in Canoeroots and Family Camping magazine.

While the traditional wanigan—that bulky wooden box, custom-built to fit snugly within a canoe’s contours—has largely been replaced by plastic tubs or barrels, its purpose has remained true: to cram as much kitchen stuff as possible. But one portager’s perfect stash is another’s albatross. Wanigans reveal trippers’ traits, classifying them as one of three wanigan personalities: extremist, minimalist or middle-malist. And there’s wisdom—and warning—to be dished from each camp.

“Most paddlers want to eat like they do at home,” says Andrew Rafton, an extreme tripper and waniganer who won’t compromise on meals. It’s why he invested in a food dehydrator and vacuum bag sealer, which allow him to fill his wanigan with all the fixings for everything from shepherd’s pie to pizza to cobbler. He won’t scrimp on his eco-friendly clean-up, either; he makes room for three—yes, three—folding sinks.

“That’s not gonna happen on any trip I take,” says Jason Picard. “Not even a luxury one.” A self-proclaimed minimalist tripper, Picard uses his cook pots as sinks, eschewing anything that only has one use.

In Eugene Mohareb’s barrel-cum-wanigan you’ll find plenty of lightweight just-add-water meals. Whereas Rafton needs his full assortment of spices, minimalist Mohareb is happy with his tiny vial of hot sauce. Picard does one better by loading up on individual packets of condiments when he’s at a deli counter.

Your wanigan’s contents may also depend on your camping skills. Take Barb Russell, who describes herself as a middle-malist and worked as a guide and chief cook for a tripping company. “A percolator takes up too much room in my wanigan,” she says, before describing how to make cowboy coffee by literally swinging a pot of hot water above your head. “So my kit always includes a billycan.”


The Minimalist

Swiss Army Knife
Butane canister stove
Folding bowls

One pot, its lid doubling as a pan
Instant oatmeal
Instant coffee, enjoyed black
Instant rice
Mac and cheese
Hot sauce

No utensils—a carved stick for stirring and shovelling food


The Extremist

Dehydrated veggies and meat

Fresh apples

Vacuum packed food

Three foldable sinks—wash, sterilize, rinse
Spice rack
Outback oven with thermometer
Double-burner stove with tins of extra fuel
Dutch oven with charcoal

Titanium utensils—full set

Spatula, ladle and whisk

Plates, bowls, cups and mugs

Percolator and fresh ground gourmet coffee
Tetra-pak milk and cream
Mixing bowls

Flour

Biodegradable dish soap
Dish towel

This article originally appeared in Canoeroots & Family Camping, Early Summer 2011. Download our freeiPad/iPhone/iPod Touch App or Android App or read it here.

Perfect Your Pry Canoe Technique

Photo: Joannie and Gary McGuffin.
Pry technique demonstrated.

This article on how to perfect your pry stroke was originally published in Canoeroots and Family Camping magazine.

All pries use the paddle shaft as a lever against the gunwale to move the canoe away from the paddle. The resulting action of the canoe differs depending on the placement of the pry, whether the canoe is moving (dynamic) or not moving (static), and whether the pry is used in a solo or tandem situation. These four useful solo maneuvers are performed using variations of this adaptable stroke.


Solo Offside Abeam

STROKE Dynamic pry


WHEN Use to move the canoe directly sideways away from the side you are paddling on.

HOW This pry uses short, quick motions to lever against the gunwale. Rotate your upper body toward the onside gunwale and place the paddle at your hip with the shaft vertical and the powerface of the blade against the hull. Pull the paddle grip across your chest. Once your control hand reaches the canoe’s center- line, turn your control thumb out and slice the blade back under the canoe to repeat.

TIP Think of your shaft hand as an oarlock, and keep the paddle shaft anchored to the gun- wale throughout. Avoid rocking the canoe back and forth as you pull.


Solo Offside Sideslip

STROKE Stationary pry


WHEN Use to sideslip the canoe around an obstacle without having to turn, change direction or sacrifice speed.

HOW Get some speed paddling forward. At the end of a forward stroke, turn your control thumb back and slice the blade into the hull at your hip. The powerface is facing the hull. the blade should be slightly angled in the direction you want to go. Keep the blade in this static position. Weight your onside knee so the canoe meets the least amount of water resistance as it moves sideways.

TIP: Adjust the paddle shaft slightly forward or backward of your hip to ensure that the canoe does not turn as it moves sideways.


Solo Offside U-turn

STROKE Sliding pry

WHEN Use to turn the canoe around 180 degrees without switching paddling sides. This elegant, exciting offside turn requires good boat control and balance.

HOW Initiate the turn with a forward sweep, edging the canoe to the outside of the turn. Following the sweep, knife the leading edge of the paddle blade to meet the hull. The paddle shaft is vertical and the force of the water is on the back of the blade. Smoothly slide the vertical paddle shaft along the gunwale toward the bow as far as you can comfortably reach, rotating your onside shoulder forward.

TIP Maintaining an upright body position (j-lean) is essential for keeping your balance.


Offside Capsize Recovery

STROKE Righting pry


WHEN Use to recover your balance and prevent a capsize to the offside. if you are tipping away from the side you are paddling on, the righting pry is a very effective and powerful correction that takes guts and commitment.

HOW Slice the paddle toward your hip, keep- ing the paddle shaft vertical. set the shaft against the gunwale and turn your control thumb back so the blade is parallel with the canoe. push down on the grip to submerge the blade deep in the water. pull the grip toward you, past the centerline.

TIP Push down on the grip and choke up your shaft hand to submerge the blade deep in the water for a successful pry.

—Words and photos adapted from Gary and Joanie McGuffin’s Paddle Your Own Canoe.


This article originally appeared in Canoeroots & Family Camping, Early Summer 2011. Download our freeiPad/iPhone/iPod Touch App or Android App or read it here.

Open Canoe Bracing Techniques

Brace yourself to never flip again. Photo: Virginia Marshall
Brace yourself to never flip again.

This open canoe technique article describes how to effectively brace and was originally published in Rapid magazine.
Any brace is a good brace—even if you high braced when you should have low braced or vice versa. Having your paddle in the water contributes to your stability.


FORWARD STROKE


When to Use: Flipping to either side.


Pros and Cons: The best brace is often a for- ward stroke. When a paddle is in the water with force against the blade, it’s extremely stabilizing. For beginners, doing a forward stroke takes the guesswork out of which brace to choose. The forward stroke has the additional benefit of keeping your canoe moving. Also, some paddlers become habitual low bracers—bracing their way down the river rather than paddling. Using the forward stroke as a brace will help break this habit.


LOW BRACE


When to Use: Flipping to your onside.


How to: With your paddle perpendicular to your canoe, slap the water with the back of your blade and use the momentary support to drop your head and move your body towards the opposite (high) gunwale.


Pros and Cons: Repeated efforts to low brace often result in the paddle sinking and the canoe flipping. Ideally, this brace is a one shot deal to recover and get moving. Doing a stationary brace has one drawback—it’s stationary. A boat is easier to control when it’s underway and this brace doesn’t provide momentum.


RIGHTING PRY


When to Use: Flipping to your offside.


How to: Hold your paddle vertically, blade in the water at your hip and lever off the hull with your top hand.


Pros and Cons: This is an unbelievably solid way to keep your boat upright but it takes presence of mind to employ. The force that’s created from levering your paddle off the hull is very strong. Avoid mashing the thumb of your lower hand between your boat and paddle by keeping it on top of the shaft with the rest of your fingers.

When you’re tipping to your offside, the water feels a long way from your blade. A key part of an effective righting pry is reaching to place your entire blade in the water. Unlike the low brace, the righting pry is often most successful after multiple attempts as you continue to work at finding purchase in the water.


HIGH BRACE


When to Use: Flipping to your offside


How to: Reach your paddle over the high gunwale and grab the water as if you were doing a draw.

Pros and Cons: Much maligned as the least effective brace, it nevertheless looks spectacular in photos. Be aware there is concern that doing a high brace may cause shoulder injury. A good rule of thumb to avoid injury is to stop doing the high brace if you find your lower arm is being forced away from your rib cage.

No matter which brace you use, bring your head and body back over the canoe’s centerline to restore stability.

Remember—even if you have the perfect paddle position for a brace, it’s worthless unless you right the boat and correct your center of gravity.


This article originally appeared in Rapid, Early Summer 2011. Download our free iPad/iPhone/iPod Touch App or Android App or read it here.