I thought intensely about what the other parents felt would make these plans challenging, and in my mind, none of those challenges outweighed the monumental, life-altering experiences my children were about to have. So my answer was yes to the adventure.
Kayaking with kids is not something that should scare people, no matter the age of their child. It’s easier than we build it up to be if… IF… you set zero expectations for yourself to begin with and keep in mind a few considerations.

A Guide To Kayaking With Kids
Planning your trip
Plan a trip that you will actually do. We can all dream of something spectacular that will hook our kids on kayaking forever, but the reality is that it’s not the one time that you went kayaking that hooked you, it was the accumulation of experiences. If you don’t have the energy or bandwidth to plan a “trip” then just load your boats to the roof and go to the nearest beach for a two-hour scoot. Keep it simple. I assure you, it will still be more fun for your kids than watching four back-to-back episodes of whatever show is recommended by the Netflix algorithm that day.
If you do want to do something that is longer than a couple of hours and you do have some time to plan, figure out what you have the time to plan for. A multi-day self-supported kayak trip seems a bit daunting with kids, even for me, but possible. Or a multi-day cottage-base with daily outing is another option—hey, no one’s judging. We aren’t here to set records or score bragging rights. We are aiming to get our kids on the water in kayaks as much as possible. If that means visiting your local paddle club and renting boats anytime you want to go out, do it. If that means you visit your parents’ cottage more than you ever used to, do it. The goal is simple, butts in boats.
Kayaking gear for kids
Gear checklist
This is the checklist for a minor outing, assuming the child is very young and inexperienced. Don’t overwhelm them with gear and instructions; keep it simple. The items listed below are all a child needs for a bit of fun paddling whether they are sitting in a boat with you or their own kayak:
- Kayak
- Paddle
- Appropriate-size life jacket and whistle
- Bathing suit, sunshirt, and hat (wetsuit for colder water)
- Bowline (if they need a tow on flatwater)
- Super Water Blaster 5000 (also works well as a bailer)
Additional gear parents should consider having:
- Water
- Drybag with…
- Communication device (cell phone, radio, other)
- Snacks
- extra layers
- splash jacket
- Sunscreen
- Basic first aid kit
- Buoyant rope
- Bailing system (like a bilge pump or waterscoop)
- Float bags (for enclosed kayaks that do not have sealed bulkheads)
Things you may want to bring along to make the experience more fun include things like:
- Binoculars
- Mini paddles
- Waterguns
- Nature Identification Activity Sheets
Again, we don’t want to overcomplicate things, so if the outing is simple, keep your packing list simple.
On the water
When you are on the water with your child who is still getting into kayaking just remember what it’s truly about. It’s not something we are doing so we can be the best. It’s something we are doing to help us enjoy nature and each other. My tips for ensuring your kids have fun on the water are:
- Don’t be in a rush, give yourself lots of time.
- Take breaks
- Play simple games like you would on a road trip
- Learn skills through games
- Tell jokes
- Stop and look at cool things
The psychology of kayaking with kids
The key here is knowing your child really well, which I am sure most of us do. We want to avoid them associating the activity we love with a negative feeling, and a helpful way to do that is by approaching kayaking with your kids using the following acronym.
You need to S.E.L it to them:
- Safety—if they ever feel scared, it’s not going to last
- Enjoyment—make sure it’s fun
- Learning—becoming a paddler involves a life-long progression; take every challenge as an opportunity to teach your child something new.
Safety
First things first, whoever is organizing the outing needs to be very confident with the adventure you are taking them on. You are taking a risk on behalf of the child you are with, so you need to feel confident you could get them out of any danger that may come your way while on the water. Don’t let this turn you away from taking your children out at all. We do the exact same thing while driving them to daycare and school each day. We are weighing risk vs. reward here.
A good exercise would be to take mental notes on the potential risks and the potential rewards.
One more note on safety: we need to be able to let them make their own mistakes. You design the trip with the question in mind, “What’s the worst that could happen?” If you are comfortable with “the worst” your child will likely encounter, move ahead. For example, I have a four year old. He doesn’t like getting splashed or wet very much. At the end of the day, when he is tired and taking a bath, trying to wash his hair makes me feel like I am temporarily employed as a torturer. No matter how enjoyable I try to make it for him, he will scream, yell, cry and look at me like “how could you.”
All that to say, when I am taking an inventory of the possible risks for him, I try to ensure the worst possible risk is that he will get splashed. Eventually, I am hoping he becomes okay with more than just being splashed, so we can move up a level in risk for him. What next you ask? Maybe a full dunking!
If you ever get to the point where you are not confident that you are skilled or experienced enough to get your child out of the potential dangers, but you don’t want to hold them back either, find someone who is and pair your child with them. If you don’t know anyone, put them in a paddling camp or a paddling school. There are lots! This step seems so obvious when we talk about things like hockey or ballet, but it is the same for paddlesports.
Enjoyment
If we are not having fun, why are we doing it? For kids, this question is amplified a hundredfold. We need to make every day on the water fun. Ask yourself how you are going to do that, because telling a child to sit down and paddle until you say they can stop may not be their definition of fun. I’ll share four of the most available and best methods to make a kayaking trip enjoyable: snacks, laughter, the company of other kids, and seeing the opportunity to make it a game.
Snacks
Bring all the snacks.
Isn’t it weird when you are camping how much better food tastes? I am sure it’s because we are actually experiencing hunger. I remember a friend giving me some of his bagel with cream cheese and cucumber sandwich while on a paddling trip. It was the most incredible meal I had ever eaten. Of course, I made it when I got home, but it didn’t hit the same. I mean, a bagel? Not toasted? How did I even swallow that? Anyway, snacks, meals, candies, whatever you think will make someone smile.
Laughter
See the humor in everything.
Hearing laughter and seeing smiling faces forces positive memories, even if the experience is difficult. With my kids, I make sure to come equipped with a couple of new knock, knock jokes. That invites them to start joking around and although their jokes sometimes make no sense at all, the fact that they think they themselves are so funny, is funny in itself.
I also laugh at situations that most people would choose not to laugh at—while also keeping in consideration whether someone was seriously hurt. For example, let’s say my son—who doesn’t like getting splashed—accidentally walked under a downspout, got soaked, and started to cry. Ask yourself, what is it that he hurt? If his ego is the answer, then laugh away, just make sure you include them in the joke and convince them to laugh too. If I decide to leap off a jumping rock and land flat on my back and even bruising myself, that’s laughable too! Lead by example here, put your ego aside, and laugh at yourself when you do something that didn’t work out the way you had planned. It invites everyone else to laugh along with you. Cut yourself while whittling your kid’s marshmallow stick? Laugh it off. Having trouble setting up the family tent? Laugh it off. Lost a boot in the mud? Laugh it off.
Bringing other kids
Bringing more kids really speeds up the learning process and kids’ willingness to paddle.
It’s difficult to do when children are young unless you know other dedicated paddling parents, but when kids reach five and older, having other kids around is great. It helps with the preplanning and packing stage because your children will be motivated to help, knowing that their friends will be there too. Sure, the items they pack may be questionable, but that’s besides the point. And when you are on the water it is incredible to see how much more enthusiastic they become around another kid. Imagine yourself paddling with a superhero. It would be easy to give up knowing that the superhero would forever outlast you, but put another adult in your boat, and all of a sudden, your stamina and confidence in yourself will not be skewed.
Make it a game
Use what your kids are already doing to transform the experience.
One example: if you are in the boat with your child and they are lily-dipping and saying how bored they are, ask them to count how many drips come off their paddle into the water before there are no more drips left. Then, tell them to try to beat the high score; the most drips wins. Another fun game for when you are on shore is stick juggling. Grab three fairly straight sticks, put two in your hands like drumsticks, and try to juggle the third, just like a set of devil sticks. Eventually, your kids will start to get creative and make their own games, and this is where the real magic happens. Creating games also translates back into everyday life, and you’ll likely have less requests to watch TV, go on the iPad, or play video games because they’ll know how to make their own fun and engage others around them.
Learning
This one is easy because if you are doing the first two things well, the learning will happen naturally. If you and your kids are excelling at the first two things and they come easy to you now, here are some ways to facilitate the learning that is taking place already.
Highlight something that you noticed as a learned skill
Kids aren’t able to reflect too far back in their younger years, so it is difficult for them to notice that they are getting better at something. You need to highlight these accomplishments for them. Saying things like, “Wow! Did you just bring your own backpack all the way to the boats for me? That’s a huge help! Thank you!” or something like “How did you get here in your kayak? I saw you paddling in that direction. Did you turn the kayak on your own? I thought you only knew how to go straight! That’s amazing!” These types of questions require affirmation from your child and, in turn, ignite their self-confidence and feeling of achievement.
Success is addictive but sometimes it’s hard to notice in ourselves, especially if we are comparing ourselves to others. So, help them see their progress.
Mindfully consider challenges
As a parent it is really easy to say, “Don’t do that!” or “Be careful!” or flat out, “No.” But in spending a lot of time with kids and parents in an outdoor setting with inherent risks all around, I have found that many parents use these phrases as a reflex without actually considering what their child is trying to do
It also has crossed my mind that parents are saying no because they don’t want to deal with the aftermath of what could happen, and aren’t actually considering the child in the equation at all. I get it because I do it too. I just try to catch myself now.
For example, you’re on a paddling trip with friends and other children. It is the end of a long day, and you are exhausted, but you still need to set up camp, make dinner, and do it all again tomorrow. (I am already laughing in my head as I type this because it is a familiar story.) While you are wrapping your head around the monstrous list of things you need to do, your child is goofing off by standing up in a kayak t in the middle of the lake. You think to yourself, “I have done this and got the biggest bruise on my shin bone and it was sore for weeks.” You think, “When this happens to her, she is going to come crying to you and you just can’t deal with it.”
Let’s restructure this thinking for the sake of your child’s learning. Ask yourself, “What’s the worst possible outcome?” Or, “What else could happen?” And even, “What could they learn?” If you decide the reward is worth the risk, then let them do it. The beauty of being outside with no distractions is that there is ample time to reflect on our stupidity or genius and how we may do things differently next time. It is learning in its most complete form. And you will have just gifted this experience to your child. So when they come back crying from a bruised shin bone, you can say, “You’re welcome.”
Teaching your kid to kayak
It’s important to understand that kids are essentially beginners with few life experiences to draw from. The progression may first involve getting kids comfortable around water, trusting the people they are with and understanding why we are doing this (reasons you will need to provide them with at first). Here are some things that I remind my kids about:
- It’s fun
- More time playing with mom and dad
- Offer to bring friends if you are up for it (this one works like a charm)
- Excuse to eat special snacks reserved for adventures
When you are on the water, make sure to highlight the awesome and downplay the not-so-awesome…
- Wasn’t that snail the coolest!
- Wow you really paddled fast there!
- You didn’t like that splash in the face? On the bright side, we won’t need a bath tonight
- Always laugh
Comfort in and around water is sometimes a big hurdle. Think back to what you didn’t like about any watersport and consider a solution for your child before it has the opportunity to become a negative memory. Some common hurdles with paddling and possible solutions are:
- Water up the nose: nose plugs
- Splash in the eyes: goggles
- Getting cold:
- Opt for warm days for very young children
- Bring dry fleece layers for backup
- Bring splash tops and pants for backup
- Bring a thermos of hot chocolate
- Try to keep butts off the hull in cold water environments with a sleeping pad or something insulating
- Getting tired quickly:
- Snacks! Snacks! Snacks!
- Short paddle outings at first
- Adult paddle power as backup
- Towing as a backup plan
- Shuttle options, even on a lake, where you could get blown somewhere you couldn’t get back from. Having arrangements with a friend on standby to call for a pickup could work in this case.
Thinking about these risks is the first step to a successful day. Your children will also learn from it and start to understand how to do it themselves. With solutions to predictable challenges in place, we can move onto the actual teaching part.
It’s crazy to think that as a parent you become so many things to your children. One of them is a teacher. With anything, the more you do it, the easier it becomes, but if you don’t have much experience with teaching yet, here is a simple understanding of a learner’s progression and how you can tailor your teaching role to each stage.
Stages of learning
Stage 1: unconscious incompetence
This refers to the saying, “you don’t know what you don’t know.” For example, even if you are an adult going on a river trip for the first time, you may not even consider that you will have to set up a shuttle. In my raft guiding days, it astonished me to hear the number of people who would think the river ended at the same place we started, yet these people were typically way more educated than me around other subjects, where I am likely the “unconscious incompetent” one. Your role as a teacher here involves lots of patience, explanations, demonstrations and celebrations when your child tries and or succeeds with the skill. Yes, even trying should be celebrated.
Stage 2: conscious incompetence
This is where the learner knows what they need to do but can’t do it yet. When playing the teacher role at this step, be careful not to remind your child what they are doing wrong too many times. They know. This is likely the most frustrating stage in the learning process. As a teacher, try to camouflage the skill they are learning by getting your child to do a drill or a game that requires it. For example, if I am learning the sweep stroke in my kayak, it may be fun to play sharks and minnows where I will need to dodge people using a sweep stroke. The goal is now having fun, and the skill is a byproduct. It’s kind of like feeding your dog medicine with a spoonful of peanut butter.
Stage 3: conscious competence
This is where the learner is able to perform the skill, but still needs to be consciously thinking about it. This is a fun stage because it is less frustrating and there is a sense of accomplishment every time they complete the skill. As a teacher, take note of the child’s energy levels because this can play a big factor in their success and personal confidence. A learner can start to believe that they have regressed back to being unable to achieve the skill, when in fact they are just tired because they have to consciously think about it every time. Reminding kids to take breaks and not be hard on themselves at this stage is a good idea.
Stage 4: unconscious competence
This is what we all aim to achieve in our learning. Once the learner get to this point, they can take on much more. Think about every skill you have learned in your life. If we still had to think about how to walk every time we wanted to walk, I think our brains would start cramping up. If someone is lucky enough to get to this stage with an entire skill set, magic starts to happen. There will be times they will be faced with a challenge that seems impossible, but all of the skills that they have mastered will unconsciously line up, leaving them the victor, without even knowing how they did it. Most people call this the “flow state”. These have become some of my most coveted memories since I can count on one hand the times I experienced my own flow state.
If you understand these stages and where your child is at with a certain skill, you will be able to decide how much direction is needed from you. Stages one to two require lots of explanation, encouragement and involvement. You will be more of an instructor whose role is to keep things fun and engaging, and reduce frustration and disappointment. Stages three and four are where mileage and creativity come in. All you need to do is continue to seek out and set up the opportunities to keep them involved.
Don’t forget to use your paddling community for support because you can burn yourself out here if you make everything your kids learn about kayaking your personal responsibility. Also consider signing your kids up for paddling camps, schools, competitions and clubs to keep them engaged and learning.
What if they just aren’t into it?
If your child isn’t into kayaking, I would recommend trading them for one that does…kidding. Don’t force it. It is fun watching little humans make their own decisions and find their own path. Kayaking is our passion and your child will know that. Their passion may be elsewhere and that’s okay, and will bring you the opportunity to try something new too. But I believe that if you continue to have experiences with your children while kayaking, it is something that will shape them for the better, and they will always value sharing adventures with you.
So while I’ve got my work cut out for me trying to convince my son that water splashes aren’t going to kill him in hopes that he someday loves kayaking too, I am going to keep signing them both up for kayaking trips. If there is a complementary passion starting to spark in your little ones, even better. Use that to keep them going. Luckily for me, my daughter loves nature, so anytime we can rescue a drowning moth or wonder what those two dragonflies are doing, it’s a good day. I don’t even need to “S.E.L.” the adventure to her anymore, because she knows that kayaking means she gets to be one with nature’s little creatures.
If you’re looking for inspiration, have your child submit a story to the Paddling Kids Story Contest!
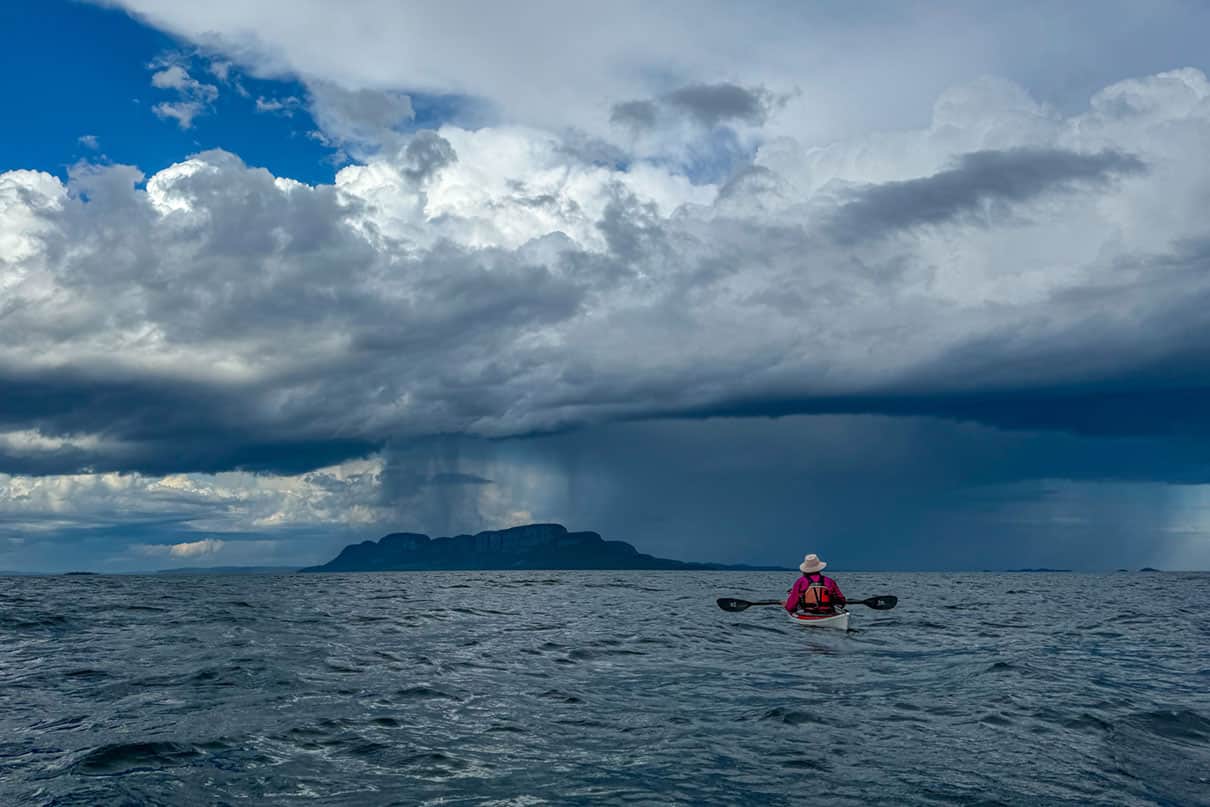
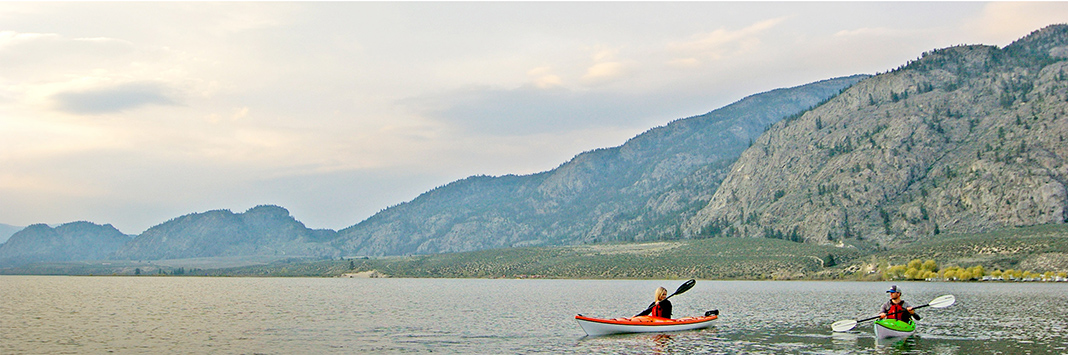
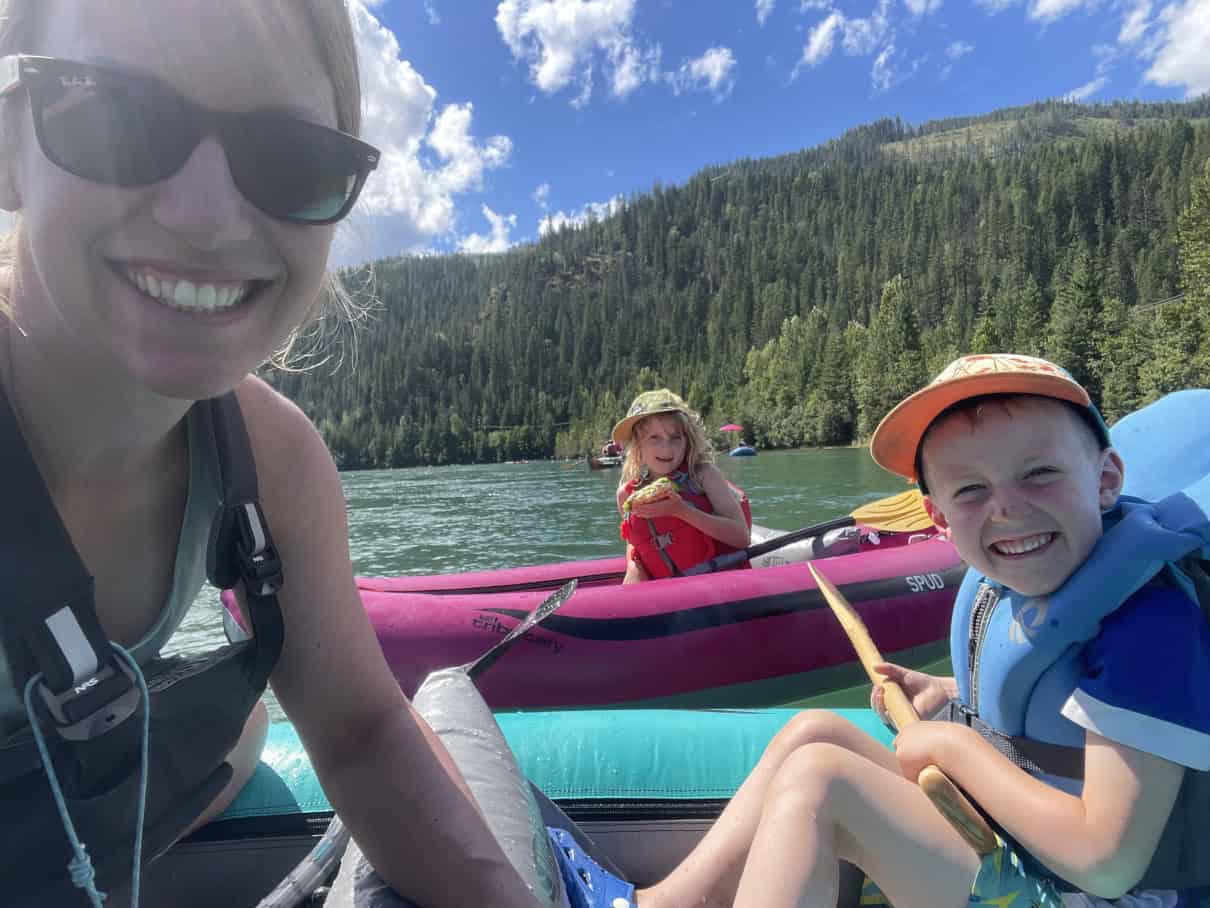
Family planning. | Feature photo: Bruce Kirkby


 This article was published in Issue 73 of Paddling Magazine.