For an ultimate layering item, choose Fjallraven’s stylish Keb Fleece Jacket W. A roomy fit and stretchy fabric means I can throw it over a puffy jacket and feel warm but not bulky. The wool blend fabric adds insulation and reinforced shoulders boost water and wind resistance.
This video features ACA Swiftwater Rescue techniques for unpinning a canoe or kayak with Walter Felton. This symposium was held in 2013 on the Tuckasegee River in North Carolina.
James Roberts and Dympna Hayes of Ontario Sea Kayak Centre demonstrate the essentials for a quick and effective scramble—aka Cowboy or Cowgirl—sea kayak re-entry. If you’ve exited your kayak, the scramble self rescue will get you back in your boat in almost any conditions, no extra tools required.
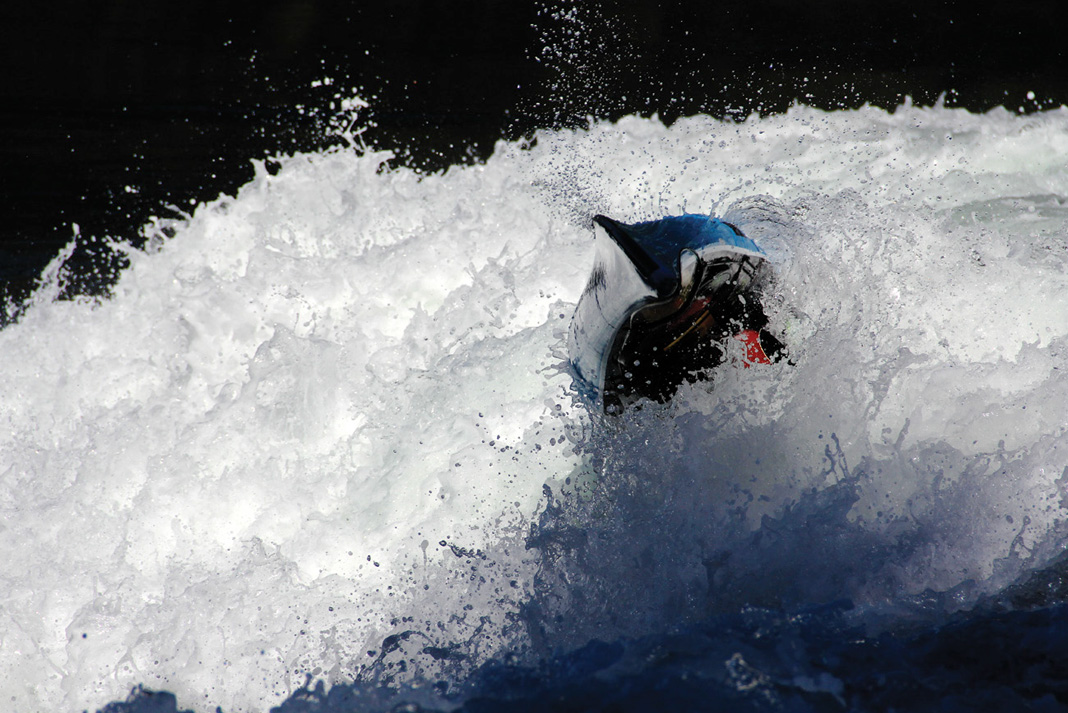
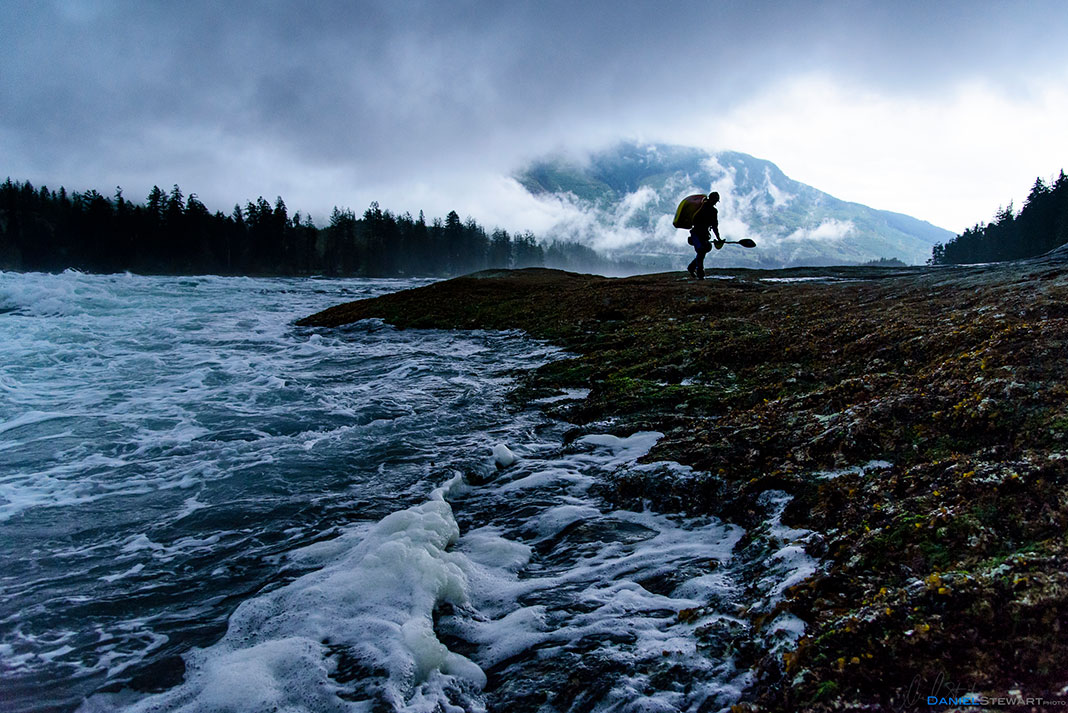
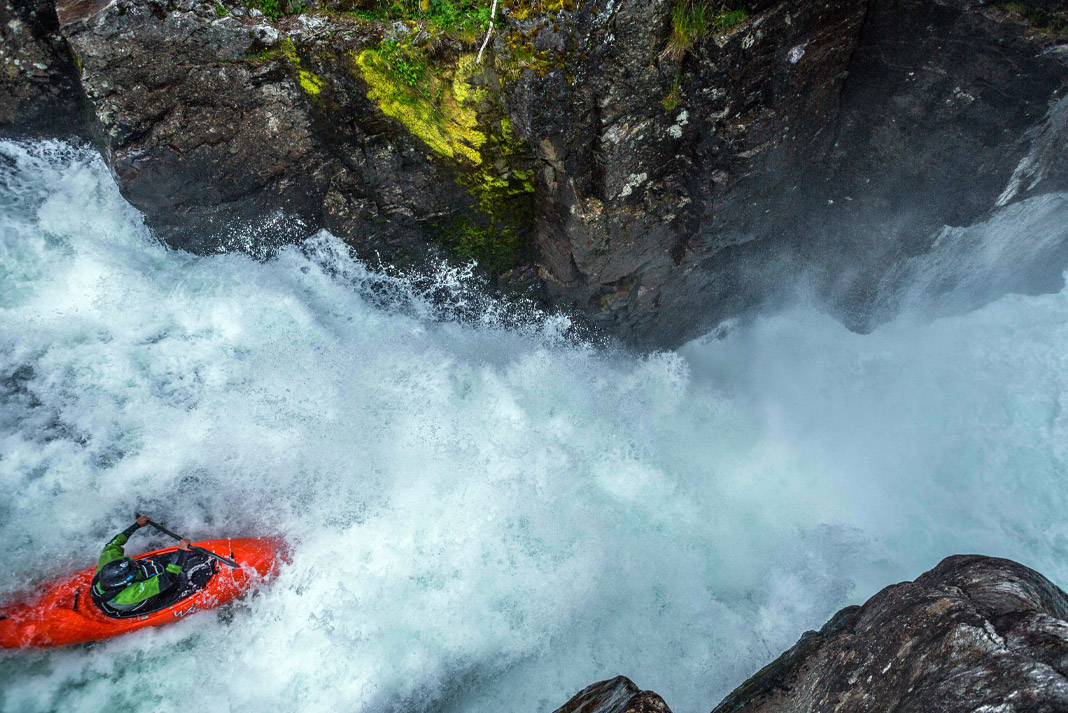
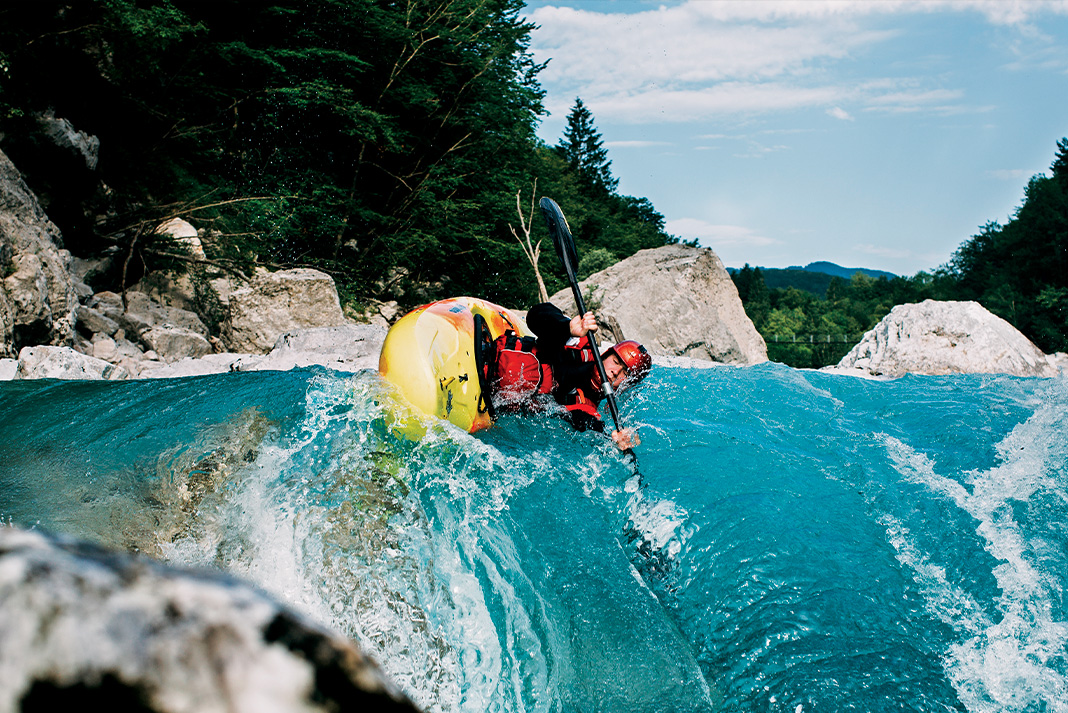
Story Beneath the Shot: Illusion of Control | Photo: Rowan Gloag
Longtime disciples of the capricious currents at Skookumchuck Rapids, rough water paddlers Rowan Gloag and Costain Leonard knew exactly where—and when—to look for the perfect foam pile.
“We’re interested in finding out how much control we can have in the foam, in a sea kayak,” explains Gloag, a mission that prompted a late summer visit to Skook in British Columbia’s Sechelt Inlet.
When the difference between high and low tide in the constricted passage at Skookumchuck Narrows is less than a meter, the modest current forms the sort of friendly green wave that is the stuff of surf kayakers’ wet dreams. But when the celestial bodies align and a large spring tide widens that gap to two meters or more, the flood of water can reach 16.5 knots—one of the fastest tidal currents in the world—and a menacing foam pile takes shape.
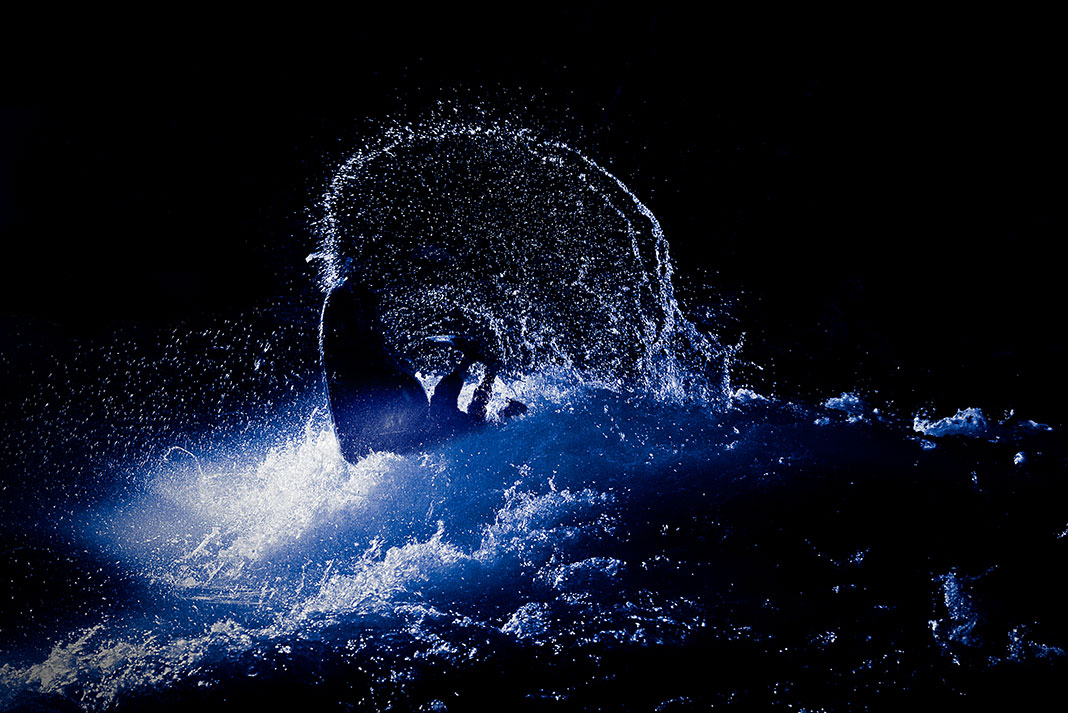
Story Beneath the Shot: Illusion of Control | Photo: Rowan Gloag
Charging into the recirculating maw of aerated water, Gloag says, develops skills necessary for playing safely in punishing ocean shore breaks. The length and shape of a sea kayak makes breaking free of all that foaming water a sticky proposition. Still, he says, “There are times during the chaos when we can gain control.”
Gloag took a timeout from Skook’s 10.9-knot current that day to shoot his hapless companion’s efforts to tame the hole. “In this picture, Costain has buried his bow in an attempt to launch himself free,” he recalls. “As you can see, it didn’t work, but you gotta try.”
This article first appeared in the Spring 2015 issue of Adventure Kayak magazine. Subscribe to Paddling Magazine and get 25 years of digital magazine archives including our legacy titles: Rapid, Adventure Kayak and Canoeroots.
A contact tow line is an easy to use, practical, multi-use line that can help make your sea kayak rescues faster and less complicated. Though its design is simple and easy to make, there are few shops that sell them.
In this short video, Leon Sommé of Body Boat Blade shows you how to build your own versatile contact tow line and how to effectively use one in the event that it is required. We believe you will come to love and appreciate how useful this piece of kit is and will find yourself wondering how you ever paddled without one.
Watch it, then build it!
Stay tuned for more skills videos with Body Boat Blade International in this series, presented by Adventure Kayak, and watch more techniques on our YouTube channel
We knew Poplar Rapids could give us some trouble. Driving in the van we discussed the continuous 800-meter entry feeding over an eight-foot horseshoe falls fanning out over a shallow ledge with most of the water bending around against the left bank. At lower water on a warm lazy summer afternoon trip in creek boats we’d eddy hopped down to the lip, scrubbed up on an exposed piece of granite, had a look over the edge, shoved ourselves back into the current and launched the drop.
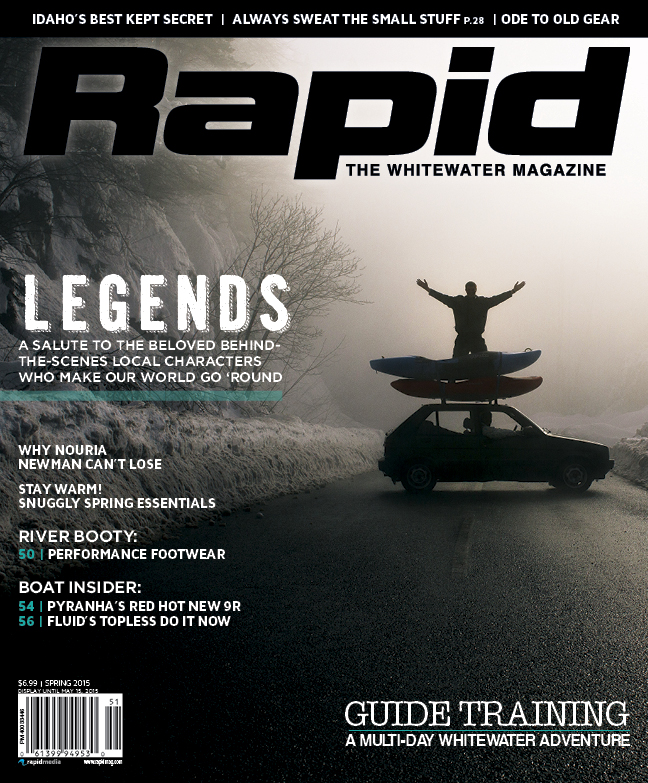
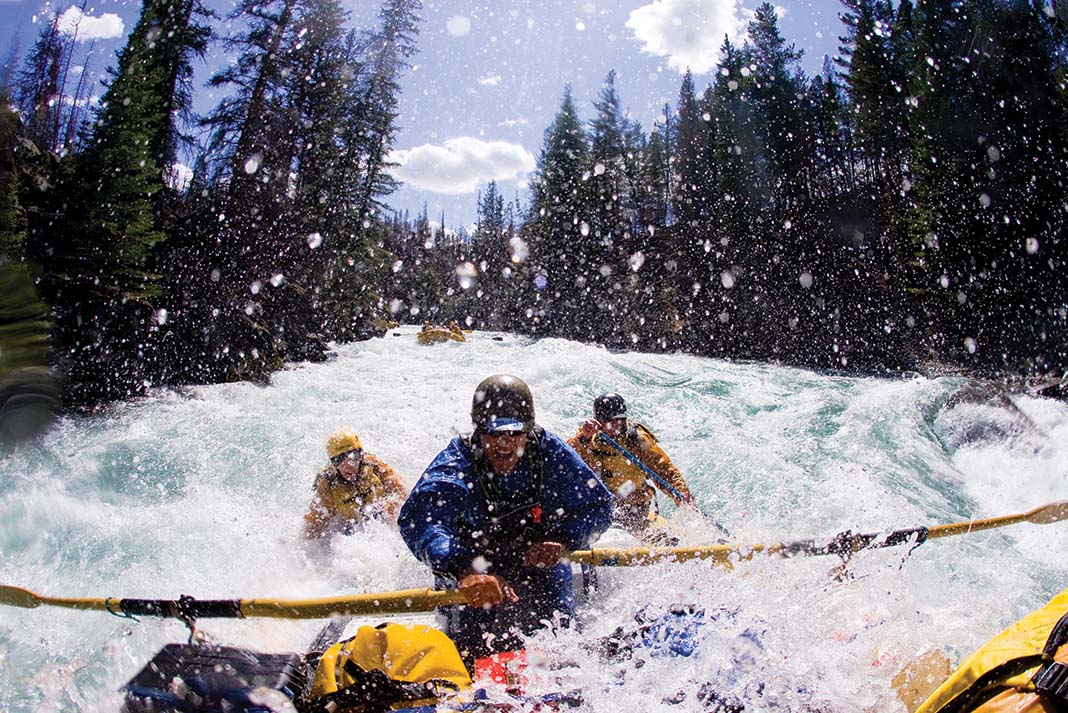
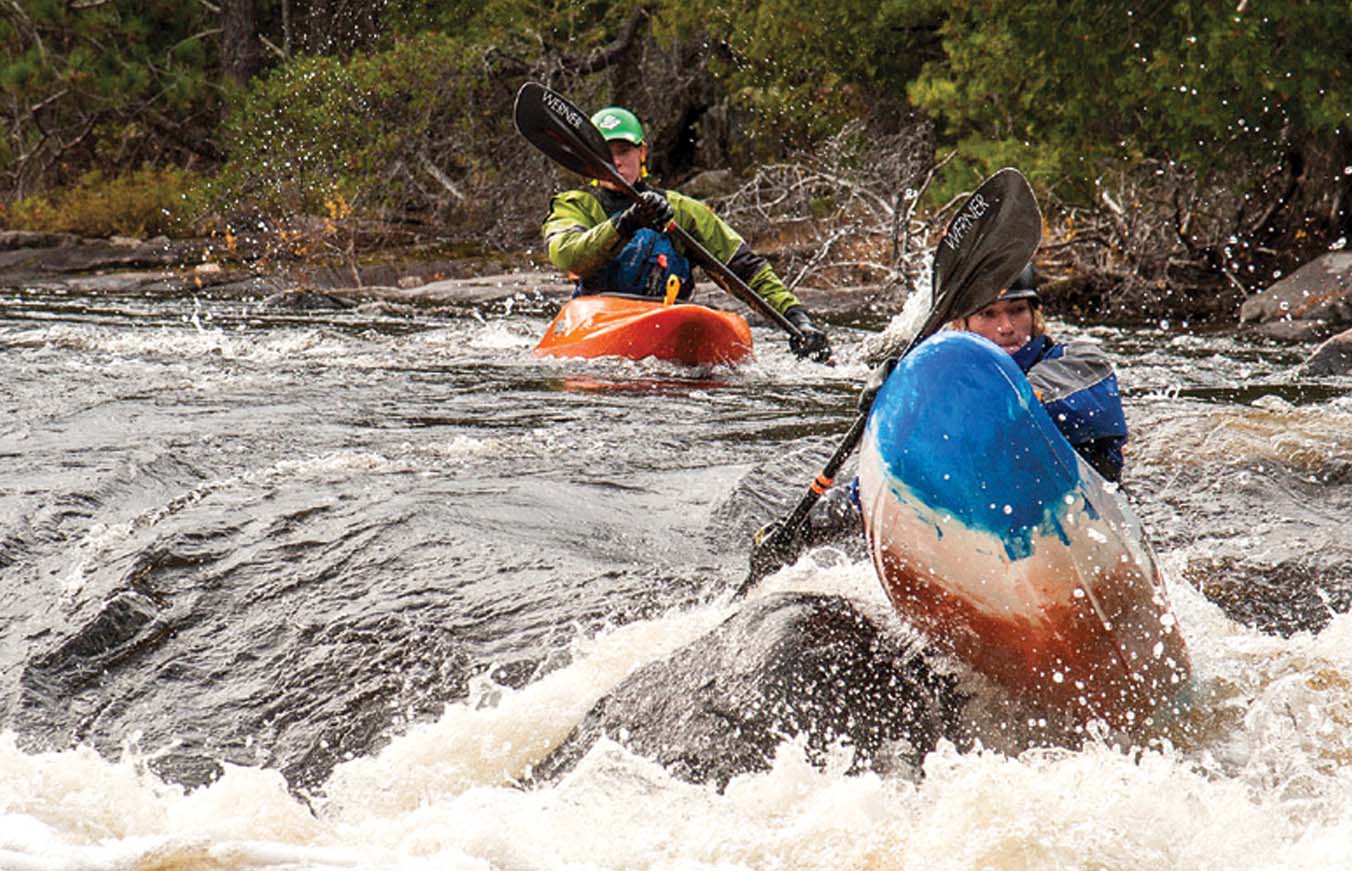
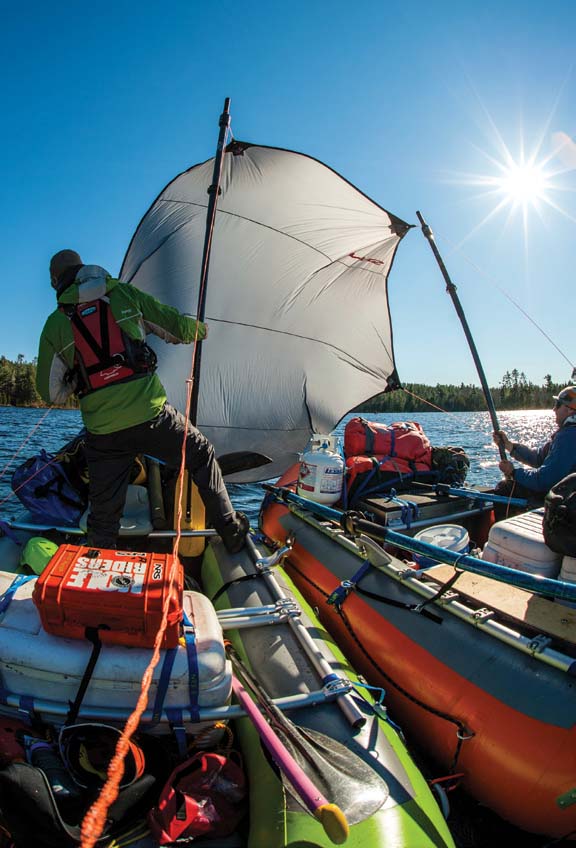
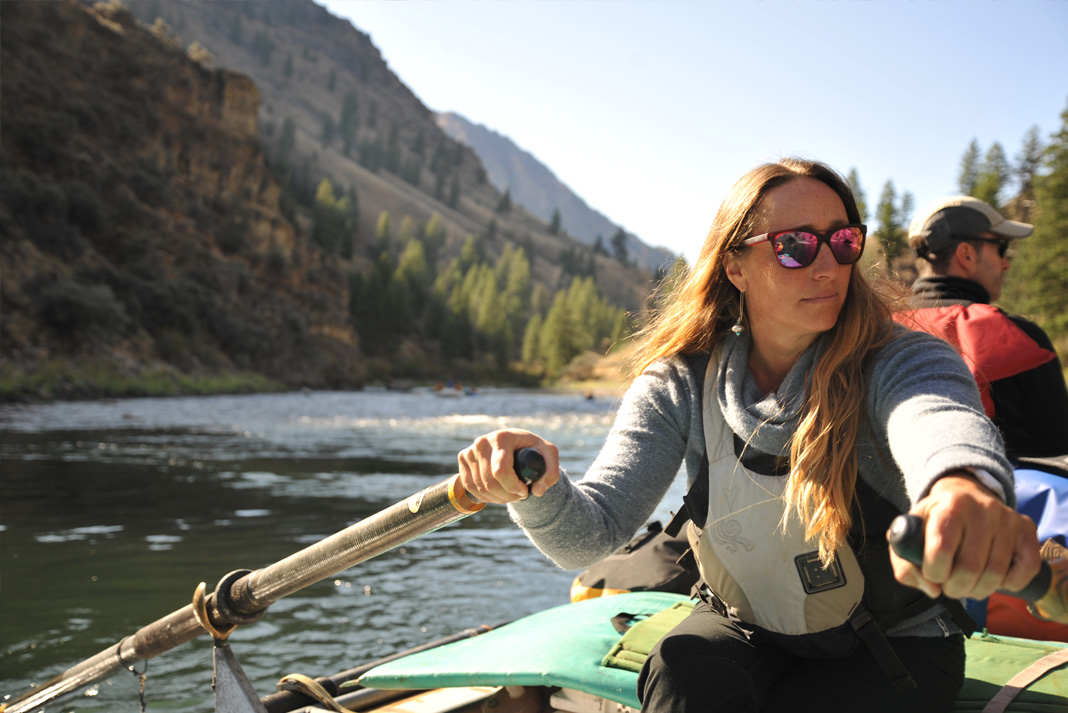
Guide training: A multi-day whitewater adventure with tomorrow’s outdoor leaders
On a high water multi-day raft and kayak trip with college students of varying skills we were considering our other options. We knew there was another channel to the left. We’d heard it lost the gradient more gradually through winding shallow class II. We’d expected to be lining and dragging rafts off rocks, not putting them on their roofs.
Louise Urwin was driving the van. She was the kayak guide and instructor. Lou is a strong, beautiful, no-bullshit Kiwi with long list of whitewater accomplishments. Photographer Rob Faubert and I were in the bench seat leaning forward to be part of the conversation. Behind us were the 12 college students who signed up for the multi-day whitewater guide elective. If not for the smell of river, they could be any other group of college students dozing, plugged into Taylor Swift, or trying to remember where they’d left a friend’s bike after last Saturday night’s house party.
Photo: Robert Faubert
Jeff Jackson was riding shotgun. He’s our trip leader and the Outdoor Adventure program coordinator. He’s in his early 40s, athletic and wise. His river resume reads like a dirt bag 20-something’s bucket list, while his professional resume would make any mother proud. He’s an educator and professional guide who is all business.
When Jeff got wind that Algonquin College was creating an outdoor leadership program, he returned home to the Ottawa Valley from guiding jobs on the Green, Yampa and Cataract Canyon of the Colorado River so that he’d be in town for job postings. He was hired in May of 2000 and went to work developing the new Outdoor Adventure program and recruiting the first class of 70 students to arrive four months later.
This group, Jeff’s fourteenth batch of second year students, had already completed their fall camp orientation, a 10-day sea kayak trip and two other six-day electives, two of which had to be whitewater canoeing or whitewater kayak certification courses and raft guide training programs—prerequisites for this trip. It’s a grueling schedule with back-to-back weekend electives and classes Monday to Friday. Not all of their outdoor training can be jammed into the late summer when the water and weather are warm. This river trip needed to be pushed deeper into the fall when the water levels on the Petawawa River could be higher and the temperatures much lower.
Petawawa proving ground
The Petawawa River flows almost all the way across Ontario’s Algonquin Provincial Park. Thousands of whitewater canoeists have cut their teeth on the Petawawa, most paddling the second half of our trip, the three-to-four day section below Poplar Rapids. Above this classic summer weekend section, above where Poplar Rapids spills into Lake Travers, flows a less accessible, steeper and more continuous section of whitewater.
Twelve years ago Jeff and I began dragging creek boats up the abandoned Canadian National Railway line that borders this upper section of Petawawa. Back in the ‘80s guides from nearby rafting companies rigged a railway jigger handcart to pump rafts and equipment up the rail line for early big water spring runs. Today the Petawawa is not a commercially viable rafting run. It is too remote. The logistics are too complicated and, this time of year, it’s too cold for paying clients. But the Petawawa is exactly what Jeff needed for the program’s new multi-day whitewater guide elective.
When we slid down the scree slope of the old rail line into the moving water above McDonald Rapids, it was obvious right way that the students had a wide range of skills and confidence. Adrian, Nevin and Holly had guided this past summer. Their lifejackets were faded from the summer sun. They wore throw lines with their names and cell numbers scribbled on them. Some of kayakers had their own boats. They hit the eddy above the first drop with plenty of room to spare. The rest—well, they have enjoyed a longer stretch of river before the first drop.
Photo: Robert Faubert
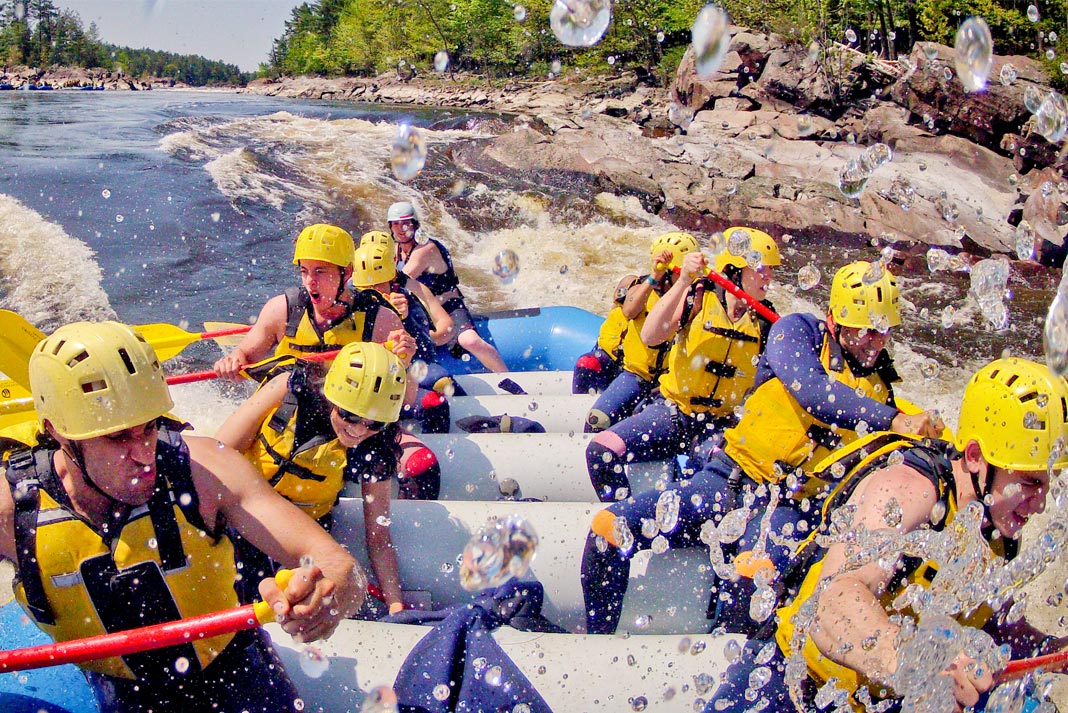
A prerequisite for this trip was a raft guide elective run on the Ottawa River, where commercial day trip rafting is a wham bam, thank you ma’am one-day affair. The Ottawa is big and deep and safe. The bigger the hits the bigger the tips, guides in my day used to say.
“Day guiding is so low consequence, the mentality is different. There is always a bail out to a road,” Jeff told the group as were scouting the first drop. “By taking away that access we add exposure to consequences. We need to look at every rapid differently. We need to always take the safest line possible.” We weren’t looking for big hits on this trip. We were looking to get down with all the people and equipment we started with.
Through McDonald Rapids, Devils Cellar and Rocky Chute they did a good job getting everyone down. Some of the lines weren’t pretty. We had some swimmers from the rafts. There were a couple wet exits from kayaks. The clean up and safety was quick and efficient. Kind of what I expected.
The bigger rapids we scouted from shore. Down the 1,000-meter series of six ledges known as the Temptations the students boat scouted with rolling cover looking out for the boats below and above you.
Photos: Robert Faubert
Lou ran mini clinics in the eddies along the way. Jeff took turns perching himself aboard student rafts. His ongoing narrative to them was, “What do you see? Where are you going?” Expedition rafting is all about controlling boat momentum and using the momentum of the river. “Pull down and slow down,” he reminds the students.
On multi-day rafting trips you don’t charge forward into meaty lines. You didn’t flip rafts on purpose. You try to never flip, ever. A full-loaded oar rigged raft on its roof is a dangerous mess of aluminum, oars and a truckload of food and equipment. A lost cooler on the Grand Canyon could be 21 days without bacon or beer—and no chance of tip for any guide.
Students gain hard-won experience
The Keeper is one of the last of the Temptation rapids. To the left it piles up into a small rock face. Most of the river goes straight through a maze of boulder islands and then over a ledge creating a smooth, shallow and deceivingly sticky recirculation—the Keeper. On a previous low water run a friend of mine swam out of her kayak in this sleeper of a hole. While this water level widened and deepened the lines, it also made the current pushier, and the hole munchier—munchy enough to flip our first raft. Half the group scurried around the river picking up swimmers and bits of gear—it seemed a perfect time for a cup of hot soup and a review lesson on rigging before Poplar Rapids.
Jeff wrote in the course outline: guides integrate paddling skills, on-river management and logistics planning in a multi-day whitewater trip format. Students learn logistics, planning for transportation, gear management and group travel. On-river group management integrates kayak and oar rig safety in a technical river setting. Multi-day trips take what they’ve learned in skills courses and plays it out in real life. We’d just had a little taste of that.
Photo: Robert Faubert
Twenty-five years ago my first guide manager told my group of trainees after an intensive two-week course that we didn’t know shit until we’d been guiding for at least two years. “You guys haven’t screwed up enough yet to know what you’re doing,” he shouted at us. “If you stick with it long enough you may eventually become competent river guides.” That was a tough pill to swallow when I was 21. If I ran into him today, I’d buy him a beer.
Jeff acknowledges the limits to technical training course electives. In a recent Outdoor Adventure program review, employers of graduates recommended that students have more expedition experience. They saw great value in expeditions for building leadership skills, judgment and competence. Competence is different than understanding. Competence is being able to apply what you know in whatever situations arise.
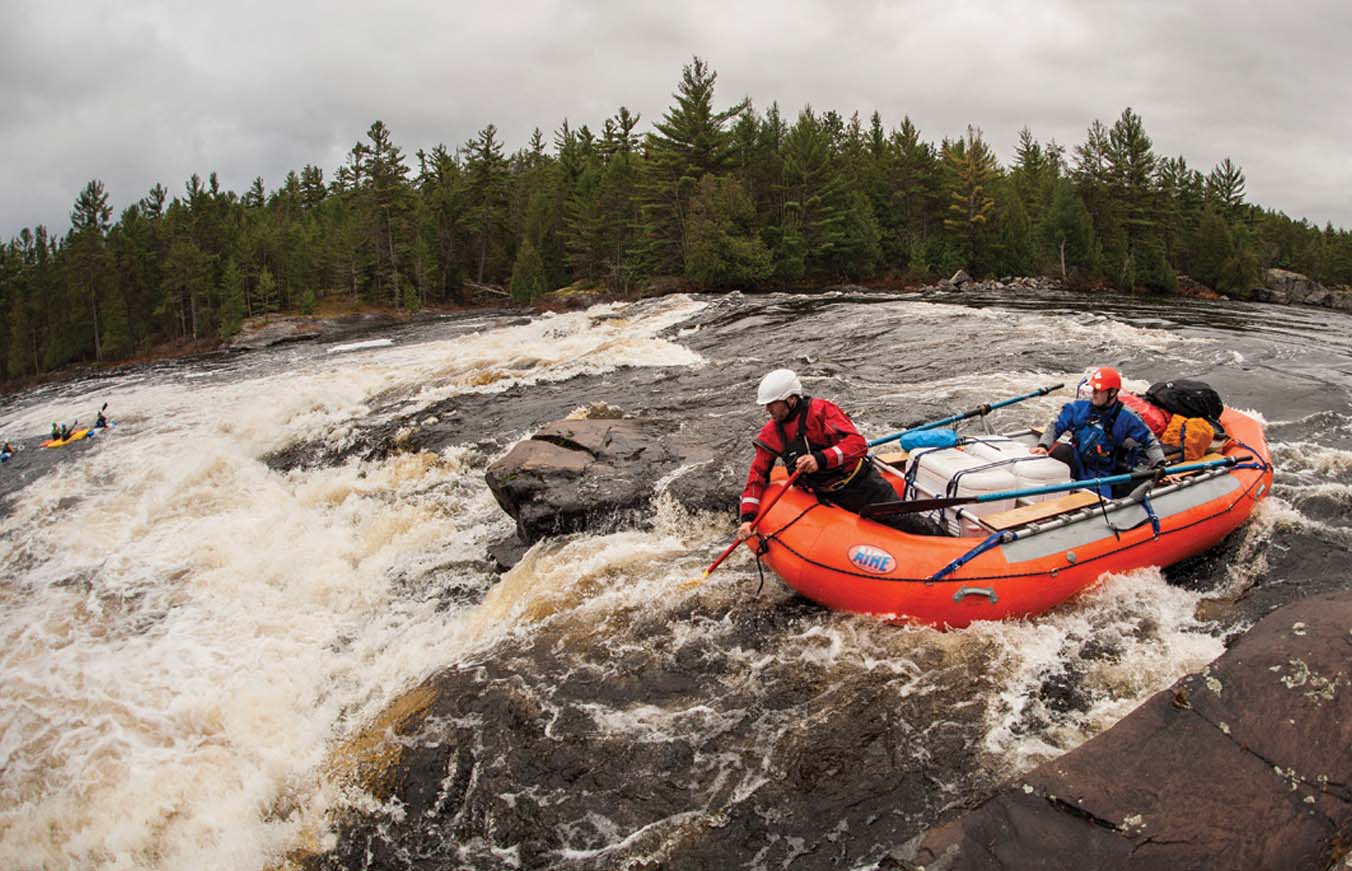
The left channel of the 800-meter-long Poplar Rapids began as we’d expected. Shallow and spread out. Boney. I cursed the tiny unavoidable pillows hidden everywhere just below the surface. They snagged the floor and bumped the blades of my oars.
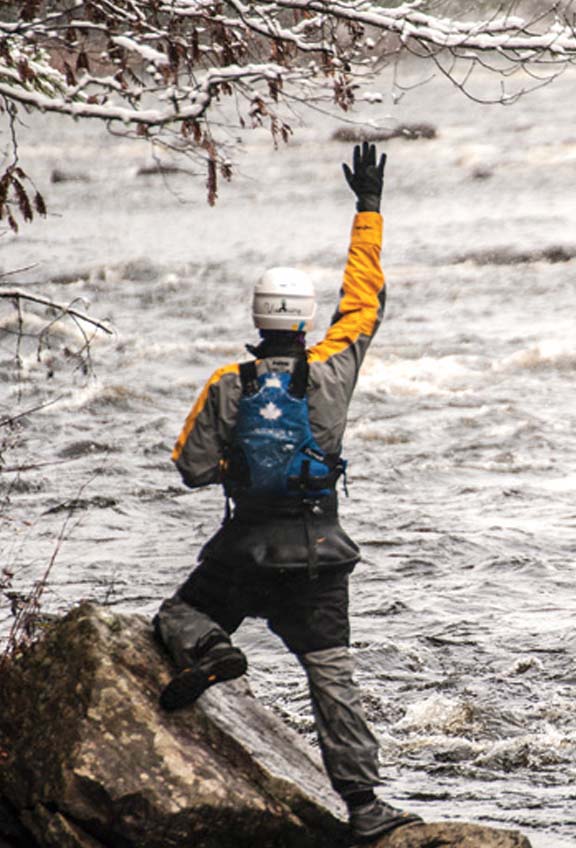
Rob and I were way out in the middle when we both got the feeling. “I don’t like this,” was all Rob had to say. I didn’t either. We’d gotten the willies and started booking it for the river left shore. I looked upstream to signal the others; they’d already figured it out and were moving left.
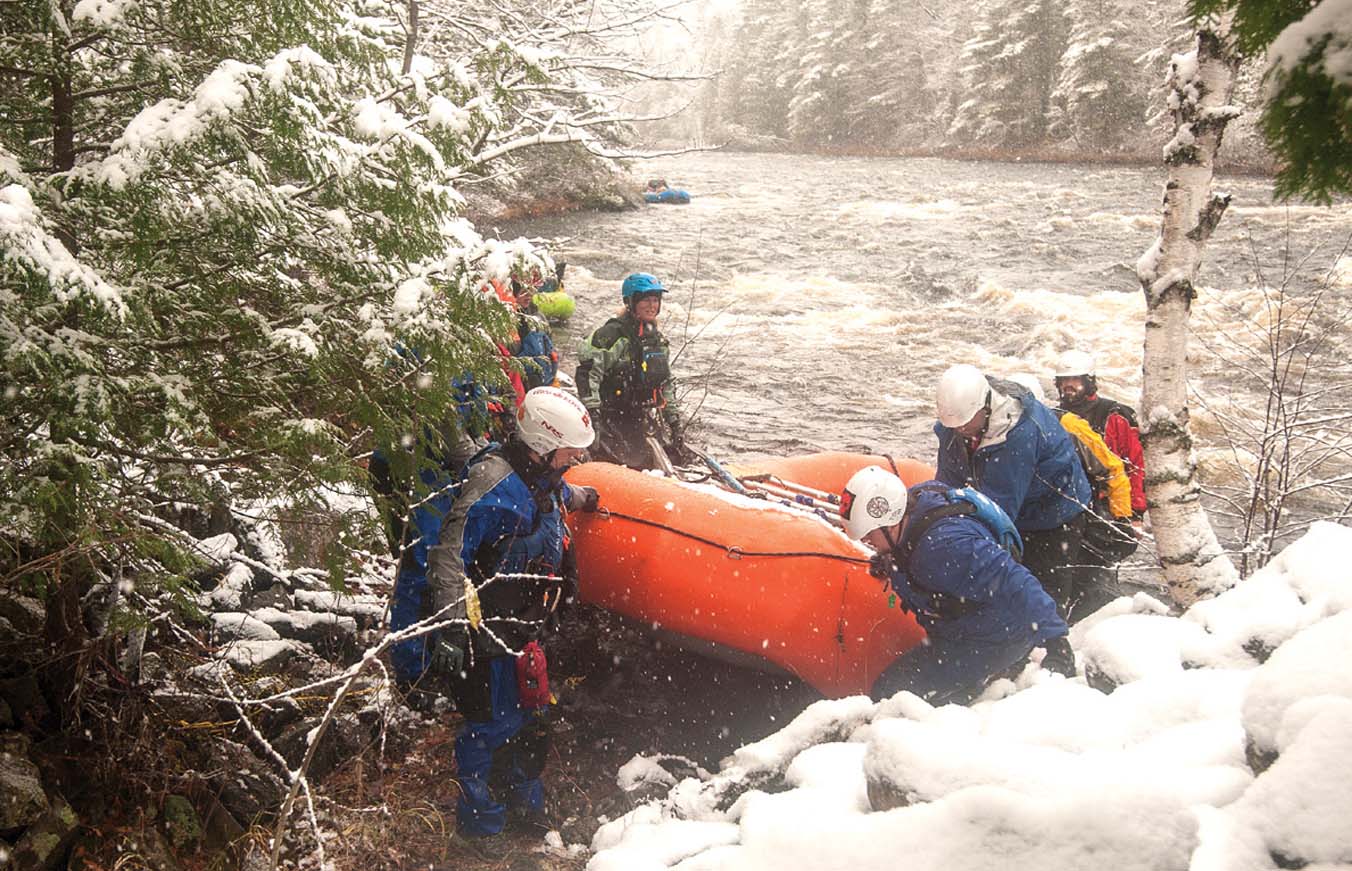
Around the corner the wide channel came altogether. Our gentle class II sneak route was now constricted between the flooded riverbanks and a rock in the middle the size of the passenger van we rode in on. The approach from where we were tied up was sticky. The drop folded over into a hole with another hole right below stretching out past middle from the right shore. The rest below, as far as we could see, was shallow, fast moving and disappeared down and around another bend. We were way off the typical route and nowhere near a portage trail. Lou and her kayakers bushwhacked their boats through the thick balsam and cedar trees.
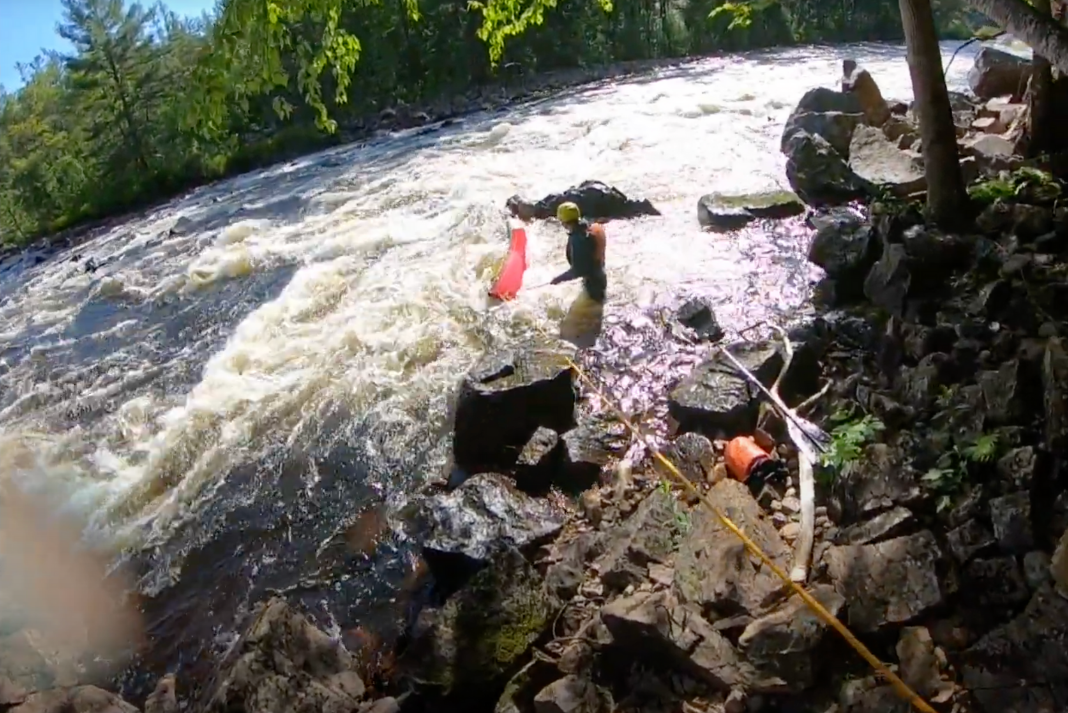
Photos: Robert Faubert
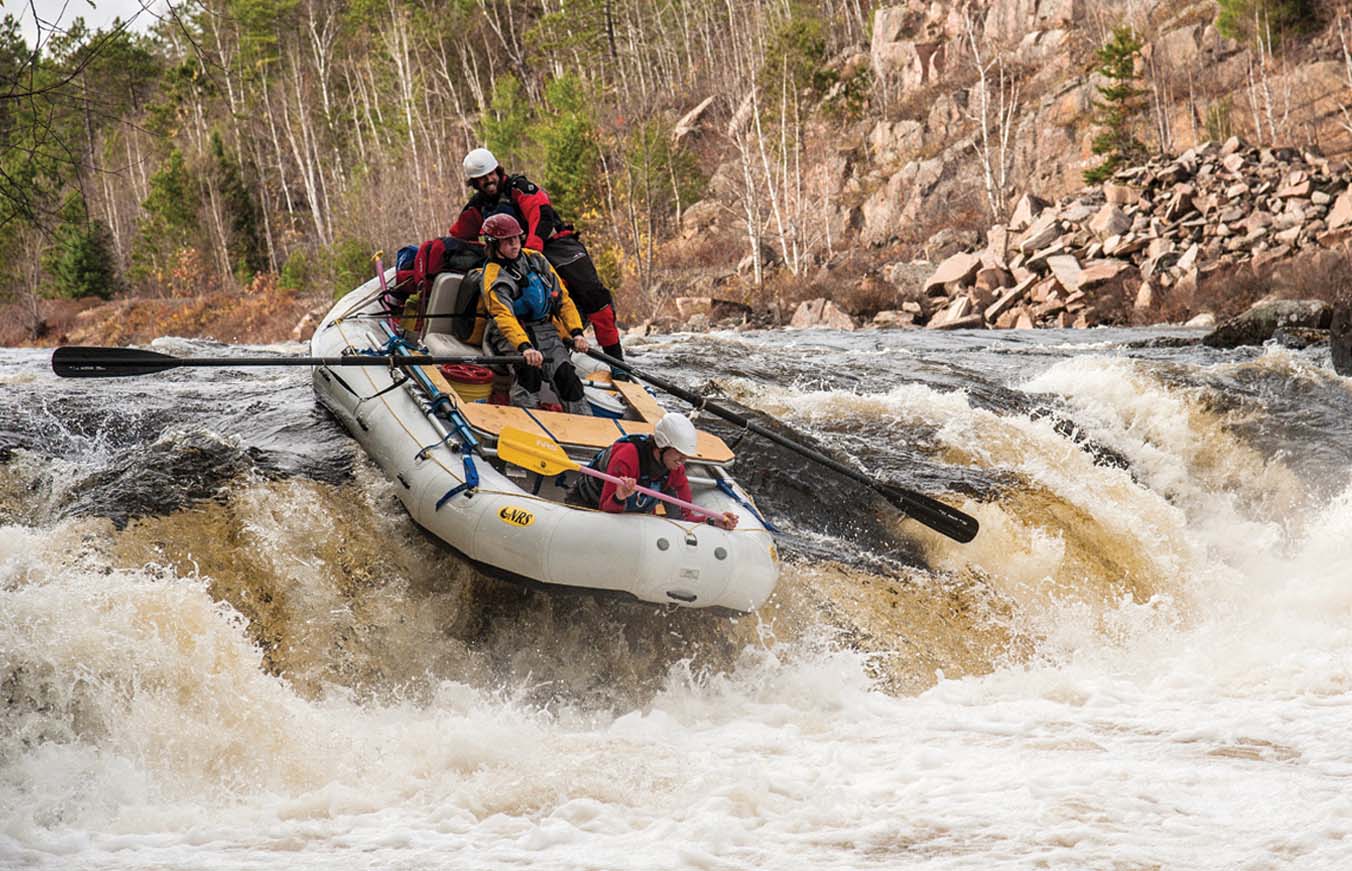
Rob and I ran our raft first. The slot was narrow so we removed our oars from the oarlocks and paddle guided our 14-footer over the drop. The front tubes buried in the seam throwing Rob forward over the front tubes and damn near in the drink. I held him in the raft by his PFD long enough for the boat to come back to level and drain so we could get left to avoid the second hole, get to shore and help set up safety.
Adrian was the strongest student guide with a keen eye for reading water. It was decided he’d run the next boat with Lou. The bigger 16-foot raft was pushed wide and off line at the top and it came over the lip sideways. The seam of the pourover swallowed the downstream tube and the momentum pushed the raft up and over on top of them. This could be really bad.
Whistles screamed over the roar of the water. At first we couldn’t see the either of the swimmers. It was shallower than we’d expected. The frame, and gear beneath, bounced off the river bottom and possibly off their heads. As the boat bounced past, Lou surfaced upstream and was trying to slow the raft down so Adrian could swim free.
I dove in the current and the two of us were able to stop the raft from carrying on further downstream. Adrian was still underneath. I feared that he was pinned between the raft and the rocky bottom. I hoped he was tucked up into one of the upside down compartments.
When he eventually flushed out he was pelted with throw bags. He had his river knife in one hand and with the other he grabbed a rope and was swung into the flooded cedars. Adrian, we learned later, had cut himself out of the bowline that had wrapped around his foot.
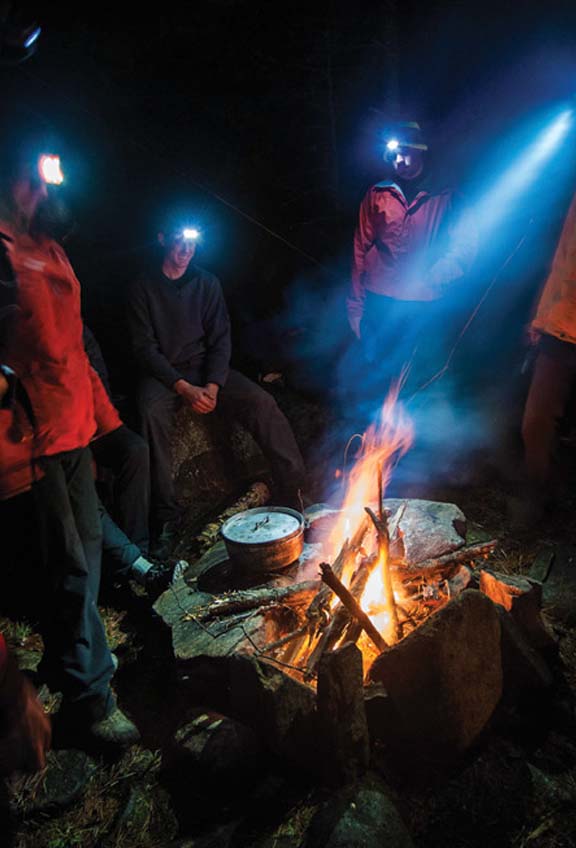
Time out to rest and take stock
When we finally made camp it was in the parking lot below Poplar where the Petawawa dumps into Lake Travers. It was almost dark. We’d hoped to be half way down the lake by now. When Adrian said he thought he bumped his head we knew this river day was over.
Photo: Robert Faubert
“That was too much,” Jeff told the group after dinner around the campfire. “We’d taken the most conservative choice presented to us but it was still too much exposure for me to be comfortable as the leader. I wouldn’t choose that level of exposure to consequences again with this group.”
We all were nodding agreement.
We discussed our decision to take the mystery channel and avoid the main line at Poplar. We reviewed the rescue and the clean up afterward. We discussed the environmental factors of high water level, short days and cold temperatures. Students shared stories from other trips they’d been on. We felt good about our decision to stay here for the night.
We were keeping an eye on Adrian. We’re camping in this put-in parking lot because it is the best point to get him out. If he showed any signs of trauma, we’d make a call and he’d be going home in the morning.
“I feel like we did everything right,” one student said. “I’m not sure what I would have done differently.”
Somebody suggested that next time Adrian should try harder to keep his boat off its roof. He seemed okay now, and it was okay to laugh. It felt good to laugh and blow off the stress of the day.
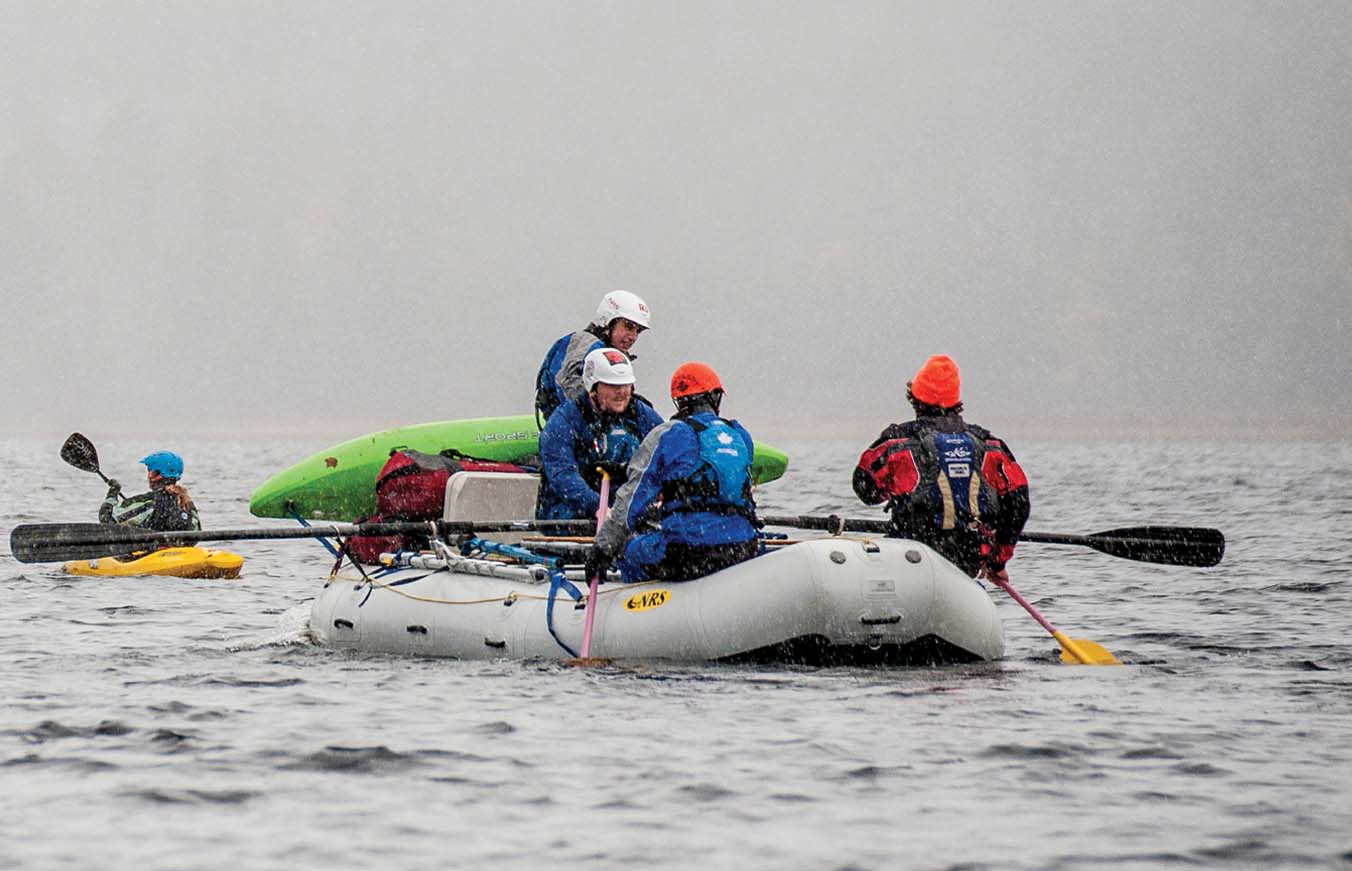
The Petawawa River would be better the other way around. It would have been nice if the swifty class II and III rapids were in the first few days. At least now the students had time to get comfortable in their kayaks. Those in the rafts would have three more days to finesse their oars. They’d practice moving slower than the current and they’d learn to take advantage of river features to assist their back ferries. They knew that now that we’d gotten to Lake Travers they could settle in for a few days of wilderness river travel and camping.
Guiding lessons extend beyond the final grade
The evaluation rubric for the course included leadership and behavior, boat management, group management, camp contributions and at the bottom of the chart was a lesson the students were to prepare and present.
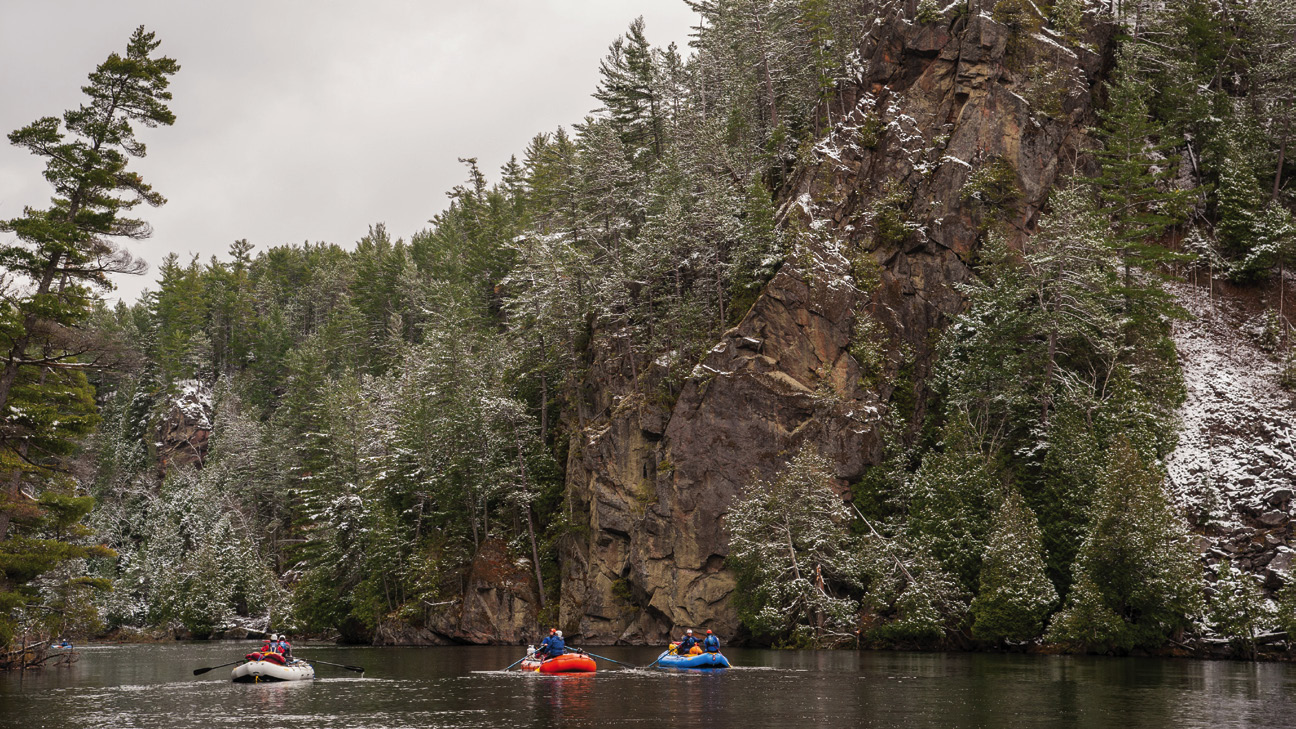
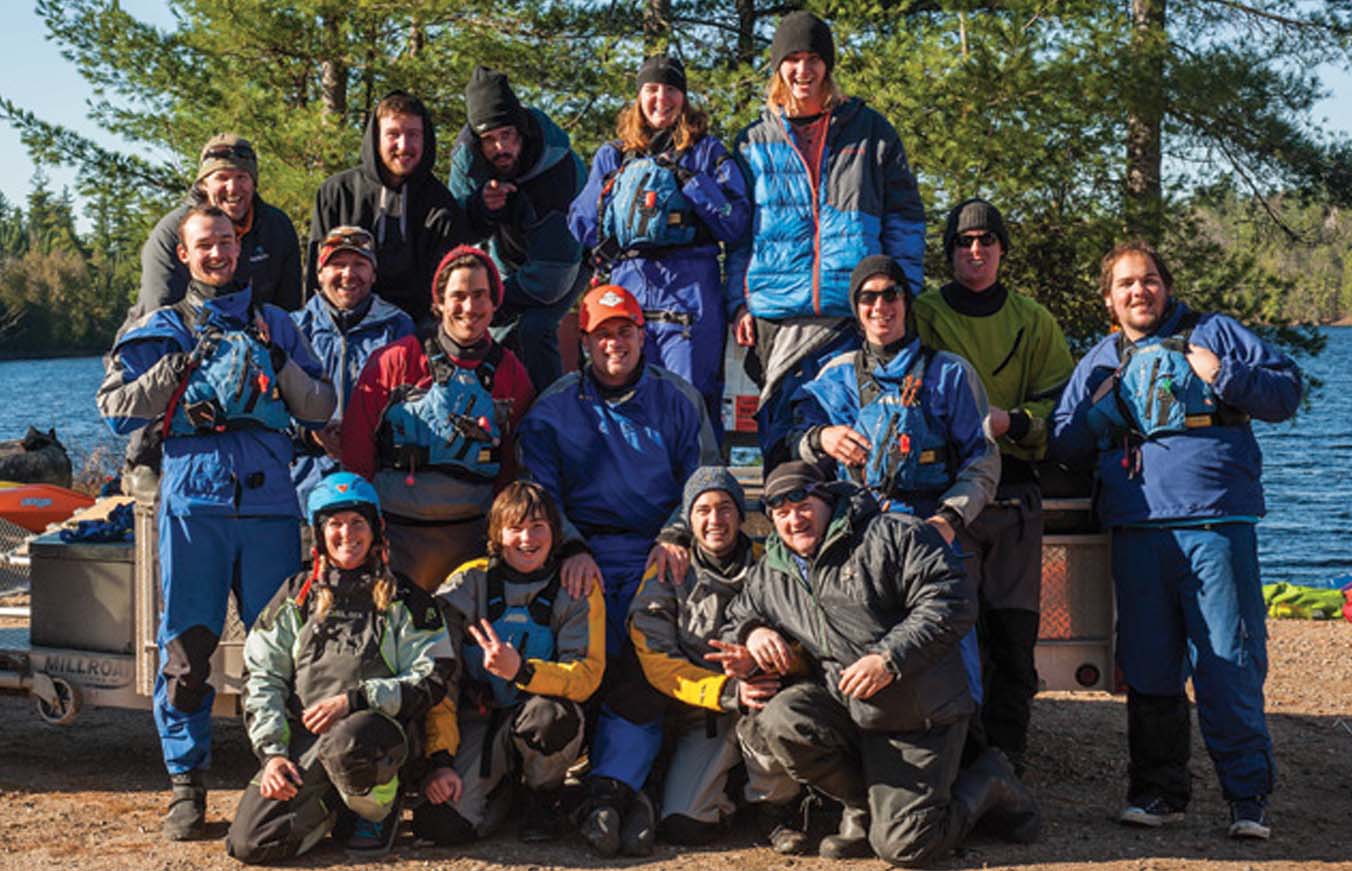
Between river travel and meal preparation, building fires, tarps, the portage and shuffling about to keep warm in the snow there wasn’t time to present their mini lessons. Jeff and the students were okay with that. I’d all but forgotten this was part of their college course.
At first Jeff was running the show. Rob and I watched him take charge to organize the meals and call shots on the river. Over the next five days the students picked up the rhythm of big group multi-day river travel. This was part of his plan. Meals took half the time to prepare. Camp was set up and torn down, rafts were loaded and good decisions about the menu and river travel were all just happening as they should on a guided expedition.
To satisfy the college, Jeff must award a grade to each student. However, what these students truly learned will not appear on their transcripts. In fact they may not know what they’ve learned until much further down the road. If they stick with guiding long enough, if they screw up enough and if they face enough adversity, hard work and bad weather like we did on the Petawawa, a river manager I knew once would say they’d eventually make good river guides.
On our final morning the sun broke through the snow clouds. We layed our stiff wet gear in places the sun’s heat would thaw and soften the frozen fabric. The group decided on a simple breakfast to get us on the water and moving an hour earlier. When Jeff, Rob and I wandered over for coffee, the students asked if that would be okay, but really they were telling us what they’d already decided and what they had in store for us that day.
Scott MacGregor is the founder and publisher of Rapid magazine.
This article was first published in the Spring 2015 issue of Rapid Magazine. Subscribe to Paddling Magazine’s print and digital editions, or browse the archives.
It sounds nice, doesn’t it? Steamy baths under a night sky. The price might be enough to put those fantasies on ice though—$600 – $999.
If that doesn’t dissuade you, have a look at the specs. The unit weighs 20 pounds. Certainly not for the lightweight paddler, but an equal weight of food (or beer) has been paddled into the woods before. On closer inspection of the fine print, those 20 pounds aren’t representative of the total weight—you’ll need to schlep another 30 pounds to bring in the tub’s external heating unit. Otherwise you might as well just sit in the lake.
Even if the price and the weight doesn’t make you balk—maybe it’s an indulgence for car campers or ATVers—you’ll still have to fill up the tub. All 225 gallons of it. That’s potentially 851 trips with a one-liter pot—to the lake, to the spigot or more likely, to the backyard hose, because this tub isn’t likely to make it farther than your driveway.
While the backcountry hot tub might seem to be one of the more impractical camping inventions on offer, it’s surely not the only eyebrow raiser out there. There are 16-room tents, tent-specific air-conditioning units and plush, 20-pound queen-sized cots. There are pop-up kitchens with more storage than my brick-and-motor pantry, inflatable outdoor loveseats and tents with electricity. Also: portable dishwashers, collapsible whisks and a Swiss Army knife with 80 implements.
All quality products, and all products I’ve probably momentarily wished I had at some point in the past. But there’s something that doesn’t sit right about trying to replicate all the modern conveniences my house offers—and even some it doesn’t— in the wilderness.
Last fall I had the privilege to spend a week in the boreal forest with Ray Mears and got a first hand look at a master of bushcraft in action. It helped me gain some perspective—what am I doing with all these things?
In the Canoeroots office it can be easy to get a little gear-obsessed—manufacturer specs noting the ounces saved, R-values and durable denier weaves dance across my desk. A sleeping bag that packs down smaller than a Dutch oven that weighs less than a titanium spork and promises to keep me as warm as Thomas’ red snowsuit? Wow!
It’s super cool—but it’s still just stuff.
While I’ve drooled over weather-proof mini torches, perfect for lighting a fire in any conditions, there was something much more meaningful—primitive, ethereal—in seeing Mears create fire from friction using only materials available in the forest.
It got me thinking about getting back to the basics. The only items absolutely essential for exploring the wilderness are a canoe, paddle and PFD. I’m going to start rebuilding my camp kit from there—no hot tubs needed.
This article first appeared in the Spring 2015 issue of Canoeroots and Family Camping magazine.
Subscribe to Paddling Magazine and get 25 years of digital magazine archives including our legacy titles: Rapid, Adventure Kayak and Canoeroots.
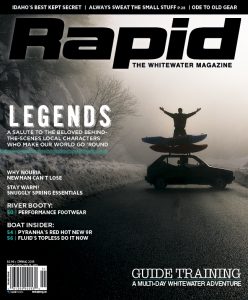
“If class V kayaking means you have to be focused and aware and mistakes mean injury or death, then every instant in the air in a helicopter is class VI. Jim Reed is quiet, humble and spectacularly skilled, with a deep understanding of these whirling masses of parts. He makes gravity disappear.”
Lofty impressions, especially coming from Doug Ammons, a whitewater icon and adventure sports pioneer. They attest to the level of intimacy between pilot and paddler—especially when venturing into the Grand Canyon of British Columbia’s Stikine River, a larger than life landscape that demands expertise and nerves of steel in the air as much as it’s a proving ground for the world’s best boaters.
Reed came to Canada from his native New Zealand in 1990 and eventually settled in the northern B.C. town of Dease Lake, flying for Pacific Western Helicopters. Like most chopper pilots, the majority of his flights transport geologists and supplies to drilling camps and fisheries biologists to mountain wildernesses. In between, he whisks tourists through the 72-kilometre-long, 300-metre-deep Stikine Canyon, which was first attempted by kayak in 1981.
Reed became the go-to pilot for world-class paddlers looking for logistical and video support—and sometimes emergency extractions—from the air. His first group arrived in 1998, including Ammons, Rob Lesser, Gerry Moffat, Charlie Munsey, Wink Jones, Reggie Crist and a cameraman. “I’d often tried to picture a kayaker running the canyon and figured it would be too difficult,” says Reed. “Seeing these guys in their tiny boats I got a better feel for the actual size of the waves. I came to the conclusion that they were bloody nuts.”
That first expedition, which was completed successfully in three days, still ranks amongst Reed’s best memories. Besides sparking a long-time friendship with Ammons, Reed was struck by Lesser’s “tenacity of age”; the Stikine legend was 53 when Reed met him.
Ammons describes Reed as exuding a preternatural, “Yoda-like” calm behind the controls. Reed’s most hair-raising moments have come on account of the handful of unprepared paddlers he’s lifted out of the canyon—rescues involving precise landings, long lines and miniscule margins of safety. “Jim’s done this with for more than 30 years with quiet aplomb,” says Ammons. “He’s a master of the machine.”
MARTIN LITTON | PHOTO: JOHN BLAUSTEIN
THE ACTIVIST
MARTIN LITTON
CALIFORNIA-BASED JOURNALIST, editor and World War II vet Martin Litton first ran the Grand Canyon of the Colorado River in 1955. As a trivial claim to fame, he was the 185th person to descend the Grand since John Wesley Powell first did it in 1869; Litton’s distinction was rendered more anticlimactic by the fact that he was unable to paddle because of a shoulder injury. Yet the journey marked the beginning for a man whose legacy is as monumental as the canyon itself.
At the time, Litton was battling two proposed dams on the Green River that would flood the spectacular rock canyons of Dinosaur National Monument. Just as congress denied the dams on the Green—one of the first environmental victories in the United States—they approved the Glen Canyon dam on the Colorado River in 1956.
Meanwhile, the Bureau of Reclamation planned two more dams for the Grand Canyon itself. In 1963, directors of the San Francisco-based Sierra Club were prepared to capitulate when Litton addressed the board. Producing hand-drawn diagrams and quoting Theodore Roosevelt, Litton laid the Sierra Club’s intentions to waste. He argued that a dam would suppress the beating heart of the Grand Canyon—the free-flowing Colorado River.
“A MAN WHOSE LEGACY IS AS MONUMENTAL AS THE CANYONITSELF.”
“Martin doesn’t have to prime for a speech,” said the late David Brower, longtime Sierra Club board member and executive director. “Martin poured it on…and we voted ‘no.’” After a campaign that galvanized the environmental movement, President Lyndon Johnson rejected the dams in 1969.
Litton championed the intangible values of wilderness—its sublime beauty and spiritual power. He loved introducing Americans to the wild Grand Canyon, and launched an outfitting business in 1972. He was the only commercial outfitter to guide on the Colorado River exclusively in wooden dories—graceful, oar-powered boats as fragile in class V rapids as wilderness in the face of human onslaught.
Litton’s greatest attribute was his pig-headedness. Brower, widely revered as the greatest conservationist of all-time, called Litton his conscience. “When I would waver in various conservation battles, he would put a little starch in my backbone by reminding me that we should not be trying to dicker and maneuver,” said Brower. “I guess I got some of my extremism from Martin Litton, and I’m grateful for it.”
Litton ran the Grand Canyon for the last time at age 90. He died on November 30, 2014, at his home in Palo Alto, California. He was 97 years old.
“The American West has lost one of its great champions,” said current Sierra Club director Michael Brune, in a statement released December 1st. “His tenacious inability to surrender was an inspiration to the generations of environmental activists who followed in his wake.”
THE CRAFTSMAN
BRIAN SHIELDS
BRIAN SHIELDS WILL NEVER FORGET the moment he was smitten by the aesthetics of a whitewater canoe. “It was a Dagger Caption with wood trim and Tennessee cherry decks,” he says. “It was like looking at a sports car, the most beautiful thing I’d ever seen.”
In the late 1990s, Shields was an aspiring open boater, having recently retired from a career as a commercial airline pilot and residing north of Toronto, Ontario. The canoeing community is close-knit, and Mike Yee—the inventor of modern whitewater outfitting in the 1980s and the only one doing installations at the time—sensed his friend Shields’ interest in a retirement project. “He had the time to do installs,” says Yee. “I didn’t. More importantly, he’s a great woodworker. I knew he wouldn’t cut corners.”
“HE’S A GREAT WOODWORKER. I KNEW HE WOULDN’T CUT CORNERS.”
So Yee recruited Shields for a one-day crash course on whitewater outfitting. “It was like drinking water from a fire hose,” laughs Shields. By the end of the afternoon, the pair made a deal: Yee would supply airbags, saddles, straps and anchors, and Shields would install it—often along with graceful wood trim—to canoeists’ custom specs.
Shields became ingrained in the open boat community. He doesn’t have a website or promote himself on social media. For Sheilds, business is generated through glowing word-of-mouth reviews. Shields especially loves the thrill of putting his “beautiful machines” to work and paddling the gates with his wife, Gail. Last year, he and Rapid Media publisher Scott MacGregor won the senior men’s tandem title at Ontario’s Gull River Race—vindication after years of second-place finishes.
Shields has customized countless open boats in his 16 years of outfitting, but he remains as passionate about the canoe’s simple elegance as the day he started. “Installing wood is like cabinetwork,” he says. “Sometimes people ask for ash gunwales and grain-matched cherry decks. Those are the boats I hate to give back.”
CHRISTIE COCHRAN | PHOTO: STEVEN MCBRIDE / COURTESY NANTAHALA OUTDOOR CENTER
THE RIVER GUIDE
CHRISTIE COCHRAN
FOR CHRISTIE COCHRAN, a love for flowing water is an inherited trait. Growing up in Texas, Cochran spent her childhood summers traveling and canoeing with her parents, both ardent river rats. They paddled the Guadelupe, San Marcos and Frio rivers in central Texas. When Mom and Dad learned about the Nantahala Outdoor Center (NOC), a Bryson, North Carolina-based whitewater facility with access to numerous southeastern rivers, they registered the family for canoeing and kayaking retreats.
As an earth sciences student at Trinity University in San Antonio, Cochran bucked family tradition (and her parents’ encouragement for her to be a river guide) to take on summer internships in geology. Upon graduating in 1998, she finally gave in and applied to NOC to work as a raft guide. As it happened, she also received a job offer to do geological research. “Mom said, ‘You’re going to be a raft guide,’” says Cochran. “So I moved east.”
Today, in between homeschooling her two children, Cochran still guides on some of the toughest rivers in the Southeast, including the Cheoah and Chattooga.
Now known as Mama Christie at NOC, Cochran estimates she’s guided more than 5,000 people down rivers in her 17-year career. She lists Mother Nature as her sole sponsor in a profile on NOC’s website.
“MOM SAID, ‘YOU’RE GOING TO BE A RAFT GUIDE,’ SO I MOVED EAST.”
Over the years, Cochran’s inspired other female guides and supported gender equality on the river.
“Guys can muscle their way down the river,” she notes “but women have to do it with finesse. Women are finding out that it’s something they can succeed at.”
Cochran is one of the few guides “checked off” to lead trips on all of the rivers NOC operates on, says Steven Foy, NOC’s director of guest relations and sales. “She’s one of the best river guides in the Southeast.”
“I first met Christie when I was one of her instructors for guide school in 1998,” says Cathy Kennedy, NOC’s director of operations. “We’ve been friends and coworkers ever since. I’ve been her boss and I’ve babysat her children. I know how hard it is to blend the life of a river guide with the challenges of raising a young family. Christie is one of the few women at NOC to have done this with success.”
At the moment, Cochran’s greatest responsibility is sharing her passion for the outdoors with her children. “I have a favorite picture of my infant son and I hiking up the trail from the Chattooga,” she says. “I have a boat on one shoulder and my son on the other. I’m a momma to a baby, and here we are on the river.”
BRAD CAMDEN | PHOTO: NATHANIEL WILSON
THE SHUTTLE DRIVER
BRAD CAMDEN
A NEW STAY-AT-HOME DAD, Brad Camden had just moved to Gasquet, California, when a business opportunity appeared in his driveway. It was a kayaker looking for a ride to the put-in on the North Fork of the Smith River. Besides taking care of his six-month-old daughter, Camden was “walking circles in his living room.” That is to say, he was eager for a diversion. Driving the two-hour shuttle seemed like a good way to get out of the house, so “I said, ‘If you have room for a car seat, I’ll give you a ride,’” recalls Camden, 59.
That was 1986. Today, Camden, better known as Bearfoot Brad, remains the only shuttle driver for whitewater runs in northern California’s Smith River drainage. As his nickname suggests, Camden is known for his aversion to footwear. “Anybody can take their shoes off,” he laughs, “but it takes a long time to get bear feet.”
His house is on the main thoroughfare in Gasquet, and is described as a “miniature castle,” with three turrets and suits of armor in each window.
Camden is amazingly tolerant of paddlers’ quirks. “I would prefer if kayakers called the night before,” he says, “but I understand that in a lot of cases they might not know until that morning which fork they are going to float and how many drivers they’ll need.”
“I DON’T MAKE A LOT OF MONEY, BUT BILL GATES CAN’T AFFORD AN OFFICE AS PRETTY AS MINE.”
Because flows on the Smith depend entirely on precipitation, Camden keeps tabs on an improvised gauge on the river in Gasquet. He posts daily synopses on the website, Dreamflows.com. In the winter, when the forest service gives up maintaining the road to the North Fork, Camden routinely gets out and uses his four-wheel-drive truck to punch a path in the snow. “It wouldn’t be good business to get stuck,” he notes. “So I take it upon myself to keep the road open.”
Camden has only floated the Smith twice, but he loves to live vicariously through the stories of the paddlers he shuttles. He also battles to keep the watershed pristine. Camden once collected nearly 2,000 signatures on a petition opposing a nickel mine in the area. The proposed development was ultimately turned down.
Remarkably, Camden’s fees have only increased by $5 over the 29 years he’s been in business. “I hate to think you can’t float the river because you can’t afford it,” he says. “I don’t make a lot of money, but Bill Gates can’t afford an office as pretty as mine, and he doesn’t get to hang around as nice of people as I do.
“Whatever the paddlers do from Monday to Friday, I see nothing but smiles on faces when they’re going to float the North Fork of the Smith.”
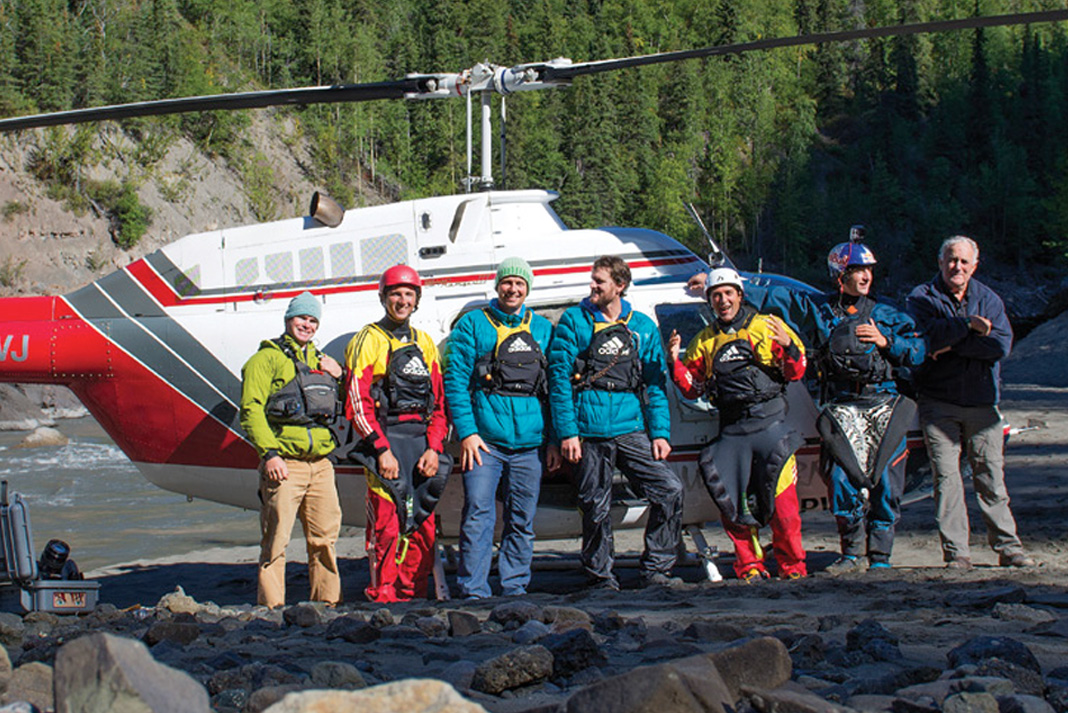
THE SALESMAN
BRAD NELSON
WHEN BRAD NELSON SELLS SOMEONE THEIR FIRST KAYAK, he always jots a list of phone numbers, websites and Facebook pages on the receipt. As much as he enjoys selling kayaks, the Delta, Pennsylvania, retailer loves welcoming new people to the whitewater fraternity. After all, Nelson believes his Starrk-Moon Kayak Shop owes its existence to the network of boaters.
Nelson has been a paddler since his parents bought a farm near the Susquehanna River in the early 1970s. He was introduced to whitewater on Muddy Creek; eventually, he bought a house on the shuttle road to the creek, and opened a shop.
As for the region, “I call it a no-name whitewater area with a good amount of moving water,” says Nelson. “It isn’t North Carolina or the West, but West Virginia and the Water Gap is only a few hours away.” Dozens of local waterways flow high all winter, including Holtwood on the Susquehanna.
Starrk-Moon started as a canoe shop, but transitioned to kayaks when keyhole cockpits made close-decked boats less intimidating. Nelson’s big break came when he offered free boats and gear to a group of young skateboarders. “They went out and met the best local paddlers—guys I didn’t even know existed,” says Nelson. In turn, the skateboarders became expert paddlers, and shared their passion with a new generation. A dynasty took shape. “It’s been trickling down ever since,” says Nelson.
“LIVING AROUNDHERE AND NEVEROWNING A KAYAK ISLIKE LIVING ON THEBEACH AND NOT OWNING A BATHING SUIT.”
Nelson sells exclusively kayaks and paddling gear—“no tents, bows and arrows or sleeping bags”—in his unique, three-story shop, which is built into the side of a hill.
When he started taking trade-ins, Nelson realized that some of the old, classic boats he was getting from customers were too special to re-sell. So he started hanging vintage fiberglass Noah Boats from Czech-American builder Vladimir Vanha from the ceiling in his second floor “museum.”
“I hold onto them so people can appreciate them,” Nelson explains. The collection also includes composite prototypes for contemporary models, including the Pyranha Speeder, Jed and InaZone.
Nelson isn’t afraid to call himself a salesman. But with over 27 years of retail experience, he insists that selling kayaks comes with a moral obligation to create paddlers—something ignored in big box stores.
“I’ll tell people, living around here and never owning a kayak is like living on the beach and not owning a bathing suit,” says Nelson. “Kayaking is relatively cheap and it’s something you can do for the rest of your life. But you can’t be a loner. You have to get out and make those connections.”
This article first appeared in the Spring 2015 issue of Rapid magazine.
Subscribe to Paddling Magazine and get 25 years of digital magazine archives including our legacy titles: Rapid, Adventure Kayak and Canoeroots.
Looking to level up your whitewater skills? We asked for tips from some of the biggest names in the game. From maintaining fitness to finding new waves and staying ahead of the pack, try these pro techniques to go from an also-ran to truly kicking ass on the river.
I always decide what combo I’m going to throw before I throw it to ensure I have proper body position for each trick. Throw at the top of the wave to get the most amplitude out of the first trick and enough upstream momentum to stick the second move.
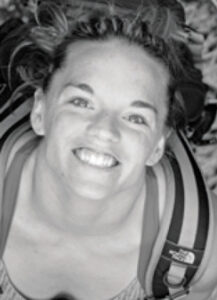
2 Paddle ‘til you’re really old
Heather Herbeck, paddle fitness guru
Maintain your ability to move through full range of motion by rolling out tight muscles with a foam roller after a workout or paddling session. I roll out the length of my back three to five times, as well as my hamstrings, glutes, quadriceps and IT band (the outside of the leg). The whole session takes five to 10 minutes and helps prevent injury and boost muscle performance.
Activities other than kayaking help me stay in shape for paddling. I pick activities I enjoy and can do year-round so I want to do them often. You don’t have to run or bike 10 miles to get a good work-out; integrate 10-minute bursts of activity into your workday. I love anything that gets me outside—I go for quick runs and play speed rounds of disc golf throughout the day.
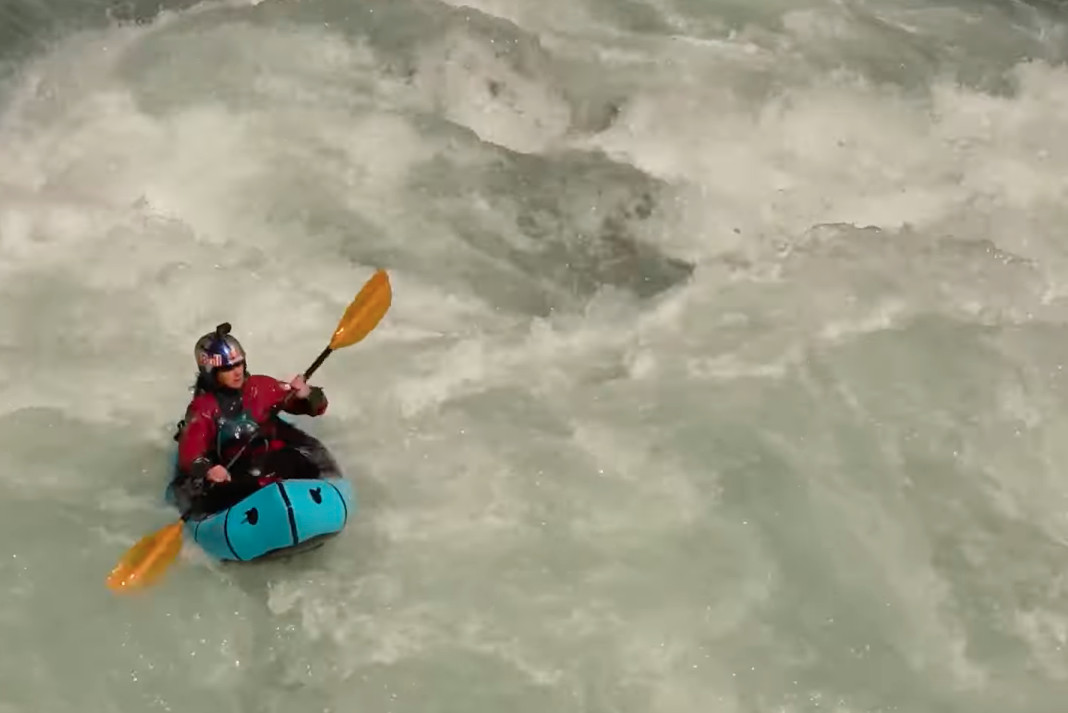
4 Travel with your kayak
Lu Urwin, globetrotting whitewater nomad
The days of claiming your kayak as a surfboard or surf ski are over. Baggage rules differ between airlines, so I research weight allowances every time I travel. I’m always at the airport early for my check-in and most importantly, super nice, patient and friendly to the people helping me, for as long as possible. When all else fails, I’ve found bursting into tears usually gets ‘em.
5 Master the read and run
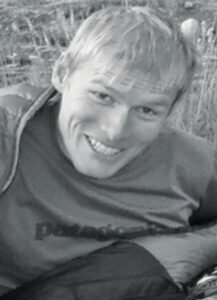
Chris Gragtmans, expert river runner
I constantly scan to find eddies because it’s important to have bail-out options, even on an easy river. Pay attention to the river’s geology as well as the water—does it look like it’s gorging up ahead? Dropping faster? Is there a lot of fallen wood on the banks? If something doesn’t feel right above a rapid, I trust my instincts and get out to scout.
Louis-Phillippe Rivest, big wave hunter of the Great White North
Aerial images and satellite maps are great scouting tools. I use Google Earth to survey unexplored areas for free and from the comfort of my home. I zoom in and out to preview potentially dangerous features up- or downstream of a play spot. I also contact friends in the area to scope out locations and levels before making the trek with boats.
7 Make all the gates
Nouria Newman, slalom slayer
Before dropping into a slalom course, I sit in my boat above the rapid, close my eyes and try to mentally visualize the whole run. I picture it as if I’m watching a GoPro video of myself running the gates and imagine the specific strokes I’ll need for certain turns and boofs.
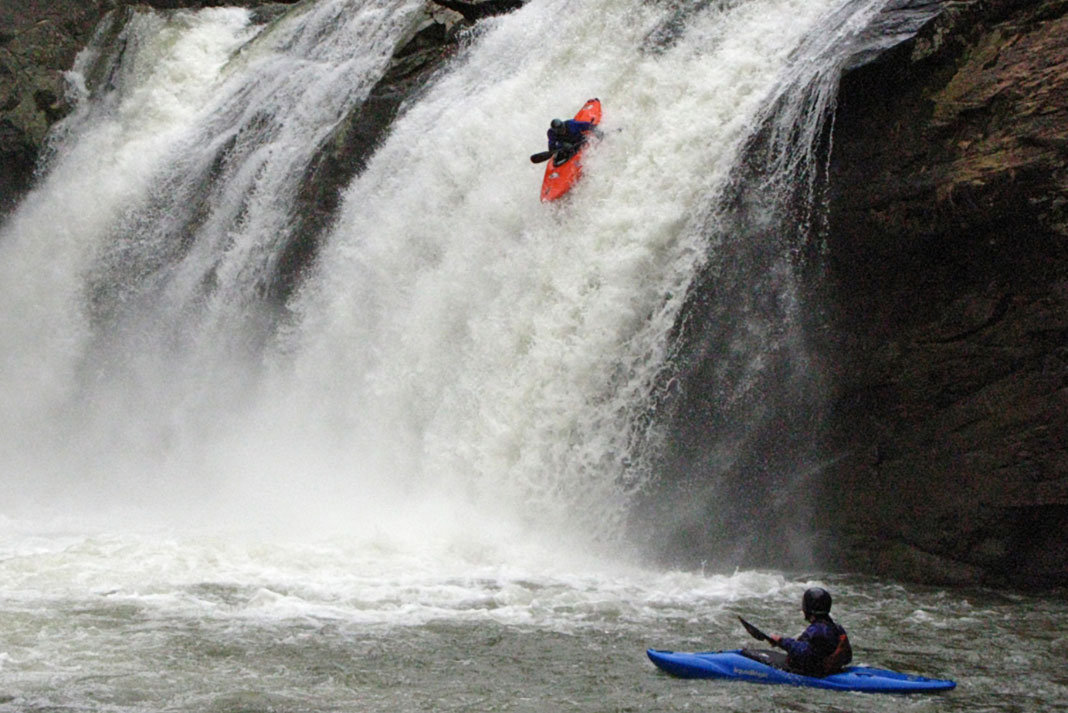
When dropping into a slide, make sure to have your shoulders square to the direction you want to go and lean slightly forward. This forward stance puts you in a more aggressive paddling position, keeps you stable and protects your back on hard impacts. Looking where you want to go, no matter what goes wrong, will help get you there.
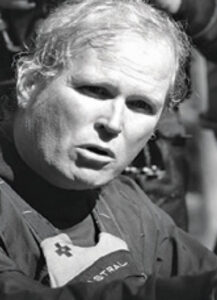
9 Bombproof your OC1 roll
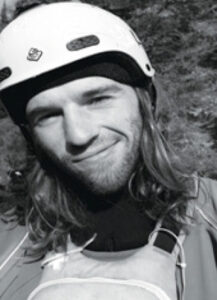
Jim Coffey, international river guide
Try to get back up every time you go over, even if you don’t have a reliable roll yet, and practice rolling in the eddy anytime you empty your boat—these mini attempts only take a minute and build up until you finally have a solid roll. When practicing in an eddy, tip over towards your off-side to learn how to set up for a roll like you’ll need to in current.
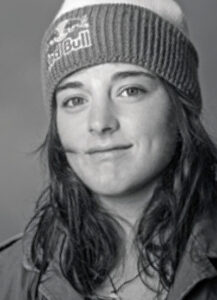
10 Dominate extreme races
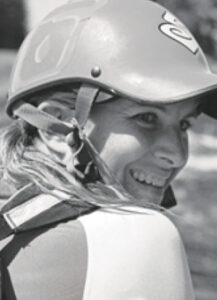
Louise Jull, steep creek queen
I practice going as fast as I can by racing down the Kaituna River, my home run. It builds muscle endurance and trains my brain to react quickly. When I’m out for a relaxed lap with friends, we turn the last section into a friendly race, pushing ourselves to the end.
This article was first published in the 2015 Paddling Buyer’s Guide. Subscribe to Paddling Magazine’s print and digital editions, or browse the archives.
From Discovery Channel’s documentary series, How It’s Made, this five-minute video goes behind the scenes of how Klepper folding kayaks are manufactured by hand in Germany from laminated ash, birch and marine fabrics.


 This article first appeared in the Spring 2015 issue of Adventure Kayak magazine.
 This article was first published in the Spring 2015 issue of Rapid Magazine.
 This article first appeared in the Spring 2015 issue of Canoeroots and Family Camping magazine.


 THE SALESMAN


 This article was first published in the 2015 Paddling Buyer’s Guide.


