Home Blog Page 281

How Paddlers Can Save Money At The Pump

MILEAGE MAY VARY.| PHOTO: KAYDI PYETTE

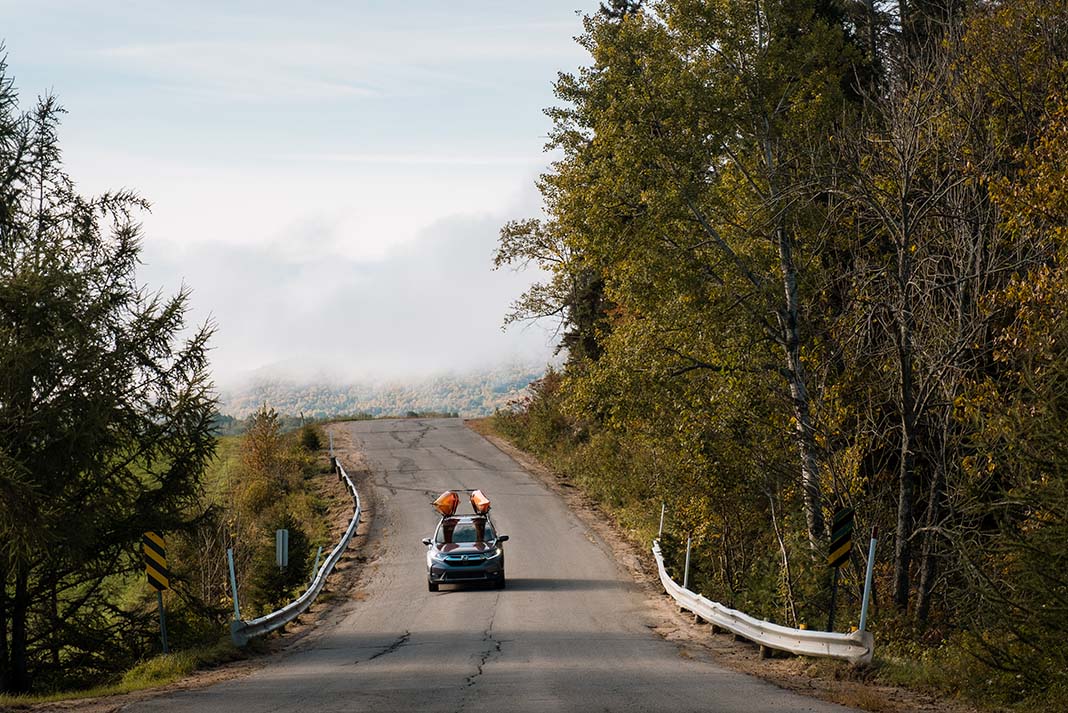
With gasoline prices in America at an all-time high, fillin’ ‘er up can feel like a punch in the gut. The added wind resistance of a car-topped canoe can be even more of a drag on your finances. With these challenges in mind, you can still find ways to save money at the pump on your way to the put-in.

How paddlers can save money at the pump

On a recent trip, my fuel economy dropped by six miles per gallon, about 25 percent, with a single car-topped Prospector. With local gas prices hovering around $5 per gallon, the round-trip fare for my canoe alone cost $60—equal to the cost of renting a canoe for my weekend trip.

The decrease in gas mileage with a car-topped canoe varies with vehicle model, ranging from five to 25 percent according to the U.S. Department of Energy.

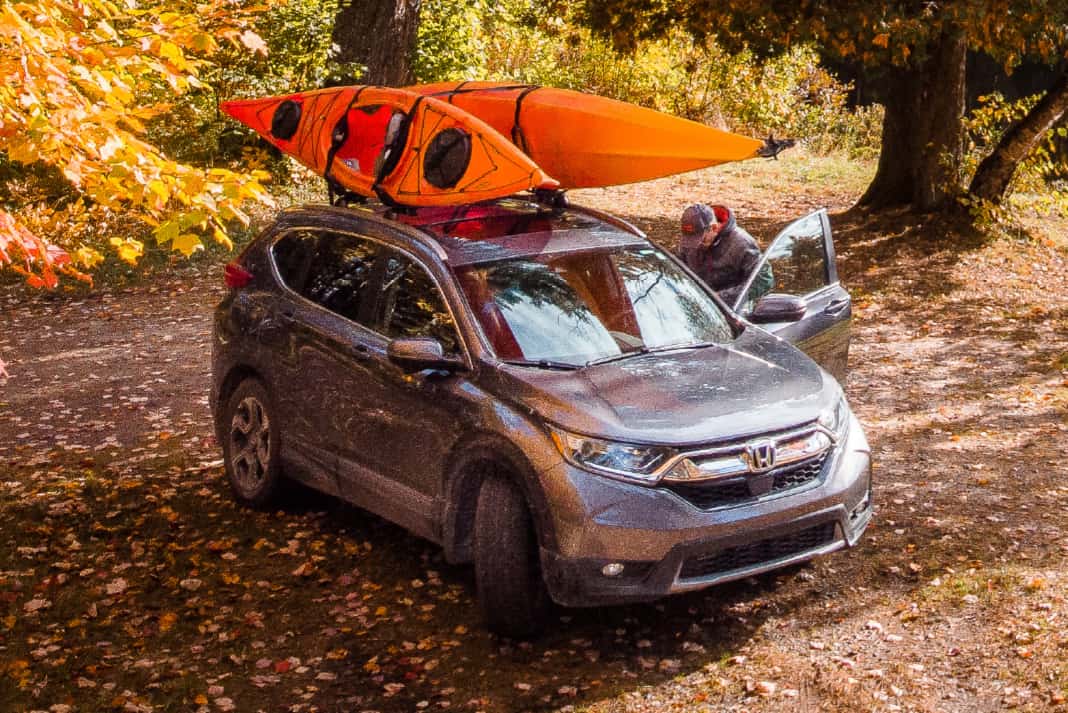
“You’ll really notice a decrease in efficiency if you’re driving an aerodynamic design, like a Prius. A Ford F-150 is barely going to notice the difference with a canoe up top,” says Dave Condon, senior design engineer for Yakima. “If a vehicle has been created to move very efficiently and you add a boat, you’ve just added a lot of drag; a little Honda is going to suffer far more than a big rolling brick.”

Your mileage may vary. | Feature photo: Kaydi Pyette

The shape and size of your boat, tie-down method, road conditions and terrain, as well as wind direction and speed are all variables that will also affect your mileage.

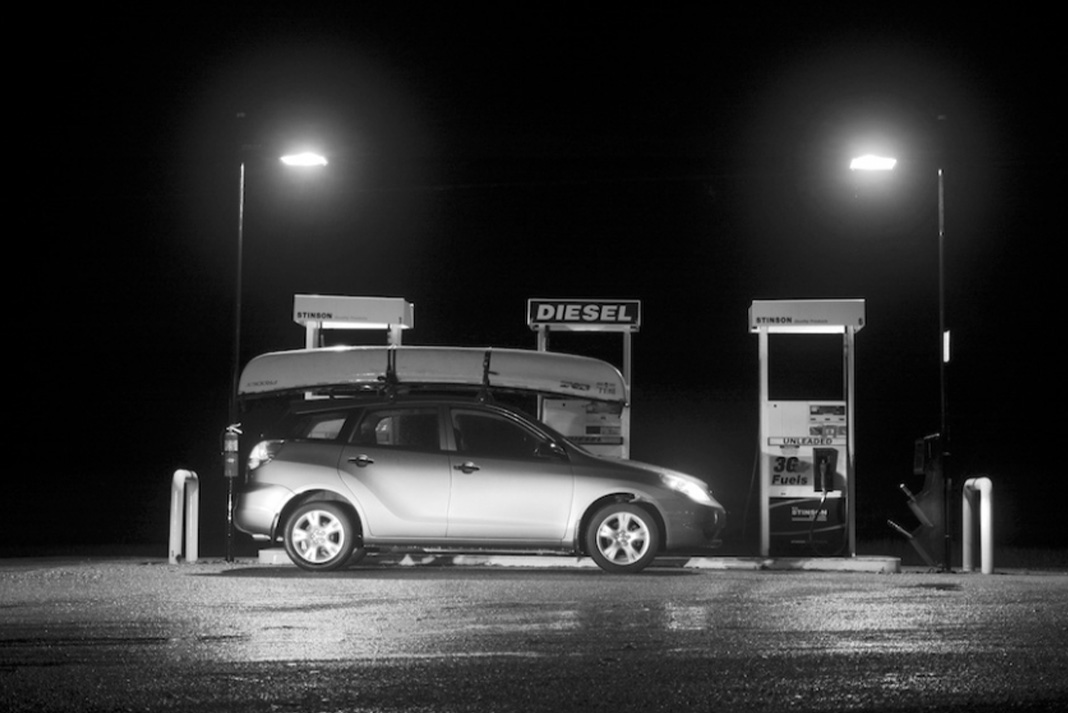
To get the most distance for your dollar, Condon recommends a dedicated system for transporting your boat, such as roof racks or a trailer. Though trailers have a larger ecological footprint, they offer better fuel economy because they cruise in the slipstream behind your car.

DIY techniques to improve efficiency

Canoeroots readers shared stories of experimenting with their own DIY hacks for making the gallons last, including transporting canoes with inflated flotation bags and spray decks to create a more aerodynamic shape. They reported marginally better fuel economy with than without.

However, the most effective way to increase fuel economy is unfortunately also the least popular—get out of the fast lane.

“Taking the back roads, compared to driving at 70 miles per hour on the freeway, will increase your mileage,” advises Condon. “The power required to push a car (and boat) through the air increases exponentially with increased speed.”

This means that wind resistance increases more between 70 and 80 miles per hour than it does between 50 and 60. Just slowing down from 65 to 55 miles per hour can increase your fuel economy by as much as 15 percent—that’s mileage you’ll need if you’ve got a car-topped canoe.

cover of Canoeroots Mgaazine, Summer/Fall 2014 issueThis article was first published in the Summer/Fall 2014 issue of Canoeroots Magazine. Subscribe to Paddling Magazine’s print and digital editions, or browse the archives.


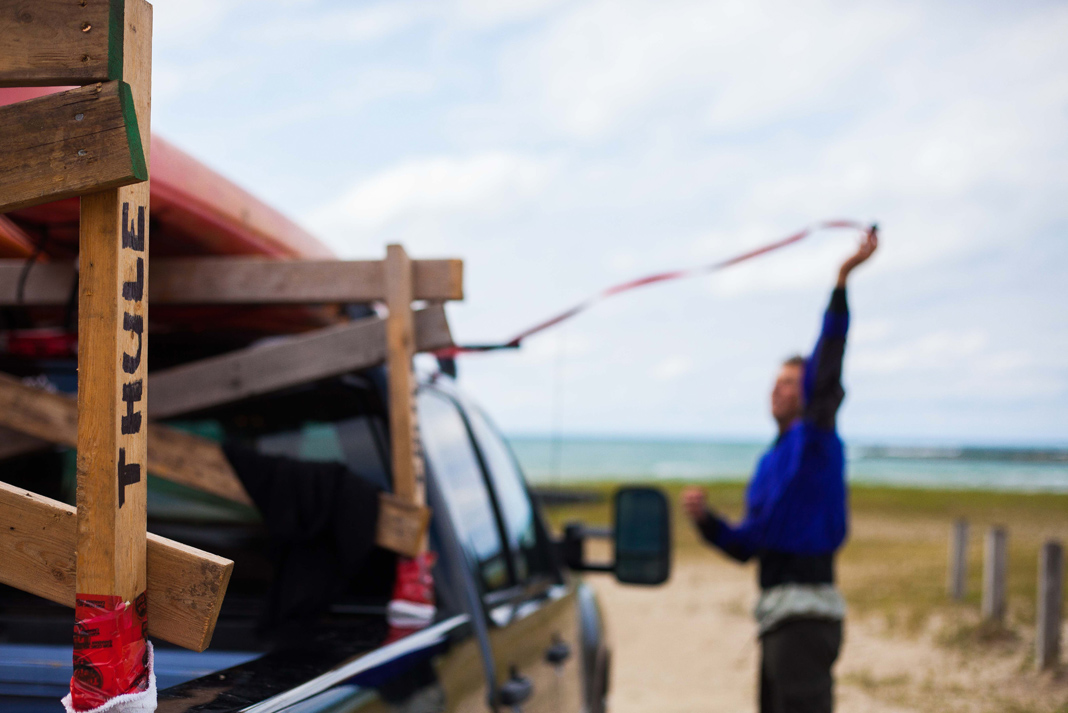
Your mileage may vary.| Feature photo: Kaydi Pyette


Substantial Media House Ep. 9 “The Siphon”

Photo: Screen Capture Substantial Media House Ep. 9 "The Siphon"
Substantial Media House Ep. 9 "The Siphon"
[iframe src=”//player.vimeo.com/video/104756910″ width=”500″ height=”281″ frameborder=”0″ webkitallowfullscreen mozallowfullscreen allowfullscreen ]

Substantial TV Episode 9 “The Siphon” from Substantial Media House on Vimeo.

From the filmmaker:

“The Siphon of Pucon is a retentive force of massive proportion. Epic paddling, beautiful scenery, night life, and yes…The big white Volcano! For the past 8 years I have continuously been pulled back into The Siphon mercilessly. Once you are able to break free of this powerful force and explore the rest of Patagonia you will be rewarded with -> The Tour de Stout…Back to Back to Back -> River to River you go carelessly running the brown and getting SUBSTANTIAL! Enjoy on one the best seasons Chile has blessed us with and relive some of the craziest moments we have ever captured on film.

Shot by: Evan Garcia, Ryan Lucas, Aniol Serrasolses.

Edit: Evan Garcia”

From Substantial Media House.

In the Hatch: DryCASE DRYVIBES

DryVIBES is salt-proof, sand-proof, dust-proof, and waterproof. Photo: Courtesy DryCASE
DryVIBES is salt-proof, sand-proof, dust-proof, and waterproof.

Rock out on the water with the newest speaker from DryCASE, the manufacturer of waterproof electronic cases. Their new DryVIBES, $79.99, is “a compact, yet powerful waterproof speaker system that allows you to connect to your playlists while hanging by the pool, out on the water, or in the shower.”

More importantly, DryVIBES is salt-proof, sand-proof, dust-proof, and waterproof. An attached suction cup allows the DryVIBES speaker to mount right onto your kayak and a built-in waterproof microphone doubles as a speakerphone. Now you can make calls even while paddling (unless it’s a work call, then you can say it doesn’t make calls, sorry boss).

Other Features:

  •        USB charge Cable

  •        Rechargeable Battery

  •        6 Hours of Playback Time

  •        30 Foot Bluetooth Range

  •        One Year Warranty

For more information on DryCASE or their new DryVIBES, check out their website, drycase.com.

Geek Beak! Why An Iconic Whitewater Fad Won’t Die

Photo: Kaydi Pyette
Geek Beak

In the days when playboats were more than eight feet long, when freestyle was called rodeo and pirouettes were a hot move, paddlers had a problem.

It was the early 90s, and the Pro-Tec and Wildwater helmets of the day worked well for protection but did little for sun protection.

People layered baseball caps under their helmets to add a brim, but the pressure of the hats’ buttons pressing into their skulls meant every paddling session ended with headaches.

Around the same time, Patrick Kruse sat in his Seal Beach, California, basement apartment trying to solve a dilemma of his own: how to launch his startup gear company into the world of whitewater and stand out against other manufacturers.

A paddler himself, Kruse had heard complaints about the baseball cap conundrum.

After a two-day flurry of cardboard and fabric cutting and pasting, he emerged with a design that would push his new business into the mainstream.

The Salamander brim was a hit.

For years, every Dagger Crossfire and Perception Pirouette contained a paddler whose helmet had a sticky Velcro strip and colorful, three-inch, foam-filled visor.

It came out in more and more colors and jungle and hibiscus patterns that would’ve made the Fresh Prince proud.

More than two decades later, the same brim comes with the same Salamander logo on the same 600-denier poly-cloth and Volara foam with Velcro-705 molded hooks, as when Kruse first designed it.

It remains on Salamander’s best seller list and is easily the company’s defining product.

In the late ‘90s though, helmet companies like Orosi started catching on—modern helmets emerged with built-in brims and started turning heads.

The Salamander does offer one advantage over built-in brims, says current owner, Shane Preston, who’s been with the company for six years. “If a kayaker is upside down, the bill will actually flip back rather than catch the water and yank your head back.”

Today, companies like Sweet Protection, WRSI, Shred Ready and Predator all make brimmed buckets of their own. But Salamander lives on.

The company still sells 2,500 visors every year, although for the most part, it’s not us buying them.

“To be 100 percent honest, it’s the horse industry—they love these things,” says Preston.

Salamander now sells 20 times more brims to its equestrian market than to whitewater paddlers. The visors fit on riding helmets just as well as they once did on whitewater helmets.

He’s also selling to bike and ski shops.

“For the hot kayakers, not too many kids are wearing them because they’re a little dorky looking,” Preston says. “But they work. You can’t deny that it gives you some nice protection.”

Salmander’s original visor designer Patrick Kruse now runs a company called Ruffwear selling performance dog gear in Oregon.

Three years ago on a hot summer day he was driving down Highway 395 towards Red Rock Canyon when a giant grin spread across his face. On the side of the road he saw a crew of 20 or so road workers, each with a bright red Salamander visor Velcroed to their hardhats.


This article on introducing friends to whitewater was published in the Summer/Fall 2014 issue of Rapid magazine.This article first appeared in the Summer/Fall 2014 issue of Rapid Magazine. Subscribe to Paddling Magazine’s print and digital editions, or browse the archives.

Mapping Memories

Photo: Ryan Creary
“IT IS NOT DOWN ON ANY MAP; TRUE PLACES NEVER ARE.” —Herman Melville, Moby-Dick | PHOTO: RYAN CREARY

Without a paper map to guide me, my interpretation of a wilderness area looks more like a map from the 16th century. Without satellite precision it’s rough and hypothetical, with notched portages marked Here Be Blackflies and picturesque campsites denoted by smiling suns.

The lakes, river and creeks form the skeleton of the map and land out of sight beyond hilltops fades into obscurity. It’s not quite to scale—landmarks loom larger than life, proud and prominent, and hazards are rendered with a giant’s bold hand. Thankfully, this mental map is underlaid by an accurate paper one.

I’ve always been entranced by maps. They share more than simple topography and route finding. Through the winter I paper my floor, not just to allay cabin fever, but also to wonder what’s over that next rise, beyond that next portage, always looking for rivers and lakes previously unseen. On a trip, I love to curl up around the fire and familiarize myself with what lies a mile distant in the west or five miles off in the east.

Not everyone shares this level of enthusiasm for placing their route within the context of a 50-square-mile area. Instead, some use their map only as a navigational aid to get from A to B. While I’m feeling blissfully small in an interconnected and unfurling wilderness, I sometimes wonder if my map-ambivalent counterparts are enjoying just a series of beautiful lakes and rugged trails occurring in an arbitrary order.

Set up at camp, we tell tales about past trips. A never-ending portage, a vicious storm, waking up to a bear peering into the tent—but I’m surprised when reminiscing is followed by, “Hey, where were we when that happened?”

While mapping wild land has grown sophisticated as a science, our own familiarity with wild places has become fragmented. Paradoxically, we live in a world where we can peer down from space into distant forests to trace a wilderness route, yet the true knowing of wilderness places is in short supply.

Photo: Ryan Creary
“IT IS NOT DOWN ON ANY MAP; TRUE PLACES NEVER ARE.” —Herman Melville, Moby-Dick | PHOTO: RYAN CREARY

Less common today is the intimate knowledge of place. Indigenous communities built this knowledge over the generations and it allowed them to travel over the land using stars, landmarks and oral stories as guides.

While I can’t lay claim to the gift of rooted generations, there are a handful of wilderness areas where I’ve felt a sense of place, where even with eyes closed the landscape unrolls in all directions and I could paddle and portage for days without needing reference. It’s a surreal and wonderful feeling when the map becomes drawn inside.

Whether it’s a paper map or a map of the mind, when paid attention to, the blue lines and green swatches become a treasure trove of personal history. It’s a storyteller of geography, yes, but if we listen, it’ll also recount our own stories back to us. —Kaydi Pyette


Get the full article in the digital edition of Canoeroots and Family Camping, Summer/Fall 2014.Subscribe to Paddling Magazine’s print and digital editions, or browse the archives.

Kevin Callan Ice Bucket Challenge

Photo: Courtesy Kevin Callan
Kevin Callan Ice Bucket Challenge
[iframe width=”560″ height=”315″ src=”//www.youtube.com/embed/paadDgSgTUs” frameborder=”0″ allowfullscreen ]

The Happy Camper was challenged by Chris Johnson and Alan Drummond for the ALS Ice Bucket Challenge. He took the challenge – and wish he didn’t.

How To Pack For Self-Support Kayak Trips

Photo: Flickr user Zachary Collier , licensed through Creative Commons
How To Pack For Self-Support Kayak Trips

Multi–day whitewater kayaking trips are a rewarding way to experience a new river or a remote area of your local watershed. Packing for an expedition is important for both safety and comfort. Knowing what to pack is crucial. But less commonly discussed is how to pack all your gear inside your boat.

Aniol Serrasolses has spent a lot of time on remote rivers, living out of his kayak. His packing philosophy will help you paddle confidently and camp comfortably in the backcountry.

BE ORGANIZED

Pack your kayak in your backyard, prior to arrival at the put-in. Serrasolses suggests laying all your gear out, and organizing it with weight in mind—divide the gear into a couple dry bags that each weigh approximately the same amount once packed; this will be helpful when it comes time to pack the bags into your boat.

Another option is to use multiple smaller dry bags that can be easily rearranged.

Using differently colored bags can help distinguish which items are packed where.

Specialty dry bags are tapered to fit in the bow or stern of a kayak to make the best use of your limited space.

STAY BALANCED

“Weight distribution is key when packing a boat for a multi-day,” says Serrasolses. Having a fully loaded boat changes the way it handles, tracks and sits on the water.

There are three spots in your boat to store gear: the bow, the stern and in the cockpit (on your lap or between your legs). Where you put gear will depend a lot on personal preference. Serrasolses prefers to avoid gear in the bow of the boat. “I will only put weight in the front when packing up for really long expeditions.”

A good rule of thumb is to keep weight low and centered—too much weight in the stern encourages enders and too much weight in the bow makes it hard to boof.

Serrasolses uses a simple three-bag system to stay balanced. Items he needs easy access to are stored in one dry bag between his legs. This includes camera, batteries, snack bars, safety kit and spot device. He likes having these heavy items centered on his legs to stay balanced. “The other two dry bags go in the back of my boat. One has all the food I need and the other has a sleeping bag and dry clothes.” A breakdown paddle can also be stored in the stern.

PLAN FOR SWIMS

Properly packing your gear can mean a more comfortable day on the river, but it’s also important to ensure you don’t lose crucial expedition gear. Pack essential items, like a cell phone, in a waterproof pouch.

Serrasolses recounts a swim he had on expedition in Peru. They were fortunate to find his boat and most of his equipment a few kilometers downstream, but he lost one dry bag because it wasn’t well attached to the boat. “Always safely attach the dry bags to a solid place in the boat.”

THINK ABOUT SAFETY

Safety should always be on your mind when loading your boat. Ensuring you have a quick and clear way out of your boat should never be compromised, so don’t overload the cockpit with gear. “You don’t want to have more than one bag on your legs,” Serrasolses warns. If you know you are slow getting in and out of your kayak you should avoid having any gear on or near your legs.

Always make sure your safety equipment is easily accessible.

By properly and safely packing your kayak, you can make the most of days and nights on remote rivers. After a few days of packing and unpacking, you will develop your own system. “It took me a while to figure out what works best,” says Serrasolses. “Try out a few options and see what is the best for you!”

BONUS TIP: FREESTYLE, FULLY LOADED

Known for his smooth downriver freestyle, it’s not surprising Serrasolses throws tricks while on multi-day trips. His tip for fully loaded kickflips? “Get more speed, and try to get as much air as possible so you don’t have to force the move.”


This photo was taken by Flickr user Zachary Collier and licensed through Creative Commons

Learn How To Sharpen Your Camp Knife Blades

Photo: Kaydi Pyette
Sharpen camp blades

No matter what type of knives you use for your adventures, it’s important to keep your blades well-honed. A sharp edge reduces the possibility of injury by reducing the amount of force required to cut. Less force means more accuracy.

The traditional way to sharpen a knife is to use a sharpening stone. Stones come in a variety of styles, sizes and materials, but each promises a good finish by removing minute quantities of metal from the blade.

Like sandpaper, stones also come in a variety of grits. If your blade is dull and heavily used, you may want to begin with a coarse grit stone, however, many people choose medium grit and use it exclusively.

The two most popular types of stones are whetstones and oilstones. If using a whetstone, soak it in clean water before use. If using an oilstone, spread a few drops of honing oil on it. In both cases, make sure the stone is wet at all times when in use.

Large stones should be placed on a solid surface. If sharpening a blade at home, a vice can be a handy tool to hold the stone in place, but in camp, the ground or a picnic table will be suitable. Small stones can be handheld for sharpening, but should still remain motionless—the best technique is to move your blade across the stone, not the other way around.

To find the correct angle to sharpen your blade, lay the flat side of the knife against the stone and tilt the blade until the cutting edge comes into contact with the stone. This is the angle you’ll sharpen at, also known as the bevel.

Use your free hand to gently guide the knife away from you and down the length of the stone. Imagine that you are slicing off a very thin sliver of the stone. You should hear a distinct sweeping sound.

If the knife blade is curved or if it’s longer than the stone is wide, you’ll also need to sweep the blade sideways, so the entire edge is sharpened evenly. Maintain the bevel by listening carefully to the sound—if you change the angle of the blade, the sound and resistance will change.

PROS AT THE GRINDSTONE. | PHOTO: KAYDI PYETTE

Repeat the motion 10 times on the same side. Then repeat 10 strokes on the other side. Depending on how dull your blade is, you may need to repeat this pattern several times.

A medium grit stone will leave micro-serrations in the steel that give it more edge surface and bite, perfect for performing general camp chores.

For whittling, skinning or shaving a beard, you’ll need to progress to a finer stone. Repeating the procedure with a fine stone will remove the micro-serrations left by the medium grit stone.

Finally, to polish the new edge of your blade, stroke the edge down a piece of scrap leather a dozen times.

The best way to test your handiwork is to hold up a sheet of paper and drag the knife across its edge. A sharp knife will slice the paper effortlessly. —Wolf Starchild


Get the full article in the digital edition of Canoeroots and Family Camping, Summer/Fall 2014.Subscribe to Paddling Magazine’s print and digital editions, or browse the archives.

Paddling To Help Kids Go WILD

"STOP . BREATHE . RELAX . LISTEN - The Power of Nature to Restore the Human Spirit." Photos: Courtesy Daniel Fox
"STOP . BREATHE . RELAX . LISTEN - The Power of Nature to Restore the Human Spirit."

“Knowing the importance of today’s youth in shaping the future, I am proud to announce the beginning of W.I.L.D. – Wilderness Immersion for Leadership and Discoveries,” said photographer Daniel Fox. “Its aim is to give youth, especially under-privileged teens, the opportunity to experience first-hand the positive impact nature can have on their lives. The goal is to motivate them to explore and discover the natural world and understand how experiencing the beauty and challenges inherent in nature can lead to enhancing their self-confidence and developing valuable leadership skills

Our wish is to have their testimonials and experiences reach ​ ​and positively impact other teens and their families and inspire them to Experience the W.I.L.D.

Daniel Fox body 2

For my first W.I.L.D. campaign, I will raise the necessary funds to send a small group of under privileged teens to a 30-day Sea Kayaking camp in Alaska in the summer of 2015. The wilderness immersion camp will be given by the internationally known and extremely well reputed National Outdoors Leadership School (N.O.L.S.).

Launching in the third week of August, I will paddle from Victoria on Vancouver Island to San Francisco, a journey of 1,000 miles. The 2 1/2 month paddle will be at the core of a Indiegogo campaign. Click here – INREACH tracking & FACEBOOK, to follow this amazing journey!

Find out more about how you can contribute and the wonderful rewards you can get. These teens will be changed forever, transformed and more deeply connected with the planet. Lets make this happen!

“The most rewarding part of this course was getting out of my element, and experiencing nature at its fullest.” Thomas W. Southeast Alaska NOLS Sea Kayaking Grad

STOP . BREATHE . RELAX . LISTEN – The Power of Nature to Restore the Human Spirit is the foundation of my narrative and the message behind my work.”

Daniel Fox body 1

In the Hatch: ALL-Terrain Portable Speaker

Waterproof, shockproof and ready for adventure. Photos: Courtesy ALL-Terrain
Waterproof, shockproof and ready for adventure.

The ALL-Terrain, $79.99, from FresheTech, is a Bluetooth-enabled, portable speaker that is waterproof and shockproof. It has a sturdy polycarbonate clip at the top which allows you to attach it to backpacks, PFDs, or a hook on a boat/kayak. It’s perfect for crakning out the tunes on paddles, because even if it comes loose, it will float!

All Terrain body 1

It’s about three inches tall without the clip. With the clip, it’s about 4.5. It’s also roughly 3 inches wide. Another great feature of the speaker, is with the push of a button, you can answer calls and talk on your phone through the speaker. Perfect if you don’t want to risk getting your phone dirty or wet, or just handsfree talking while paddling.

All Terrain body 2