
Inside America’s Largest Private Collection Of Kayaks: Charles Albright’s Boat House

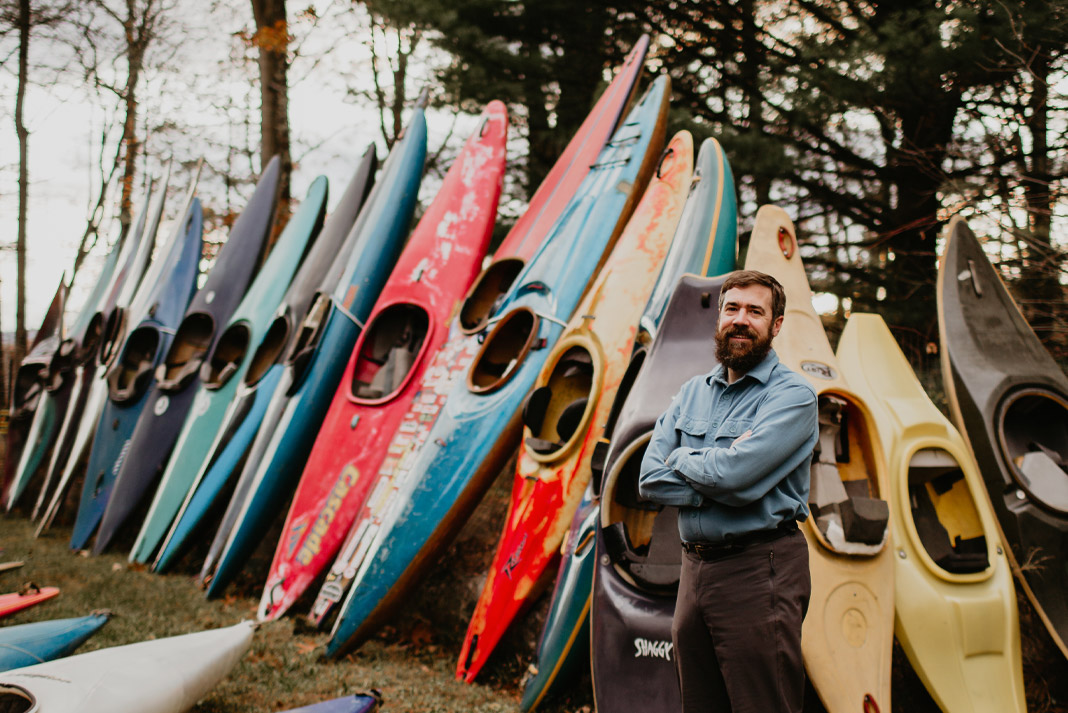
Charles Albright has more boats than you ever will. At last count, the Reno, Nevada, kayaking legend had a whopping 150 in his house, including about 25 in the front room, four in his bedroom, more in his basement and garage, and a full boat room of 40 or so.
The boats range from downriver and sprint racing kayaks to surf shoes, surf skis, outrigger canoes, whitewater slalom kayaks, C-1s, regular whitewater kayaks, a smattering of sea kayaks and canoes, and more, all hanging from rafters, lining the walls and taking up nearly every available square inch of space.
A former USA Wildwater Team member and longtime instructor, he just keeps getting them, curating them into one of the world’s biggest, most eclectic collections. And he doesn’t hoard them; last year he gave 24 of them away—many to local kids—and makes similar donations every year.
To Albright, 75, spreading the paddling love is far more important than his museum pieces.
“My biggest prize isn’t my boat collection but all of the folks I’ve met racing and paddling over the years,” he says. Below, we call out a few favorites—and some other odds and ends—in his kayak-heavy home.
Inside America’s largest private collection of kayaks: Charles Albright’s Boat House
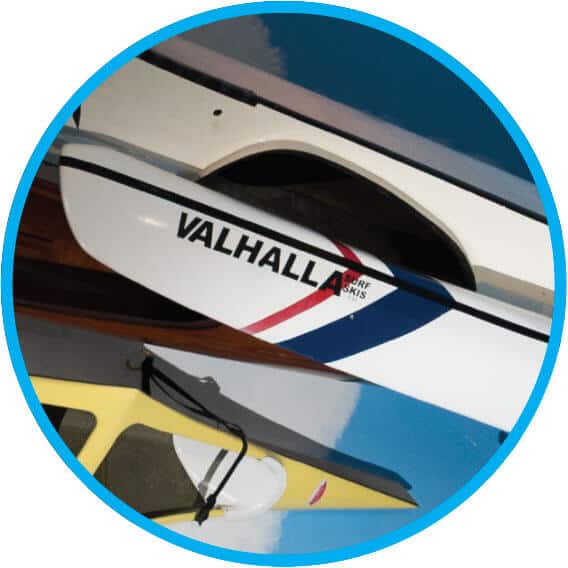
 Olympic K-4
“That’s a Struer from the 1968 Mexico Olympics. I bought it from a flatwater racing team in Seattle. The white one is a K-4 from Susan Starbird, an Olympic paddling coach from Petaluma, which I got from their training center when they needed room.” The 34-foot-long K-4s join another wooden K-2 Struer. “I love Struers. I bought wood boats for a while because they’re so beautiful.”
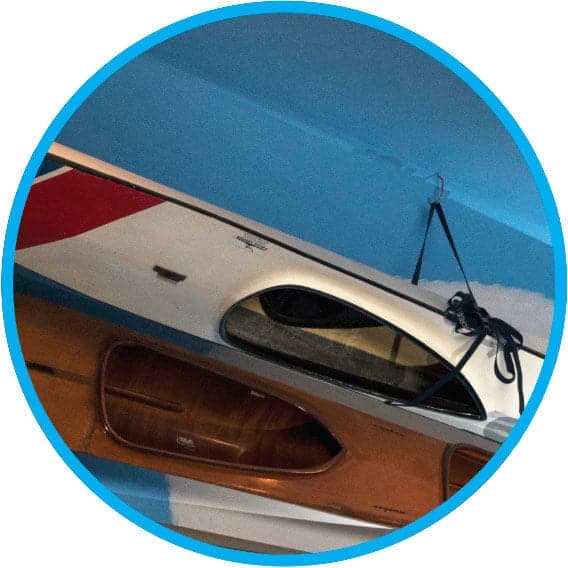
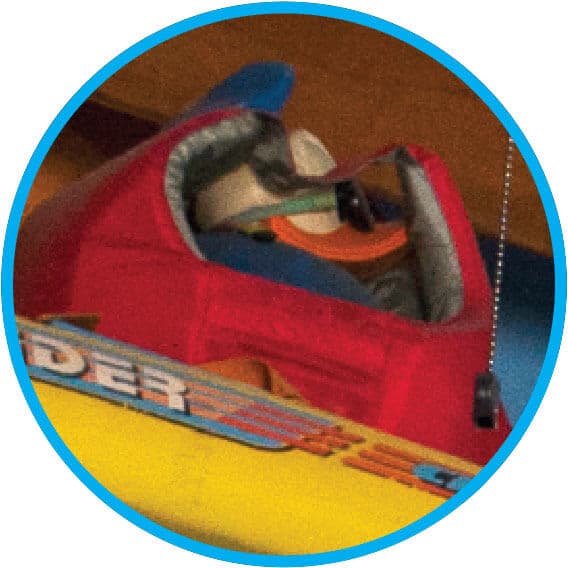
 Wave Ski
“That’s a Raider from Australia. I competed on it at the Santa Cruz Surf Kayak Festival. Breaking through the surf was challenging, and it was intimidating to be in sometimes, but it’s dynamic and cuts quick.” The ski joins a K-1 collection that ranges in size from a 24-foot-long Missile to a 7’5” Wave Sport Stubby and 6’9” Minnow by Ann Dwyer.
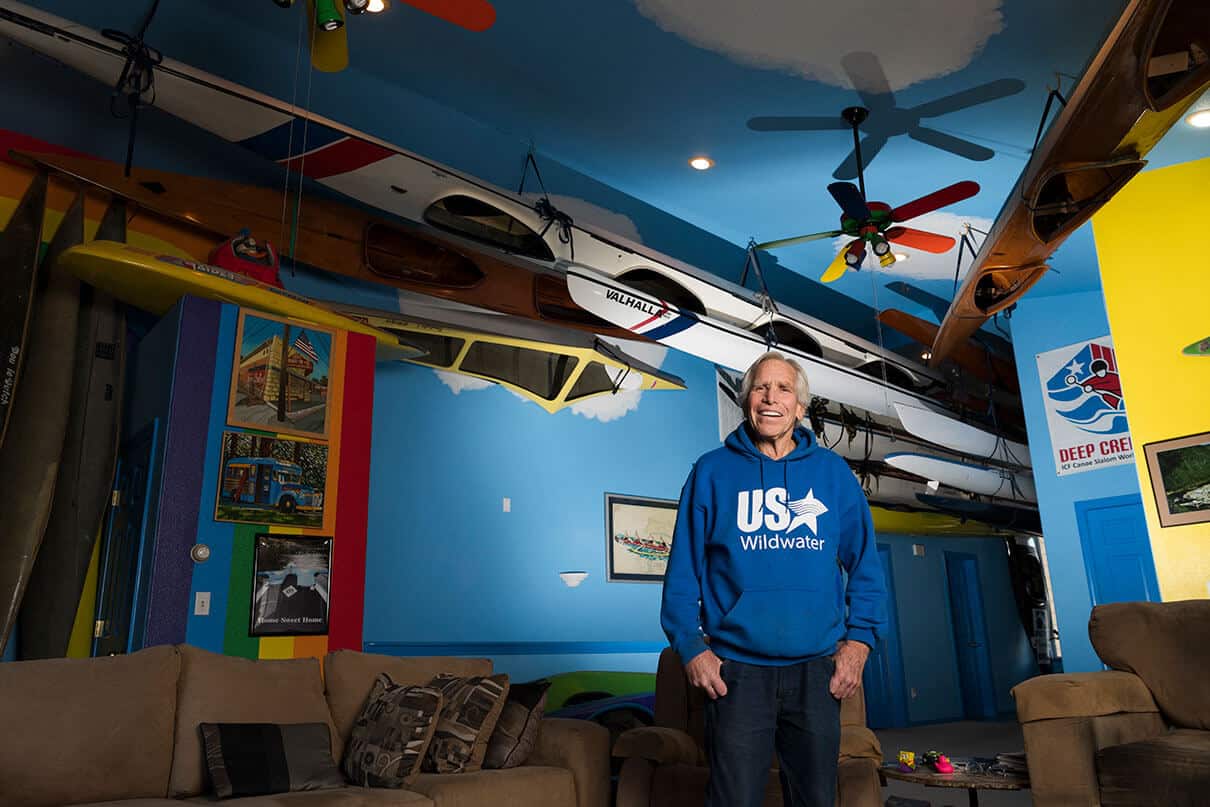
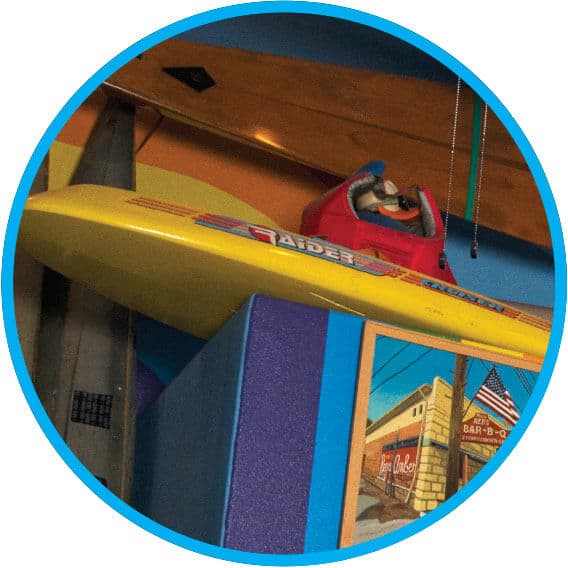
 Valhalla
“That’s a double surf ski I bought from a builder named Keith Keillor out of San Diego. The yellow one is a Plastex Olympic flatwater sprint boat from Fairfield, California.” They join other rare designs most paddlers only ever see in grainy photos, including a Hydra Taurus, Duet C-2, Mongoose and Hollowform from Tom Johnson, several boats from the 1960s by Apple Line, and his first kayak, a wood frame/Naugahyde skin Folbot.
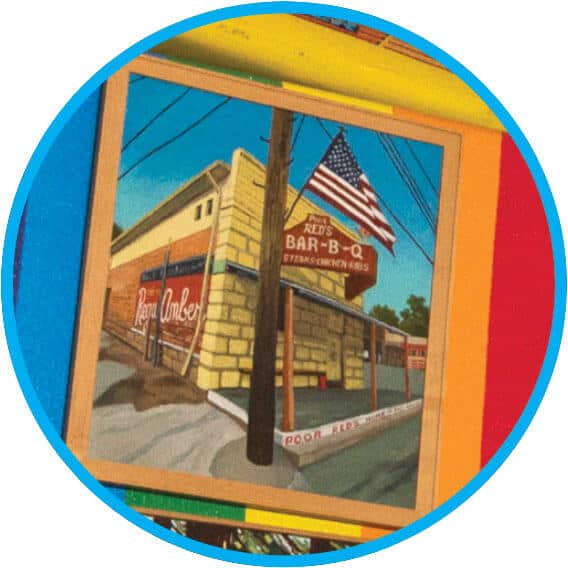 Wall Art
“My cousin painted a picture of Poor Red’s [bar] in El Dorado, California. It’s a great place to party after paddling and get s**tfaced on Gold Cadillacs, a drink made with Galliano. The bottom photo I took myself on the Rogue River in my RPM. My roommate put ‘Home Sweet Home’ on it, which describes me when I’m on the river.”
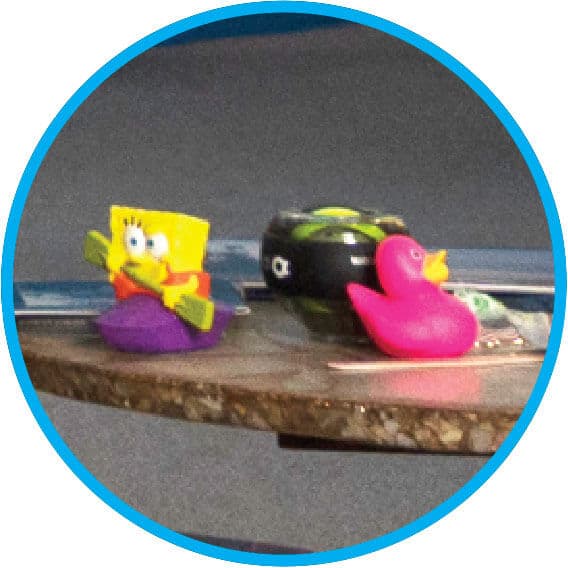 SpongeBob
“Usually, I’d have it on the dash of my van, but there’s no room there; it’s too filled with other things. The pink duck was a river find. I found it in an eddy on the Grand the last time I did it—a super cold November trip during Covid. They were doing some river studies, so it dropped to 4,000 cfs and rose to 20,000—some of the highest water there since 1984, which I was also there for.”
 Life Jacket
“That’s a Donald Duck life jacket. His face and body are a bouncing ball. We brought him to Poor Red’s once and sat him on a barstool with us and bought him drinks. I had a business selling paddling gear from 1981 to 1994, and it was one I used for taking people with disabilities out on the water. I still do that, teaching and putting about 60 to 80 people with disabilities on the water every year.”
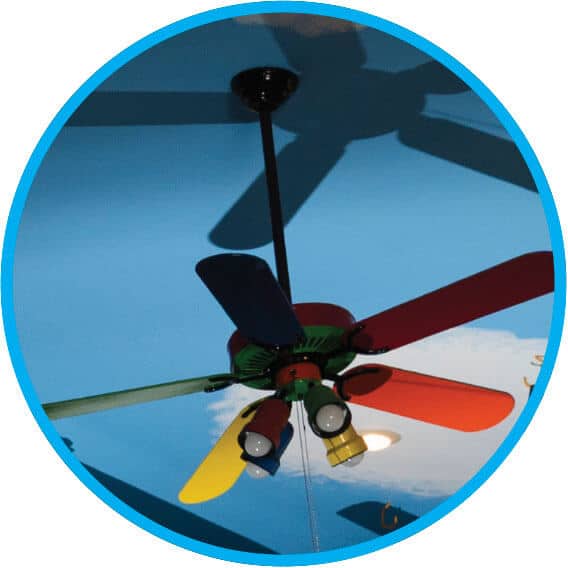 Ceiling
“I moved into the house in January of 2000 and decorated it to think I was outside. I painted the walls and ceiling with clouds and rainbows, and put in light brown carpet and green linoleum. I also added skylights and 12-inch glass blocks.” You can see Albright’s house for yourself as he gives informal tours twice per month (just get in touch and ask). He’ll be ogling those sky lights aplenty this spring after getting shoulder surgery in February, admitting, “I have to spend three agonizing months off the water.”
 Deep Creek Poster
“I helped run the Slalom World Cup on Deep Creek in McHenry, Maryland, in 2014. I showed up and said, ‘Tell me what you need me to do.’ I did everything—timing, cleaning, hanging gates, you name it. It was a total reunion of boaters.” Albright stayed in his truck—a 2005 Ford Explorer with a license plate that reads “Canoer”—which he’ll drive to Alaska this summer for a two-month paddling trip.
 Wildwater Sweatshirt
“During Covid, I was supposed to be at the World Championships at NOC, competing in Wildwater C-2, but it was cancelled.” Albright was on the USA Wildwater Team 12 times, competing in 12 events in the U.S. and in Europe, finishing as high as fourth. He also raced whitewater K-1 in Europe and attended four team trials in Slalom C-2, placing one spot off the team four times. “But it’s all a little fuzzy now,” he says.
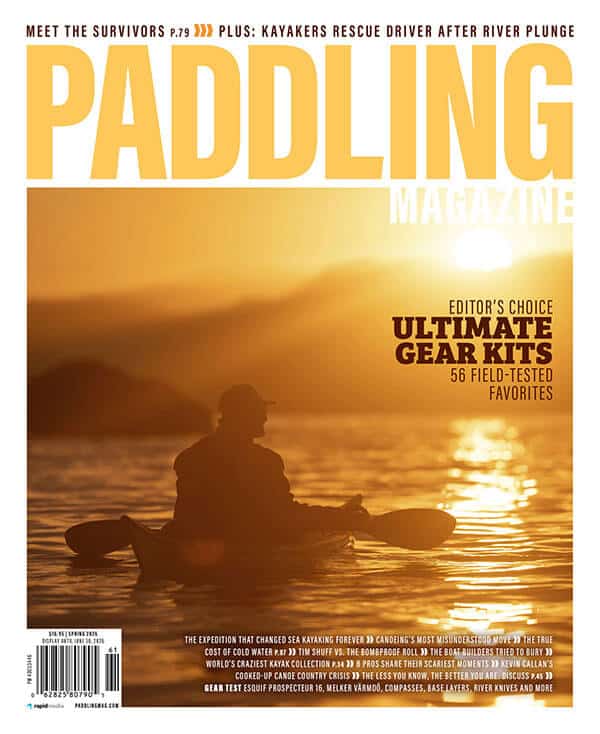 This article was published in Issue 75 of Paddling Magazine.
 “Folks give me free boats all the time,” says Charles Albright. “I’ve loaned out about 50 that I’d love to get back someday.” | Feature photo: Scott Sady
Whitewater Kayaking Hits the Big Screen in Apex
If you’ve been browsing Netflix recently, you might have noticed an uncommon sight: a film featuring whitewater kayaking trending number one among English films, with 40 million views just two weeks after its release.
Apex is a thriller starring Charlize Theron and Taron Egerton, and involves the former being chased by the latter through the Australian wilderness as part of a deadly game Egerton contrives. Sasha, played by Theron, is an extreme sports enthusiast—as she says in the film, she “does a bit of everything,” including rock climbing and whitewater kayaking.
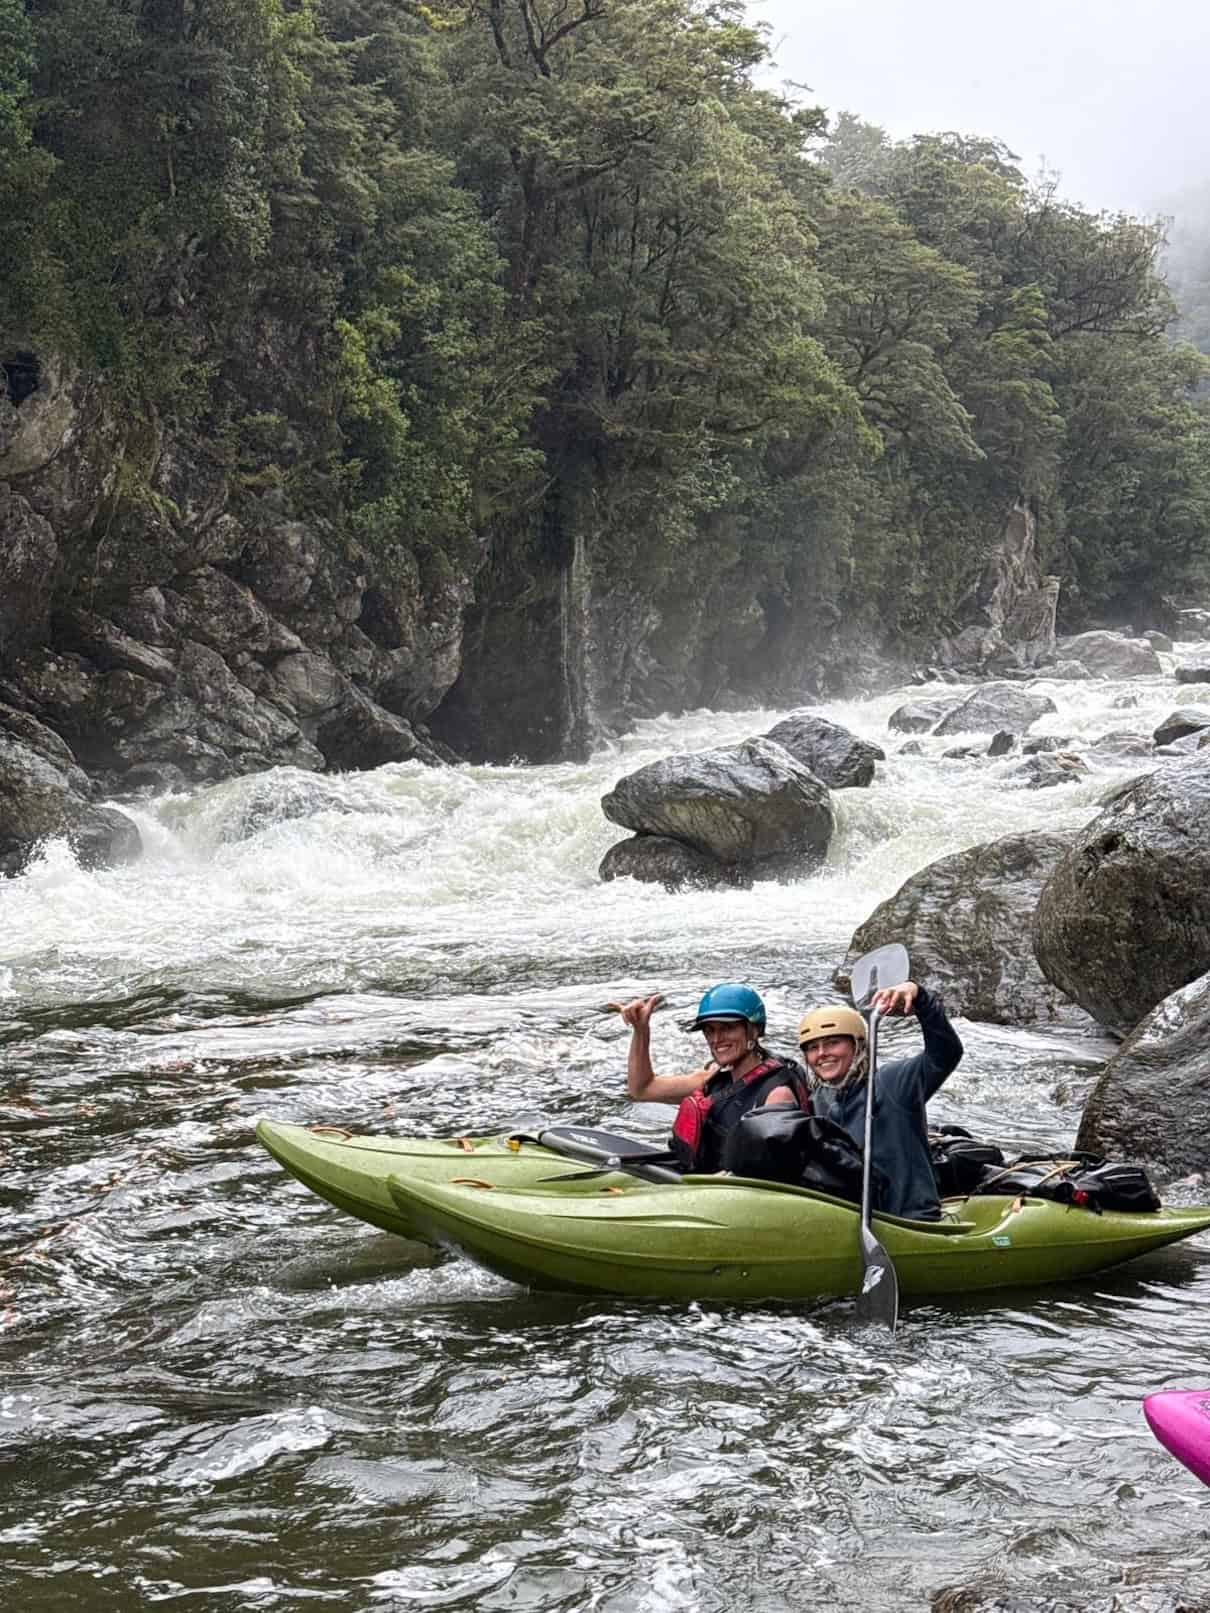
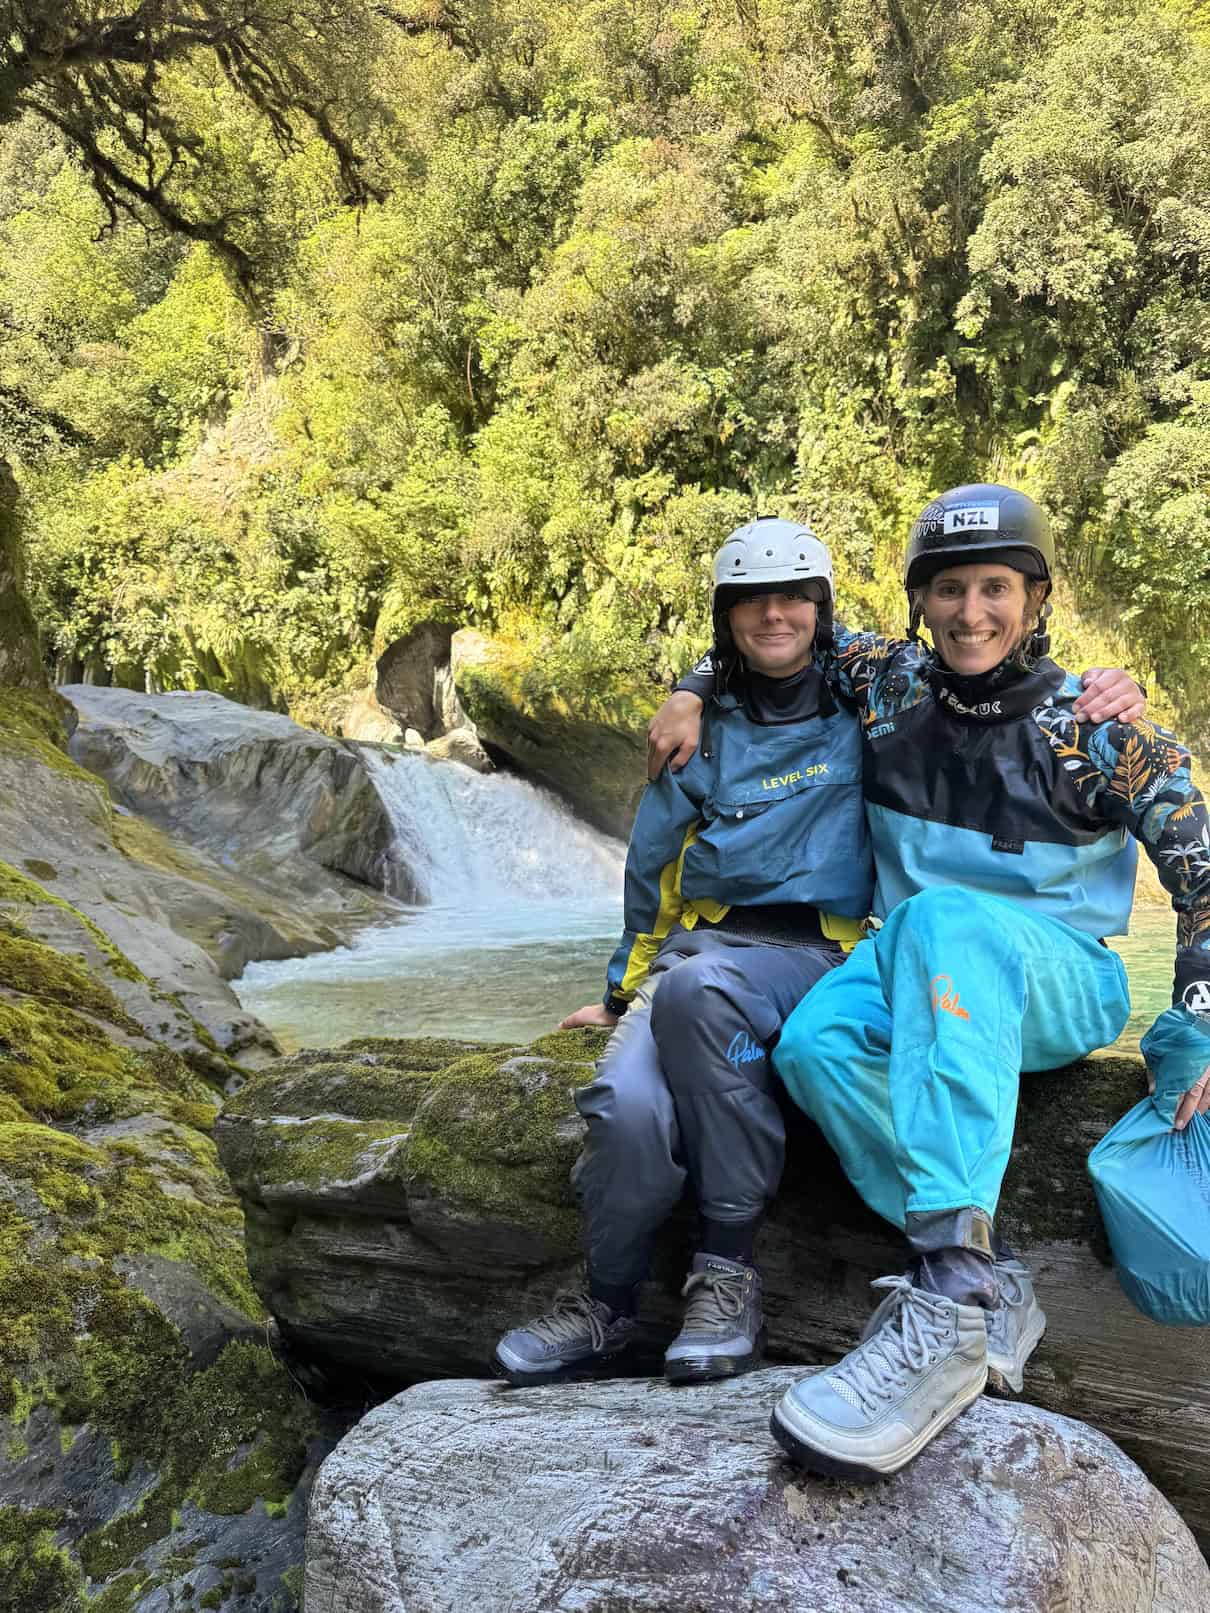
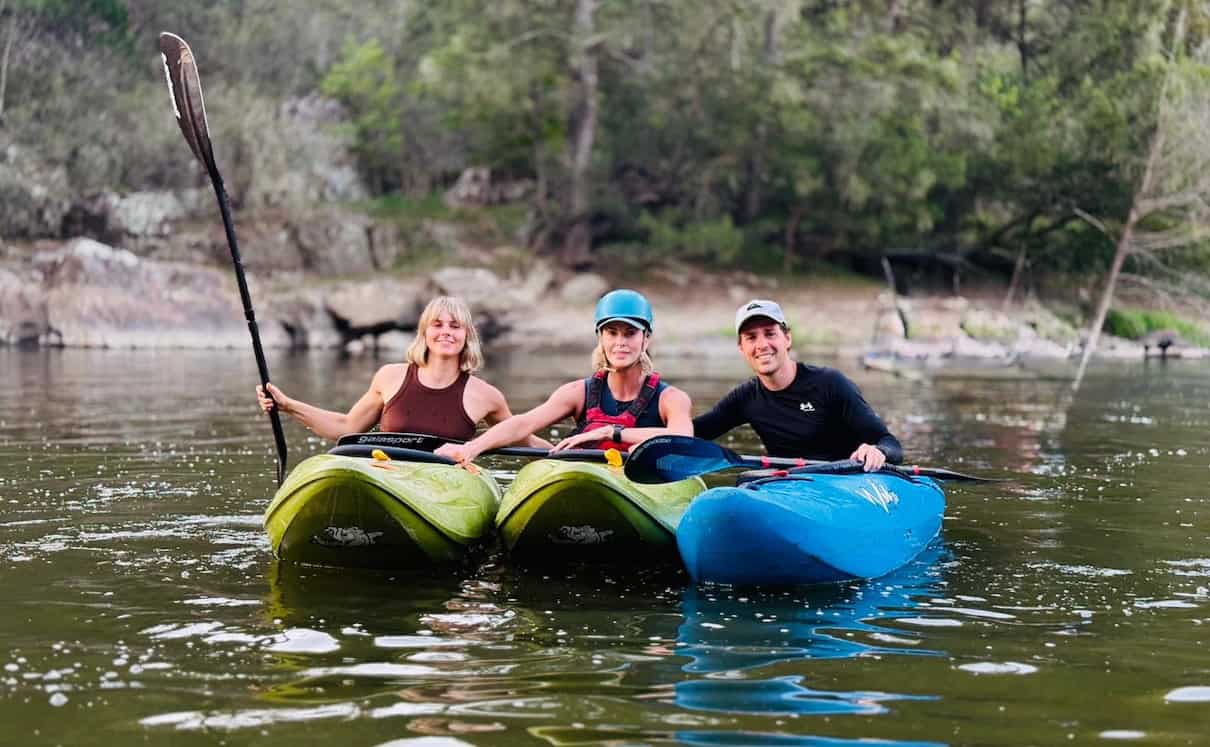
It’s not often whitewater kayaking is featured so heavily in the plot of a mainstream Hollywood film. To make it happen, the film employed two high-level whitewater kayakers to be Theron’s stunt doubles on the river: Luuka Jones-Yaxley and River Mutton.
Both hailing from New Zealand, neither Jones-Yaxley or Mutton had been part of a movie previously. In this capacity, at least—Mutton notes she was an extra in the film Yogi Bear when she was eight years old. Pete Townend—who is managing director of Canoe & Kayak, a New Zealand-based company specializing in paddling gear, tours and instructional courses—has been doing kayak and water safety on movie sets in recent years and was asked by the Apex crew whether he knew of any whitewater kayakers who could double for Theron. A friend of both Jones-Yaxley and Mutton, he reached out in late 2024 to see if they’d be interested.
“I thought it seemed so farfetched and unbelievable,” says Jones-Yaxley, who is a five-time Olympian in canoe slalom and K1 bronze medallist at the ICF Canoe Slalom World Championships. “The next thing I knew, I was being called by some of the stunt coordinators and River and I were having to send in our measurements for costuming. It started to become more real.”
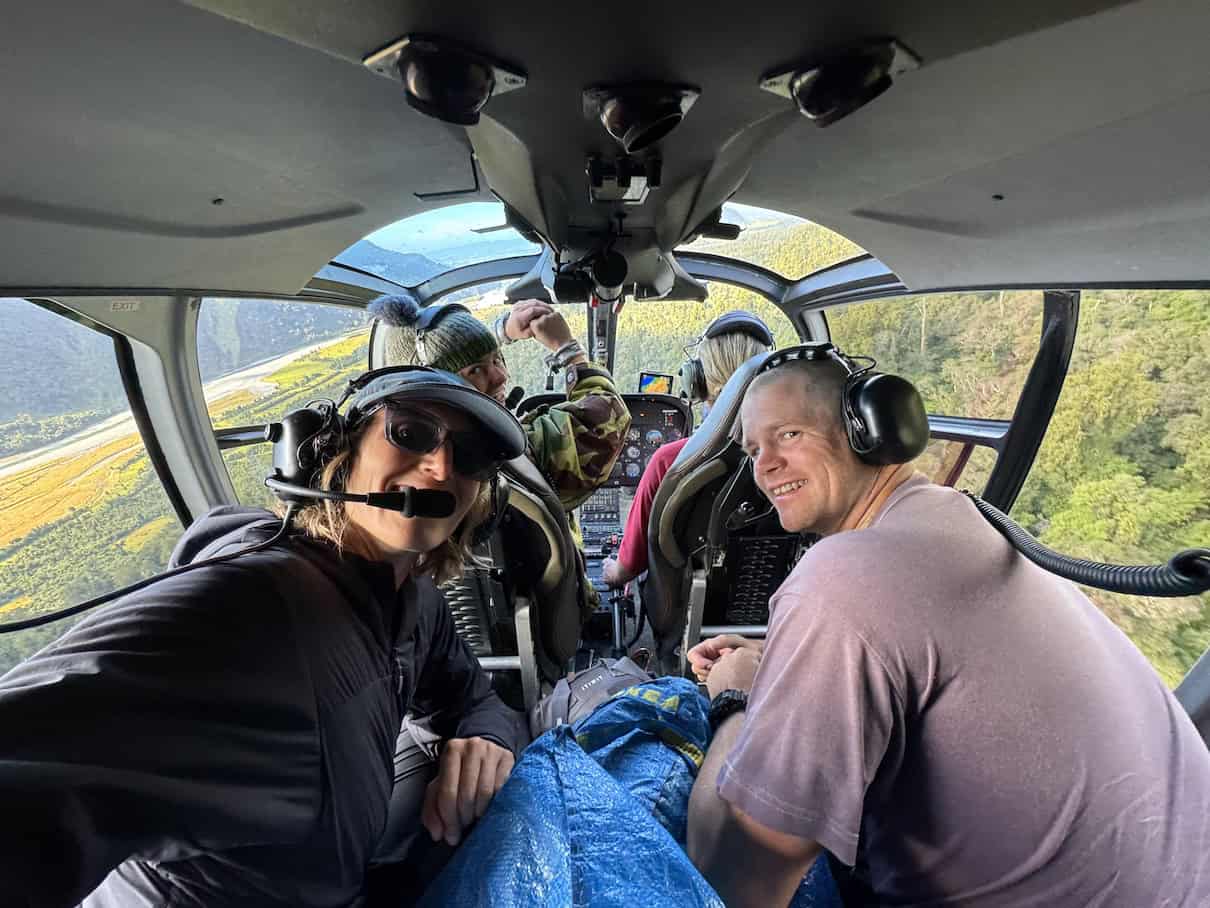
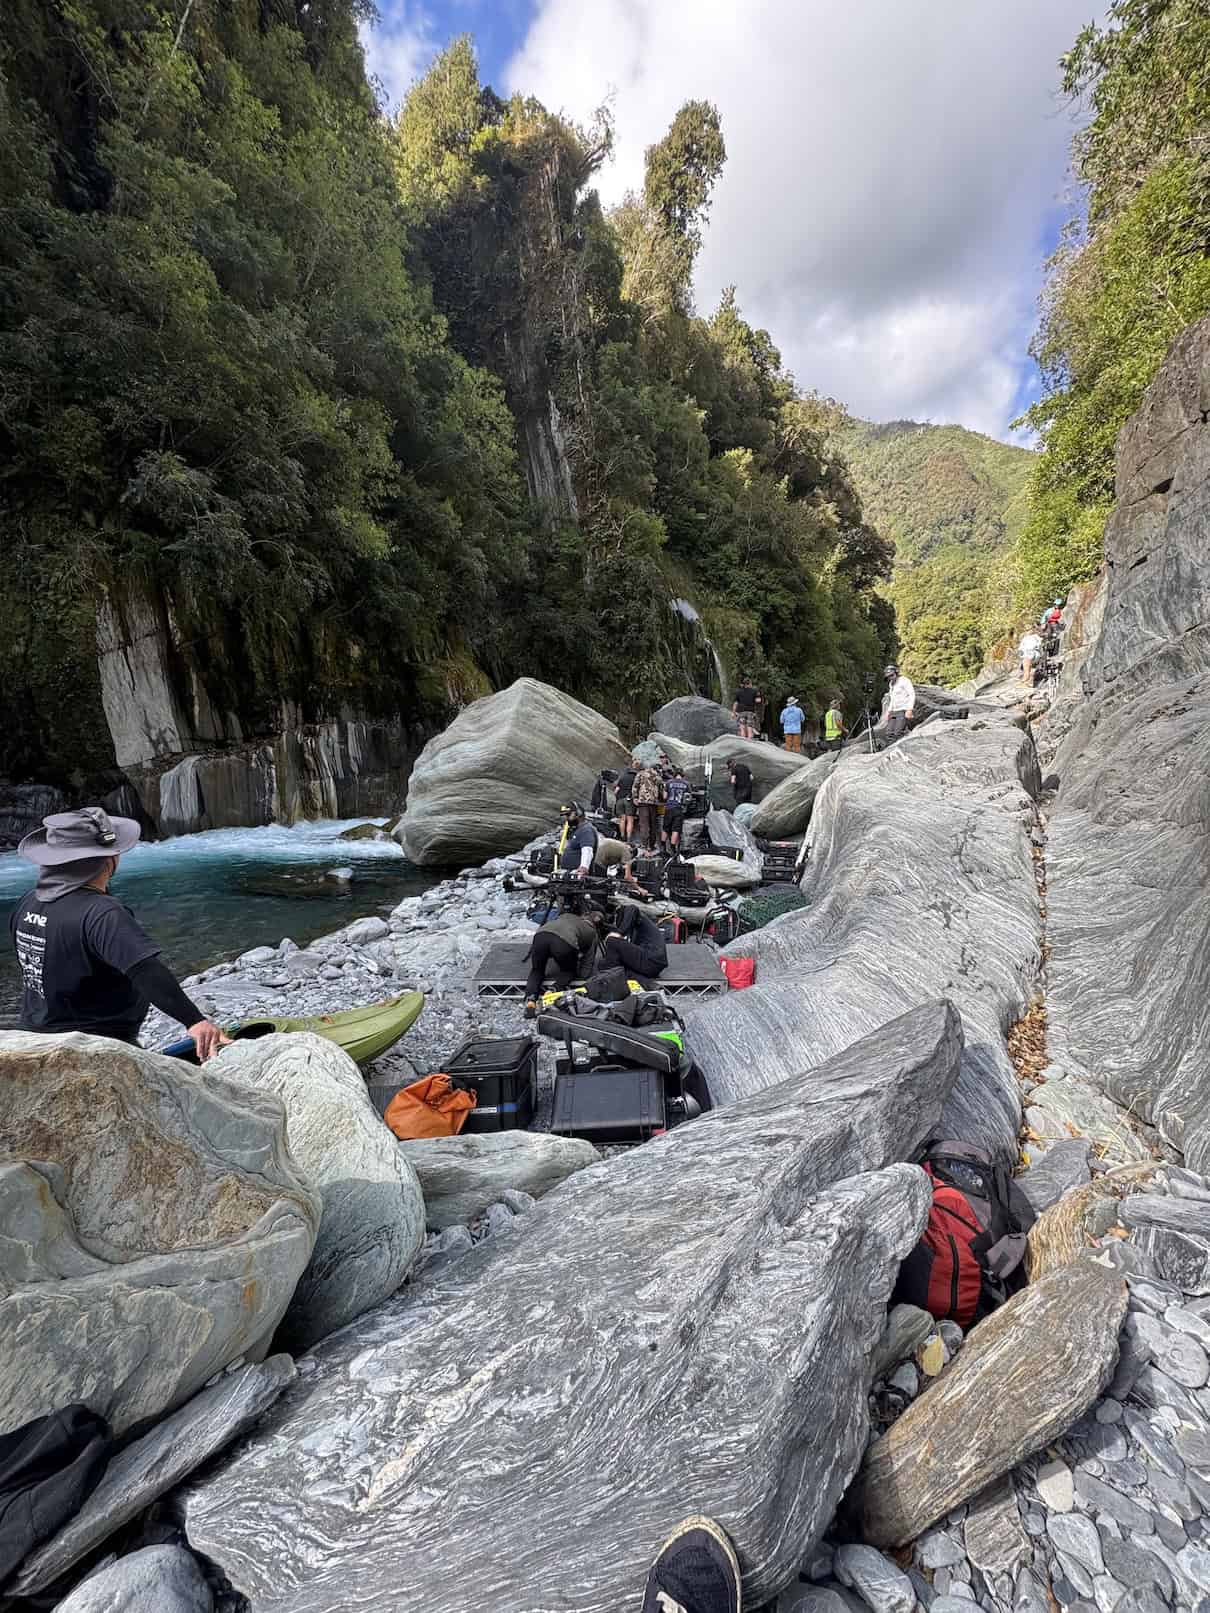
Preparation for filming began in early 2025. The pair were flown to New Zealand’s South Island where they met up with a small film crew. They spent about a week being flown by helicopter into remote rivers, scouting locations where they planned to shoot most of the whitewater kayaking scenes. Then they spent a week flying back to those locations to film.
“We were working together [with the director and stunt coordinator] on what looks cool in a movie context,” continues Jones-Yaxley. “Because when you’re paddling really well on whitewater, you look smooth and you’re dry. But when you’re in a movie, you need to make it look exciting. So it was quite interesting, looking at a river differently and trying to figure out how to make it look as dramatic as possible.”
Mutton, who is an extreme kayak world champion, explains that she was told to hit rocks and miss lines to make the kayaking look more exciting. They were also told to paddle “a little more oddly,” with a less technical forward stroke, so the shots of she and Jones-Yaxley paddling would be easier to knit together with the shots of Theron paddling.
She says it was difficult at first to override her instinct to paddle well.
“It went against what you naturally have trained yourself to do,” says Mutton. “But by the end of filming, I was so practiced at it, that when I went back to my own kayaking I was a little worried I had practiced paddling like that too much. I didn’t have any problems, but it did get in my head a little bit.”
They divided up the stunt work according to costuming. Jones-Yaxley was in the costume with the red life jacket and blue helmet, which meant she did the scenes before Theron was being chased. Mutton was in the costume with the hoodie and jeans, which meant she did the chase scenes.
“It did mean River had to do more swimming in the cold river than I did,” laughs Jones-Yaxley. “I got the Gucci role.”
Mutton says she isn’t sure why she ended up doing the chase scenes, which involved more swimming.
“Maybe I just seemed a little too enthusiastic,” Mutton says jokingly. “Maybe I looked like I was having too much fun swimming.”
Part of Mutton’s costuming was to not wear a PFD or helmet, because in the film Egerton steals Theron’s equipment and provides her only with her kayak, paddle and backpack of supplies to carry through the chase.
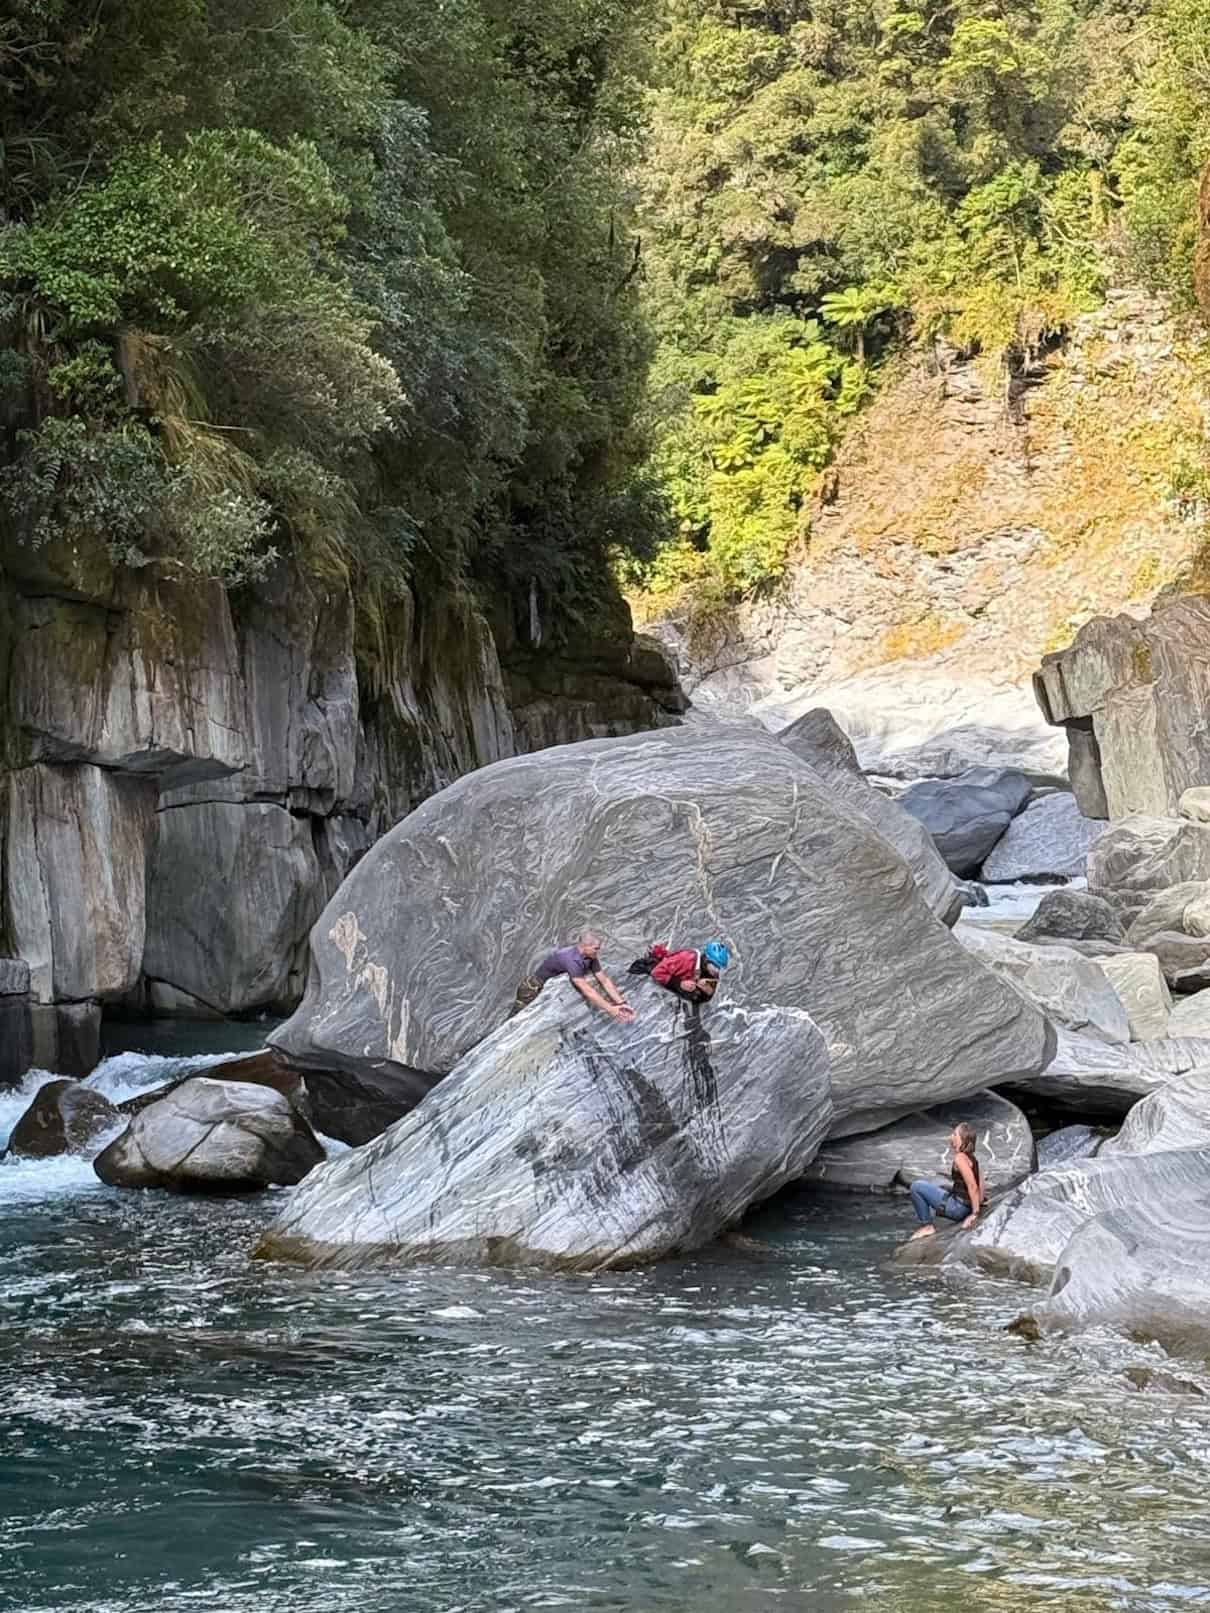
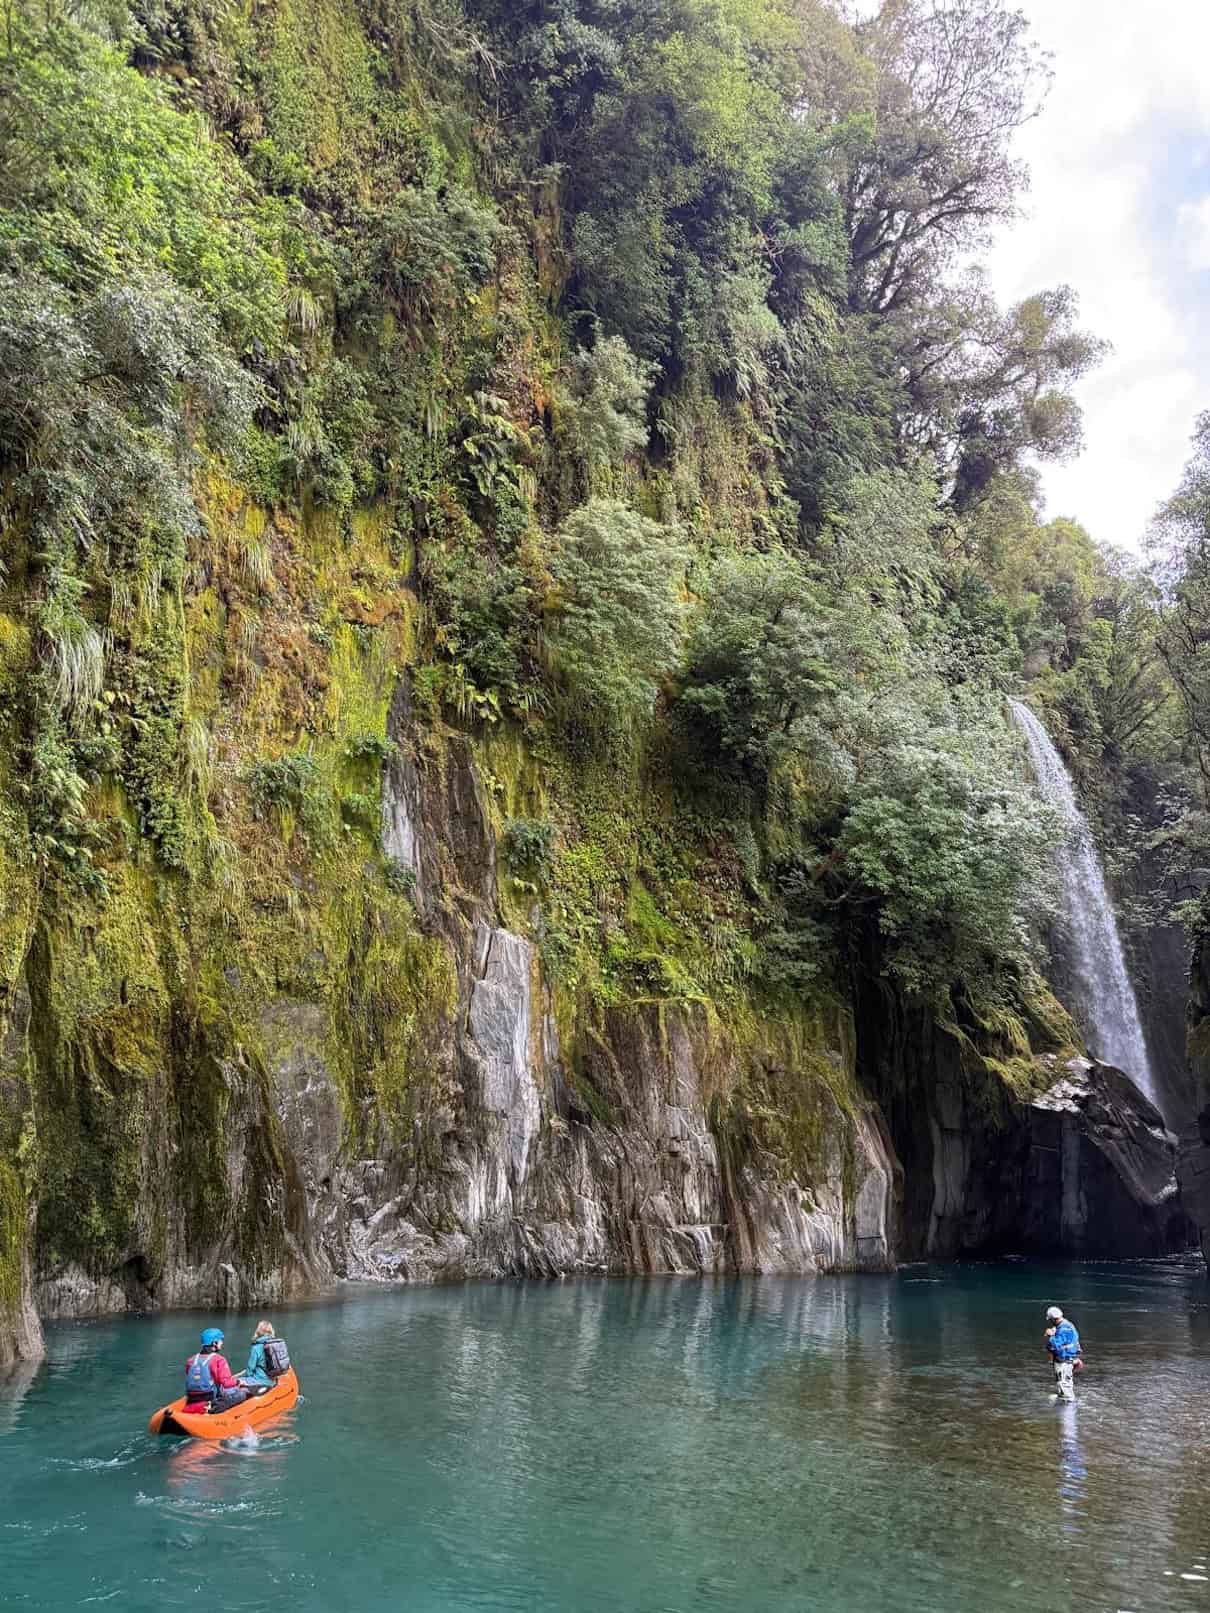
“A lot of the kayaking was reasonably chill,” says Mutton of the rivers and sets they were paddling. “But as soon as you’re taking your helmet and life jacket off, you’re a little sketched out because you’re not really supposed to do that.”
But she says they had a good safety crew and since filming took place late in the summer, they weren’t dealing with “heaps of water”—with one notable exception. They were filming on the Turnbull River when a flash flood occurred and the whole film crew had to be evacuated. Then Jones-Yaxley and Mutton were asked to go out and paddle and be filmed on the drone.
“We kind of looked at each other like, oh that’s quite high now,” says Mutton. “It was actually really fun paddling. It was very good kayaking, solid grade five. But it was probably one of the scariest things I’ve ever done, just kayaking without a PFD.”
Unfortunately, none of the shots from them kayaking on the flooded Turnbull made it into the film.
Despite being cold and potentially hypothermic at times, Mutton and Jones-Yaxley say they were well looked after. Where possible, there was a hot tent set up riverside where they could warm up between takes. They were given handwarmers by the costuming department and were wrapped in warm blankets as soon as they got off the river.
“It was quite nice actually,” continues Mutton. “Every day you wake up, you meet your private chauffeur downstairs and they drive you to the movie set. You can just roll out in your pajamas. And you go there and someone tells you what to wear, they brush your hair, style it. And then you go kayaking.”
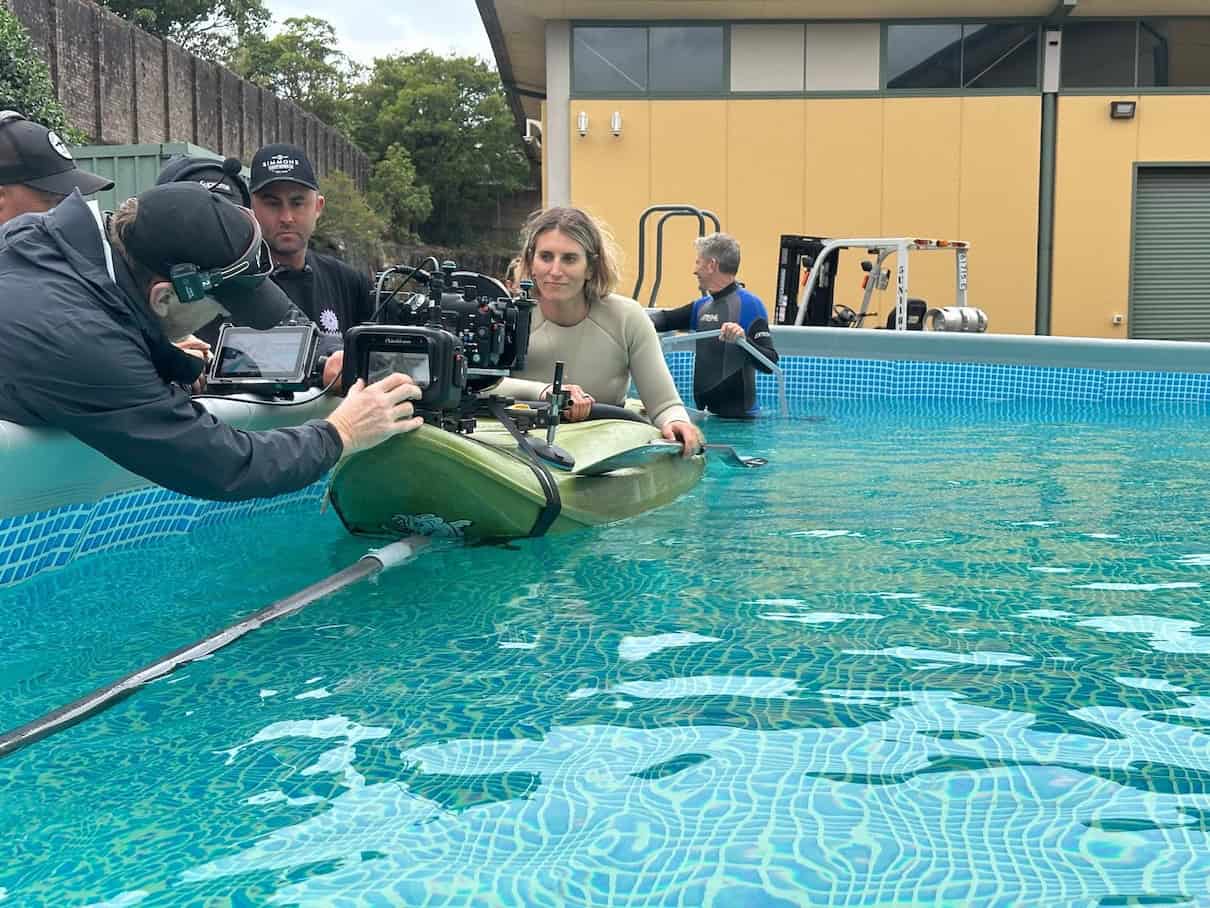
Filming with the actors took place in Australia. Jones-Yaxley flew back and forth four times and Mutton once to shoot paddling scenes there themselves and advise on Theron’s paddling scenes.
They both comment how down to earth and approachable Theron was to work with, and how eager she was to make sure the paddling scenes looked authentic.
“I was super impressed by how quickly she picked up that natural-looking style and she was really good at watching myself or River,” says Jones-Yaxley.
Mutton echoes this, saying she noticed Theron would watch her relaxing in her kayak between shots. “I wouldn’t even be doing anything, I’d just be chatting and hanging out. And then she’d film her next shot and she’d instantly look like she’d been in a kayak her whole life. It was kind of scary. But it was so impressive.”
Jones-Yaxley and Mutton gave some pointers to help Theron learn how to paddle in a straight line, which she initially struggled with.
“She was like, Luuka, what do you love about kayaking?” says Jones-Yaxley, laughing. “I was like, the feeling when you get it right. I think she kind of put that into a dancing context because she has a dancing background. It’s like when you’re in the flow and in the moment, it all feels really good.”
When Apex was released, Jones-Yaxley and Mutton watched the film on a laptop at Mutton’s house.
“Watching the film, it’s actually quite amazing how they put everything together,” comments Mutton. “All these different sets from the South Island and Australia were meshed to look like the same scene. I think paddler-wise the person looked pretty convincingly the same the whole time between me, Luuka and Charlize.”
Jones-Yaxley says the movie was a lot more intense than she was expecting.
In terms of the kayaking, she says, “It was a really authentic film. It was just so cool that they had whitewater kayaking in there that was authentic in terms of going to real rivers and paddling good whitewater.”
Both agree the film is good exposure for the sport.
“I just think it’s awesome,” says Jones-Yaxley, “and I really hope it’s the start of lots of whitewater kayaking in feature films.”
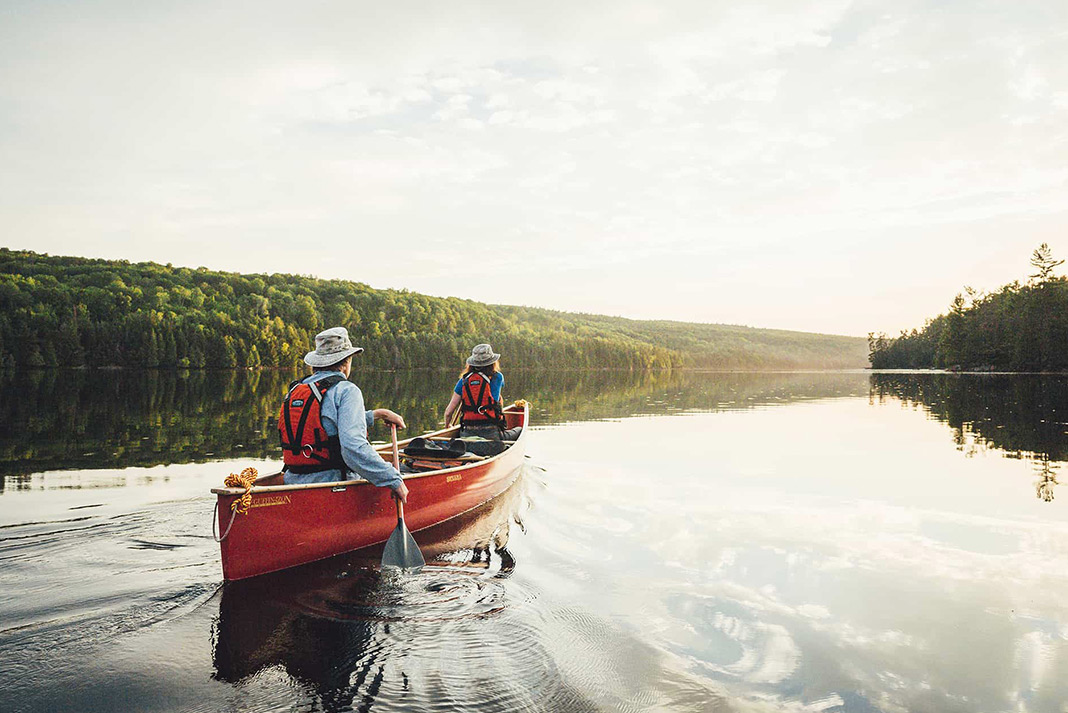
Join Our Upcoming Webinar: How to Get Your Dream Girls’ Paddling Trip Out Of The Group Chat

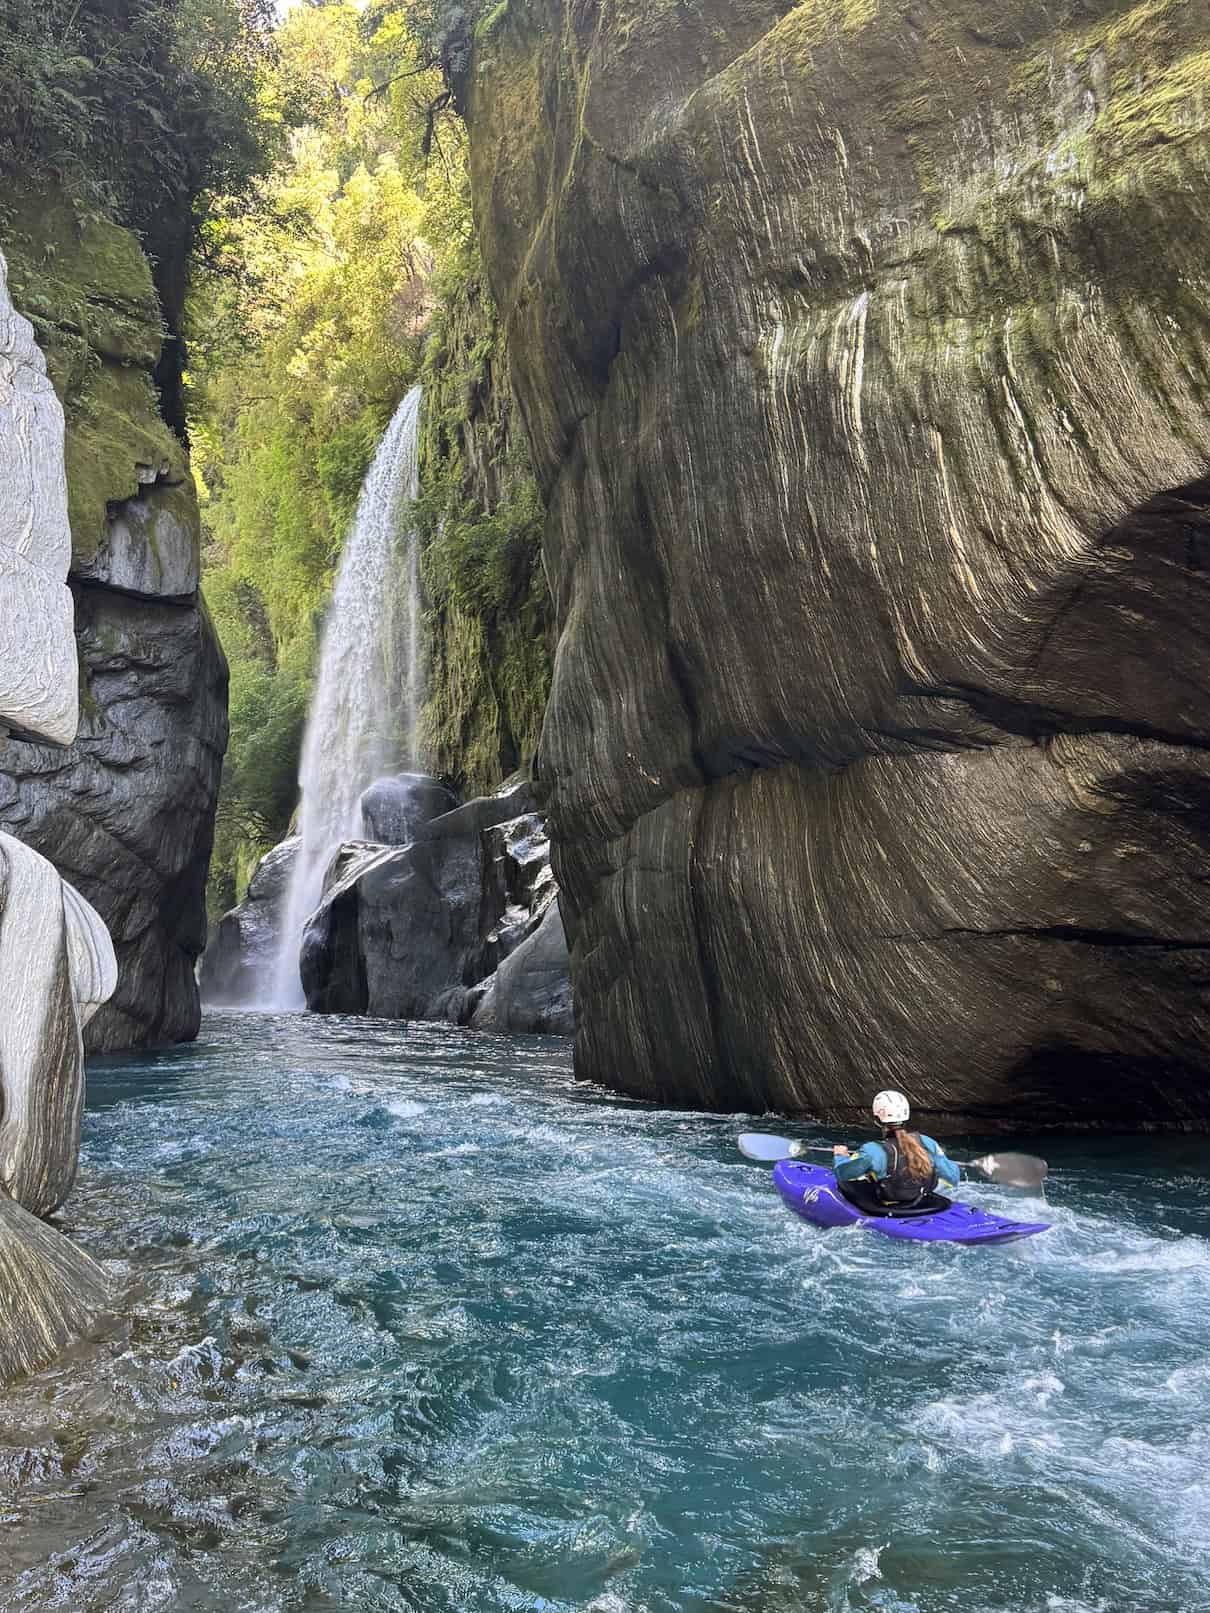
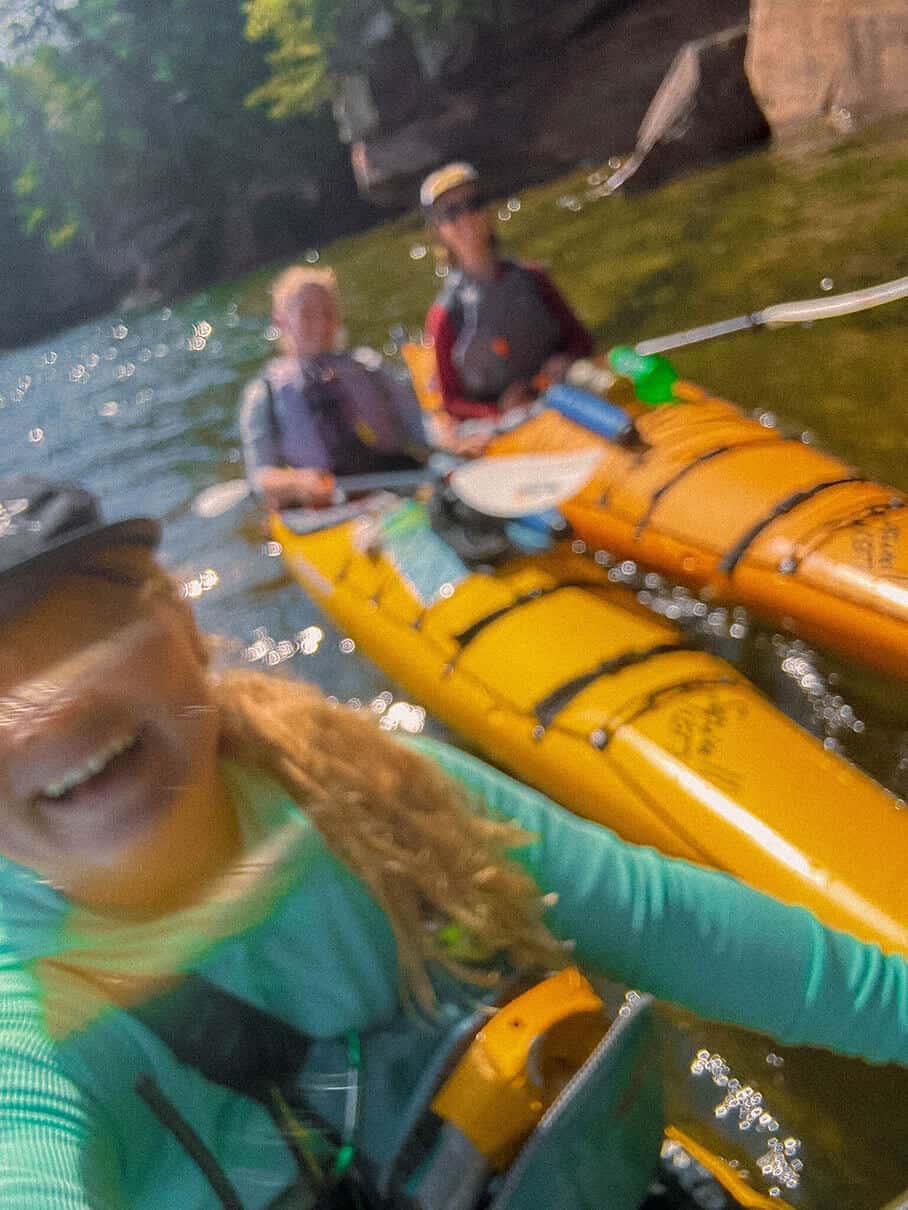
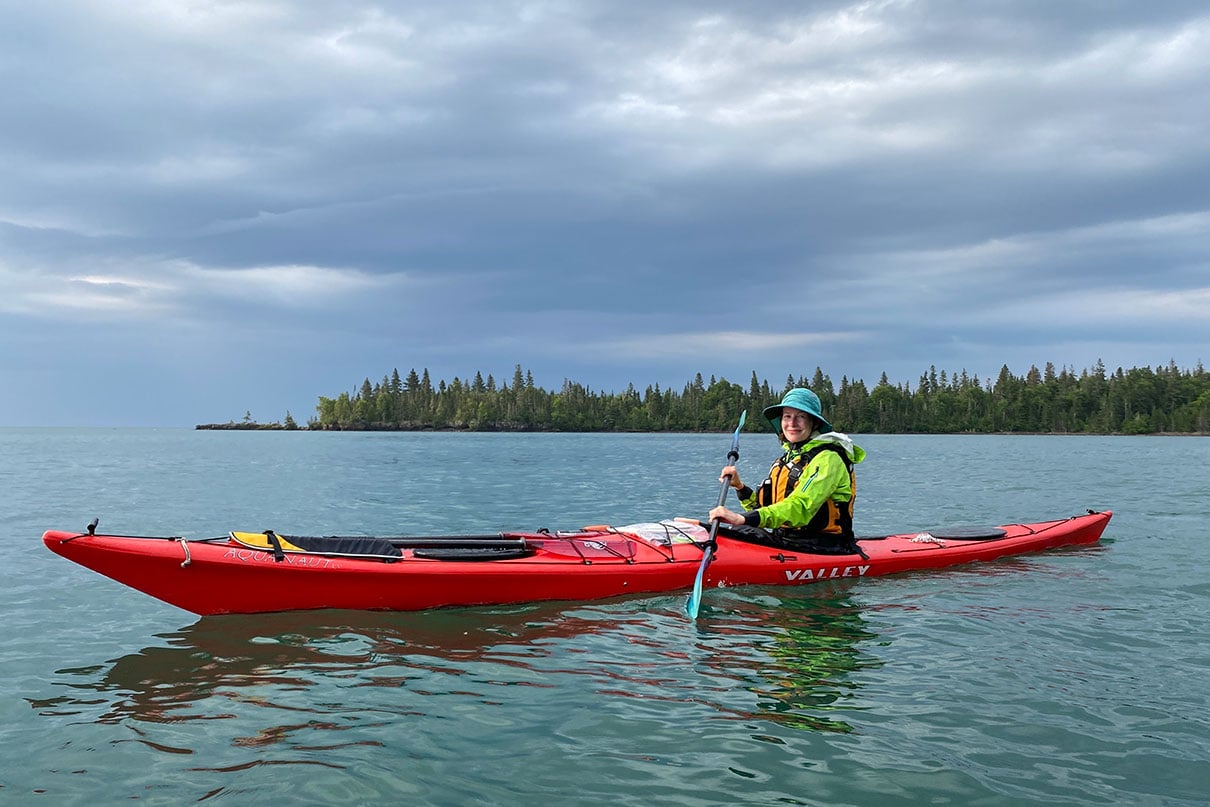
Paddling Magazine is hosting an inspiring and practical webinar with Maddy Marquardt—editor, experienced sea kayaker and guide known for leading women’s trips on Lake Superior and beyond.
This session is designed for women who have spent months (or years) dreaming, chatting, and planning group paddling adventures—but haven’t taken the leap to actually book and go.
Maddy will break down the common barriers that keep trips stuck in the group chat and share actionable strategies to move from idea to execution. Drawing on her extensive guiding experience, she’ll cover how to build momentum, align expectations, make decisions as a group and confidently commit to a plan.
Attendees will leave with practical tools, insider tips and the motivation needed to transform their vision of a girls’ paddling trip into a real, on-the-water experience.
Bring your questions—there will be time for a live Q&A at the end of the session.

Note: A recording of the webinar will be made available to registrants via email after the live session concludes, so sign up even if you can’t attend on May 26!
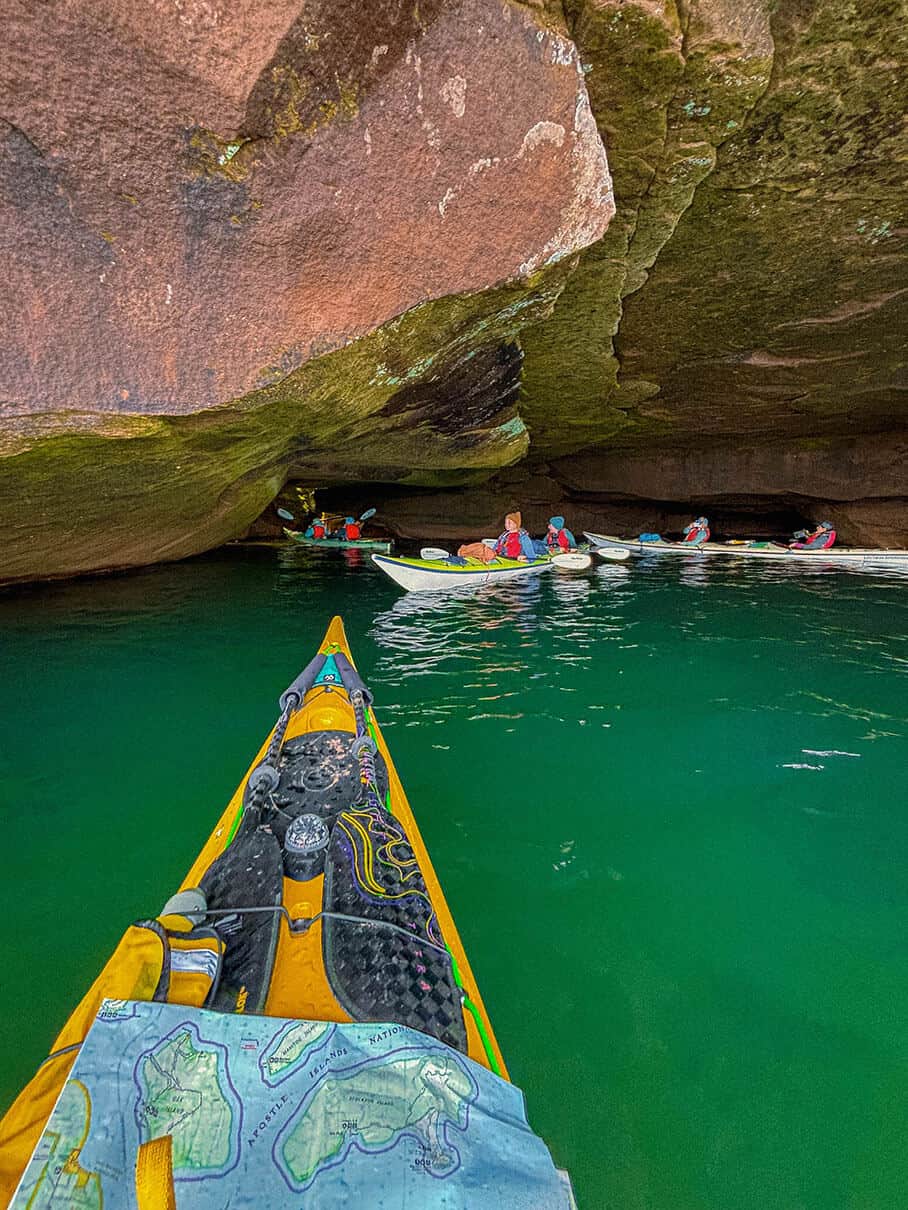
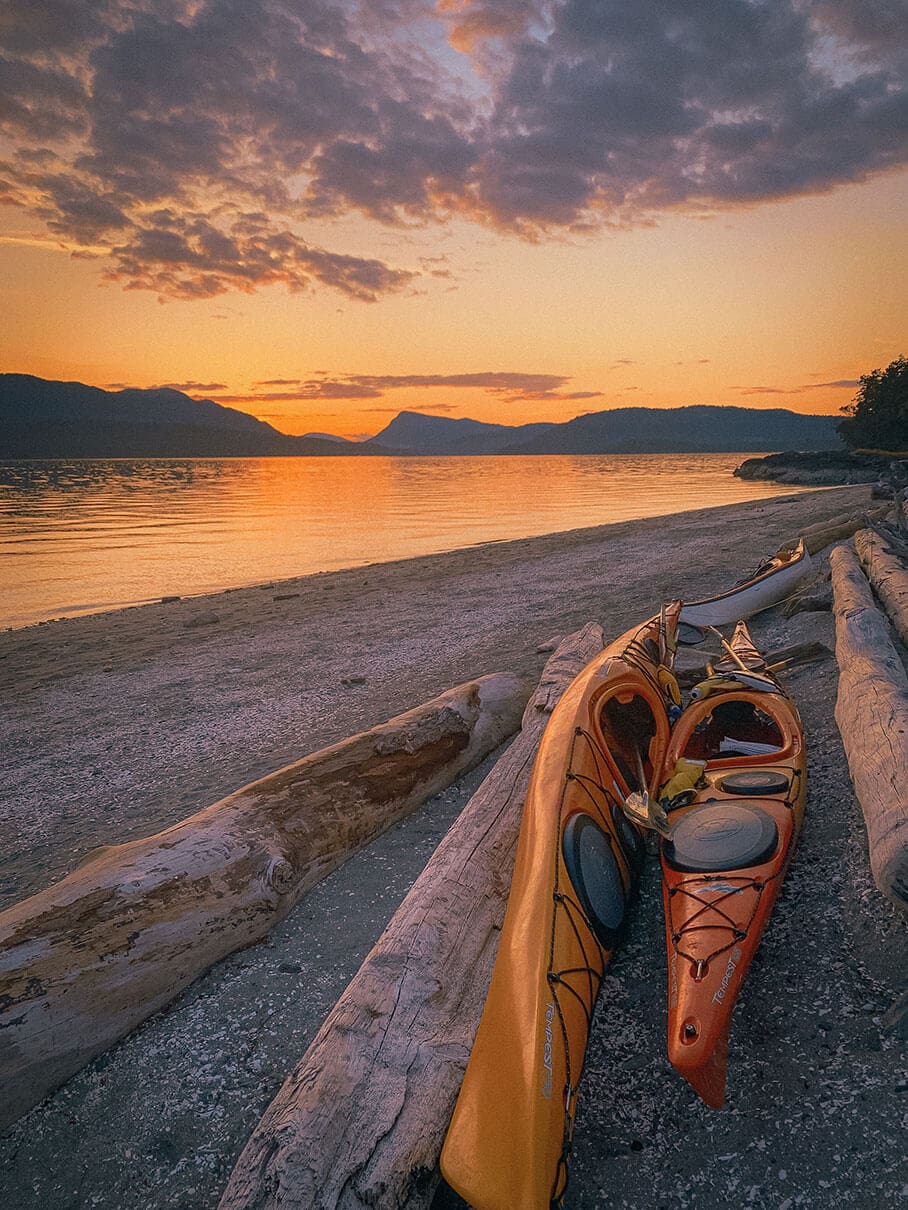
Feature photo: Maddy Marquardt
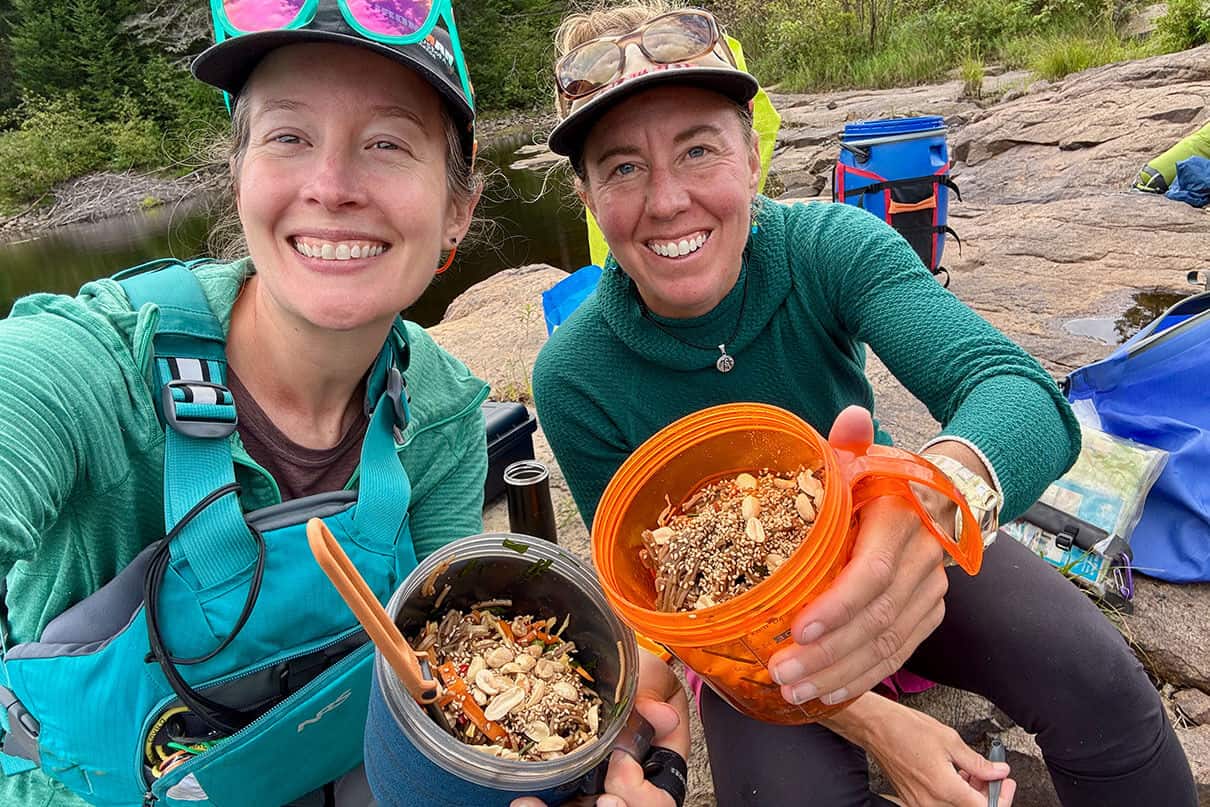
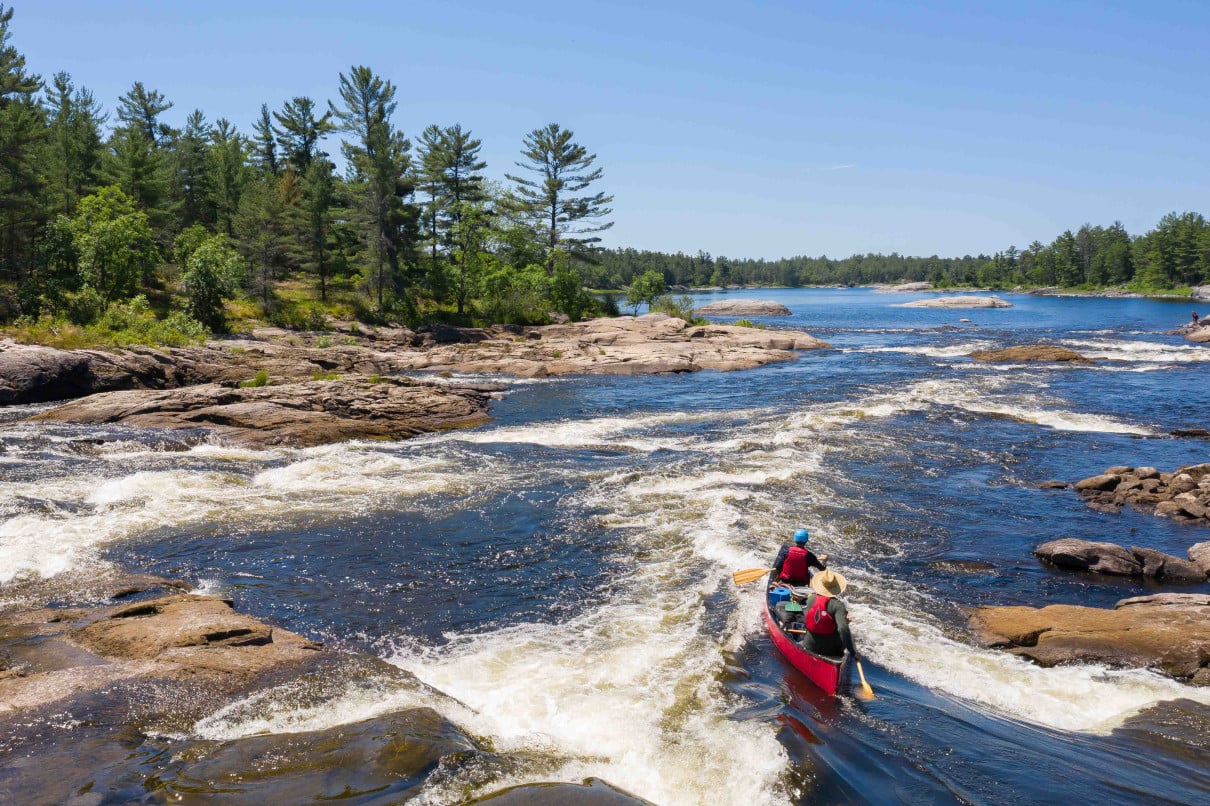
Trail Salads Are The Best Tripping Lunch You Don’t Know About

For many backcountry paddlers, lunch is little more than fast fuel. Midday meals provide vital calories between breakfast and dinner, but they’re rarely the culinary highlight of the day. Another salami-and-cheese wrap, anyone?
Lunch planning can be especially challenging on longer adventures or portage-intensive trips where minimizing weight and bulk is imperative. The quest for a lightweight, satisfying and easy-to-prepare tripping lunch led me to a surprising (and surprisingly tasty) discovery—the trail salad.
Trail salads are the best tripping lunch you don’t know about
If the thought of salad as a hearty paddling meal has you reaching for a pack of Slim Jims, think again. Combining generous portions of your favorite grains or pasta with calorie-dense crowd-pleasers like peanut butter and coconut milk, these trail salads hit well above their weight. Toss in an endlessly customizable selection of dried fruits, dehydrated veggies and seasonings, and you have the makings of gustatory gold.
Because you can use just about any combination of grains, vegetables, fruit, seeds, nuts and flavors, trail salads let you build a deliciously varied lunchtime menu for longer trips. Even better, they require near-zero prep in the field, so they’re perfect when you’re hungry, pressed for time or hunkering down in bad weather.
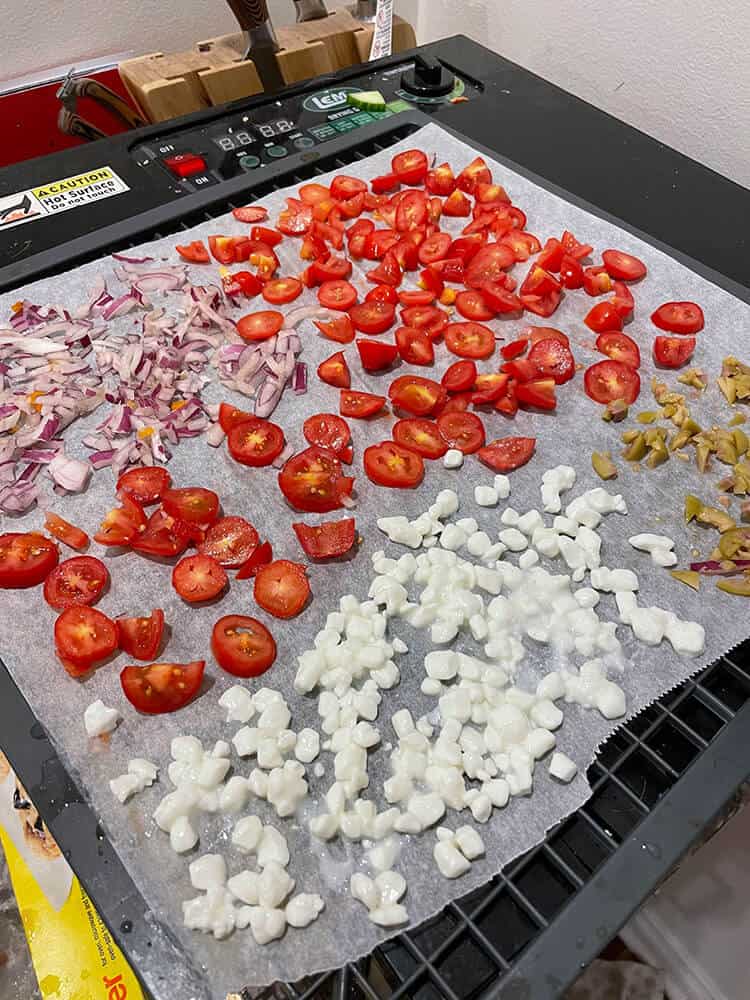
The secret to mouthwatering, fresh salad when you are days, or even weeks, away from your crisper is dehydration. A compact and inexpensive home dehydrator is the most convenient option for avid campers, but you can also dehydrate in your oven at low heat. Dehydration removes all the moisture from foods, drastically reducing their size and weight, and allowing them to travel shelf-stable in a kayak hatch or canoe pack for weeks without spoiling.
Before your trip
Cook the rice, orzo, farro, quinoa, bulgur or other grains as directed, then spread them thinly on trays or baking sheets to dehydrate. Veggies dehydrate best when finely diced or thinly sliced. Cook or blanch starchy or hard vegetables, such as potatoes, beans and carrots, before dehydrating. Use frozen or canned veggies for hassle-free dehydration straight out of the freezer or can.
Chickpeas, broccoli, peppers, onion, cabbage, kale, peas, corn, carrots, bamboo shoots, sweet potatoes, beans, tomatoes, zucchini, celery and beets are all tasty, nutritious additions to dehydrated salads. Try store-bought dried berries, cherries, apricots, coconut, dates, raisins, apples, mangoes and more in your recipe for a deliciously fruity twist.

Combine dry ingredients in portion-sized Ziploc bags for foolproof rehydration on trip. Cover with filtered water (cold is fine) at breakfast or the night before to enjoy ready-to-eat salad at lunch. I like my GSI Fairshare mug for easy measuring and rehydrate-and-eat convenience, but any leakproof three- to four-cup container will work.
From Asian-inspired noodle bowls to Mediterranean and tropical flavors, midday trail salad is my go-to backcountry lunch. On your next paddling trip with friends or family, serve something unexpected and watch the carnivores convert.
Szechuan Peanut Salad Recipe
Ingredients
- 1 cup soy sauce
- 1 tsp. Szechuan chili oil
- 2 tsp. Dijon mustard
- 1 lbs somen noodles
- 6 green onions, thinly sliced
- 1 red pepper, julienned
- 1 green pepper, julienned
- 2 carrots, thinly sliced and blanched
- 1 can (8 oz) sliced bamboo shoots
- 1 can (15 oz) mini corn, thinly sliced
- 1 cup small frozen peas
- 1 tbsp. dried cilantro
- 2 tbsp. toasted sesame seeds
- 1 cup roasted peanuts
- Natural peanut butter, to taste (optional)
Prepare at home
- Whisk together soy sauce, chili oil and mustard in a large bowl.
- Cook the Japanese noodles in boiling water until al dente. Drain and toss cooked noodles in the soy sauce mix, coating thoroughly.
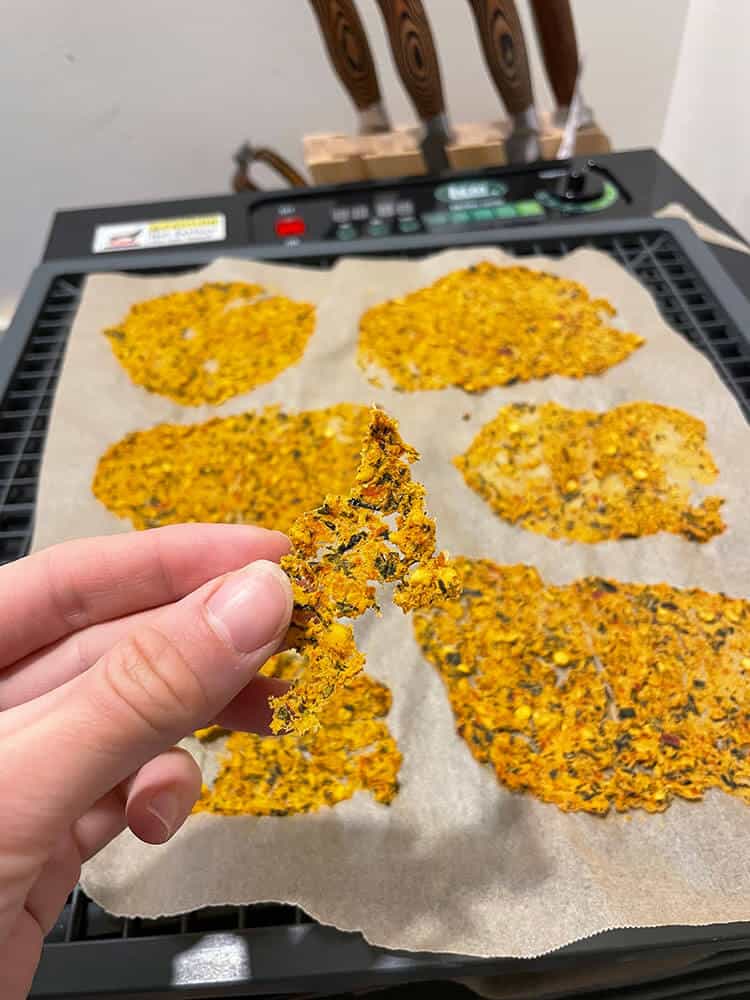
- Spread a thin layer of noodles on dehydrator trays or baking sheets. Dehydrate until noodles are dry and snap easily.
- Dehydrate the peppers, carrot, bamboo shoots, corn and peas. Since different vegetables will dry at different rates (125°F for about six hours is a good starting point), I recommend dehydrating on separate trays.
- Break dry noodles into shorter lengths and combine with dehydrated veggies, cilantro and seeds. Divide the mixture into six equal portions.
On trip
- To rehydrate, add ¾ cup of water to each serving the night before. At lunchtime, garnish with peanuts. For an extra peanut punch, stir a generous spoonful of peanut butter into each serving.
This recipe makes six servings.
Eat fresh on Day 30. | Feature photo: Kaydi Pyette
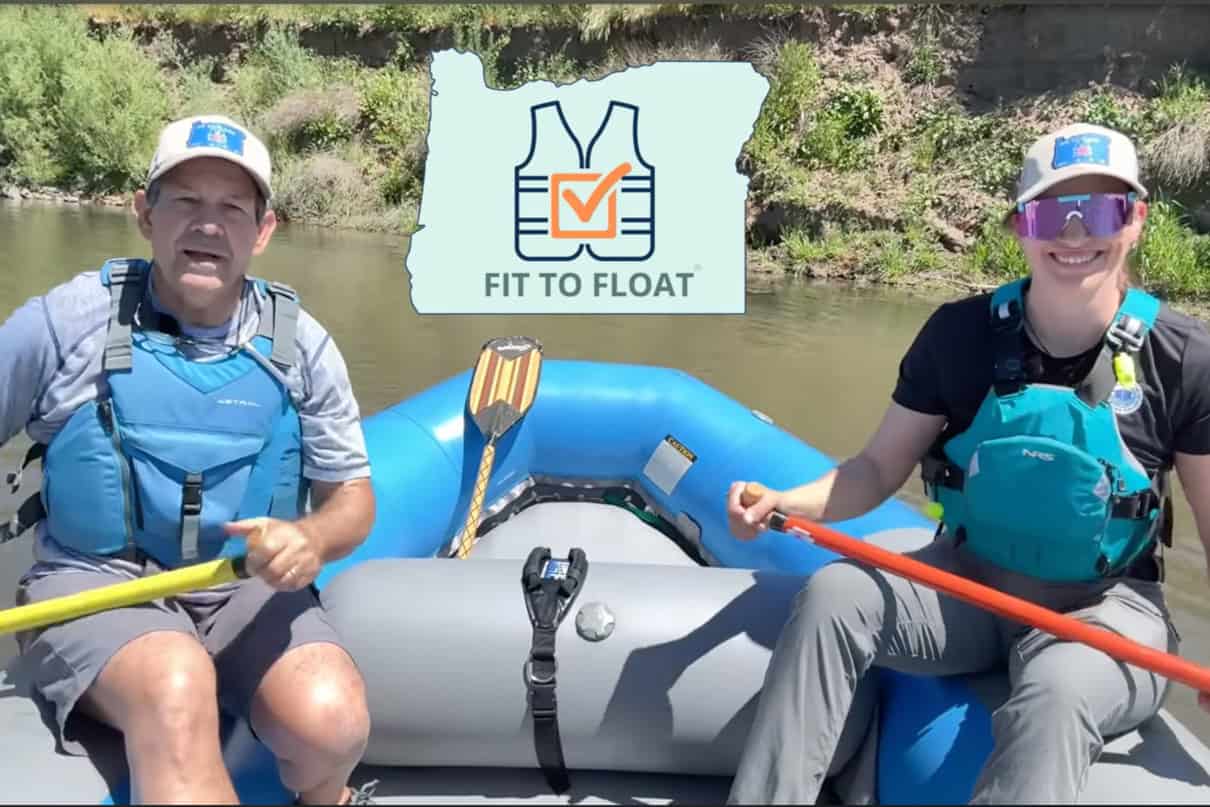
New Oregon Program To Save Lives Hinges On One Simple Concept

A new program is bringing an often overlooked safety concept to the forefront of Oregon lakes and rivers. On May 15, 2026, the Fit to Float life jacket fitting event will take place at multiple paddlesports retailers and outfitters from Portland to Medford. Part of National Safe Boating Week, the event is focused on educating new paddlers on proper life jacket fit and the importance of wearing a properly fitted personal floatation device (PFD) and will run from three to six in the afternoon.
Oregon paddlesports at the helm of new Fit to Float safety initiative
The Fit to Float program began with a discussion between the Oregon State Marine Board and Zac Kauffman from Sawyer Paddles & Oars about a push for broader life jacket education, a conversation that took place on the Sawyer Paddles & Oars on-water podcast. When Kauffman later met with American Canoe Association (ACA) representatives, the idea materialized into the dream of a statewide life jacket fitting day.
Together with support of the Oregon State Marine Board, the ACA and the US Coast Guard Auxiliary, Sawyer Paddles & Oars has created a replicable model of a statewide Fit to Float life jacket fitting and awareness day. Any prospective paddler or family of paddlers can show up at a participating location, try on a variety of life jackets and learn about proper fit and the importance of life jackets when paddling. The event is for all, but particularly created with families in mind to help parents find a life jacket that their children can wear both comfortably and safely.
“The whole concept is if the kids have a life jacket that fits and fits well, they’ll want to wear it,” shared Kauffman.
Fitting life jackets for kids can be an extra challenge for parents as children are constantly growing. It might seem economical for parents to size up, but in a life jacket this comes with high risk and high stakes as a life jacket that doesn’t fit properly can slide off a child’s body.
In Oregon, it’s required by law that children 12 and under wear a life jacket on all underway boats including paddle craft. Kauffman explained that culturally, kids stop wearing a life jacket after that age as a badge of honor. Part of the goal of the program is to meet some of these kids and instill a more positive association with life jackets so they continue to wear them beyond what is required by law.
A well-fitted life jacket serves as the first step towards becoming an avid paddler
While for many avid paddlers life jacket and PFD use is standard, many newer or recreational paddlers may elect not to use them. According to the ACA, 88% percent of fatal canoeing accidents, 60% of kayak fatalities, and 93% of SUP fatalities involve people who weren’t wearing a lifejacket.
“I would say getting a life jacket on and getting a life jacket that fits is the first step as an avid paddler and river enthusiast,” said Kauffman. “If you have a PFD that fits, it’s more likely to stay on you. It should feel like it’s part of your body.”
For padders who have not yet tested their life jacket or been professionally fitted, Kauffman had two key recommendations.
“On a nice hot day, just put your life jacket on and roll out of your boat, float around, see how it floats you,” said Kauffman.
Using a life jacket in the water will give a paddler a solid understanding of how the life jacket will function in an actual capsize scenario and a gauge of how tight a life jacket should be fastened to be effective in the water.
Kauffman also recommended paddlers visit an in-person store that sells life jackets, whether that store is a specialty retailer able to give personalized advice or a big box store. From here, paddlers can try on multiple life jackets, adjust the fit and ask for help if needed.
“If you’re curious, if there’s an outfitter in your area, go on a river trip,” added Kauffman. “That professional guide might be 19, but I guarantee you they don’t want you coming out of your life jacket.”
For seasoned paddlers, Kauffman had some advice as well.
“Help someone new get that life jacket fitting and get them on the water so that they can find the rivers, lakes and oceans like the rest of us,” shared Kauffman. “The rivers are magical places and a lot of us have known it all our lives.”
What’s In Editor Maddy Marquardt’s Sea Kayak Day Trip Guiding Kit

When you’re out on the water with beginner paddlers every day all summer, you’re likely to run into challenging conditions and unusual scenarios. While in calm waters it might be easy to dig for your emergency gear, the conditions you’re most likely to need your backup gear in are the same conditions that might make that gear hard to reach. Here are the essentials I keep at the top of my day hatch and on me in my day trip guiding kit.
What’s in Editor Maddy Marquardt’s sea kayak day trip guiding kit
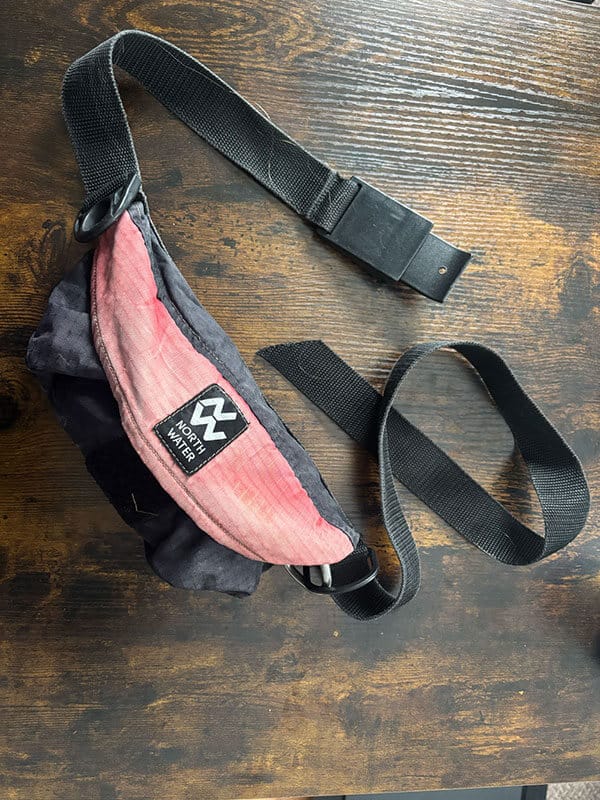
North Water Micro Tow Line
MSRP: $130 CAD
Marketed as an entry-level tow belt, the North Water Micro Tow Line packs more punch than meets the eye. Ideal for conditions I typically encounter while commercial guiding, the tow line comes with both a 17-foot and 50-foot line and is easily customizable by adding a shock absorber or floats to the ends.
Buy from:
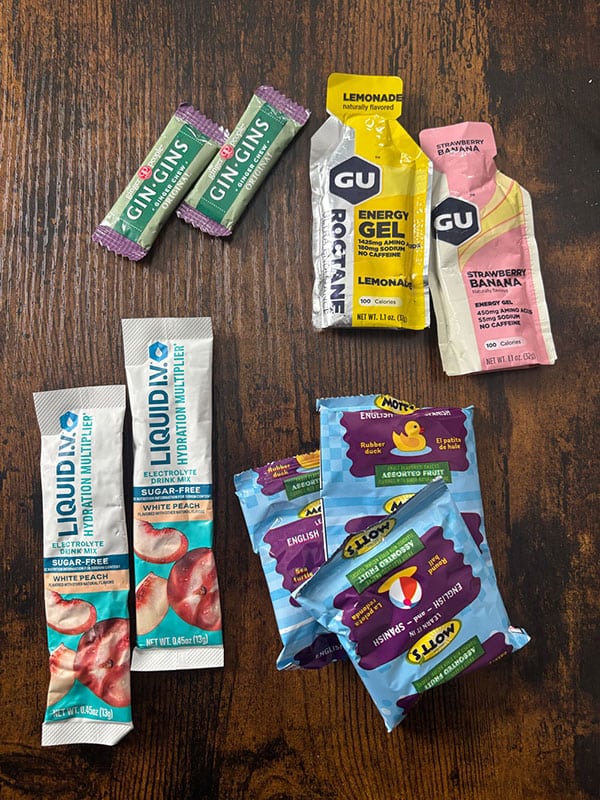
Quick-Fix Snacks & Mental Boosts
MSRP: $21+
Whether hungry, dehydrated or seasick, it pays to carry a few ginger chews, small snacks and Liquid IV, even if just to give new paddlers a mental boost to help them push through challenging conditions.
Buy Liquid IV from:
DICK’S SPORTING GOODS AMAZON LIQUID IV
Buy Roctane Energy Gel from:
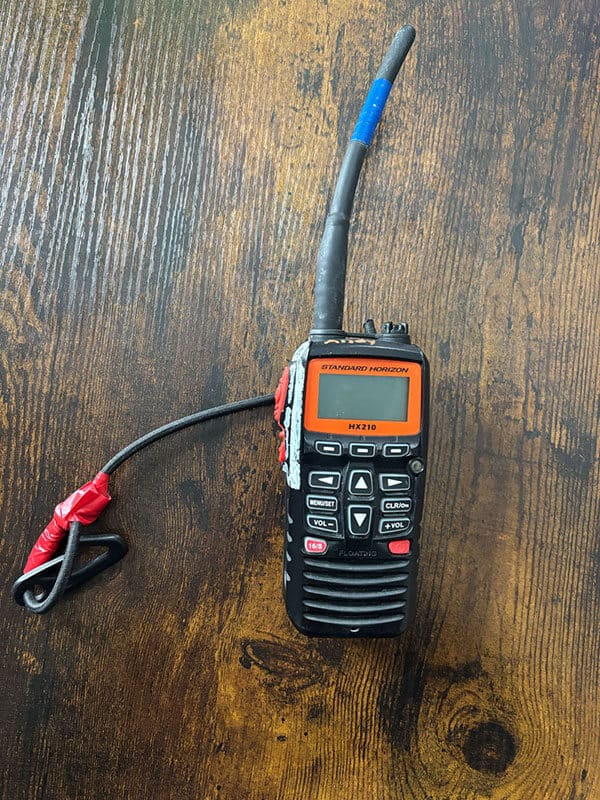
VHF Radio With Tether
MSRP: $159
In addition to flares, a signaling mirror and other essential safety gear, a VHF radio, like Standard Horizon’s HX210, is one of the best tools to carry on the water, but it doesn’t do anyone much good buried in a hatch. Tether your VHF to your person with a bungee cord long enough to comfortably make a call.
Buy from:
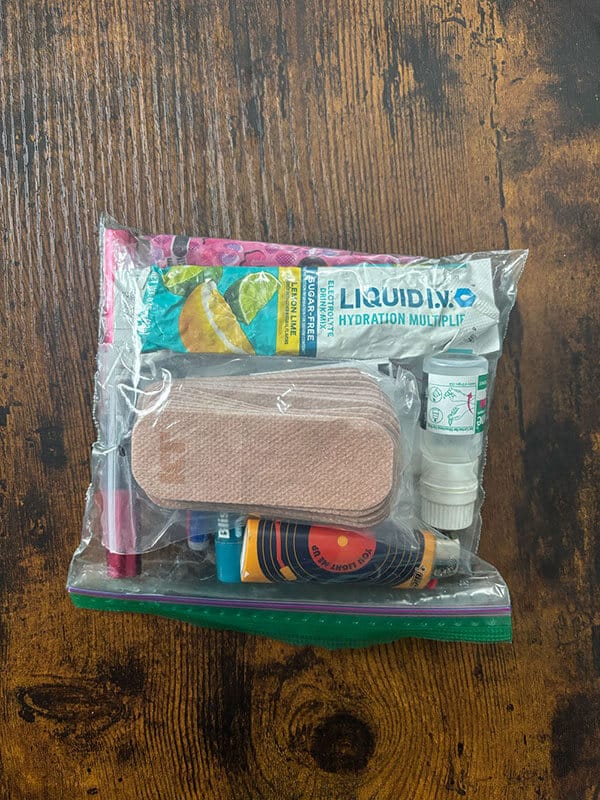
Micro First-Aid Kit
A full guide’s first-aid kit is a must-carry, but there are a few items that come up regularly on trips and are worth keeping a little closer at hand. I like to separate out key items like ibuprofen, Benadryl, blister patches and a few Band-Aids into a smaller Ziploc and stash near the top of my day hatch or in my PFD pocket.
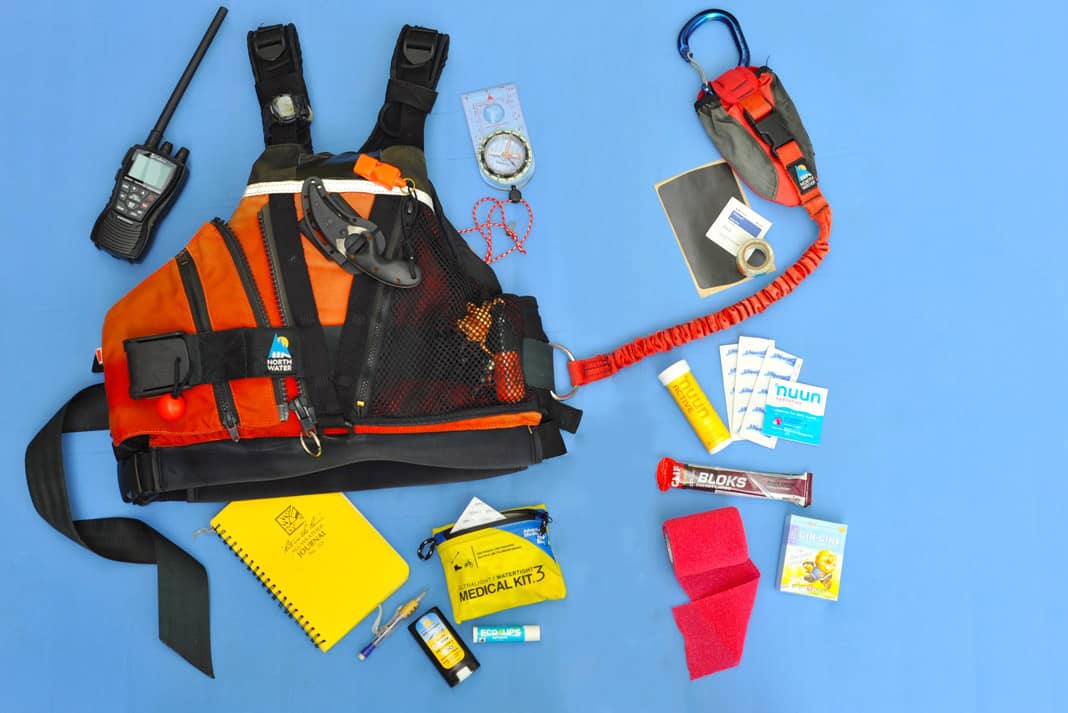
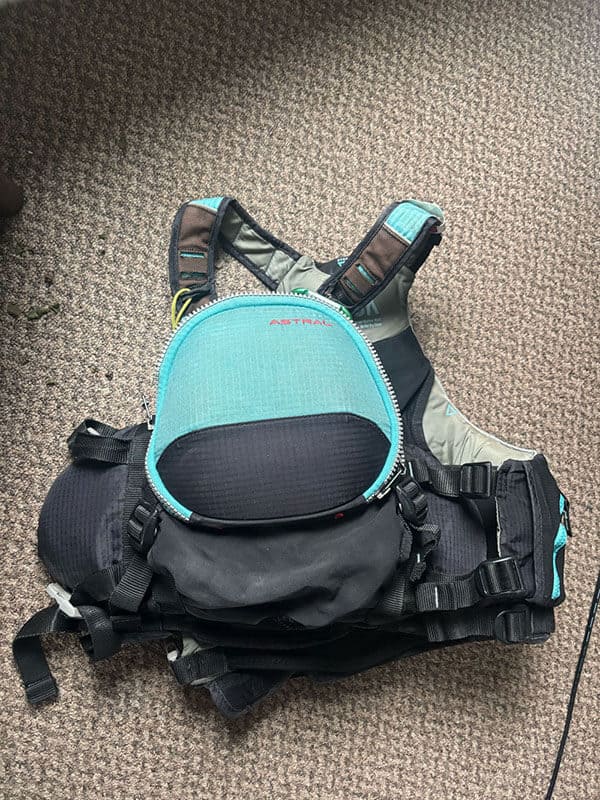
Astral Bluejacket
MSRP: $265
Now discontinued and replaced by the Astral Bowen, the Bluejacket is still my PFD of choice. It features a large clamshell pocket to store gear and is highly adjustable, with most of the flotation around the waist.
Buy Astral Bowen from:
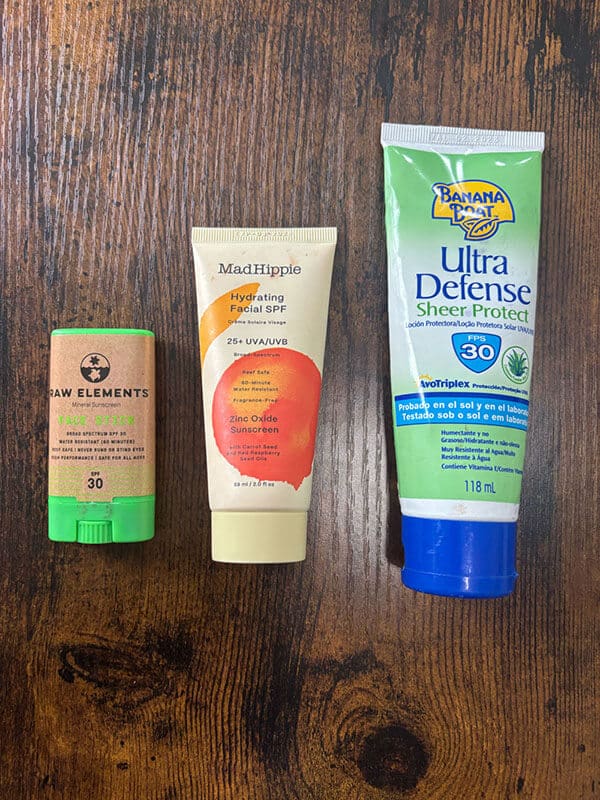
Sunscreen
MSRP: $19
Mineral-based zinc oxide sunscreens are considered reef safe and protect my skin from both UVA and UVB rays. At the same time, carrying a few options can be helpful to meet group needs while out on the water, and sunscreen is one of the things I’m most likely to be asked for as a trip leader.
Buy from:
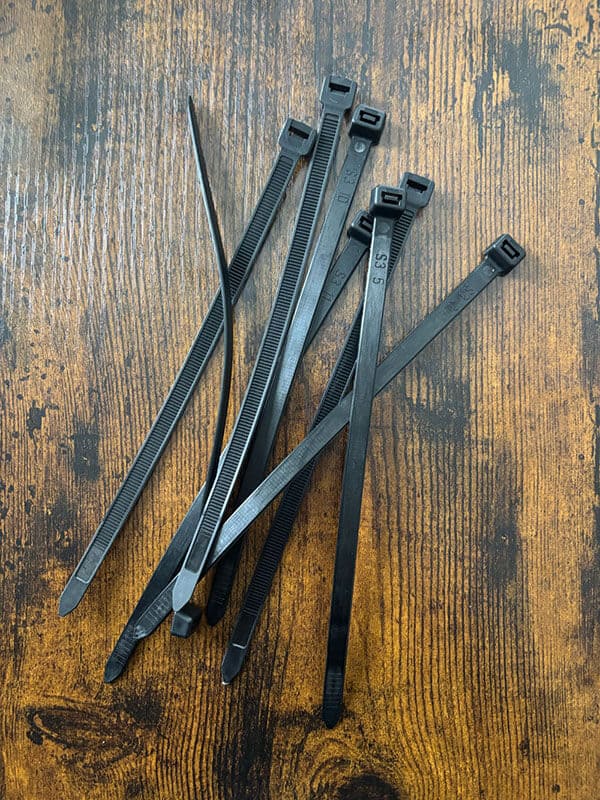
Zip Ties
MSRP: $3 per dozen
When a rudder breaks on the water, pulling out a screwdriver in choppy waters isn’t always the best option. Enter the zip tie: a quick fix that can get my clients through the day, or even the week, until I get a chance to do a full repair.
Buy from:
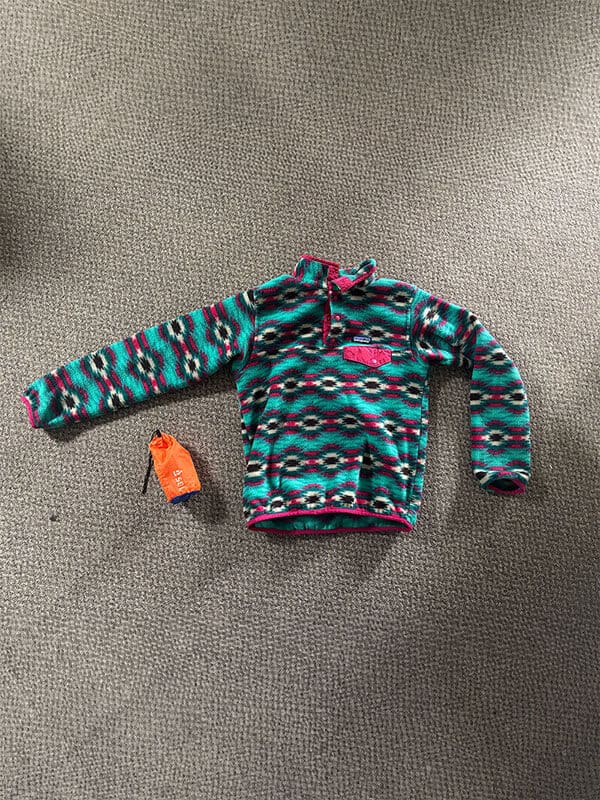
Emergency Layers
A space blanket, fleece and a stashed raincoat can go a long way if paddlers get cold. Search for layers in larger sizes to fit a variety of body types, and check the thrift store first; this way, you won’t be heartbroken if a paddler walks off with your extra layer after the trip.
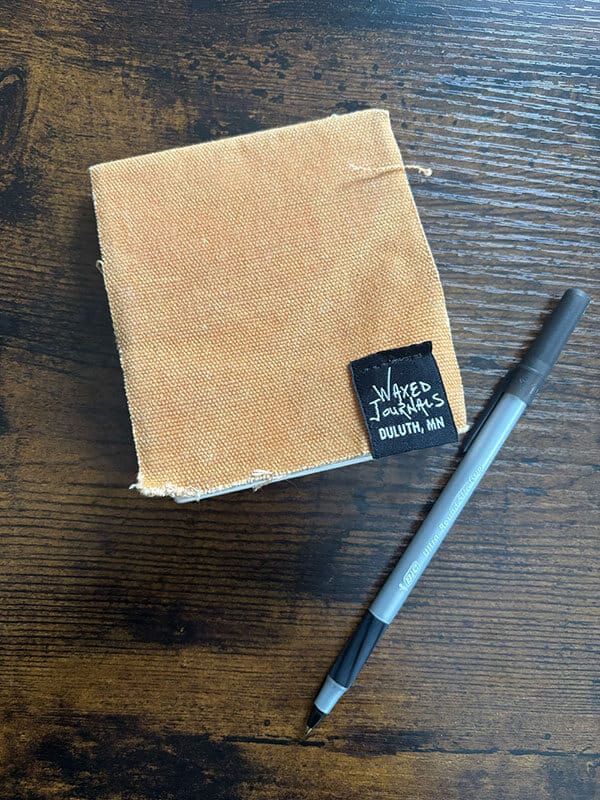
Waxed Journal & Bic Pen
A simple waterproof notebook can help you keep notes on weather and route, or act as a cheat sheet to help you remember names. In challenging conditions, I’ve found paddlers will respond a lot faster to their names than, “hey, you!”
Buy waterproof notebooks from:
Tools of the trade. | Feature photo: Courtesy Maddy Marquardt
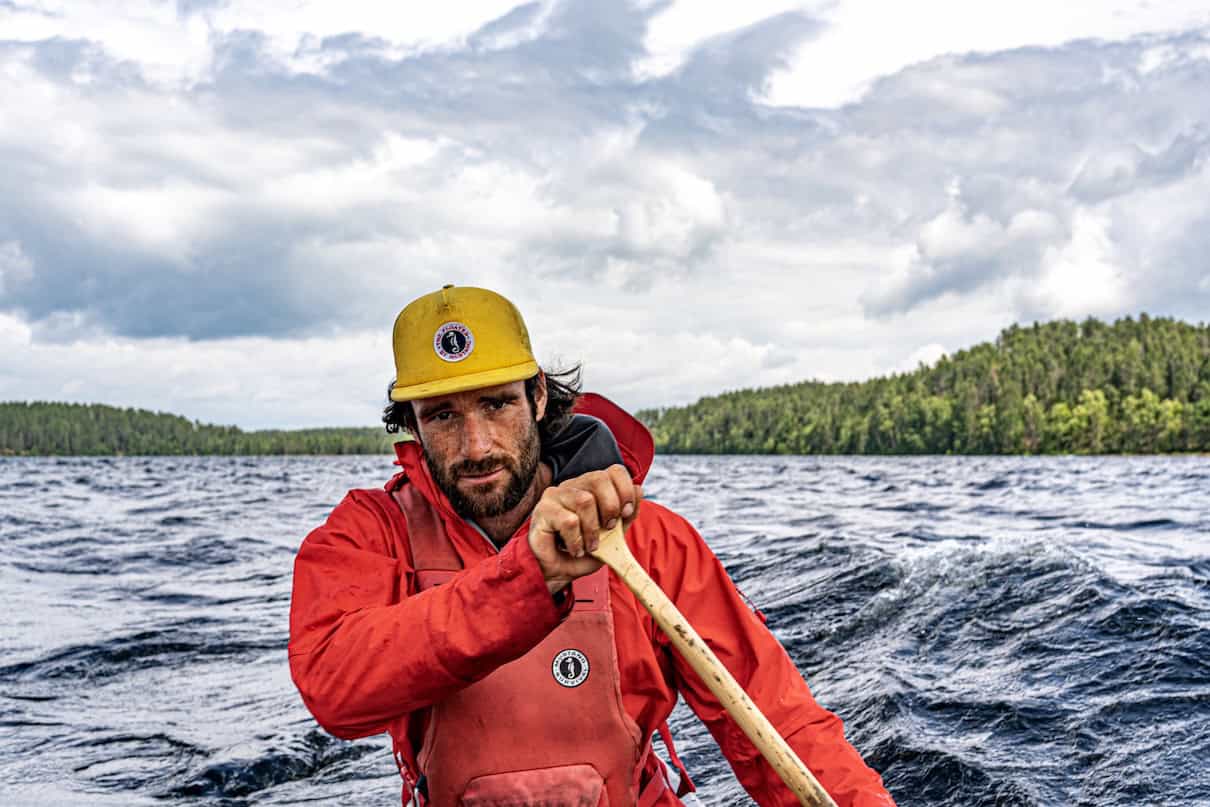
River Mamma

 When Elisha McArthur agreed to let filmmaker Sarah Hamilton make a short film about her life, she had no idea how far her story would reach. The next thing she knew, River Mamma was winning Best Short at the 5Point Film Festival, being declared a Finalist at the Banff Mountain Film Festival, and being screened at various other film festivals across the U.S. and internationally. Most recently, River Mamma won Best Rafting Film at the 2026 Paddling Film Festival, sponsored by AIRE.
Elisha notes that at the film’s world premiere at the 5Point Film Festival, she was brought onstage to answer some pretty personal questions about an already personal film.
“I was like, oh boy, what did I get myself into?” laughs Elisha. “But I’m still glad I put myself out there. Because I believe stories are important and representation matters.”
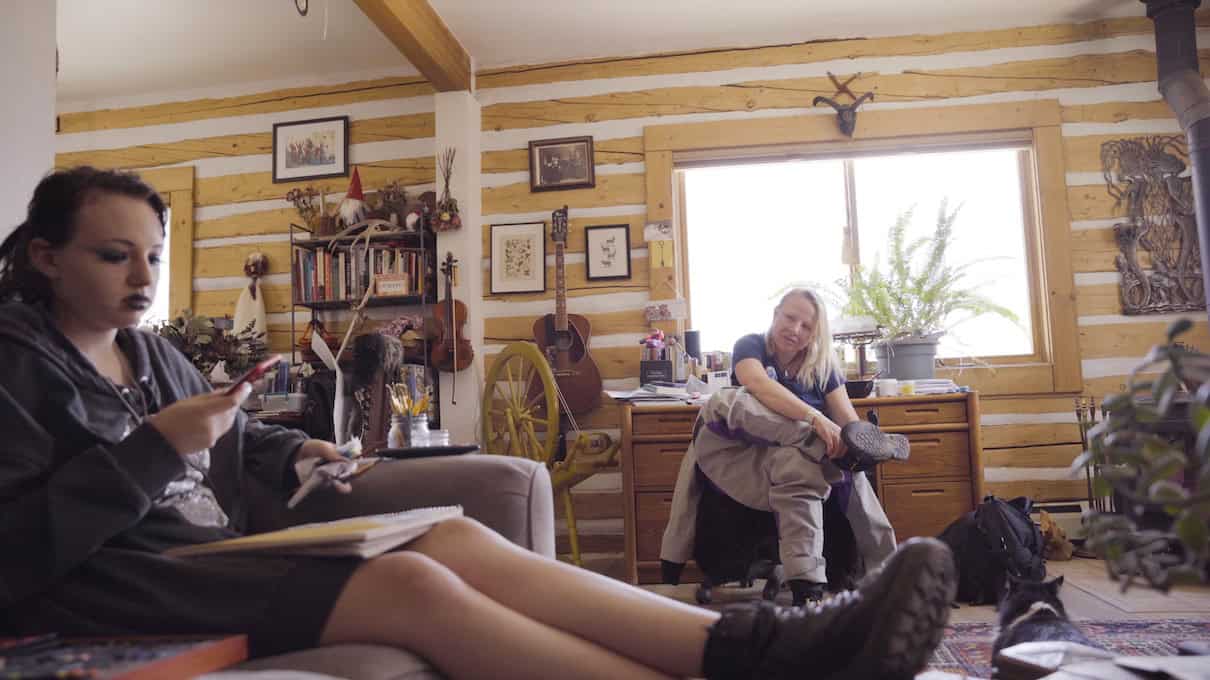
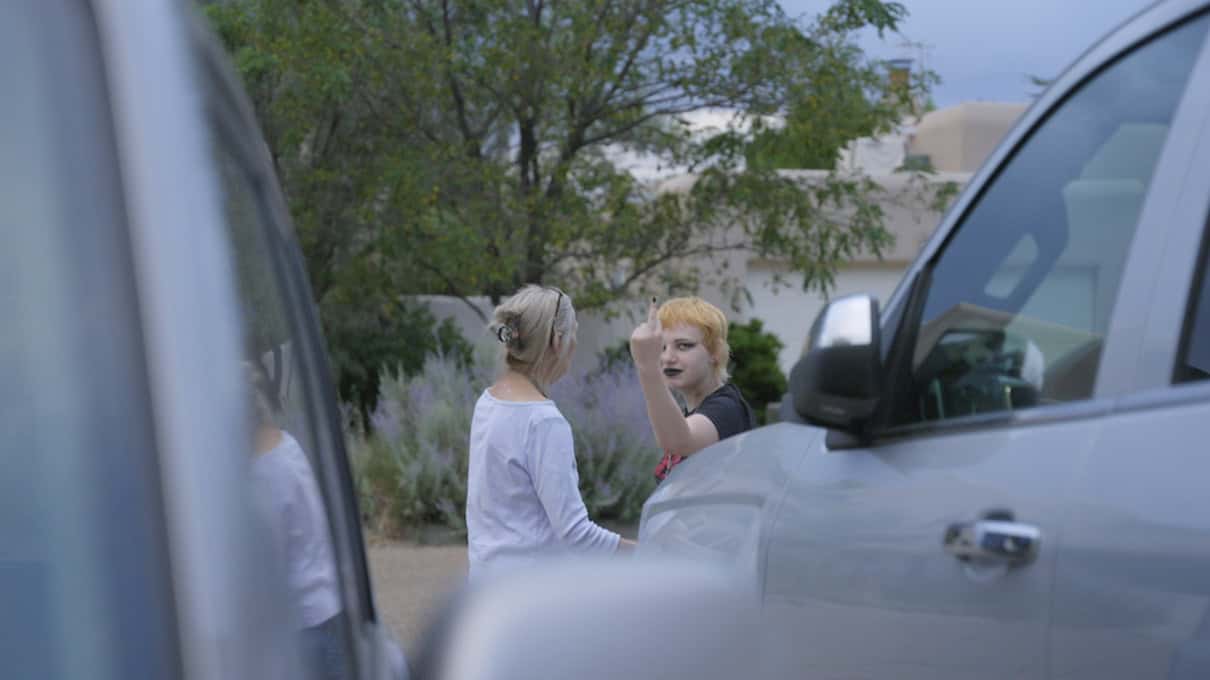
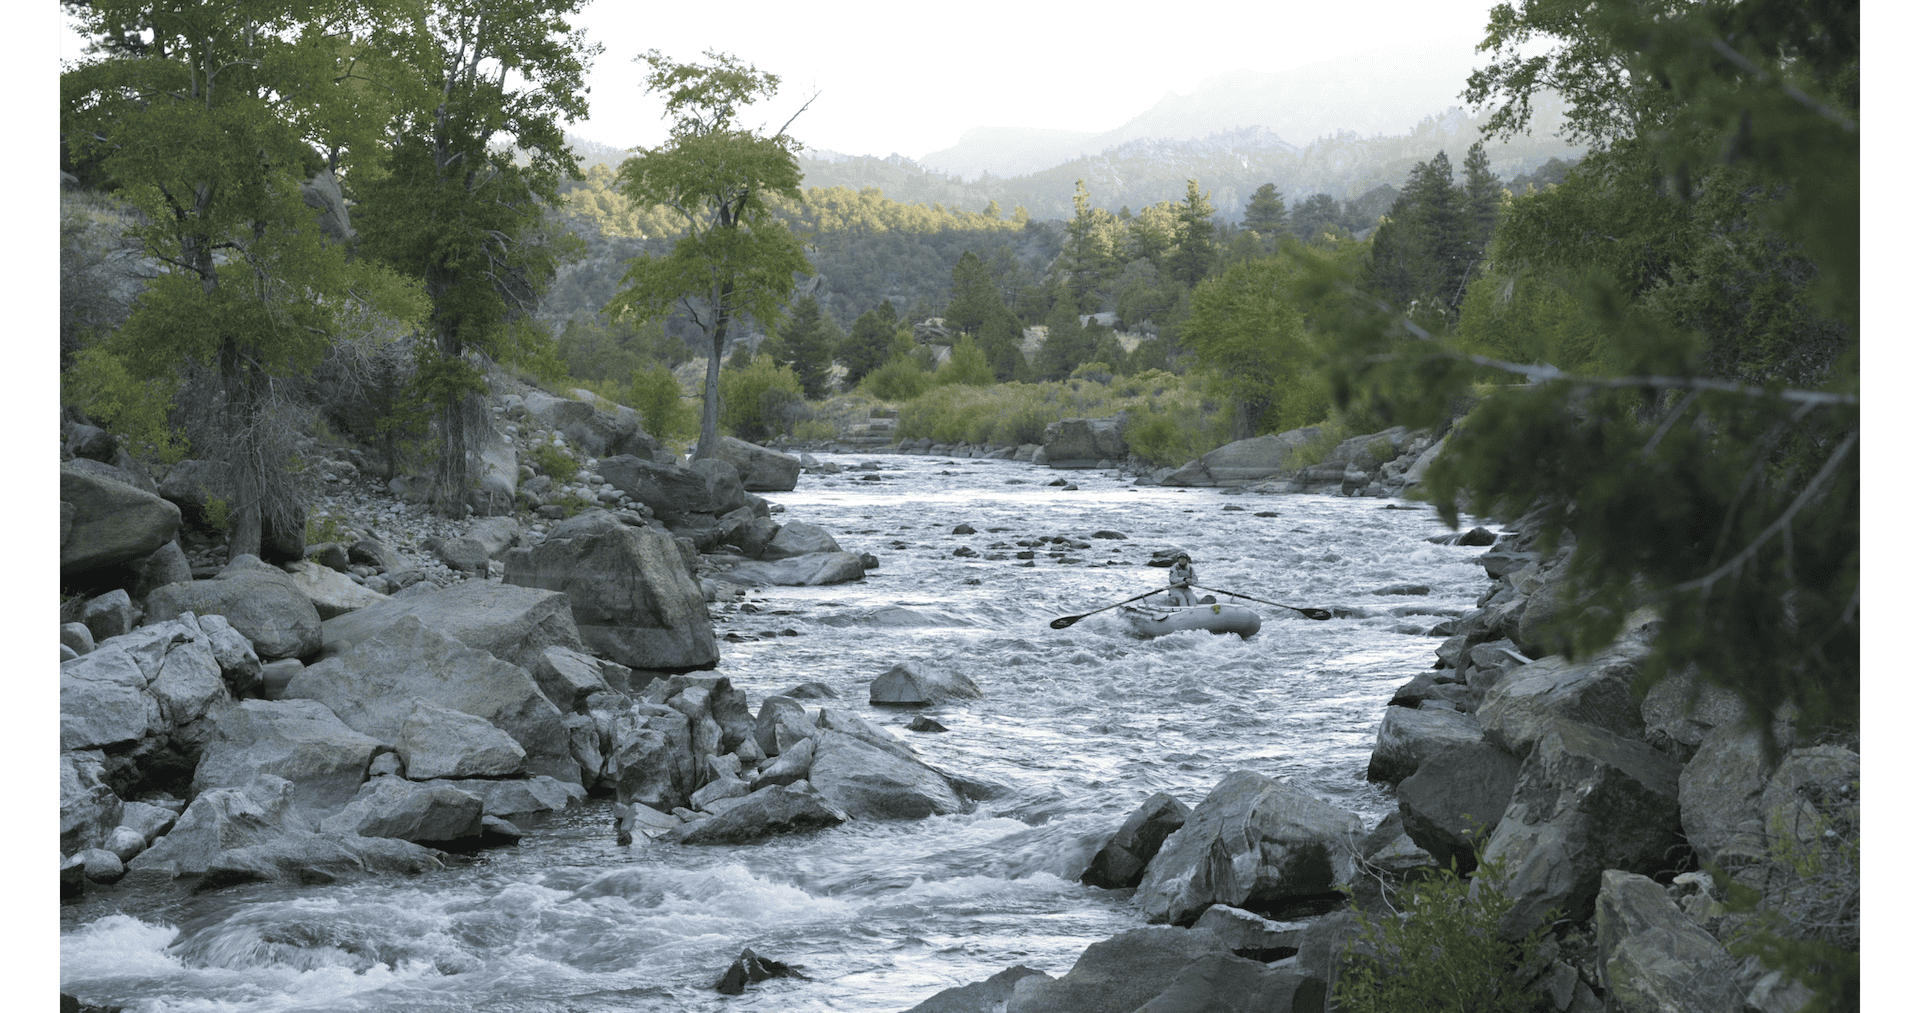
Elisha is a lifelong whitewater enthusiast, raft guide and instructor. The film explores her relationship with her teenage daughter, Charlotte, who despite growing up on the river, no longer feels passionately about paddling.
The film’s name refers to a nickname Elisha was given just after Charlotte was born. She says that as a single mom with a baby who was less than a year old, she felt pressured to get a “real job.”
“But I had this realization that if I was going to be the best mom I could be, I had to be the best me I could be,” she continues. “Which meant doing what I love and being a raft guide.”
So she returned to the river with Charlotte, prompting the guides she worked with that summer to nickname her “River Mamma.” It’s stuck ever since.
At the time, she couldn’t find any stories of other single moms who were also raft guides.
That’s why she agreed to let Sarah tell her story. Since the film’s release, she’s had many reach out letting her know her story has inspired them to follow their passions amid becoming new parents. Most recently, she had a student who was a new dad and had been raft guiding for a long time tell her her story helped him decide to continue to pursue his career after he had been thinking of walking away from the river.
“It was important to me to hear that the film is having an impact,” says Elisha. “And having a different kind of impact than I imagined.”
When it comes to the tension many parents might feel between chasing their passions and parenting, Elisha says parents need to be true to themselves.
“I see so many people have kids and put their passions on the back burner,” she continues. “That’s not healthy for anybody. It’s not good modelling for your kid, it’s not good modelling for you. If you can continue to be true to yourself then that models for your kid for them to be true to themselves.”
She says this still hasn’t been easy to navigate as Charlotte has gotten older—she’s now 18—particularly because Elisha’s career has expanded. In 2017, Elisha started Canyon River Instruction, specializing in teaching rafting and swiftwater rescue. She is also the president of the nonprofit organization Worldwide Women of Whitewater (WWoW), which supports women in the whitewater industry globally. These pursuits and others have her teaching whitewater paddling full-time, year-round in places around the world.
“I feel a lot of parent-guilt that I am investing in my career and am not around as much while Charlotte’s in her teenage years,” says Elisha. “But I also know she’s proud of me and what I’m doing in the world. So you have to weigh that. I just have to be intentional about taking time to be with her when I am here and we both have time.”
Although the pair don’t spend much time on the river together anymore, it does happen now and then. At the time of this interview, Elisha says she, along with Charlotte’s girlfriend and best friend, were able to get Charlotte out on the river for the first time in a long while.
“I have a Grand Canyon trip coming up for August 2027 and Charlotte was officially invited by the permit holder,” says Elisha of other opportunities she may have to paddle with Charlotte. “She gave a solid maybe. So, maybe.”
Elisha says Charlotte prefers the multiday trips and has a special love for the Grand Canyon, so she wouldn’t be surprised if Charlotte does decide to join.
The film discusses the fine line parents have to walk between pushing their kids to do something they know will be good for them, and letting them just be who they are. Elisha explains, “Only push when you know they’re going to have fun. Or when you know the outcome is going to be positive. Like, don’t push when you know they are going to be wet, cold, miserable and have a bad time. Pushing kids into type II fun isn’t productive.”
If you’ve identified an opportunity to push, she says it can help to be sneaky about it.
“I’ve gotten pretty good at finding the gentle ways to push so that she does actually do the thing and get the experience and have the good time,” says Elisha. For example, convincing Charlotte’s girlfriend and best friend to go boating so Charlotte would be more inclined to say yes, too.
Ultimately, though, you need to know your kid and whether pushing them will be helpful or not.
“Charlotte is one of those kids who needs a little push from time to time,” she says.
These days, Charlotte is pursuing her passion for art, is a ski instructor at the local hill in the winter, and works part-time jobs at an art collective and bookstore. She also recently approached Elisha about learning some guitar. In addition to being a whitewater instructor, Elisha is a musician and taught Charlotte some fiddle and piano when she was young.
“I was like, I think that’s really cool that you’re getting back into music. And she says, ‘Yeah… give me a couple more years and I might get back into boating,’” Elisha laughs. “I was like, hey you do you, kid. If it’s never your jam, it never has to be your jam. But she does have fun when she’s out there.”
For Charlotte’s 18th birthday in March the pair spent a week together in Iceland. Charlotte wanted to get a tattoo there from a very specific artist, so Elisha joined her for the trip.
“That was really lovely and special,” says Elisha. “And the fact that she wanted to spend her 18th birthday with her mom tells me I’m doing something right.”
River Mamma is winner of Best Rafting Film, sponsored by AIRE. You can watch River Mamma in person at a Paddling Film Festival World Tour event or watch at home with a subscription to Paddling Magazine TV.
River Mamma is a tribute to motherhood, honoring the strength it takes to nurture others while staying true to your own passions. | Feature photo: Sarah Hamilton
In Defense Of The Goon Stroke

In recent years,a wave of YouTube videos and articles has declared the goon stroke—or river-J—to be a poor or even so-called “wrong” stroke. Critics dismiss it with a sneer, claiming it robs the canoe of power and control, and insisting good paddlers rely solely on the J-stroke.
I see it differently.
In defense of the goon stroke
The goon stroke is a forward stroke paired with a thumbs up stern pry. Both the thumbs down J-stroke and the goon stroke are steering strokes, used to keep the boat traveling in a straight line. And both belong in every canoeist’s toolkit, whether you paddle calm lakes or dynamic rivers.
The goon stroke’s bad reputation stems largely from two misconceptions. First, many detractors only see poorly executed stern prys. When performed incorrectly, the stroke becomes a back sweep or backstroke, which is inefficient and counterproductive. But that’s user error, not a flaw in the stroke itself. Done correctly, there is minimal backward force.
Second is the myth that there is only one right stroke. In truth, the J-stroke and goon stroke each shine in different contexts. The stern pry delivers more power, stability and less wrist strain. It’s ideal for responsive whitewater canoes, controlling a heavily loaded tripping boat or battling headwinds. The J-stroke, on the other hand, excels at efficient straight-line travel.

In Path of the Paddle, Bill Mason famously wrote: “The thumbs-up J, or goon stroke, is really just a forward stroke with a rudder at the end. It works, but it’s clumsy and inefficient on flatwater. In rapids, the goon stroke is powerful and versatile. It can instantly become a rudder, pry, reverse sweep or low brace.”
Legendary instructor Bob Foote added his own take: “Unlike other strokes, the stern pry is either done right or dead wrong—that’s why it gets so much bad press.”
Watch how to execute the stern pry portion of the stroke below.
Doing it right: Quick, compact, powerful
When done correctly, the goon stroke is elegant and efficient. To properly execute the stern pry, here’s what you need to know.
Set up with the T-grip hand outside the gunwale, and the shaft hand on the gunwale. The power face of the blade should be flush with the hull.
The power potion of the stroke is quick and compact—a short, popping move, or as instructor Kent Ford calls it, a “microsecond burst.” Pull the T-grip into the canoe and use the gunwale as a fulcrum. The blade should travel no more than four to six inches from the hull. The result is the bow moves toward your onside.
Two common errors ruin the stroke
First, starting too far from the hull. If the blade begins at a 45-degree angle, the force drives backward rather than sideways.
Second, carrying it too long. After four to six inches, the stroke shifts from a pry to a backstroke, killing momentum. You can quickly diagnose a good versus bad stern pry by looking at the T-grip hand. If the paddler’s T-grip hand starts inside the gunwale, the stroke is almost certainly going poorly.
One of the stern pry’s greatest assets is its versatility. With a small adjustment, it can flow naturally into a low brace for stability or a back sweep for added turning power. Hold it steady and it becomes a rudder, a priceless tool when surfing a wave or maintaining your line in current. It also works beautifully for those moments when your bow partner is doing the hard work and you’re supervising (just don’t tell my wife I said that).
Is the stern pry my preferred stroke for long flatwater days? No, the J-stroke still wins for efficiency and rhythm. But for beginners learning control, and for maneuvering in current, wind or waves, the stern pry is indispensable.
Jeff Oxenford is an ACA Level 4 Whitewater Canoe Instructor Trainer Educator. He has almost 40 years of experience teaching canoeing at summer camps and through canoe clubs.
Respect the goon. | Feature photo: Aaron Black-Schmidt
An Inflatable Life Jacket Could Save Your Life: Here’s How To Choose The Right One

When I ask Lili Colby to recommend the best PFD for me, her answer of a belt pack inflatable catches me off guard. I’ve been paddling for over 30 years, in just about all disciplines—sea kayaking, canoeing, whitewater boating and a bit of standup paddleboarding. I’ve had a series of paddling-specific foam PFDs with pockets, quick-release towboats, and other bells and whistles. Over the past decade I’ve focused mostly on canoe tripping: multi-week journeys with a mix of lakes and down- and upstream travel, and many portages.
Colby is the industry and outreach representative at Mustang Survival and a longtime paddling professional. She also attends many industry events where she puts on presentations about inflatable life jacket operations and maintenance.
I made a confession to her: I appreciate the margin of safety my PFD affords on big water, but its bulk is an uncomfortable nuisance on hot, calm days and long portages, where it simply gets in the way. It’s a relief when Colby doesn’t pass judgment when I hesitantly tell her that on the usual flatwater day in midsummer, my PFD serves as a sunshade for the food duffel in the middle of my canoe.
“You’re not alone in doing that,” she intones. “But there’s a better solution.”
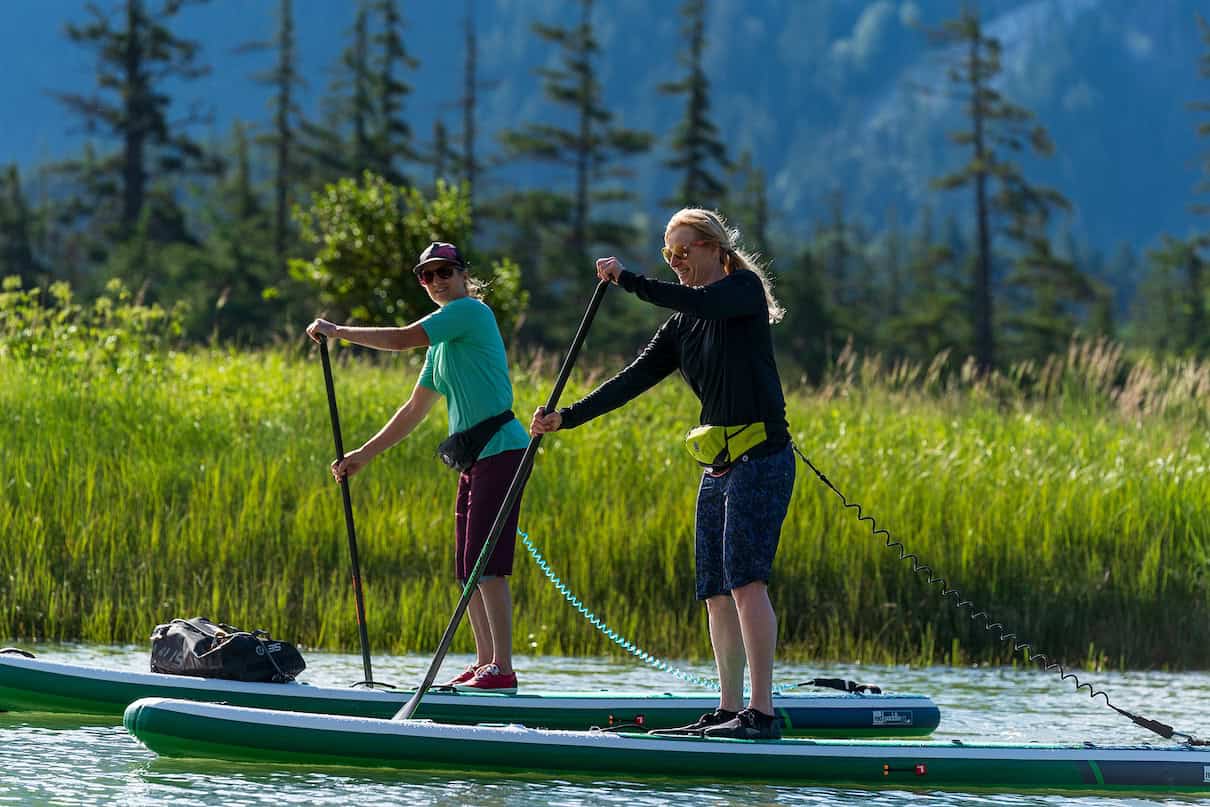
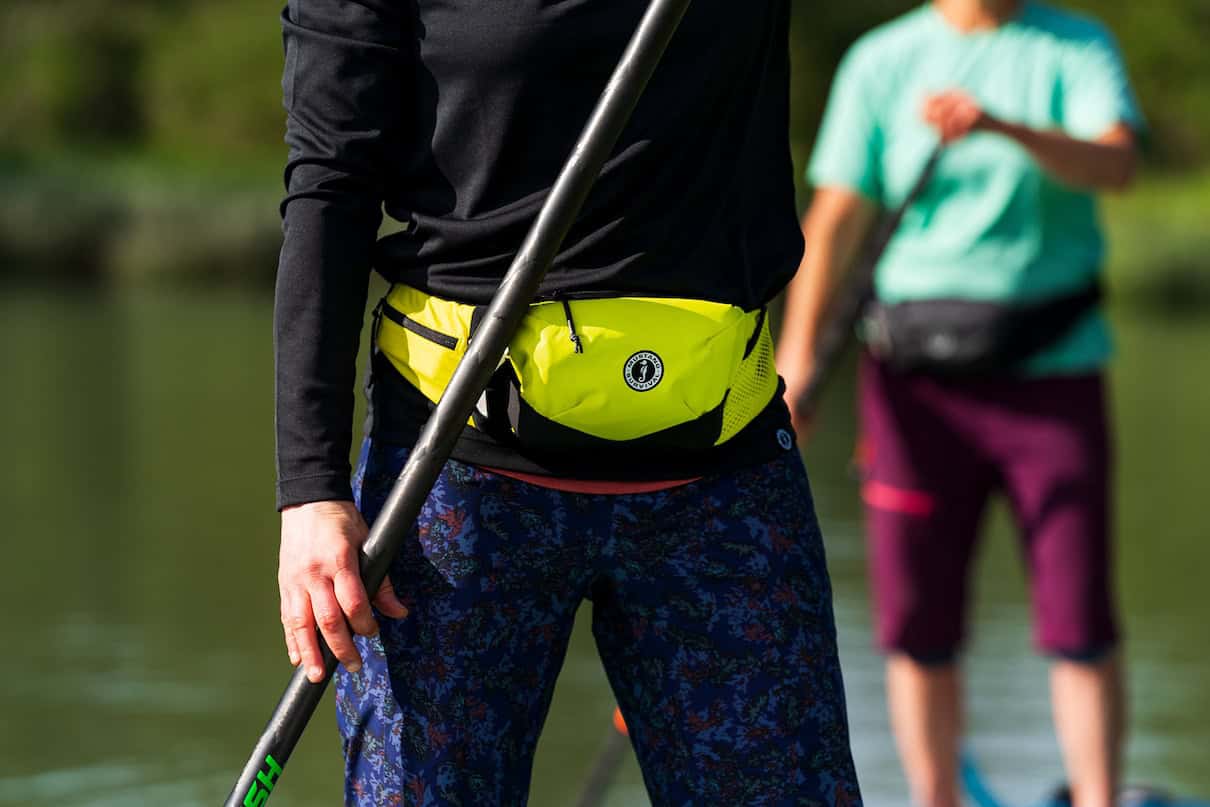
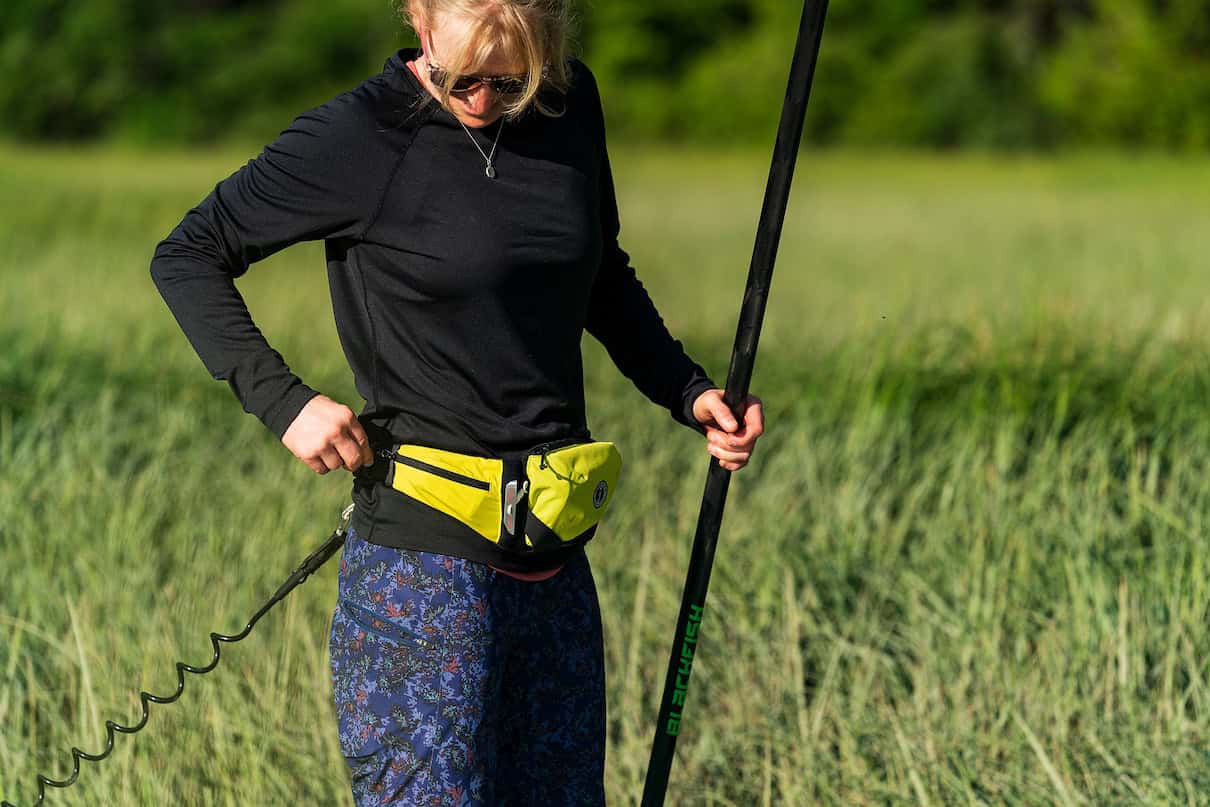
Colby suggests the Minimalist Inflatable Belt Pack, a waist-mounted inflatable PFD that’s barely bigger than my wallet, yet complies with U.S. Coast Guard and Transport Canada regulations when used in the right context. “It’s all you need on a flatwater trip in warm weather,” she insists. “You’re legal and you’ll have plenty of flotation in the unlikely case that you swim.
The Minimalist is among nine inflatable PFDs Mustang Survival offers, including belt packs, yoke-style and hybrid foam. Once you’ve selected a style, the next big decision is whether to go with automatic or manual inflation, or a convertible that allows you to switch between the two. Here, we’ll help you know which is right for you according to your paddling habits.
Of choosing any of their inflatable offerings, Colby says, “Easy, breezy.”
I start imagining the freedom—and the points I’ll score with my partner, who is always chastising me to wear my life jacket—in shedding my hot and bulky PFD and wearing a simple inflatable belt pack. “Of course, you’ll need to wear a foam PFD if your trip has moving water,” Colby adds, “but on those days you can easily stuff the inflatable in your pack.”
The origins of inflatable PFDs
Inflatable PFDs have been around for years, yet paddlers have been slow to appreciate their benefits. In fact, the concept of air-based flotation dates back over a century, Colby says. The technology came into its own in World War II, when Allied airmen relied on yellow inflatable vests known as Mae West life preservers, a nod to a bosomy American actress and performer.
Decades later, in the 1990s, Mustang Survival was the first to manufacture a contemporary inflatable life jacket—collaborating with Billabong, a popular surfing brand, to create inflatable flotation bladders to help Hawaiian big wave surfer Shane Dorian survive epic wipeouts.
Mustang technological advancements like durable radio-frequency welded seams trickled down into Mustang’s first-generation inflatable belt pack. The U.S. Navy promptly made this model standard-issue across its fleet, speaking to the brand’s long-standing relationship with professional users, including the Canadian and U.S. Coast Guard, Navy SEALs, law enforcement and NASA.
Standup paddleboarders eventually discovered inflatable belt packs as an extra measure of safety on the water. Mustang’s stake in the recreational market expanded as more paddlers recognized the attributes of inflatable PFDs.
In particular, the innovative Khimera Dual Flotation PFD, a foam/inflatable hybrid launched in 2019, was a game-changer, for its streamlined fit and high buoyancy. As a rule, inflatables are cool, comfortable and lightweight; there’s no excuse not to wear one, no matter how hot and benign the conditions, says Colby, who is a board member of the Canadian Safe Boating Council. The key is choosing the right model for your application.
Inflatable PFD styles
Many inflatable PFDs sport a “Harmonized Level 70” label, explains Colby. This reflects a binational Canada-U.S. certification for inflatable PFDs with a minimum of 70 Newtons (about 15.7 pounds) of buoyancy. The certification stipulates that these PFDs are designed for people who weigh more than 88 pounds, are 16 years of age or older and are good swimmers. They are not meant for use in moving water or whitewater, where their straps present a risk of entanglement.
You can read more about new changes to PFD regulations in the U.S. and Canada here.
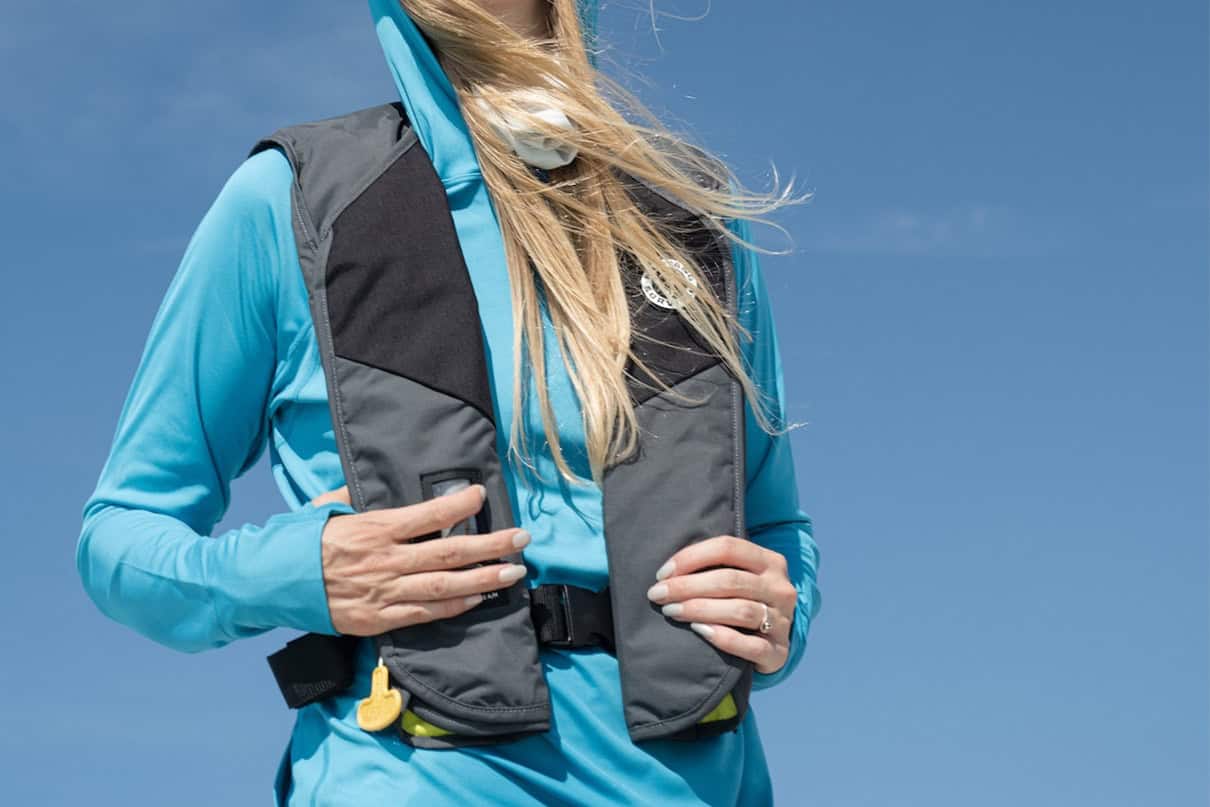
Besides the Khimera, which looks like a typical foam PFD, inflatables generally come in two styles: belt packs and yoke-style, which fit over the shoulders like a vest, such as the popular MIT inflatable range.
Manual vs automatic inflatable PFDs
Colby says there are three main parts to an inflatable PFD: the “lungs,” or air bladders; the “muscle,” or inflator; and the “brain,” which is the mechanism to activate the inflator. The “muscle” of all inflatable PFDs is a CO2 cartridge for rapid inflation, as well as a backup oral tube to inflate by mouth. In “manual” models like the MIT 70, the user is the “brain,” with the CO2 inflator activated by pull-tab. These are generally the preferred option for paddlers, Colby says.
“Automatic” models come with different types of inflators, and are all triggered to inflate when submerged in water. This makes them unsuitable for people who are paddling in scenarios where falling in the water isn’t a problem, such as when paddling close to shore or in the shallows where they can stand up safely. “You don’t want your PFD to inflate when not needed,” Colby adds.
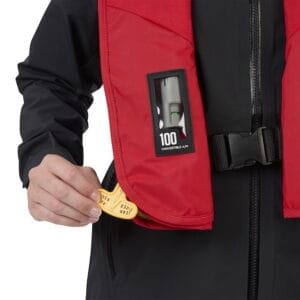
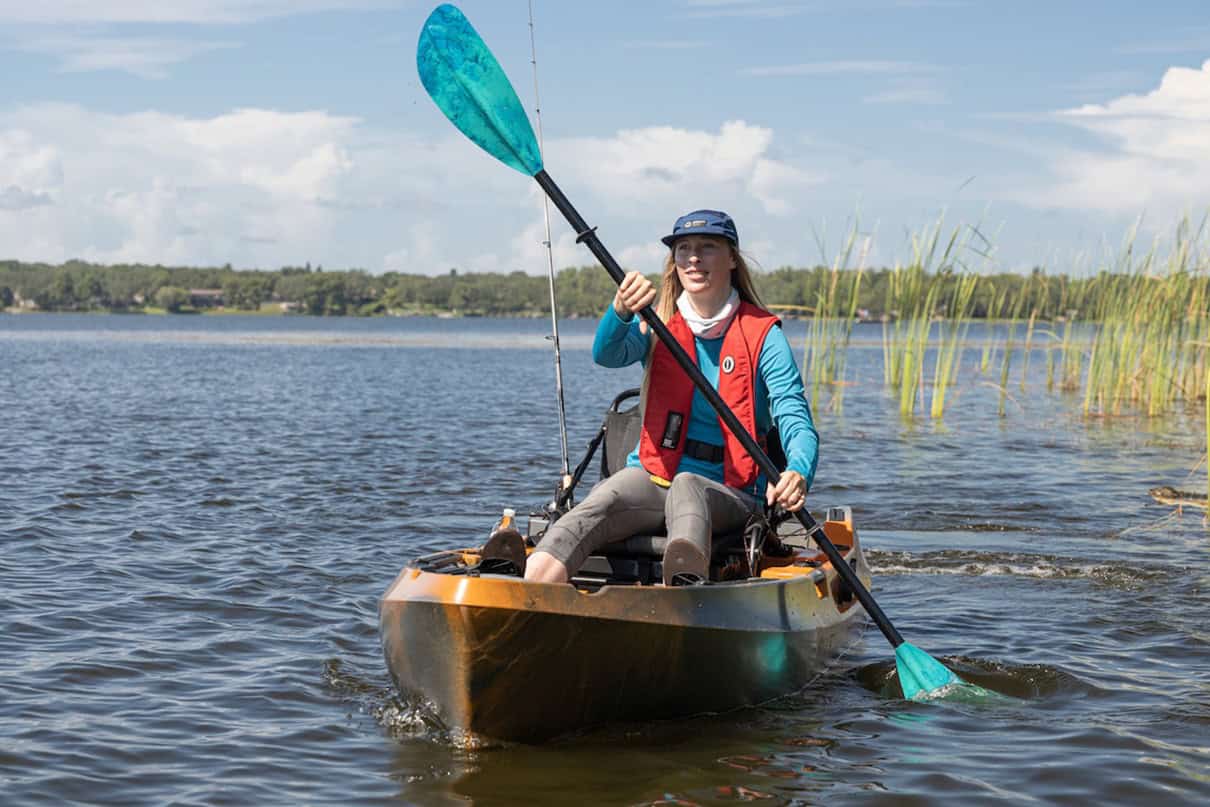
However, a PFD with an automatic inflator (such as the MIT 100 A/M Convertible Inflatable PFD, which can be set in either automatic or manual modes) could be a key safety feature for offshore kayak anglers.
“[Kayak fishing] boats are top-heavy and they are loaded with gear,” says Colby. “[Kayak anglers have] their hands full, they are often out there by themselves—and then they hook a fish of a lifetime. An automatic inflatable PFD could save their life.”
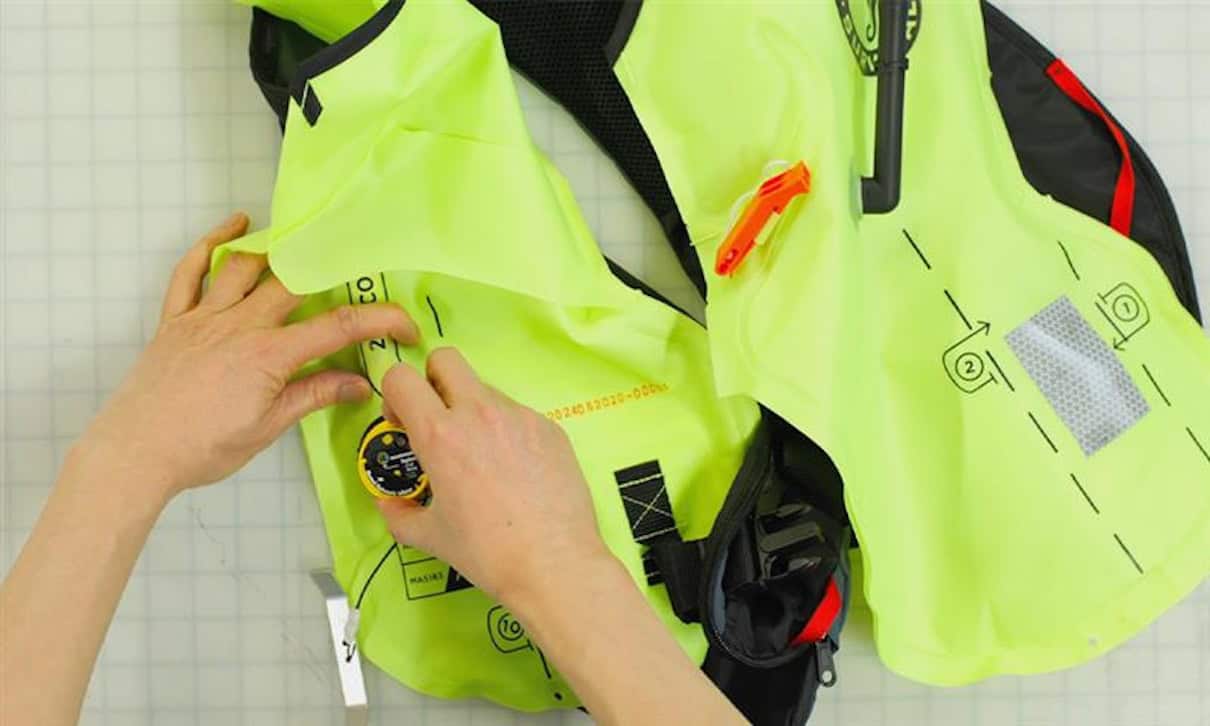
Inflatable PFD maintenance
Along with an awareness of the regulations around inflatable PFDs, users must also commit to the responsibilities of using them. “You need to make sure you are armed and ready,” Colby says. That means making sure the inflator mechanism is in good shape (components of a CO2 cartridge will corrode over time) and ensuring the air bladders do not have leaks. Colby suggests inspecting these elements at least once per year.
A CO2 cartridge that’s been deployed or worn out is easy to replace by purchasing the appropriate rearm kit for the model from the manufacturer, and following the instructions, for a fraction of the cost of a new PFD.
Colby’s description of inflatable PFDs could be a game-changer for me. I was lucky to get a one-on-one consultation, but Mustang’s new online PFD Finder is a good alternative.
“It takes more thought to choose an inflatable PFD, especially when you’re used to the simplicity of foam,” she says. “But it can be such a great choice because it’s just so much more comfortable, and you’re more likely to wear it.”


