Home Blog Page 176

How Kayaking Can Improve Your Physical Health

Shot from back of a kayak of a woman paddling
Kayaking is so much fun you won't even realize you're exercising. | Photo by: Image Ontario

One of the keys to developing a healthier lifestyle is finding a physical activity you enjoy doing. Fun and excitement help mask unpleasant feelings you may experience as a result of the activity, and will make you more likely to participate in it more frequently. Can you say the same for spin class?

Getting moving even a little bit is beneficial for your health, but even better if you can elevate your heart rate, strengthen your muscles, and challenge your mind as you learn new skills. According to these parameters, is kayaking a good workout? The answer is, yes! Kayaking works your core through torso rotation movement. It works your upper body when you take paddle strokes. It works your cardio through fast-paced, heart-pumping movement. And it works your mental state as it requires you to puzzle out different movements in whitewater, take on your fears, and overcome doubts about your abilities.

Best of all, you’ll reap all of these benefits and more while having fun. Still not convinced? We’ll go over all your questions and doubts about kayaking and exercise below.


Is kayaking good exercise?

If done properly, kayaking can be very good exercise. However, if you simply float down the river without taking any paddle strokes, you are just sitting on your bum and won’t get any exercise.

If you are using kayaking as a workout, you need to treat it as a workout.

If you are kayaking on flatwater, the best way to get a workout is by doing sprints. Paddle at full “race pace” for one minute, rest for 20 seconds, then paddle at “race pace” for another minute. Rest one minute, then repeat this exercise until your core feels fatigued.

If you are kayaking downriver in a creek boat, the best way to get a workout is to catch as many eddies as you can, do as many ferries as you can, and surf as many waves as you can. If you are paddling class II, you should try to find moves in every rapid that makes it feel like class III. If you are paddling class III, try to find moves that make it more difficult and similar to class IV. Challenge yourself as much as you can every time you are on the water and not only will your skill improve, but so will your endurance and strength.

If you are kayaking in a playboat on a standing wave, you will more than likely get a workout no matter what you do. Freestyle kayaking is an incredible workout for your core, as you will need to keep your core engaged while surfing waves in order to stay stable.

The best way to get strong from kayaking is to kayak as much as possible. The more time you spend in your boat taking strokes, doing sprints and surfing waves, the faster you will progress in both strength and skill.


Can kayaking build muscle?

Kayaking is a workout that will build muscle, but not in mass. Since kayaking is such a fast-paced sport with a large portion of the workout being cardio, you will build a good base of strength, but most likely will not bulk up. Kayaking is good for toning muscles and strengthening them from within.

What muscles does kayaking work?

The main muscles used in kayaking are your abdominals, lats, biceps and forearms. Essentially, kayaking works all the muscles in your shoulders and back. After several months of kayaking multiple times a week, you will begin to see muscle development in your lats. After a few more months, you’ll see muscle development in your biceps and forearms. And after a year, you may even have a six-pack!


Shot from back of a kayak of a woman paddling
Kayaking is so much fun you won’t even realize you’re exercising. | Photo by: Image Ontario

Is kayaking good cardio?

Kayaking can be good cardio if you make it good cardio. What this means is that if you simply float down the river, not taking any strokes and not challenging yourself, you won’t get a cardio workout at all. One the other hand, if you really challenge yourself on the water, taking race laps, doing sprints and trying freestyle tricks, you will get an incredible cardio workout. You get out of it what you put into it.


Calories burned kayaking

The number of calories you will burn while kayaking is entirely dependent on both your body and how hard you are paddling. If you are paddling hard and making kayaking into a good workout, you can burn upward of 400 calories per hour. If you are leisurely floating down the river, you will have trouble burning even 50 calories. Once again, you get out of it what you put into it.


Is kayaking good exercise for back pain? | Photo: Karolina Grabowska
Karolina Grabowska

Is kayaking good exercise for back pain?

Depending on the type and severity of back pain you are living with, kayaking can be a good way of helping relieve it. Kayaking works the muscles in your core and lower back through a torso twisting motion. This strengthens the smaller muscles around your spine, thus providing more strength and stability in your back and core.

Before attempting kayaking as back pain relief, make sure to check with your doctor to ensure you won’t be doing any more damage. Once you have been given the okay by your doctor, try to test out as many kayak designs as you can, so you can find one that feels the most comfortable for your back while you are sitting in it. You can also adjust the outfitting in any kayak to provide more back support by adding straps, foam and backrests.

[ Paddling Buyer’s Guide: View all rigging and outfitting options ]

The best advice for using kayaking as back pain relief is to start out small, and slowly build up from there. Start by taking slow strokes in flatwater and then wait two days to make sure you haven’t aggravated your back. If your back feels okay, next time you kayak you can slowly push a bit more. Hopefully in time you will be able to build up the muscles surrounding your spine to provide more stability and pain relief.


Is kayaking a good way to lose weight?

Kayaking is a great form of exercise for anyone looking to lose weight. You will receive the benefits of both cardio and strength training, while not even noticing you are exercising because of how much fun you’re having! The best forms of exercise are the ones where you challenge yourself both physically and mentally, and thus distract your brain from the pain of the exercise, making it more fun and more likely you will stick with it. Kayaking does just that.

However, while kayaking is a great workout and may assist you on your weight loss journey, it can’t do it all. It is a good form of exercise, but if you are looking to lose weight, you will also have to work with a physician or dietician to adjust your diet and lifestyle.

5 Risks Of Sun Exposure All Paddlers Should Take Seriously

Woman and man wearing hats and long-sleeve shirts in a canoe with sun flare
Protect yourself from the dangers presented by sun exposure, especially while spending time on the water. | Photo by: Image Ontario

Often overlooked, sun and heat exposure present some of the biggest risks in paddling. While in or on the water, your body may not feel dehydration coming on until it’s too late. Similarly, you might not feel a sunburn happening until you are burnt to a crisp. There are also many issues that can crop up in the long-term as a result of repeated sun damage.

Fortunately, there are simple steps that can be taken to ensure safety in the sun. Read here about the risks you should keep top of mind, the preventative measures you can take to combat the risks, and the care necessary if you do slip up.

Risks

Dehydration

Dehydration is a condition that sneaks up on you quickly. If you are playing in or around the water, you may not feel dehydrated even if your body is needing water. For this reason, it’s best to play it safe and keep track of your water intake as you are paddling.

Sunburn

The most obvious of all sun-related risks, sunburn is one we all know too well. Too much time in the sun without protective clothing, and your skin will burn, peel, and become sun-damaged. Sunburn can happen even on cloudy days, so make sure to cover up even if there is cloud cover. Similarly, the temperature doesn’t dictate what the UV index reading is for a given day. It may be a chilly, cloud-covered day, and you can still get a sunburn.

Eye damage

Too much sunlight exposure to your eyes can cause ultraviolet keratitis, which is inflammation of the cornea. This is essentially a sunburn on your eyeballs. This risk is especially prevalent in water-related activities due to the sun’s reflection from the water back to your eyes. Not only are you exposed to the sun itself, but also its reflection.

Heat stroke

Heat stroke is a condition you develop when your body overheats. It is most commonly caused by physical exertion in high temperatures. Heat stroke is very serious and requires emergency medical treatment. Symptoms include, but are not limited to, high body temperature, altered state of mind, nausea and vomiting, flushed skin, rapid breathing, racing heart rate, and heachache. Keep heat stroke in mind as something to consider with sun safety.

Skin cancer

Most skin cancers are caused by large amounts of exposure to ultraviolet (UV) radiation from the sun. There are three types of UV radiation: UVA, UVB and UVC. All three types cause skin cancer. Factors affecting UV radiation exposure are proximity to the equator, altitude, reflectiveness of the water, time of year, time of day and cloud cover.

Woman and man wearing hats and long-sleeve shirts in a canoe with sun flare
Protect yourself from the dangers presented by sun exposure, especially while spending time on the water. | Photo by: Image Ontario

Prevention

Avoid the hottest part of the day

Between 1 p.m. and 4 p.m. is the hottest part of the day in the summer months. If possible, plan to paddle in the morning or evening to avoid the risks associated with hot temperatures. If you’re out paddling in the afternoon, make sure to stay covered up, stay hydrated and take dips in the water to keep your body temperature down.

Stick to the shade

Less sun exposure = less risk. It’s as simple as that.

Wear sun-protective clothing

Many paddling companies now sell UV-resistant clothing. Sun-protective shirts are often lightweight and equipped with a hood and long sleeves. Wearing one means you’ll never have to worry about remembering to reapply sunscreen to your neck and arms, making this a much more convenient option.

Check out some of our favorite UV-resistant clothing options here:

  • NRS H20zone Sun Sleeves
  • NRS H2Core Silkweight Hoodie
  • NRS Women’s Silkweight Hoodie Dress 
[ Browse all sun-protective clothing here ]

Wear a hat

Protect your face and eyes from the sun’s harmful UV rays with a wide-brimmed sun hat! A buff or neck gaiter is also a good idea to protect your neck and face from UV rays.

Our favorite neck gaiter:

  • NRS H2Ozone Neck Gaiter 

Or subscribe to Paddling Magazine to receive a complimentary neck gaiter!

Wear sunglasses (with UV protection)

Sunglasses are one piece of sun safety gear you shouldn’t skimp on. Make sure you are purchasing sunglasses with full UV protection. Without proper UV protection, they are just masking the symptoms of sun exposure, which may allow you to look into the sun without pain, but will still cause damage to your eyes.

Wear (and reapply) sunscreen

The sunscreen you use must be a broad-spectrum, water-resistant sunscreen of SPF 30 or more. Sunscreen in combination with sun-protective clothing, a hat, and sunglasses will be your best bet for safety in the sun. Make sure to apply sunscreen to your whole body 20 minutes before going outside, then reapply at least every two hours, or after every swim.

For the best possible sunscreen, find one with zinc oxide in it. These sunscreens often come in stick form, and are meant to be used on your face. Apply it liberally to your nose and cheeks, embrace the inability to rub it in, and enjoy the many colors zinc sunscreen comes in!

Stay hydrated

Health officials recommend drinking 2 liters of water per day, but if you are active in the sun, you may need more. A good way to keep up with water intake is to take a drink each time your paddling crew catches an eddy on the river. An easy way to track your water intake is to use a 1-liter Nalgene water bottle, and try to finish two to three of them each day.

Care

How to treat a sunburn

If you do get sunburnt, the best thing you can do is rest, drink LOTS of water and stay out of the sun to avoid further damage. Aloe vera gels and lotions, as well as over-the-counter anti-inflammatories, may help with the pain and peeling, but unfortunately, you will still just need to wait for it to heal.

Make sure to wear protective clothing over the sunburnt area, and keep it as clean as possible to avoid infection. If the sunburn starts to blister, avoid picking at it or touching it. Leave it alone, keep it clean, and wait for it to heal.

Explore Sea Caves & Wild Islands: Guide To Kayaking The Apostle Islands

Person kayaking near shore in Apostle Islands
Whether day trip or overnight excursion, the Apostle Islands have plenty to offer kayakers. | Photo by: Flickr // Tim Wilson

Northern Wisconsin hosts a hidden gem that’s located on the largest freshwater lake (by surface area) in the world: The Apostle Islands National Lakeshore. This area didn’t receive much attention until recent years when tours of the beautiful winter ice caves along the shore became available. While these ice caves obviously can’t be reached by boat, come summer, these same sea caves can be explored by kayak. Apostle Islands kayaking also provides the opportunity to hop between 22 wild and beautiful islands, whether on a day trip or multi-day camping excursion.

Read on to learn how you can experience this Northern Wisconsin wonder.

Person kayaking near shore in Apostle Islands
Whether day trip or overnight excursion, the Apostle Islands have plenty to offer kayakers. | Photo by: Flickr // Tim Wilson

Best tours

With its growing popularity over the past five years, there are ample tours of the sea caves and islands in the area available. In fact, if you are unaccustomed to sea kayaking and/or the harsh maiden that Lake Superior can be, it is an especially good idea to head out with a knowledgeable guide. Here are a few of the best tours in the Apostle Islands to get you started.

White Cap Kayak

One of the top-rated guide services in the area, White Cap Kayak offers an array of day and overnight trips. You can explore the sea caves near Meyers Beach or visit some of the area’s lighthouses before spending the night on one of the numerous isles. Explore a more secluded area with rocky cliff faces and waterfalls galore on their Canyons, Cliffs, and Waterfalls tour. Prices are $90 per adult.

Poseidon Kayak

If you’re looking for a cultural experience on your kayaking trip, you can’t beat the Mawikwe Bay Kayak Tour ($85 per person). This guided tour takes you to the Meyers Beach Sea Caves, an important area to the Chippewa people, where you’ll learn more about the history of the caves and people from a member of the Red Cliff Tribe.

Apostle Islands Cruises

For an all-day excursion exploring some of the more remote islands of the Apostles, head out on the Kayak and Cruise Adventure Tour ($149 per adult, $109 per child). Their 50-foot powered vessel will take you out to the best area for kayaking that day (selected based on weather and lake conditions); then you’ll be afforded two hours of paddling before heading back.

Rentals

While most guide companies in the area only provide tours, there are a few that do offer kayak rentals and packages (including wet or drysuits, spray skirts, etc.) if you’d prefer to do some self-guided Apostle Islands kayaking.

Trek & Trail

Trek & Trail offers plastic and fiberglass sea kayaks in both single and tandem models for rent. Prices start at $40 for six hours for a plastic single. You can also rent each model for additional days with prices ranging from $40 to $60 per day, depending on the model. It should also be noted that you must first pass their Basic Safety Course ($55) before being allowed to rent a kayak. Trek & Trail operates from Memorial Day to early-October, 8 a.m. to 6 p.m.

Rustic Makwa Den

Whether you want to paddle close to shore to explore the mainland’s sea caves or go on an extended trip through the islands, Rustic Makwa Den has you covered with both sit-on-top kayaks and sit-inside sea kayaks. Single sit-on-top kayaks, single sea kayaks and tandem sea kayaks are priced at $45 per day. Tandem sit-on-top kayaks are priced at $55 per day. You must pass a free safety test to rent a sea kayak. Rentals and sea cave tours are available from June through October.

Lost Creek Adventures

Lost Creek Adventures offers not only single and tandem sea and sit-on-top kayaks, but camping gear as well if you’re planning an overnight trip in the islands. Single sea kayaks start at $40 per day, single sit-on-top kayaks at $15 for the first hour, double sea kayaks at $60 per day, and double sit-on-tops at $20 for the first hour. You will also need to pass an Introductory Safety Class ($50 per person). Lost Creek Adventures has open availability during summer months and by appointment during spring and fall.

[ Paddling Trip Guide: View all paddling trips in the United States ]

How to explore the sea caves

As mentioned above, if you plan on renting a sea kayak from a local outfitter, you will be expected to pass some form of introductory safety course. However, sit-on-top kayaks are perfectly acceptable for paddling close to shore where the mainland sea caves are.

There are two launching points along the coast, one located at Meyers Beach and the other at Little Sand Beach. Both of these areas are popular spots for tours and novice kayakers to explore the sea caves.

Being such a large body of water, Lake Superior tends to make its own weather, making air and water conditions unpredictable oftentimes. A sunny day can turn into a raging thunderstorm in the afternoon, if not sooner. Be sure to check weather reports and water conditions before heading out.

If you do find yourself caught in less-than-desirable water conditions, it is very important that you do not approach the sea caves. As noted across numerous websites, the rebounding waves can make them nearly, if not completely, impossible to navigate.

Check out these maps from the National Park Service for island locations and to plan your route.

Popular routes to take

From beginner-friendly shoreline paddles to strenuous overnight trips, the Apostle Islands offer routes for any kayaker.

Meyers Beach

As stated above, the Meyers Beach area is quite popular for viewing the mainland sea caves. Take a leisurely five-mile (round-trip) paddle along the shoreline to not only view but pass through some of the arches and sea caves (calm waters permitting, of course). It takes about two miles to get to the sea caves from the launch point and you can always extend your paddle if desired.

Madeline Island

Paddling around Madeline Island, the park’s only permanently inhabited island, is also a great option for beginners. Head out from the boat launch at Big Bay Town Park or the beach at Big Bay State Park and spend an afternoon exploring the Big Bay Lagoon and sea caves along the point.

Outer Island Loop

For die-hard yakkers with plenty of sea kayaking experience and a thirst for adventure, the 75-mile Outer Island Loop of the Apostles is a fun choice. This trip will take roughly a week to complete, allowing you to stop and explore 11 of the islands along the way. You’ll be able to view more sea caves and old lighthouses as well as find hiking trails on some of the bigger islands. The trip around Devils Island is notorious for being rough, especially in strong winds, so this trip is definitely recommended for seasoned sea kayakers.

Kayak camping spots

The Apostle Islands National Lakeshore consists of 69,372 acres, providing plenty of primitive kayak camping sites among the islands. Over 30 spots are available, though they fill up quickly, so be sure to get your permit and reserve a spot in advance. You can find more specific camping information on the NPS website.

With its close proximity to the mainland, Sand Island is a popular place to camp. There is a campground located on the island and the island itself is a short 3/4-mile paddle from Little Sand Bay. Be sure to check out several sea caves located around the island before setting up camp for the night.

For intermediate and advanced paddlers looking for an extended trip, but not something as lengthy as the Outer Island Loop, plan for a 23-mile trip extending from Little Sand Bay to Sand Island, then heading to York, Raspberry and Oak Island, and then back to shore. All but Raspberry Island host campsites, and water crossings between each island do not surpass 2.5 miles.

Time of year to go

Northern Wisconsin winters can be harsh and it’s not out of the question for them to extend into springtime, so summer is your best bet for Apostle Islands kayaking. Weather-wise, July and August are best but can become quite busy with other visitors. If you’re looking to avoid the crowds, try for September and October, during which time you can enjoy the beautiful Wisconsin fall foliage. Be warned, though, that the weather becomes more unpredictable this time of year with the possibility of early winter storms.

Kayaking the Apostle Islands of Wisconsin offers a unique look at one of North America’s coolest geological wonders, whether you’re an experienced sea kayaker or just beginning.

KL Outdoor Takes On New Ownership

KL Outdoors logo

We are pleased to announce that substantially all the assets of KLO Holdings LLC, including the various trademarks of that company have been acquired by The KL Companies, Inc., a newly formed company based in Muskegon, Michigan. This acquisition allows The KL Companies, Inc. to focus on the personal watercraft market and recapture our leadership position in this popular and growing business. The company provides a full line-up of kayaks, canoes, fishing boats and pedal boats that are 100% designed, developed and manufactured in the USA.

“The KL Companies, Inc. will continue the business of the original company under the iconic name KL Outdoors, which is a registered trademark of The KL Companies, Inc. This includes the complete family of well-known brands that have played a major role in the development and growth of this category”, said Bob Farber, President of The KL Companies, Inc. “This new company brings together a unique combination of production capabilities, product assortment, and in-depth industry knowledge that places KL Outdoors in a position to lead the industry. We look forward to and are committed to working with our valued customers to make this category an increasingly important part of their business”. Our clear and unwavering objective is to use our design prowess, production capabilities and industry knowledge to serve all distribution channels within this industry”, continued Farber.

Operations are expected to commence on June 1st, 2020. This is date could be subject to change due to the Covid-19 pandemic and the shelter in place orders that are in effect in Michigan.

SPOT Introduces the New SPOT X Jeep® Edition 2-Way Satellite Messenger

SPOT Introduces The New SPOT X Jeep® Edition 2-Way Satellite Messenger

MISSISSAUGA, Ontario–(BUSINESS WIRE)–Globalstar Canada Satellite Co., a wholly owned subsidiary of Globalstar Inc. (NYSE MKT: GSAT) and a leader in satellite messaging and emergency notification technologies, today announced the launch of an exclusive SPOT X™ Jeep®Edition 2-way satellite messenger. This newest product launch comes after SPOT recently entered a licensing deal with the Jeep brand.

The SPOT X Jeep Edition offers 2-way message capabilities with an on-board backlit display and Qwerty keyboard, GPS location tracking, and direct communication with emergency services in one portable, lightweight device. The new Jeep Edition combines the capabilities SPOT is known for with Jeep branding. The SPOT X Jeep Edition is the latest product introduction to the award-winning SPOT family of devices, providing affordable, off the grid messaging and tracking. Through a direct connection to the GEOS International Emergency Coordination Center, SPOT has triggered over 7,000 rescues around the globe.


SPOT Introduces The New SPOT X Jeep® Edition 2-Way Satellite Messenger


Key Features of the SPOT X Jeep Edition:

  • Bluetooth wireless technology allows pairing option to perform device functions using the SPOT X app
  • Send and receive messages with family and friends when beyond cellular range
  • S.O.S. emergency notification and direct 2-way messaging with 24/7 Search and Rescue services
  • Check-In “OK” with the push of a single button directly to pre-set contacts
  • Navigation: Built-in compass and programmable waypoints
  • Rechargeable lithium battery averaging a life of 10 days when tracking in 10-minute intervals
  • GPS Tracking and SPOT Mapping interface to Share your Adventures

Pricing and Availability:

The SPOT X Jeep Edition will be available online at FindMeSPOT.ca. The device retails for $389.99 CAD with several annual service plans available, beginning at $11.95 USD per month. More pricing and product details are available at FindMeSPOT.ca/Jeep.

About Globalstar, Inc.

Globalstar is a leading provider of customizable satellite IoT solutions for customers around the world in industries such as government, oil and gas, emergency management, transportation, maritime and outdoor recreation. As a pioneer of mobile satellite voice and data services, Globalstar allows businesses to streamline operations via the Globalstar Satellite Network by connecting people to their devices, supplying personal safety and communication and automating data to more easily monitor and manage mobile assets. The Company’s product portfolio includes the industry-acclaimed SmartOne asset tracking products, Commercial IoT satellite transmitters and Duplex satellite data modems, the innovative Sat-Fi2 satellite wireless IP hotspot and the SPOT® product line of personal safety, asset and communication devices, all offered with a variety of data service plans. For more information regarding Globalstar Canada Satellite Co., please visit globalstar.ca.

About SPOT

SPOT LLC, a subsidiary of Globalstar, Inc., provides affordable satellite communication and tracking devices for recreational and business use. SPOT messaging devices use both the GPS satellite network and the Globalstar Satellite Network to transmit and receive text messages and GPS coordinates. Since 2007, SPOT has provided peace of mind by allowing customers to remain in contact with family, friends and co-workers, completely independent of cellular coverage and has helped initiate over 7,000 rescues worldwide. For more information, visit FindMeSPOT.ca. Note that all SPOT products described in this press release are the products of SPOT LLC, which is not affiliated in any manner with Spot Image of Toulouse, France or Spot Image Corporation of Chantilly, Virginia. SPOT Connect is a trademark of Spot LLC. All other trademarks are the property of their respective owners.

About Jeep

Built on more than 75 years of legendary heritage, Jeep is the authentic SUV with class-leading capability, craftsmanship and versatility for people who seek extraordinary journeys. The Jeep brand delivers an open invitation to live life to the fullest by offering a full line of vehicles that continue to provide owners with a sense of security to handle any journey with confidence.

The Jeep vehicle lineup consists of the Cherokee, Compass, Gladiator, Grand Cherokee, Renegade and Wrangler. To meet consumer demand around the world, all Jeep models sold outside North America are available in both left- and right-hand drive configurations and with gasoline and diesel powertrain options. Jeep is part of the portfolio of brands offered by global automaker Fiat Chrysler Automobiles. For more information regarding FCA (NYSE: FCAU/ MTA: FCA), please visit www.fcagroup.com.

Media Contact:
Caroline McGrath
CMM Communications Inc. for Globalstar Canada Satellite Co.
caroline@cmm-communications.com
+1-416-972-1642

7 Stages of Gear Addiction

husband and wife fight over a kayak at wedding
Successful interventions can help an addict’s loved ones express their feelings constructively. Photo: Dan Caldwell

You know you’re living with a gear disorder when you exhibit one or more of the following traits: You feel you cannot face life without your gear; you cannot control your use of gear; you are proud of excessive use of gear, despite harm to your health and other parts of your life; you lie about your use, especially about how much you are using it; you give up friends, family and activities you once enjoyed; you cannot recognize the problems with your behavior.

These are signs of the sixth stage of a gear addiction. Sound familiar?

Most people develop gear disorders of all kinds before reaching adulthood. The alpine ski trade associations know if children are riding chairlifts by the age of 11, they contribute exponentially more to the ski gear industry’s bottom line throughout their lifetimes. This is why grade five students ski for free at most resorts across the country. Hey kids, want some candy?

Other outdoor industry studies suggest the same, and anecdotally we know this to be true for paddling.

Stage one of a gear use disorder, the initiation stage, generally happens during the reckless teen and college years—mostly out of curiosity and because friends and family are doing it. This is a great time for creating lifelong addictions of all kinds. The prefrontal cortex part of the brain, responsible for decision making and controlling impulses, has not fully developed. This makes 40-foot waterfalls and $1,000 drysuits seem totally reasonable. Why not, right?

[ Paddling Buyer’s Guide: View all technical outerwear ]

Stage two is the experimentation stage. Gear use in this second stage is a social activity associated with fun, unwinding and a general lack of consequences. You are fleetingly aware of the risks but think to yourself, I can stop using my gear if I want to. You think, my gear doesn’t control me, I control my gear. Delusion begins here.

During stage three, gear use becomes more frequent. You may not be able to use it every day, but patterns develop, like say, using gear every weekend. At stage three, you may begin to miss work or school. Gear use becomes an excuse to miss family functions like weddings, or gear is worn to weddings when an opportunity for use exists before or afterward. In advanced cases, you might wear it to your own wedding. You may already have your local gear dealer on speed dial. And gear use has become intricately tied to escaping negative emotions or unpleasant situations.

Gear addiction, say some, becomes a real problem at stage four when you begin to change your circle of friends. Here your behavior almost certainly changes, becoming noticeably more chill, often late for appointments and more likely to be naked in public places before and after use.

Stage five dependence leads to the serious gear use disorder of full-on stage six addiction, see above.

As the editor-in-chief of paddling’s largest gear guide, I say heavy gear use is not a disorder at all, but it’s the activities of kayaking, paddleboarding, kayak fishing and canoeing we are addicted to.

But I would say that, wouldn’t I?

No matter, if you are reading this, it’s probably too late to regain control over your life and your bank account. Sorry, not sorry. You’ve surely already been through the endless pages of the best paddling gear in the Paddling Buyer’s Guide.

With other addictions, stage seven is treatment. Treatment would be to stop doing it. Professionals would recommend an initial cold turkey detox period followed by intense behavioral therapy and some expensive pharmaceuticals.

Gear addition, the way I see it, is only a problem when you’re not using. For which there are therapy sessions and groups we can attend. In the cold winter regions, addicts flock to warm community pools for help. When the water is not stiff, such groups gather on lakes and rivers everywhere. Check your national paddling association or local club for regularly scheduled meetings.

Scott MacGregor is the founder and publisher of Paddling Magazine.

Successful interventions can help an addict’s loved ones express their feelings constructively. Featured photo: Dan Caldwell

Video: Surviving COVID-19 For Sea Kayakers

“In 2020 we had big plans,” writes filmmaker Tom Vetterl. “Several expeditions and trainings were in the making, I wanted to start my BCU education to become a sea kayak guide, there were lots of ideas for new films in the pipeline, a full 2020 schedule.”

Unfortunately, like so many others, his plans came crashing down due to the COVID-19 crisis. “All plans are cancelled or at least on hold, especially friends with businesses are struggling,” he writes.

But, sea kayakers are resilient, he says. “We never bust our heads in the sand! With this film, me and my friends from Moryak Premium Sea Kayaking, Expedition Paddler and ISKGA, want to encourage everyone to stay optimistic, make plans and concentrate on what can be done! Take online classes, plan your next expedition, reach out to friends and support your community, read books, learn something new, be creative! We hope everyone is doing well out there, and we cannot wait to get back on the waters with you.”


You’ll Be Surprised By The Beautiful Paddling Experiences Lake Powell Offers

Kayaks with canyon walls on either side
There's beautiful natural scenery to be enjoyed on Lake Powell.

Paddling on Lake Powell is a lesson in embracing contradiction. Behind a controversial dam, a massive reservoir winds like a ribbon through 150 miles of remarkable desert canyons. Of course, being located in one of the driest regions in the U.S., the reservoir is typically half full. The watercrafts of choice, in high season, are speedboats and houseboats which bounce waves between cliffs in the main channel. Many Southwestern paddlers hate Lake Powell so much, they call it Reservoir Powell, and refuse to even consider paddling there. BUT WAIT.

Other paddlers explore stunning side canyons, take overnight trips to remote bays, and even paddle across the entire reservoir. In recent years, Lake Powell has developed a growing paddling scene among dedicated locals and awestruck visitors. And those paddlers, including skeptics, who give the reservoir a chance often come away pleasantly surprised.

Kayak and SUP rentals at Lake Powell

The town of Page, Arizona, near Glen Canyon Dam, serves as regional hub for paddling at the southern end of the reservoir. Three companies offer rentals. For those new to paddleboarding, check out rentals from Lake Powell Paddleboards and Kayaks. For kayak rentals, check out Kayak Lake Powell and Hidden Canyon Kayak.

For those seeking a more remote experience, the Hite Outpost is now operating on the north end of the reservoir, offering kayak and SUP rentals, plus an updated campground.

Kayak and SUP tours of Lake Powell

The three companies based in Page, listed above, each offer a variety of tours. The most common are half-day trips by kayak or SUP into the narrowing slot of Antelope Canyon or to Lone Rock Canyon in Wahweap Bay. Full-day and overnight trips will often motor paddlers and boats to more distant places, like Labyrinth Canyon and Padre Bay. At North Lake Powell, the new Hite Outpost plans to start offering tours in 2021.

[ Paddling Trip Guide: View all kayak and SUP tours in the U.S. ]

Side canyons: The best place for paddling at Lake Powell

For most paddlers, Lake Powell is all about exploring side canyons. A great introduction to this experience is Antelope Canyon at the southern end of the reservoir, near Page. This is the lowest extremity of the famous Antelope slot canyon in the Navajo Nation.

To reach this side canyon, paddlers launch from Antelope Marina and paddle west for a mile on the main channel. Go early in the morning if you want to avoid the wakes from boat traffic in the main channel. Depending on reservoir level, water typically reaches two miles back into the narrowing Antelope Canyon. After that, you can hike another two miles through the twisty slot canyon that’s known as Lower Antelope Canyon, which is accessible only to small watercraft. Due to the risk of flash floods, do not explore slot canyons during thunderstorms.

Another popular and user-friendly area is northern Wahweap Bay, where you can paddle into Lone Rock Canyon. Further away, paddling at North Lake Powell offers a remote experience far from the southern scene.

Places to kayak and SUP near Lake Powell

The section of Colorado River between Glen Canyon and Lees Ferry goes by several names, including the Backhaul and Horseshoe Bend section. The run offers the final 15 miles of the Colorado River through Glen Canyon that’s not flooded by the reservoir. The water runs clear and cold, about 50 degrees Fahrenheit, from outlet pipes at the bottom of the dam. Since there’s no road access, paddlers and boats must be hauled upstream on a motorboat from Lees Ferry by Wilderness River Adventures.

Best time of year to visit Lake Powell

You can paddle at Lake Powell any time of year. Summer is hot and busy, but it’s still a nice way to cool off. Winter offers a nearly empty experience but expect cold temperatures and cold water.

The shoulder seasons, when the reservoir is less busy, can offer a good window for many paddlers. These windows will vary each season, given shifting weather patterns, so check conditions at Page, Arizona, before you go. For fall, target roughly late-September to early-November. During spring, consider March to early-May.

What to pack to kayak and SUP Lake Powell

Other than a party boater tossing you a beer (not likely, but also not impossible) prepare like you’re going desert hiking. An approved PFD must be worn by each paddler. Bring plenty of drinking water, food, sunscreen, a sun hat, a sun shirt, a sun dial—did I mention it’s very sunny out there?

That said, take some extra layers or splash jacket in case air temperatures drop and winds rise. Given the potential for waves, be prepared for possible immersion—water temperatures are colder during shoulder seasons and warm substantially during the summer.

Important things to know

The surface elevation of the reservoir is typically around 3,600 feet. Weather can appear with little warning. Be prepared for building clouds, rising winds, frequent waves and sudden thunderstorms. If this happens while paddling, head to shore and wait until conditions improve.

Access to the marina launch ramps in Glen Canyon National Recreation Area requires a $30 entrance fee per vehicle which is good for seven days.


Mike Bezemek is author and photographer of Paddling the John Wesley Powell Route: Exploring the Green and Colorado Rivers. The book combines a condensed retelling of the dramatic 1869 expedition with color photos and a trip guide to the 1,000-mile Powell Route, which includes Lake Powell.

Stay Warm & Dry With This Guide To Using, Buying & Maintaining A Drysuit

Man in orange whitewater kayak with yellow and black drysuit
Wearing a drysuit isn't just about comfort—it's also essential to your safety on cold water.

What is a drysuit? Simply put, a drysuit is a specialized piece of paddlesports clothing. Drysuits provide a high level of protection from cold water immersion and a broad range of comfort in all but the hottest weather. For many paddlers, good drysuits are money well spent—the best investment you can make in safety and comfort paddling.

When to use a drysuit

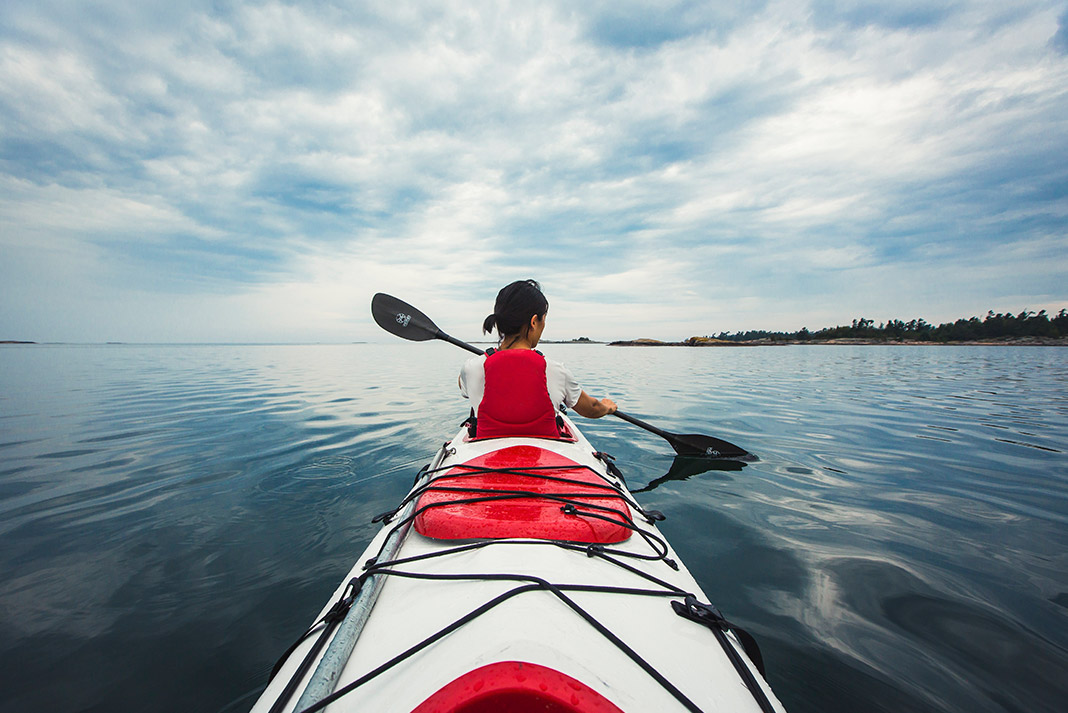
A drysuit is appropriate to use anytime the water temperature is cold enough that you would be at risk of hypothermia if you went for a swim. This might sound extreme, but it really isn’t. Summertime water temperatures are cold enough in much of North America to warrant a drysuit for sea kayaking or whitewater boating. Water conducts heat away from your body 25 times faster than air. This means that even cool water temperatures can be dangerous if you don’t dress appropriately.

Many people choose neoprene wetsuits for cold water protection, but drysuits are more effective. Drysuits offer better protection from cold water immersion and a broader comfort range in warm weather. Any way you slice it, drysuits are a secret weapon for paddling comfort and safety.

How does a drysuit work?

Drysuits work by preventing cold water from touching your skin. If water can’t contact your skin, you won’t be subject to the rapid cooling effects of H20. Drysuits accomplish this feat by sealing your body inside a watertight envelope. The suit itself is made of waterproof materials, neck, wrist and foot openings are sealed with super-tight latex gaskets, and entry is provided by a waterproof zipper. Different suits use slightly different materials and closures, but the general concept is the same—water stays out, you stay warm.

The drysuit doesn’t offer any insulation itself, but anything under the suit will stay (mostly) dry. This means you have the option of increasing or decreasing insulation under the suit to adapt to different water and air temperatures. The ability to vary insulation to meet different conditions is the key reason that drysuits are so versatile.

Buying a drysuit

Common features

All drysuits have a few features in common. The most obvious of these are latex wrist and neck gaskets that seal tightly against your skin and limit the amount of moisture that can enter the suit. Many suits have latex or fabric socks at the feet rather than gaskets. These are much easier to use than ankle gaskets and keep your feet warmer.

A second common feature is some kind of closure. You need to be able to get into and out of the suit somehow and designers have hit on a few angles that work well. When you start looking at suits, one of the main decisions you’ll need to make is what type of entry you prefer. It is definitely worth trying on different suits with different zipper placement to figure out what works best for you.

Here are a few of the main types of entry design.

Types of drysuits

Font-zip drysuits

Front-zip drysuits place the entry zipper across the chest of the drysuit beginning at the upper right shoulder and angling downward toward the waist on the left. The advantage of the front-zip entry is that it is the easiest configuration to zip closed by yourself. With a little practice, most paddlers can zip the suit all the way closed at the top and reach the zipper tab to open the suit at the end of the day.

The disadvantage of front-zip suits is that they place the bulky zipper right across your chest where it can be uncomfortable. They also tend to be less dry on the boat than rear-zip suits since any sprayskirt tunnel incorporated into the design will need to be penetrated by a flap that allows the zipper to be opened and closed.

Rear-zip

Rear-zip suits open and close across the back of the shoulders. This design places the zipper away from the chest. The advantage is that there are no penetrations through the sprayskirt tunnel on the suit. A drier sprayskirt tunnel means a drier boat, so rear-zip designs are popular with whitewater kayakers and rough water sea kayakers.

Rear-zip suits work great once you’re zipped inside, but they can be tricky to close. Depending on how flexible you are, you may not be able to zip the suit closed by yourself. This isn’t a problem if you’re spending a day out on the river with friends, but it might be an obstacle to wearing the suit on solo adventures.

Two-piece

There are a few suits on the market that mate together top and bottom. The idea is that you can use the top section separately as a drytop if you don’t need the full protection of your drysuit. The most common of these systems use a conventional drytop with a double tunnel and a specialized set of paddling bib pants that have a matching tunnel. The two tunnels are rolled together and tucked inside the tunnel of a neoprene sprayskirt for security.

The drytop/bib drysuit option is versatile, but it doesn’t provide nearly the amount of protection that a true drysuit does. In practice, the roll closure is difficult to keep sealed and some amount of water does enter the suit if you swim. This means this kind of system doesn’t really function as a true drysuit. If you already have a good drytop, adding a set of bibs can stretch your season and improve your safety, but a dedicated drysuit will function better.

There are some drysuits on the market that place a waterproof zipper between the top and bottom of the suit. This allows the top of the suit to be worn as a drytop by itself, or to be combined with the drysuit bottoms to create a full suit. The use of a waterproof zipper creates a truly dry closure between the two halves of the suit. If you’re looking for the versatility of one suit that can be worn as a drysuit or a drytop, this is the most secure option.

Semi-drysuits

One last type of suit worth mentioning is the semi-drysuit. These suits typically have all the features of conventional drysuits but replace the dry latex neck gasket with a neoprene closure. This closure isn’t as dry as a latex gasket but can be adjusted for comfort and ventilation. The thinking is that if you capsize and come out of your kayak, your head and neck will quickly be above water, so you won’t get that much water in through the looser neck opening.

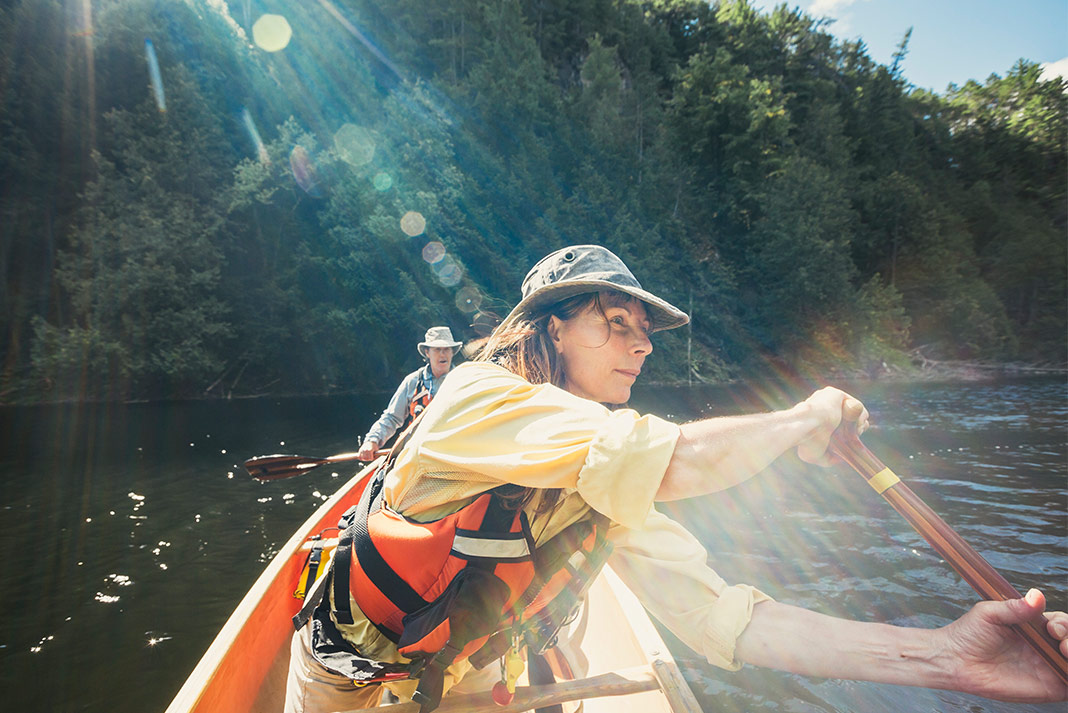
Semi-drysuits can be a good option for expedition canoeing, where you’re unlikely to put your head underwater if you flip. They also might be the right choice for someone paddling in very hot air conditions and cold water. Some folks have sensitivity to latex and aren’t able to wear a suit with a neck gasket. In these circumstances a semi-drysuit could be a good choice. Just remember that it won’t keep you as dry as a true drysuit. For most folks, a true drysuit is the best option.

Drysuit materials

Drysuit fabrics and zippers are the two main areas of variation between models and manufacturers.

Fabrics

Years ago, drysuits were built from urethane coated nylon fabrics that didn’t breathe. Water couldn’t get in, but your perspiration couldn’t get out. This meant that in warm conditions you would stew in the suit. Back in the non-breathable days, drysuits were really only an option if the water and the air temperatures were freezing.

It took the advent of breathable fabrics to make truly versatile drysuits possible. The best known of these is Gore-Tex, which is a family of fabrics made from ePTFE (expanded polytetrafluoroethylene). Other common breathable fabrics are produced by laminating breathable urethane coatings to a variety of face fabrics. Both Gore-Tex and proprietary waterproof breathable fabrics are proven, effective options in drysuit materials.

Breathable fabrics allow some moisture to escape from the inside of the fabric to the outside. All work best when the environment on the inside of the suit is warmer and more humid than the outside air. If the outer fabric of your suit gets soaked, it won’t breathe as well. In practice, this means that even breathable suits can get a little sweaty when you’re working hard. Even so, they are much more comfortable than non-breathable suits. So much so that it’s become difficult to find a suit made from non-breathable coated fabrics. The breathable suits just work better.

As far as fabrics go, Gore-Tex has a strong reputation as a durable, breathable material for drysuits. WL Gore even goes so far as to back their materials with a robust warranty that covers delamination. This means that Gore-Tex suits are among the most durable and strongly backed options on the market.

The downside of Gore-Tex is cost, which can be considerably higher than the cost of other effective fabrics. Many quality manufacturers choose alternatives to Gore-Tex for their suits and most companies that build Gore-Tex suits offer a lower-cost alternative in a proprietary fabric. Fabric alone shouldn’t necessarily dictate which suit you choose. There are lots of good options out there in a wide range of materials.

Zippers

Drysuits require waterproof zippers. The two types available are metal and plastic. The metal waterproof zipper has long been considered the best, driest option, but in recent years new waterproof plastic zippers have come onto the market and are giving the metal option a run for its money. At this point it would be difficult to say whether metal or plastic waterproof zippers are truly superior. A quality drysuit manufacturer will choose the zipper that is best matched to the design of the suit. Both metal and plastic options are effective.

Special features

These days, drysuits come standard with a wide range of specialty features. The most common of these are double tunnels and relief zippers, but there are a few more worth considering.

Double tunnel

Double tunnel drysuits have a fabric tunnel sewn into the suit that goes over the top of the tunnel on your sprayskirt. This tunnel snugs up tight with a velcro closure and dramatically limits the amount of water than can get into your kayak between your body and your sprayskirt. Whitewater kayakers will prefer this option as will sea kayakers who venture out into the rough stuff.

Relief zips

Once considered a luxury, relief zips are now standard on a range of drysuits. They are worth every penny of extra cost that they add to a suit. Simply put, a relief zip makes it possible to answer the call of nature without completely removing your suit. This means you’ll stay warmer and will be more likely to hydrate properly. Men’s suits have a relief zipper at the front. Women’s suits feature a zipper around the edge of the seat.

Socks

Another option that is rapidly becoming standard issue, socks are definitely worth having. It’s much easier to slide your feet in and out of socks than it is to force them through ankle gaskets. Better still, wool socks inside waterproof socks, inside the fully-sealed drysuit stay toasty warm and dry.

The two main types of socks are latex and fabric. Fabric socks breathe a bit and keep your feet a little drier. Latex socks are a little more durable and don’t bunch up inside your booties or water shoes. Both options work well and can be repaired or replaced if needed.

Pockets

Sleeve pockets, chest pockets, thigh pockets. There are lots of options out there. Some pockets can be custom added to suits. Others come standard as part of a specialty suit design.

Reinforced wear areas

Heavy-duty fabrics on seat and knees are a good idea, especially for whitewater kayakers who will be scouting and portaging in rugged terrain. Many suits come with this feature as standard. Others offer it as a custom option.

Hoods

Specialty sea kayaking drysuits frequently feature a hood that can be deployed to keep the rain off your head and block the wind.

How should a drysuit fit?

Your drysuit should fit comfortably over whatever insulating layers you plan to wear. It’s important for the suit to fit when you’re seated in your kayak. You don’t want it to bind when you sit upright or when you set up for a roll. Common fit problems include a suit being too short in the torso so that it binds in the crotch, a suit being too tight across the shoulders so that it limits mobility for rolls, and a suit being too tight around the waist, which causes limited mobility all around.

How tight should a drysuit neck seal be?

Speaking of tight, how about that neck gasket? New suits with new gaskets can fit so tight your face will turn red. Not good! You want the gasket to be just tight enough to keep water out of your suit without cutting off circulation. If the gasket is too tight, you’ll need to make an adjustment.

Over time, neck gaskets stretch out a bit and become more comfortable. A good trick for loosening your neck gasket is to stretch it over an oversized object like a mixing bowl. Leave the bowl in place for several days and try on the suit again. In most cases the gasket will stretch enough to fit properly. Don’t be afraid to try this several times before moving on to more drastic measures.

If you can’t get your neck gasket to fit comfortably by stretching, you can cut the gasket down to create a looser fit. This is a tricky process and if you do it incorrectly you could tear the gasket. Check with the manufacturer of your suit for tips before you resort to cutting your neck gasket.

How much does a drysuit cost?

Depending on features and materials, drysuits range from about $500 to well over $1,000. Many of the most popular models sell for $800 to $1,000. This is obviously a considerable outlay in cash for a piece of clothing. On the other hand, the versatility and comfort that a drysuit provides is unmatched. When it comes to comfort and safety, drysuits are worth the investment.

Where to buy a drysuit

If you’re lucky enough to have a serious paddling store in your hometown, pay them a visit. Buying a drysuit from your local shop is a great way to ensure you’ll end up with a suit that fits and has the features you need for your local waters. Chances are, the folks at the shop will have tried one or more suits themselves and will be able to offer up an educated opinion on what will work best for you.

If you don’t have a local connection, you can search out suits on the web. Our Paddling Buyer’s Guide is a great place to start. It compares a range of suits from top manufacturers and provides links for online shopping.

[ See all drysuits in the Paddling Buyer’s Guide ]

Where to rent a drysuit

Depending on where you live, you may be able to rent a drysuit from a local paddling shop. Some manufacturers also provide rental services as a way for you to take their products for an extended test drive. A few specialty retailers and schools will ship a drysuit to you anywhere in the country. A web search for kayak drysuit rental will be your best bet in finding a drysuit to rent.

How to use a drysuit

What to wear under a drysuit

What you wear under a drysuit will dictate how comfortable you are in and out of the water. You can read our complete guide on What To Wear Kayaking for the nitty-gritty of how to stay comfortable in a full range of conditions.

The basics of layering under a drysuit come down to moisture management and insulation. You’ll want to wear a wicking base layer to help move moisture away from your skin and toward the outer fabric of the suit. In warm weather, this wicking base layer may be the only thing you wear under your drysuit. In colder conditions, you’ll want to wear a layer of wicking fleece over the top of this base layer.

Wicking fleece works better than conventional fleece inside a drysuit. It is woven in a way that draws moisture from the inside of the fabric toward the outer fabric face. This active wicking process works with your body heat to move perspiration away from your skin so you’ll feel drier, warmer and more comfortable. In some cases, wicking fleece is so effective you might choose to wear it alone, next-to-skin rather than layering over a thinner base layer.

You can layer under a drysuit with any appropriate wicking clothes from your conventional outdoor closet, but specialized paddling layers work better. These clothes are cut to move seams away from armpits or waist where they might chafe while paddling. They typically have longer tails and higher waists to prevent gapping while seated. You can even buy a one-piece fleece suit to wear under your drysuit for low-bulk, gap-free insulation.

What you shouldn’t wear under a drysuit is anything that absorbs moisture and is slow to dry. Cotton is out. Merino wool works but is slower to dry than synthetics.

Avoid wearing rings, watches or other jewelry that could damage latex wrist gaskets. You’ll want to remove all these items before trying on any drysuit.

How to put a drysuit on

The easiest way to put on a drysuit is feet, waist, hands, head. Find a padded, clean surface to stand on. A chair can help. Slide your feet into the legs and fully down into the drysuit’s socks. Next, pull the suit up to your waist. Slide your hands into the arms and get them fully through the wrist gaskets one at a time. Now comes the tricky part. Grasp the neck gasket with both hands and pull outward to expand the gasket. Duck your head into the suit and under the gasket and press through the gasket until it drops below your chin. You’re in! Zip the zipper and you’re ready to go.

How do you get a drysuit off?

To remove a drysuit, reverse the steps mentioned above. Open the zipper. Grasp the neck gasket with your hands and pull outward to stretch the gasket. Pull the gasket over your head and duck your head out of the body of the suit. Pull your hands out of the wrist gaskets. It is usually easiest to pull these gaskets inside out. Once your hands are out, the suit can be removed like a pair of pants.

Taking care of your drysuit

Repair

All our tools wear with time. Drysuits are no exception. Latex gaskets degrade with time and must be replaced. Waterproof fabrics can develop pinhole leaks that need to be patched. The best manufacturers offer repair services that will get your suit back up and running when it comes time for scheduled maintenance.

How long should a drysuit last?

The lifespan of a drysuit has a bit to do with materials, but more to do with how you care for the suit. Gaskets deteriorate with age and with frequent use may need to be replaced every three to five years. Waterproof fabrics can develop small pinholes over time. Fabric socks are prone to this problem because of the wear and tear they endure inside paddling shoes. A quality manufacturer can test your suit for leaks and make repairs for a modest cost.

What’s the maximum lifespan of a drysuit? A long time. 10 years isn’t uncommon, particularly if the suit is well-maintained. Longer is possible.

How to dry out a drysuit

It’s a good idea to dry your drysuit after each use. This prevents destructive mildew from forming on the fabric. Rinse your suit in fresh water if you’ve been paddling in the sea. Hang the suit out of the direct sun to dry. You may need to turn the suit inside out to ensure it dries completely.

How to clean a drysuit

If your drysuit is grungy, or if the outer fabric isn’t beading water anymore, it’s time for a clean. Follow the manufacturer’s recommendations when cleaning your drysuit. In most cases, it’s recommended that you use a front-loading machine or a top-loader without an agitator. Use a technical soap, not conventional laundry detergent. Detergents will destroy the Durable Water Repellent (DWR) treatment on the face fabric of the suit. Hang the suit to dry.

If you need to restore your suit’s DWR, use a spray-on treatment. You can’t put your suit in the dryer (it would destroy the gaskets), so you’ll want to use a hand iron to complete the DWR treatment. Details of how to do this correctly can be found on the manufacturer’s website.

How to store a drysuit

Store your drysuit in a cool, dry place out of the sun. UV radiation breaks down drysuit gaskets so the more time they spend in the dark the better. It’s okay to store your suit in a duffel bag or hanging over a stout hanger. There isn’t a particular way the suit needs to be folded.

Follow the recommendations from the manufacturer about what to do with your suit’s zippers. Some zippers should be stored slightly open, while others should be zipped up tight. Proper storage will ensure the zipper remains waterproof for the life of the suit.

Don’t compress your suit or store it in a hot place. This can cause the latex gaskets to become sticky and make them adhere to themselves. Once this happens, the gaskets usually tear and need to be replaced.

How do you change a drysuit gasket?

Changing a drysuit gasket can be tricky. It’s definitely something that is within reach of a skilled DIY paddler, but it’s worth doing some careful research before you dig into the project.

The basic process involves cutting away the old gasket where it meets the fabric of the suit. The opening is then stretched over an oversized object (PVC pipe sections are commonly used). The surface of the old gasket is prepped and a new gasket is stretched over it and glued in place with Aquaseal. When the sealant is cured, the repair is complete.

Replacing a gasket isn’t difficult, but it can get messy. If you’re going to try this on your own, be sure to do a little homework ahead of time. If you don’t feel like tackling this project at home, you can send your suit in to the manufacturer for a professional gasket replacement.


A Paddler’s Guide to Social Distancing

Paddlers guide to coronavirus

Iced in with nowhere to go? As more states and provinces recommend people work from home, stay home from school, cancel paddling events and practice social distancing, many are starting to feel cabin fever—especially since open water is still weeks away for northern regions.

Not to fear. Paddling Magazine has you covered with a list of suggestions to keep you calm, busy and feeling inspired.

Favorite Podcasts for Paddlers

Keep adventure on your mind with this list of 16 podcasts paddlers and adventurous souls are sure to love.

Favorite Books for Paddlers

Get our list of eight books every paddler should read (but probably hasn’t) here.

Crossword for Whitewater Kayakers


Need a clue? Consult the Best River Lingo List.

Favorite Movies for Paddlers

Watch the most recent viral paddling videos on Paddlingmag.com here.

Practice Yoga

Stay bendy and ready for paddling season with these poses specific to keeping your paddling muscles loose and limber.

Dream Up Your Next Trip

Use the online Paddling Trip Guide to dream up your next big adventure, or Paddling Maps to discover new routes local to you.

Wish List Gear

Browse the best new gear for 2020 on the online Paddling Buyer’s Guide, then organize your gear closet to make room for more.

Go Paddling and Get Outside

Go paddling. Take a walk in the woods. Just be extra safe while doing it. Time in nature makes us happier, healthier and more creative—it’s not just in your mind, time outside benefits us on a physiological level. Here’s why. 

Main image: Image by Alain Audet from Pixabay