

Filmmaker Mike McKay On Quitting Your Day Job
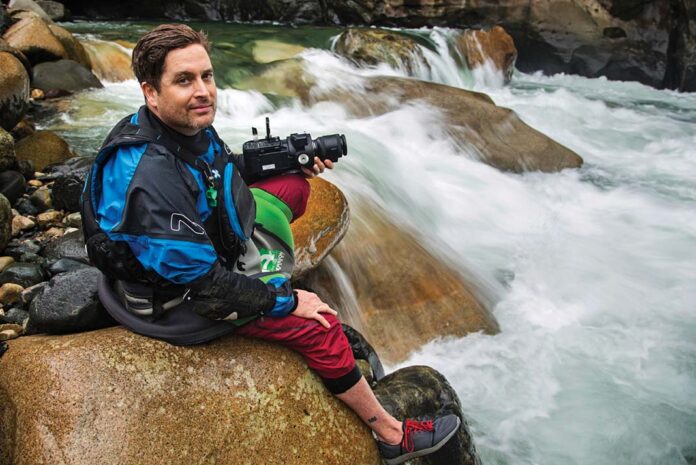
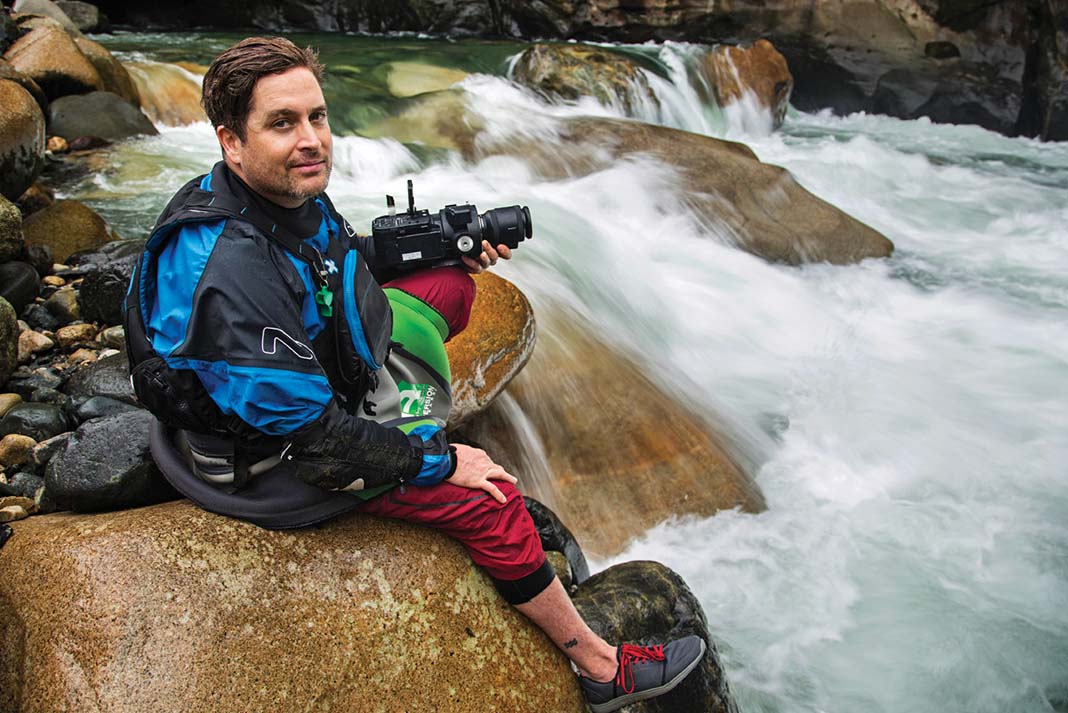
Mike McKay has been one of whitewater’s best-known filmmakers since his 2010 release of Currents, a 20-part conservation-themed series profiling whitewater communities around the world. Since then, McKay has made more than 50 whitewater films, including an in-depth rescue skills series and his recent three-part Chaos Theory, juxtaposing skillfully shot artistry—music, dance, painting—with class V whitewater scenes.
McKay and his production company, Five2Nine, is regularly shortlisted and awarded at outdoor film festivals. He’s a fixture of Rapid Media’s annual Paddling Film Festival. We caught up with McKay after his recent decision to quit his day job—a 14-year career in finance—to pursue filmmaking full time.
4 questions for filmmaker Mike McKay
1 What inspires your filmmaking?
It all started with a kayak porn video called Just Like You Imagined. After that went well, I started wondering what I could do if I made something that really mattered. I had the idea of going to all these different places and telling the story of each whitewater location and how it involved the community—it was very conservation-based.
I thought kayak porn was fun to do, but that it would be really cool to use this skill set to make a difference. That was really how Currents was born. I wasn’t a conservationist when I set out to do this, I was just striving for a better form of content.
2 How have you grown as a filmmaker?
From the beginning, I think I had a knack for storytelling, but my technical skills weren’t there—that grew with every single episode. By the end of the Currents series I was getting pretty stoked on where things were. I’ve come a long way in terms of how I tell stories too.
With my newest film, Botella, I didn’t want to just have talking heads discussing the issue of garbage on the Alseseca, so I followed a bottle down the river to tell the story.
3 Why did you quit your day job?
I wasn’t going to bed at night thinking “wow, that really helped.” I used to feel like I was making a difference for people, and when I stopped feeling that way about my job it really bothered me.
On the other hand, when I went out to communities where there was a dam being constructed on a river or a pollution problem, and I could do something that really mattered, it felt good. I was getting pissed off about the fact that there were all these great places I might not get to visit in my lifetime because those rivers might not be there any more.
4 What’s your advice for those looking to quit their day job?
You need to wake up in the morning and know that you’re not going to make any money but go out and do something anyways. A lot of professionals won’t leave their house unless they’re making a certain amount, but sacrifices are important at first.
Pay comes in many different forms. You can do a cool project and not make much money, but somebody who’s going to pay you a lot for another job really likes it. A project that doesn’t pay might be the one that defines you and gets you all kinds of gigs.
Also, you have to go all in. You have to come home from your nine-to- five job and work until midnight—as I was working towards this, it was really like having two full-time jobs.
 This article was first published in the Early Summer 2016 issue of Rapid Magazine.
 Goodbye, nine-to-five. | Feature photo: Dylan Page
Paddling Swiftwater & Pursuing Sweetwater Seals In The Wilds Of Northern Quebec
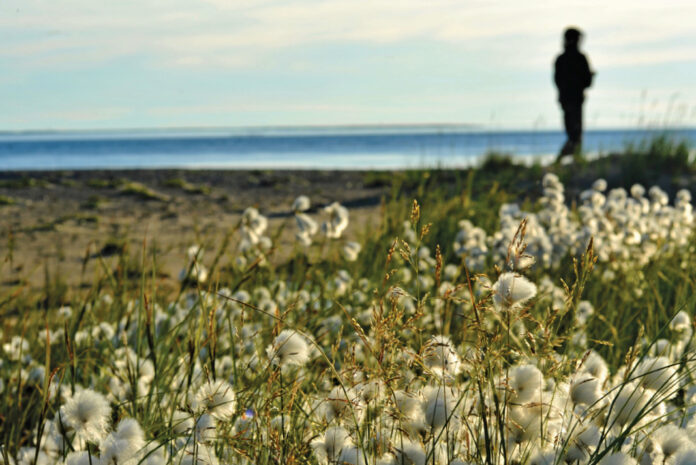
Scrambling through a sea of knee-deep scrub alder and dwarf willow, I scurry to keep pace with Jon’s loping gait. We’re trekking across the rolling taiga into the rapidly sinking sun, and the golden light washes across the mesh face of my bug jacket, obscuring all but the lanky silhouette of my canoe partner. My near blindness and the cloying warmth inside the hood amplify the sound of my panting. At last, I stumble over a rocky rise and my breath catches, half-drawn, in my throat.
Moments earlier, Jon had burst into our campsite where I was hiding with our tripmates, Conor and Kim, from the evening blackfly onslaught behind the screened walls of our tarp shelter. “What is it?” Conor asked, glancing past Jon for signs of a marauding polar bear.
Jon pressed something icy cold into my hand. “It’s what we’ve paddled 35 days to see,” he replied, dropping his arm to reveal the snowball in my palm. “But you have to hurry.”
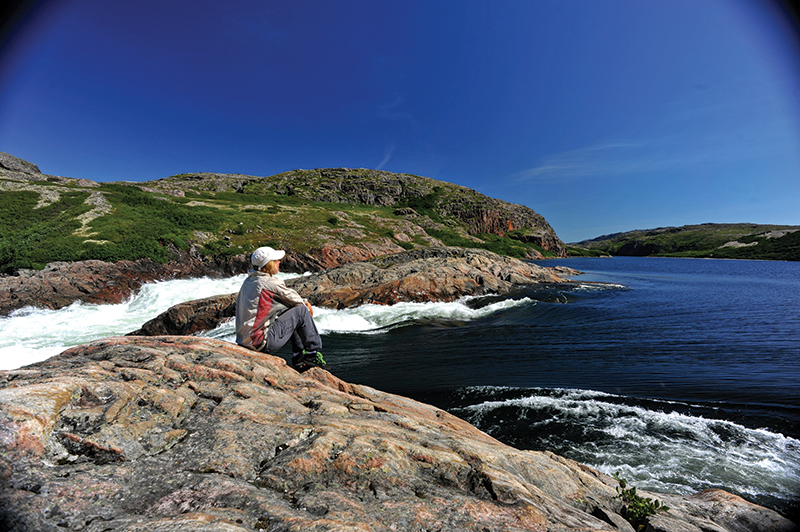
Lush subalpine meadows carpeted in delicate white bunchberry blossoms and a score of other tiny wildflowers tumble down to the edge of a misting precipice. The last rays of sun pour like honey into the deep gorge and spill fully on a thundering avalanche of water. Near the rim of the falls, hidden in shadow for most of the day, a small snowfield clings to the slippery bedrock, irreverent of the early August warmth.
The falls’ cold, billowing mists have formed this remarkable micro ecosystem, a world every bit as sublime as the imaginary Elvish kingdoms of Tolkien’s tales. And yet this spectacular cascade is unnamed on our 1970s-era, black-and-white topographic maps—an unremarkable hatch line where the Nastapoka River doglegs between bald-rock hills on its westerly journey to Hudson Bay.
The falling water whispers a certainty: If this were Banff or Yellowstone, rather than this isolated wedge of northern Quebec, the falls would be among the parks’ star attractions. But up here in Nunavik, the 100-plus- foot plunge is merely an all-but-unknown precursor to Nastapoka Falls, just a day’s paddle downriver, which plummets into Hudson Bay 40 kilometers north of the Inuit community of Umiujaq.
Together, the falls, rapids, valley and headwaters of the Nastapoka River form one of the central arteries of Parcs Quebec’s newest national park, Tursujuq, a 26,100 square kilometer (6.5 million acre) wilderness of taiga, rocky ramparts, swift rivers and crystalline lakes. Designated in 2013, the park is one of North America’s largest protected areas, nearly triple the size of Yellowstone and four times the size of Banff. However, like many parks in the North, Tursujuq is accessible only by bush plane or boat; there are no roads, signs or, for now, marked trails or campsites.
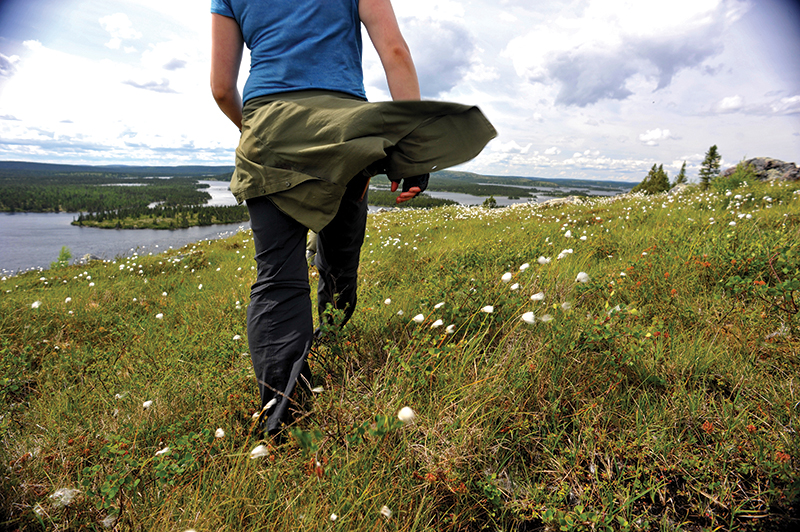
As the sun slips behind a craggy ridge, staining crimson a scarf of woolly clouds, I ponder what park status means for the Nastapoka’s future. Only one other paddling party has traveled our route this summer. Last year, there were none. In five weeks, we’ve seen just four other people—a floatplane pilot and his clients, three American fly fishermen. It’s this isolation, and the sense of discovery it instills, that I’ve come to love most about this place.
Standing at the lip of the falls, with the Nastapoka rumbling beneath the worn soles of my river shoes, I feel like a real explorer.
Reaching north towards the Canadian Arctic like a tattered mitt, with Hudson Bay’s frigid saltwater to its west and Ungava Bay tucked into its thumb, Nunavik is the name given to the vast, roadless region of Quebec above the 55th parallel. It’s also the homeland of Quebec’s Inuit people, who live in 14 small coastal communities forming a sparse perimeter around a hinterland that’s larger than the state of California. Plied by snowmobiles in winter and freighter canoes in summer—and plagued by rapacious insects, unforgiving terrain and savage weather—the interior is empty save a small number of seasonal camps where geese, caribou and fish harvests continue to sustain local families as they have for generations.
“Let Mother Nature be your master,” advises a French Canadian shopkeeper in Radisson, Quebec, when we tell her about our plans to paddle and portage north into this sea of spindly tamarack forests and black spruce bogs. We’ll navigate the confusing mosaics of lakes Bienville and d’Iberville, we explain, before tracing the eastern and northern edges of Tursujuq National Park through the Seal Lakes and, finally, down the mighty Nastapoka River, emerging 40-some days later on the treeless coastal barrens of Hudson Bay’s tidal shore.
Radisson marks the northern terminus of the James Bay Highway, a 620-kilometer-long shoelace of frost-heaved asphalt connecting the Hydro Québec-built town, and the massive hydroelectric complex it services, with the rest of the province. Construction on the James Bay Project’s series of dams, spillways, underground power plants and some 30,000 square kilometers of reservoirs and harnessed waterways began in the early 1970s, and the complex comprised the world’s largest hydroelectric development for a quarter-century. Today, it’s surpassed only by China’s Three Gorges.
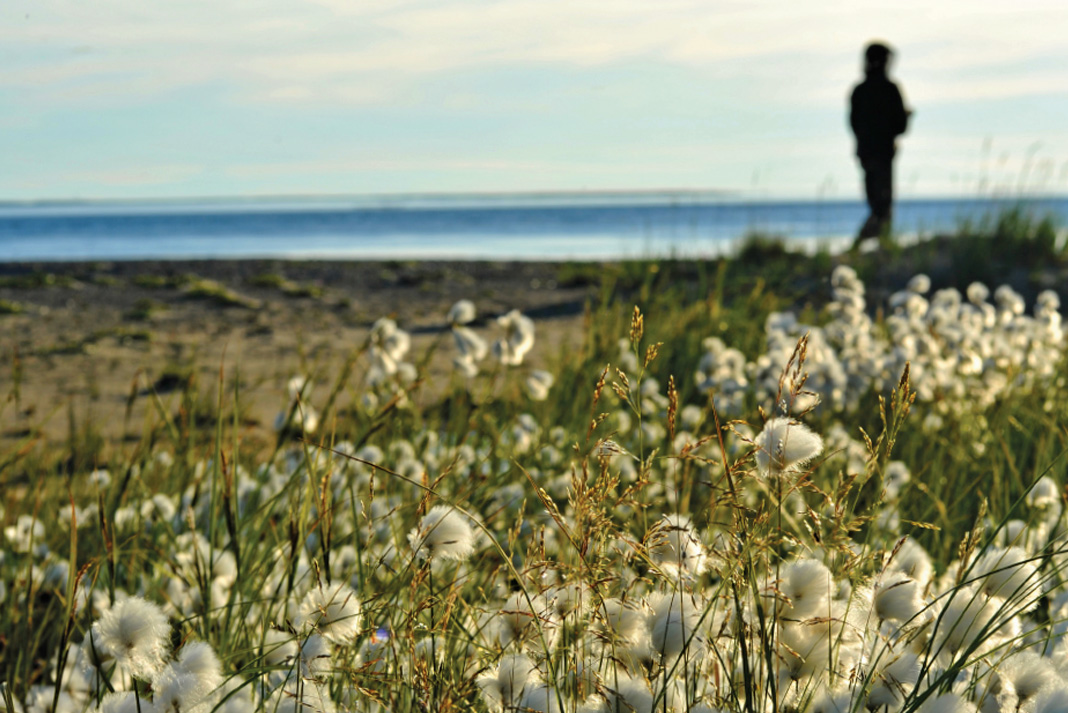
For hardy canoeists, there’s an unexpected upshot to the development. The gravel arteries used to access Hydro Québec’s remote energy outposts also offer a backdoor into the wilderness that, for now, lies beyond the utility’s reach. Our own journey begins on Lacs des Oeufs, a dusty, day-long shuttle from Radisson on the Trans-Taiga Highway. The earth-and-stone barrage at our put-in marks the last vestige of the James Bay Project, and the beginning of Nunavik’s wild and free-flowing rivers.
The shopkeeper’s hazel eyes study my face, checking that I’ve understood her warning. Behind the concern, however, there’s also a knowing look informed by a lifetime spent on the edges of the same wildness and vastness that draw us. Before taking our leave, I assure her that we’re respectfully aware of our position on the bottom rung of Nunavik’s wilderness hierarchy.
Three weeks later, as a wet and blustery headwind saps the energy from our sodden limbs and the heat from our pruney fingers, even that humble foothold feels tenuous. The only upside to the squalls and near-freezing temperature that have dogged much of our trip is that they offer fleeting respite from the hordes of insatiable blackflies, mosquitoes and bulldogs (ping pong ball-sized deer flies) that coexist on the taiga in July. Head nets, heavy-duty bug dope and psychological resilience are essential. Still, there are moments when my guard is down—and breezeless mornings, unfortunately, when so are my pants—and sanity is as elusive as sunshine.
Paddling into the lee of a mop-topped island, Jon and I pause for a moment, thankful to escape the wind-driven rain. Eager for a distraction from the monochromatic lake views, I search the shore for signs of wildlife. We’re hoping to catch sight of what we’ve been calling Nunavik’s “Big Five,” a list of hallmark species that includes wolves, bear, musk oxen, beluga whales and—rarest of all—kasagea, the shy and solitary freshwater seal.
Once again, I’m disappointed. So far, the only other creature we’ve seen, aside from our own soggy and bedraggled forms, is a sky so animated and malevolent I could swear it’s alive.
References to a unique species of freshwater seal, more than 150 kilometers removed from the ocean, in the Seal Lakes date back to the accounts of early 19th century fur traders. Isolated and enigmatic, the seals remained something of a mystery for nearly 200 years. Then, in the early 1990s, Hydro Québec eyed the narrow gorges and churning falls of the Nastapoka, surveying the river for a new waterpower project. Central to this plan was an expansive reservoir that would inundate the Seal Lakes.
In response, the local Cree people supported studies to refute Hydro Québec’s claim that the seals were widespread in northern Quebec lakes. Researchers confirmed that not only is kasagea confined to the Seal Lakes and two neighboring waterways, but that the landlocked species—geographically isolated since the last ice age—is genetically distinct from its cousin, the saltwater harbor seal.
Under pressure from environmental scrutiny and enormous development costs, Hydro Québec ultimately shelved the Nastapoka project. But the bell had been rung. When Nunavik Parks began working with the Inuit and Cree to draw up plans for a co-managed park extending east from Umiujaq to Lacs à l’Eau-Claire (Quebec’s second largest lake, formed hundreds of millennia ago by twin meteor strikes), the locals fought to have the proposed boundaries expanded to include the Nastapoka and 95 percent of its watershed, including the Seal Lakes.
Tursujuq National Park, along with two existing Nunavik parks and two more parks planned for the region, represents a big step towards the goal of protecting 30 percent of Quebec’s lands above the 55th parallel from development. As a new wave of private mining interests clamor to stake their claims in the area’s mineral-rich bedrock, conserving these ecologically intact areas is more important than ever.
Lacs des Loups Marins, the French name for the Seal Lakes, directly translated is Lakes of the Sea Wolves. The Francophone appellation for the lakes’ secretive seals has captured our imaginations since the beginning of our journey. Fisheries and Oceans Canada puts the lakes’ seal population somewhere between 50 and 600 individuals. The possibility that we may not see a single specimen is unthinkable.
When at last we veer our canoes from their northerly pilgrimage and turn west down the larger of the two lakes, glassy calm on this sunny morning, I’m half hoping a seal will leap over our bow.
Conor spots it first: a shiny, dark sausage draped atop a sun-warmed boulder. The animal slips into the water as we edge nearer, then reappears, warily circling our canoes from a safe distance. Kasagea’s wide, dark eyes stare out from a round and whiskery face. We’re ecstatic—the first of our Big Five!
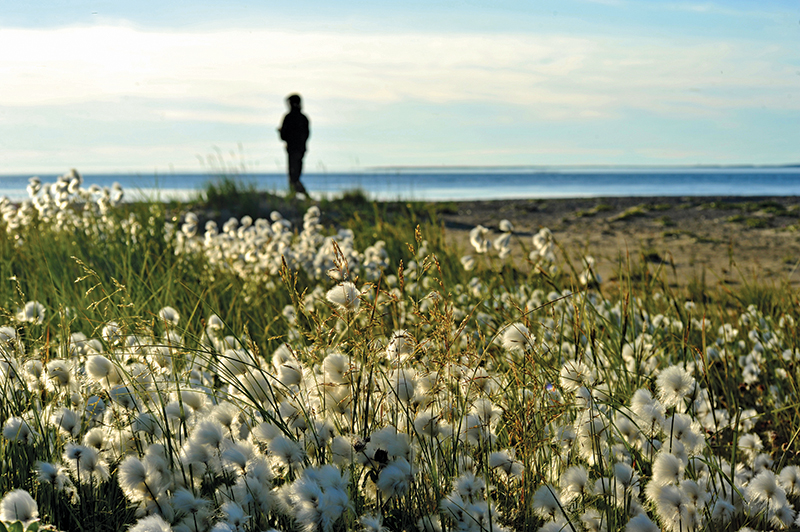
In the next week, we’ll spot several more freshwater seals. At a huge dragon’s tongue rapid, the most gregarious hurls itself again and again into the crashing waves, seemingly for the pure enjoyment of bobbing cork-like through the haystacks. Its amusement is ours, and we linger over lunch until the seal makes a final pass and disappears into the roiling current.
Below the Seal Lakes, the Nastapoka swells, hurtling over ever- larger cataracts, each rapid more astonishingly beautiful than the last. The sinuous, sandy ridges of glacially deposited eskers give way to high rocky domes, through which the river burrows undaunted. The sparse tree cover grows ever thinner, until not even the wizened black spruce can make a stand. Stripped bare of soil and superfluity, the land seems to open itself to our passage. Where weeks before we had staggered under back-breaking loads through swampy forest, snagging shouldered canoes and following only compass bearings and intuition, we now stroll easily, often spotting the end of the portage from its beginning.
Our wildlife sightings continue down the Nastapoka River: a mother black bear and her two cubs on a rocky ridge; a tawny wolf sauntering along a sandy beach; two shaggy musk-oxen shuffling across the grassy lowlands at the river’s mouth. And, at our final campsite on Hudson Bay, windbound and cowering from a cold drizzle that’s somewhere between fog and rain, we spot the white crescent backs of beluga whales spiriting south along the shore.
Tursujuq National Park’s gleaming new visitor center rises like a mirage beside the lone road linking Umiujaq village with its airport. We’re walking the pavement back to our campsite after a dash to the Northern Store for post-trip ice cream bars, when a Nunavik Parks pick-up slows to a stop. Our brightly colored waterproof camera cases give us away as paddlers, and the truck’s driver, Michel Haarc-Morissette, is quick to offer us a tour of the not-quite-finished building.
Soon we’re studying maps, admiring the park’s fleet of shiny yellow sea kayaks, and nodding with approval at shelves piled high with new, top-of-the-line paddling and camping equipment in the center’s dedicated outfitting room. Michel tells us his role is to develop tourism products for the fledgling park, identifying key attractions and partnering with local Inuit guides and boat drivers. Beginning in 2016, Tursujuq will offer summer sea kayaking packages and snowmobile-supported winter trips in the spectacular estuary of Richmond Gulf, as well as freighter canoe excursions to Nastapoka Falls—coastal areas Michel refers to as the park’s “front-country.”
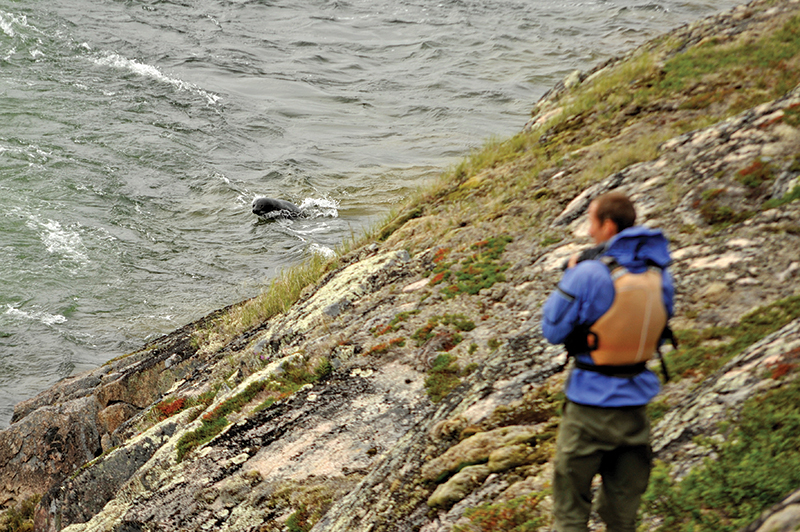
Our 730-kilometer trip places us among the park’s few backcountry visitors, and Michel is curious to hear about our experiences in Tursujuq’s furthest flung reaches. We relate our encounter with the acrobatic seal, and the black bear that watched us drift beneath his riverside perch. We describe the scenic beauty of the Seal Lakes, and navigating the challenging class II–III rapids of the Nastapoka. But there are some experiences I don’t share.
I don’t tell Michel about the evening kasagea visited the pebble beach just beyond my tent; or the night I crept out of my sleeping bag after midnight to watch the northern lights dance like austral eelgrass across a pure-black sky, framed by the river’s steep-walled valley. I don’t tell him about the bald-rock peak from where you can gaze west across the foam-streaked blueness of Hudson Bay to the islands of Nunavut, and east across the rumpled green-and- grey carpet of northern Quebec. And of the perfect sunset Jon and I savored from the dewy meadows above the nameless falls, I breathe not a word. Some things cannot be told, only discovered.
Virginia Marshall is the former editor of Canoeroots and now the editor of sister publication, Adventure Kayak.
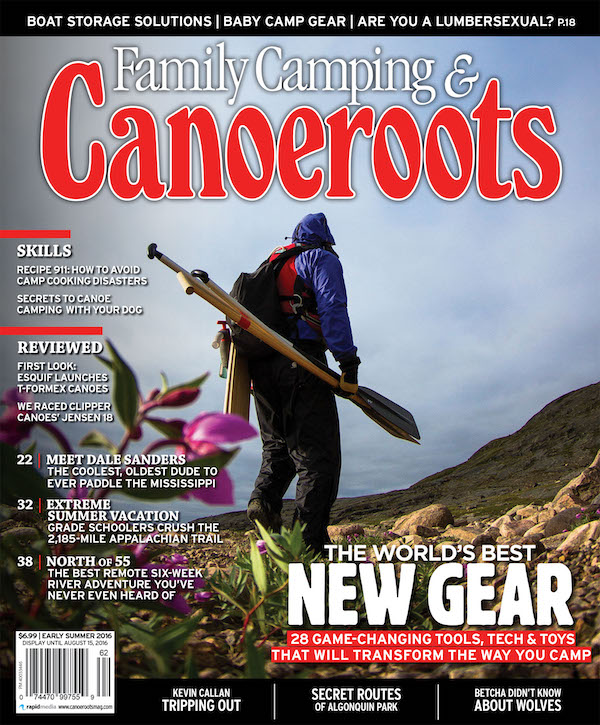 This article originally appeared in the Canoeroots Early Summer 2016 issue.
Subscribe to Paddling Magazine and get 25 years of digital magazine archives including our legacy titles: Rapid, Adventure Kayak and Canoeroots.
What’s In Paul Zizka’s Camera Bag
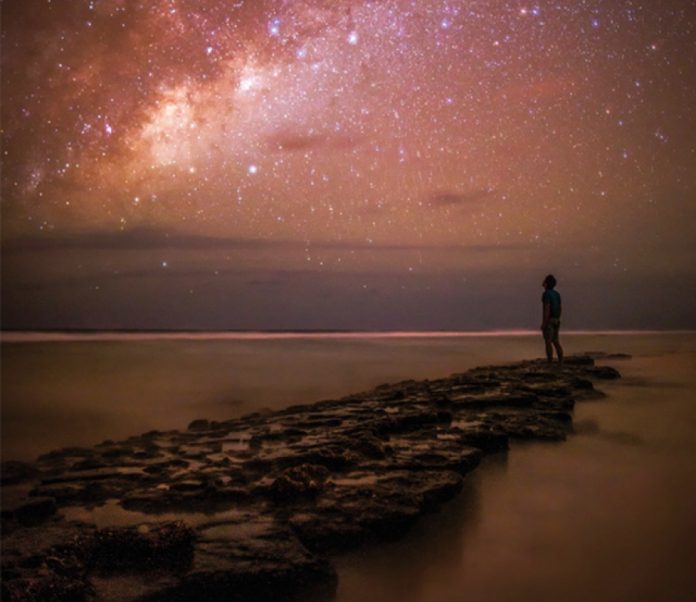
Best known for his stunning captures of the night sky—from spectacular northern lights pulsing above mountain lakes to starlit paddlers, climbers and skiers—adventure photographer Paul Zizka has long had a fascination with shooting after dark. “I love how the nighttime can turn familiar places into completely different experiences,” says the Banff-based lensman. Zizka’s work is inspired by his passion for wild places, a connection that’s reinforced through his instantly recognizable self-portraits. “We live in a cluttered world. You have to put effort into making that connection and then when you’re out there, under the stars, it just feels so right.”
HOLD STILL
The magic of astrophotography is how the camera reveals all these elements—aurora, stars, moonlight—that the naked eye cannot see. All we see are little points of light; everything else is left to the imagination. There is so much to dream about. The key to capturing night photos is a sturdy tripod, like my Manfrotto MK055XPRO3-BH, that holds the camera perfectly still during minutes-long exposures.
PERFECT TIMING
Including a person in a landscape image can convey a sense of vulnerability or belonging, or make an image more relatable. Often I am out shooting alone, so the human in the frame is me. At first, it seemed like a chore, running back and forth to the camera to change settings and fix any compositional issues. But eventually the self- portrait aspect became a part of the photographic journey, and I enjoy the challenges it brings. One essential tool to capture this sort of image is an intervalometer—a remote that allows you to trigger a timer so you can put yourself in the image.
BODY BUILDER
I shoot with a versatile Canon 5D Mark III SLR camera. I can photograph astro, fast action and landscape all with the same camera. It’s super durable and easy to operate, which is important in the dark when I’m shooting by feel.
LENS CRAFTER
My Canon 16–35mm f/2.8L has been my workhorse lens since I started doing photography. I love this wide-angle zoom’s versatility, and its relatively light weight. I also carry a Canon 70–200mm f/2.8L telephoto lens to get sharp and dramatic mountain shots. And my fast prime, Canon’s 24mm f/1.4L, is perfect for night and…
GET FILTERED
Two of my go-to filters are a circular polarizer and a neutral density (ND) filter. Use a polarizer to add contrast to a blue sky or to eliminate reflections—perfect for shooting water scenes on bright days. I use a three-stop ND filter to achieve long exposures without waiting for low light, usually to emphasize subtle motion that a shorter exposure would not record. For example, capturing the silky flow of water or grasses blurred by the breeze.
LESS IS MORE
Your camera pack needs to protect all your essentials, without restricting access to your gear. It should be comfortable and weatherproof, like Lowepro’s Pro Runner BP 450 AW II backpack. Shooting in the backcountry for extended periods, I’m committed to using only the gear I carry. Deciding what I need depends on the duration of the trip, the location, how technical the terrain will be and what I want to accomplish.
SELF-PORTRAIT
This shot was captured on a very dark night on the remote atoll of Fakarava, in the Tuamotus, French Polynesia. After finding a foreground that complemented, even mimicked, the Milky Way above, I proceeded the way I usually do: adjust composition and settings, drop headlamp on the spot where I need to stand, set focus, set intervalometer to shoot continuously, enter the scene, try different body positions, then return to the camera to see if anything needs fixing. The skies are incredible in this part of the world, but the profound darkness pushes the equipment to its limits. As well, each set of incoming waves washed over my feet and swirled around the tripod, which made things a little nerve-wracking
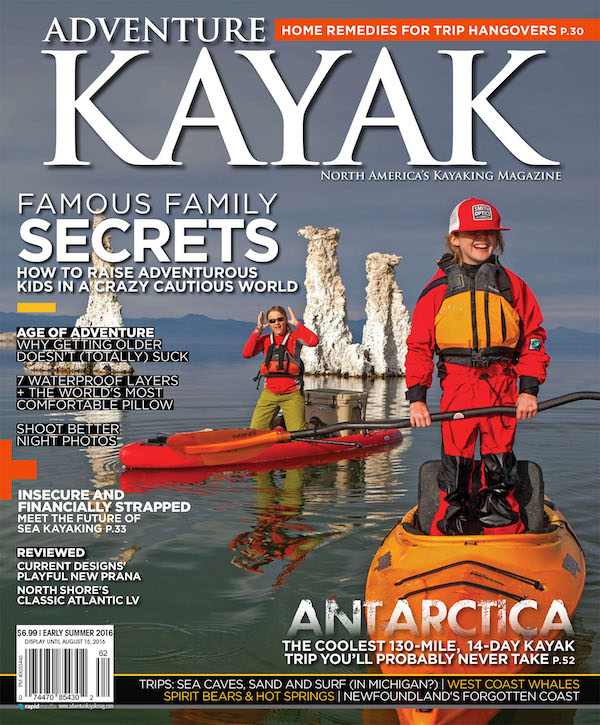 This article originally appeared in Adventure Kayak Early Summer 2016 issue.
Subscribe to Paddling Magazine and get 25 years of digital magazine archives including our legacy titles: Rapid, Adventure Kayak and Canoeroots.
7 Tips For Great Whitewater Etiquette
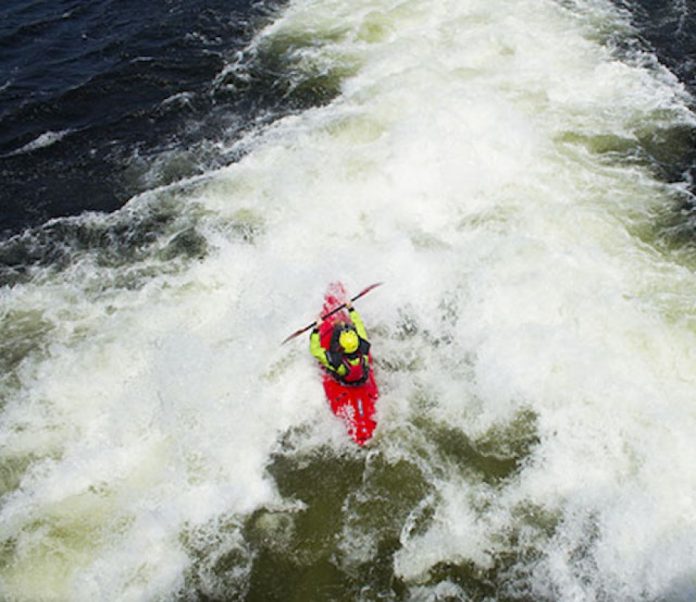
Every sport has subtle rules of etiquette that participants expect of their teammates and partners. Some of these rules of thumb are obvious, and some will be seared into your brain from experience, like if you fail to signal to a downstream surf session and accidently crash into an unsuspecting playboater.
1. Respect the line
The social aspect of surf sessions on the river is one of the best things about playboating, especially if you are a beginner and looking to watch some more experienced paddlers land tricks. Many popular surf waves fill up with enthusiastic playboaters, especially on the weekends, making it common to have a collection of kayakers waiting in the eddies. Be polite and respect the line, making sure everyone gets a chance to show their stuff.
Read More: Essential Items To Bring To Your Next Surf Session
2. Share your snacks
Packing excellent river snacks makes breaks and floating lunches a great hiatus from the excitement of whitewater. Spread the love by sharing your snacks and treats, especially if some of your paddling partners forget to bring their own grub.
3. Use your river signals
River signals are a key safety element. From letting your friends know you are okay after a big swim to communicating with an upstream paddler that the river is clear for them to go, good signals can prevent major mishaps. Kayakers will have a variation of different signals they use, so it’s a good idea to establish a baseline with your group before you hit the river to make sure everyone is on the same page.
4. Make room in the eddy
If you are in the eddy before your paddling partners, be considerate of where you position yourself and how that will affect upstream kayakers. This is especially important if the eddy is essential to catch because of hazards or a drop downstream. Each time you catch an eddy, think about how much room you would want from other kayakers and hang out accordingly.
5. Be a respectful shuttle participant
Ah, the shuttle. A seemingly easy process that often ends in a lack of essential gear and confusion. While it is simple to botch the shuttle, try your best to keep track of your things and have the right items at the take-out. If you are a passenger in a shuttle vehicle, try to keep your wet things in a dry bag or on a tarp and don’t hop in your seat in wet clothes unless you have permission from the driver.
6. Offer help to less experienced kayakers
Kayaking is one of the best sports for meeting encouraging people who will volunteer tips and advice. This is often because those dispensing the advice vividly remember the exhausting days spent swimming and emptying their boats. Even if you aren’t an experienced kayaker, you can always help your fellow paddlers out from aiding boat carrying at a tricky put-in to holding their paddle while they adjust their ratchet straps to helping them tie-down their kayak. Hello good karma!
Read More: 10 Things That Will Happen When You Learn To Whitewater Kayak
7. Be prepared
Good whitewater etiquette largely depends on being prepared. Bring a throwbag and know how to use it. Have water and sunscreen. Understand your ability. Scout properly. Check water levels. Pack a first aid kit. Some of these things are learned from experience, but arriving ready to paddle as prepared as you can be will help you and your fellow kayakers have an awesome and safe day on the water.
The Ultimate Backcountry Birthday Cake Recipe
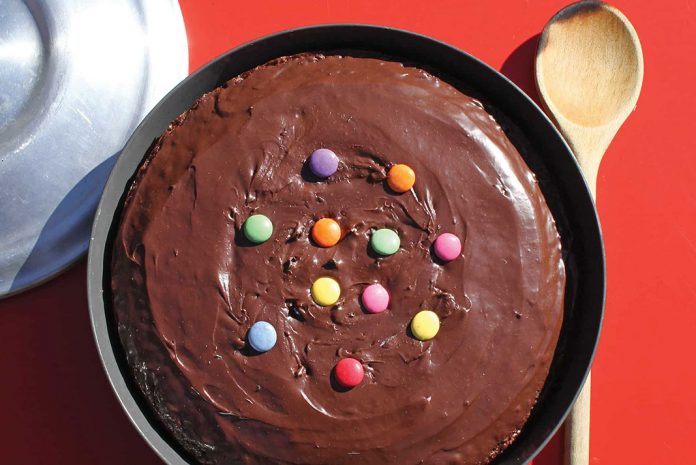
Being on a canoe trip for your birthday is a treat in itself. Make it even more special with a camp-stove friendly birthday cake. More akin to a fudge brownie—and less reliant on food science for success—this backcountry birthday cake recipe is just as festive as a classic bonne fete cake when decorated with icing and candy.
Backcountry Birthday Cake Recipe
Prep at Home
- ¼ cup (60 mL) all-purpose flour
- 3 tbsp (45 mL) vanilla sugar or granulated sugar
- 2 tbsp (30 mL) unsweetened cocoa powder
- 1 tbsp (15 mL) powdered eggs
- ¼ tsp (1 mL) baking powder
- ⅛ tsp (0.5 mL) salt
- ⅓ cup (75 mL) icing sugar
- ¼ cup (60 mL) chocolate chips (optional)
- Coloured sprinkles or candy (optional)
- Parchment paper and foil
In a sealable plastic bag, combine flour, vanilla sugar, cocoa, powdered eggs, baking powder and salt. Seal and store at room temperature for up to one month.
Pack icing sugar, chocolate chips and candy in separate sealable plastic bags.
Cut a circle of parchment paper to fit into the bottom and about half an inch up the sides of a six-inch skillet; roll up and pack. Pack a piece of foil slightly larger than the skillet.
To Serve
- ⅓ cup (75 mL) water
- 1 tbsp (15 mL) vegetable oil
First, preheat your camp stove over low heat.
Shake flour mixture in bag; pour in four tablespoons of water and the oil. Gently squeeze until evenly moistened.
Rub a little water over both sides of the parchment paper to make it more flexible and prevent burning. Place parchment paper in skillet. Pour batter onto the paper and spread evenly; cover skillet with foil.
Hold skillet about two inches above the burner for five to eight minutes, or until the top just looks dry and edges spring back when lightly touched. Remove from heat; let stand covered for two minutes. Invert cake onto a plate or heatproof surface; peel off paper.
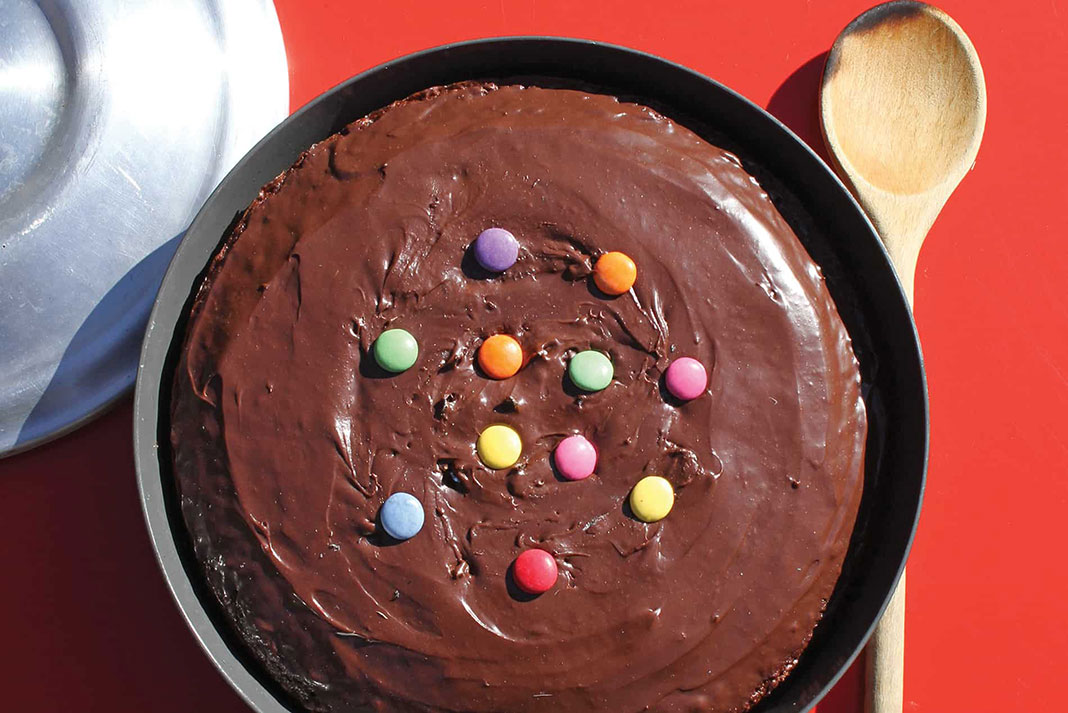
If using chocolate chips, sprinkle over hot cake and let melt, then gently spread to cover evenly. Let cool completely.
For the icing, add one teaspoon (5 mL) water to the icing sugar in the bag and gently squeeze to blend to a smooth, thick icing, just slightly thinner than a soft putty. If necessary, add a few drops of water at a time, and squeeze icing to mix, just until desired consistency. Cut a small tip off one bottom corner of bag, twist bag just above icing and gently squeeze to write or draw decorations on top of cooled cake, then garnish with sprinkles, as desired.
Additional Tips For The Perfect Backcountry Cake
Parchment paper might sound fussy for camping, but it does allow you to “bake” in a skillet without adding oil, which would create a fried product rather than a tender baked one.
If your burner doesn’t go low and tends to scorch foods and uses a pump to build pressure for the fuel canister, pump less pressure, or release some pressure, before lighting to reduce the flame and prevent burning baked goods.
Chopped dehydrated berries and nuts are a nice backcountry alternative to icing and sprinkles; just sprinkle them over top of the batter before cooking.
As a cheater backcountry birthday cake, you can use your favorite pancake recipe, stir in some coloured sprinkle and make a large pancake, then decorate the top with icing and more sprinkles.
Storm-proof matches can double as impromptu candles.
Baker’s Backcountry Cake Recipe from the NOLS Cooking Show:
How To Light Paint For Spectacular Canoe Trip Photos
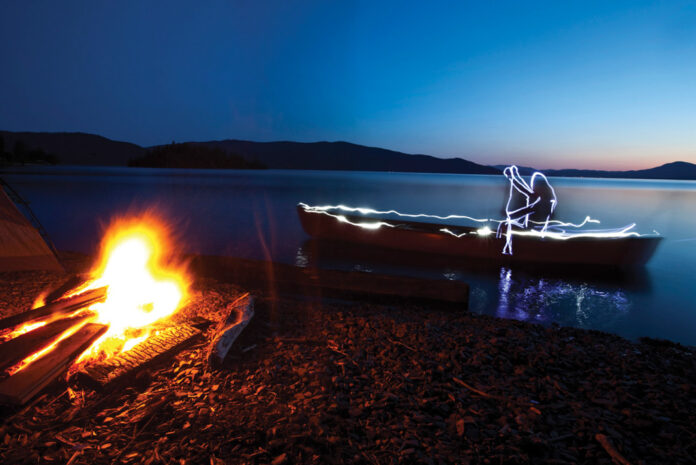
A few years ago a friend and I jumped at the opportunity to spend a few days in the backcountry of Algonquin Park on Thanksgiving weekend. After setting up camp on Misty Lake, dusk turned to night at the early hour of 6:30 p.m. With dinner finished and site chores complete, I grabbed my new DSLR to experiment with some long exposure shots. To include ourselves in the photos, we took turns standing extremely still, while one of us illuminated the other with a headlamp. Several successful shots later, my fascination with light painting was born.
Light painting uses a slow shutter speed and various light sources to create color and design in an otherwise darkened image.
During a long exposure the shutter of the camera remains open and allows all available light to hit the sensor. If you do this for a second or two in bright conditions, the image will turn out overexposed or even white. However, in dark conditions, all available light is recorded so if you walk across the frame with a light source you create a bright line. Or, if you bathe your friend in a headlamp’s glow they become visible standing in the dark. With the immediate feedback of being able to view photos on your digital camera you can really fine-tune the look.
There are two ways to paint with light. The first is to aim the light source towards the camera lens. Using a focused beam, with this technique you can trace outlines of boats or tents, draw forest creatures or write words in the air like you did with sparklers as a kid (just remember to write letters backwards). Even though you are in the camera’s field of vision, so long as you keep moving and you’re not illuminated, you won’t show up in the image.
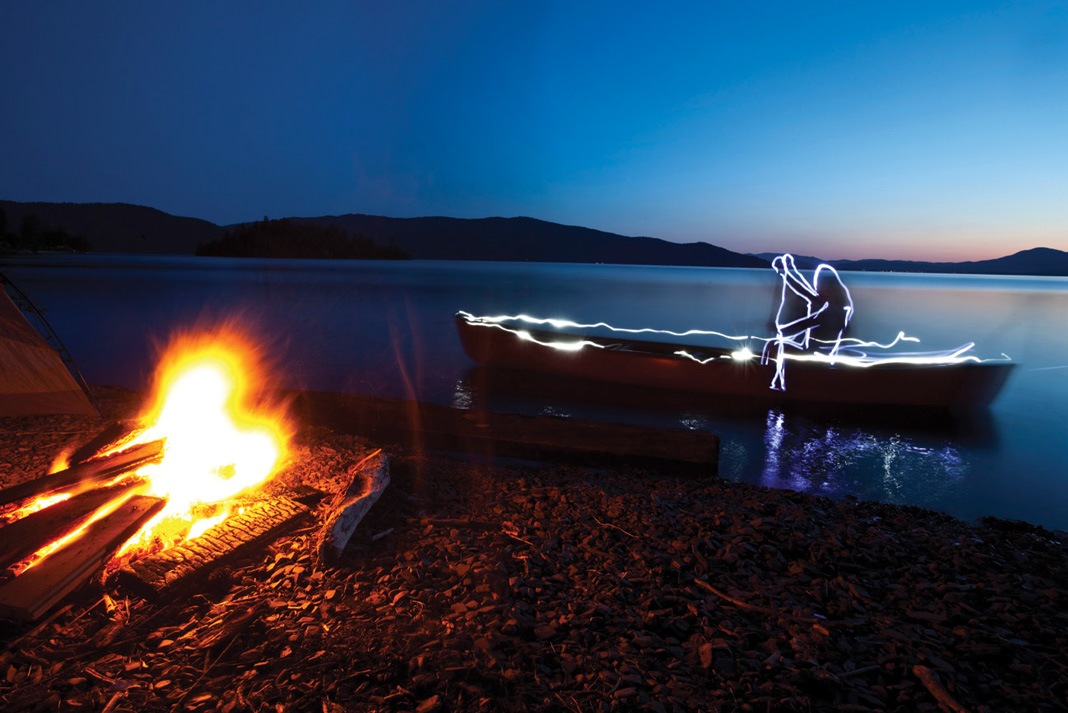
PHOTO: | MASTERFILE.COM
The second way to light paint is to stand back from the subject with the light source pointed away from the camera. This technique is perfect for creating broad highlights in an otherwise dark image. During the shutter release use your light source like a brush to paint the parts of your image you want to highlight, such as a tree, camper or canoe. For example, to illuminate your campsite against a starry sky, set your exposure to capture the sky then shine a broad beam of light across the site for a fraction of the time the shutter is open. Too much bright light and you’ll overexpose the foreground.
Once you wrap your head around these two methods you can draw pictures and words or bring attention to different areas of the scene, harnessing light to build the image you want.
Rob Nelson is a photographer with a passion for exploring wild places. www.robnelson.ca
 This article originally appeared in the Canoeroots Summer/Fall 2016 issue.
Subscribe to Paddling Magazine and get 25 years of digital magazine archives including our legacy titles: Rapid, Adventure Kayak and Canoeroots.
How To Make The Perfect DIY First Aid Kit
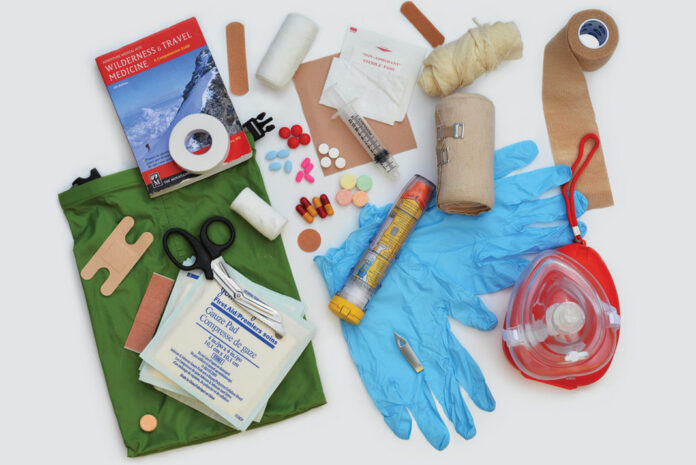
Without customization, your first aid kit is potentially just a heavy and bulky piece of junk. Yes, you read that right. Whether it’s an expedition kit costing hundreds of dollars or a simple pocket kit ordered off eBay, commercially pre- packaged first aid kits are often stocked with items that you’ll never need or can be improvised quickly in the field. By creating your own first aid kit you can customize the items to address specific environments, existing medical conditions and the needs of your group.
Consider length of trip, size of group, level of experience and training, types of activities, destination and medical backgrounds of your group when designing your kit. Pack your kit in something light and waterproof. Use small watertight bags within, like Ziplocs, to organize and categorize items for easy access.
While many outdoor retailers carry prepared commercial kits, they carry individual first aid items, like bandages and moleskin. Your local pharmacy will also have much of what you need to stock your kit and Amazon and eBay have great selections and even better prices.
Though there are great advantages to creating your own first aid kit, remember that relevant medical training, such as a wilderness first aid course and good critical thinking, are your best assets in an emergency. The following 19 items provide a foundation to build on for your DIY first aid kit for a three-to five-day wilderness canoe trip.
Mike Webster has worked as an expedition medic, outdoor emergency care instructor, past Canadian director of Wilderness Medical Associates, and is a field hospital manager for Odyssey Medical (www.odysseymedical.ca).
DRUGS
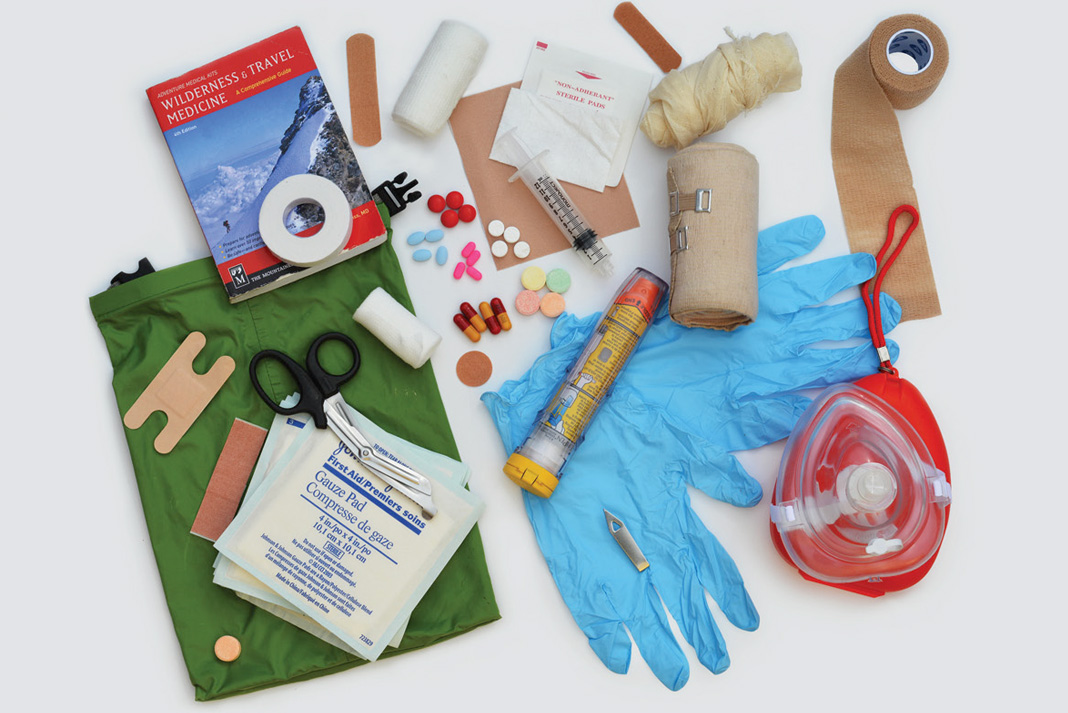
Paddlers with known life-threatening allergies should bring their own epinephrine. Antihistamines can manage minor allergic reactions. Consider bringing both ibuprofen as an anti-inflammatory and acetaminophen for pain management. An over-the-counter solution for diarrhea, acid reflux and nausea or vomiting won’t save anyone’s life, but will save a paddler’s enjoyment of his or her trip. Don’t
forget day-to-day prescription medications.
REFERENCE
Even experienced trippers may panic in an emergency. Bring a pocket-sized wilderness first aid field guide. Referencing your guide also provides time to calm down and think logically
BLEEDING CONTROL
So long as you’re not canoeing in active combat zones you won’t need a tourniquet. Gauze pads, clothing and your gloved hand all control bleeding when direct pressure is applied. Avoid clotting powders and hemostatic agents— they’re expensive and not effective. Trauma shears cut clothing and bandages better than a knife.
WOUND CARE
Blisters are one of the most common injuries on trip—bring moleskin or an equivalent. A syringe with a catheter tip is ideal for wound irrigation. Consider a magnifying glass to help find small debris lodged in wounds. Tweezers help remove debris from wounds, as well as slivers or ticks. Pack an assortment of gauze and dressings, including non-stick options for burns. Bring an occlusive dressing, which is waterproof and seals the wound completely. Athletic tape will hold bandages in place.
FRACTURES AND MUSCULOSKELETAL INJURIES
Improvised splints can be created using branches, hiking poles or closed cell sleeping pads. Vet wrap or Coban is better than tape for wrapping splints, and holds in wet conditions. A triangular bandage provides support as a sling, and a compression bandage provides support for sprains and strains.
LIFE AND DEATH
Though bulky, a rigid CPR mask will assist with providing CPR with ventilations for a prolonged time period. While you might not be worried that any of your trip mates have bloodborne pathogens, gloves give you the confidence to manages all bodily fluids—vomit or feces included.
This article originally appeared in the Canoeroots Summer/Fall 2016 issue.
Subscribe to Paddling Magazine and get 25 years of digital magazine archives including our legacy titles: Rapid, Adventure Kayak and Canoeroots.
6 Essential Items For A Successful Cross-Country Canoe Trip
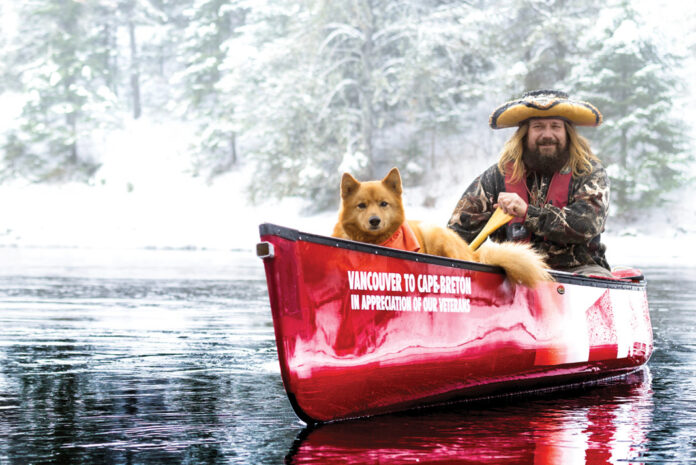
Unofficially already holding the title for longest solo canoe trip, Ranta departed the West Coast on April 1, 2016, from Fisherman’s Memorial in Steveston, British Columbia. He’s aiming to break his own seven-month record over 7,500 kilometers and arrive in distant Cape Breton, Nova Scotia before his 45th birthday at the end of September. Along the way, he’s raising funds for Canada’s war heroes and invited veterans to meet him en route and sign his canoe so he and four-legged tripmate, Spitzii, can show their appreciation. These are the six essentials fueling his ride.
SPITZII, PUREBRED FINNISH SPITZ
“Spitzii turned eight on April 3 and we celebrated on the Fraser River. He’s my best friend, my bear scarer, and my campsite soldier,” says Ranta. “He and I have such a great bond and this is our third big trip we’ve done together. I wouldn’t leave without him.” As fearless as he is handsome, Spitzii hangs out on the bow deck and watches for rocks, logs and beavers, barking to alert Ranta when he sees something.
ATTA THE COCONUT
“I found a coconut when I was paddling near Prince Albert National Park in Saskatchewan. On my next trip, it disappeared on me,” says Ranta. “I did the whole trip and the coconut was gone about two years. When I was reconing for this trip I decided to camp where I stayed last time, and I’ll be damned if I didn’t find it. Spitz found it in amongst the grass. I call it Atta The Coconut. I’m from Atikokan, Ontario. Our mayor’s not impressed because he doesn’t like when people call us Atikoconuts, he prefers we call ourselves Atikokanites.”
SOURIS RIVER WILDERNESS 18
“This is its maiden voyage,” says Ranta of his red Kevlar ride. “It’s done great, it tracks nice and is bulletproof. I can’t say enough good things about it, actually.”
HAND-CRAFTED MEANY XY PADDLE
XY Company’s paddles are handmade by Don and Spencer Meany in Ranta’s hometown. They’re named after great explorers and voyageurs such as Alexander Mackenzie, Simon Fraser, William McGillivary, George Simpson, David Thompson and La Verendrye. “It’s a bent shaft, and an amazing paddle,” says Ranta.
TRAINING PADDLE IN MARCH. | PHOTO: ALAN POELMAN
Learn
HOMEMADE BIRCHBARK HAT
“A lot of kids call me the pirate when I go by,” says Ranta. “I use spruce root to sew it all together and a homemade adhesive from bear fat, pine pitch and charcoal. It’s a durable hat, and it’ll last forever.” Voyageur-level supporters of Ranta’s journey—defined as those donating more than $1,000 to the cause—will receive their own birchbark hat in the mail post-trip, handmade by Ranta and his father. Cowboy or sombrero styles available. Voyageur-level supporters will also receive a 2017 Spitzii calendar.
VETERAN SPIRIT
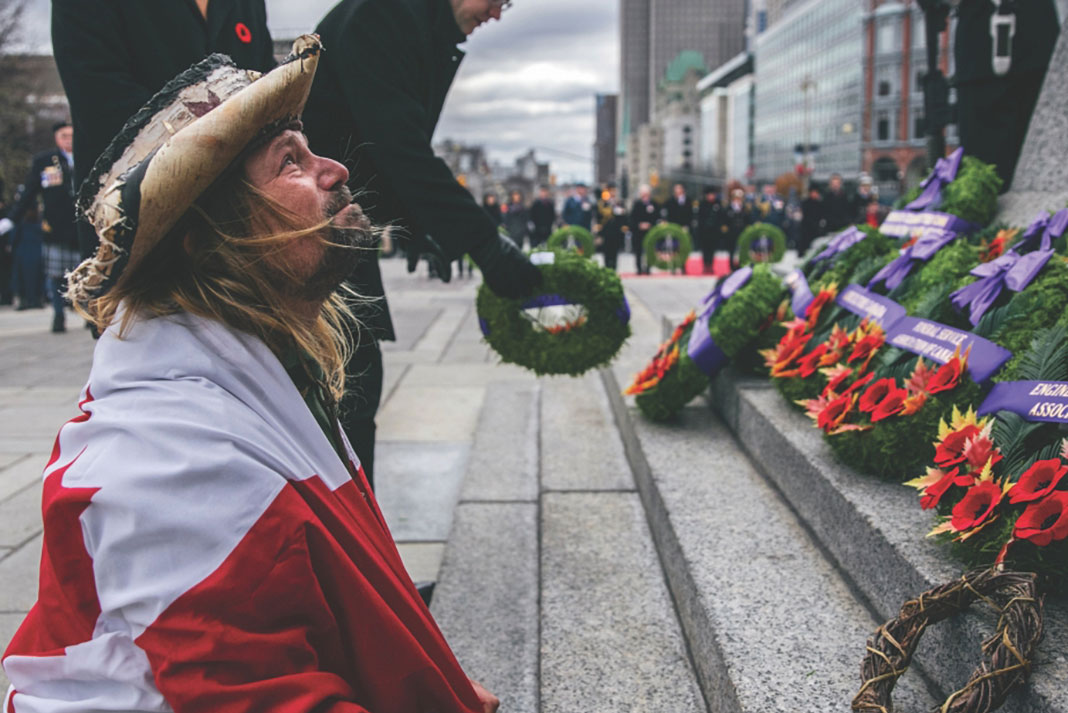
“My brother, Kevin, is a veteran. He was in Sarajevo and Bosnia and he came back a little bit broke,” says Ranta. “He’s a good man and I didn’t like the way he was being treated. That’s kind of what put me onto this: I’ve got that veteran spirit, I like to say. War is a terrible thing and we need to step up as Canadians and help these guys.” Fifty percent of the money raised by the journey will be donated to the Atikokan Legion. The remainder will be donated to the Atikokan Youth Centre, which was the beneficiary of Ranta’s record-breaking 2015 trip. —Tom Bateman
This article originally appeared in the Canoeroots Summer/Fall 2016 issue.
Subscribe to Paddling Magazine and get 25 years of digital magazine archives including our legacy titles: Rapid, Adventure Kayak and Canoeroots.
One Couple, 1.1 Million Acres And 365 Days Living In The Wilderness
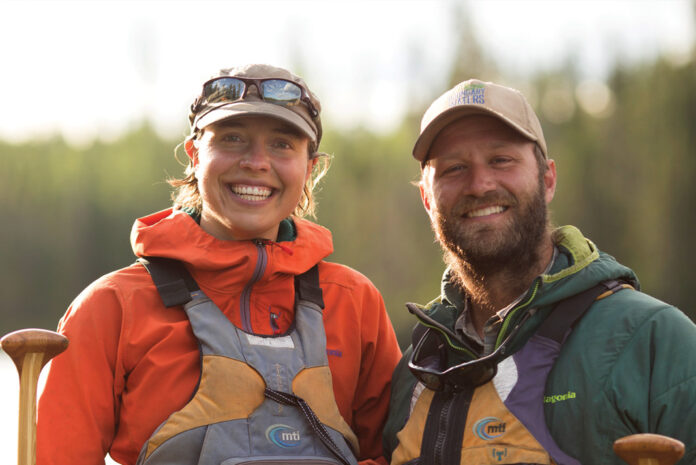
Christmas 2015 was a little different for seasoned adventurers Dave and Amy Freeman. The pair adorned their tent with solar-powered Christmas lights, built glowing ice luminaries, baked Norwegian sandbakkelse cookies and chowed down on a dehydrated holiday feast. Three months before, the Freemans had embarked on a yearlong stay in the Boundary Waters Canoe Area Wilderness in northern Minnesota. The pair are spending a full year exploring more than 3,000 miles and 500 lakes and streams by canoe and dogsled in support of a campaign to protect the Boundary Waters from proposed sulfide-ore copper mining on the wilderness’ edge.
Unlike their 2015 expedition, which saw the Freeman’s paddle from the South Kawishiwi River to Washington, D.C. to hand deliver a canoe signed with 2,000 signatures protesting the mine, the year spent in the wilderness is dedicated to exploring and bringing awareness to America’s most popular canoe tripping destination. “We are not here to cross it or conquer it, but to bear witness to it,” says Dave.
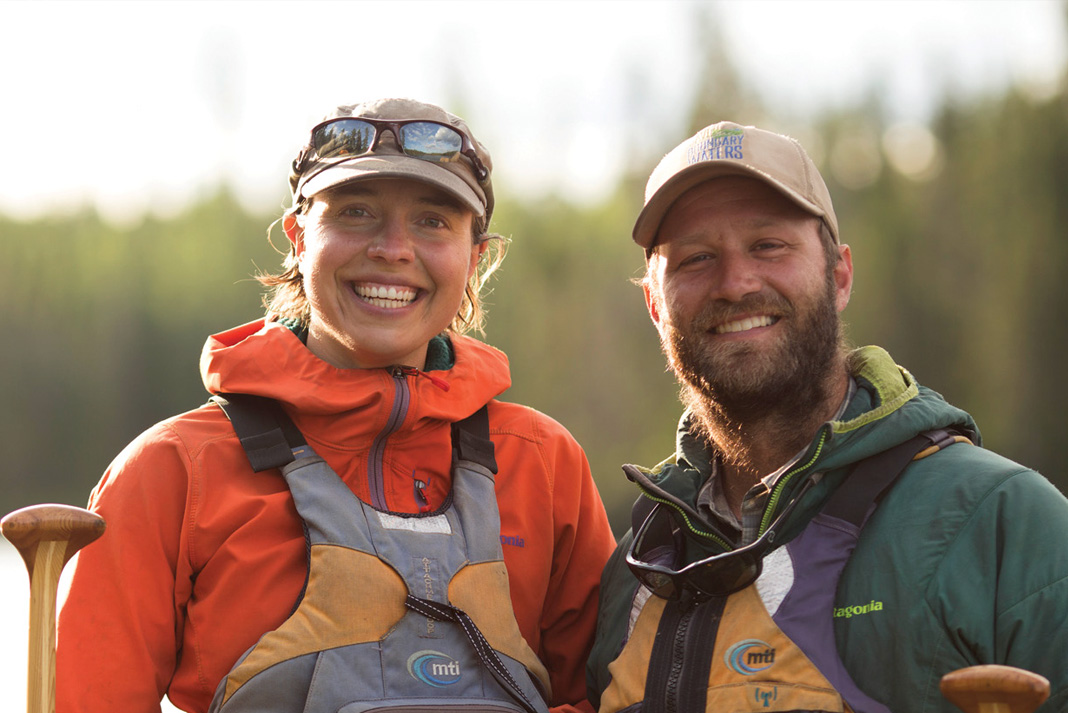
How did you stay warm through winter?
It’s all about the calories. We ate between 4,500 to 5,000 calories a day. A typical day would start with coffee and oatmeal with a dollop of peanut butter, followed by trail mix, hunks of cheese and a Thermos of soup. Dinner consisted of pasta with smoked, responsibly harvested salmon, lots of butter or olive oil, dehydrated veggies and parmesan cheese. When it was really cold or we had worked extra hard we would bake a chocolate cake.
Does the reality of a year in the wilderness live up to the dream?
It’s not for everybody and we have our moments, but for the most part we work well together and enjoy being alone. We have found that communicating clearly and honestly with each other is important and we try to caring and considerate of each other’s needs. It is easy to get short with each other when we are cold, wet and tired. When this happens we try to talk about the conflict after we have had a warm meal, or the stresses have abated.
What have been the best and most difficult times?
Sitting by the lake and drinking our coffee and watching the light change is often one of the best parts of our day. We also enjoy finding a new place to camp, setting up our tent and making our new temporary home. Low days have been when we hear news from the outside world, like the passing of a relative, the Paris attacks, the Syrian refugee crisis and Prince’s death.
What’s after a Year in the Wilderness?
Hopefully we will have acquired a diverse array of stories, insight and photos that will allow us to travel around the country and share this special place with many more people through speaking engagements at schools, businesses and symposiums. We were transformed by the wilderness long ago, but it is becoming apparent that visiting is not enough. We have to work tirelessly to protect places like the Boundary Waters so that future generations will also be able to experience its transformative effects.
What have you learned so far?
We have learned to slow down and appreciate little things we would normally rush past. Being immersed in the wilderness has helped us understand how dramatically humans have altered and continue to alter the planet. It’s becoming clear to us that we need to put sustainability at the center of the the decisions we make. More than anything this experience has affirmed what a unique national treasure the Boundary Waters is and the need to protect it.
This article originally appeared in the Canoeroots Summer/Fall 2016 issue.
Subscribe to Paddling Magazine and get 25 years of digital magazine archives including our legacy titles: Rapid, Adventure Kayak and Canoeroots.