A few years ago a friend and I jumped at the opportunity to spend a few days in the backcountry of Algonquin Park on Thanksgiving weekend. After setting up camp on Misty Lake, dusk turned to night at the early hour of 6:30 p.m. With dinner finished and site chores complete, I grabbed my new DSLR to experiment with some long exposure shots. To include ourselves in the photos, we took turns standing extremely still, while one of us illuminated the other with a headlamp. Several successful shots later, my fascination with light painting was born.
Light painting uses a slow shutter speed and various light sources to create color and design in an otherwise darkened image.
During a long exposure the shutter of the camera remains open and allows all available light to hit the sensor. If you do this for a second or two in bright conditions, the image will turn out overexposed or even white. However, in dark conditions, all available light is recorded so if you walk across the frame with a light source you create a bright line. Or, if you bathe your friend in a headlamp’s glow they become visible standing in the dark. With the immediate feedback of being able to view photos on your digital camera you can really fine-tune the look.
There are two ways to paint with light. The first is to aim the light source towards the camera lens. Using a focused beam, with this technique you can trace outlines of boats or tents, draw forest creatures or write words in the air like you did with sparklers as a kid (just remember to write letters backwards). Even though you are in the camera’s field of vision, so long as you keep moving and you’re not illuminated, you won’t show up in the image.
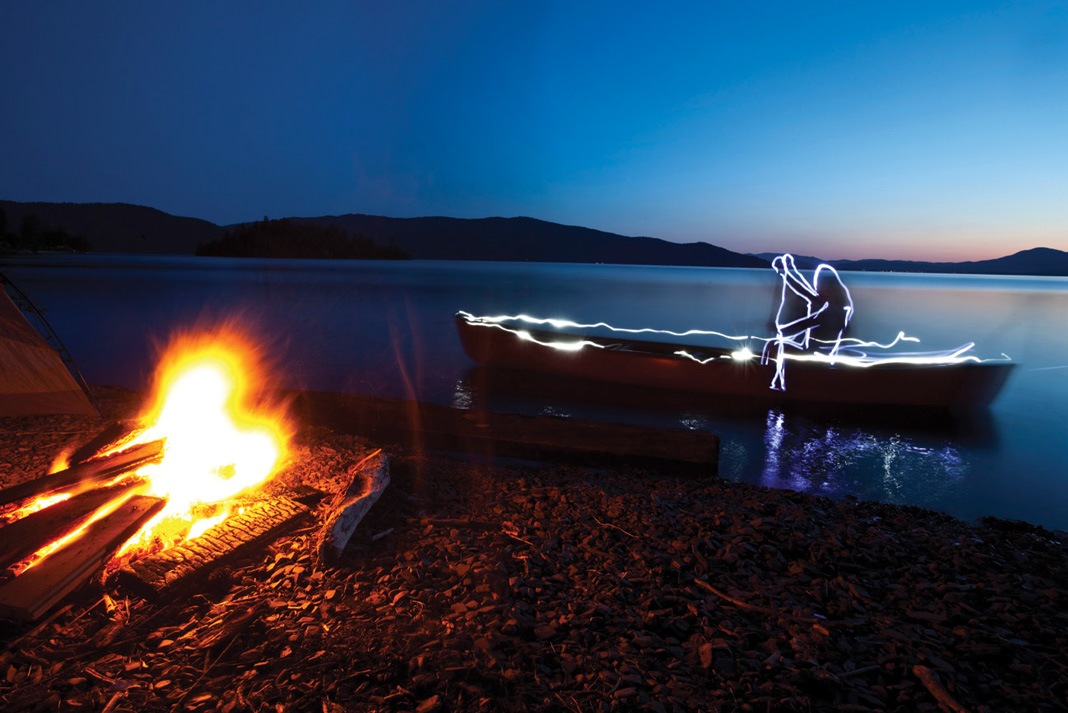
PHOTO: | MASTERFILE.COM
The second way to light paint is to stand back from the subject with the light source pointed away from the camera. This technique is perfect for creating broad highlights in an otherwise dark image. During the shutter release use your light source like a brush to paint the parts of your image you want to highlight, such as a tree, camper or canoe. For example, to illuminate your campsite against a starry sky, set your exposure to capture the sky then shine a broad beam of light across the site for a fraction of the time the shutter is open. Too much bright light and you’ll overexpose the foreground.
Once you wrap your head around these two methods you can draw pictures and words or bring attention to different areas of the scene, harnessing light to build the image you want.
Rob Nelson is a photographer with a passion for exploring wild places. www.robnelson.ca
 This article originally appeared in the Canoeroots Summer/Fall 2016 issue.
Subscribe to Paddling Magazine and get 25 years of digital magazine archives including our legacy titles: Rapid, Adventure Kayak and Canoeroots.


