Home Blog Page 277

Better Photos from Your Kayak

Photo: Freya Fennwood
Five sea kayakers paddle into the sunset, captured from the seat of a sea kayaker.

Sea kayaking with thousands of dollars of camera gear in your lap can be intimidating even for the seasoned paddlers. “Taking great photos out of a kayak is one of the hardest places to work from,” confesses pro photographer Freya Fennwood, a six-year veteran of making images for the Outdoor Industry. Fennwood scored the cover of Adventure Kayak’s Summer 2014 issue, and her work has also appeared in Men’s Journal, National Geographic.com and Outside Online, to name a few. Here, she reveals some tricks for making your paddling photography easier and more powerful.

Dynamic angle: If you want to get great shots of sea kayaking, then you are not going to only get them while shooting out of a kayak. Some of the best shots are from a bank or bridge high above the water looking down at you’re paddling partners, or submerged half in the water as they paddle towards you. That said, while you are in your boat try and think about making the boat perspective more interesting. A camera phone is really good at this because it is so light and there are cheap waterproof cases. Hold your camera up high above your head, close to the water, or even in the water (if you have a waterproof housing, more on that in a bit) and keep asking yourself, “How can I make this look different?”

A paddler splashes water at the bow of another sea kayak as it passes in front of it

Boat movement: We can’t do that much about the subject we are photographing, except ask for a copious amount of patience as we ask them to repeatedly, “Paddle a little to your left, no, now paddle a little to your right, now come at me so the light is on your boat where I can see it…” so on and so forth.

One thing we can do is look for something to anchor on. Bull kelp is quite nice for this. If this is an option where you are photographing, park your boat in the middle of a kelp bed, grab a few strands and tuck them under your deck rigging. This at least eliminates your own movement out of the process of getting the shot. Also, rafting up to another boat can give you more stability and less boat movement.

Choosing the right boat for photography: The right boat for photography greatly depends on your paddling ability, size, and what you are going to be photographing. A wider more stable boat gives you more room in your cockpit for camera gear, and is less tippy while taking photos…

Learn more about Freya’s photography kit and read the rest of her tips on the Pygmy Boats blog.


Paddle Through The Desert On The Black Canyon Water Trail

Two kayakers on river with volcanic cliffs in background
See sights seldom seen. | Photo: National Park Service

The Black Canyon, a portion of the Colorado River, was named as the United States’ 16th nationally dedicated water trail in 2014. The Black Canyon National Water Trail is the first water trail that flows through a desert and the first located in the Southwest.

Enjoy the unique scenery and solitude along this 30-mile-long stretch of river, located entirely within Lake Mead National Recreation Area and downstream of the Hoover Dam. Your eyes will constantly be scanning the cliff walls to look for majestic desert big horn sheep, falcons, eagles, vultures and osprey. Local guides educate paddlers on geology, plant life, animals and historic remnants along the river that date back to the 1920s, as well as stories and facts on the building of the Hoover Dam.

Find out how to experience your own paddling adventure on the Black Canyon Water Trail below.

What you’ll experience

Shuttle down the historic Lower Portal Road, the same road that delivered Hoover Dam workers to their job site in the 1930s. As you round a corner through the red volcanic cliffs, to your left is a view of a lifetime: the Hoover Dam on the Colorado River. This is one of the most unique and restricted launch sites to begin a kayak adventure in the Black Canyon.

The river here is moving water through colorful, towering volcanic walls. Short hikes into side canyons lead to natural hot springs and waterfalls. Hike into Sauna Cave, an exploratory tunnel dug near the Hoover Dam and abandoned when a hot spring was reached. Don’t miss a paddle into the shimmering green glow of the Emerald Cave.

Fly to

Las Vegas, Nevada. Drive or shuttle to Boulder City, Nevada (30 minutes from the Las Vegas Strip).

[ Paddling Trip Guide: View all paddling trips in the United States ]

Where to stay

For guided trips, outfitters pick up at hotels in Las Vegas. For those driving to the river, camping is available in Lake Mead National Recreation Area and hotels are available nearby in Boulder City, Nevada.

Watch out for…

Be prepared for cold water and extreme weather conditons, including heat and wind. Summer temperatures can reach 115 degrees Fahrenheit in the canyon. The Colorado River below the dam averages 54 degrees Fahrenheit, posing a danger to paddlers who are not proficient with rescue skills.

Don’t go without…

Adequate clothing for sun and immersion protection, plenty of water, sunscreen and food. Also do not launch without checking the weather forecast for the conditions on the day of your trip.

View of river with cliffs on either side
Year-round paddling on the Black Canyon Water Trail. | Photo: National Park Service

Access points

Hoover Dam

The road leading to this launch site is heavily restricted. If you have your own paddle craft you want to take down the river, you’ll need to reach out to a local outfitter and inquire about having them transport your boat to the launch site. You’ll need to pay a $12/person launch fee and $10 National Park Service entrance fee, plus whatever the outfitter charges for transport.

The best way to paddle out from the Hoover Dam is by taking a tour with an authorized outfitter. There are both self-guided and guided tour options available from the outfitters below.

Willow Beach

Launch and take-out for free at Willow Beach, located 14 miles downriver from the Hoover Dam. This is the preferred place to start if you wish to paddle to Emerald Cave, which is located 2 miles upriver. There is a full-service marina, store and restaurant onsite.

Eldorado Canyon

Eldorado Canyon marks the end of the Black Canyon Water Trail. It is necessary to walk a quarter-mile up a desert wash to reach the vehicle parking area.

Outfitters

Hoover Dam Rafting Adventures

  • Six- and four-hour rafting tours
  • Launch from Hoover Dam

Blazin’ Paddles

  • Half-day, full-day and twilight guided kayak tours
  • Launch from Willow Beach or the Hoover Dam

Blue Waters Kayaking

  • Four-day guided canoe tour
  • Launch from the Hoover Dam

Breakwater Expeditions

  • Seven-day guided canoe tour
  • Launch from the Hoover Dam

Desert Adventures

  • Full-day guided kayak tour
  • Launch from the Hoover Dam

Evolution Expeditions

  • Half- and full-day kayak tours
  • Launch from the Hoover Dam and Willow Beach

Jerkwater Canoe Co.

  • One- to three-day canoe trips
  • Canoe rentals
  • Launch from the Hoover Dam

Kayak Lake Mead

  • Half- and full-day kayak trips, plus other adventure packages
  • Lake Mead

Las Vegas SUP & Kayak Club

  • Guided and self-guided kayak tours
  • Launch from Willow Beach and the Hoover Dam

River Dogz

  • Guided kayak and paddleboard tours
  • Launch from Willow Beach and the Hoover Dam

Vegas Glass Kayaks

  • Guided and self-guided glass-bottom kayak tours
  • Launch from Willow Beach and the Hoover Dam

Venture Out Vegas

  • Guided kayak tours
  • Launch from Willow Beach and the Hoover Dam

Willow Beach Harbor

  • Kayak and canoe rentals

Black Canyon Water Trail map

Find a map of the Black Canyon Water Trail here.


See sights seldom seen. | Photo: National Park Service

Paddling With Camera Gear

Photo: Flickr user BigTallGuy, licensed through Creative Commons
Paddling With Camera Gear

To be a great whitewater kayak photographer you must be a participant in the sport as well. Due to the nature of kayaking—the isolation of rivers—photographers must paddle to remote locations, carrying with them all the gear they need to ensure evocative images make their way into magazine and onto screens.

Shooting great whitewater photography means balancing photography with participation, and combining camera expertise and technical knowledge with river smarts and kayak skills. Eric Parker is an accomplished photographer. Which also means he’s also an accomplished whitewater kayaker, keeping up with pros on rivers around the world. Often, he’s photographing a rapid he’s already run with all his gear.

Getting great shots doesn’t come without planning. Parker shares his whitewater soaked knowledge on how he gets the gear to the location to get the shot.

What camera gear do you bring with you paddling?

Eric Parker: I have a few different packing setups that I like to use while shooting kayaking. The first step is identifying what type of river and what kind of kayaking I want to do. Having a good dry bag is the fundamental key to success while carrying any camera gear or anything of value.

For lighter and quick laps down the river I typically bring my Camera (Canon 5D Mark III), a wide-angle lens (16mm-35mm), a small lens cloth, a cotton T-shirt to wipe my hands and dry my camera, and a Watershed bag liner.

When I am more focused on shooting and would like to bring more gear I use a larger dry bag, and I may bring a mid-range lens (50mm or 24mm-105mm), a telephoto lens (70mm-200mm), an external flash, and extra memory cards and batteries.

On an expedition, I try to keep my camera bag light. Weight adds up quick when you are packing food, clothing and camping equipment. I try to limit my gear to camera, wide-angle lens and either a mid-range lens or a telephoto lens.


How do you pack your gear? What are your tips for keeping gear dry, safe from swims and bumping around in a kayak?

EP: This is where packing gets technical. Having a quality dry bag is fundamental, as is the way you pack it. Even if you have a badass dry bag it isn’t going to protect your camera when you beater off a waterfall or send it through a class V rapid. Having solid internal protection is key.

On most river trips I like to use the Watershed bag liners, which I fully trust. But when I am on stouter rivers with bigger waterfalls I like a little more protection. I find the strongest protection on a dime is to make a custom liner with old bow or stern pillar foam. Take a big block of foam and draw an outline with your preferred camera and lens. Cut it out and use the remaining foam to protect the top and bottom of your camera.

Another option for expeditions is to use your sleeping pad as a liner. Obviously this depends on the type of pad you have, but for me I save weight and room for my stern float bags and maximize efficiency. As far a keeping my stuff dry, I always do at least one roll with my dry bag seal and wrap my camera in a cotton T-shirt or extra layer.


Do you run everything with your gear?

EP: I try to keep my camera with me at all times. You never know when you will cross some amazing lighting or a unique angle. But sometimes when I feel that I will do damage to my gear I will run the waterfall and go retrieve the camera after, pass it on to someone that might be walking the drop, and occasionally just walk it myself.


What are the three most important things you consider when packing camera gear?

EP:

1. Using a quality drybag.

2. Bring the right camera gear for job but avoid excess.

3. Use appropriate protection for the style of whitewater you are running. Liners are great but you may want something more substantial for waterfalls, slides and expeditions.

Check out Erik Parker’s images here: Eric Parker Photography.

This photo was taken by Flickr user BigTallGuy and licensed through Creative Commons. 

Field Test: Astral’s Brewess

Photo: Kaydi Pyette
Field Test: Astral's Brewess

Gone are the days of dirty old gym shoes. Until now, I hadn’t owned a pair of trusty river shoes that really won me over. Sure, I bought a new pair every couple seasons but ultimately reverted back to worn out running shoes when something about the paddling-specific pair rubbed me the wrong way.

Enter the Brewess, a feminine counterpart to Astral’s Brewer shoes. The women’s specific design makes them ultra comfy—much better than my previous attempts to size down in a men’s or unisex version. I wore them barefoot from the start and didn’t suffer a single blister. I also love that I can step on the heel to wear them as a clog without doing any structural damage.

This shoe is less clunky than Astral’s popular Rassler—made for serious scouting and portage missions—but, thanks to a quality outsole, the Brewess still provides enough support for a rocky trail. The outsole offers reliable traction even on slippery rocks.

It can be tough to find a shoe that’s at home on land and water, but the Brewess is best at both. When I end up in the water, the shoes are very light for swimming. The slim but tough fabric doesn’t absorb water that weighs me down and the multitude of drainage holes helps water flush through the shoes instead of filling them up.

The flip side of great drainage is that there are many places for sand and small stones to enter. At the end of the day I find myself dumping a collection of dirt out of each shoe. On the plus side, the simple design and durable fabric don’t leave anywhere for the sand to get embedded, as in the old sneakers I’ve used as river shoes until now—with a quick rinse in the river or shake when they’re dry all dirt is easily eliminated.

My favorite thing about these shoes is that I almost never had to put them on wet. The simple design means they dry in no time. A hot half-hour in the sun is often enough to leave them ready to throw on dry the next day. Even wearing them wet around camp on multi-day trips, I found these shoes dried fast on my feet.

www.astraldesigns.com | $99.95

Northern Canoeman

Photo: Jasmijn Decupyer
Northern Canoeman

As a paddler, canoe builder and filmmaker on the road documenting what the canoe means to North America, it was only fitting to explore the legacy of the Prospector.

Likely the most popular canoe in history, the Prospector’s fame is largely due to the writings and films of the legendary Canadian author and filmmaker Bill Mason. However it’s its versatility and functionality that has kept the Prospector a classic after 90 years on the market.

The original cedar-canvas Prospector was built by the Chestnut Canoe Company. Nowadays, there are many different Prospector designs, built in a variety of materials, but I kept asking myself, what happened to the original Chestnut Prospector?

It was as I traveled this past summer to interview some of North America’s leading canoe experts while filming my upcoming feature, Canoe: Icon of the North, that I discovered the answer in the small town of Wakefield, Quebec.

In the shop of Headwaters Canoes, Hugh Stewart runs a small operation specializing in wood and canvas canoes and still manufactures the original Chestnut design today.

Stewart grew up paddling and spent his summers as a youth exploring Ontario’s Algonquin Park at summer camp. Later he learned to repair cedar-canvas canoes while operating a wilderness camp in northern Ontario. It was a necessity to maintain the wooden vessels, but for Stewart, it was more than just routine patchwork—he was combining his love of woodcraft and his passion for wilderness canoe tripping.

After moving to Wakefield, Stewart established his own small cedar-canvas canoe shop. It seemed natural when the original Chestnut Canoe Company building forms came up for sale that he would purchase them and continue building the canoes he’d grown to be so fond of. It was in his shop that my film crew and I caught up with him.

I’d never expected that I’d be able to get so close to a newly canvassed and cleanly varnished authentic Prospector. Stewart’s works feature the same beautifully crafted forms and functional prowess that the boats have always boasted.  

Stewart was a very gracious host and we spent our time talking about canoe design, building methods, wilderness canoe travel, skills development and what it means to be a canoeist.

There was something special as a canoe builder myself to sit in a master builder’s shop surrounded by his work and tools and discuss canoe philosophy. “Canoeing strikes on the physical plane, it strikes on the intellectual plane, historical, cultural and it even affects you on the spiritual plane,” Stewart told me. “There aren’t many activities that you can undertake which will give you nutrition on all these elements.”

As I got to know this icon of the North, Hugh shared with me that even if his Prospectors haven’t changed much in nearly a 100 years, everything else has, including himself. “When I look back on my canoeing times and the few I have left to look forward to, I don’t think of how I’m going to go up or down that big rapid. Now canoeing gives me a chance to spend time with the people I like. And to get away from television, Internet, cars, and the telephone—that’s what I’m attracted to.”

Jason Eke is the producer and director of upcoming documentary Canoe: Icon of the North. Follow the travels of Jason and his crew at www.canoemovie.com. Visit Headwaters Canoes online at www.headwaterscanoes.ca.


11-November-PM-Screenshots.jpgThis article was first published in the November digital edition of PADDLING Magazine, on our free iPad/iPhone/iPod Touch App or Android App or read it on your desktop here.


They Say The Ultimate Lessons Come From The Journey

REAL ADVENTURE. | PHOTO: SCOTT MACGREGOR

Every spring since I was a little boy my father and his buddies have rented a cabin at a fishing lodge, a four-hour drive north then another two hours west, smack in the middle of nowhere. It is a walleye fishing trip. A number of years ago I started going and this year I brought along my son, Doug.

We do plenty of family camping trips, wilderness canoe trips and family ski trips, but this one is different. It’s with Grandpa. We stay in cabins. We ride ATVs. No mother or sister. He misses school. And it’s all about fishing.

Motorboat fishing is not my cup of tea. Pull the rope. Zoom to the spot. Catch our legal limit of fish. Zoom back. Clean, cook and eat. It all seems too predictable. Too boring. And, I’m not that good at it. This year, I thought I’d mix things up. This year, Doug—I say while pumping a fist in the air—you and I will go on a real adventure!

“I’m going to ask Grandpa if he’ll take me fishing tonight. No offense Dad, but I’d like to actually catch some fish.”

I’d planned a 35-kilometer ride down abandoned mining roads winding through scrubby clear-cut forests. Where the road ends we’ll find orange flagging tape tied to alders marking the spot where we are to pull off the road. If we are lucky we’ll crawl the ATVs close enough to the lake we won’t have to drag the canoe and our gear too far through the boggy beaver meadow. Ron at the general store recommended bug shirts.

You get the idea. Real adventure.

From there we’ll paddle north into the Montreal River. Then upstream until it opens up again. If the water has dropped enough, our landmark is a lonely stick poking out of the lake about two boat lengths off the eastern shore. If we anchor right there the old boys say we’d be over the deep hole and it will be a slaughter. A true walleye honey hole. Fish, they tell Doug, will jump right into his canoe.

When old men say such things to children they are taken very, very literally.

Ralph Waldo Emerson famously wrote: Life is a journey, not a destination. Joy should be found not in finishing an activity but in doing it. Philosophers, poets, best-selling novelists and fathers say these types of things to children when they are selling them on great adventures.

Our journey had taken more time than I expected. We had to pull ashore for two thunderstorms. We forgot our anchor, which probably didn’t matter because there was a very slim chance of us actually being in the right spot—there were 13 sticks poking up around that end of the lake.

By mid-afternoon, Doug had renamed the Honey Hole, the Sucky Hole. He’d given up on fishing altogether and was racing minnows back and forth in the rainwater on the floor of the canoe.

REAL ADVENTURE. | PHOTO: SCOTT MACGREGOR

Warm, dry and finally back at the cabins, I told Doug it didn’t matter that fish didn’t jump into our canoe. I told him that he should find joy in the journey; it is about the doing of the activity. It isn’t the destination that is important. What is truly important is the adventure, the ride, the river, and our time together.

He sat there at the kitchen table listening, eating the coconut shrimp we’d pulled out of the freezer. Then he got up and put on his shoes and sweater.

“I’m going to ask Grandpa if he’ll take me fishing tonight. No offense Dad, but I’d like to actually catch some fish.”

Scott MacGregor is the founder and publisher of Canoeroots.


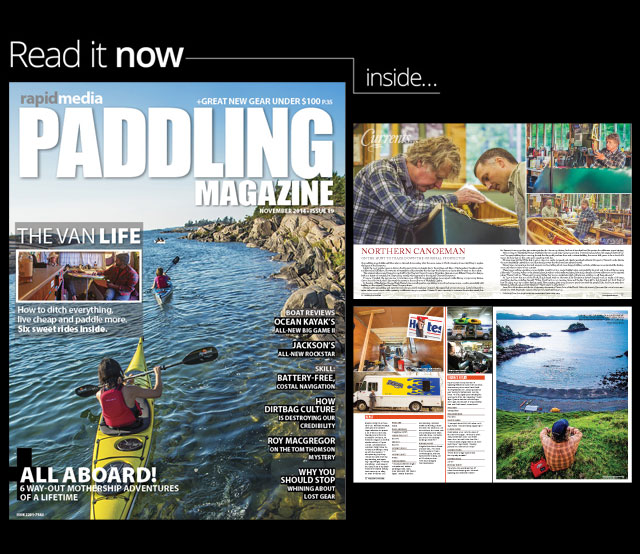
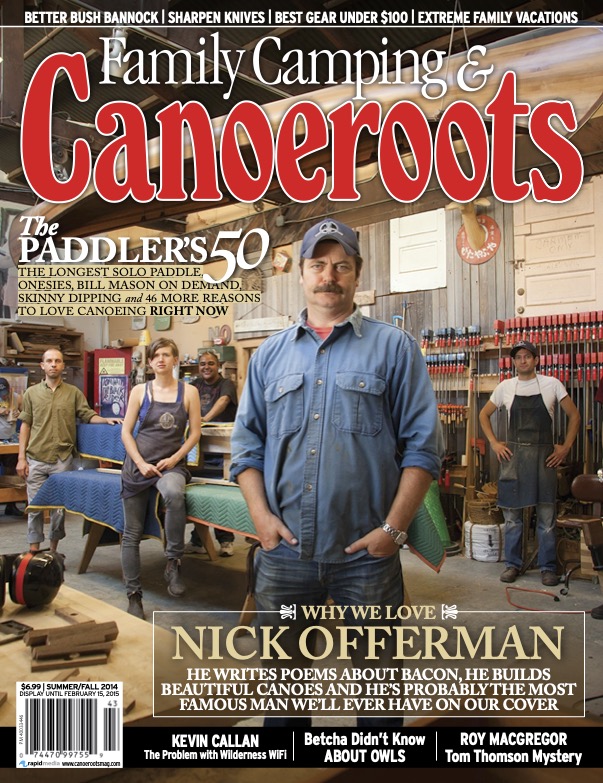
Get the full article in the digital edition of Canoeroots and Family Camping, Summer/Fall 2014.Subscribe to Paddling Magazine’s print and digital editions, or browse the archives.

How To Relieve & Prevent Lower Back Pain From Paddling

Man wearing PFD standing at end of dock beside kayak and holding paddle.
Prevent or relieve lower back pain with these tips.

Here’s an astonishing number for you: People in the U.S. spend over 100 billion dollars per year on low back pain relief (trying to get it). What is most astounding about this statistic is that most, if not all, low back pain is avoidable. We don’t need to suffer unnecessarily. With a little knowledge and discipline, we can prevent and decrease most low-back pain and discomfort.

Most low back pain has nothing to do with your low back. Tight hip flexors from sitting (in kayaks, canoes, at desks, in cars) are what most often lead to low back discomfort, pain and injury in paddlers. In fact, tight hip flexors, over time, can lead to severe injuries such as disk herniations and bulges. SUP paddlers also experience tight hip flexors from balancing and hinging at the waist when paddling.

Lower back issues can stem from a lot of different causes, however, such as:

  • Weak glutes
  • Overcompensating movement with other muscles
  • Injury
  • Imbalances
  • Decreased flexibility
  • Inactivity
  • Sitting

Typically it isn’t until someone can barely move, their roll deteriorates, or pain intensifies that they start a rehab program to fix it. Having back pain makes you age much quicker or feel older, which makes paddling more uncomfortable.

However, implementing certain practices into your daily life and incorporating certain exercises into your training routine will act as preventative care for your back as you continue to paddle, or assist in improving the health of an already “bad back.”

[This article is part of The Ultimate Fitness Guide For Paddlers. Find all the resources you need to stay healthy and fit for paddling.] 


Kayak back pain solutions

1. Always practice good posture

When sitting, choose to sit on an exercise ball. This forces good posture. Think about contracting your core (laugh out loud and feel what happens to your core—this is core contraction); pulling the shoulder blades back and down; and lifting your chest upwards.

2. Stretch it out

Read our article about Post-Paddling Stretches.

3. Add these exercises to your weekly routine

For a well-rounded program, add the following exercises after your gym program, paddling session or other activity. Perform these exercises three to four times a week. Give it a chance—you will start feeling a difference in just a few weeks.
  • Double knee to chest stretch
  • Flutter kicks
  • Four points
  • Clam
  • Abduction with band

These simple exercises are important even if you don’t feel the burn you’d get from a different workout—it doesn’t mean you’re not improving. Strengthening these smaller muscles and increasing their movement will make you stronger. You are not necessarily strong if you have big biceps, glutes or deltoids, as these are just the “show” muscles. The muscles that make you stronger are the tiny ones deep inside a joint. Strengthen these and you’re well on your way to being injury and pain free.


The best stretch for lower back pain

Since lower back pain is often attributed to tight hip flexors, if you can only do one stretch it should be one that targets your quads and hip flexors. As they lengthen, the hip flexors release their grip on the pelvis and spine and allow the body to come back toward alignment. When the body moves toward optimal alignment, we can experience relief from pain in the low back.

If we could only give one stretch to all padders it would be this one: the Hand to Big-Toe Pose Variation. It has four parts and it targets the hips and hamstrings while keeping the spine in alignment. You’ll need a strap of some kind for this stretch, whether it be a resistance band, skipping rope, towel, etc.

Woman lying on back with one leg extended straight up in the air.

Step one

Lie on your back with your knees bent, feet flat on the mat and your strap within reach.

  • Take your strap, lift your right leg and place the strap around the ball of your right foot letting equal amounts of the strap drape from either side of the foot
  • Cross the strap and hold one end in each hand
  • Extend the right leg up toward the sky while maintaining a soft bend in the knee
  • Draw your shoulder blades toward one another to create a gentle lift in the chest
  • Press the ball of the foot firmly into the strap and spread the toes
  • Your leg may not be at a 90 degree angle to your torso and that’s okay
  • Hold for five deep and easy breaths

Woman lying on back with leg extended at 45-degree angle from body.

Step two

  •  Take both ends of your strap and hold them in your right hand
  •  Keep your sit bones moving back and apart and slowly take your right leg out to the right. Go only as far as you can without lifting your left hip off the floor.
  • Hold for five breaths

Woman lying on back with leg above body and on slight angle.

Step three

  • Bring the leg back to center
  • Cross your straps again holding one end in each hand
  • Take the right leg across the midline to the left about 10 degrees
  • Take the sit bones back and apart
  • Hold for five breaths

Woman lying on back with leg across body

Step four

  • Finally, hold both ends of the strap in your left hand and take the right leg all the way across the body toward the floor. You can keep holding on to the strap and extend your leg in this reclined twist, or you can release the strap and let the leg relax in the twist.
  • Hold for five breaths
  • To finish, bring the leg back to center and extend maintaining a soft knee before releasing the strap and allowing the leg to float down
  • Pause for a few breaths and notice the difference between both hips and legs before moving on to the other side

This program is not for everyone. Please see your doctor prior to this exercise program. Depending on your back pain and/or mechanism of injury, some exercises will feel better than others. If any pain is caused by these movements, please stop.


Heather Herbeck has a B.Sc. in Exercise Science and is a pro-kayaker, Certified Personal Trainer and Level 1 Crossfit Trainer with over 15 years experience. Check out her website for personal training or fitness consultations and trainings via Internet or phone.

Anna Levesque is the leading expert on paddling instruction for women and yoga for paddling. She is the author of the book Yoga For Paddling.

Gear: Silky Pocketboy 130

Photo: Kaydi Pyette
Silk Pocketboy 130


This pocket-sized folding saw is ideal for camp chores, from pruning the portage trail to collecting deadwood. Though it’s a few bucks more expensive than similar models of the same size, it’s worth the price—Silky’s five-inch long, Japanese-made blade keeps an edge and is built to withstand abuse.


Technical Features
– 5-inch (130 mm) blade length
– 7 teeth per inch (8 teeth per 30 mm) teeth configuration 
– 0.35 pounds (160 grams) operating weight; 0.5 pounds (220 grams) weight with carrying case 
– Clear plastic flip-lock carrying case with belt clip is included 
– Limited lifetime warranty against defects in material and workmanship

$35 | www.silky.jp 


Screen_Shot_2014-09-30_at_9.19.33_AM.pngThis article originally appeared in the Late Summer/Fall issue of Canoeroots and Family Camping. Read the entire issue on your desktop, Apple  or Android device. 

Butt End: Lost and Found

Photo: Ian Merringer
Lost Paddle - Kevin Callan

I like to keep a relaxed pace when I trip, but that afternoon we couldn’t get our dawdling daughter through the portage quickly enough. The curious black bear seemed as interested in us as I was in it, and to add to the anxiety a column of storm clouds was collecting upwind. 

Our push-off from the portage was hasty. It wasn’t until we were halfway around the lake, losing ground to the storm, that I discovered our spare paddle was missing. 

I knew exactly where I had left it—tucked into the marsh grass in the muck that sucked at our boots as we hurried into the canoe—but I wasn’t going back. Alana and I had our two-year-old daughter with us, and you have a maximum of an hour-and-a-half grace time while paddling with a two-year-old. We were already in too deep. 

Besides, the storm would soon be on us, and the bear was probably licking his lips in a carefully selected ambush sport near the paddle…Click here to continue reading in the free desktop edition of Canoeroots, Spring 2008.  

Screen_Shot_2014-10-10_at_1.49.09_PM.pngThis article originally appeared in the Late Summer/Fall issue of Canoeroots and Family Camping. Read the entire issue on your desktop, Apple or Android device. 

Skills: Shoot Perfect Sunsets

Photo: Rick Matthews
sunset canoe

Remember that trip with the perfect sunset that seemed to go on forever? Did the photos you took that sunset look the you remembered it? Probably not. The lighting effects that make a setting sun so beautiful also make it diffilcult to capture. 

1. Be steady. Use a trippod whenever you can. It’sa guaranteed image sharperener, especially in low light situations when shutter speeds get slower. 

2. Be selective. Choose the best section of sky to include in you shot and make the most of it. Don’t be tempted to …

Screen_Shot_2014-10-07_at_11.51.47_AM.pngThis article originally appeared in the Late Summer/Fall issue of Canoeroots and Family Camping magazine.