Home Blog Page 278

They Say The Ultimate Lessons Come From The Journey

REAL ADVENTURE. | PHOTO: SCOTT MACGREGOR

Every spring since I was a little boy my father and his buddies have rented a cabin at a fishing lodge, a four-hour drive north then another two hours west, smack in the middle of nowhere. It is a walleye fishing trip. A number of years ago I started going and this year I brought along my son, Doug.

We do plenty of family camping trips, wilderness canoe trips and family ski trips, but this one is different. It’s with Grandpa. We stay in cabins. We ride ATVs. No mother or sister. He misses school. And it’s all about fishing.

Motorboat fishing is not my cup of tea. Pull the rope. Zoom to the spot. Catch our legal limit of fish. Zoom back. Clean, cook and eat. It all seems too predictable. Too boring. And, I’m not that good at it. This year, I thought I’d mix things up. This year, Doug—I say while pumping a fist in the air—you and I will go on a real adventure!

“I’m going to ask Grandpa if he’ll take me fishing tonight. No offense Dad, but I’d like to actually catch some fish.”

I’d planned a 35-kilometer ride down abandoned mining roads winding through scrubby clear-cut forests. Where the road ends we’ll find orange flagging tape tied to alders marking the spot where we are to pull off the road. If we are lucky we’ll crawl the ATVs close enough to the lake we won’t have to drag the canoe and our gear too far through the boggy beaver meadow. Ron at the general store recommended bug shirts.

You get the idea. Real adventure.

From there we’ll paddle north into the Montreal River. Then upstream until it opens up again. If the water has dropped enough, our landmark is a lonely stick poking out of the lake about two boat lengths off the eastern shore. If we anchor right there the old boys say we’d be over the deep hole and it will be a slaughter. A true walleye honey hole. Fish, they tell Doug, will jump right into his canoe.

When old men say such things to children they are taken very, very literally.

Ralph Waldo Emerson famously wrote: Life is a journey, not a destination. Joy should be found not in finishing an activity but in doing it. Philosophers, poets, best-selling novelists and fathers say these types of things to children when they are selling them on great adventures.

Our journey had taken more time than I expected. We had to pull ashore for two thunderstorms. We forgot our anchor, which probably didn’t matter because there was a very slim chance of us actually being in the right spot—there were 13 sticks poking up around that end of the lake.

By mid-afternoon, Doug had renamed the Honey Hole, the Sucky Hole. He’d given up on fishing altogether and was racing minnows back and forth in the rainwater on the floor of the canoe.

REAL ADVENTURE. | PHOTO: SCOTT MACGREGOR

Warm, dry and finally back at the cabins, I told Doug it didn’t matter that fish didn’t jump into our canoe. I told him that he should find joy in the journey; it is about the doing of the activity. It isn’t the destination that is important. What is truly important is the adventure, the ride, the river, and our time together.

He sat there at the kitchen table listening, eating the coconut shrimp we’d pulled out of the freezer. Then he got up and put on his shoes and sweater.

“I’m going to ask Grandpa if he’ll take me fishing tonight. No offense Dad, but I’d like to actually catch some fish.”

Scott MacGregor is the founder and publisher of Canoeroots.


Get the full article in the digital edition of Canoeroots and Family Camping, Summer/Fall 2014.Subscribe to Paddling Magazine’s print and digital editions, or browse the archives.

How To Relieve & Prevent Lower Back Pain From Paddling

Man wearing PFD standing at end of dock beside kayak and holding paddle.
Prevent or relieve lower back pain with these tips.

Here’s an astonishing number for you: People in the U.S. spend over 100 billion dollars per year on low back pain relief (trying to get it). What is most astounding about this statistic is that most, if not all, low back pain is avoidable. We don’t need to suffer unnecessarily. With a little knowledge and discipline, we can prevent and decrease most low-back pain and discomfort.

Most low back pain has nothing to do with your low back. Tight hip flexors from sitting (in kayaks, canoes, at desks, in cars) are what most often lead to low back discomfort, pain and injury in paddlers. In fact, tight hip flexors, over time, can lead to severe injuries such as disk herniations and bulges. SUP paddlers also experience tight hip flexors from balancing and hinging at the waist when paddling.

Lower back issues can stem from a lot of different causes, however, such as:

  • Weak glutes
  • Overcompensating movement with other muscles
  • Injury
  • Imbalances
  • Decreased flexibility
  • Inactivity
  • Sitting

Typically it isn’t until someone can barely move, their roll deteriorates, or pain intensifies that they start a rehab program to fix it. Having back pain makes you age much quicker or feel older, which makes paddling more uncomfortable.

However, implementing certain practices into your daily life and incorporating certain exercises into your training routine will act as preventative care for your back as you continue to paddle, or assist in improving the health of an already “bad back.”

[This article is part of The Ultimate Fitness Guide For Paddlers. Find all the resources you need to stay healthy and fit for paddling.] 


Kayak back pain solutions

1. Always practice good posture

When sitting, choose to sit on an exercise ball. This forces good posture. Think about contracting your core (laugh out loud and feel what happens to your core—this is core contraction); pulling the shoulder blades back and down; and lifting your chest upwards.

2. Stretch it out

Read our article about Post-Paddling Stretches.

3. Add these exercises to your weekly routine

For a well-rounded program, add the following exercises after your gym program, paddling session or other activity. Perform these exercises three to four times a week. Give it a chance—you will start feeling a difference in just a few weeks.
  • Double knee to chest stretch
  • Flutter kicks
  • Four points
  • Clam
  • Abduction with band

These simple exercises are important even if you don’t feel the burn you’d get from a different workout—it doesn’t mean you’re not improving. Strengthening these smaller muscles and increasing their movement will make you stronger. You are not necessarily strong if you have big biceps, glutes or deltoids, as these are just the “show” muscles. The muscles that make you stronger are the tiny ones deep inside a joint. Strengthen these and you’re well on your way to being injury and pain free.


The best stretch for lower back pain

Since lower back pain is often attributed to tight hip flexors, if you can only do one stretch it should be one that targets your quads and hip flexors. As they lengthen, the hip flexors release their grip on the pelvis and spine and allow the body to come back toward alignment. When the body moves toward optimal alignment, we can experience relief from pain in the low back.

If we could only give one stretch to all padders it would be this one: the Hand to Big-Toe Pose Variation. It has four parts and it targets the hips and hamstrings while keeping the spine in alignment. You’ll need a strap of some kind for this stretch, whether it be a resistance band, skipping rope, towel, etc.

Woman lying on back with one leg extended straight up in the air.

Step one

Lie on your back with your knees bent, feet flat on the mat and your strap within reach.

  • Take your strap, lift your right leg and place the strap around the ball of your right foot letting equal amounts of the strap drape from either side of the foot
  • Cross the strap and hold one end in each hand
  • Extend the right leg up toward the sky while maintaining a soft bend in the knee
  • Draw your shoulder blades toward one another to create a gentle lift in the chest
  • Press the ball of the foot firmly into the strap and spread the toes
  • Your leg may not be at a 90 degree angle to your torso and that’s okay
  • Hold for five deep and easy breaths

Woman lying on back with leg extended at 45-degree angle from body.

Step two

  •  Take both ends of your strap and hold them in your right hand
  •  Keep your sit bones moving back and apart and slowly take your right leg out to the right. Go only as far as you can without lifting your left hip off the floor.
  • Hold for five breaths

Woman lying on back with leg above body and on slight angle.

Step three

  • Bring the leg back to center
  • Cross your straps again holding one end in each hand
  • Take the right leg across the midline to the left about 10 degrees
  • Take the sit bones back and apart
  • Hold for five breaths

Woman lying on back with leg across body

Step four

  • Finally, hold both ends of the strap in your left hand and take the right leg all the way across the body toward the floor. You can keep holding on to the strap and extend your leg in this reclined twist, or you can release the strap and let the leg relax in the twist.
  • Hold for five breaths
  • To finish, bring the leg back to center and extend maintaining a soft knee before releasing the strap and allowing the leg to float down
  • Pause for a few breaths and notice the difference between both hips and legs before moving on to the other side

This program is not for everyone. Please see your doctor prior to this exercise program. Depending on your back pain and/or mechanism of injury, some exercises will feel better than others. If any pain is caused by these movements, please stop.


Heather Herbeck has a B.Sc. in Exercise Science and is a pro-kayaker, Certified Personal Trainer and Level 1 Crossfit Trainer with over 15 years experience. Check out her website for personal training or fitness consultations and trainings via Internet or phone.

Anna Levesque is the leading expert on paddling instruction for women and yoga for paddling. She is the author of the book Yoga For Paddling.

Gear: Silky Pocketboy 130

Photo: Kaydi Pyette
Silk Pocketboy 130


This pocket-sized folding saw is ideal for camp chores, from pruning the portage trail to collecting deadwood. Though it’s a few bucks more expensive than similar models of the same size, it’s worth the price—Silky’s five-inch long, Japanese-made blade keeps an edge and is built to withstand abuse.


Technical Features
– 5-inch (130 mm) blade length
– 7 teeth per inch (8 teeth per 30 mm) teeth configuration 
– 0.35 pounds (160 grams) operating weight; 0.5 pounds (220 grams) weight with carrying case 
– Clear plastic flip-lock carrying case with belt clip is included 
– Limited lifetime warranty against defects in material and workmanship

$35 | www.silky.jp 


Screen_Shot_2014-09-30_at_9.19.33_AM.pngThis article originally appeared in the Late Summer/Fall issue of Canoeroots and Family Camping. Read the entire issue on your desktop, Apple  or Android device. 

Butt End: Lost and Found

Photo: Ian Merringer
Lost Paddle - Kevin Callan

I like to keep a relaxed pace when I trip, but that afternoon we couldn’t get our dawdling daughter through the portage quickly enough. The curious black bear seemed as interested in us as I was in it, and to add to the anxiety a column of storm clouds was collecting upwind. 

Our push-off from the portage was hasty. It wasn’t until we were halfway around the lake, losing ground to the storm, that I discovered our spare paddle was missing. 

I knew exactly where I had left it—tucked into the marsh grass in the muck that sucked at our boots as we hurried into the canoe—but I wasn’t going back. Alana and I had our two-year-old daughter with us, and you have a maximum of an hour-and-a-half grace time while paddling with a two-year-old. We were already in too deep. 

Besides, the storm would soon be on us, and the bear was probably licking his lips in a carefully selected ambush sport near the paddle…Click here to continue reading in the free desktop edition of Canoeroots, Spring 2008.  

Screen_Shot_2014-10-10_at_1.49.09_PM.pngThis article originally appeared in the Late Summer/Fall issue of Canoeroots and Family Camping. Read the entire issue on your desktop, Apple or Android device. 

Skills: Shoot Perfect Sunsets

Photo: Rick Matthews
sunset canoe

Remember that trip with the perfect sunset that seemed to go on forever? Did the photos you took that sunset look the you remembered it? Probably not. The lighting effects that make a setting sun so beautiful also make it diffilcult to capture. 

1. Be steady. Use a trippod whenever you can. It’sa guaranteed image sharperener, especially in low light situations when shutter speeds get slower. 

2. Be selective. Choose the best section of sky to include in you shot and make the most of it. Don’t be tempted to …

Screen_Shot_2014-10-07_at_11.51.47_AM.pngThis article originally appeared in the Late Summer/Fall issue of Canoeroots and Family Camping magazine.


Field Test: Bomber Gear’s K-Bomb Sprayskirt

Person standing beside whitewater kayak wearing sprayskirt.
Fashion meets function. | Photo: Emma Drudge

The K-Bomb Octopod Sprayskirt from Bomber Gear explodes onto the whitewater scene as a perfect mix of function and fashion.

Man standing beside whitewater kayak wearing sprayskirt
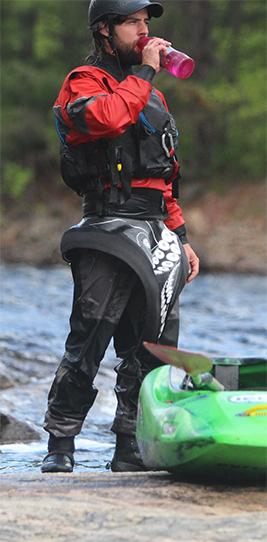
As soon as I picked up the K-Bomb I noticed how beefy it felt. The rubber rand is just the right size to provide a great seal yet not too bulky that it’s a pain to get under your cockpit rim.

A super tough-feeling outer ring protects the high wear areas that rub on your boat; this durability will appeal to any kayaker who’s had to empty boats out by sliding them across the deck.

[ Paddling Buyer’s Guide: View all sprayskirts ]

The K-Bomb uses what Bomber Gear calls Sub Screen technology. To make it, they pressure inject Teflon-based ink into the pores of the skirt’s neoprene to create wicked water repellency with added durability. The result is an incredibly smooth-feeling fabric that sheds water fast—no more annoying drips onto your legs from water sitting on the top of the deck and seeping through.

The solid seams are sealed with a four-step process called Bomblock Construction, making them reliably strong and watertight.

Rounding out some of the thoughtful design features are a rubberized pull handle that keeps a large triangular shape for easy grabbing and the WickClip, which lets you easily buckle your skirt up and out of the way while walking. The clip is also handy for hanging to dry at the end of the day.

Available in a variety of cockpit and tunnel sizes it’s important you get the right fit as we found the skirts don’t stretch quite as much as those without the Sub Screen neoprene. I was glad to see that Bomber Gear has measurements in their extensive online sizing guide to help me find the perfect fit.

Bomber Gear makes it clear that serious equipment doesn’t have to look boring. The K-bomb Octopod is a great choice for kayakers who paddle hard and want to look good too. It is available in several prints but the intricate tentacle design of the Octopod stands out as my favorite option.

This article originally appeared in Issue 17 of Paddling Magazine. Subscribe to Paddling Magazine’s print and digital editions here, or browse the archives here.


Fashion meets function. | Photo: Emma Drudge

Jackson Kayak’s 2014 Rockstar

Photo: Emma Drudge
Jackson Kayak's 2014 Rockstar

Rock stars are all about putting on a show. Many start their careers with high-energy acts, running around on stage with the music cranked to 11. For some that’s as far as it goes, they hit their peak and decades later we wonder where they went.

Jackson Kayak’s 2014 Rockstar
Small/Medium/Large
Length: 5’4”/5’9”/5’11”
Width: 25”/26.5”/28”
Height: 14”/14.5”/15.5”
Volume: 48/57/65 GAL
Weight: 27/29.5/33 LBS
Paddler weight: 115–180/ 150–200/170–250 lbs
Cockpit dimensions: 32.5”x19”/34.5”x20”/36”x21”
Price: $1,249
www.jacksonkayak.com
Other stars though, the famous, long-lived favorites, mature with age. They tweak and refine their style. This is the path of the Rockstar from Jackson Kayak, which, with its new design for 2014, proves it is still in its prime.

Sitting beside its predecessor, the new Rockstar has only a few visible differences. It’s an inch shorter, has a slicier bow and a smoother, more continuous rocker profile.

It’s once I’m on a wave that the Rockstar’s refinements become apparent. This kayak’s movement is predictable. At the top of a wave it seems to wait for me to decide what to do. While the original Rockstar was twitchy, reacting to extremely subtle inputs, the newer version is more patient and highly controllable.

It will give you a good dose of air on a straight butt bounce or just as easily lay a nice, speedy carve across a wave face. You can quickly transfer one edge to the other and you’ll whip aerial blunts, cleans and pan ams with ease.

Less volume in the bow and stern and more around the paddler means I can slice ends into the water for easier cartwheels and still retain lots of pop for loops and similar tricks.

With continuous rocker compensating for the boat’s short length, the new Rockstar is as fast as ever on a wave.

As with any maturing rock star, the changes are more than just skin deep—internally, the boat has also evolved. A tighter knee and thigh area keep me in an aggressive, upright paddling position and the back band’s new cut feels secure and moves when I do.

MORE LIKELY TO POP OUT THAN FLOAT AWAY. | PHOTO: EMMA DRUDGE

Jackson’s inflatable bean bag Happy Feet fill the bow, and are removable for traditionalists like me who prefer a foam block. The Sweet Cheeks seat forms to a custom fit.

On my first ferry out towards a wave, I quickly realized that I felt really high—not in the way you might expect a rock star to be, but high out of the water— even with the Sweet Cheeks as low as they go. For beginners this extra height may be unnerving, since a higher center of gravity makes you more prone to tipping. Intermediate to advanced paddlers will enjoy that it allows for better visibility downstream and, more importantly for freestylers, more leverage for throwing tricks.

The Rockstar comes in three sizes, and if you’ve paddled an older version of this boat you might find yourself switching sizes. At 190 pounds I’m at the high end of the medium size, which fit perfectly in the original design. Being at the top of the weight range makes the boat easy to throw around while playing, but cumbersome for downriver moves—sizing up would easily solve that problem and help make wave and hole moves bigger too.

Like a lot of veteran rock stars, this updated freestyle design from Jackson is a more refined and polished performer. You can still expect high energy and big-air thrills, but now in a more predictable and controllable package.


This article on introducing friends to whitewater was published in the Summer/Fall 2014 issue of Rapid magazine.This article first appeared in the Summer/Fall 2014 issue of Rapid Magazine. Subscribe to Paddling Magazine’s print and digital editions, or browse the archives.

Video: Cliff Jacobson’s Canoe Camping Advice

Video: Cliff Jacobson's Canoe Camping Advice
[iframe width=”420″ height=”315″ src=”//www.youtube.com/embed/1voqypngmQY” frameborder=”0″ allowfullscreen ]

Part one of a Q&A with the opinionated and knowledgeable Cliff Jacobson on all things canoe camping related!

“This is a continuation of our interview with Cliff. We just turned the camera on and let him go wild, talking about whatever he wanted to about canoe camping and camping gear! There’s some excellent in-depth advice given here.” — MorrallRiverFilms

Gear: Oral Mosquito Repellant

Photo: Kaydi Pyette
Mozi-Q oral insect repellant | Photo: Kaydi Pyette

At first we were skeptical; insect repellant in pill form? But after eating an all-natural Mozi-Q tablet we did seem slightly less desirable to the blackfly and mosquito population in buggy May. According to Mozi-Q, active ingredient Delphinium makes all sorts of insects, including head lice and bed bugs, less inclined to bite.

From the manufacturer: “Mozi-q is a formula containing five homeopathic remedies: Staphysagria, Ledum palustre, Urtica urens, Cedron and Grindelia. They are in low C and D potencies, thereby acting at the physical level for their common indication, to reduce the frequency and severity of insect bites.”

Would you try it?

$9.95-$24.95 | www.mozi-q.com 

Screen_Shot_2014-09-30_at_9.19.33_AM.pngThis article originally appeared in the Late Summer/Fall issue of Canoeroots and Family Camping. Read the entire issue on your desktop, Apple  or Android device. 

Boat Review: Get On The Water’s DIY Cedar Strip

Get On The Water Touring Canoe | Photo: Kaydi Pyette

At Otto Vallinga’s backyard boat building shop in the little community of Corunna, a poster on the wall depicts the wise words of well-known wooden boat builder, Captain Pete Culler: “Any man who wants to can produce a good boat. It takes some study, some practice and, of course, experience. The experience starts coming the minute you begin and not one jot before.”

Get On The Water Touring Canoe Specs
Length. 15’7”
Weight 50 to 58 lbs (depending on construction details)
Max width 33”
Capacity 1,070 lbs
MSRP $1,500
getonthewater.ca

At the outset, building your own kit canoe can be intimidating, but the rewards are plentiful, Vallinga assures me. As the owner and founder of kit boat designer, Get On The Water, which celebrated its tenth anniversary this summer, he’s witnessed the pride and joy of customers post-build.

“There’s more satisfaction in building your own boat; to be out there in something you made, something you crafted,” he says.

Constructed using western red cedar strips, Get On The Water’s gleaming 15-foot, seven-inch Touring Canoe is beautiful. The design is the result of Vallinga’s 15-plus years in the boat-building world; a modern canoe designed for joyful paddling.

“Every wood boat is different, even when it’s the same design, because every piece of wood is different—the grain, the texture, and the way the light plays on the surface,” adds Vallinga.

On the water I find it tracks effortlessly, maneuvers gracefully and offers plenty of stability—there’s something magical and unmatched about the ride of a wooden boat on water.

At 55 pounds and with such a pretty finish, it’s not a model I would choose for rugged wilderness trips, but for a cottage cruiser and day tripper I can’t think of a more attractive option. The Touring Canoe is a perfect match for discerning recreational paddlers.

Vallinga says the building project takes about 100 hours and, though it’s not necessary, it doesn’t hurt to have a background in woodworking.

Get On The Water Touring Canoe | Photo: Kaydi Pyette

While Get On The Water offers the build plans alone for $70, purchasing the kit simplifies the project. For $1,500, your local UPS delivery guy will drop off cardboard boxes in various shapes and sizes, containing pre-cut cedar strips as well as epoxy and fiberglass sheeting. You’ll want to hold on to the 70- page instruction manual. The supplies come direct from boat-building supply shop, Noah’s Marine. For the budget-minded, a DIY build is more cost effective than the $3,000 to $4,000 purchase price of most off-the-sawhorse wooden designs.

Purchasing Vallinga’s design also comes with the assurance of assistance via phone or email, should the woodworker run into trouble, which Vallinga assures me happens rarely. Perhaps it’s my own inexperience when it comes to woodworking, but I’m surprised when he tells me that no one has ever called in a panic, claiming to have ruined their canoe.

So long as you follow the steps, you’ll end up with a water-ready boat, Vallinga says— any imperfections only add to the story of the craft. “Your wood boat, whether built from a kit or from scratch, was crafted by you for you. It was your sweat, your time, your passion that have brought it together.” —KP


Get the full article in the digital edition of Canoeroots and Family Camping, Summer/Fall 2014.Subscribe to Paddling Magazine’s print and digital editions, or browse the archives.