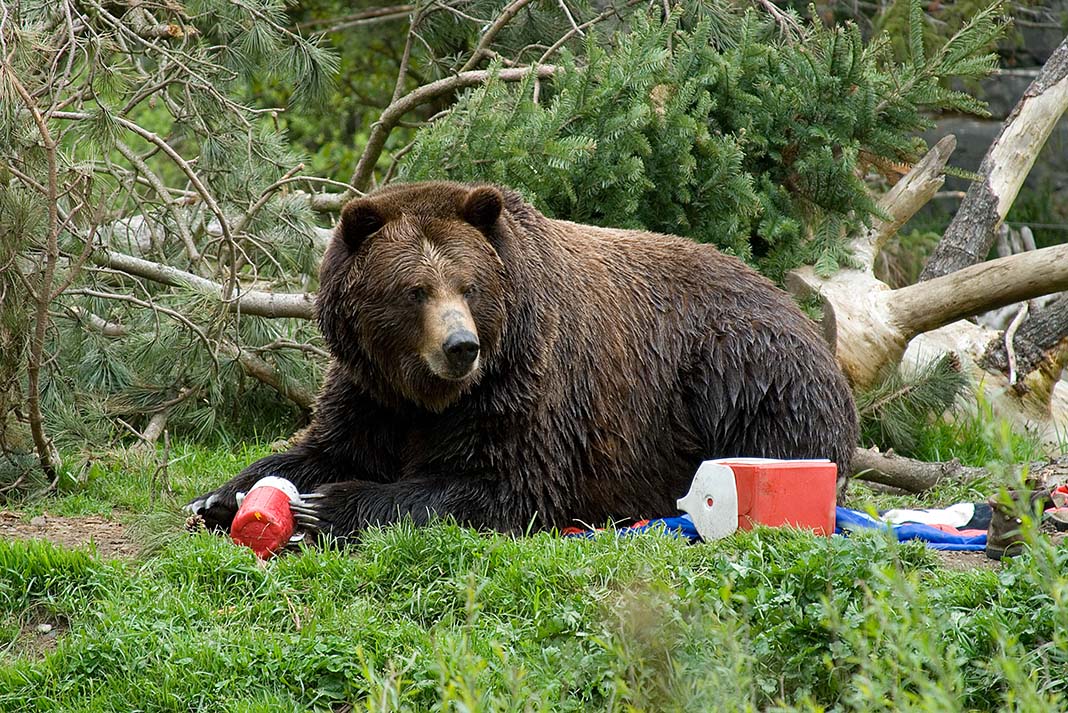
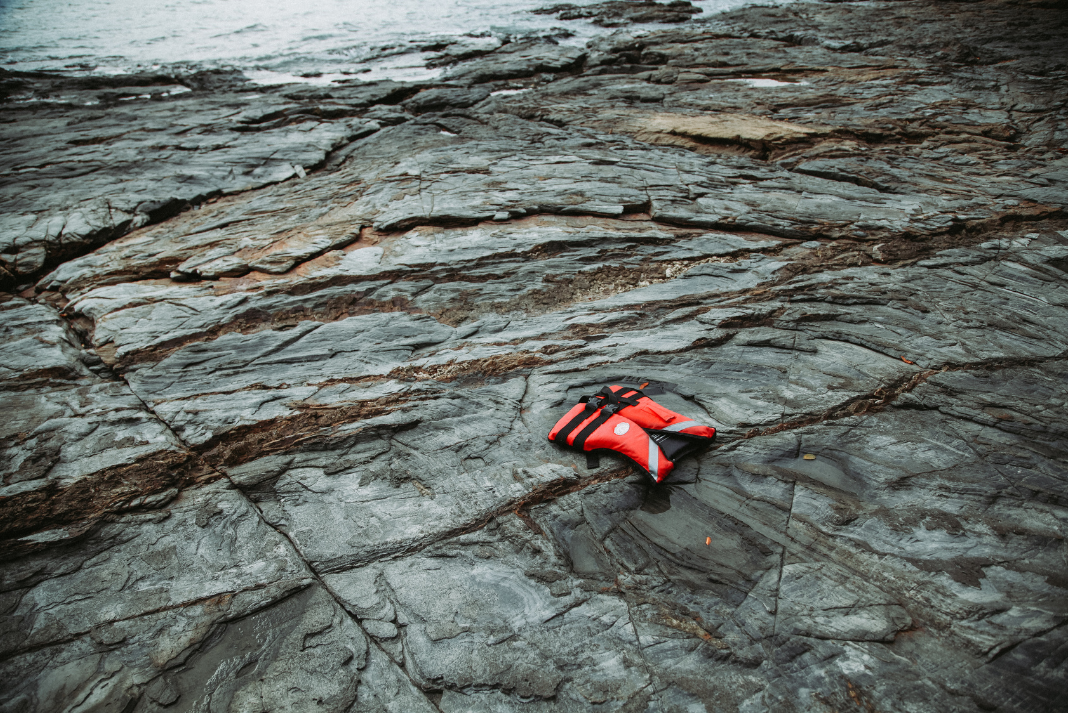
The day the teddy bear got his picnic. | Photo: istockphoto.com
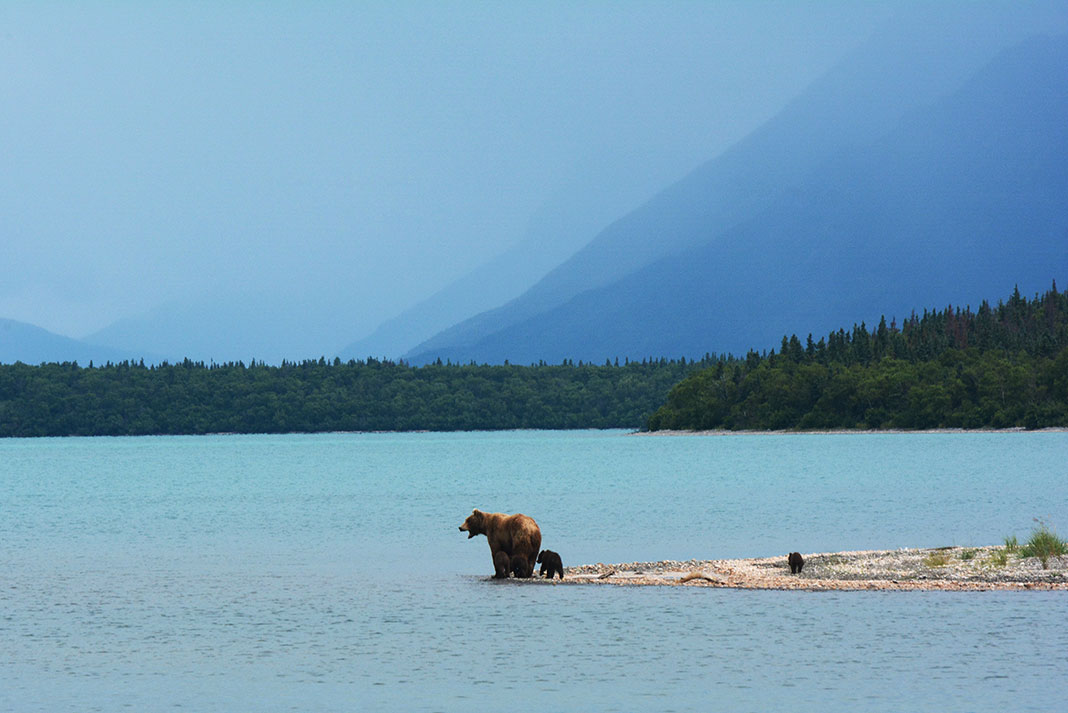
Generally, bears would like to avoid an encounter with you as much as you would like to avoid an encounter with them. In fact, you’re more likely to be hit by lightning than mauled by a bear—the 750,000 black bears in North America kill less than one person per year on average, despite tens of thousands of human-bear interactions.
Bear spray is the most effective deterrent and works more than 90 percent of the time. Just don’t apply as a preventative spray to your tent, it actually attracts bears when not used properly. The steps you can take to deter a bear apply to black bears and grizzly bears.
Generally, bears would like to avoid an encounter with you as much as you would like to avoid an encounter with them. | Photo: Paxson Woelber/Unsplash
Avoid bear encounters
Make noise when moving through the woods by talking or singing.
Travel in groups.
Keep your campsite clean.
If a bear sees you and doesn’t run away
Make sure the bear has an escape route, since leaving is probably what it wants to do.
Speak in a calm voice to identify yourself as a human.
If with other people, remain in a tight group.
Back away slowly, preferably in the direction you came.
Stand your ground. Most charges are bluffs and a bear may bluff charge multiple times.
The majority of attacks by grizzly bears are defensive attacks involving a sow protecting her cubs. A defensive attack is likely to be brief. The best you can do is protect your head, neck and belly. Very rarely, predacious bears may attack someone looking for a meal. Fight back with all possible means, targeting the bear’s face and eyes. Visit the Get Bear Smart Society to learn how to recognize the difference between a defensive attack and a predacious one.
[ Browse the widest selection of boats and gear in the Paddling Buyer’s Guide ]
This article appeared in Canoeroots & Family Camping, Spring 2009 and in Paddling Magazine Issue 65. Subscribe to Paddling Magazine’s print and digital editions here, or download the Paddling Magazine app and browse the digital archives here.
The day the teddy bear got his picnic. | Feature photo: iStock
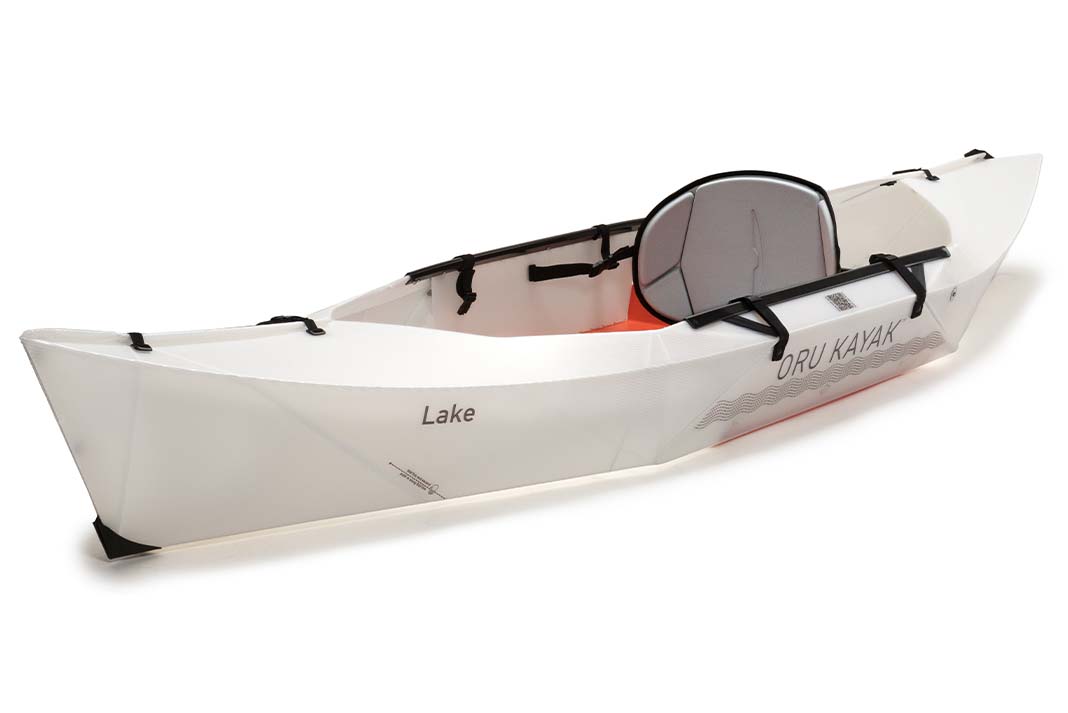
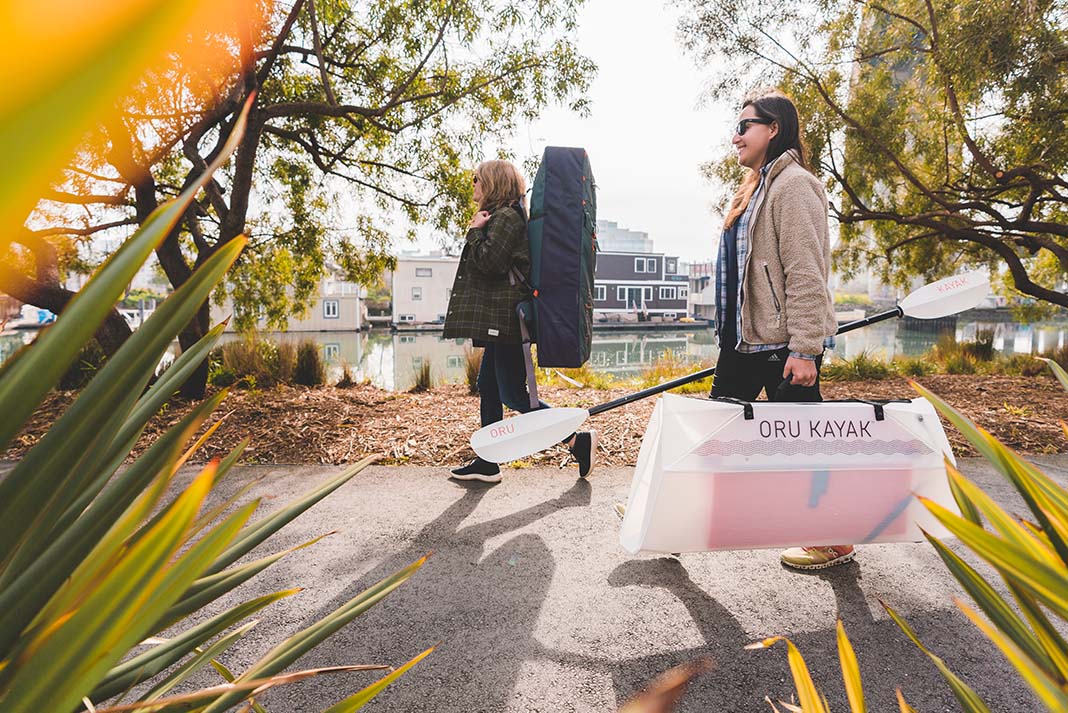
Oru Kayak has pushed the boundaries of its original origami-inspired design to create the brand’s most affordable and universally approachable boat yet, the Lake. Composed of only two loose parts, the Lake can be assembled in under 2 minutes and weighs just 18 lbs, making it the lightest non-inflatable kayak on the market. Affordability also parallels the Lake’s simplicity. At MSRP $699, the Lake provides an opportunity for more people to own a beautiful, highly functional piece of durable origami design that will provide years of on-water joy.
Photo Courtesy of About Oru Kayak
Oru Kayak Lake Specs
Assembly Time: 2 minutes
Weight: 18 lbs
Lenght: 9′
Width: 32″
In box form: 42”x10”x18”
MSRP: $699
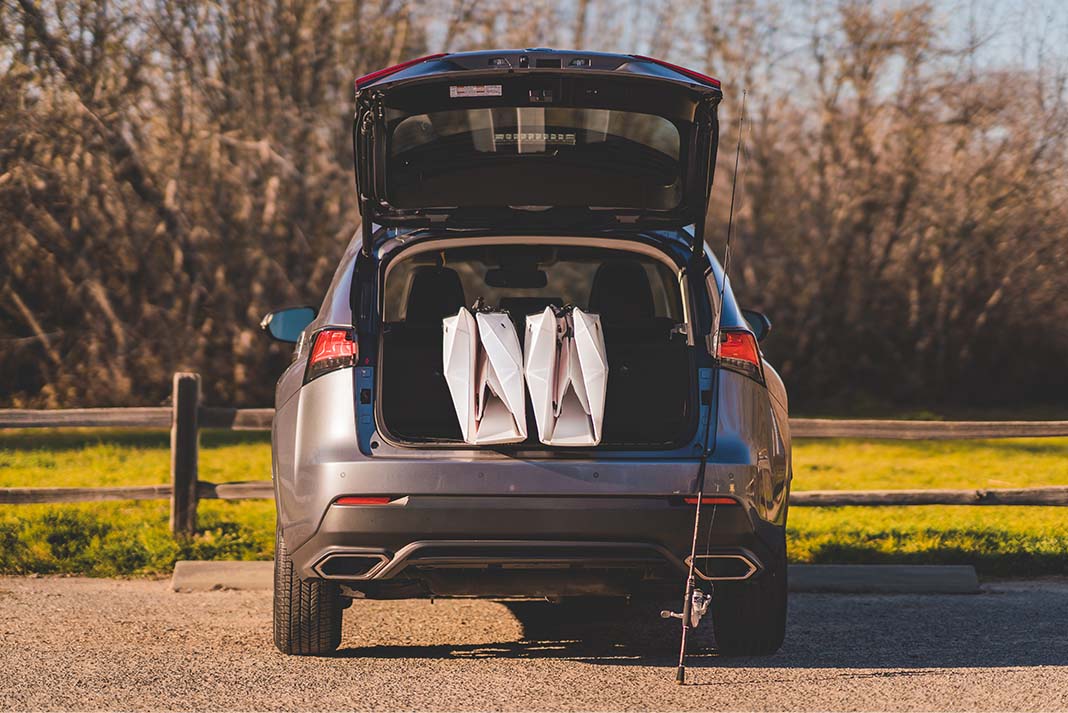
To create a superior user experience, Oru recognized the need to distill its kayak design as close as possible to single-sheet origami art. Fewer moving parts translates to less weight and a more efficient assembly experience. The 9’ X 32” wide Lake has only two loose components: a single sheet of double layered polypropylene which forms the hull and deck of the kayak (as well as the box), and a custom folded floorboard with built-in 18mm memory foam seat. Whereas other Oru models rely on users to install bulkheads to provide rigidity, the Lake employs an innovative new folded floorboard to create the same structural integrity. With bulkheads, footrests, trim, and individual seat components removed, the Lake weighs an eye-catching 18 lbs –10% less than the next lightest Oru kayak – making it the most lightweight non-inflatable kayak in the world. Regardless of strength or age, the Lake allows more people to transport, carry, and store a fully functional kayak on their own.
The Lake can be assembled in under 2 minutes – 33% faster than Oru’s Inlet kayak. In box form (42”x10”x18”), the Lake is similar in size to the Inlet, Oru’s next smallest boat. However, unlike the Inlet, Oru’s collapsible paddle can nest within the Lake to create a compact, all-in-one package that can be stored three deep in the trunk of a car or under a couch.
Photo Courtesy of About Oru Kayak
“The defining principle of this boat is simplicity both in terms of customer accessibility and design ethos,” commented Oru Founder and Chief Design Officer, Anton Willis. “Eliminating things is difficult, especially when we’re committed to the same standards of durability and user experience as our performance models. However, we make origami kayaks, and this boat is the essence of that–it’s the most purely ‘origami’ thing we’ve ever made,” Willis continued.
In an on-going effort to make on-water recreation accessible to more people, Oru paid special attention to the Lake’s price tag. At MSRP of $699 (or $450 for a limited time on Kickstarter), the Lake is notably $200 less than the brand’s most affordable kayak.
Founded in 2012, Oru Kayak is a leading innovator in the kayaking industry and the first to bring a foldable kayak to market utilizing the principles of origami. Beyond the functionality of its engineering, the Oru Kayak stands apart from the competition for its superb on the water performance, durability, easy assembly, and stylish design. Based in Emeryville CA, Oru Kayak is sold in dozens of countries across five continents including Europe, Australia, Asia and the Americas. For more information visit orukayak.com
Expert kayaker Todd Wells recently went for a nasty swim on his local run, the Little White Salmon River in Washington state.
He and two others, Alec Voorhees and Owen Doyle, were navigating the river at higher-than-average flows when Wells was stopped by a powerful hole–and it didn’t take long for things to go sideways from there.
Of the rescue, a spokesperson for the Whitewater Awards wrote: “There isn’t a whole lot of time or space in between the island, and a horrendous cave at Sac-relig. A gargantuan effort by these two to get Todd safety to shore in the nick of time. Staying calm, cool and collected is so important in these scenarios, the boys stayed relaxed, didn’t put themselves in additional harm, and took their chance to eddy out when it arose.”
The impressive rescue was nominated for the new, Kokatat-sponsored category for 2022: ”Best Save.”
2022 Whitewater Awards–What Exactly Is It?
The Whitewater Awards is an annual rider-submitted, rider-voted award ceremony that highlights and celebrates whitewater kayaking’s best accomplishments. The awarding body has traditionally focused on visual media – such as “GoPro Line Of The Year” and “Photographer Of The Year” – but has now branched out to additionally include categories such as “Activist Award” and “Best Save.”
“This new [Best Save] category will acknowledge the skills that aren’t always on display while pushing the limits of kayaking,” the organization explained in a recent Instagram post. “Safety skills are an extremely important aspect of kayaking on expeditions, first descents, and on your backyard runs. Submissions for this category can be video, or a written description.”
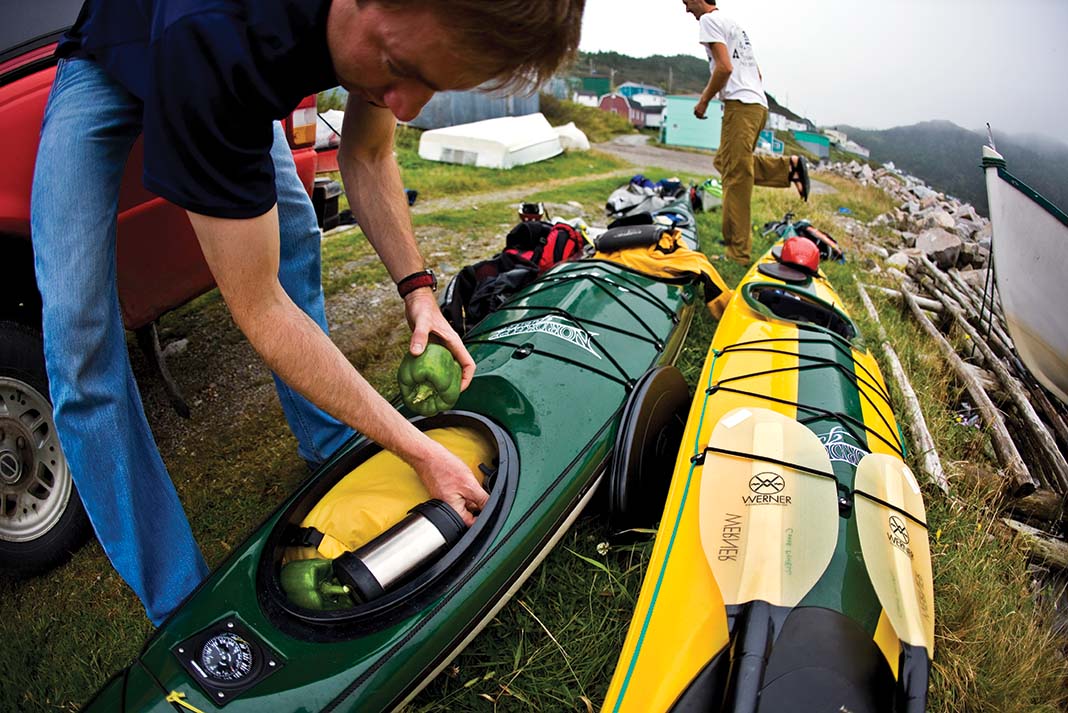
Lightweight kayak camping requires a place for everything and everything in its place. | Feature photo: Ryan Creary
Before I became a kayaker, I was a canoe tripper. Canoe tripping taught me that you can never have too much good camping gear—as long as the canoe stays afloat. I followed the same formula for kayak camping, convinced my comfort depended on bringing along everything I possibly could. Until one day I found out just how much it pays to pack lightweight.
When I switched over to a sea kayak, my packing philosophy changed only slightly at first. With the limited space I was forced to think about the volume of gear I brought along. Over the years, however, I developed new packing and boat-loading techniques, which allowed me to bring increasing amounts on every trip. By the end, I was the guy who brought the most stuff even though I had one of the smallest boats.
Eventually my friend Sean Keelor organized a group intervention about my gear issues and gave me a valuable revelation: with less stuff, I could travel faster, keep more organized and thus enjoy kayak tripping more.
Lightweight kayak camping requires a place for everything and everything in its place. | Feature photo: Ryan Creary
I used to think that since I wasn’t carrying the gear on my back, weight didn’t matter. In reality, the opposite is true. Similar to backpacking, travelling with a light boat and gear results in less draft in the water, making it easier to paddle. You move faster than your buddies and at the end of the day have some energy left to enjoy the best part of the trip, sitting around the fire.
5 reasons to try lightweight kayak camping
Lighter boats travel faster and are more nimble.
Low-impact: smaller tents, less fuel and less gear are lighter on the land.
You’ll expend less energy and be less tired at the end of the day.
Forces you to be more organized.
For purists, the point of going into the wilderness is not to recreate your home in the backcountry, but to live more simply.
Other kayakers often ask me why I would even consider giving up so much. Doesn’t less stuff just mean less comfort? It’s a good question, but it hasn’t made a huge difference. I sometimes miss my big camp chair but the lightweight blue foam pad cut to the size of my butt works just as well and it’s 90 per cent smaller and lighter.
Of course, there are limits to how much you can cut down before it starts to undermine trip safety as well as the fun factor, but in my experience, you can cut quite a bit before you really start to run into that problem.
Sean and I decided to put the lightweight camping theory to the test last May. We planned a seven-day trip along the North Shore of Lake Superior from Wawa out and around Michipicoten Island. The trip involved very cold water and two 15-kilometre offshore crossings.
We still wanted to paddle our small performance boats, but with very limited space, extreme remoteness (due to the time of year) and cold water, we had to make some sacrifices. We needed extra clothing and safety gear to make it home safely so we had to closely examine all of our gear and leave any non-essentials at home. Here are some lessons we learned about how you can slim down and go light.
With less stuff, you can travel faster, stay more organized, expend less energy and enjoy your adventure even more.
12 tips for lightweight kayak camping
1 Take it one step at a time
Remember that there are various levels of commitment and a logical order in which to do things. You don’t need to start by getting rid of all your gear right away and replacing it with the lightest titanium pots and stoves on the market. Look for the obvious things you can do to cut down on both space and weight. Don’t cut the handle off your toothbrush before you’ve weeded out your oversized tent or the 20 pounds of extra food you’re carrying.
2 Pack more efficiently
There’s lots of space in your boat, but you need to learn where to find it. Don’t pack everything in large bags. Keep items loose or in small stuff sacks so they fill in the small spaces under the hatches. There are plenty of websites and books on packing your kayak. You will probably find that 10 to 15 per cent of your space was wasted because of poor packing.
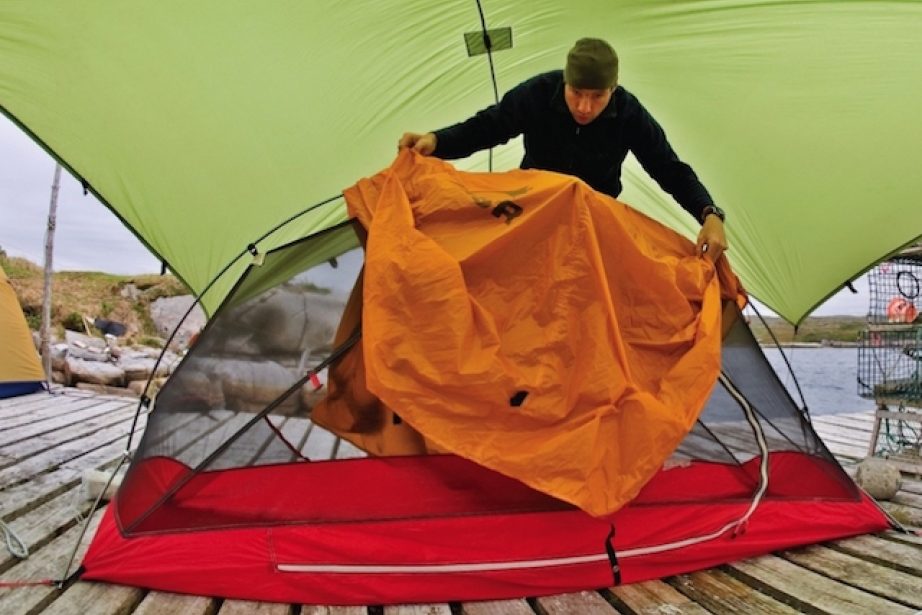
3 Replace your tent
First off, when it comes to gear, look at getting a smaller tent. Do you need a four-man tent if there are just two of you? If you’re using space in your tent for gear storage, keep that gear outside or in your boat and get a smaller tent. All of your important gear should be waterproofed anyway for paddling. You’ll be surprised how much space you can save with a tent that packs down smaller.
4 Prioritize your gear
When packing, divide everything up into “must bring” and “would like to bring if there’s room” categories. Leave the “would like to bring” items home. If you really needed it, you would have moved it into the “must bring” category in the first place.
5 Make a packing list
Making a packing list will force you to organize and think about what to bring, rather than just throwing things in just in case. It will also help you speed up the process next time.
Keeping your food in check is a key method for cutting the amount of weight and bulk brought along. When people pack food, they pack way more than what they would normally eat at home. There seems to be an embedded fear of starvation. Leading up to a trip, watch how much food you really eat, then add only a little bit more to compensate for the extra calories burnt during the day.
7 Dehydrate your meals
If you are looking to really save weight and space, dehydrate your food. With excess water removed, your food will last longer and be considerably lighter. On your trip you can quickly rehydrate your pasta sauce back to its original form. With a little practice, you can easily dry your own fruit, beef jerky and pasta sauces.
Dehydrators are relatively inexpensive and pay for themselves quickly with the money you’ll save by drying your own food rather than buying it at the bulk food store. A great resource is the book Dry It—You’ll Like It, by Gen MacManiman.
8 Keep track of what you use
Keep close track of how much food you are bringing and write down the quantities of everything. When the trip is over compare how much you have left over with what you took so next time you know exactly how much you really eat on trip. Do the same for gear, writing a packing list and taking note of things that you really didn’t need so you won’t bring them next time.
Pack lighter and more efficiently to make for a more enjoyable trip. | Photo: Ryan Creary
9 Eliminate redundancy
Like any good diet, the last five pounds are the hardest to shed. That is when you need to be creative in your gear selection. Find gear that will serve double duty and can be used for two purposes. The “spork” (spoon/fork combo) is a great example. Leave the plate at home since a bowl will work much better. Leave your raincoat at home. You don’t need it since you already have a paddling jacket.
10 Lose weight in your sleep
Choose an ultralight sleeping bag and compact sleeping pad. They will probably pack down around 50 per cent smaller than the set you currently own. When looking at any new gear—tents, clothes, sleeping bags, cookware—look not just at the weight but also how small it packs down.
Get the lightest cooking gear you can find. Lightweight pot sets made of titanium, aluminum or lightweight alloys, though more expensive, will cut the weight down compared to stainless steel monsters. Replace your giant two-burner stove with a smaller, lightweight model.
12 Hop on the scale
The scale never lies. You’ll only know if you’re really cutting down when you’ve got the numbers to prove it. Weigh yourself on a bathroom scale, then weigh yourself holding all your stuff in a duffel bag or backpack and subtract your own weight to find out the total weight of your gear.
Lightweight kayak camping requires a place for everything and everything in its place. | Feature photo: Ryan Creary
Kayakers need to know how to treat blisters and, more importantly, how to prevent them. Blisters are common on the thumbs and pads of the fingers where the paddle rubs against the skin. Water softens hands, and sand gets caught in these areas making the friction worse. Friction and pressure with the kayak and excessive moisture from sweat and damp clothing can also cause blisters on the lower back, armpits, hips, bum, knees and heels.
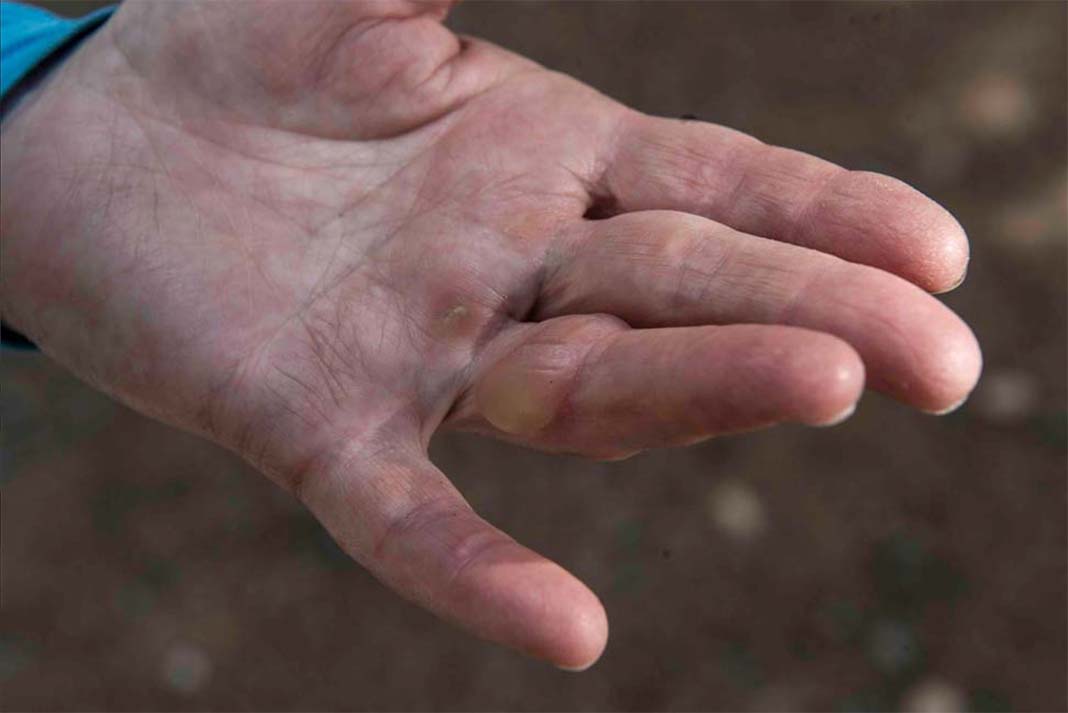
A blister with trapped fluid is called a “bleb.” Leave a bleb intact unless it is too painful or awkward. | Feature photo: Harry Kern
2 techniques to prevent blisters
If improperly treated, blisters can become a serious, potentially trip-ending problem. The best defense is prevention.
1 Reduce friction
The key to preventing blisters is to reduce friction and pressure. First of all, use proper technique when paddling. Hold the paddle loosely in both hands—enlarging the shaft diameter with a fingerboard may encourage a looser grip. Trim and smooth any rough edges on the paddle shaft, and also consider applying a smooth surface such as cork or shrink-wrap to your paddle shaft. Develop and maintain tougher skin by training regularly to build calluses. Or, rub your palms with rubbing alcohol or Tuf-Skin regularly prior to the start of your trip.
If you are prone to blisters, consider pre-bandaging common hotspots with a Spenco Skin Care Pad, Dura Gel or other durable medical gel pad. Well-designed equipment also helps reduce friction. Make sure your clothing and equipment fit well, minimizing ridges, seams, and zippers along areas of friction and pressure like the back, armpits, hips and bum.
Moisture contributes to blisters by softening your skin and increasing friction. To keep moisture away from your skin, wear proper layers of technical clothing. If you wear a wetsuit for long periods, wash and dry the underlying skin regularly and try to rinse and dry the wetsuit every few days.
Wear proper-fitting gloves or pogies to help keep hands warm and dry (or at least not soaking wet). Gloves should fit snugly and not have any seams along areas of friction and pressure. Dry your hands and body thoroughly at rest stops, lunch and especially at night. Consider using talcum powder, corn starch, or antiperspirant in armpits and groin to reduce moisture buildup.
There are three stages of blister development, and the earlier you can notice and treat blisters, the better. | Photo: Diana Polekhina/Unsplash
3 stages of blister treatment
Monitor common problem areas for early signs and symptoms of blisters. There are three stages of blister development, and the earlier you can notice and treat blisters, the better.
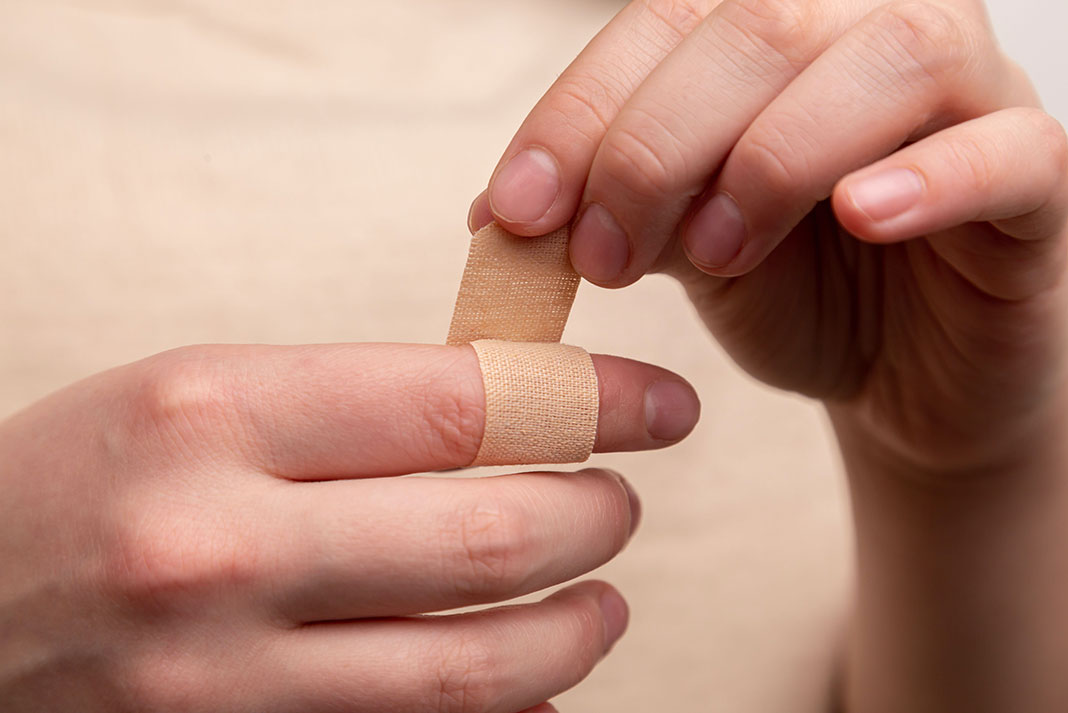
1 Red, irritated skin
Cover the affected area with non-adhesive padding such as Spenco Skin Care Pad, Dura Gel or 2nd Skin. Then tape with a waterproof and breathable tape. Reduce pressure and keep the area dry.
2 Intact blister with trapped fluid
A blister with trapped fluid is called a “bleb.” Leave a bleb intact unless it is too painful or awkward. Make a donut to pad around the bleb with non-adhesive foam or ProWrap. Then pad and tape the bleb and donut as in stage one. Sometimes, the pain or loss of mobility caused by the blister requires draining the bleb:
Sterilize a thin disposable needle with alcohol or a flame (the carbon left on the needle from the flame is sterile).
Penetrate the blister from underneath through the healthy skin surrounding the blister, not through the dead skin covering the bleb.
Treat as a stage three blister, but leave the bleb skin intact to reduce the likelihood of infection.
3 Broken blister
A broken blister is an open wound, susceptible to infection. Infection is a serious, potentially trip-ending problem. Use only sterile supplies with an open wound.
Remove any debris by soaking in warm, sterile water or by irrigating with a large-gauge syringe or a bag with a hole.
Cover the blister with sterile, impregnated gauze such as Aquaphor or Jelonet. The impregnated gauze won’t stick to the wound.
Pad the blister with sterile gel such as sterile 2nd Skin. If the area is exceptionally painful, surround the wound with a donut as in stage two.
Tape the area as in stage one, using sterile OpSite or similar waterproof/breathable tape. If there is no sign of infection, change the bandage when it comes off.
Monitor the wound for signs of infection every four hours or so for the first 24 hours and every 12 hours after that. If the wound becomes infected—indicated by red, hot, inflamed skin surrounding the wound and pus discharge—clean the wound site of dead skin, pus, and other debris and replace the bandages every 12 hours until the infection subsides.
If the pain associated with the blister is affecting the patient’s ability to meet the objectives of the trip, consider non-urgent evacuation. If the wound becomes infected and the infection moves beyond the wound site—indicated by fever, swollen lymph nodes, and red streaks from the wound toward the heart—the patient should be evacuated semi-urgently to a medical clinic or hospital.
You’re better off to plan ahead and avoid such serious, trip-ending blister injuries. Before you go on your trip, seek first aid training and invest in a first aid guidebook for reference. Visit a medical supply store or large pharmacy to stock your first aid kit with the blister supplies mentioned here. With proper prevention, monitoring and early treatment, you can stop blisters before they stop you.
A blister with trapped fluid is called a “bleb.” Leave a bleb intact unless it is too painful or awkward. | Feature photo: Harry Kern
When we envision the worst thing that can happen on a trip, having our canoe eaten by a bear isn’t a scenario that typically springs to mind. For expedition canoeist Frank Wolf, however, this hypothetical situation became a little too real.
Wolf was on the final stretch of a 1060 km trip from Sandy Bay to Hudson Bay when three polar bears surrounded his basecamp; a remote cabin at the mouth of the Seal River in Manitoba. In the hilarious video, we witness Wolf yelling at one particular bear who is insistent on chewing up his canoe, while the other two circle the cabin perimeters–presumably in search of food.
[ View all Canoes for sale in the Paddling Buyer’s Guide ]
A canoe with holes in it could be detrimental to the completion of the trip, as well as the safety of both the paddlers. Quite understandably, Wolf is determined to not let the bears get away with it. Watch how he deals with the situation in the video above.
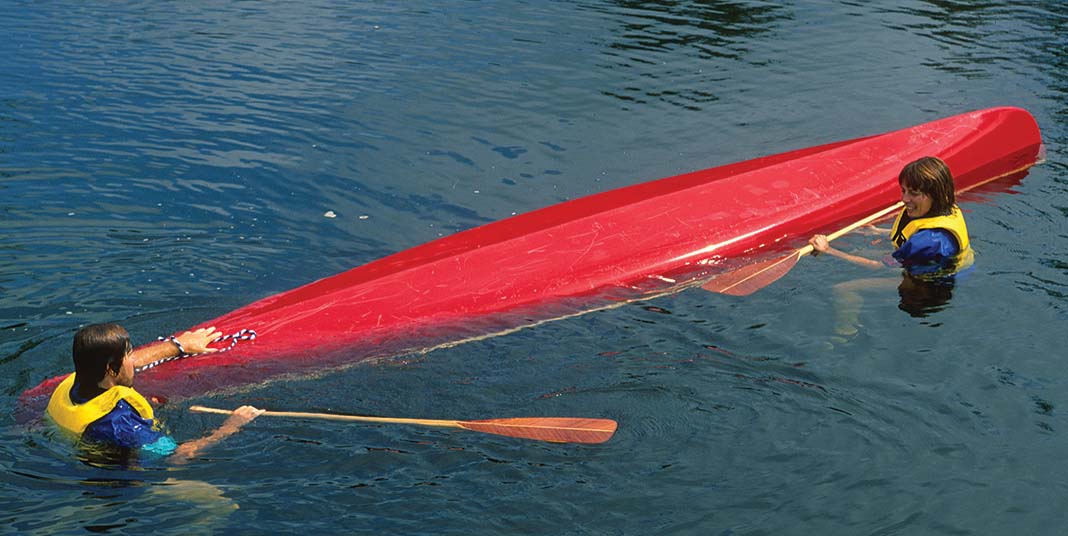
When paddling without other boats nearby, a capsize means self-rescue. If close to shore, it may be possible to swim in, pulling your swamped canoe, but this is even less fun than it sounds. If you are far from shore, you will need to get as much of the water out as possible and attempt to reenter. The Capistrano flip is a self-rescue technique that will get you out of deep water and back on your way.
Both paddlers get to the same side of the capsized canoe and lift the nearest gunwale. | Photo: Joanie and Gary McGuffin
1 Lift the gunwale
Both paddlers get to the same side of the capsized canoe, still holding paddles. Lift the gunwale nearest you up out of the water.
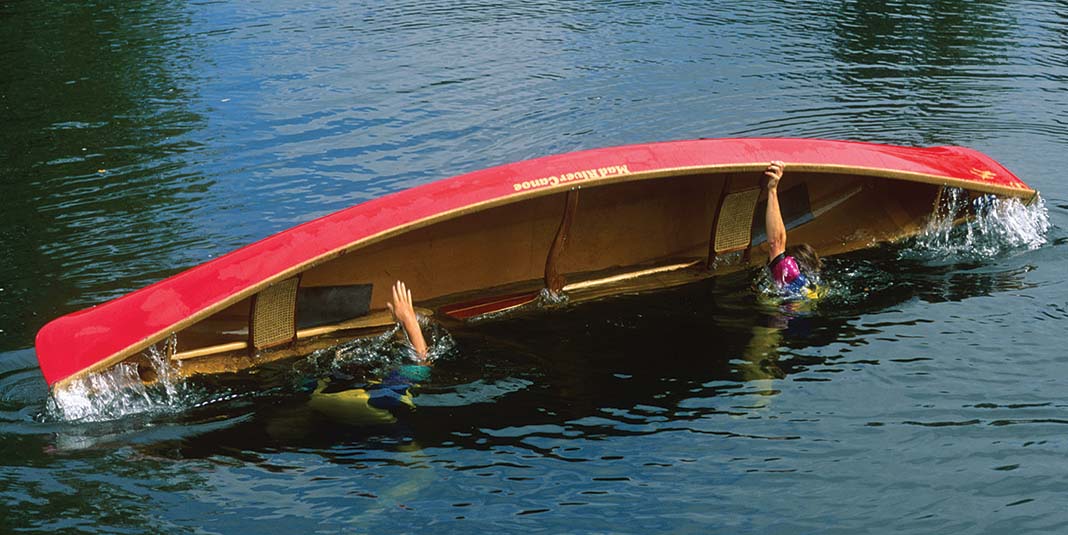
2 Tip the canoe
Face each other and tuck your paddles between the thwarts and seats so they won’t float away. On a count of three, tip the canoe back over you in unison.
Tip the canoe back over and roll it upright with a strong scissor kick. | Feature photo: Joanie and Gary McGuffin
3 Roll it upright
Use the momentum of this action, along with a strong scissor kick while straightening your arms to push the canoe up and over to one side. The aim is to roll it upright while in the air.
[ Paddling Buyer’s Guide: View all tandem canoes ]
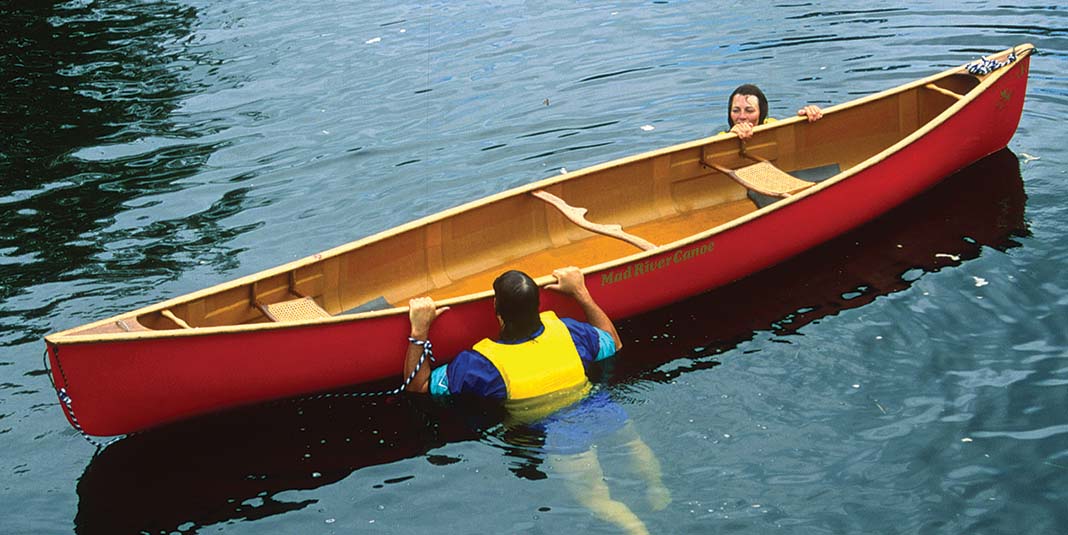
4 Ensure you’re not swamped
Although you may not get all the water out, there will be enough freeboard to allow you to reenter the canoe and bail it out or paddle to shore.
Reposition yourselves on opposite sides of the canoe and reenter with strong scissor kicks. | Photo: Joanie and Gary McGuffin
5 Reenter from opposite sides
To reenter, reposition yourselves on opposite sides. While holding the gunwale, use strong scissor kicks to get up and out of the water.
Time your actions to coincide with your partner. Lean forward, keeping your torso weight as close to the centerline as possible. Reach across to the opposite gunwale, twist and flop your butt back into the canoe.
This article originally appeared in Paddling Magazine Issue 65. Subscribe to Paddling Magazine’s print and digital editions here, or download the Paddling Magazine app and browse the digital archives here.
Tip the canoe back over and roll it upright with a strong scissor kick. | Feature photo: Joanie and Gary McGuffin
What’s the most embarrassing thing that’s ever happened to you on the water? We asked our Instagram followers to reveal their biggest paddling faux pas. It was reassuring to know we weren’t the only ones guilty of (most of) these blunders. Here are our 11 favorite responses.
1. A swim. Nothing like having to have your friends save your a**, boat and paddle.
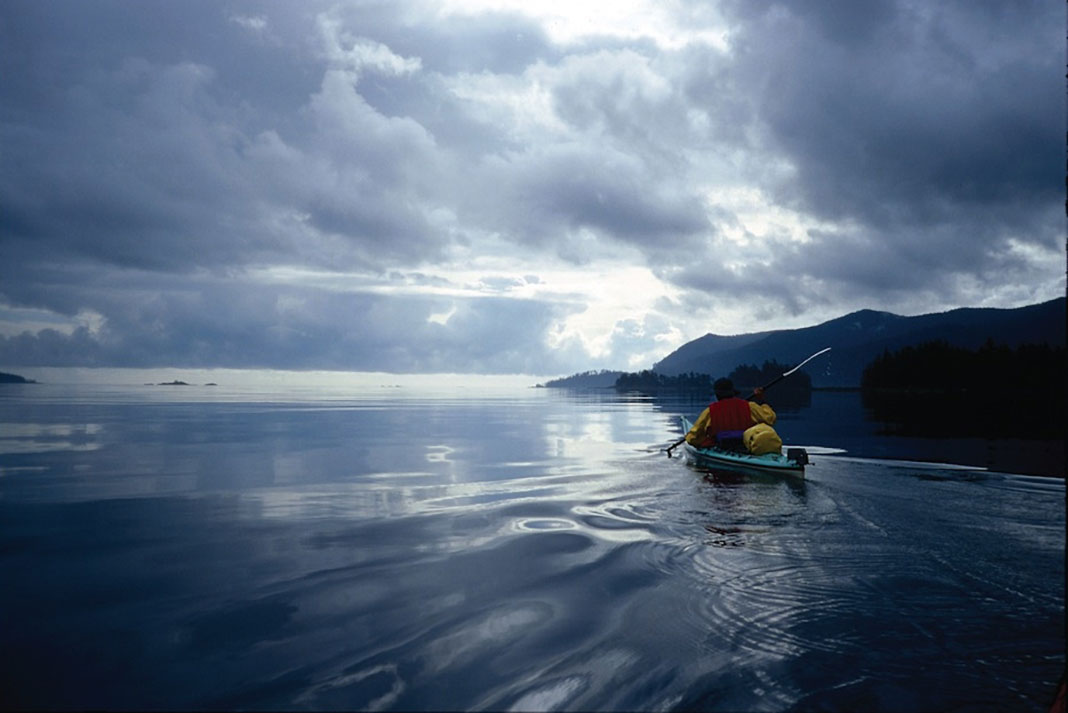
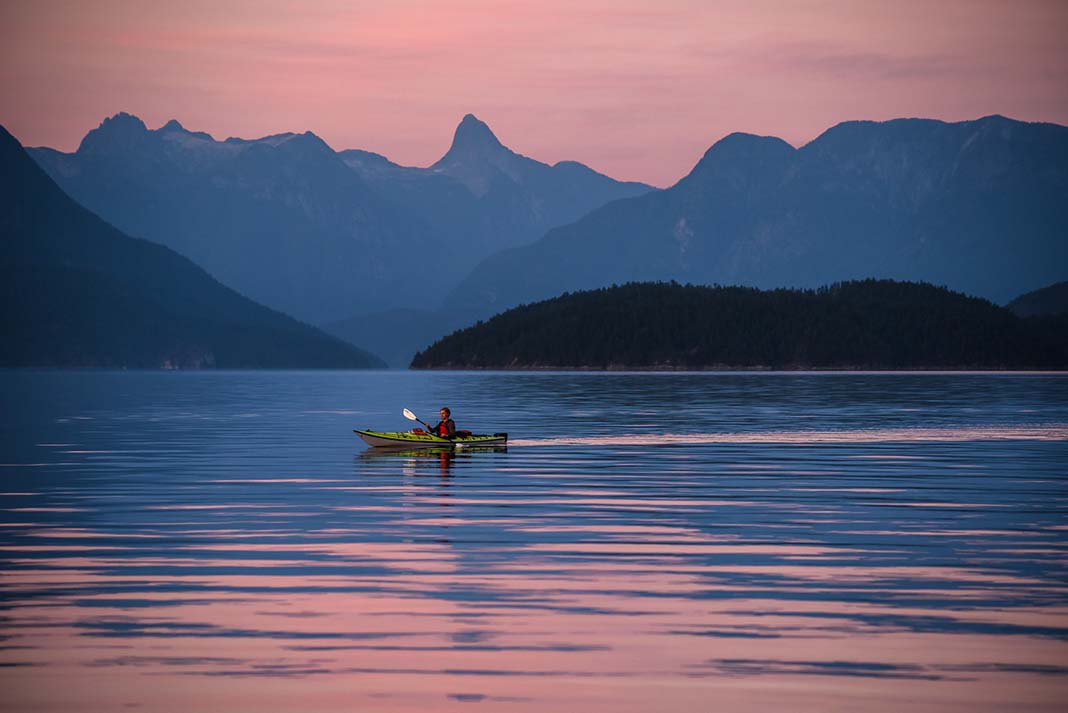
Get used to seeing the sunset. | Photo: Andrew Strain
The director of programming at Hudson Valley Outfitters in New York has mastered one of the keys to expedition paddling: the long-distance day. Ray Fusco once paddled 61 nautical miles (113 kilometres) in one go, cruising between the New York towns of Hudson and Cold Spring in 14 hours. At the 2005 Blackburn Challenge, Ray placed second in his division, finishing the East Coast’s legendary 20-mile open-ocean race in a time of 3:26. To help extend the distance of all our expeditions, we asked Ray for his top long haul kayaking secrets.
Calories in must equal calories out. Plan your calorie consumption so you don’t run out of energy. Estimate about 100 calories per nautical mile at a speed of four and half to five knots. Read the labels on food and know how many calories you are taking with you. Balance your diet with a mix of healthy foods throughout the day to avoid the “bonk.” A lunch break for comfort food like sandwiches, chips and candy bars is a good rest stop, but supplement with high-carbohydrate, protein-rich energy bars and gel packs while paddling.
Go paddling longer with the right preparation. | Photo: Martin Lortz
For a 60-mile day, try five energy bars, five gels, two sandwiches, a candy bar and a mix of fresh or dried fruit. Duct-tape gel packs to the deck of your boat for fast, easy consumption. Place the tape across the opening tab so a simple pull will release the gel pack and open it at the same time.
[ Browse the widest selection of boats and gear in the Paddling Buyer’s Guide ]
2 Solve your drinking problems
For a 14-hour, 60-mile day, you’ll need at least six litres of liquid. For clean hydration and electrolyte balance, bring three litres of water and three litres of energy drink. Hydration and fuel intake are very closely related. Often, consuming a half or full litre of energy drink can be a perfect fix for simple fatigue, or maybe suck down a gel pack with some clean water to drive you for a few more hours.
Try using hydration bladders with a long hose, holding the bite valve in your mouth during peak exertion for quick, constant hydration. And get it off your back! The more stuff you have on, the less torso rotation you will achieve.
Push with your legs to drive your boat past your paddle and through the water. Even the best paddlers drop in and out of good leg drive. It is very easy to forget to drive your legs once you have reached your 3,000th stroke! Find the comfort zone in your cockpit for maximum leg drive. Then reach, pull hard and smooth, and drive with the legs for a really good glide.
If you’re into long distance kayaking, get used to seeing the sunset. | Feature photo: Andrew Strain
4 Here’s the catch
Remember your stroke recovery (the part where your blade exits the water) needs to be clean and quick but the catch (the part where your blade enters the water) is most important. Jam your blade in the water and wait one full second to make sure your blade is completely submerged. Then pull like fury.
Experiment with your cadence. Find your sweet spot and adjust up and down. If you are comfortable with 50 strokes a minute how fast will you fatigue at 75? Can you pull harder at 60 and not burn out too fast?
Experimentation is equally important for fuel intake. Try different fuel and hydration sources under varying work loads. Conditions will also affect your results so pay attention to your body and learn how it performs in a wide variety of conditions.
This article originally appeared in Adventure Kayak, Spring 2006 and in Paddling Magazine Issue 65. Subscribe to Paddling Magazine’s print and digital editions here, or download the Paddling Magazine app and browse the digital archives here.
If you’re long distance kayaking, get used to seeing the sunset. | Feature photo: Andrew Strain
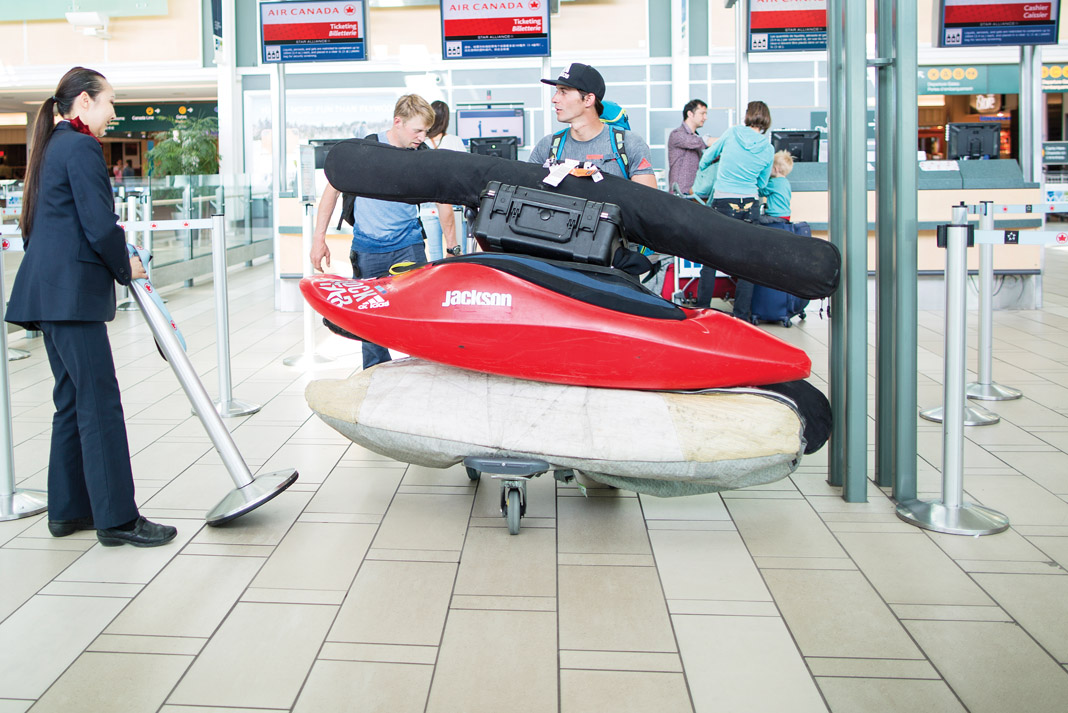
Step one: be super friendly. | Feature Photo: Jens Klatt
There’s no doubt that figuring out how to fly with a kayak can be a pain. Kayaks are big, bulky and prohibited on many airlines. Yet, kayakers willing to jump through some administrative hoops and play by the airline rules will likely be rewarded for their efforts.
Research which airlines allow you to fly with a kayak. Some airlines won’t take kayaks, while others will take them without any trouble. Still others will take them, but only if there’s enough room on the aircraft that particular day.
Check regulations on airline websites, but also search Google and ask other boaters for advice. Don’t be swayed by horror stories because there are horror stories associated with practically every airline. You’ll find general trends emerge—United and Delta have policies against accepting kayaks, while it’s a grey zone for American Airlines and KLM.
Depending on the carrier options available to you, it’s possible no airline will officially take your kayak.
“Research so you know what you are getting yourself into,” recommends Crista Wiles, an instructor with traveling paddling school, World Class Kayak Academy, and a veteran of dozens of flights with dozens of kayaks in tow.
She recommends getting to know the different carriers’ fees for extra baggage, rules for packaging the boats and the maximum baggage dimensions before settling on a carrier. “Then print the policy, highlight the appropriate parts and bring it with you to the airport for reference and to save time,” adds Wiles.
Depending on the carrier options available to you, it’s possible no airline will officially take your kayak. “When airlines hear ‘kayak’ they often assume slalom boats, which break more easily and are more expensive to replace, which is why they are more hesitant to take them,” says Wiles.
Not to fear, because you’re not flying with a kayak at all! It’s time to get creative by calling your kayak a wave ski, paddleboard, ski equipment or another conventional piece of sports equipment accepted by a carrier’s regulations.
2 Wrap your kayak up properly
Your kayak should be wrapped up for its journey. The bag your boat came in works perfectly, but blankets or a tarp can be rigged to work in a pinch. Wrapping protects the boat when you fly with a kayak. It also disguises it if you’re trying to pass it off as something else to comply with regulations.
Remember that if you’re lying about what’s inside, definitely avoid a carrying bag that says kayak on it. Most airport staff won’t dig inside to check what it actually is, advises Wiles.
Of course, there are no guarantees with this method. Be sure to wrap your boat in a way that offers a loop for the bag tag and makes it easy for baggage handlers to carry.
[ Browse the widest selection of kayaks in the Paddling Buyer’s Guide ]
3 Know the weight of your kayak
Before arriving at the airport, weigh your kayak and gear. Most airlines accept baggage up to a maximum of 71 pounds for national flights and a maximum of 100 pounds for international destinations.
A typical playboat, like the Jackson Fun, runs about 35 pounds. This leaves lots of leeways to stuff your cockpit with PFD, helmet, disassembled paddle, and other kayaking gear. If your gear won’t fit in your cockpit then pack into a duffel. Be sure to write your name and contact info on each piece of baggage.
On departure day, get to the airport early. Start smiling as soon as you walk in the door and don’t stop until your kayak has been accepted. Be the friendliest and most polite person those customer reps will deal with all day. Grease the administrative wheels.
Step one: be super friendly. | Feature Photo: Jens Klatt
Extra or oversized baggage almost always incurs fees, so be prepared with a credit card in hand. One-way fees can range from free to $50 to $200 and even higher. It could be cheaper to rent a boat at your destination.
“Try to get the boat sent through to your final destination so you don’t have to keep checking it,” advises Wiles. It’ll help avoid trouble with other check-in desks, and possibly avoid incurring more oversized baggage charges.
If your airline officially accepts kayaks as baggage, you don’t have much to worry about. When and if you’re bending the rules to fly with a kayak, it’s best to have a backup plan in case you get skunked. “If you are really worried, have someone you can call to pick up the boat if you can’t get it on the plane. Makes life way less stressful,” adds Wiles.
This article originally appeared in Paddling Magazine Issue 65. Subscribe to Paddling Magazine’s print and digital editions here, or download the Paddling Magazine app and browse the digital archives here.
Step one: be super friendly. | Feature Photo: Jens Klatt