
Home Blog Page 141

How To Seal And Test A Drysuit For Leaks

Bob Holtzman
How to Leak-Test Your Drysuit

Even the best of drysuits can spring a leak. When it does, it can be tricky to conduct a leak test and find the exact spot. When you were wearing the suit, you probably noticed a leak in a general area—the left foot, perhaps, or the right side under the armpit—but when you take the suit off, there’s enough moisture spread around so that you can’t tell exactly where the water came in. And if you can’t do that, you can’t fix it.

Here’s an easy, DIY method to test a drysuit for leaks and identify their exact location.

How to leak-test your drysuit

Step 1: Prepare your workspace

Work on a flat hard dry surface. On a nice day, a paved driveway works best. Otherwise, a garage floor will do. Cover a large area with clean, dry corrugated cardboard. Open the drysuit’s entry zipper and close the relief zipper if it has one. Turn the suit inside-out and lay it flat.
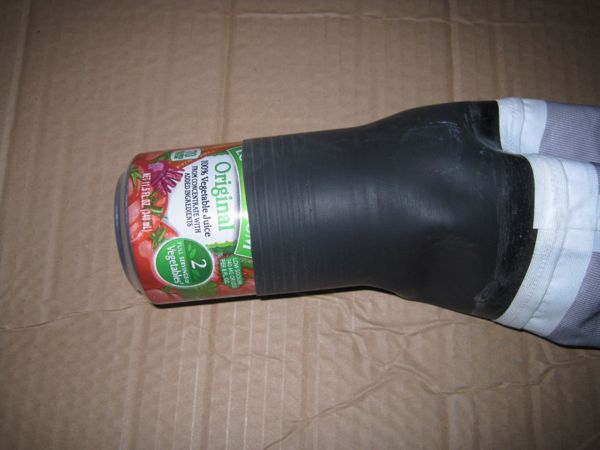
A can is placed in the wrist gasket of a drysuit to stretch it out
Photo: Bob Holtzman

Step 2: Plug the wrists

Plug the wrist gaskets with FULL 12-oz. cans. (Empty cans will crush and won’t work.) If your suit has ankle gaskets, treat them the same way. If it’s a slightly loose fit, you can use a larger can or tighten up the seal by wrapping it with painter’s tape. If your gaskets have very small openings, use a smaller can like the kind tomato paste comes in.

Step 3: Add hose

Put the end of a garden hose through the neck gasket. A hose nozzle with an on-off control that you can operate through the fabric is nice to have. If you don’t have one, just the plain hose end will do.

Step 4: Close entry zipper

Reach into the suit through the neck gasket and close the entry zipper. Pull it tight and make sure it’s completely closed.
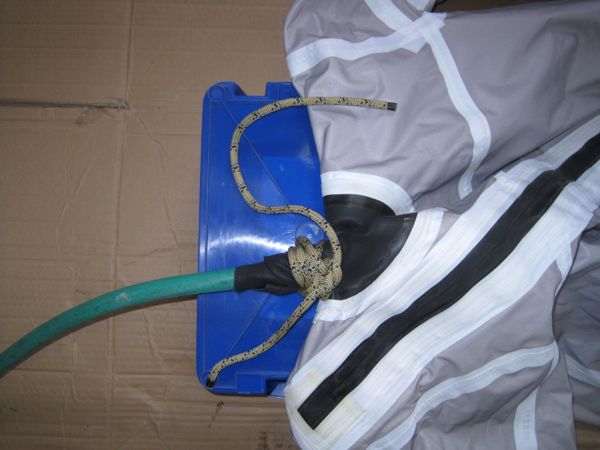
A hose is tied to the neck gasket of a drysuit to fill it with water for a leak test
Photo: Bob Holtzman

Step 5: Tie off the neck

Wrap the neck gasket tightly around the hose, then tie it in place. If you use string, take several wraps around the gasket before tying the knots: this will help prevent the string from cutting into the latex. Heavier cordage, like the 3/8″ rope shown, is less likely to cut. Prop the neck up off the ground 6″ to 8″. A plastic tub works well for this.

Step 6: Start watering

You’re ready to go. Turn on the water and watch carefully for any major leaks where the gaskets or zippers might not have been closed off completely. Small leaks in the suit itself are not likely to show up immediately.

Step 7: Fill half way

Let the water run until the drysuit is 1/3 to 1/2 full then turn it off. Do not fill the suit completely—that will make it too heavy to move.
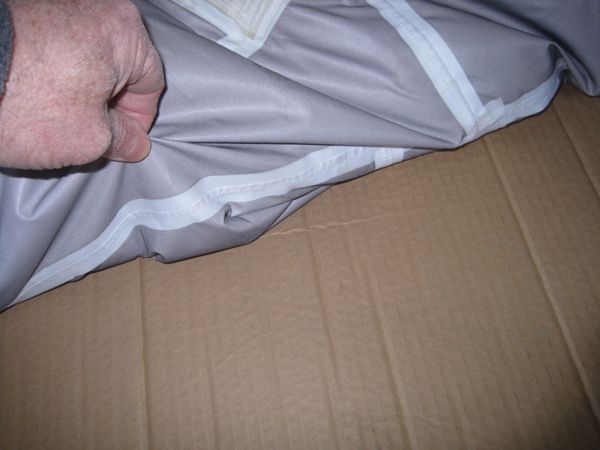
A hand holds the seam of a drysuit.
Photo: Bob Holtzman

Step 8: Check for leaks

As the suit is filling, gently lift the areas where leakage is suspected. If the suit isn’t torn, then leaks are most likely to occur at the seams.

Step 9: Expose the seams

Lifting all around the suit, exposing the seams on the underside and checking for leaks. Be careful not to move the suit around at this point. After you lift a section, let it settle back to the same spot.

Step 10: Be patient

Leaks will be obvious when water drips onto the cardboard. It may take several minutes for the water to inch its way through the seam, so take your time.
Step 11: Mark the leaks

Mark the area of the leak with a permanent marking pen like a Sharpie.
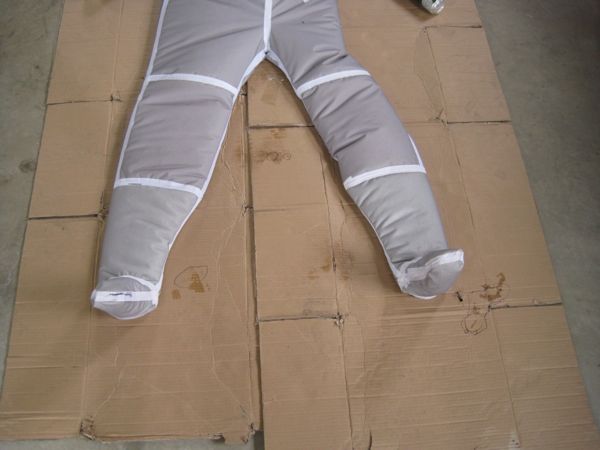
The legs of a drysuit are filled with water to test for leaks.
Photo: Bob Holtzman

Step 12: Mark the cardboard

Go over the entire suit, lifting it gently in small sections to check for leaks at all the seams on the underside. Draw circles around the wet spots on the cardboard so that when you turn the suit over, you’ll be able to distinguish them from any new leaks that occur.

Step 13: Check the other side

Turn the suit over. This isn’t as easy as it sounds, since there is a lot of weight in water in there. Lift the right leg to drain the water out, then cross it over the left leg. Lift the neck and chest to drain water toward the legs, then shift the left arm under the suit toward the right side. Pull the right arm over to the left side, then gently roll the body of the suit and reposition it on the cardboard. If there were any leaks on the first side, position the legs, arms, and main body seams so that they are not over the marked wet areas.
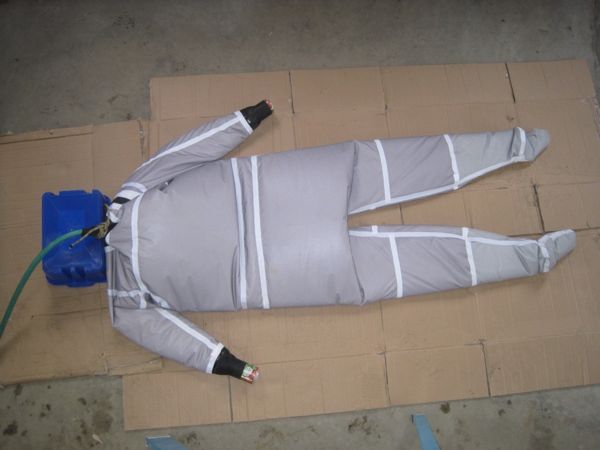
A drysuit lies on the floor filled with water during a leak test
Photo: Bob Holtzman

Again, take your time and wait several minutes for water to work its way through any dubious seams. Lift the entire suit gently, in small sections, looking for new wet spots on the cardboard. Mark the offending seams and circle the wet spots on the cardboard.

Step 14: Drain the suit

When you’re sure you’ve found all the leaks, pull one of the cans from a wrist gasket to begin draining. If you’re working inside a garage, the whole setup—suit and cardboard—should be dragged outside before you drain.

Step 15: Hang to dry

Hang the suit inside out (out of direct sunlight) to dry the inside, then turn it rightside-out to dry the outside before repairing the seams.

Bob Holtzman is the president of Mythic Drysuits, makers of affordable drysuits for recreational paddlers.
 

Evolution of the Pack Boat Canoe

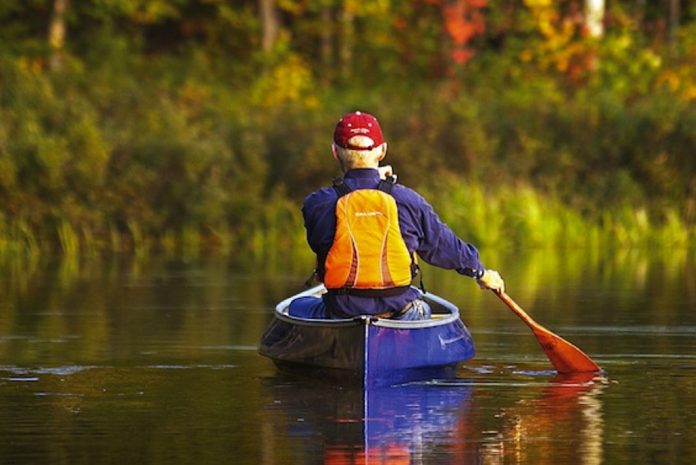
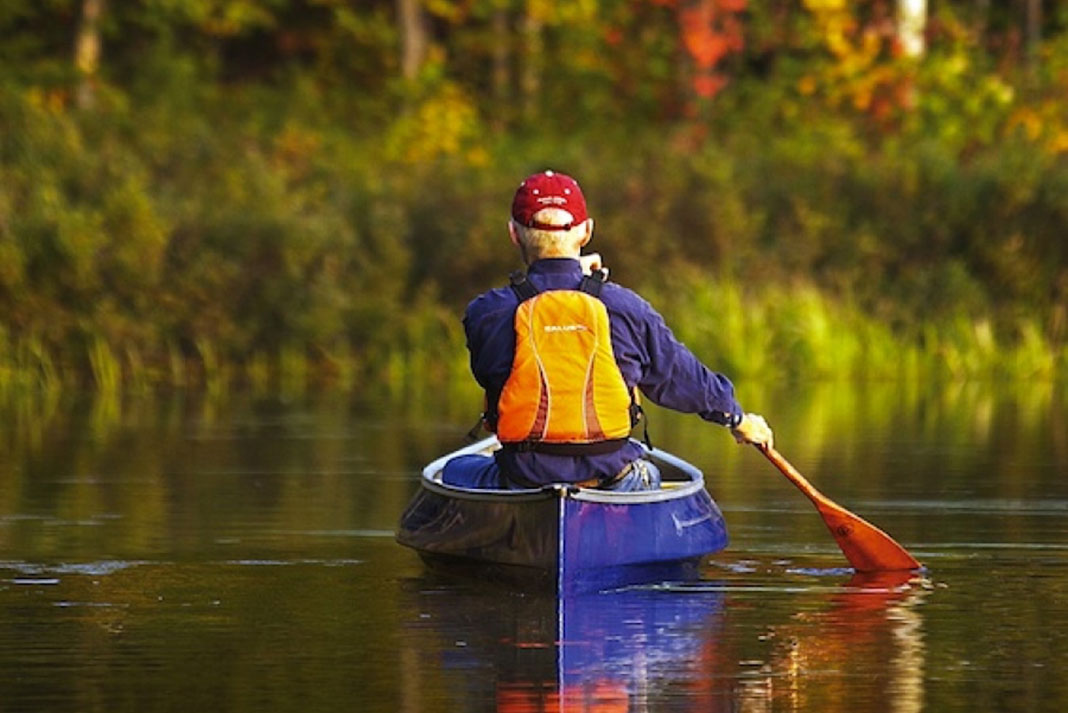
Person paddles in a pack boat canoe
Feature Photo: Rick Matthews

Media and geography merged over 130 years ago to create the pack boat, a unique style of canoe that remains popular today. A pack canoe’s short length, wide beam and ultralight construction make it maneuverable and stable on the water, and barely noticeable on long portages. Find out why this classic adventure craft continues to evolve alongside the needs of backcountry canoeists.

Birth of the Adirondack pack boat

In 1880, outdoors writer George Washington Sears, who went by the pen name Nessmuk, approached Canton, New York-based boat-builder John Henry Rushton, requesting a lightweight canoe to carry into the remote ponds of the Adirondacks. Rushton drew on his experience building partially decked Rob Roy sailing canoes and downsized his 13-foot Hunter model to shape the Nessmuk, an open-topped, all-wood, 10-footer that weighed only 18 pounds.

And so a new genre of solo canoe was born. So-called pack boats thrived in the Adirondacks, where long portages and small lakes are the norm. These canoes work well with double-bladed paddles, eliminating the hassle of J-strokes.

Canadian pack boats of old and new

The Canadian equivalent to the Adirondack pack boat was Chestnut’s diminutive, 11- and 12-foot Lightweight and Trapper canoes that were designed for portaging into backcountry trout lakes. Ontario-based manufacturer Nova Craft recently reincarnated this style of canoe with its new Trapper, a stout and stable boat designed for anglers and aimed squarely at competing with less portable fishing kayaks.

“How do you portage a kayak for a mile?” says Nova Craft sales rep Roch Prevost. “We’ve built on the great access of a canoe to make something that carries way more gear and is not nearly as restrictive for paddling.”

Pack canoes continue to grow and evolve

Contemporary pack boats bridge the gap between kayaks and canoes. While short, peapod-shaped, open-decked Rushton-style canoes still define the category, some manufacturers have gotten creative, adding length, partial decks and kayak-like seating and foot pegs. For instance, Mad River pulls no punches in describing its recently released 13-foot Serenade as a hybrid that’s designed to be propelled with a double-bladed paddle from a seated position. Similarly, Wenonah jumped into the pack canoe market with a Rushton-inspired Wee Lassie and the Canak, a partially-decked take on a 16.5-foot solo hull with hatch-like cutouts for packing gear.

[ Paddling Buyer’s Guide: See the Mad River Serenade AR 13 pack canoe ]

In 2010, Massachusetts-based paddler Skip Ciccarelli demonstrated the potential of propelling a modern, stretched-out pack boat with a double-bladed paddle. Ciccarelli shattered the speed record for paddling the Northern Forest Canoe Trail, a 740-mile route across the northeastern United States. To be sure, Rushton would scarcely recognize Ciccarelli’s sleek, 17-foot Hornbeck canoe. Nor would Nessmuk have ever imagined the 40-mile days and 50-plus miles of portaging involved in tracing the full length of the NFCT in only 25 days.

Person paddles in a pack boat canoe
Feature Photo: Rick Matthews

With pack boats, form follows function

Ciccarelli is an example of the contemporary pack canoe’s versatility. But for industry vets like Charlie Wilson, a designer and co-founder of New York’s Placid Boatworks, it’s the genre’s straightforward design and ease of use that makes it timeless.

[ Plan your next canoe tripping adventure with the Paddling Trip Guide ]

“They offer the short learning curve of kayaks,” notes Wilson. “As the population ages, the demand for lightweight boats with user-friendly performance and easier entry and exit means the pack boat concept will be with us for a long while.”

This article was first published in the Fall 2012 issue of Canoeroots Magazine. Subscribe to Paddling Magazine’s print and digital editions, or browse the archives.


6 Steps To Learn The Kayak Stern Draw Technique

Nigel Foster demonstrates the kayak stern draw technique
Feature Photo: Nigel Foster

If you’ve ever experienced weathercocking in your kayak, you’ll value an efficient way to counter it. The stern draw accomplishes this with very little effort or loss of speed, helping your kayak to maintain a straight line with or across the wind.

[ See the widest selection of kayaks in the Paddling Buyer’s Guide ]

What is the kayak stern draw technique?

The stern draw is one type of stern rudder: the blade position pulls the stern sideways rather than pushing it sideways or tracking it straight. The blade is held high, as in a draw stroke, rather than low, as in a sweep stroke. The maneuver relies on water flowing across a static blade face.

Used on the windward side to correct weathercocking, the stern draw is stable and the stern will not skid out. However, attempted on the downwind side, or with no wind, current or waves to counteract it, a good stern draw will initiate a tail skid. This is not its purpose: the stern will overrun the paddle, which could flip you. For this reason, first practice at a slower speed without edging on a windless day. Should your tail skid, keep balance by transitioning into a low brace.

Next, pick a target ahead across the wind so you can monitor the effect of each of the following steps. With forward speed, you’ll likely turn into the wind from your target—the stern draw steers you back.

[ Plan your next kayaking adventure with the Paddling Trip Guide ]

6 steps to complete the kayak stern draw

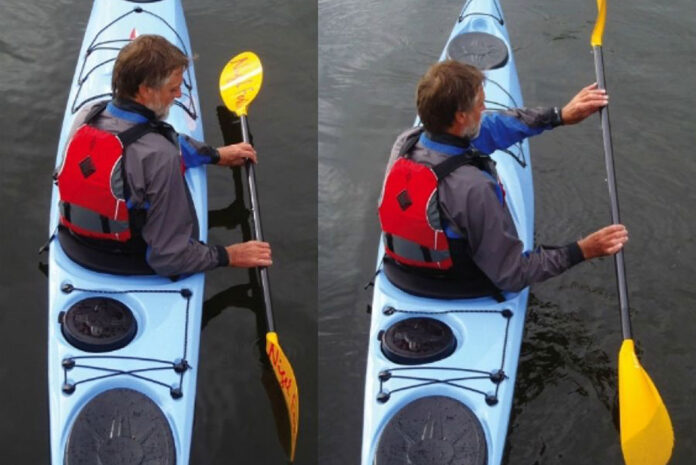
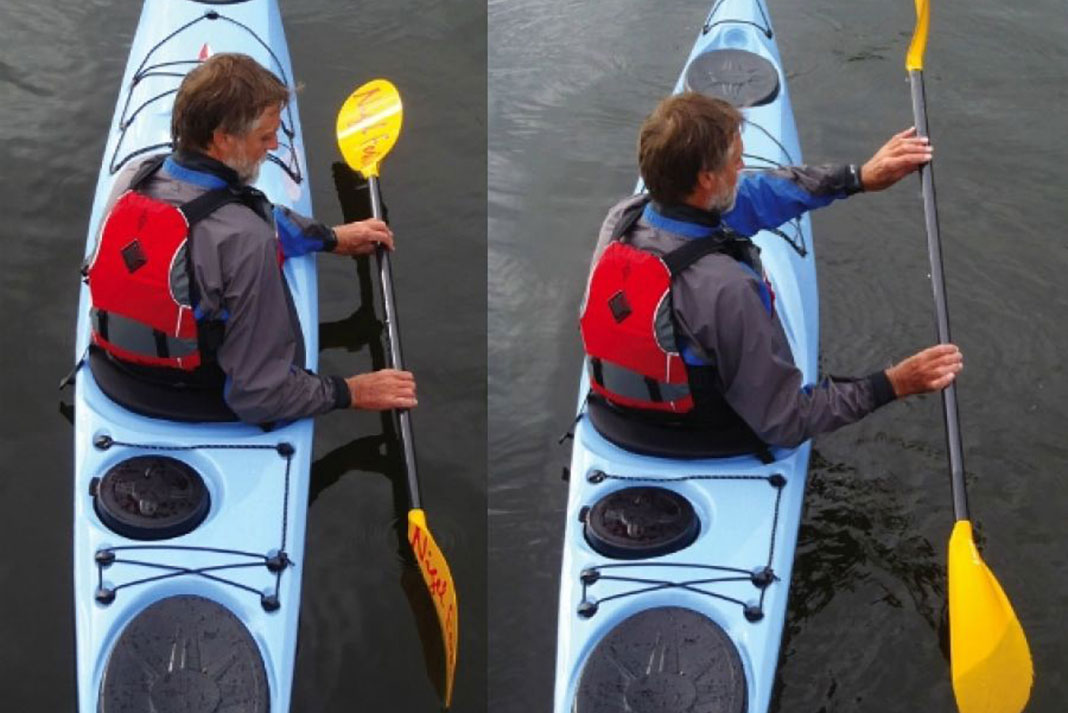
1. Position yourself

Rotate torso toward wind/draw side. Hold paddle low, parallel to both water and kayak, both hands above water. Tuck rearmost elbow to hip.

Nigel Foster demonstrates the kayak stern draw technique
Feature Photo: Nigel Foster

2. Start your stroke

Slice rear blade into water. Blade should remain neutral with water flowing evenly along both sides.

3. Hold and extend the paddle

Hold bottom arm and hand position, raise front arm to shoulder height and with this high hand, push paddle further from kayak. Ideally, straighten top arm at elbow and bring perpendicular to kayak—this depends on your flexibility. This action changes the blade alignment, bringing light pressure against the face. Your kayak should start to turn away from the paddle and the wind. Check against your target.

4. Accentuate the turn

Press with draw-side foot and edge kayak down toward the active blade to release stern and accentuate turn. This also aids top arm extension.

5. Adjust your pressure

Adjust the amount of pressure against blade by raising or lowering your top hand. Remember, you must push away with your top hand. As you become more proficient, use your bottom hand to fine-tune blade angle.

Note: A stern draw placed too far forward becomes a sideslip. If your kayak moves sideways toward the blade without turning, move the blade back.

Next steps to practice with the kayak stern draw

Practice transitioning into the stern draw from a forward stroke. Finishing your forward stroke, slice blade diagonally back from the side of the kayak. Pull your lower arm elbow to your hip and push top arm into its stern draw position.

A sea kayak pioneer, Nigel Foster is an author, boat designer and BCU Level 5 Coach based in St. Petersburg, Florida, where he is a partner and Director of Training at Sweetwater Kayaks.

Peer review of Nigel Foster’s kayak stern draw technique

“As Nigel indicates, the stern draw is a subtle stroke. Too much push with the top hand or edge with the windward hull can cause the kayak to turn downwind, resulting in a drunken series of S turns.”

— Michael Pardy, Paddle Canada level 3 instructor trainer, Victoria, BC

“Use your bottom hand like you would on the throttle of a motorcycle, rolling it forwards or backwards in order to transition between neutral, a pushing sensation and a pulling sensation. By doing this you will be experimenting with both the stern draw and the stern pry. Blade angle is one way of compensating for reduced torso rotation due to lower flexibility.”

— Meaghan Hennessy, Paddle Canada level 2 instructor trainer and BCU level 3 coach, Vancouver, BC

“We learned this great technique from Nigel about 15 years ago. Having this skill has allowed us to paddle kayaks without using skegs ever since.”

— Shawna Franklin and Leon Sommé, BCU level 4 coaches, Orcas Island, WA

“As handy as the stern draw is for correcting weathercocking, it is also delightfully useful when surfing, especially on gently rounded swells or small waves. Apply it at the end of a forward stroke/sweep at the first hint that the kayak wants to broach.”

— Ginni Callahan, ACA level 5 instructor and BCU level 4 coach, Cathlamet, WA / Loreto, Baja

“Remember to always look at your target. As Nigel says, this may be hard if you are not flexible, but it is key to knowing if the draw is working.”

— Christopher Lockyer, Paddle Canada level 4 instructor and BCU level 4 coach, Halifax, NS

This article was first published in the Fall 2012 issue of Adventure Kayak Magazine. Subscribe to Paddling Magazine’s print and digital editions, or browse the archives.


Kayaking In Saanich Inlet, British Columbia

A view of the Saanich Inlet in British Columbia
Saanich Inlet offers plenty of paddling opportunities. | Feature Photo: Anne M. Fearon-Wood

Saanich Inlet is a unique fjord inlet on the southern shores of Vancouver Island providing year-round urban access to an isolated natural setting. With spectacular natural landscapes and unique geography, Saanich Inlet is a natural treasure and wonderful paddling destination neighbouring Sidney’s urban conveniences.

[ Plan your next B.C. kayaking adventure with the Paddling Trip Guide ]

The Saanich Inlet is a British Columbia kayaking gem

At 12 miles long and 4 miles at its widest crossing the steep mountainous terrain isolates and protects an already moderate local climate. The region enjoys a moderate Mediterranean-type climate with mild temperatures, low rainfall and very little snow. Over 100 species of birds and more than 20 percent of British Columbia’s rare plants grow in this diverse and specialized habitat. Surface water temperatures can rise from a cold nine degrees Celsius in winter to 16 degrees in small coves and shallow beaches; they’re never warm, but always refreshing. With so much natural diversity, beauty and variety of paddling opportunities it’s no wonder local initiatives have recommended that Saanich Inlet be designated a National Marine Conservation Area.

Wildlife and culture abound in the Saanich Inlet

As happens in many west coast inlets, salmon are the foundation to a diverse ecosystem. From late October through December salmon run up the Goldstream River where they spawn and then die. Bald eagles flock to these feeding grounds to feast on the salmon carcasses. Closing the Goldstream River estuary to all hiking and paddling has resulted in up to 250 bald eagles returning to this valuable food resource. Orca whales also visit the inlet to feed on the salmon. Sea lions come in to follow the herring and harbour seals wander the inlet year-round. I have even encountered a grey whale roaming the inlet.

The traditional territory of the Saanich First Nations includes the shores of the Saanich Peninsula. Here the Saanich moved with the seasons. The rhythms of the wind and tide determined the best time to net salmon or collect shellfish. The area is important to Indigenous peoples, who continue to utilize the region for medicinal, ceremonial and spiritual purposes. Drop your kayak in and spend some time in Saanich Inlet and I think you’ll agree with the local name, Eetsun-Hunnumut, which in the Indigenous Saanich language can be loosely translated to mean “the land where it is good to be.”

Urban access to the Saanich Inlet

The town of Sidney (Pop: 11,116), located on the northeast corner of the Saanich Peninsula, is the gateway to the BC Gulf Islands and the US San Juan Islands. Sidney has accommodations, antique shops, and coffee bars. Sidney is a hub for incoming travellers. It’s a short 40-minute drive from Victoria, and is situated within 10 minutes of the Victoria International Airport, BC Ferries, and Washington State Ferries.

Brentwood Bay Village, on the east shore of Saanich Inlet, offers accommodation, quaint waterfront restaurants, and access to the waters of Saanich Inlet. Nearby, Butchart Gardens was once a limestone quarry, but for almost 100 years has delighted visitors with floral displays and spectacular views. The gardens are kayak accessible via Brentwood Bay and the shelter of Tod Inlet. The Brentwood Bay-Mill Bay Ferry is a 25-minute route across Saanich Inlet; it offers a short cut between Saanich Peninsula and points farther north up-island. The three best sites to launch your kayak are Goldstream Marina, on the southwest shore; the canoe launch adjacent to the Brentwood Bay ferry dock on the east shore; and in Patricia Bay 100 metres south of Mills Road there is a picnic area with a few stone stairs leading down to the water. Once in the water the parks of Saanich Inlet offer spectacular natural environments for a variety of recreation very close to the cozy urban centres.

A view of the Saanich Inlet in British Columbia
Saanich Inlet offers plenty of paddling opportunities. | Feature Photo: Anne M. Fearon-Wood

4 parks to visit around the Saanich Inlet

1. Coles Bay Regional Park

On the western shore, Coles Bay Regional Park covers 3.6 hectares of forest with picnic and washroom facilities bordering on Coles Bay. Very warm in the late afternoon; you may even want to go in for a swim.

2. Gowlland Tod Provincial Park

The Gowlland Tod Provincial Park park encompasses nearly the entire east side of Finlayson Arm, providing excellent day-use recreation opportunities. From the sea you can land at the sandy beach in McKenzie Bight. There is more than 25 kilometres of trails with spectacular views from high on the Gowlland Range that rises 430 metres above the water.

3. Goldstream Provincial Park

The Goldstream estuary dominates the southern end of the Saanich Inlet and provides a focal point for Goldstream Provincial Park. Just 16 kilometres from downtown Victoria, the park has numerous trails winding through 600-year-old Douglas fir and western red cedar trees. Adjacent to the estuary, Squally Reach is the southern most extent of the inlet. Beware the name; when foul weather turns fair, strong winds occasionally rush through the narrow passage.

4. Bamberton Provincial Park

On the west side of Saanich Inlet, Bamberton Provincial Park is just a 30-minute drive from Victoria or 25 minutes across Saanich Inlet by ferry from Brentwood Bay. Bamberton has a vehicle accessible campground and picnic area fronted by a sandy beach with views of Mt. Baker to the east.

This article was first published in the Fall 2008 issue of Adventure Kayak Magazine. Subscribe to Paddling Magazine’s print and digital editions, or browse the archives.


Ultimate Glossary Of Kayaking Slang Terms

a kayaker hucking off a waterfall, one of many kayaking slang terms
Feature Photo: John Webster

Mystified by the jargon veteran boaters throw around? Don’t know why everyone got real religious all of a sudden? If you’re new to paddling agua blanca, this glossary of kayaking slang terms will get you well on your way to understanding the lingo of the river.

[ See the widest selection of kayaks in the Paddling Buyer’s Guide ]

Glossary of kayaking slang terms

Slang terms—nouns

Beater (n.) A kayaker whose skill doesn’t match the level of whitewater paddled, often leading to a beat-down and much mirth—for everyone else.

Bootie beer (n.) Punishment for swimming. Pour your beer in your bootie and chug it down. Often goes hand-in-hand with a rescue beer, which a swimmer should purchase for his rescuer to ensure future rescues.

Carnage (n.) What may happen if you blow your boof, roll, huck or lean upstream. Not to be confused with Spiderman’s archnemesis. Often followed by a yard sale.

Class fun (n.) Slang term for a rapid or stretch of river that offers more smiles than worries. Think: deep, big wave boogie.

Dirtbag (n.) A term of endearment for broke, unemployed kayakers dedicating their lives to chasing flow. Often found living in a dilapidated van down by the river, and spoken of with admiration and envy by kayakers with day jobs.

GORB (n.) Good Old Rafting Buddy. Has been known to ask, “Does the river take out where we put in?” Tolerated for kayaking tips.

Hair boater (n.) A skilled paddler pushing the limits of sane boating on steep creeks. Mullet and love for Mötley Crüe not necessary but encouraged.

Local boater (n.) The best person to follow down a river you are unfamiliar with. They know the best lines, the worst holes and appreciate payment in beer after showing you a good time.

Open boater (n.) A small but mighty band of boaters who believe half the paddle equals twice the paddler.

Squirt boater (n.) A mysterious and tiny tribe of mermen and merwomen.


Slang terms—verbs

Boof (vb.) A powerful stroke and hip thrust off the lip of a waterfall, flake or rock. This maneuver helps avoid getting stuck in holes below, and makes you look stylish.

Carp (vb.) The fishy resemblance of a kayaker trying to grab air between unsuccessful rolling attempts.

Chunder (vb.) When a boat gets caught up so violently in a hydraulic it results in unintended surfs, backenders, pirouettes, and occasionally cartwheels, often continuing long after the paddler has been ejected.

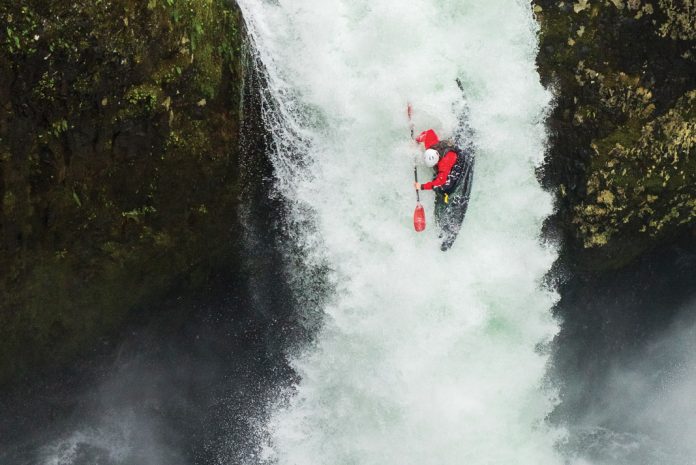
Huck (vb.) The act of throwing oneself over a waterfall.

Wallace (vb.) A beatdown. As in, “Hey, watch that guy getting wallaced in that hole!” See also: chundered.


Slang terms—adjectives

Brown (adj.) Originated with Sacha Baron Cohen’s Borat character carrying around a bag of poop at a dinner party (seriously), but it mostly refers to difficult rapids, drops or stouts. Best paired with a claw hand gesture and a GoPro.

Church (adj.) Slang term for a perfect run or perfect day providing a transcendent kayaking experience. Not to be confused with the Whitewater Church in South Fayetteville.

Gnarly (adj.) What a kayaker’s feet look like by the end of summer.

Manky (adj.) Sketchy condition of a rapid or stretch of river. Synonymous with very rocky or unappealing rapids. May also refer to the nasty, moist gear moldering in your trunk.


Boat Review: Dagger Super Ego Kayak

Dagger logo displayed on the Dagger Super Ego kayak review
Feature Photo: Courtesy Dagger

Finally Dagger has released a real freestyle boat for people with long legs and big feet. The Dagger Super Ego is big for me at 6’1” in height, with loads of knee room and a comfortable foot box. The slight bumps at the feet are effective and don’t hamper performance in any way.

Dagger Super Ego Specs
Length: 7’6”
Width: 24.5”
Cockpit: 34” × 19”
Volume: 51 U.S. gal
Weight Range: 140-220 lbs
MSRP: $1,520 CAD
[ Paddling Buyer’s Guide: See all Dagger kayaks ]

Dagger’s Super Ego is super supportive

The Precision Adjustable thighbraces and seat makes fine tuning and overall balance easy. The boat comes with tons of foam and a clever Thigh Booster that can be easily contoured or built up to provide leg support. An Immersion Research ratcheting backband completes the outfitting to ensure a snug, yet adjustable fit.

The Super Ego spins like a top

The volume in the Super Ego is more evenly distributed than some of Dagger’s other freestyle boats, which makes it more predictable while back surging or flatwater flailing. The super slicey nose ramps up quickly to knee volume creating comfort but also a big surface to vertical stall on. The stern, although shaped differently, offers the same slice and stall characteristics.

Stern squirting and flatwater cartwheels are easy, even with the relatively big volume. Very stable on end, especially the stern. On a wave this thing rocks. I found it easier to continue flat spinning rather than trying to stop it. Once the hull cuts loose it literally lifts off the water and skips through the spin. Beyond the original flick to get it going, it takes no effort to keep it spinning. Insane. Besides comfort, the hull is the second greatest selling point.

Keep your nose up

Being the shortest boat I’ve paddled, I found flat water/straight line speed slow. However, the Dagger Super Ego has no problem catching waves, as it accelerates to plane very quickly. Things seem to happen fast, as the short length allows change in direction so quickly. Paddling boily water the boat goes nowhere, and doesn’t provide much charge across strong eddy lines. It seemed easier to boof across eddy lines, to keep the nose up and water off the minimal deck.

[ Plan your next whitewater kayaking adventure with the Paddling Trip Guide ]

Catch a wave with the Dagger Super Ego

Overall, the Dagger Super Ego freestyle kayak is the most exciting new design on the market. For those of us on the lankier side it offers comfort, wicked spinning and super slicey freestyle fun.

This article was first published in the Early Summer 2001 issue of Rapid Magazine. Subscribe to Paddling Magazine’s print and digital editions, or browse the archives.


Boat Review: Delta 15S Kayak

Woman paddles the Delta 15S kayak
Feature Photo: Vince Paquot

Delta Kayaks has been building high-quality, user-friendly thermoformed touring kayaks in their Vancouver area factory since 2005, but recently Delta’s design team noticed a deficiency. “We haven’t had a great boat that fits smaller paddlers really well,” says Delta designer, Stuart Mounsey. Insert the new Delta 15S kayak.

Delta 15S Specs
Length: 15’
Width: 22”
Weight: 44 lbs
MSRP: $2,295
www.deltakayaks.com
[ Paddling Buyer’s Guide: See the Delta 15S kayak ]

Delta’s 15S kayak performs on tour

An evolution of the popular Delta 16 kayak, the 15S is specifically designed for small- to medium-sized paddlers and joins the 16 and a higher volume 17-footer in the company’s performance touring line.

“Fifteen feet is really the shortest you can go and still have solid touring performance,” says Mounsey. Indeed, sharing similar hull characteristics—a shallow V bottom, moderate rocker and cutter bow—with the 16 and 17 allows the deceptively quick 15S to keep up with its bigger sisters.

The 15S is not merely a scaled-down version of the 16, however. Delta’s designers gave the new boat a fuller sidewall and hard chines to improve handling with a heavy touring load and enable more definitive, stable edging when you’re carving a turn or spinning around to catch a wave.

The front deck has also been lowered, reducing windage and enabling shorter paddlers to perform low-angle strokes without bashing our pinkies or short-changing our catch.

A snug seat with lots of storage

A smaller, shallower cockpit further privileges the Delta 15S kayak’s vertically-challenged, 115- to 175-pound target audience, while leaving room for taller paddlers who don’t mind a snug fit. I found Delta’s positioning of the molded-in thigh braces spot on—well back on my thighs with a secure grip for edging, bracing and rolling. Rather than making the thigh braces adjustable, the designers used a sliding seat that’s easy to trim on the fly.

A low-profile skeg box (the 15S is also available with a rudder) and placement of the day hatch in the front deck, rather than behind the cockpit, give the Delta 15S way more storage capacity than you’d expect from a low-volume, 15-foot boat. Mounsey is especially proud of the totally redesigned hatch covers, which he says have been two years in development. The plastic lids pop on and off in one easy step and, according to Mounsey, will remain watertight for years to come thanks to their double-sealing rubber gaskets.

[ Plan your next sea kayaking & touring adventure with the Paddling Trip Guide ]

Good grabs and stylish hatches

Chunky, soft-grip carry handles are very easy to hold and serve double-duty: the handles retract into tidy “toggle parks” and are tied into the deck lines to take up slack without making the lines too tight.

Woman paddles the Delta 15S kayak
Feature Photo: Vince Paquot

Delta’s expertise stretching thermoformed acrylic shows in the 15S’ subtle refinements: integrated cockpit coaming and hatch rims improve durability; accordion-like flex points in the curved bulkheads reduce stress when pressure is placed on the hull or deck.

The front day pod is convenient for smaller essentials like a camera, GPS and sunglasses, but moves the deck bungees further forward and out of easy reach for, say, a map case. Delta designer Stuart Mounsey says he’s “sceptical of hatches that are too easy to get on and off,” but you wouldn’t know it from the 15S’ slick lids—they’re dry, stylish and dead easy.

[ Paddling Buyer’s Guide: See all Delta kayaks ]

Get the right fit with the Delta 15S

The new Delta 15S kayak combines innovative design features with the proven characteristics of Delta’s performance touring line-up. Best suited to aspiring and intermediate paddlers looking for a responsive kayak that’s fun to paddle both empty and loaded down for a longer trip, the 15S is proof that good things do come in small packages.


Boat Review: Chesapeake Shearwater 14 Sectional Kayak

Photo: CLC
Chesapeake Light Craft Shearwater Sectional

For more than 20 years, Chesapeake Light Craft has been designing functional and appealing kayaks and small boats and selling them in the form of kits and plans. But what if you don’t have room to store a 15-foot kayak? The Chesapeake Shearwater 14 Sectional arrives to provide apartment-dwellers with a clever kayak storage solution.

Chesapeake Light Craft Shearwater 14 Sectional Specs
Length: 14’6”
Width: 25”
Weight: 48 lbs
Max Capacity: 300 lbs
MSRP: $1,150 USD (complete kit)
www.clcboats.com
[ Paddling Buyer’s Guide: See all kayak kits & plans ]

Chesapeake’s Shearwater 14 Sectional fits in anywhere

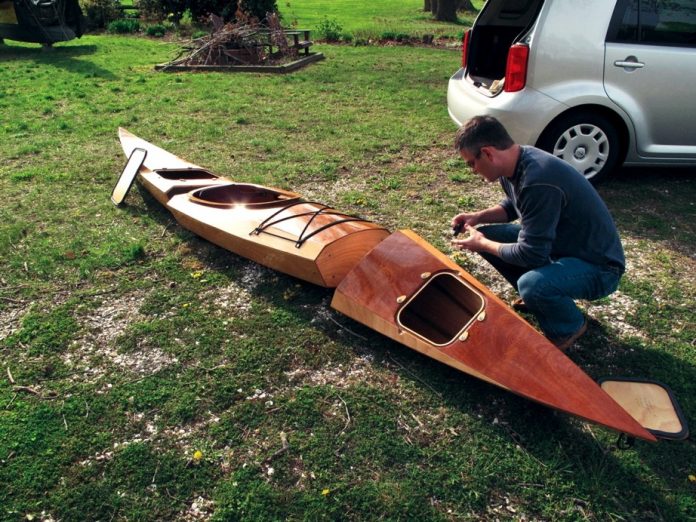
Developed by CLC with designer Eric Schade, the 14’6” Shearwater Sectional is a performance-oriented kayak that successfully bridges the gap between high performance, comfort, and stability. Spin loose five bolts at the watertight bulkheads and the Chesapeake Shearwater 14 packs down to fit into a closet or a small hatchback car.

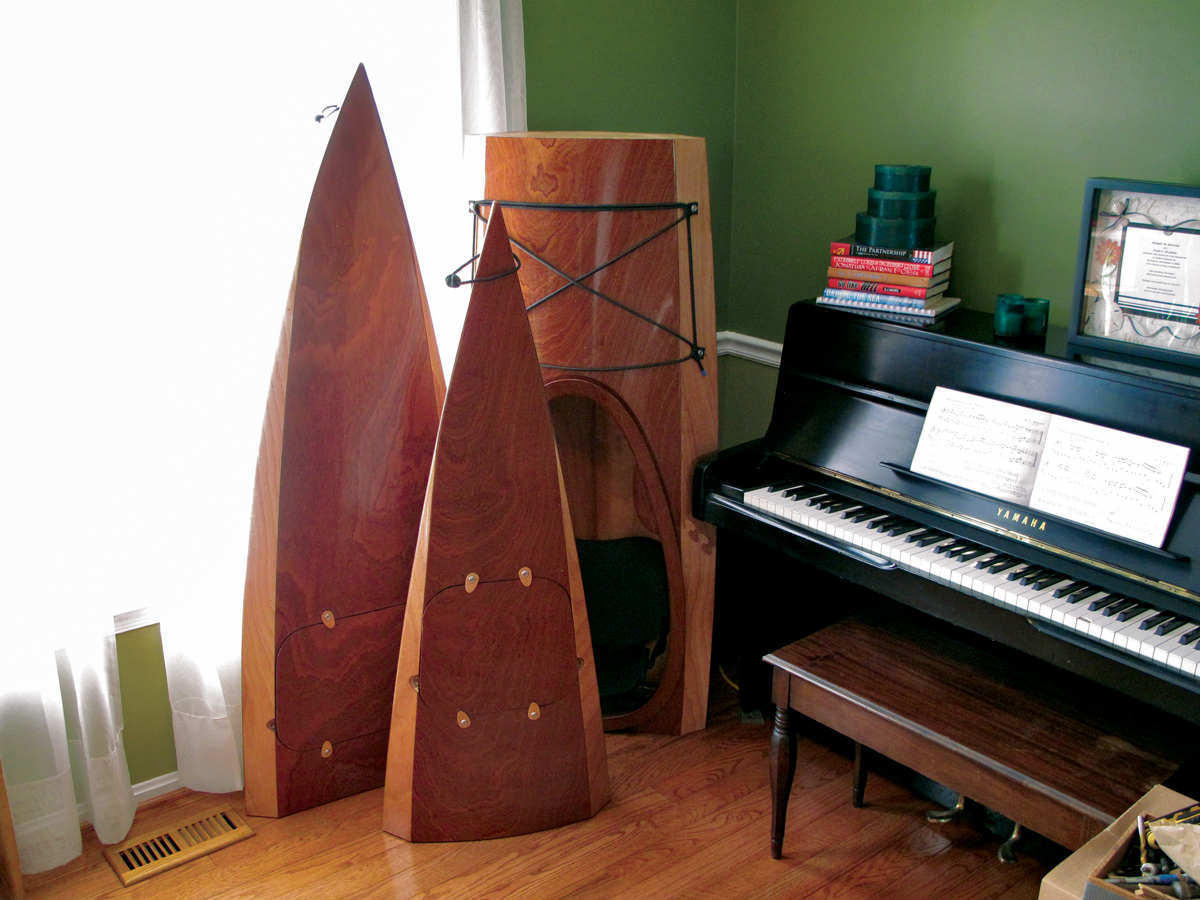
A sister to CLC’s popular Shearwater Sport kayak, the wood-composite Sectional has been divided into three manageable parts that assemble in minutes. It can be stored in a garage, shed, closet, or displayed in the corner of an apartment living room. It could be hidden away aboard a cruising yacht, or even stowed in a light aircraft and flown into the wilderness.

Chesapeake Light Craft Shearwater 14 Sectional kayak being stored in sections next to a piano
Photo: Chesapeake Light Craft

“Apartment dwellers are limited either to expensive skin-on-frame collapsible kayaks, or a rented spot in a boathouse,” says John C. Harris, Chesapeake Light Craft’s CEO. “With the Shearwater Sectional you can have a high-performance touring kayak and store it, too.”

[ Plan your next sea kayaking & touring adventure with the Paddling Trip Guide ]

A capable and refined kit craft

At 48 pounds the Chesapeake Shearwater 14 Sectional weighs a bit more than the stock Shearwater Sport, but retains every quality that has made the original a huge hit with paddlers. The design combines the proportions and great looks of West Greenland-style kayaks with compact dimensions for the perfect compromise of light weight, sharp handling, effortless cruising speed, and an extra-large cockpit for comfort. Watertight bulkheads and flush-mounted deck hatches are standard, so many builders will camp out of the boat.

“The payload is ideal for up to a 220-pound paddler plus gear,” Harris explains. “But the Shearwater Sectional is proportioned to fit anyone from 100 pounds on up.”

Two men work on assembling the Chesapeake Light Craft Shearwater 14 Sectional kayak
Photo: Chesapeake Light Craft

Assembled with tried and true techniques

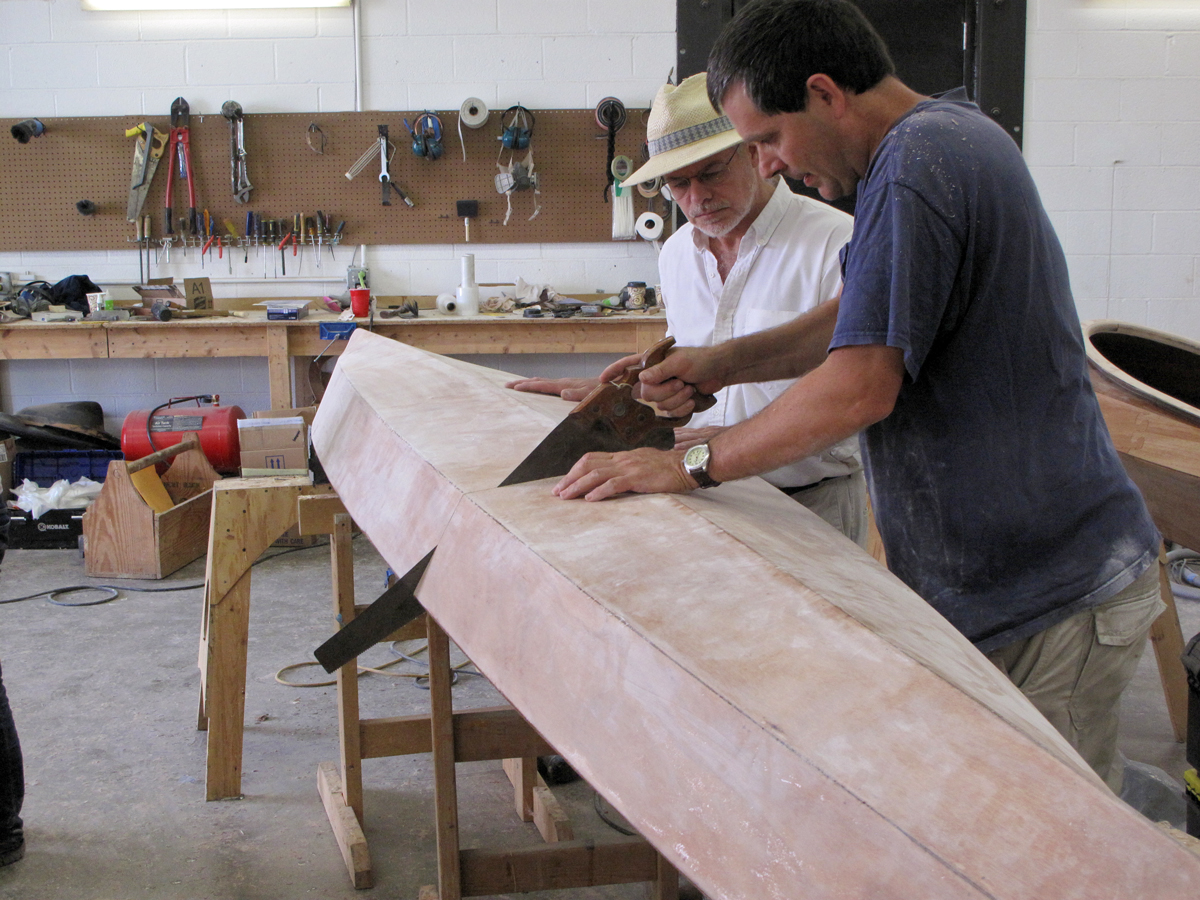
The Chesapeake Shearwater 14’s construction follows the proven stitch-and-glue process used to build thousands of CLC kayak kits. A dark sapele deck is standard. The Sectional kayak is built at full-length in the usual fashion, with the addition of carefully-designed structural bulkheads at the joints. When construction is nearly done, out comes the saw. Using cut lines clearly marked in the kits, builders cut between the bulkheads to create three watertight pieces.

Build your own boat with the Chesapeake Shearwater 14

The Shearwater 14 Sectional kayak from Chesapeake Light Craft is an excellent choice for those with the workshop space and woodworking wherewithal to assemble a kit boat. Once built, the Shearwater 14 is a handsome and maneuverable craft whether bobbing on the waves or standing in sections beside the piano.

“The obvious application is the paddler with a storage challenge—either an apartment or just limited space, but the possibilities for travel with a kayak like this are endless, and enchanting,” Harris says.


Boat Review: Fluid Do It Now Kayak

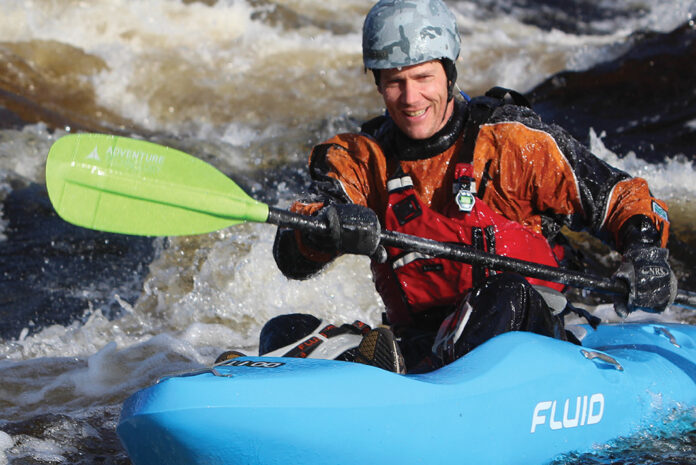
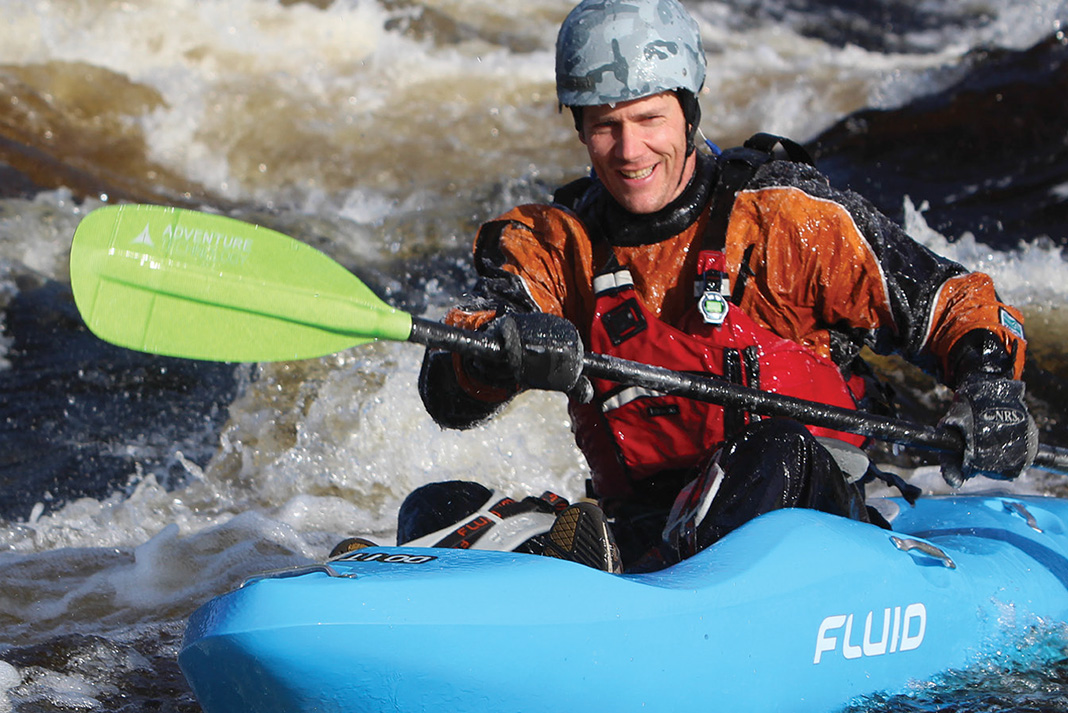
Fluid Do It Now Kayak | Feature Photo: Emma Drudge

If you’ve ever taken a first-time paddler out in a kayak you’ve probably heard this question: How do I get out if I flip? It’s a common fear for new paddlers and even if you work on wet exits some people just don’t like feeling confined. So what can you do to score some on water time with them? Our answer is the uniquely named Do It Now from Fluid Kayaks.

Fluid Do It Now Specs
(S / M / L)
Length: 7’6” / 8’2” / 8’10”
Width: 28” / 29.5” / 30.75”
Weight: 42 / 46 / 49 lbs
Weight Range: 65-140 / 90-190 / 120-265 lbs
MSRP: $498 / $548 / $598
www.fluidkayaks.com

Fluid’s Do It Now will get you moving

The first thing I noticed about this sit-on-top kayak is that the adjustable foot pegs and wide padded thigh straps give options for how securely I fasten myself in. Leaving the straps loose makes the boat a perfect platform for those fearful of ‘being stuck’—tip over and you’ll fall off. By tightening the outfitting, I can lock my legs against the raised knee area and feel in control for running rapids, edging and rolling.

Simplicity rules for the Do It Now

One of the biggest benefits of the sit-on-top is how easy it is to get in and go—no fussing with a sprayskirt or worrying about waves splashing into the cockpit. Not needing to buy or struggle with a skirt is a huge benefit to beginners, and the ease of hopping on and off shore will also appeal to those that get in and out of their boats frequently, like video boaters and some guides.

Getting to the water was a bit tricky as I couldn’t throw the Fluid Do It Now on my shoulder like a regular kayak—I found it easiest to transport with a canoe-style overhead carry.

The Do It Now’s design is based on Fluid’s Bazooka creek boat but with a wider hull, which means bomber primary stability—even absolute beginners will feel confident they’ll remain upright in most situations. The tradeoff is that it’s difficult to get an efficient, vertical paddle stroke—I have to reach out to get to the water and when I have the outfitting adjusted to an aggressive position, my knees sometimes get in the way of a strong stroke. Adjusting the outfitting and switching to a longer kayak paddle helped me work around this.

Take it easy when on edge

The Do It Now feels stable riding over waves and small holes. The planing hull makes it easy to catch smooth waves for relaxed soul surfing.

Fluid Do It Now Kayak | Feature Photo: Emma Drudge

Putting the boat on edge allows for gentle carving in and out of eddies or across the face of waves. Testing an aggressive edge caused the water to catch and pile on the deck. This means people used to closed cockpit boats may need to adjust their style, but it’s unlikely to trip up beginners since they won’t be inclined to edge aggressively.

With the outfitting tightened, the Fluid Do It Now rolls like any other kayak. For those that aren’t at the rolling stage, bow, stern and side handles make it easy to get back on board—no need to drag it to shore.

Get started today with the Fluid Do It Now

Experienced whitewater kayakers will find the Do It Now a fun, convenient downriver ride, but where Fluid really hit the mark is for people looking to get into the sport who aren’t comfortable in a closed cockpit—all their excuses have been thrown out the window. Time to Do It Now!


RPv17 rgb

This article first appeared in the Spring 2015 issue of Rapid magazine.

Subscribe to Paddling Magazine and get 25 years of digital magazine archives including our legacy titles: Rapid, Adventure Kayak and Canoeroots.


Boat Review: P&H Scorpio MKII HV Kayak

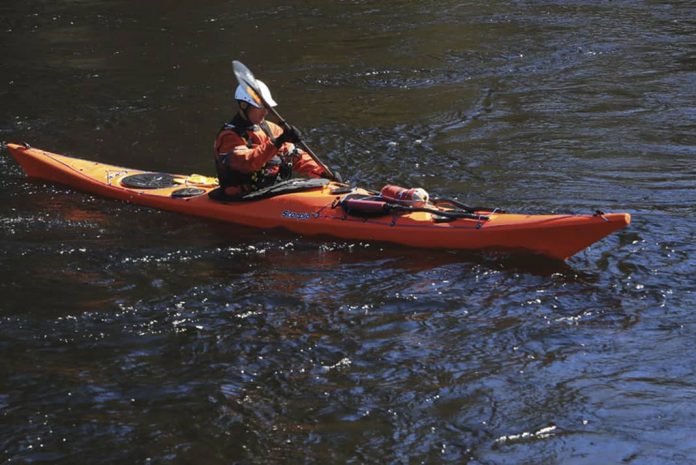
man paddling a P&H Scorpio MKII HV touring kayak
Check out all the features afforded by the high volume model of the Scorpio MKII. | Feature Photo: Gabriel Rivett-Carnac

Six years after the original Scorpio was introduced in 2009, P&H brought us a more innovative design: the Scorpio MK II. The first to arrive from the United Kingdom was the LV or low volume model. Then the MV in medium volume. Bigger paddlers and those of us going places with lots of gear had to wait the longest, but the wait for the large volume P&H Scorpio MKII HV is over.

P&H Scorpio MKII HV Specs (Corelite X lay-up)
Length: 17’7”
Width: 24”
Weight: 65 lbs
MSRP: $2,099 USD
www.phseakayaks.com

Introducing the P&H Scorpio MKII

Before we get into the specifics of this new larger version, let’s first look at the entire MK II family tree. If saying the Scorpios are plastic versions of the P&H’s Cetus composite cousins doesn’t create a picture in your mind, then let’s say they are Swede-form designs with shallow V hulls and rounded chines. The LV is 16-feet eight inches long, 21-inches wide—the HV Scorpio is just over 17-feet and proportionally 24 inches wide with the MV as the happy middle child.

Skeg or rudder—why not both?

On top, P&H has updated the rigging fore and aft to include contemporary perimeter lines and bungee systems for ample rescue points and above-board storage. Two innovative details added on the bow deck are the pre-moulded fittings for the P&H Code Zero Sail system and the grooved slots on either side of the recessed compass mount to cradle the shafts of your two-piece spare paddle.

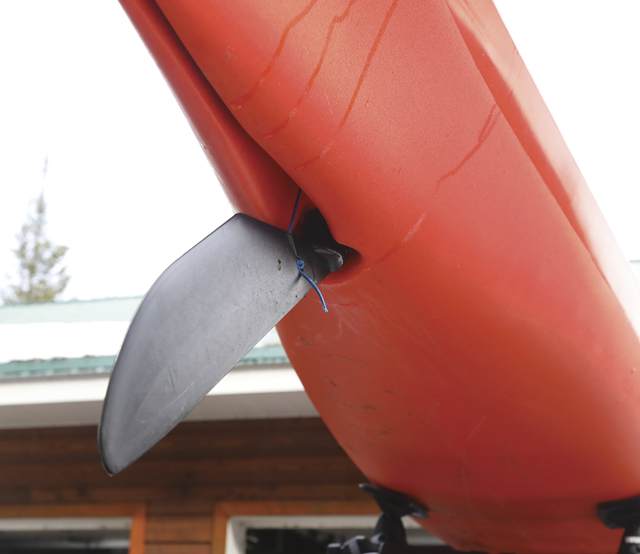
Fin on bottom of orange kayak
The Scorpio “Skudder.” | Photo: Gabriel Rivett Carnac

A few years ago, P&H turned the whole rubber versus skeg debate upside down. The Skudder was first introduced on the Jura, a recreational light-touring kayak made by P&H’s sister brand Venture Kayaks. The Skudder is being integrated into more models as they come up for redesign. I had never seen one of these systems before this. The concept is so simple, I wonder what took so long—as effective as a rudder system, except it deploys from the keel like a skeg. The pinch-and-slide mechanism on the left side of the bow deck drops the skeg varying amounts until it is free of the hull completely. When fully deployed, the Skudder allows you to actively steer the kayak like a traditional rudder using your toes on the fixed SmartTrack foot pegs.

When you don’t need the Skudder, it’s tidy and out of the way of wind and re-entries. Like with any skeg, after dragging the Scorpio II HV through the early spring mud and snow from my truck to the water I had to clean out the box for the Skudder before I launched. And, perhaps, the debate continues. Except, what looks like a fifth hatch is access to the guts of the Skudder system where you can adjust the lines and, if necessary, completely remove the Skudder for cleaning.

Hands on with the new HV model

“The boat is wider, deeper and longer than the mid-range MV size, which gives it additional capacity and stability,” says head of operations for Pyranha USA, Brian Day. “We designed the HV to meet the demand of larger paddlers or those who are taking longer trips.”

These changes included a lowered stern deck, increased bow rocker in the nose, and the cockpit shifted slightly aft. Day says they did this to the larger version to make the boat more neutral in the wind and less prone to weathercocking.

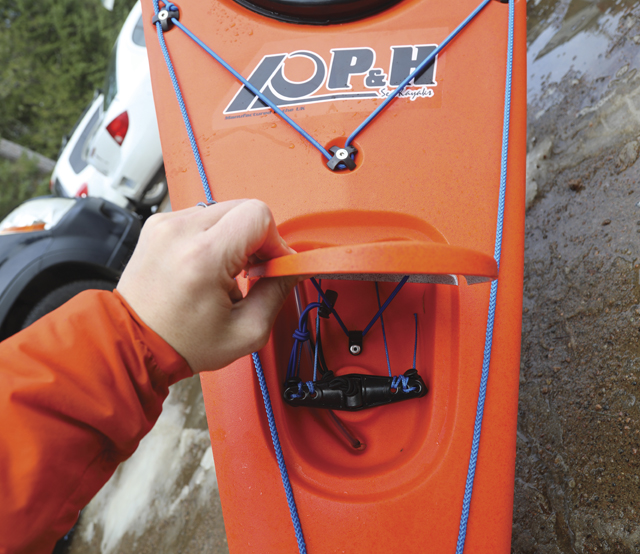
Hatch on orange kayak
The hatch fits tightly in warm weather, but can be a pain to open in cold weather. | Photo: Gabriel Rivett‑Carnac

I packed half the bed of my full-sized Nissan Titan pickup truck into the Scorpio MKII HV’s four hatches. With all the MKIIs, P&H improved drainage around the hatch covers. The hatch rims themselves are angled slightly to improve access combined with the accentuated openings and the standard snap-fit KajakSport hatch covers allowed the hiding of over 160 liters of awkwardly shaped gear, including my Greenland ice tools.

One thing I noticed during our early spring testing is the hatch cover is designed to fit tightly in warm weather when you are paddling the P&H Scorpio II HV in the colder seasons or closer to the poles you will find the plastic covers stiff and challenging to peel off and pound back on. That said, I’d rather have sore numb fingers than soggy gear. All four hatches proved 100 percent watertight after my dunk testing.

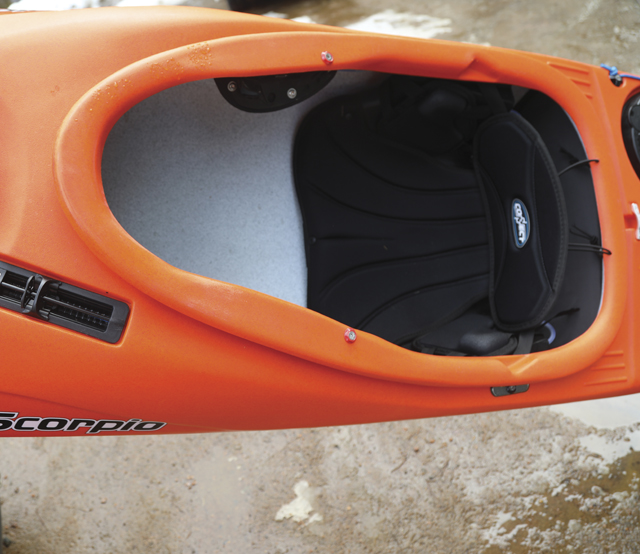
Cockpit on orange kayak
Extra volume has been added to the cockpit. | Photo: Gabriel Rivett-Carnac.

In the HV, extra volume has been added to the cockpit. This translates to a comfortably high knee position and copious amounts of legroom for my long pins. In fact, even with warm thick-soled booties there is still 11 inches between the backside of my foot pegs and the foam bulkhead. As with the hip pads, adding foam under the cover can easily customize the seat. The back band system is simple and effective, utilizing five different points of adjustment.

As a guide, I need to be nimble. Often I find myself quickly jumping out of my boat into surf landings or to assist guests in transitions in and out of their boats. The Scorpio MKII HV has a large keyhole cockpit. As I’m six-foot, two-inches tall, the large opening makes getting in and out a breeze. After performing a morning of scramble self-rescues I found access to the cockpit was seamless and the low back deck and adjustable back band did not interfere with re-entry in any way.

man paddling a P&H Scorpio MKII HV touring kayak
Check out all the features afforded by the high volume model of the Scorpio MKII. | Feature Photo: Gabriel Rivett‑Carnac

Try the P&H Scorpio MKII HV on for size

The Scorpio MKII HV is available in both polyethylene and P&H’s proprietary new Corelite X material. The Corelite X has all the benefits of the tri-layered CoreLite construction but with increased stiffness and greater durability. The Scorpio MKII HV in Corelite X is about six pounds lighter than the plastic model.

Sounds pretty good to me, I thought as I grabbed the bow toggle and dragged the 56-pound Scorpio down the gravely slope to the water and seal launched from an ice shelf.

This article originally appeared in Adventure Kayak Early Summer 2017 issue.


Subscribe to Paddling Magazine and get 25 years of digital magazine archives including our legacy titles: Rapid, Adventure Kayak and Canoeroots.


Check out all the features afforded by the high volume model of the Scorpio MKII. | Feature Photo: Gabriel Rivett-Carnac