In honour of our recent engagement, Francine and I decide to celebrate with a canoe trip down the Shikwampkwa River. I tell Francine that I chose this gorgeous Northern Ontario flow because it reflects her purity and beauty. She accepts this explanation but I suspect she knows I chose it more for the deep swirling pools of walleye than for the swift riffles and easy rapids squeezed between its pine-studded rock and gravel shores.We’ve been on several river excursions together and Francine is well aware that my paddling trips are actually thinly veiled fishing trips. But with this being our first trip since becoming formally engaged, compatibility issues are now in sharp focus.
You see we come at angling from different angles. I revel in every aspect: finding fish, selecting the right lure, bait, and presentation. I like photographing fish, admiring fish and I enjoy releasing them unharmed. Francine’s relationship with fishing is a bit more practical. She sees it as a means of procuring flesh for the table. I know from previous experience that any fish unfortunate enough to bite her lure is destined for great things, like floating around in a pan of hot oil.
It’s mid-afternoon by the time we slide our canoe into the Shikwampkwa. We’re prepared for foul weather but the overcast day and the onset of driving rain begin to grate on our spirits as we wend our way down gentle rapids and swifts. Time glides by as swiftly as the current but as the day wears on our perpetual dampness is punctuated by pangs of hunger.
Luckily, we’re within sight of the island where we’ll camp, but the alluring prospect of shelter and food is suddenly diminished by the need to angle.Ahead lies all the warmth and nourishment I need in the form of a deep walleye pool. Here a short riffle eddies out into the slack water sequestered behind a spit of rock. To paddle past such a spot would be like ordering a cold beer and not drinking it. I lower the anchor and we pull our fishing gear from wet packs.
The walleye are holding near bottom where the current and slack water meet. I cast and let my lure sink before deftly bouncing a small jighead and white soft-plas- tic grub along bottom. I have the walleye dialed in and a precise presentation means hooking a fish every few casts. I catch and release the fat green-and-gold river dwellers in quick succession and, with the fish giving such an enthusiastic endorsement of my angling skill, the hours slip by like minutes.
I glance at Francine. Her rod is resting across the gunwales of the canoe—a sure sign of waning interest. Although she is catching her share, rain soaking through her jacket has dampened her angling zeal.
“I’m tired of fishing, let’s just keep a few for supper and head in,” she says.
Rain trickling down my back only lubricates the angling machine within and I’m shocked at the suggestion of quitting. Anything less than four or five hours is a bit of a letdown, especially when the fish are biting. Francine points out that, without fish, our evening meal will consist of a well-travelled package of freeze-dried chili. I tell her I’ll keep a few fish closer to dinner, “they’ll be fresher that way.” Francine knows this is simply an excuse to fish all evening.
“I think you like fishing more than sex,” she sighs. Luckily I am anticipating this statement. It’s the inevitable accusation from the partners of passionate anglers. I laugh and quickly reply, “Of course not my dear, don’t be ridiculous.” Thankfully, fishing from a canoe, I don’t have to look her straight in the eye.
While contemplating the pros and cons of the two activities, I’m jolted from my musings by a double-header. We both have a fish on. Although Francine obviously has the bigger of the two, she is too worried I’m going to let mine go to enjoy the battle waged by her walleye. She twists around to face me.
“Keep it!” she commands as I’m pulling the jig from a 16-inch walleye. As I lower it to the water she makes one last desperate plea as she reels. “Wait, we’ll stuff it with rice and bake it by the fire.” But even in the face of this last fervent appeal, I loosen my grip and the walleye swims away. Francine’s wrath falls squarely on her fish, although she looks directly at me as she snaps the walleye’s neck. “We’re heading in,” she states.
Vivid hallucinations of lines forming on my fiancée, dividing her into shank, ribs and loin convince me of the need to eat. We pull anchor and make for shore. I get to work reconstituting the chili while Francine prepares the walleye. Although I’m quite willing to share my chili, I’m not sure how Francine feels about sharing her fish. But when we sit down to our respective feasts, Francine slides a large fillet onto my plate and garnishes it with a kiss.
Freelance writer/photographer James Smedley lives in Northern Ontario. He has earned nine national writing awards, his most recent from the Outdoor Writers of Canada National Communication Awards for 2002.
This article first appeared in the Summer 2003 issue of Canoeroots Magazine. For more great content, subscribe to Canoeroots’ print and digital editions here.
Most of what I know about canoeing, I learned from my dad. He is the inspiration behind my passion for solo paddling. As a filmmaker, Dad was always looking for an excuse to make another film involving canoes. In the late ‘70s, he explored the possibility of making a short film on what he called “canoe ballet.” Canoe ballet is a flashy style of solo paddling popularized in the ‘50s by camp instructors like Omer Stringer. In canoe ballet, the canoe is heeled over so the gunwale almost touches the water and the paddler fluidly connects various manoeuvres together with as little splashing as possible.
I was to be the principal paddler in his new film. To prepare for the shoot I had to learn, practice and perfect many different strokes. Perhaps the hardest of these was the dreaded one-hand pry—a showy way to turn 360 degrees on a dime by inserting, with one hand, a pry stroke at the bow. To practice, I would pick up steam, skim the paddle blade along the surface of the water toward the bow and wedge it into place alongside the hull. If I cut the blade in too late I would miss the turn and ram the dock, rattling my teeth in the process. Too early and I’d catapult myself right out of the boat!
After about a year of training, I was ready. Dad shot the pilot with the working title The Magic Paddle, but before the film was brought to final production Dad retired from filmmaking. It seemed a shame after all my training that nobody would see the film. Dad encouraged me to teach a course so I might pass on the skills I’d perfected. Over tea one day in 1987, we came up with the term “classic solo” to describe the style of canoeing that became the basis for my courses.
Classic solo canoeing is a great way to develop basic canoeing skills because it allows you to see an immediate cause and effect of your actions more clearly than in tandem paddling.You end up with a versatile package of flatwater solo skills that allows you to paddle a canoe comfortably, efficiently, with grace and confidence in all conditions. Whether I go for a week-long wilderness adventure, a canoe ballet spin at sunset, or an afternoon exploring a breezy lake, I utilize much of the classic solo stroke repertoire.This versatility is a rare thing for our times when most sporting activity is compartmental- ized and specialized to the extreme.The real plus of going solo, however, is that it allows you to journey at your own pace and it gives you the freedom to follow your whims and your dreams.
When I was 10, my very first solo adventure was inspired by a desire to explore the shoreline near our dock. My dad encouraged me by giving me an 11-foot birch bark canoe. I was thrilled with the idea of my first solo voyage, but I worried about the possibility of not being able to return safely. Dad tied a 100-foot length of yellow floating rope from the dock to the stern of my little canoe. I had a great time that summer revelling in my 100 feet of freedom, happy in the knowledge that I was secure. Even if a gusty wind tried to take me away, I would feel the reassuring tug of the line when I reached the end. Before long, however, the mysteries of the distant shores beckoned and I wanted to explore beyond the safety of my tether. With my Dad’s permission I untied the line and set off with my newfound skills. This childhood memory of freedom is my touchstone and the feeling that I believe classic solo canoeing can instil in everyone.
Becky Mason is a canoeist, visual artist and filmmaker. She keeps busy with teaching, work- shops, demonstrations and slide shows as well as championing environmental issues. Her award winning video, Classic Solo Canoeing, was released in 2000.
This article first appeared in the Summer 2003 issue of Canoeroots Magazine. For more great content, subscribe to Canoeroots’ print and digital editions here.
Vanessa wanted to go back to the Moisie River… But this time the trip would be different. There would be no camp kids with their battered wooden paddles, no river-weary canoes and definitely no gear wrapped in garbage bags.
While Vanessa remembered all of the Moisie’s rare beauty from 10 years before, the river had also marked her with the darkest of fears. A river-centre hole had claimed her canoe and as she was tossed beyond rescue by the river’s whims, a thousand hands had pulled her down. But in its own time, the water had released her and she crawled away, dripping and in shock, cursing and beaten, swearing that this was her last river. These few moments became the stuff of a decade of sweaty dreams, but the magic of travelling rivers was just too strong to keep her away.
The Moisie begins softly, like all rivers. A tiny dam is the height of land and the Labrador border, and from there it’s 400 kilometres of gathering excitement, southward through Quebec to the St. Lawrence River. We had given ourselves 18 days for the descent, though it’s been done in 11 and more rightly should be done in 23.
The river tripled quickly in width and flow, changing from a channel that seemed to have most of the water missing to continuous busy rapids. Speckled trout rolled in the mid-river rock eddies as we hurried past, wave splash flashing white in the drizzling gloom of this perpetually rainy river. We camped above the river’s gorge with long views upstream and down, water tumbling over ledges below us, where monster crystal eddies whispered the siren song of huge and foolish fish.
In camp we would often hear Vanessa talking about the old days because every campsite triggered a thousand memories of the ones that came before. At 17, she had paddled out of the Mackenzie Mountains and then hiked back along the Canol Road to the mountain put-in where she had started months before, an endless summer of adventure and deprivation. She paddled north out of Yellowknife to reach Wilberforce Falls on the Hood River, and that had devoured another summer. By the time she was 21, she’d tracked her canoe up the George River and over the height of land into Labrador to descend the frothing Notakwanon into the fiords of the Atlantic. She had camped in so many places, places so beautiful that it made you ache. And she was only 31.
Inconceivably, she had already been down the Moisie twice, both times with camp kids stretched to their limit, hyperventilating with excitement and hounded by fear.With male trip leaders as role models, and a girl-boy ratio heavily biased toward the male, she fought to be seen as an equal. She carried more and carried longer, making the torturing wooden beast that was their wanigan her own personal challenge. The teenager became a woman with tempered steel behind her brown eyes, a character seemingly hammered and forged by water.
For this third trip down the Moisie she combined a group of solo playboaters whose very lives revolved around fast rivers. Each paddler was paired with their Significant Other, so there would be lots of women to do the swearing and the distaste- ful heavy work.Vanessa told her partner of the Moisie long before he had ever held a paddle. She told him of the darkness of her long minutes there, of the terrifying glimpse of her own mortality. And then she led him into her passion for wild rivers until they played in moving water with every spare moment of their lives. They tumbled together into the garden of river obsession and he became an inseparable part of her critical armour.
It was on the Moisie that we all began to reflect on how we had changed as people who travel rivers. Vanessa’s mind was now always sifting and sorting the chaos of water, planning her own self-rescue. We paddled the canoes loaded, we searched for the bold centre lines of the playboater and we lived in our moving water world with great comfort and respect.
Playing our way down the Moisie, we watched our world change from the sparse spruce monoculture of the caribou wintering grounds into deciduous forest ready to riot in the frosts of September. Water poured into the deepening canyon in white free-fall at every bend, draining the river’s high plateau in threads and curtains and monster churning draperies.
Sixty-five kilometres from the St. Lawrence, we drifted out of the natural world. Hydro towers stalked over the hills, and the tracks of the QNS&L railroad joined us on the left bank. As we rafted up and drifted toward the “Railway Sets,” the adrenaline-soaked climax of a very challenging river, Vanessa may well have been the only one thinking about what lay ahead.
The first of the Railway Sets had a recirculating hole spanning half the river backed with a wide field of surging boils. A line of standing waves showed vertical faces capped with white below the hole. Vanessa had logged thousands of miles and run hundreds of rapids since she last saw this place. She had even paddled the black and whispering rivers of winter, too impatient for spring. So serene and so certain, so ready for this water that had tried to break her, she didn’t even recognize it. To her, the Railway Sets equalled just another “point and shoot” piece of water.
Vanessa and her partner paddled down to a right-side eddy and sat there for a moment processing the river. Scouting the rapid from the canoe, they spoke briefly of their plans, arms extended, pointing. Vanessa twisted around to touch paddle tips—the final piece of the ritual.
They carved out in an arc, driving hard to hit the precise piece of water to start their line. Their angle turned downriver then, and Vanessa faced the hole that leapt and churned with pure madness. She did a cross-forward stoke that lasted only a heartbeat and they rode their preordained track through a metre-wide window. A grey wall of mixed air and water stretched above her, near enough to touch, and her ears filled with the primal scream of gravity pushing unimaginable weight down the giddy slope. They rode up a wave that rolled the boat under them to 90 degrees. In crazy contortions they wave-blocked for dryness and reached for balance as the wave took them over its peak. Then a well-timed paddle- stroke pulled them beyond the heaving nightmare of the boil-line to safety.
We camped there, our last night on the river, to sleep on arching polished rock like the backs of granite whales. Vanessa sat, staring at the water, drinking tea from a battered mug that had seen almost as many rivers as she had. And then she remembered.
“This is the set. This is where I almost drowned.” She spoke with surprise and wonder, as if she’d discovered her terrible demon with a stake already driven through its heart, and that now she was free to travel without its fearsome company.
Our journey down the Moisie had taken 18 days. But Vanessa’s had taken a decade.
Brian Shields is a sun-mangled river rat, boat outfitter and creator of mean doggerel for friends’ birthdays.
This article first appeared in the Summer 2003 issue of Canoeroots Magazine. For more great content, subscribe to Canoeroots’ print and digital editions here.
With paddle in hand and journal close by, I began my 1800-kilometre lakewater canoe journey. In the high waters of late June, my partner Eric and I set off from my hometown of South River, Ontario, travelling first into Lake Nipissing. Here we followed the ancient paths of First Nations peo- ples, fur traders and settlers to the northern shore of Lake Superior.
I never imagined when I began my graduate degree in environmental studies that just months later I would be conducting research in a canoe. My aim was to experience living in a Canadian wilderness and to investigate people’s relationships to this land. What better way to do this than to travel along Canada’s largest lake by canoe?
Although the canoe may not be the fastest or the driest way to travel, it was the perfect vehicle for my research. The open canoe denotes an intimate relationship with land and water. Its manoeu- vrability and silence facilitate an encompassing sensual experience—an opportunity to listen as well as hear.
Each section of lake and shoreline that I encountered along this 60-day journey unfolded into several conversations between bodies and landscapes, water and paddles, wind, waves and canoe. All of these I recorded faithfully in a daily journal which became a narrative of my journey through the land and among the people.
Along this journey I saw that the images of forests, lakes and rivers used to represent a “Canadian Identity” are ideas steeped in a certain culture, language and history. Efforts to protect wilderness areas come from particular relationships with land and water, understandings of place that may not necessarily be shared by all Canadians.
Boundaries delineating protected wilderness areas appeared as arbitrary designations put into place with little concern for the his- tory of the land and its people. First Nations people claiming inti- mate spiritual and historical connections to the land within park borders were notably absent from parks we visited, while traditional aspects of their culture were readily used and adapted to provide entertainment for park visitors.
While claiming to protect wilderness, parks assign a cultural significance to specific lands. Park borders, however, are not immune to transgressions as flora and fauna and environmental pollutants penetrate these areas through media such as water, air and precipitation.
As I paddled over long distances through unpredictable waters, I found that the journey itself challenged accepted understandings of wilderness. Our mode of travel surprised many people who saw the canoe as perhaps out of place in modern times and their questions were always the same:What will you eat? Where will you sleep? What if it rains?
People who had paddled some of the places we were travelling told us how to experience Lake Superior, the kind of gear we need- ed, the places we should camp. While we gladly accepted this advice knowing that it came from concerned and experienced pad- dlers, I was conscious of an accepted mentality, a paddling culture promoting appropriate ways to experience the land. Speed and dis- tance seemed very important in this culture and were often discussed within an atmosphere of competition or within a conversa- tion of survival in a hostile or indifferent wilderness.
“[The Lake] defies anticipation,” remarked one woman who was paddling the North Shore of Lake Superior. She leafed through a book of her sketches of the rocky shoreline and spoke about her frustration with Superior’s unpredictable weather. Intended destinations were often not reached, schedules could not be adhered to. She sighed as she admitted to being at the mercy of the weather.
“Weather is everything,” she said. “It can make you hate or love the same place.”
The source of this woman’s frustration—an admission of nature’s power and independence from human control—echoed in many other conversations along the journey. Nowhere is the presence of a nature that is separate from human desires and control more clearly realized than in the bow of a canoe.
In a canoe on Lake Superior change was a constant. Each day of this incredible journey was completely different from the one before. Quiet, comtemplative moments became gale force winds; calm, smooth waters transformed into whitecaps and four-metre swells; slow river current ran into raging rapids and spectacular falls; complex river deltas led into the wide, unprotected expanse of open waters.
In this interactive art gallery where power and beauty are experienced by every sense, I could not have chosen a better vehicle for my research. From the unique perspective of a canoe, I was exposed to a constantly changing, unknowable nature and to many different people living within this land. I became aware of the limitations and inaccuracies of dominant definitions of wilderness. The movement of the canoe and the intense physical effort required to guide it through the natural environment afforded me an intimacy with the land that would otherwise have been unknown. I became conscious of my own culture and history as heavily influencing my ideas of wilderness. I began to question my own understanding of protection and the exclusive, controlling potential of current practices of wilderness preservation.
This journey revealed the limitations of my own and others’ attempts to represent a Canadian “wilderness.” The canoe allowed us to live the unpredictability and power of a changeable, fluid land through our bodies, our minds and our spirits.
Pauline Craig is in the Master of Environmental Studies program at York University. Her research project, entitled “Nature, Identity and the Canadian Landscape,” will continue next summer as she paddles from Lake Superior to the Mackenzie River.
This article first appeared in the Summer 2003 issue of Canoeroots Magazine. For more great content, subscribe to Canoeroots’ print and digital editions here.
Yukon River Quest: the Longest Canoe Race in the World
In the last stretch of the Yukon River Quest, a 742-kilometre paddling race from Whitehorse to Dawson City, many competitors fall asleep between strokes while others hallucinate. Exhausted competitors have recounted such visions as a dangerous waterfall in their path, a canoe with musicians dressed in tuxedos and even a boat full of laughing chipmunks.
The Yukon River Quest is a gruelling event that has drawn paddlers from around the world since 1999—elite marathon pad- dlers, former Olympians and physically honed triathletes as well as novices seeking the adventure of their lives.
There are categories for kayaks and crew boats, but the tandem marathon canoes have always been the first finishers, with the record being just over 52 hours, includ- ing the eight hours of mandatory rest.
An unprecedented 36 boats entered in 2002. One of the most inspirational teams consisted of two 18-year-old Whitehorse ath- letes, Erin Neufeld and Stephen Horton. Embodying the spirit of the race, they entered with the goals of finishing in a respectable time of 70 hours and remaining friends through the ordeal.
Similar to the elite paddlers, Erin and Stephen used a lightweight 49-pound Jensen-design Kevlar canoe and graphite bent-shaft paddles.They kept the boat light by carefully calculating even how much water to carry between stops.
Competitive teams rarely go on shore and many serious racers include “potty training” along with their daily workouts.“During the race, we use a potty and avoid the time that would be lost if we had to go on shore,” Bob Vincent, the top finisher in 2002 explained. “When I coach marathon canoeists, I put a potty under the canoe seat and replace the canoe seat with a toilet seat.”
Erin and Stephen decided against the potty, but did prepare by paddling two to six hours each day as soon as the ice broke and doing one 20-hour non-stop paddle.
Erin spent much of her youth paddling Yukon rivers with her father. She quickly learned to keep up a pace of 60 strokes per minute, approaching the 85-stroke-per-minute rate of top marathoners. Stephen is a member of Yukon’s cross-country ski team.
At noon on Thursday, June 27, Erin and Stephen joined the field of 80 competitors waiting at the start to begin the short sprint from Main Street to their boats on the Yukon riverbank. Ahead was Lake Laberge, the only lake in the course. This 48-kilometre stretch of open water is infamous for its sudden winds and metre-high waves. This year the lake remained calm and by 10 p.m. Erin and Stephen entered the fast current of the “Thirty Mile” section of the Yukon River.
They relaxed and ate their favourite snack—papaya and melon. Food is difficult to digest during a race so the choice is criti- cal. Racers take dextrose, energy gels, drinks and bars—one elite marathoner eats tapioca.
They paddled through the dusky night of subarctic summer, taking turns for a few minutes sleep until the sun beamed down on the river once again.
After 25 hours of paddling, the sleepy pair pulled into the first checkpoint at the small central-Yukon town of Carmacks under a hot noonday sun.They ate lasagna and slept most of the mandatory two hours.
Several hours later and near the end of day two, Erin and Stephen paddled into the second sanctioned stop at Minto for a mandatory six-hour break. They were again met by their families who had warm food and tents ready. All Erin and Stephen had to do was eat and crawl into their sleeping bags.
Now more than halfway through the race, they were in ninth place. The last 325 kilometres has no road access and includes a section of the river where a maze of channels confuses tired paddlers. In 2001, a kayaker took a back channel, became disori- ented and began paddling upstream. He pulled onto an island and was finally rescued after a 14-hour search.
When Erin and Stephen entered this section, the sun dipped briefly below the horizon, marking the second night of the race. This is where Erin’s experience on the Yukon River paid off as she was able to find the correct route despite the fading light.
In the second half of the race they decided to keep paddling until they absolutely had to rest. When Stephen took his break, Erin tried to keep canoeing while he slept, but she soon dozed off too. They drifted for 45 minutes until they woke with a start and picked up the pace, feeling rejuvenated and laughing over their narcolepsy.
As they paddled the final stretch into Dawson City, the rising sun flooded the river valley. First-time racers often quit at the checkpoints or arrive in Dawson City looking like refugees from a war zone. Erin and Stephen arrived in Dawson smiling and healthy after 69 hours on the river. In the last leg they had paddled almost non-stop for 26 hours.
They made their goal of 70 hours and finished ninth out of 21 canoe teams. If they had pushed a bit harder they could have won some of the $15,000 prize money. But Erin and Stephen paced themselves, took the time to enjoy each other’s company and made this a memorable adventure under the midnight sun.
Yvonne Harris writes children’s fiction and lives in Whitehorse, Yukon. She has raced in all four River Quest races, placing fifth overall in 2000. The 2003 Yukon River Quest is planned for Wednesday, June 25.
This article first appeared in the Summer 2003 issue of Canoeroots Magazine. For more great content, subscribe to Canoeroots’ print and digital editions here.
The helix is the latest move on the pallete of freestyle paddlers. This new move is a 180-degree upside down flat-spin that resembles the rotation of a helicopter rotor. That’s right, it is not a 360 rotation as most people think. The helix is just a bounce and an elaborate roll like the donkey flip, roll-X or the pan am. The boat slides sideways down the face of a wave and when the upstream edge pops up in the air, the stern gets pushed, upside down, toward where the bow just was. The move, when airborne, is really cool to watch and punishing to learn. The first person to actually land and name the move was Steve Fisher, longtime paddler of the Zambezi River. There were variations of the helix before His Holiness published the name helix on the Internet, but he, unlike everyone else, stomped the landing.
Step 1
Find the top of a nice big green wave face with a big foam pile. The foam pile will help catch you when you inevitably land on your head. Slide down the face of the wave sideways and let the upstream edge drop flat with the face of the wave. When the boat picks up speed, pull up the upstream knee and hop the boat sideways. Be sure to lean your head downstream for the hopping. The idea is to get the boat to hop as high as you can without flipping upstream. Practice this for awhile, the more height the better for the helix. You’ll need to lean a little more upstream for better height but you’ll likely crash a bunch learning.
Step 2
Just as the boat leaves the water for the first bounce, punch the downstream hand and its non-power face forward in a reverse sweep while dropping your head back on the same side. Throwing your head leads the move, and begins the spin movement by pushing the stern upstream and sends the bow downstream. If you don’t push the stern hard enough the edge drops and the cockpit rim is going to catch you in the ribs, and it really smarts.
Step 3
As the boat flips over on top of you, the paddle blade you pushed with will become open to the water upstream. Keeping the pad- dle engaged will swing your legs frighteningly fast over your head. You don’t need to pull on it, but some people do. Try both methods to find out what works best at your play spot.
Step 4
Your body needs to tuck under your boat by pulling your legs on top of you. Think of touching your toes while throwing your legs over your head. Once your legs have swung past your face, the stern will engage and the boat will want to flip back upright.
Step 5
You are now on your other edge and on your other paddle blade. On a big wave this is when you want to low brace. The low brace will, with the energy of the water, flip you right side up. On smaller waves this last part of the helix is a very fast roll. Either way, your automatic response will be a hip flick, so let it happen.
Billy Harris will be teaching intermediate and advanced freestyle clinics for Madawaska Kanu Centre.
This article first appeared in the Spring 2003 issue of Rapid Magazine.
For 15 years and all of my canoe tripping life I’ve been renting, borrowing and using the canoes supplied by the various companies whose summer jobs managed to get me an education. With driver’s licence, degree, real job and wife all checked off my list, buying my own canoe seemed the last rite of passage left for this skinny Canadian man. Seasons spent kneeling on blue foamy sleep pads in boats whose only modifications were Kevlar patches inspired fantasies of one day building my Ultimate Tripping Canoe (UTC). I pitched the idea to wilderness river tripper and meticulous boat outfitter Brian Shields and late last fall the project began.
The basis of the ultimate tripping canoe is a good boat. I chose the Esquif Canyon for its generous rocker and depth, which make it both a big-water tripping boat and also one that likes to play the river. The Canyon will be slower and not track as well in flatwater but we were building our ultimate whitewater tripping canoe and were willing to make some sacrifices for river paddling performance.
The DIY guide to outfitting your canoe for whitewater
1 Where to start…
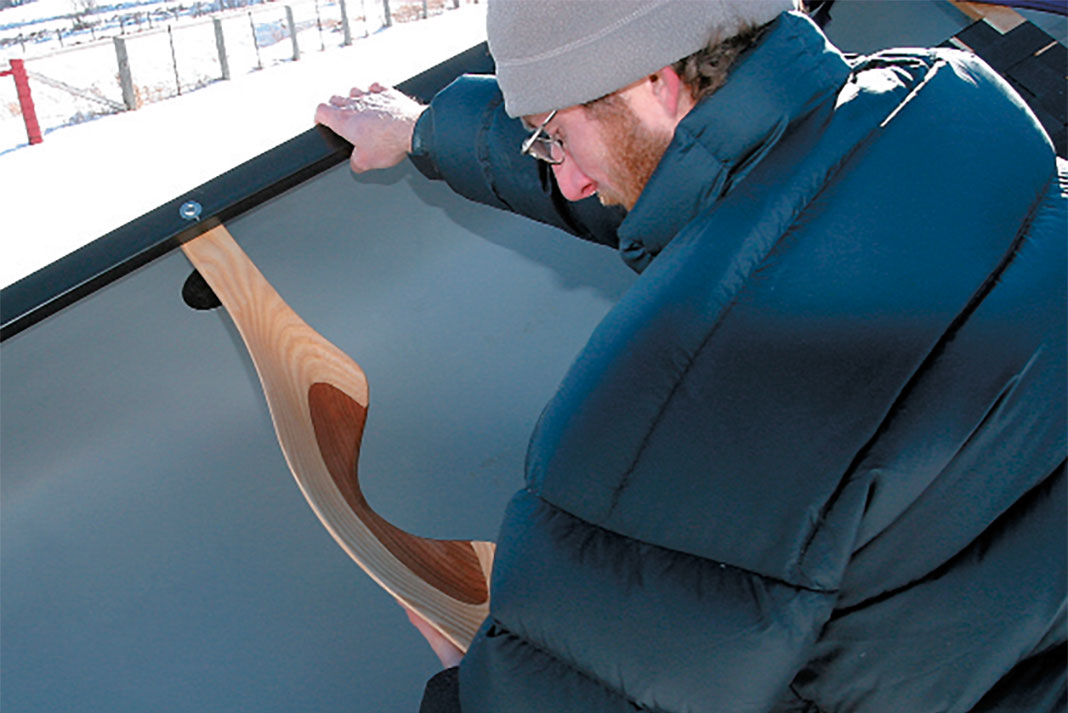
We began at the yoke, replacing the Esquif stock version with a laminated ash and cherry yoke by Madawaska Valley yoke builder SlipStream—an aesthetic touch with the highest benefit-to-cost ratio when it comes to slugging our fully outfitted 77-pound tripping boat.
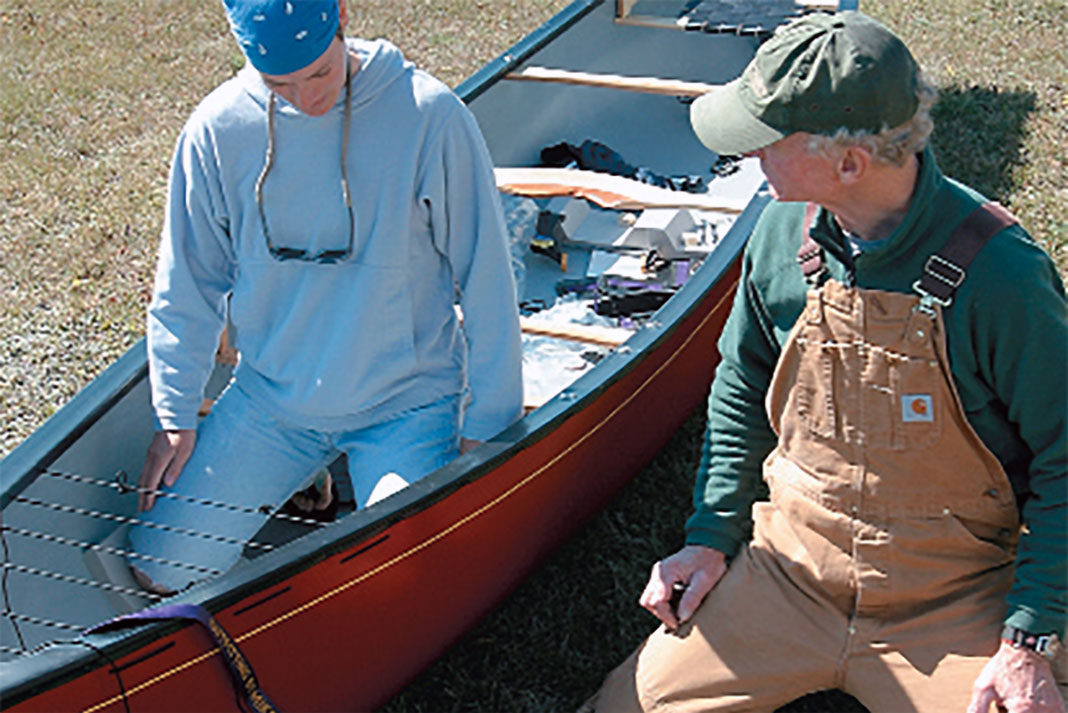
Tanya and I have fallen into the pleasant agreement that I’ll spend my time in the stern and she will enjoy the freedom and view from the bow. Locating our seats and thwart position to accommodate our typical tripping gear was the next and most important step, and one that affects the rest of the outfitting process. Having legs better for walking in deep snow than sitting comfortably on public transit, I made leg room my top priority. The Canyon comes set in a more aggressive and centred playboat-like seating position so we had to move the stern seat rearward to gain my stretching room and leave space ahead of the seat for camera gear. We know we will have to shift gear forward to weight the bow to compensate and trim the boat.
Adjusting seat height and angle are the easiest and cheapest modifications you can do to improve your paddling comfort. Moving my stern seat naturally raised the seat and increased the tilt due to the rise in the gunwales toward the stern. This was perfect for my larger feet and longer legs. The bow seat we lowered and tilted forward slightly so Tanya could reach a comfortable kneeling position without the nagging ache of a level seat bar eating into her legs. Add too much tilt without thigh straps, however, and you slide forward off the seat. Remember to be kneeling on a kneepad or piece of foam to ensure correct seat height and angle.
How to adjust yoke & stern seat
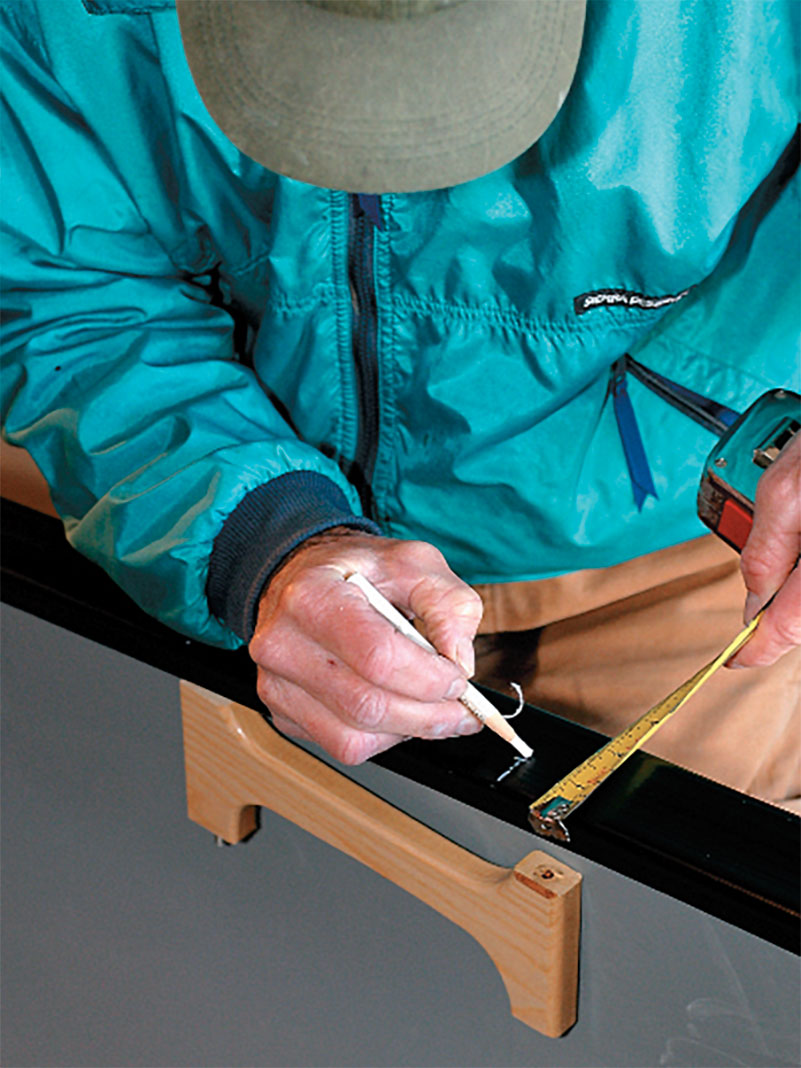
Installing the SlipStream yoke, we used the existing yoke as a guide for cutting to length, centring, marking and drilling the bolt holes. To allow two 60-litre barrels to fit snugly side by side yet still load and unload easily, we redrilled the gunwales and moved the rear thwart back to 24.5 inches from the yoke. Don’t inadvertently add flare or tumblehome to your canoe when moving thwarts—trim them to fit or replace them with longer ones.
Think carefully about the compromises involved in moving the seats from the balanced standard positions. Balance, dryness, maneuverability and gear carrying capacity will be affected. White grease pencils, found at office supply and craft stores, are ideal for marking—measure twice, drill once.
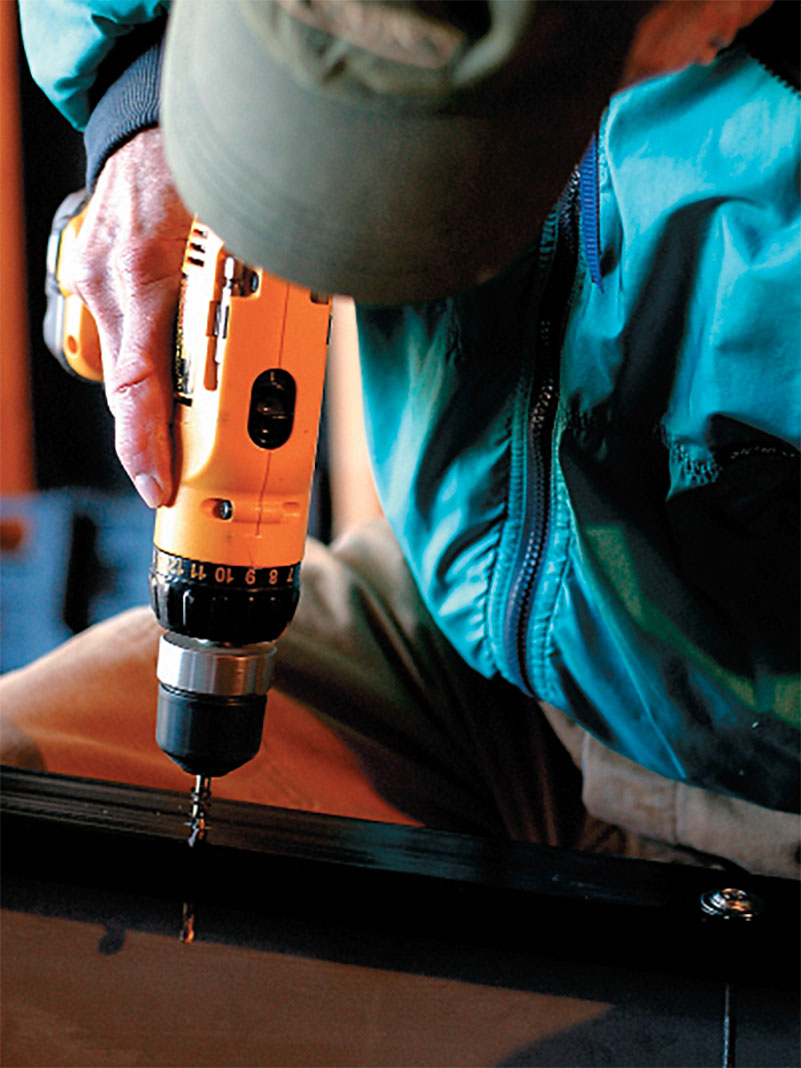
Vinyl-covered aluminum gunwales can easily be drilled without harm. Typically seat and thwart hardware is 3/16-inch diameter and stainless. Use a 3/16-inch drill bit so bolts fit snugly. Recessed washers tuck bolt heads inside and disperse the pressure on a larger surface area of the gunwale. Underneath use washers and nylon locknuts. Pack a Leatherman tool and a metre of farm fencing wire and you can fix anything on trip.
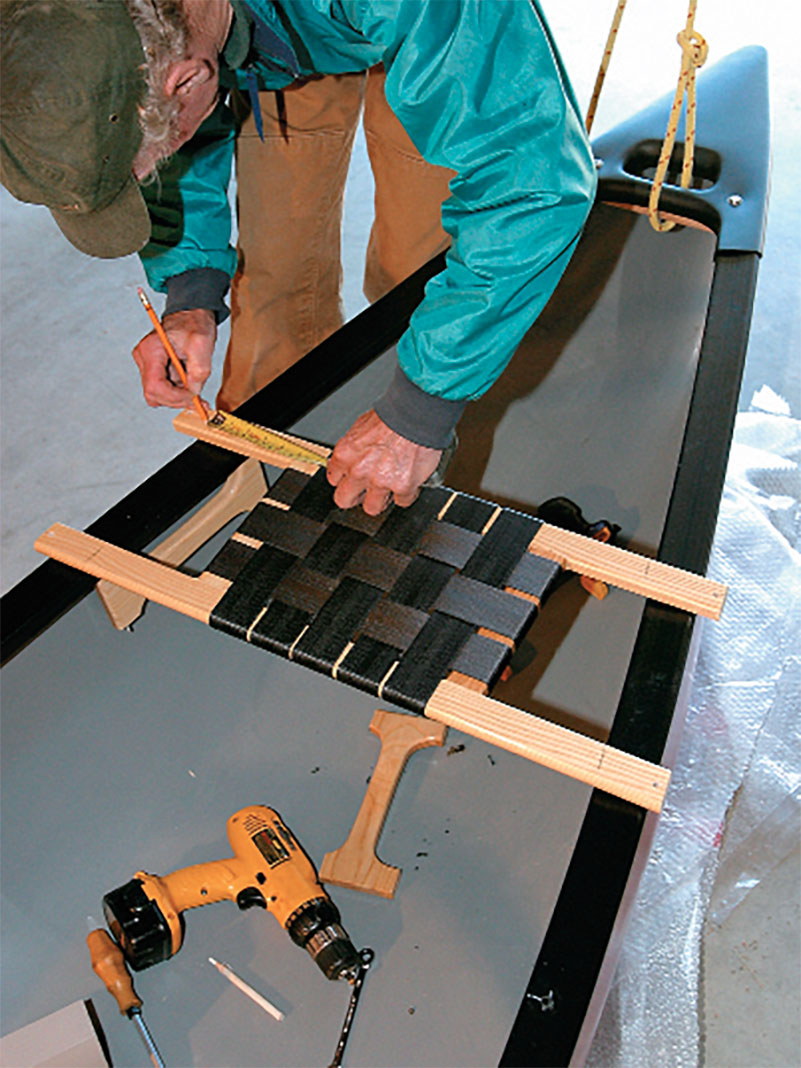
For legroom and working space we ended up moving the Canyon’s seat back a massive eight inches to a more traditional tripping measurement of 24 inches from stern. The seat had to be carefully narrowed to fit farther back in the tapering stern. Be sure to err on the side of too long when you are making your cuts and then trim and angle the seat bars for a perfect fit. A perfect installation has the seat just clear of the inside of the hull. Simply moving a seat forward or back affects the seat height and angle following the shear or gunwale lines of the canoe. Adjust seat height and angle using longer seat bolts and new seat pillars, or cut and drill wooden spacers for between the seat and pillars. We drilled the holes and loosely bolted the seat in place, tweaking height and angle after we installed the outfitting.
2 Float bags
Perhaps the best insurance policy you can buy for your whitewater canoe is a set of float bags and properly installed bag cages. Float bags come in both nylon and vinyl. Vinyl bags are worth the extra money. They are lighter, easier to work with, especially in the cold, and far more durable. Voyageur 36-inch end bags are the perfect length for tandem tripping boats, tucking just ahead of the bow paddler’s knees and behind the stern seat.
[ Paddling Buyer’s Guide: View all floatation and cage materials ]
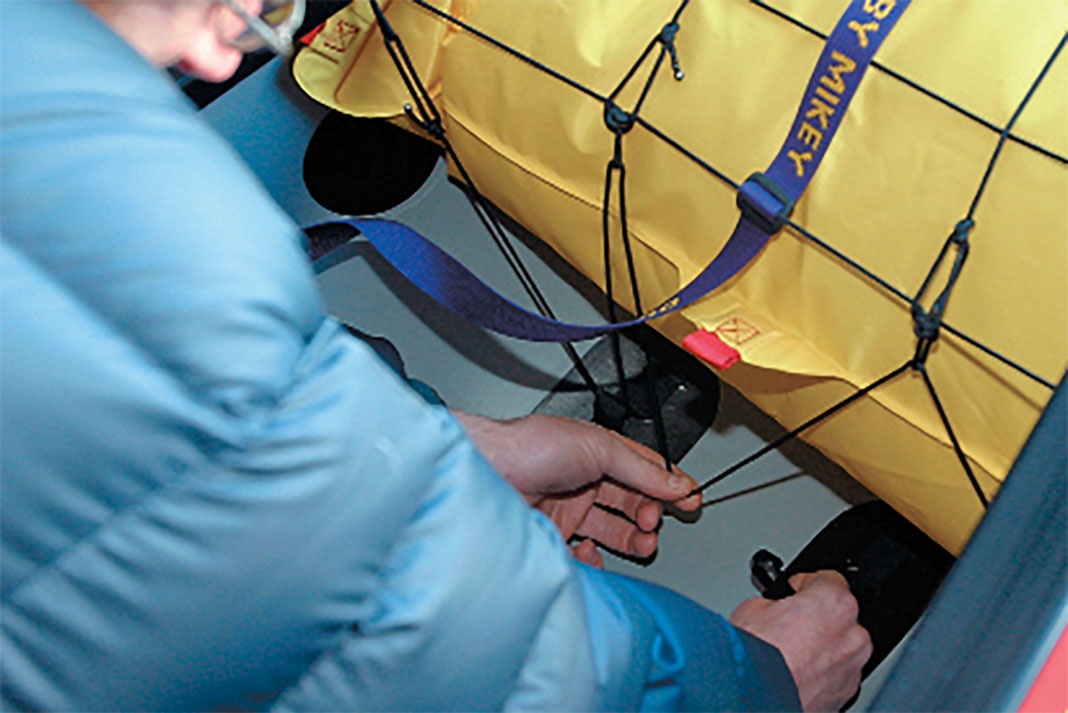
The Mike Yee Outfitting bag cage system is far superior to tying bags into the boat. Although all float bags have sewn tabs, tying bags into your canoe isn’t enough to keep them down. An upright boat full of water floats the bags, focusing all the stress at the sewn tabs. The water will displace the bag above the gunwales, rather than the bag displacing the water in the hull.
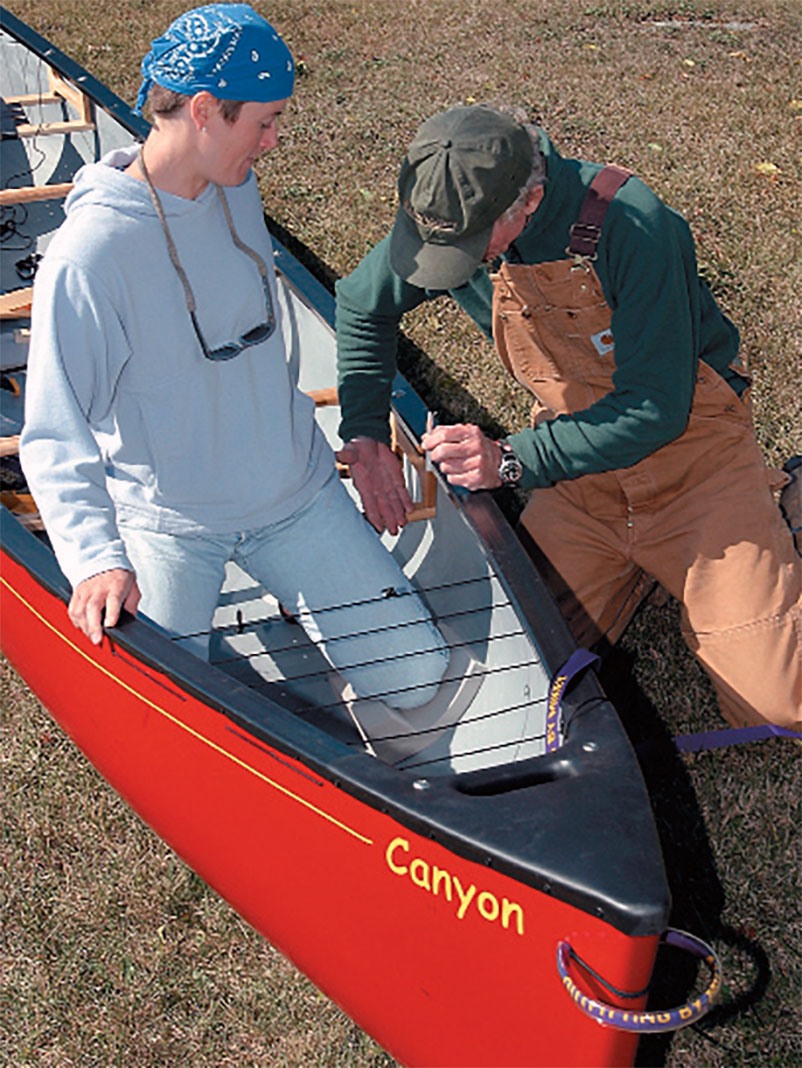
As we installed the stern bag cage, we realized the combination of moving the seat back and me having long legs meant that my feet were going to interfere with the anchors. This was aggravating, and dangerous if my river shoes caught when I needed out of the boat. We simply moved the anchors back, shortening the cage area by a couple of inches.
By necessity, the copious leg room usually enjoyed by the bow paddler gets filled by the face of the bow cage; however, we were sure to lay out our kneepads and eye things up before we drilled the cage holes to set their location. We wanted to ensure there was still enough space in front of the bow seat for Tanya to sit up and stretch a little.
How to install float bags
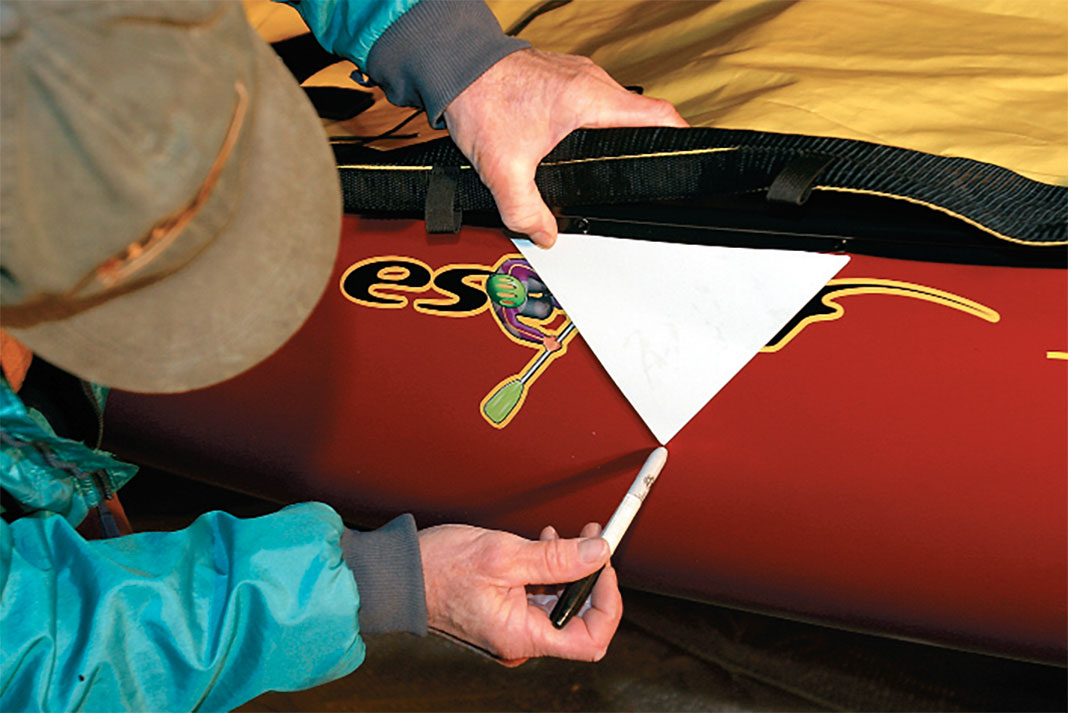
Use a paper, cardboard or plastic jig to mark the float bag cage holes so they are aligned with the holes on the other side of the boat. Mark the 3/16-inch holes every four inches starting at the end of the deck plates and continuing for as far as you want the bags to extend. Drilling holes in a new hull feels wrong, but the holes will be filled when laced with nylon cord. Be gentle with the drill, even the dullest of drill bits can tear through Royalex with ease.
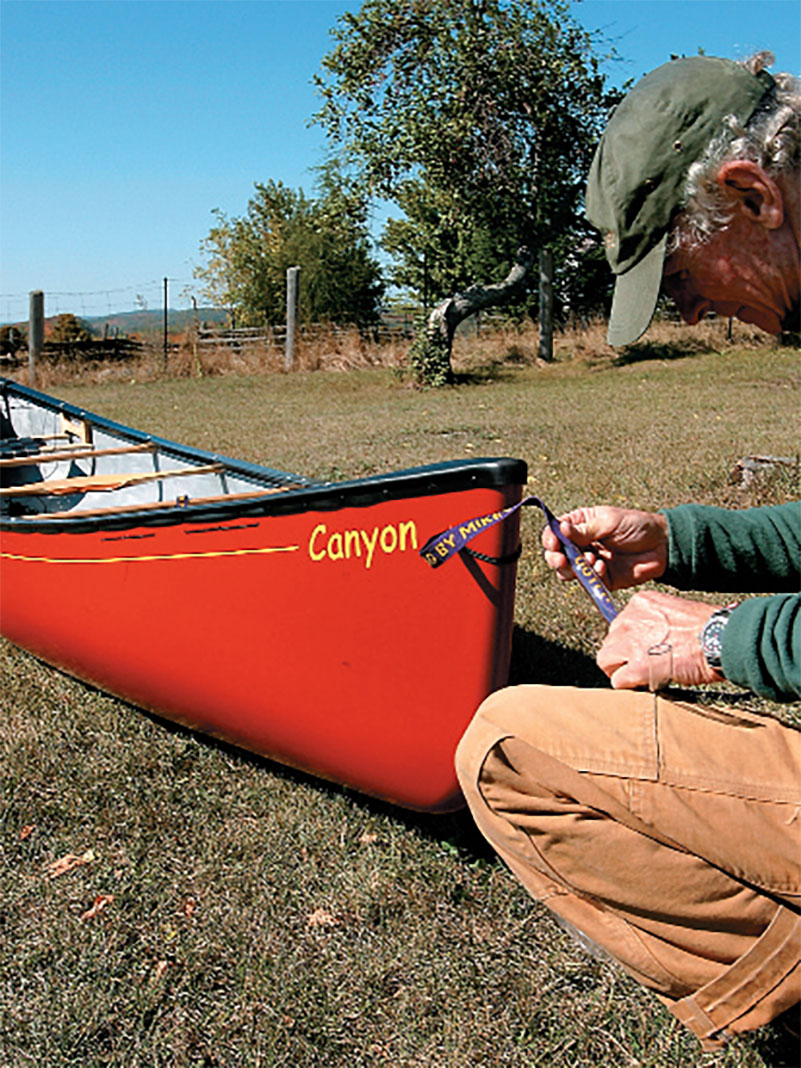
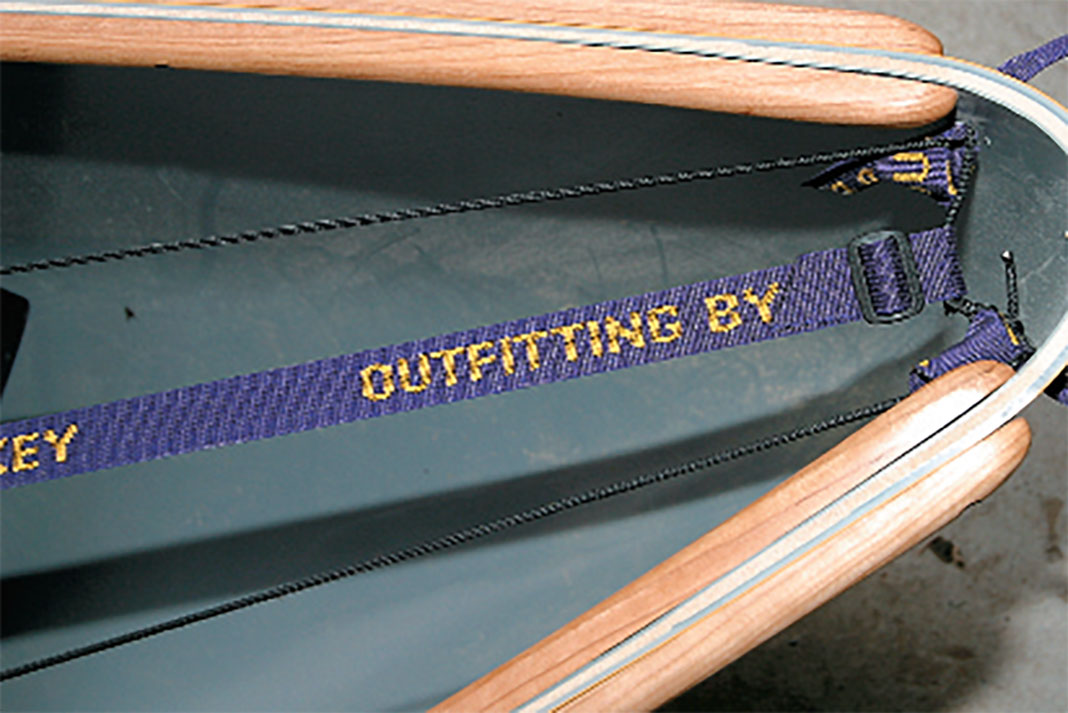
To install a bow or stern grab loop and another anchor point for the cages, drill a larger 7/16-inch hole. We checked first to ensure the holes wouldn’t interfere with the spray deck we will install later. Tie a single loop of 3mm nylon cord through the holes with the ends inside the boat. Pick up some 5/8-inch OC clear vinyl tubing and a metre of webbing at a hardware store. Force the webbing through the tube, into the holes and tie it on the inside of the canoe for a cheap, comfortable and easy-to-use handle.
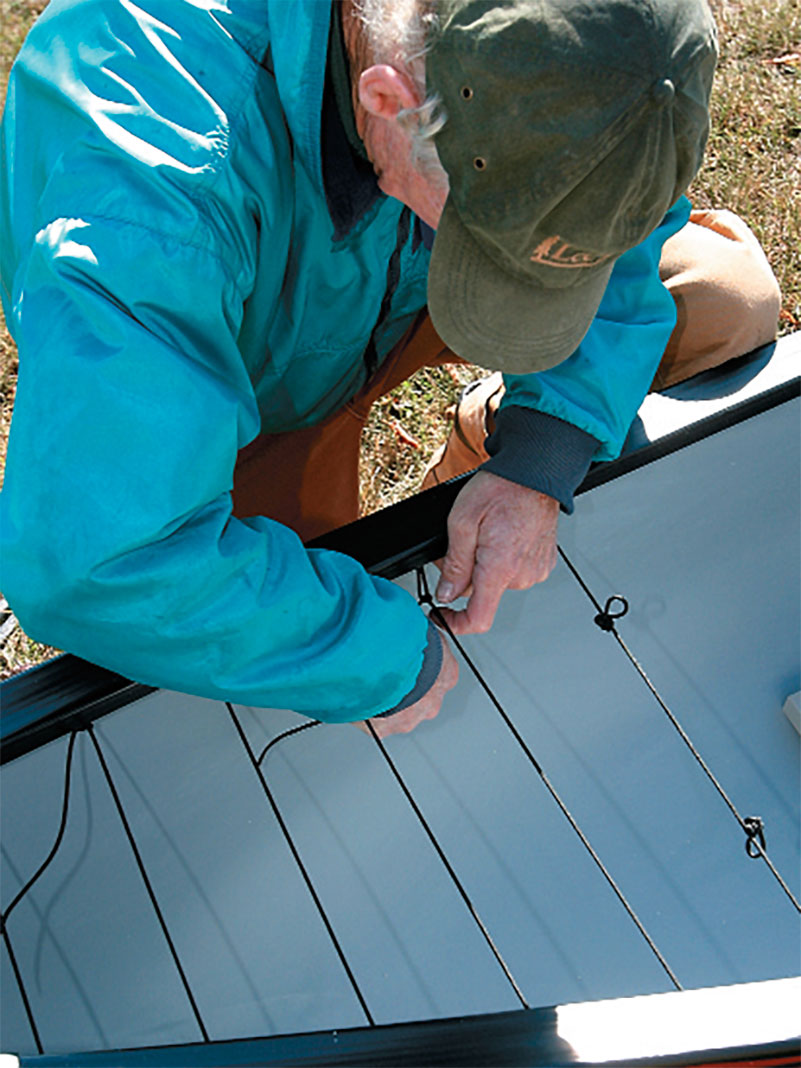
Weave the nylon cord through the 3/16-inch holes starting from the bow or stern. On the last crossing on the inside of the hull tie a loop as a stopper using a figure eight on a bight. Then tension the cord backward through all the holes until you’re back at the first end. Thread the first end back through one of the holes and tie it off with a few half hitches on the inside of the boat. Go back to the last crossing and tie three additional evenly spaced figure-eight loops. Tension this end, threading it back through one hole to tie it off on the inside of the hull with half hitches. The result is a snug cage in which the last strand has two evenly spaced loops in the middle and two stopper knots against sides of the boat so they can’t slide off centre.
Without the deck plates on this playboat you can see how the webbing grab lop and single loop of nylon cord are attache.d The nylon cord loop is the anchor for a piece of webbing running down the centre of the bag cage. The two nylon cords run from the grab loop holes to the figure-eight loops, underneath the nylon cords that go across the canoe to form a grid with gaps small enough to keep the bag from rising and escaping under water pressure.
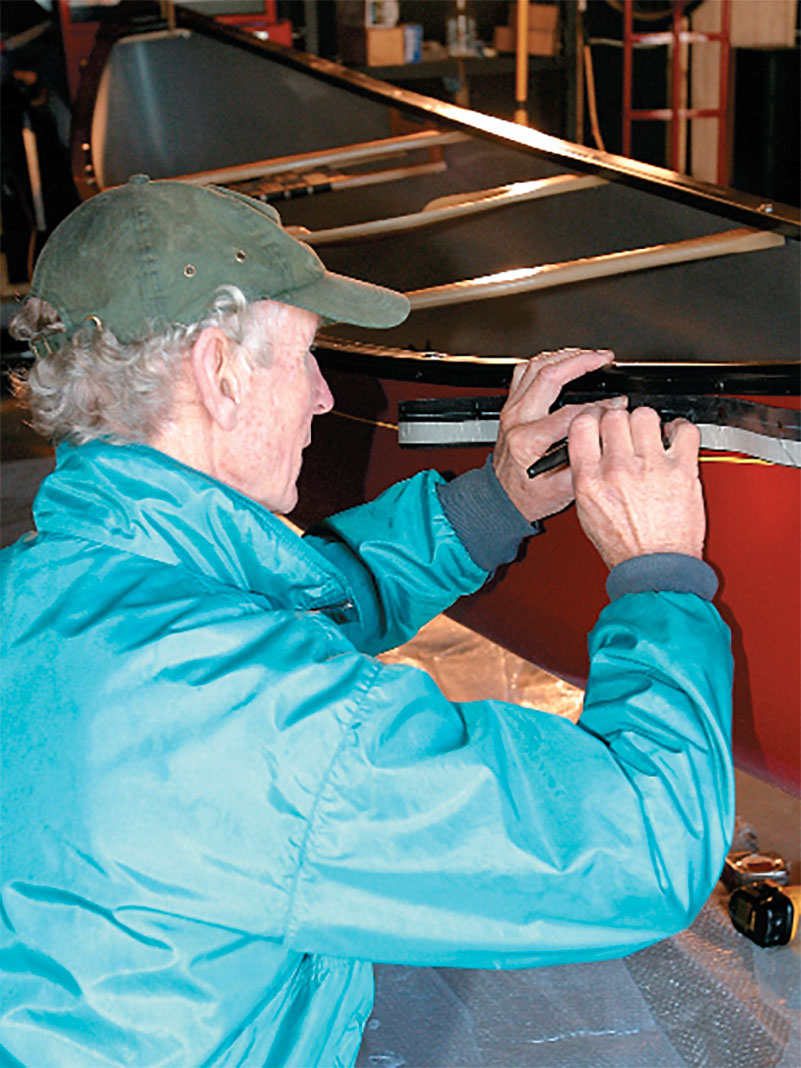
Directly below the line below the figure-eight knots, place three evenly spaced vinyl patch anchors. Mark the outlines of the patches with a grease pencil and glue them in place. Let the glue dry for 24 hours, then thread the cord through the figure-eight knots and anchors in a “W” pattern at the end of the cage. Using a centre anchor with a clip allows you to easily unclip the cord and webbing to access the float bag area.
3 Comfort and security
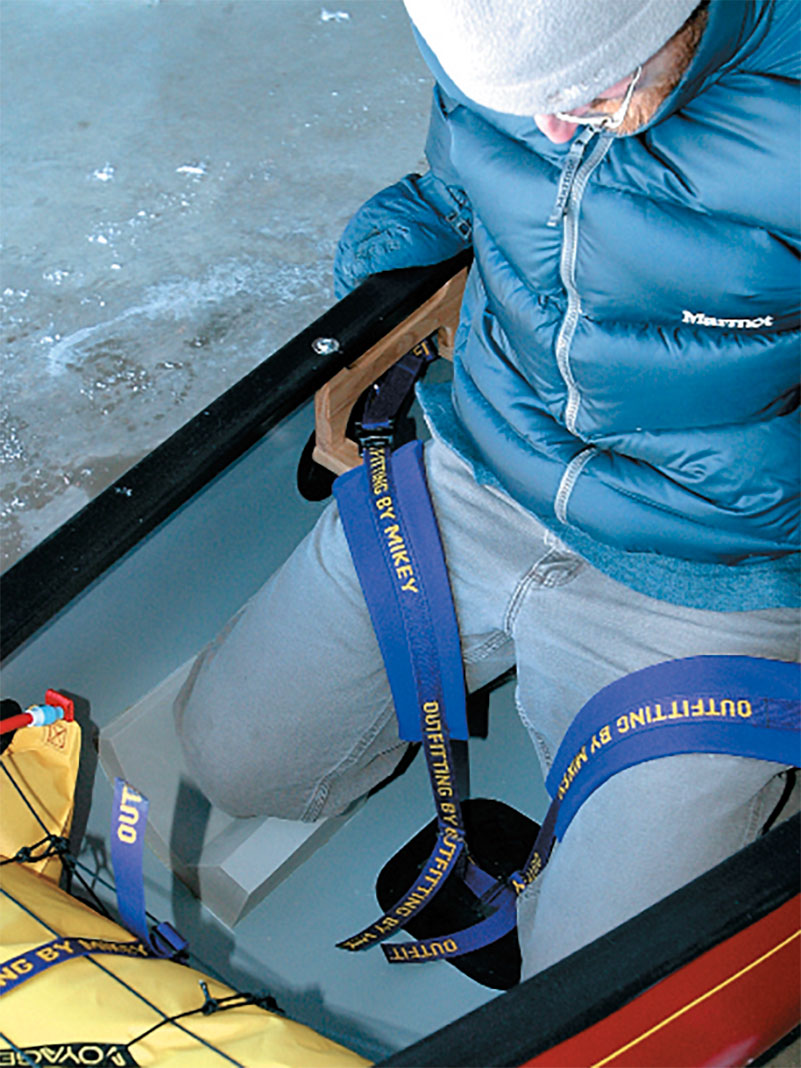
Thin pieces of blue foam offer some comfort to the knees, but proper outfitting has so much more to offer. Contoured knee pads and thigh straps stop your knees and butt from sliding around and connect you to the boat. Coming from a tripping and playboating background, we wanted the comfort and security of quality, well-placed kneepads and outfitting in our ultimate tripping boat. If the bow and stern positions will be shared, the kneepads have to be located to fit both short and tall paddlers. A tip from Brian was to be sure to space the kneepads far enough apart that you can drag a bailer between them. We also wanted this gap between the kneepads for stepping in and out of the boat.
We anchored our thigh straps on the sidewall of the boat, centred between the seat supports. Some canoe tripping outfitting loops around the seat pillar or around the seat itself but the ultra-fine stainless steel bolts used as seat hangers are not suited for the lateral forces exerted by the thigh straps. The bolts bend, work loose and can break under your body weight if the canoe happens to ram and stop on a rock. Having the anchor between the seat support brings the thigh straps into an aggressive, secure position.
How to install kneepads & thigh straps
Position the kneepads widely enough for differential balance of the canoe with pressure on either knee. Get comfortable, you shouldn’t be stretching to reach the kneepads. When you’re sure of their placement, mark the position. Now, run around the yard and get back in to ensure it feels natural. Then, glue them in using contact cement.
With the kneepads held in the correct position, we lowered the seat and tilted it forward slightly so that Tanya’s shorter legs could reach a comfortable kneeling position. Esquif’s solid, one-piece seat hangers allowed us to cut wooden spacers to lower the seat. You might need to buy longer seat bolts. Adjusting seat height and angle are the easiest and cheapest modifications you can do to improve your paddling comfort.
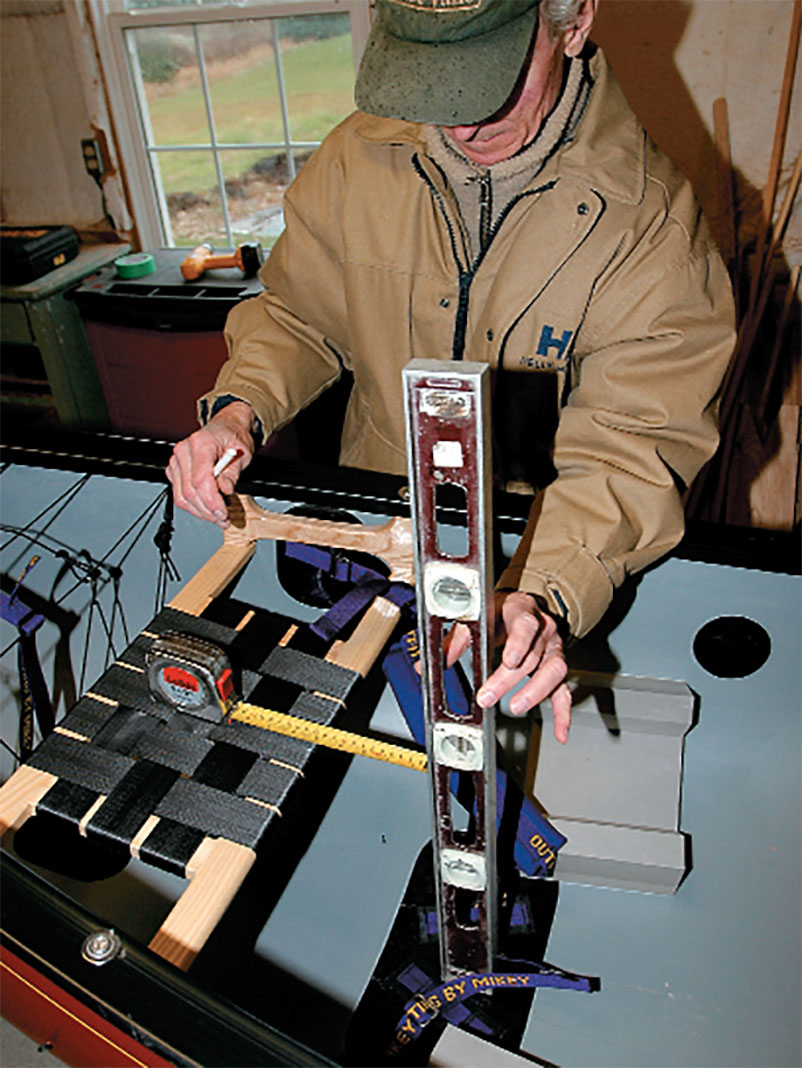
Both bow and stern anchors for the Mike Yee Outfitting thigh straps are centred in the boat five inches forward of the seat bar. Find the centre of the boat with the centre of the seat webbing and use a level to measure up from where the anchor loops leave the floor. Locate the wall anchors centred between the seat supports, with the tops near the gunwales. Mark outlines, location slashes and orientation arrows for the anchors on the hull so you know their placement and which way is forward.
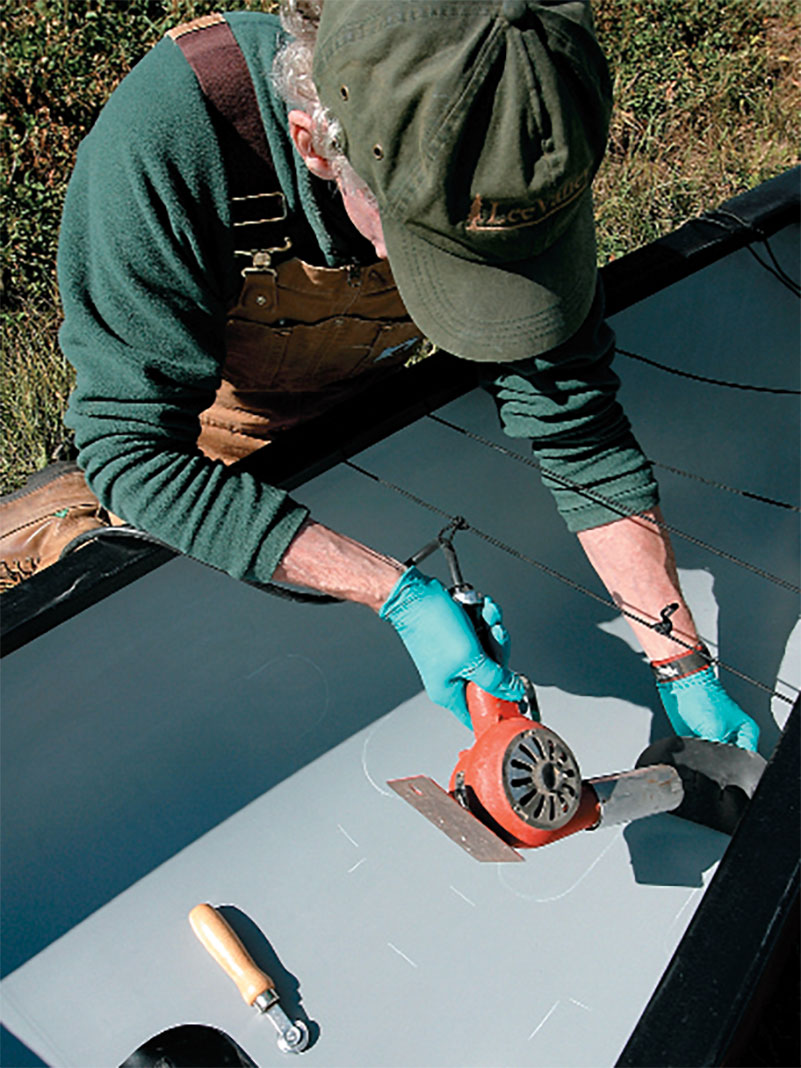
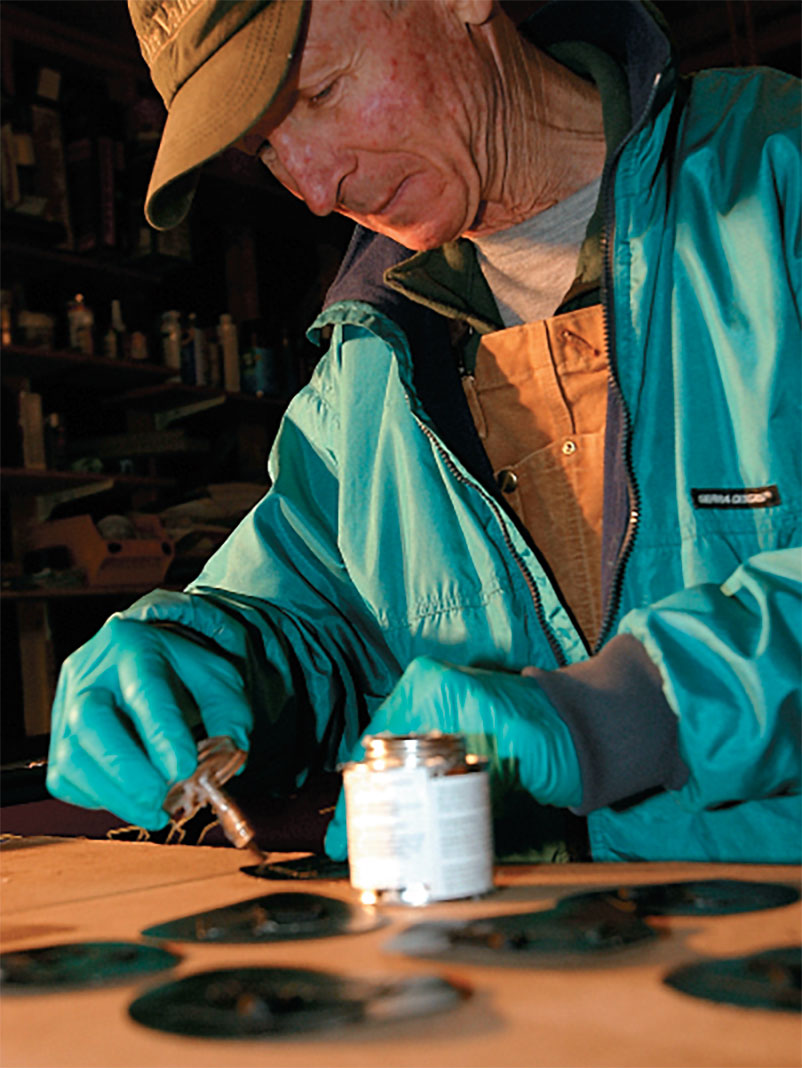
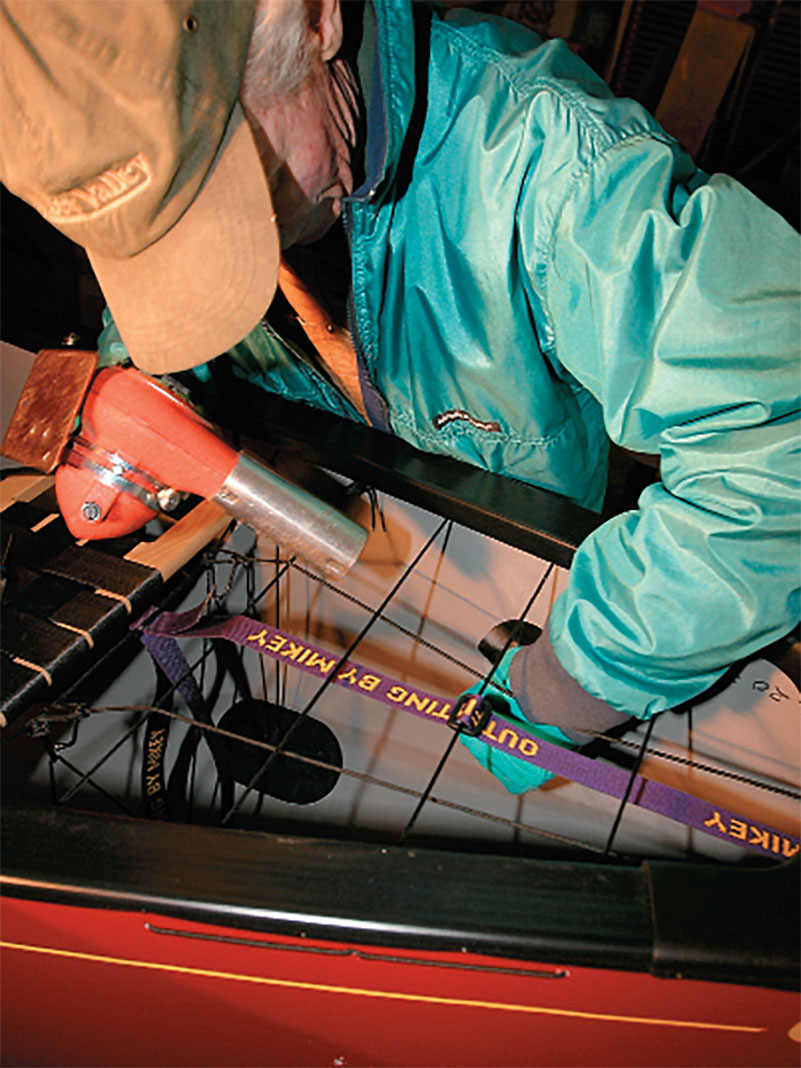
The secret to installing secure vinyl anchors is to keep everything clean. Wipe the hull and anchors sparingly with acetone. Wearing gloves, apply vinyl glue to both surfaces; be sure to go right to the edges. Let dry 15-20 minutes. Reactivate the glue with a heat gun, align and stick. Roll out with lots of pressure using a screen door roller tool.
Be sure to let it dry for 24 hours before you thread your thigh straps and haul on the anchors.
Although some paddlers may say we’ve gone overboard on the outfitting for wilderness river trips, the sporty Canyon with fully rigged outfitting bridges the gap to tandem playboat.
But, we didn’t stop there.
4 Getting northern-river ready
With dreams of traveling north to explore the massive rivers draining the Hudson Bay watershed—the Harricanaw, Rupert and Moose—I placed a call to Morgan Goldie at North Water to order our Expedition Spray Deck. I found myself in the garage with a tape measure and the cordless phone.
I hadn’t thought about it, but all canoe covers are custom-made. Any modification from the canoe builder’s specs affects the cut of the deck. I had moved my stern seat eight inches back, so North Water had to cut my cockpit opening to line up with my seat—it’s imperative to have your seats set before you order your deck.
How to install a spray deck
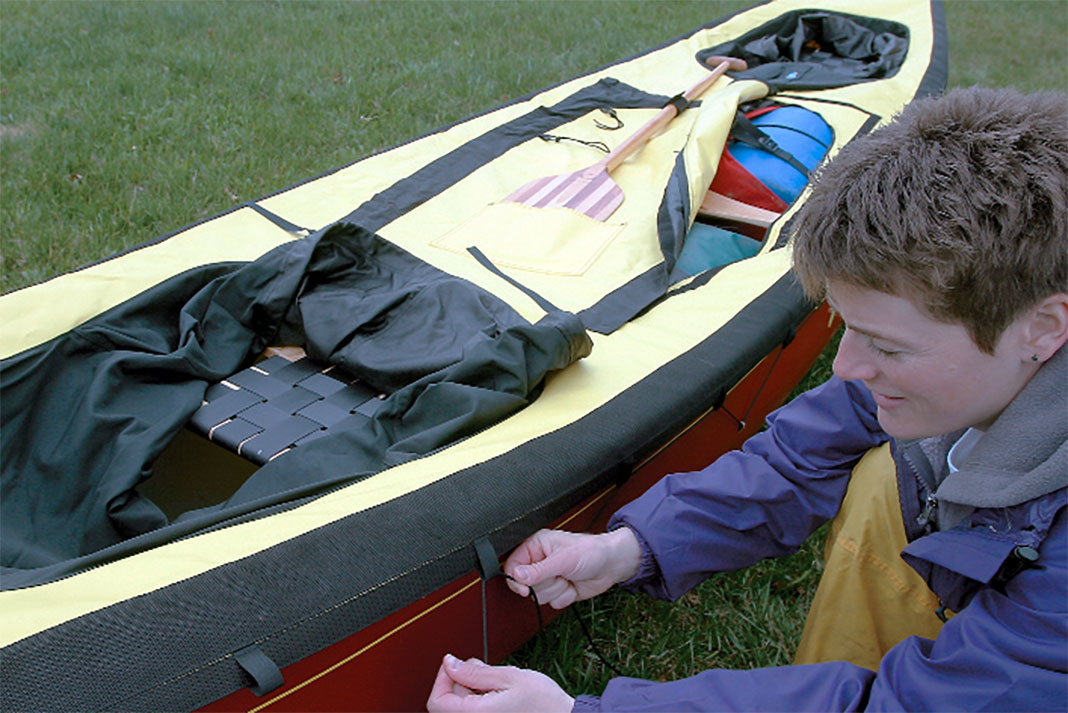
The first step to installing the North Water Expedition Spray Deck is laying it out and using the included jig to mark where you will drill the 12 anchor holes down each side of the canoe. Yes, holes! Some canoe spray covers are attached with Velcro or clasps, and some lash to a strip of webbing riveted from bow to stern. The North Water laces in place with nylon cord weaved through tabs on the deck and tiny loops poking out of the holes. Confused? Read on.
Once we drilled the 3/16-inch holes, we poked the loops through and traced the vinyl patches on the inside of the hull. Apply the supplied vinyl adhesive to both the patch and the hull. The secret is to let it dry, reactivate it with a heat gun and then carefully stick it in place.
Working around our existing bag cages and outfitting was a little awkward but doable. Before beginning the project, we checked that the North Water was compatible with our Mike Yee outfitting. The grab loops and outfitting anchors don’t interfere with the spray cover. Setting the deck anchors in place is a one-shot deal. We installed the first few patches in places hidden by the deck plates or float bags in case they weren’t too pretty. Be sure to rub firmly (especially the edges) with a blunt object such as a screwdriver handle or ideally a screen door roller tool to secure the bond.
See why the North Water system is so clever? The drilled holes are filled with nylon loops and patched on the inside. No sharp edges. The boat is completely watertight. And you only see little black dots on the outside of the hull. The deck laces in place using nylon cord and secures around the bow and stern with webbing and ladderlock buckles. The Expedition Spray Deck covers most of the deck plates, so North Water has sewn on Velcro loops for painter storage. The deck comes with one paddle pocket and we added tabs to hold a map case. The large cargo access option is key for easy access to barrels and packs.
5 Getting ramming-speed ready
There is no doubt in my mind that Captain Kirk had a quality set of Voyageur skid plates protecting the bow and stern of the Enterprise. Low-water weekend trips grinding down the Petawawa, Dumoine, Coulonge and Madawaska take their toll, even on ABS boats. And “ramming speed” is the ABS canoeist’s answer to shallow sections and keeping feet dry at portages. When you wear the skid plates out, simply grind them down and slap on another set. Remember this isn’t a cedar dock decoration. This is our whitewater UTC.
How to install a skid plate
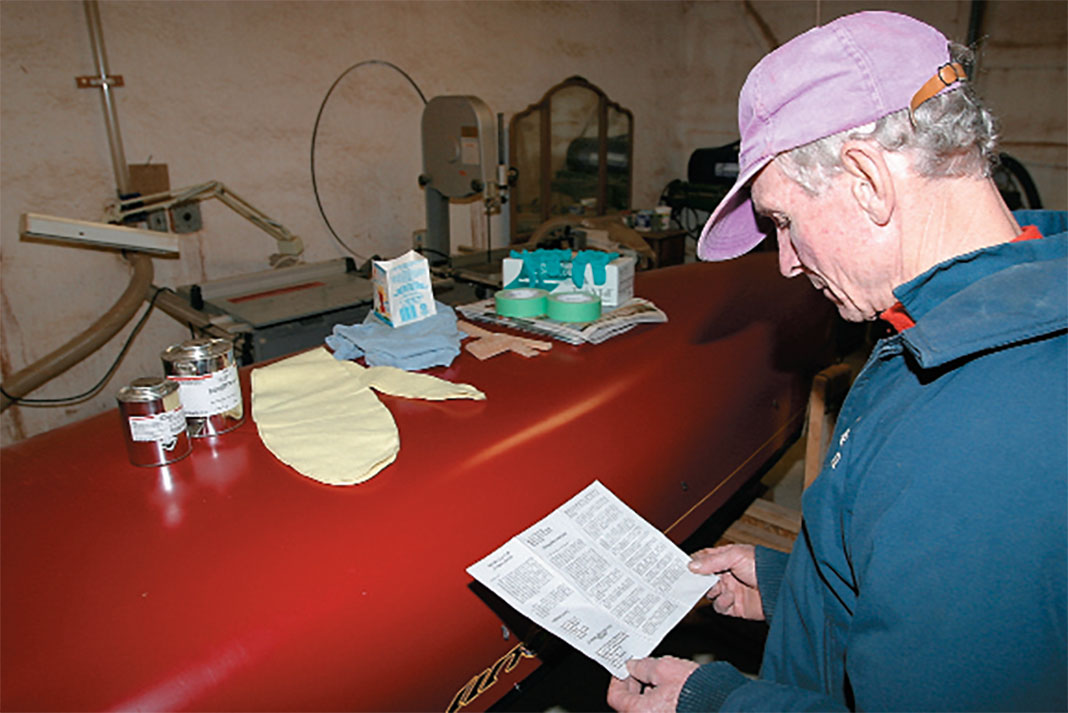
Step one: Collect and organize all necessary items. The Voyageur skid plate kit comes with almost everything you’ll need: Kevlar felts; resins; sandpaper and sanding blocks; gloves and (yes, we read them) instructions. You’ll need to round up a mixing container, masking tape, stir sticks and a disposable surface for apply the resin to the felts.
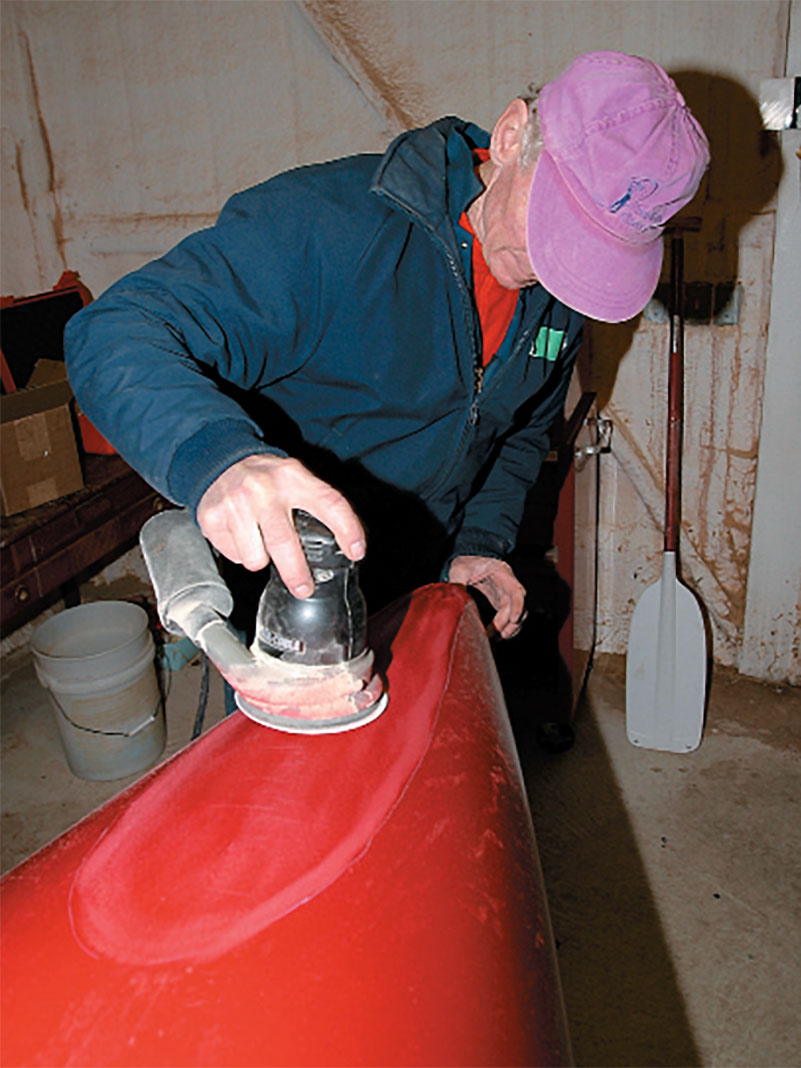
Whether you’re building your UTC from scratch or souping up your existing boat, you’ll need to roughen up (or maybe smooth out) the Royalex. Trace the felts and sand a half-inch or so past your outline—we found the patches tend to expand when wet with resin. Use the included sandpaper or speed up the process with power tools. CAUTION: sand gingerly, just roughing up the surface, not removing it. Brian took over the sanding.
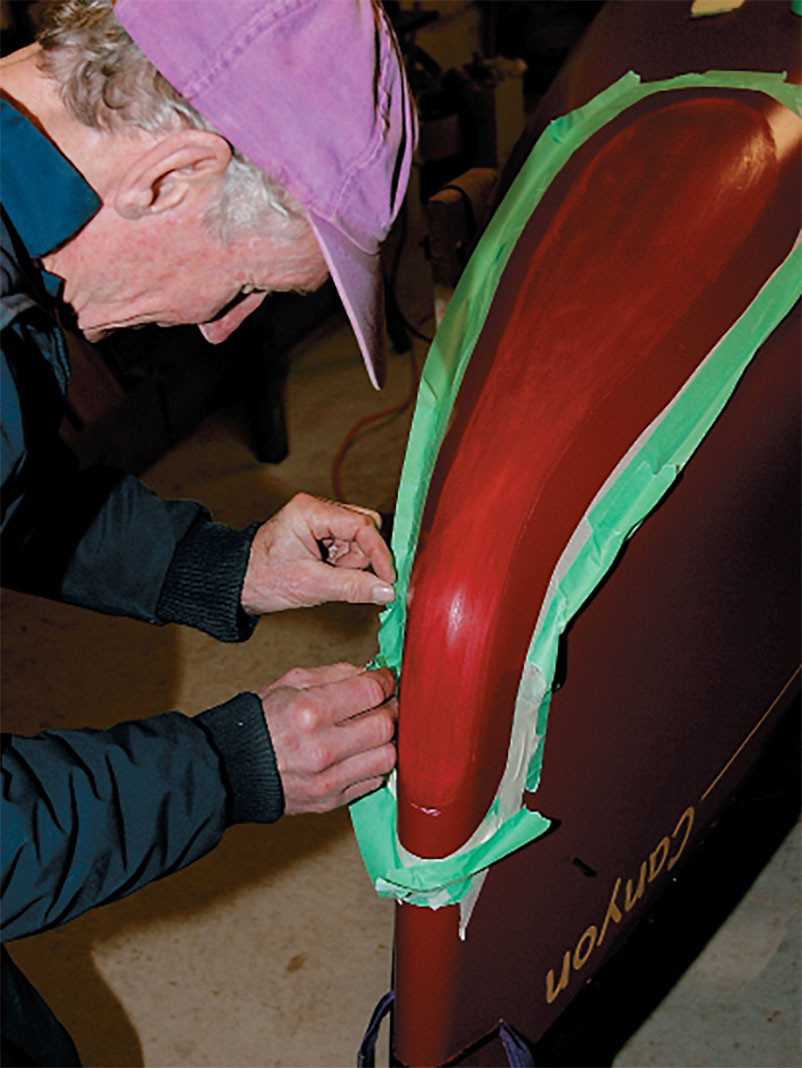
Not only did Brian mask out the area. He created a rain gutter border to channel any excess resin. He masked an inch outside of where we expected the skid plates to be and then painted the entire area with resin for a clean-looking finish.
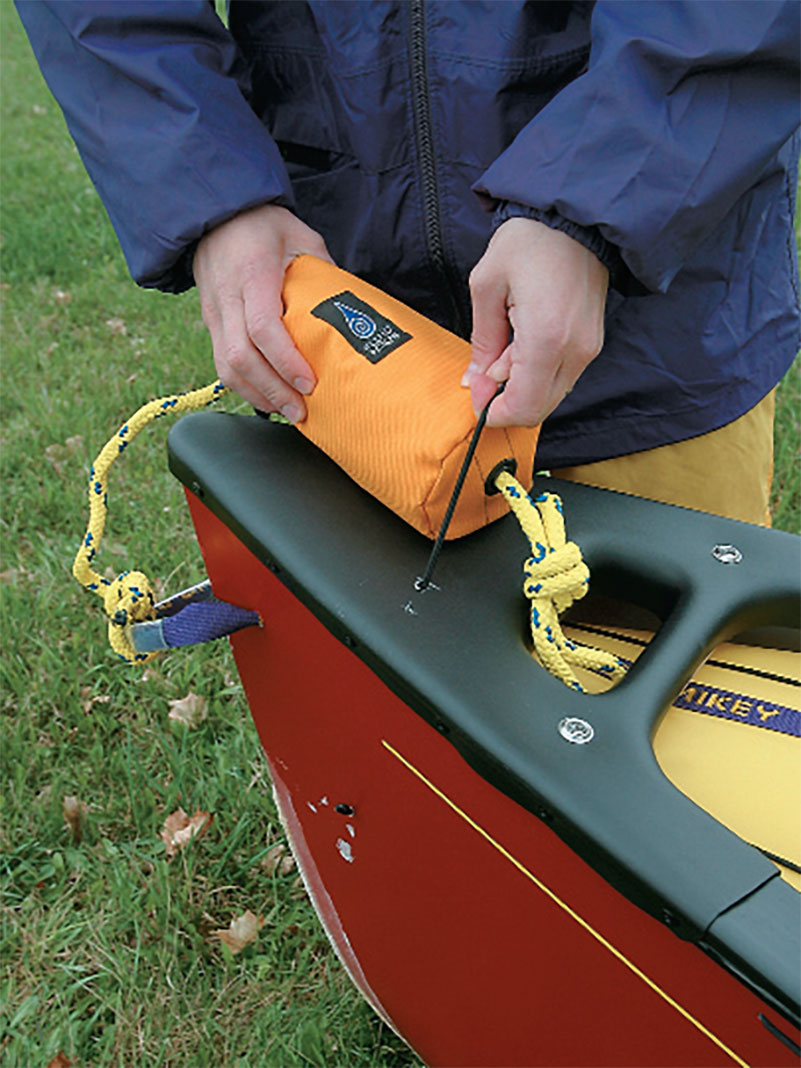
Ropes on your canoe need to be accessible when needed and otherwise out of the way. Brian’s bungee cord on the deck is cheap, easy to install and works like a charm. The secret is to ensure it is perpendicular to the boat. The Fluid Designs painter bags hide the standard 30 feet of bow and stern rope and are easily re-rigged for self-rescue or lining.
6 Finishing touches
“You’ll thank me later,” Brian said as his Black and Decker augered holes in the Canyon’s plastic deck plates. I’d sourced a pair of Fluid Designs’ nacho-coloured Painter Bags. These babies are the bomb for keeping your ropes from looking like bowls of spaghetti. They come with 30 feet of floating 3/8-inch rope stuffed inside. Through his new holes, Brian tied short pieces of 1/8-inch bungie cord and snapped my painter bags in place on the decks—very clever. With age comes wisdom.
How to install a deck bungee
Too cheap to smash the celebratory bottle of Blue Nun on her bow, we slid our UTC quietly into the river—no marching band or confetti. Feeling like we’d just walked into a honky tonk in graduation tuxes we ferried our fully rigged and decked northern river tripper into the crowded eddy of Class II weekend canoeists. My whitewater adolescence paddling in beat-to-a-pulp rental canoes is over.
This two-part article was first published in the Early Summer 2003 and Summer 2003 issues of Rapid Magazine. It was republished in part in the Spring 2008 issue of Canoeroots Magazine. Subscribe to Paddling Magazine’s print and digital editions, or browse the archives.
With Dagger scaling back their whitewater canoe division, there’s a gap in the market for smaller start-up companies like Raven Works, which began building boats in 2000 and makes the 17’ Nemesis (16’11”) tandem whitewater tripping boat.
Design
Most whitewater tripping boats are a compromise between efficiency on the flats and manoeuvrabity and dryness in the rapids. Lakewater tripping canoes have sharp lines that offer efficiency but the resulting low volume usually leaves whitewater paddlers crashing through waves rather than riding over them. Whitewater boats sacrifice speed with blunt, voluminous ends for buoyancy. Nemesis designer Skip Izon set out to combine the best of both.
The bottom section of the Nemesis’ bow and stern has the sharp lines of a touring canoe. Above that the hull flares radically. The idea is to give the boat a waterline profile that’s sharp for speed in lakewater, while the flare sheds water from the bow and stern. Izon also gave the Nemesis an asymmetrical hull, which adds straight-ahead speed but means it’s not intended to be spun around and paddled solo from the bow seat.
The hull
We took a prototype of the Nemesis on a four-day trip down the Petawawa River and found that not only was it great on the lake sections, but the rocker—four inches at the bow and two inches at the stern—was enough to let it snap in and out of eddies. With plenty of tumblehome at the paddling positions, the boat felt narrow and it was easy to plant quality strokes.
But we weren’t convinced that our Nemesis- in-progress fit its billing as a big water tripping boat. Other paddlers could see the water shedding off the bow flare as designed to but there just wasn’t enough boat above the water to keep us dry.
A quick phone call after our trip saw us set up with a much deeper and drier production model. Izon had added almost five inches to the depth for a full 21 inches in the bow, 15.5 in the centre and 20 in the stern, ensuring a dry ride.
The interior
One result of the Nemesis’ chisel-sharp entry lines is the notable lack of interior volume in the bottom of the bow and stern. If you’re packing flotation this isn’t an issue, but if you need the space for gear, your drybags better be long and narrow. Bow paddlers used to ample legroom have to get used to the tapered bow.
The webbing seats are bolted to aluminum hanger brackets rather than ash spindles, a durable system unlikely to break or rot. The aluminum flexes, allowing the seat to shift side-to- side. The seats are set quite low and can easily be raised for tall and big-footed paddlers by inserting wood spacers between the seat and the bracket. There is plenty of room mid-ship for tripping gear although you’ll have to re-drill the vinyl-covered aluminum gunwales and move the thwarts to accommodate four blue barrels, if that’s your system.
No compromise
Unless you’re fortunate enough to paddle exclusively continuous mountain rivers, choosing a whitewater expedition boat has always meant choosing between flatwater efficiency and whitewater performance. What sets the Nemesis apart is its hull shape designed to eliminate the compromise.
Specs
Length: 16’11”
Width: max 38”, waterline 33.75”
Depth: bow 21”, centre 15.5”, stern 20”
Rocker: bow 4”, stern 2.5”
Shape: asymmetrical, buoyancy 53% aft
Recommended capacity: designed 400-700 lbs, max 1,200 lbs
Weight: 75 lbs in Royalex
MSRP: $1,095 USD / $1,725 CAD
This article first appeared in the Spring 2003 issue of Rapid Magazine. For more great boat reviews, subscribe to Rapid’s print and digital editions here.
David Lech, Ottawa ON: Planning a self-supported kayak trip you struggle to leave behind the comforts of home yet discover on the river that you possess absolutely everything you need.The minimal gear and food that you are able to take actually reinforces the vastness of the land- scape, the power of the water, the vagaries of weather and the foolishness of your ambi- tion and pride. Most of all, wherever you may explore, expedition kayaking teaches you to rely on yourself.
Derek Endress, Whitehorse YT: I look up at Ken standing at the put-in for the Alsek River, gear and food strewn around us. We are just outside of Kluane National Park in Haines Junction, Yukon. He just smiles when I tell him I can’t fit everything into his Dancer. On two days notice I bor- rowed his spare boat for a 12-day unsupported trip to look at the notorious Turnback Canyon. Ken looks at me, “Hey, you could wear the backpack you have to get your gear around the eight-mile walk on Tweedsmuir Glacier.” Great idea Ken.
Heading down the Dezadeash River into the Kaskawalsh then the Alsek, the first day, of many, goes by with our narrow displacement-hull sterns underwater.Smiling at each other paddling our plastic barges with an additional 20 pounds on our backs, I keep asking him, “Where is the first Class IV rapid?”
Scott MacGregor, Quadeville ON: Expedition kayaking is canoe tripping with two blades and no cappuccino maker.
Stuart Smith, Squamish BC: During solo kayak expeditions, the challenge is recognizing or approaching your limits, be they physical limits—portaging across a range of mountains, paddling a difficult rapid, or dealing with adverse conditions—or mental limits—maintaining the focus needed to do days of hard whitewater, dealing with the intensity of remote and isolated areas where there is no assistance, and the challenge of learning self sufficiency in unknown or changing conditions.
When paddling with a group you add group dynamics.The challenges are not only your own personal tests, but also those of the other group members. The rewards are often greater as the shared experience creates kindred bonds which last the rest of your life.
As with most truly moving experiences the rewards and satisfaction are proportional to the efforts, and oftentimes to the risks. To grow I find myself needing to explore beyond known bounds.
Steve Whittall, Whistler BC: Expedition kayaking represents the ultimate paddling experience, combining the exhilaration of whitewater with a grander notion of river travel and exploration. Running a tough drop three days into a week-long expedition feels very different than paddling roadside. The team’s combined paddling skills allow you to explore with confidence, unravelling the mysteries posed by a few winding blue lines on the topo map. And in the end, whether or not you choose to run the big line is almost irrelevant.
This article first appeared in the Spring 2003 issue of Rapid Magazine.
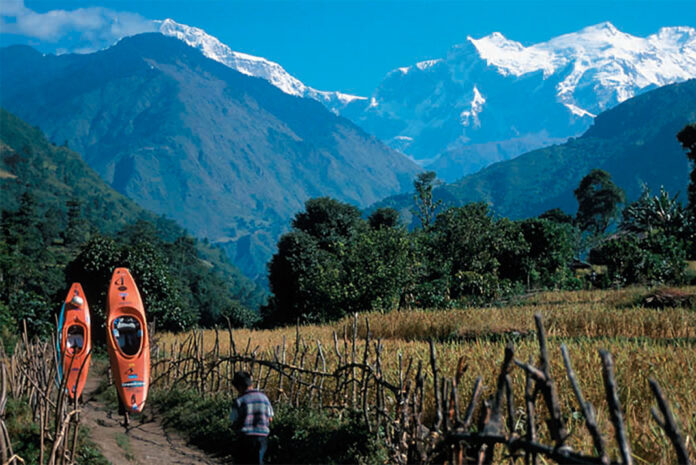
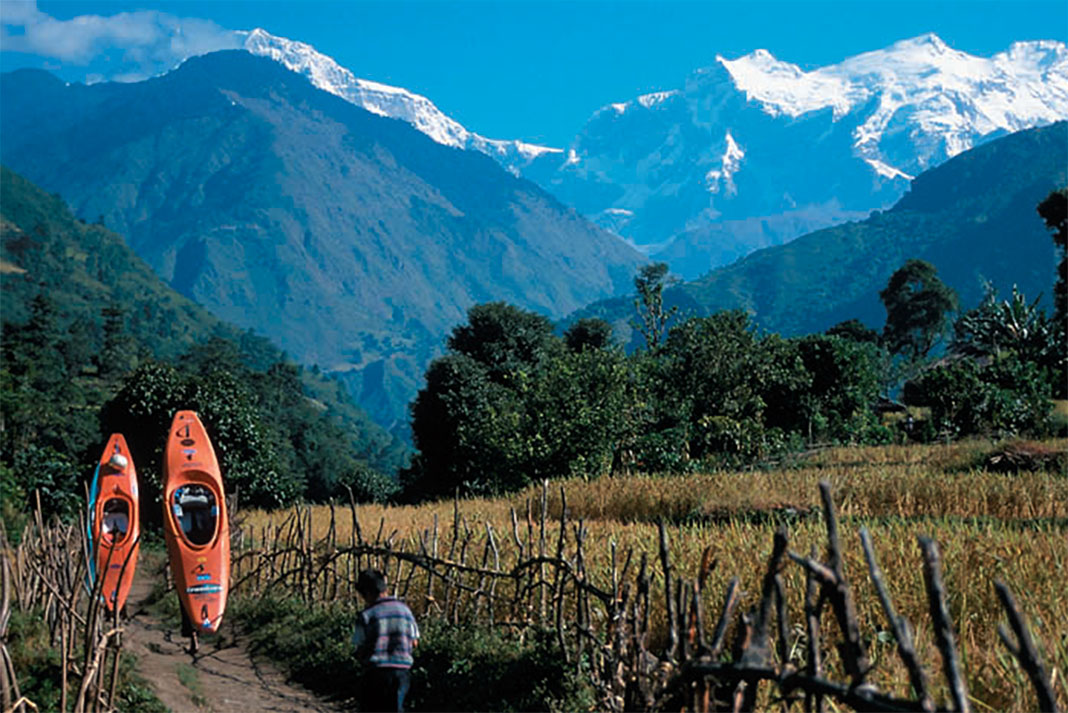
Marsayandi River, Nepal: Five miles and uphill both ways. | Feature photo: Dunbar Hardy
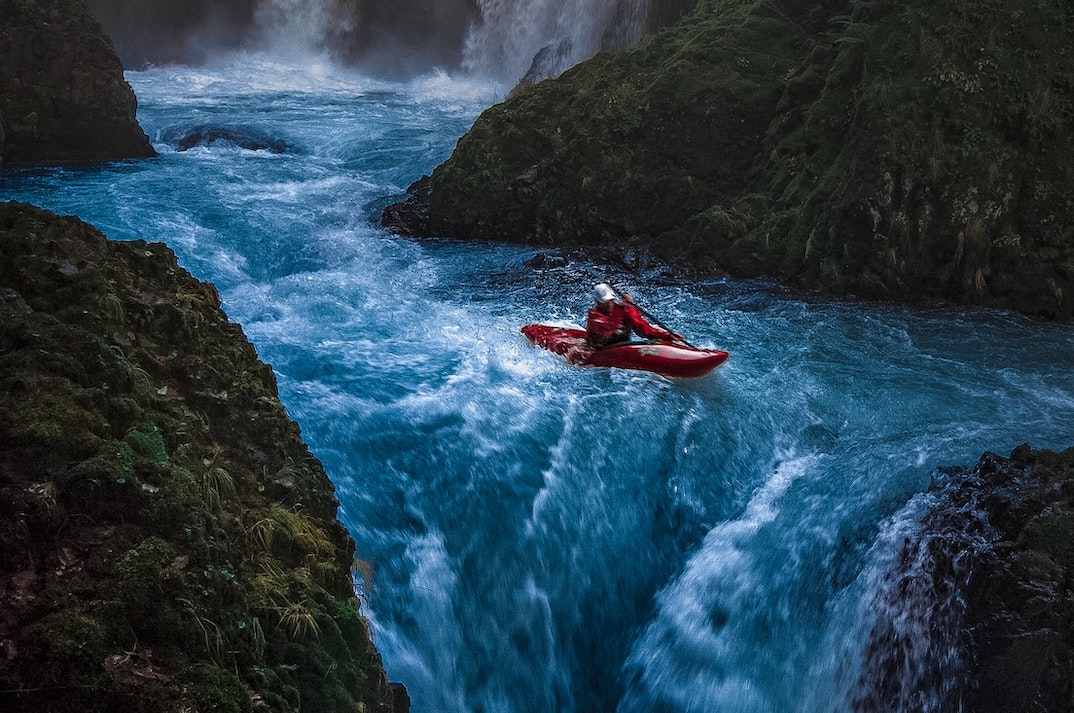
Expedition paddling is about the journey. It is immersing yourself in an untouched, inaccessible wilderness to experience some incredibly beautiful places. Once you find yourself getting fired up over topo maps, wondering what excitement lurks in a particular drainage and needing to find out, the next step is outfitting yourself for the journey. Every kayak trip you’ll come up with a few new outfitting ideas and once you have your system dialed, there will be no stopping the inquisitive explorer within you.
Big trip, small boat: Outfitting yourself for an expedition
1 Estimating time
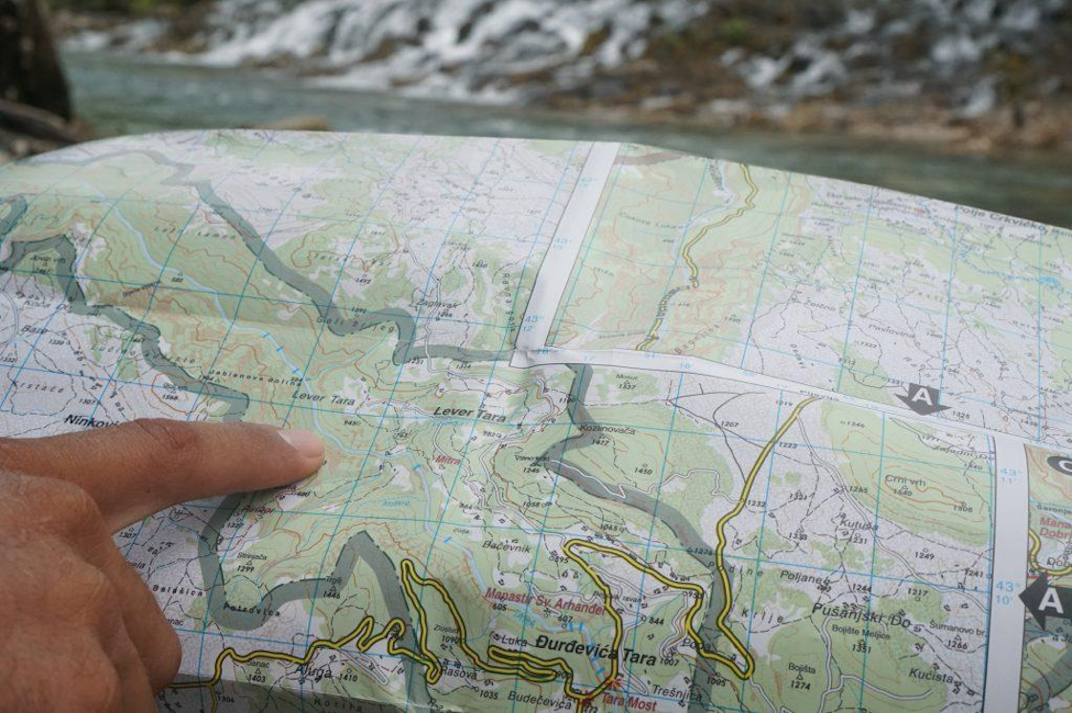
If the river has been paddled before, try to find magazine articles, guidebook descriptions, firsthand knowledge and photographs of the expedition you plan to tackle. If little or no information is available, a lot can be determined from topographic maps.
Calculate distances and gradients, breaking the run down by the kilometre or mile and contour interval to estimate the duration of the trip. As a rough guideline, estimate travel speeds at five kilometres per hour for gradients less than 100 feet per mile (fpm), two km/h for steeper sections of 100–150 fpm and for intervals over 150 fpm, anticipate portages and add time accordingly. Be conservative. Aim to paddle four to six hours per day. This will give you time to dry camping gear by the fire in the morning and to dry paddling gear in the afternoon. If the weather dictates, you can always pick up the pace.
Knowing how many days you’ll be on the river allows you to select your kayak, sleeping system, menu and cooking system and packing strategy.
Marsayandi River, Nepal: Five miles and uphill both ways. | Feature photo: Dunbar Hardy
2 Boat selection
Kayak selection will depend on the difficulty of the run, river character, gradient and volume, length of trip and climate. Most likely, you’ll be paddling a creek boat to ensure that there’s enough room for all of your gear. For less difficult rivers, larger volume expedition boats will allow you to travel with a few more camp comforts.
Regardless of your selection, your kayak will paddle differently when it’s loaded. The boat that you love for your roadside paddling adventures may sit too low in the water once you add 40 pounds of overnight gear. Your favorite creek boat’s usually forgiving stern may start to grab, or even squirt, on eddy lines. The added weight will make boofs more effort, quick direction changes more challenging and technical paddling a half-grade more difficult.
Your kayak’s lower position in the water will exaggerate its tracking tendencies. As a result, you may be happier in a kayak with more rocker than you might normally enjoy. I typically paddle a Perception Java, but for longer, more gear-intensive multi-day expeditions, I may pull out the larger-volume Phat. For my weight of 145 pounds, I find that the Phat actually paddles better when loaded, with the extra weight and hull displacement taming its spin-on-a-dime nature and improving its hole-punching abilities. Experiment for yourself!
A high back deck, with removable backband, is crucial for allowing easy access for packing gear into the stern of your kayak. Adequate space in front of your bulkhead is also important to ensure that your loaded kayak is balanced. If necessary, shift your seat forward to help adjust the trim of your kayak.
Kayaks such as the Prijon Embudo and Eskimo Salto that don’t require structural pillars are certainly easier to pack gear into. Extra room tends to get filled with more stuff, so be careful—especially if you anticipate any long, arduous portages. Think twice about removing pillars to make additional room for your gear. For one expedition, I removed the stern pillar from a Pyranha Micro 240 only to realize that it served a major role in stabilizing the seat laterally. Five or six big drops later, my seat had split in two.
Increase the available packing space by customizing your boat. Cut out access panels in your pillar and/or bulkhead to create storage compartments. Build a shelf under your front deck. Carve a hole in your hip pad for your Leatherman or toothbrush. Use a hole-saw to lighten the weight of your outfitting components, but again, consider structural integrity. Rig up a shoulder pad or backpack harness for long portages. Be creative.
[ Paddling Buyer’s Guide: View all creek boats ]
3 Sleeping gear
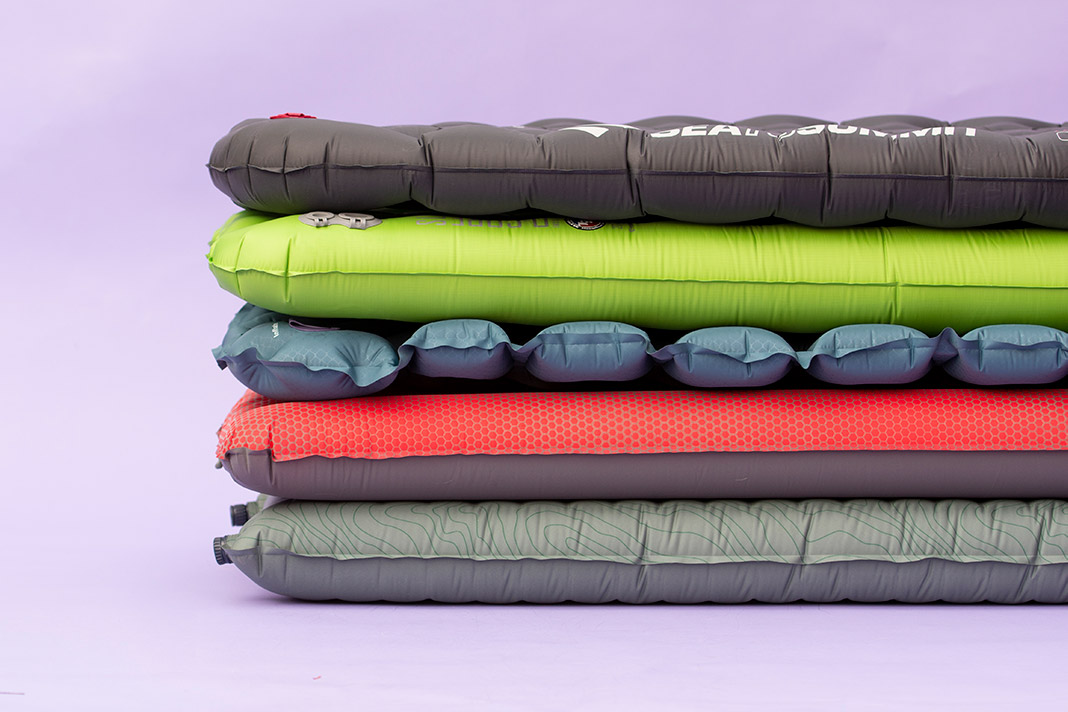
Volume is usually the critical factor when selecting sleeping gear. You’re not going to be able to bring a tent unless you are on a longer, easier trip in a big boat. You’ll have to settle for some low-volume combination of sleeping bag, mattress and tarp or bivouac sack.
The debate over down versus synthetic sleeping bags is quite simple. Down is better when cold temperatures are expected since you definitely won’t be able to fit a winter-weight synthetic bag in your kayak. But remember that a wet down bag spells trouble.
Research what type of campsites can be expected. Will you find open, sandy beaches or have to make do with a rocky ledge in a tight canyon? Hardcore expedition paddlers will use their paddling gear to sleep on. You’ll probably appreciate the extra comfort of an ultralight sleeping pad which rolls down to the size of a football and should be easy to fit in your boat. Although I’ve seen it done, a closed-cell blue foamy will take up too much space.
If mosquitoes or blackflies are anticipated, a bivy sack complete with mesh inner liner is your best bet. For rain protection, the bivy sack will also do the trick, but torrential downpours are definitely better spent under a lightweight tarp. The tarp is also indispensable for cooking or time spent hanging out in the rain. Quite likely, if it’s a solid rain, you’ll just want to keep on paddling. Better yet, check the extended weather forecast—if you can’t postpone your trip until better weather, you may want to bring a tarp and bivy sack.
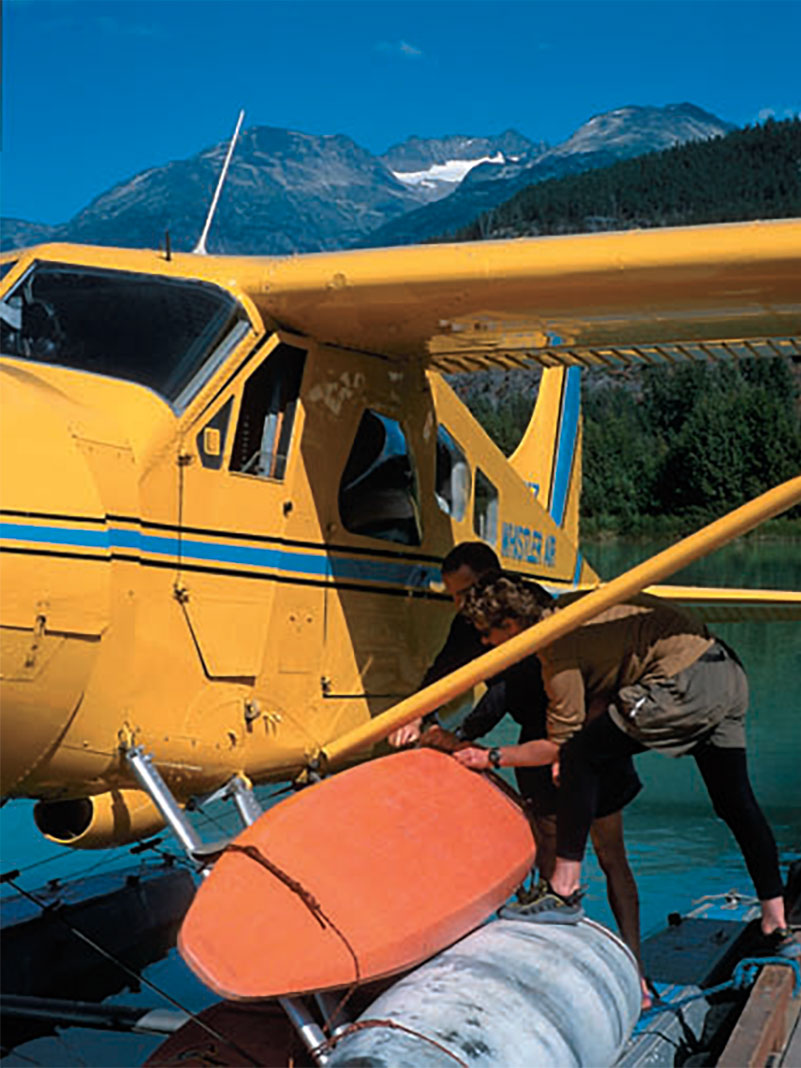
Planes… | Photo: Steve Whittall
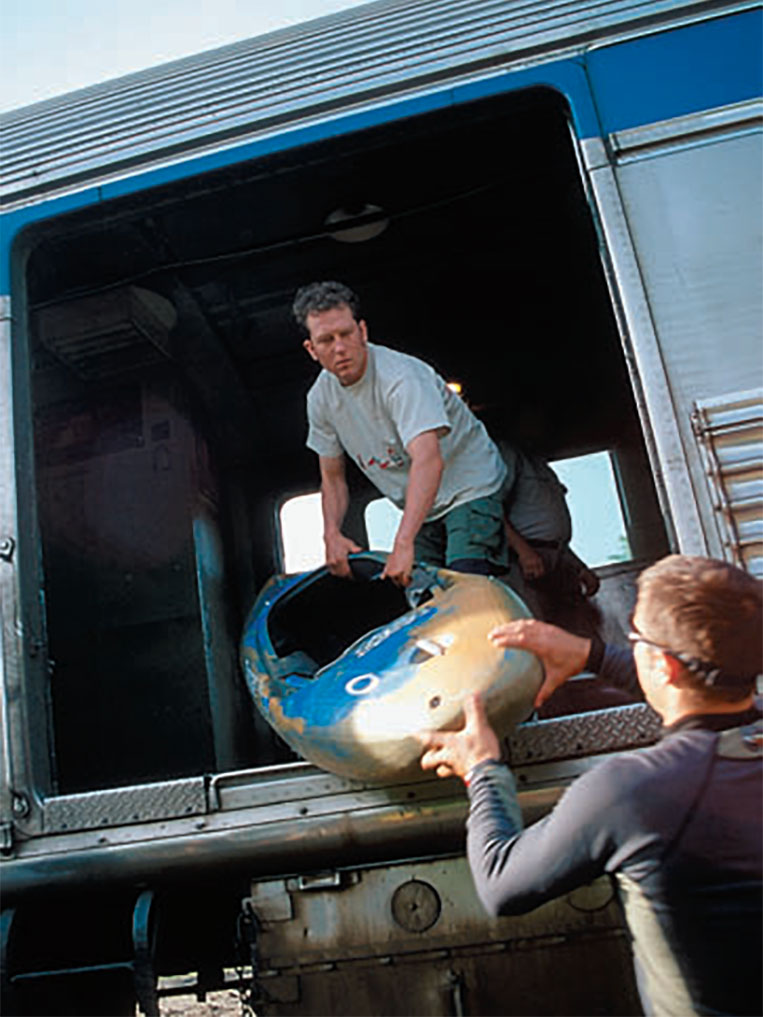
Trains… | Photo: Tyler Curtis
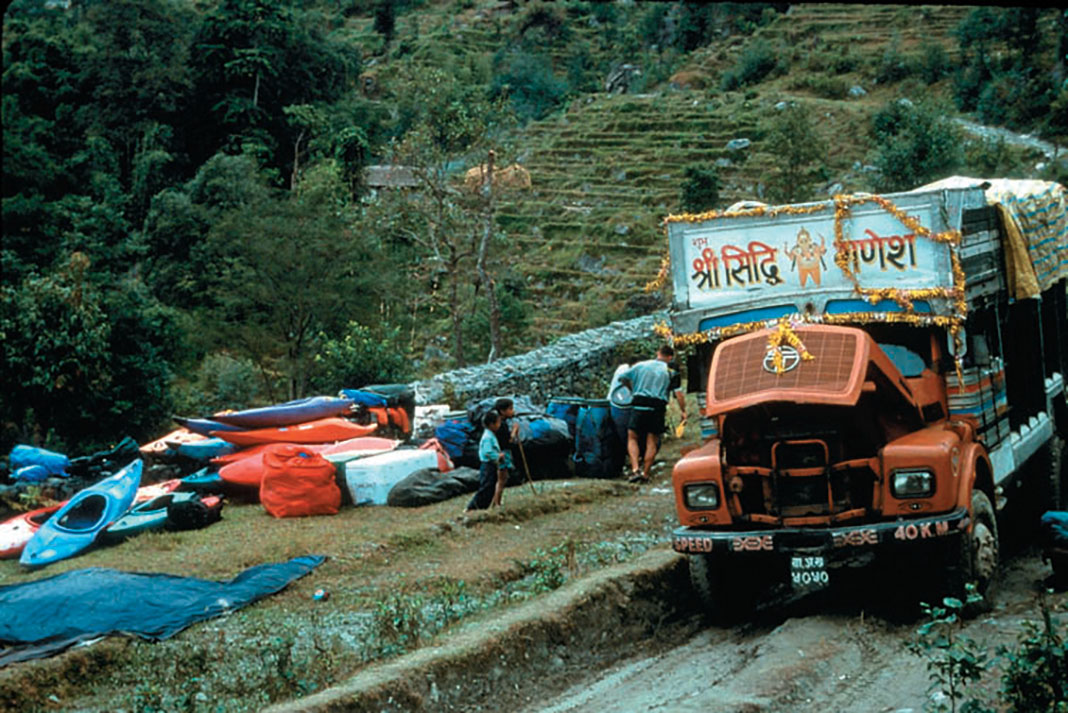
…And automobiles. | Photo: Dunbar Hardy
4 Food and cooking equipment
Is a stove absolutely necessary, or can you get by cooking on an open fire with a single pot? For northern trips, firewood may not even be an option. If there is a source of wood, you’ll probably want a fire simply for warmth or drying gear. Bring waterproof matches or a lighter and some type of fire starter (tea light candles work well) to dry out kindling and get even the wettest of wood going.
Plan a typical backpacking-style menu of dehydrated meals, pasta or rice, instant oatmeal for breakfast and dried fruit. On shorter trips, limiting yourself to dehydrated food isn’t really necessary. If you’re Clay Wright, just buy six or seven Big Macs, squish them into a small Tupperware container and you’re ready to go.
Organize your food into meals and/or days for longer trips. Ensure easy access to snacks and your lunch—you don’t want to pull your boat apart every time you’re hungry. Where possible, prep your food at home. And don’t forget your water filter if water quality issues are a concern. A Nalgene bottle with filter attachment is a great combination.
5 Rescue gear
Whether paddling for the day or on a multi-day self-supported expedition, a throw bag, wrap kit, whistle, river knife and first aid kit are essential tools for every kayaker. As with all rescue pre-planning efforts, you need to prepare yourself and your team for the worst-case scenario. Brainstorm the “what ifs” that pertain to your trip and come up with a plan, as a group, to deal with each of these potential situations.
The big difference between multi-day expeditions and day-trip paddling is the increased consequence of any problem. Carrying a breakdown paddle, for example, is absolutely necessary if the alternative to being able to continue paddling is a 100-kilometre hike. Note that a four-piece breakdown may be required for today’s shorter kayaks.
Consider some method for patching boats while on the river. As a minimum, wrap some duct tape around the shaft of your paddle. Willie Kern carried—and ended up using—roofing material to patch a cracked kayak on his 2001 Stikine Expedition. A Leatherman and basic tools may also be invaluable. Make sure you have a multi-head screwdriver and wrench to fit every nut and bolt on your boat. And don’t forget your headlamp.
Does the river require that you bring specialized climbing gear? A wrap kit of webbing slings, prussiks, carabiners and spectra throw-bag is an absolute minimum. Know how to build a harness out of webbing, rappel and belay and practice basic climbing skills.
Finally, consider the communication requirements of your team. Can a cell phone be of any use? If not, a satellite phone can be rented for the duration of your expedition and is worth every penny. Consider radio communications within your party and research all useful frequencies for contacting outside parties.
6 Clothing
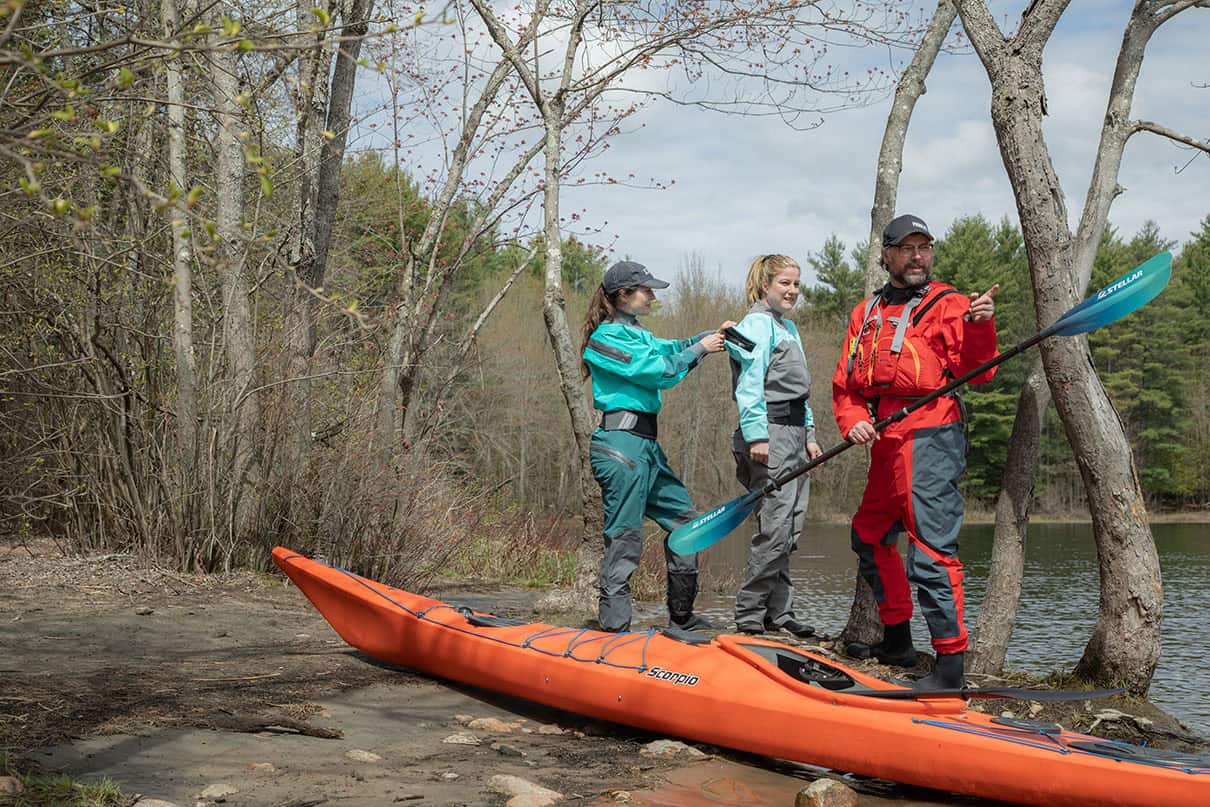
Obviously your clothing requirements will depend on the local climate, extended forecast and typical water temperature. It’s easier to pack for a multi-day trip in California or Costa Rica than for northern or alpine rivers. In any event, consider both paddling and camp gear, trying to combine these if possible. In colder climates, a full Gore-Tex drysuit with camp clothes underneath greatly reduces the amount of clothing you need to bring. For camp, a hooded down jacket provides the most warmth for the least volume. But if you bring down, be anal about keeping it dry. And bring a toque, eh!
Don’t bother with rain gear—a tarp is much more versatile. Keep your river gear on if it’s raining. Wear sturdy river shoes that you are comfortable making basic rock-climbing moves in. If you lose your boat or gear, you may be hiking out a long way. As a treat, bring some comfortable camp shoes or sandals to give your feet a break.
Make sure the drybags you intend to use fit in your boat and fit all of your gear before you head off to the river. Do a dry run of your packing strategy at home. Tapered drybags are great for taking full advantage of the potential packing space in your kayak. A cheap alternative to drybags are plastic Ziploc bags, but double them up and only include items that you can afford to get slightly wet.
For cameras or video gear, Pelican cases are great, but may be difficult to pack. You may be able to cut them into the foam of a rear pillar. Many paddlers keep cameras in cases or bags between their legs for quick, easy access. Make sure you can still get in and out of your boat.
8 Packing your boat
It’s always easier to pack the stern, so the challenge is to get enough weight forward to balance the trim of your kayak. To get gear forward of the bulkhead, it’s easier to pack in multiple small bags, rather than one larger drybag. I double-Ziploc food items and slide them past my bulkhead individually. To ensure that these smaller items can’t slide out, I glue a thin foam barricade to the bulkhead.
If you have long legs, you might have to remove all the foam from the bulkhead to create more packing space. In any event, work out some system to pack your heaviest items up front, within the pillar or bulkhead, or right behind your seat. Adjust your packing strategy as you go through food supplies to keep your boat balanced.
Expedition kayaking is all about exploring and finding magical places that would be impossible to access without paddling. It’s our big reward for a few hard knocks and a lot of persistence in becoming competent whitewater boaters. These special places are ours alone, reserved for paddlers only.
This article was first published in the Spring 2003 issue of Rapid Magazine. Subscribe to Paddling Magazine’s print and digital editions, or browse the archives.
Marsayandi River, Nepal: Five miles and uphill both ways. | Feature photo: Dunbar Hardy



 This article first appeared in the Summer 2003 issue of Canoeroots Magazine. For more great content, subscribe to Canoeroots’ print and digital editions here.


 This article first appeared in the Spring 2003 issue of Rapid Magazine.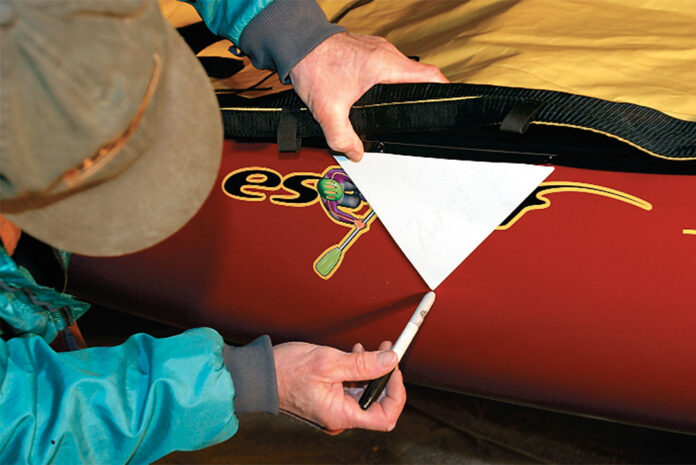
 This two-part article was first published in the Early Summer 2003 and Summer 2003 issues of Rapid Magazine. It was republished in part in the Spring 2008 issue of Canoeroots Magazine.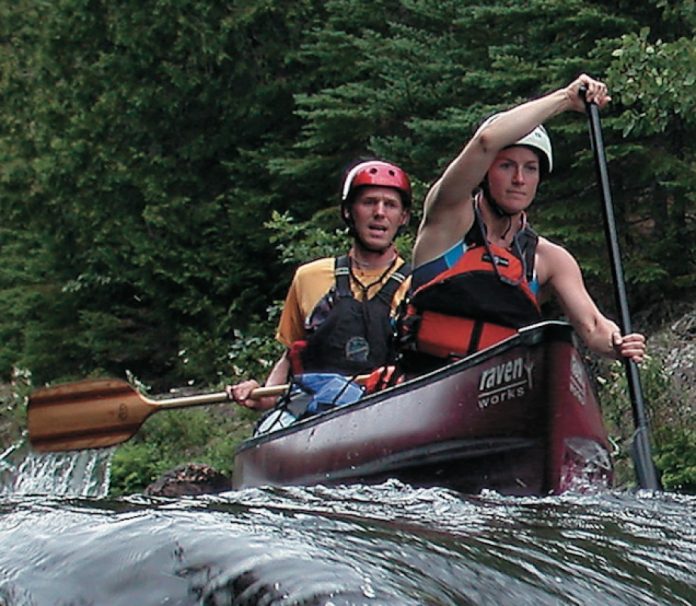
 This article first appeared in the Spring 2003 issue of Rapid Magazine. For more great boat reviews, subscribe to Rapid’s print and digital editions
 This article first appeared in the Spring 2003 issue of Rapid Magazine.