For big water kayakers, the year is not segmented by regular seasons. Spring is generally replaced with “stakeout” season, a term first coined several years ago by Pat Camblin in reference to someone literally surveying–or “staking out”–a wave.
“Stakeout is one of the best seasons of the year,” claims Dane Jackson in his most recent video. Jackson is referring to the annual pilgrimage to eastern Canada to paddle some of the biggest paddle-able rapids and waves on the planet. “Whether you get to surf the biggest and baddest waves, or just simply run the biggest whitewater. There is never a dull day,” he says.
In the video, Jackson checks out the Mistassibi River in central Quebec at rowdy flows. Watch how he gets on.
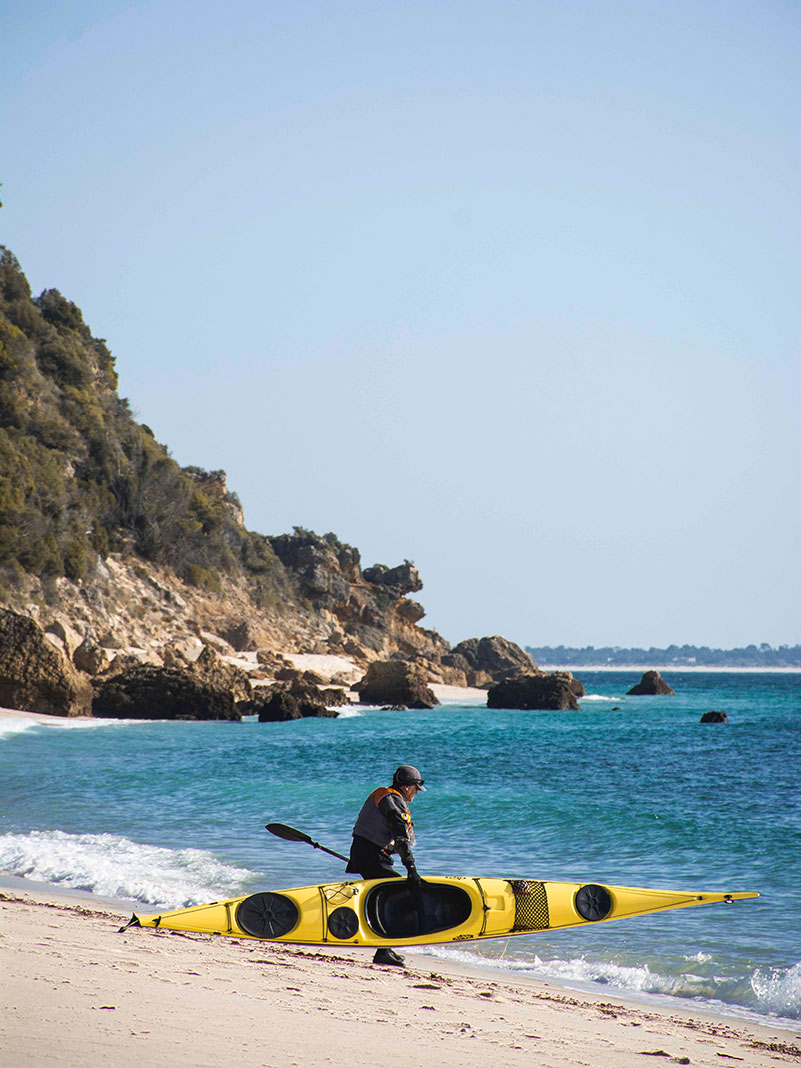
Ocean sea kayaking trips in areas subject to significant tidal current activity require paddlers who can read a tide table and consult the area’s tidal current atlas to establish the times of slack, maximum flood and maximum ebb. This is true if your goal is to play in those currents or avoid their effects.
[ Paddling Buyer’s Guide: View all sea kayaks designed for surf ]
What are tidal currents?
The vertical motion of tides raising and lowering near the shower creates currents, which move horizontally depending on whether the tide is coming in or out. As the tide comes in, the current moves toward the shore and is called flood current. As the tide goes out, the current moves away from the shore and is called ebb current.
Slack (or the “turn”) is the time when a tidal current reverses its direction and turns to flow in the opposite direction. | Photo: Red Zeppelin/Unsplash
Slack (or the “turn”) is the time when a tidal current reverses its direction and turns to flow in the opposite direction. This is the time when currents will be minimal or nonexistent and the water is at its calmest for safe travel. Information in the tidal current atlas will also provide you with the time of maximum flood and maximum ebb, and their respective speeds, in knots.
Finding slack, maximum flood and maximum ebb in this manner is relatively straightforward. To estimate what the current will be doing between these times, however, is not as easy as you might think.The cycle of tidal currents is such that a flood or ebb current lasts approximately 6.5 hours. A tidal current accelerates from slack (zero) to maximum speed over approximately three hours. The current then begins to slow again, heading toward the next slack, and this deceleration also takes about three hours.
Common sense might lead you to expect this acceleration and deceleration to progress in a nice logical, linear way from slack to maximum flow and back again. But this isn’t the case. To predict flows between maximum and slack, you need to use the Rule of Thirds.
[ Paddling Trip Guide: View all sea kayaking instruction and skills clinics ]
Using the Rule of Thirds
The Rule of Thirds breaks each half of the flood or ebb tide into three one-hour segments and states that the current reaches approximately 50 percent of its maximum speed in the first hour, 90 percent in the second hour, and 100 percent in the third hour. The current then decelerates to slack in the same order.
You should use the Rule of Thirds as a rule of thumb only. Do your homework, study guidebooks and seek out local knowledge. | Photo: Santiago Ospina/Unsplash
The Rule of Thirds shows that it’s important to travel close to the exact time of slack if you want to avoid paddling in current, because the speed accelerates quickly after the tide turns. It also shows that if you want to play in the current, it’s best to choose a maximum speed that you’re comfortable paddling in, because the current will be running at more than 90 percent of that speed for much of the time.
You should use the Rule of Thirds as a rule of thumb only. Do your homework, study guidebooks and seek out local knowledge, because current speed is far from the sole indicator of a tidal current’s potential for danger. Bottom geography, wind, water depth and shorelines all contribute mightily.
Also, big storms can disrupt the flows of tidal currents and reduce the accuracy of current table predictions. So let the final word rest with a visual appraisal on the scene. If the math works out but the current looks bad, trust your eyes and make decisions accordingly.
If you have a tidal passage that floods at a maximum of 10 knots at 3 pm, you can assume the following pattern. The same formula holds true for ebb tide currents.
Hour zero (12 pm): 0% slack, turning to flood = about 0 knots
Hour one (1 pm): 50% increasing speed = about 5 knots
Hour two (2 pm): 90% increasing speed = about 9 knots
Hour three (3 pm): 100% maximum flood = about 10 knots
Hour four (4 pm): 90% decreasing speed = about 9 knots
Hour five (5 pm): 50% decreasing speed = about 5 knots
Hour six (6 pm): 0% slack, turning to ebb = about 0 knots
This article was first published in Adventure Kayak’s Fall 2008 issue. Subscribe to Paddling Magazine’s print and digital editions here, or browse the archives here.
Alex Matthews is the author ofSea Kayaking: Rough Waters, from which this article was adapted, published by the Heliconia Press.
Big storms can disrupt the flows of tidal currents and reduce the accuracy of current table predictions. | Feature photo: Red Zeppelin/Unsplash
Immerse yourself in wild nature on a Tofino camping trip. | Photo courtesy of: Destination BC // Ben Giesbrecht
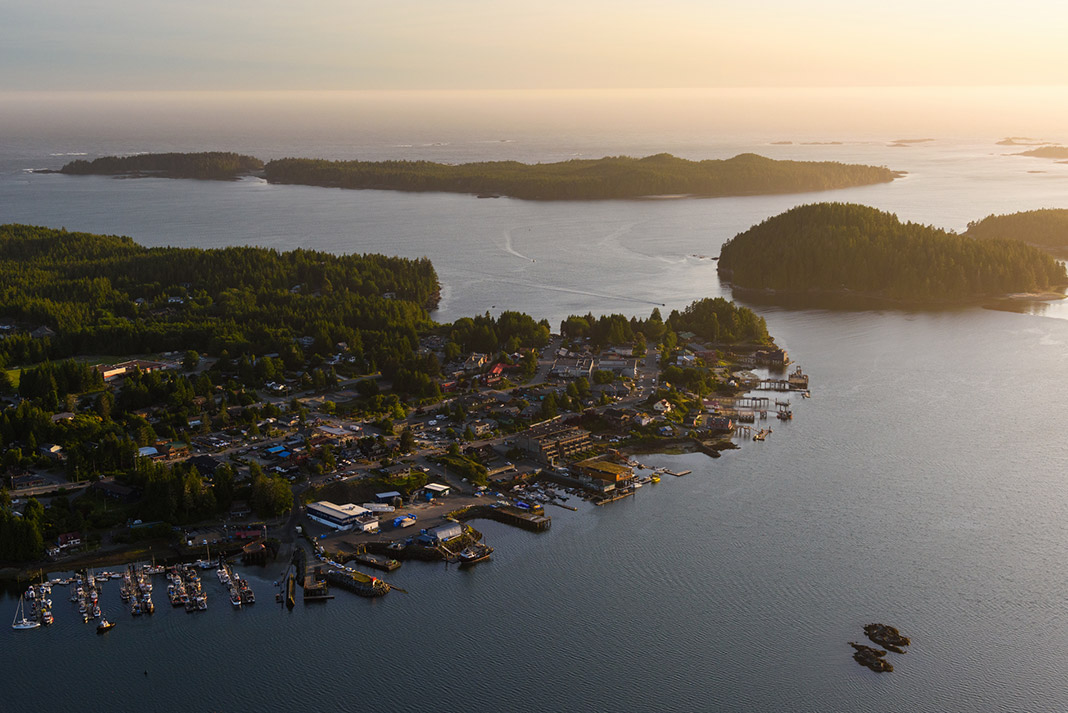
The town of Tofino on the west coast of Vancouver Island is a dream destination for paddlers, outdoor enthusiasts and nature lovers. Embrace the outdoors and stay at a Tofino campground when you visit this world-class vacation destination. There are many options for camping in Tofino, whether you’re looking for an oceanfront campsite for your tent, campervan or RV; a family-friendly campground with great amenities; a base camp location for kayak tours; or wilderness camping for a kayak trip. Or, if you desire something more luxurious, check out glamping in Tofino.
Tofino is surrounded by the beaches, old-growth forests and the Pacific Ocean, making it the perfect location for an outdoors vacation. | Photo courtesy of: Destination BC // Yuri Choufour
The drive on Highway 4 from Nanaimo to Tofino takes about three hours, with many stunning views along the way. It makes for a perfect long weekend or weeklong vacation from Vancouver. But the best is yet to come: At the Pacific coast you’ll find endless beaches, wilderness islands and old-growth trees—as well as great Tofino camping and services like kayak outfitters, outdoor shops and excellent casual and upscale dining. Located about 45 minutes south of Tofino, the town of Ucluelet is a quieter, up-and-coming tourist hub; camping in Ucluelet is a great option for those looking for a bit less traffic.
Be sure to bring your kayak or SUP, or reserve a rental kayak or paddleboard for these great paddler-friendly Tofino campsites. You’ll love the easy access to world-class paddling destinations and quiet vibes of these places to camp.
Green Point Campground
The only campground in Pacific Rim National Park is located midway between Tofino and Ucluelet on Highway 4, with sheltered, private drive-in campsites located a short distance from spectacular Long Beach on the Pacific Ocean. There are 94 drive-in sites open to tent camping and RVs. Book one of 20 walk-in sites if you’re looking for a more primitive camping experience. The campground is open from March to October and makes an excellent base camp for paddlers looking to explore the wild Pacific coast. Reservations are recommended.
This fun and quirky campground 35 km from Tofino is popular among surfers, located a five-minute drive from Long Beach and the famous waves of Pacific Rim National Park. Seventy-five campsites with picnic tables and fire pits are set in the forest. RV hookups are available. No camping gear? No problem—this Tofino campground offers tent and sleeping bag rentals. There are washrooms and showers, as well as a sauna and hot tub for relaxing and soaking after a day at the beach. The campground also offers surfboard and wetsuit rentals and beginner instruction, as well as basic supplies. Reserve your Long Beach campsite online.
The Ucluelet Campground is off the beaten track, providing peace and quiet along with good access to a sheltered harbour for kayaking and paddleboarding. The campground features 125 sites for tents and RVs, with electrical hookups available. Premium semi-private forest sites are also available for the ultimate in seclusion. This picturesque campground is replete with ocean and mountain vistas, ranking it among the most beautiful places to camp in the Tofino area. Check availability and reserve your campsite online.
All of the above campgrounds provide worthy accommodations for adventurous families, but the fun attractions at these next two places make them the best for family camping in Tofino.
Long Beach Golf Course and Campground
This rainforest campground near Tofino includes close encounters with nature, easy access to great paddling destinations and fantastic golf—a sweeping 36-hole course for enthusiasts and an 18-hole mini-course for kids. There are 76 tent campsites and six electrical RV sites available, with a popular Tofino Mexican food restaurant located on site. Book your campsite online.
Crystal Cove Beach Resort
This great family campground offers resort-style cabin accommodations and RV camping for a more luxurious experience. The resort has 10 fully equipped RV camping trailers available for rent, with space for the entire family. The campground is located steps from the quiet waters of MacKenzie Beach, which offers great kayaking, standup paddleboarding and swimming. Sixty sites are available for RVs, all equipped with 30-amp electrical hookups, free WiFi and hot showers. Advanced reservations are available.
Most visitors come to Tofino for the beaches. If you too love sea and sand (what paddler doesn’t?) here’s a preview of the best beach campsites in Tofino.
Bella Pacifica
This private campground is located within minutes of Tofino on Vancouver Island’s Pacific coast. Many of the 187 sites are located next to MacKenzie Beach, which offers sheltered conditions for kayaking and standup paddleboarding. Reservations are recommended.
Wya Point is a private beach campground near Ucluelet, with accommodations ranging from tent campsites to RV spots, yurts and luxury cabins. Fourteen yurts are located right next to a secluded beach, providing a great Tofino glamping option with several sizes available. Wya Point is dog-friendly and provides surf lessons, whale-watching tours and more. WiFi, showers and flush toilets are available. Book online.
Tofino is the starting point for some of the best kayaking on Vancouver Island. Here’s a sample of the many great kayak campsites located near Tofino on the spectacular Pacific Ocean coast.
Lone Cone Campground
You can take a water taxi from Tofino to this unique campground on Meares Island, or paddle there yourself (best for kayakers with an understanding of tides and currents). With no vehicle access, expect plenty of solitude in the 25-site campground (several campsites are pre-equipped with tents, sleeping bags and sleeping mattresses. The campground also has a hostel with private rooms and dorm accommodations. Lone Cone is a great campground for adventure travellers, with sandy beaches and hiking trails. Book your site online.
A favorite of intermediate-level sea kayakers, this island in Clayoquot Sound is located only a short paddle from Tofino and offers a great introduction to wild camping. A large beach is available for free camping, just be sure to pack out your waste and be respectful of wildlife.
If you’re looking for a more glamorous camping experience, you’ll find several fantastic options for luxury camping in Tofino.
Mussel Beach Private Getaway
This luxurious oceanfront camping spot is located in Ucluelet. Mussel Beach offers a wilderness glamping experience, with five unique seaside huts available for rent. Paddlers, you can practically launch from your cabin door and explore the coastline of Barkley Sound. The campground is quiet, located eight km from Highway 4. With limited availability you’re best to reserve your glamping hut in advance online.
Clayoquot Wilderness Resort’s luxury camping accommodations are nestled in deep green forests with views of the Pacific Ocean. Deluxe canvas tents feature king-size beds, bathrooms and showers, with options available to sleep from four to eight guests. This Tofino glamping resort offers kayaking, standup paddleboarding and many more guided adventures in the spectacular UNESCO-designated Clayoquot Sound Biosphere Reserve. Check availability and make a reservation online.
Stay in a unique geodesic dome at WILDPOD Glamping, located in Tofino. Six oceanfront domes are available for your luxury camping experience. Fall asleep to the sound of the tide and wake up refreshed, ready for adventure in one of Vancouver Island’s greatest outdoor destinations.
Free camping is rare in the Tofino area and that’s not a bad thing—you’re far better off enjoying the comforts and services of a designated campground. Paddlers have it lucky. Along with the Tofino kayak campsite at Vargas Island, skilled kayakers able to plan for the tides and currents can access a free campsite on Meares Island. Be sure to practice minimal impact camping and leave the site clean for future visitors.
Meares Island
Tofino kayakers will find a medium-sized campsite on the north side of Meares Island at Ritchie Bay. This free, sandy beach campsite has access to fresh water; be sure to treat the water before drinking.
There’s a free campsite on the north side of Kennedy Lake, accessible by vehicles by way of Kennedy Lake Road. The eight-km gravel road heads northeast from Highway 4, just south of Tofino. There are no services, but paddlers can launch from the beach camping area onto a large freshwater lake.
RV Camping and Campervans in Tofino
Tofino is an iconic road trip destination, with plenty of options for campervan and RV camping when you arrive. Here’s a taste of the best RV camping in Tofino.
Surf Grove
Surf Grove is located just south of Tofino, near the renowned waves and sand beach of Cox Bay. The campground features 130 RV and campervan sites with 30-amp electrical service. There’s water, sewer service and a sani-dump for longer term stays. No RV? No problem! Twenty Surf Grove campsites come fully equipped with rental RVs. In case the name didn’t give it away, Surf Grove is a great place to learn to ride ocean waves. Special camping and instruction packages are available, and there’s an on-site surf shack for rentals. Book online for your RV campsite.
Wild Pacific Camp caters to RVs exclusively. Located close to Ucluelet, this intimate campground boasts six full-service RV sites surrounded by nature, including towering rainforest trees and Pacific Ocean views. The campground maintains a kayak and SUP launch on Spring Cove and provides access to several great hiking trails. What’s more, it’s only a 20-minute walk to Ucluelet. View a map of the campground online.
Need camping gear? Vancouver Island is home to well-equipped camping retailers in Victoria, Nanaimo and Campbell River. Check in with the knowledgeable and friendly staff at these local outfitters if you’re shopping for gear closer to Tofino.
Storm Light Outfitters
Your local source of camping gear is Storm Light Outfitters (390 Main St, 250-725-3342). This small Tofino shop is big on service and local knowledge, with camping gear and apparel from some of the best outdoor brands—a good choice if you forgot a few items or need an entire camping kit.
Tofino Paddler’s Inn
Check out the small retail shop at the Tofino Paddler’s Inn (320 Main St, 250-725-4222) if you’re looking for kayak and standup paddleboard gear and accessories. Operating in conjunction with Tofino Sea Kayaking, you’ll find all the guide-recommended gear for your Tofino kayak camping trip.
Immerse yourself in wild nature on a Tofino camping trip. | Photo courtesy of: Destination BC // Ben Giesbrecht
Canoeing legend Reg Blomfield introduces a handful of suave tips and tricks in this entertaining short film.
Dated 1934-1935, the classic clip and shows Blomfield executing open canoe skills with excellent precision. He works the flip, the double flip, and walking the gunnel on Stoney Lake, Ontario.
Of course, we do recommend you try these for yourself—if you’re up to the challenge—but be sure to throw on a life jacket before you do!
Have you ever waved at bystanders on the river’s edge and wondered what they were saying about you? Well, now you know.
This hilarious video captures two advanced whitewater kayakers running Cumberland Falls—sometimes referred to as the “Niagara of the South”—in southeastern Kentucky. It becomes quickly apparent that the non-paddling folks behind the camera are equal part impressed and appalled. Catch the full commentary here.
The most comfortable canoe seats on the market | Photo: Ontario Tourism
Comfort was of utmost concern on a backcountry trip with my 70-year-old mother-in-law two summers ago. It was her very first wilderness trip and, while she was game for adventure, her back ached with the unfamiliar motion of paddling even during the short trip to the campsite. How nice it would have been to know which were the best canoe seats and accessories we could get to help her paddle without pain.
Comfort is a growing consideration for an increasing number of backcountry traveling Boomers, the largest demographic of paddling participants. Though aftermarket seat options have long been a mainstay of the recreational paddling crowd, trippers avoid them—and with good reason.
For casual canoeists, the comfort of a canoe seat can outweigh on-the-water paddling performance. | Feature photo: Ontario Tourism
While the support of a comfortable high-back seat sounds nice, all too often it crucially affects mobility and torso rotation, encouraging poor paddling form and losing stroke power as the seat shifts and slides against the boat’s hardware. Plus, it’s one more item to portage.
None of these factors are deal breakers for toodling around outside the cottage for an afternoon, but it’s unacceptable for those who have 30 miles to make by sunset. Fortunately, most outings fall somewhere in between these extremes. One of these seat styles might be right for you—or it could be the cushy trump card you use to convince a non-paddler to get on the water for the first—or second—time.
4 best canoe seats and accessories for comfort
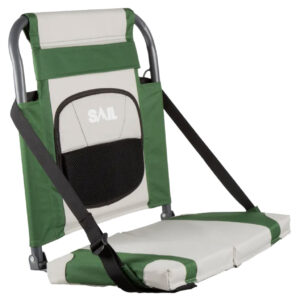
1 Aluminum frames
A classic for sportsmen and others for whom the canoe is just a vehicle to pursue another passion. This three-pound, high-back folding aluminum frame style guarantees relaxation while the cushion—senselessly thick at two inches—feels luxurious.
The trade-off for the support this burly recliner provides is it’s near impossible to rotate and take a proper stroke unless I lean well forward. And say goodbye to drifting under any low hanging limbs. The seat cushion takes hours to dry if saturated. The generically named Sit-Back Canoe Seat is branded by retailer Sail for $49, but the same seat is also sold and branded by GCI and Woods.
Best for: Anglers, photographers or lily dippers who are on the water to relax, take some shots or cast a line.
[ Paddling Buyer’s Guide: View all canoeing accessories ]
2 Wood frames
Do you think paddling aesthetics peaked during the courting canoe era at the turn of the 20th century? Then grab your parasol and gramophone because this is the seat style for you. Wooden seats come in a variety of shapes, hardwoods and finishes to please the discerning traditionalist. Generally, expect this classy and attractive folding style to be among the heavier options.
The five-pound Folding Canoe Chair from Harmony will have any paddler feeling like royalty, though it does raise your center of gravity an inch. This model easily clasps onto a bench-style seat, but extended use might see it rub and mar the finish on the existing bench seat. A big plus of wooden chairs is water just wipes off.
Best for: Courting-era canoe enthusiasts and other classy folk.
[ Plan your next canoeing adventure with the Paddling Trip Guide ]
3 Fabric seats
There’s a multitude of fabric seats, some of which offer canoeists the best of both comfort and form. The basic idea is the same—adjustable webbing tensions the seat’s backrest against the seat cushion, just like on your favorite fireside camp chair.
On the Premium Padded Canoe Seat from Pelican, available for $45, the seat back remains low enough to allow for torso rotation while providing some lumbar support. Look for this style of seat to also feature straps, crucial for securing to the bench seat of the canoe. Many seats in this versatile style can also pair with kayak and stadium seating.
Best for: Day trippers looking for a compromise between comfort and efficiency.
A little foam may not look like much, but it can offer just the right amount of comfort without ever affecting mobility. Just look to the marathon paddling scene to see this in action. Closed cell foam pads from a quarter-inch to one-inch-thick are the unsung heroes for many distance paddlers who may spend days at a time in their boats. And foam pads are just a couple dollars at your local outdoor store. Some paddlers even permanently affix the foam directly to their tractor-style seats, which has the added benefit of eliminating any shifting between pad and seat. For lumbar support, some marathon canoeists tie the ends of a piece of webbing to a canoe’s footrest. The webbing has been measured and cut so it rests firmly against the lumbar back when pulled up into place.
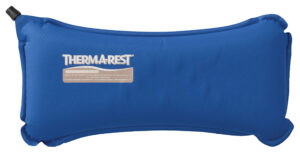
It’s a simple, low-cost solution for tired backs on long portage-free races, like the Yukon River Quest. There’s a myriad of thicker cushions or small inflatable pillows available, like this $29 Travel Pillow from Therma-A-Rest, which are another budget option for recreational paddlers looking for that sitting-on-a-cloud feeling. Be warned though: the cushier the pad, the less power transferred from paddle stoke into forward momentum and the higher your center of gravity—perhaps leading new paddlers to describe your ultra-stable, 33-inch-wide tripping canoe as “tippy.”
Best for: Trippers, expedition paddlers and everyone else who prioritizes efficiency but needs some cushion.
This article was first published in Issue 58 of Paddling Magazine. Subscribe to Paddling Magazine’s print and digital editions, or browse the archives.
For casual canoeists, the comfort of a canoe seat can outweigh on-the-water paddling performance. | Feature photo: Ontario Tourism
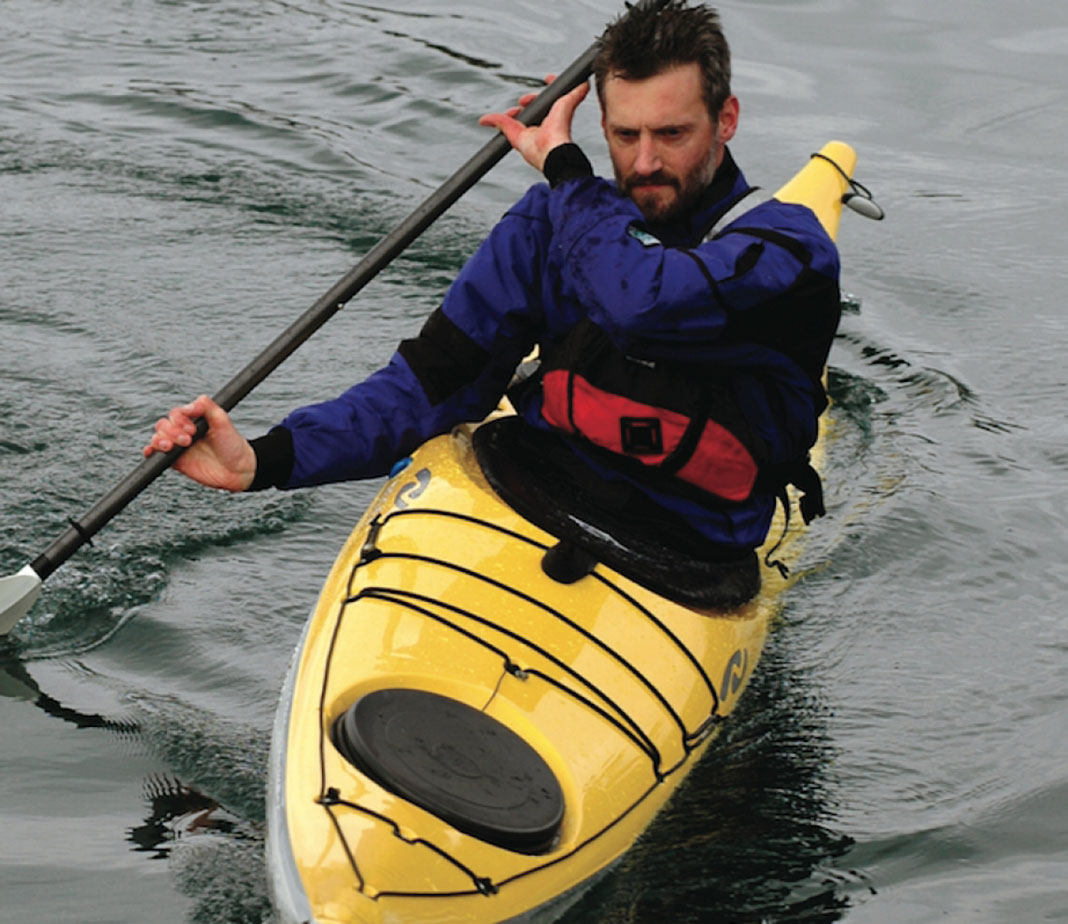
Alex Matthews executes a bow draw in his Wilderness Systems sea kayak. | Feature photo: Rochelle Relyea
The bow draw, also known as the bow rudder, is an efficient and elegant turning stroke that provides remarkably fine control over the bow of a sea kayak. It is excellent for making minor course corrections and essential for maneuvering in and out of really tight places. Follow these tips to get the benefits of a properly-executed sea kayak bow draw for yourself.
[ Paddling Buyer’s Guide: View all sea kayaks ]
Learn the Sea Kayak Bow Draw
If you’re slipping between two other kayaks, playing around rocks, or negotiating a gap between boulders, a bow draw stroke combined with some forward momentum can give you that last-second fine adjustment you need to hit your line and thread the needle.
Alex Matthews executes a bow draw in his Wilderness Systems sea kayak. | Feature photo: Rochelle Relyea
The bow draw turn requires forward momentum, so start with good speed.
To get the most turning power, initiate your turn with a sweep stroke on the opposite side. Then rotate your torso aggressively in the direction of the turn and plant your paddle in the water in front of your body, about a foot or two out to the side, beside your knee. Reach across your forehead with your upper arm with your paddle shaft vertical. Keep the lower arm close to your body to keep your shoulder safe.
Angling your blade
Angle your paddle blade with the leading edge outward so that the power face of your paddle catches water, loading the blade. The more you open the blade to the oncoming water and the further out you plant your blade, the more force you will generate with this stroke.
Time and practice will allow you to dial in the amount of blade angle that is appropriate for each situation. Too much angle will load your blade too much, acting more like a brake than a turning stroke. Too little angle will not generate much turning power at all.
Because you’re catching water with this stroke, it will slow your boat down as it turns. As you lose speed, draw the blade in to your toes to finish the stroke. You’ll then be in a perfect position for a forward stroke to get yourself going again, without even lifting your blade out of the water.
Increasing efficiency
As with any turning stroke, tilting your boat on edge away from the turn will greatly increase the efficiency of the turn. For the bow draw turn, this means tilting the kayak away from your paddle side. Because the bow draw doesn’t generate much support and you’re edging on the opposite side, tilting on a bow draw requires confident balance and solid paddle control. Start playing with bow strokes on flat water and work up to putting your kayak on edge. Once you get comfortable, the bow draw will naturally find its way into your paddling repertoire in rougher conditions.
This article was first published in the Fall 2007 issue of Adventure Kayak Magazine. Subscribe to Paddling Magazine’s print and digital editions, or browse the archives.
Alex Matthews executes a bow draw in his Wilderness Systems sea kayak. | Feature photo: Rochelle Relyea
Whether you choose to paddle inland or coastal waters in California, you won't be disappointed. | Photo courtesy of: Mono County Tourism
When you think of California, what comes to mind first: The giant redwood groves of NorCal? Death Valley’s sand dunes? The famed yuccas of Joshua Tree? The mountains of the Sierra Nevada? Or the oceanside cliffs that shoulder the Pacific Coast Highway?
California has more plants, animals and ecosystems than can be found anywhere else, making it the most biodiverse state in America. This diversity also results in some of the country’s best kayaking. From half-day pleasure paddles in ocean bays frequented by humpbacks, to week-long camping adventures on fast-flowing whitewater rivers, California has it all.
[ Paddling Trip Guide: View all kayak trips and clinics in the United States ]
Best kayaking in California
With around 1,350 km of coastline, over 300,000 km of rivers and 4,900 lakes and reservoirs, you’re never far from a solid put-in spot in the Golden State.
Here are 11 places where you can find some of the best kayaking in California:
Sonoma County
Mendocino County
San Francisco Bay
Point Reyes
The bioluminescent waters of Tomales Bay
San Diego’s La Jolla neighborhood
Monterey Bay
The Central Coast, including Santa Barbara
Los Angeles River
The Channel Islands
California’s interior, including June Lake, Big Bear Lake and along the South Fork of the American River
Read on to learn about our favorite California kayak rentals and tours.
Sonoma’s mild Mediterranean climate makes for some spectacular wines, as well as some incredible kayaking. It’s the jumping-off for adventures on the Russian River (this waterway flows through vineyards and redwood forests), Lake Sonoma (a reservoir nestled in the foothills), Spring Lake (ideal for swimming, fishing and picnicking), and, of course, along the coast.
Sonoma County kayak rentals & tours
Smart Tours offers guided tours of the Sonoma Coast as does Sonomads.
Meanwhile Russian River Adventures and Burke’s Canoe Trips will fully outfit you for an adventure down the Russian River, including coordinating return shuttles.
Kayak at Mendocino County
Although it’s only a three-hour drive north of San Francisco, Mendocino County is part of California’s “Lost Coast.” North of Fort Bragg lies a section of coastline that’s wild, all-natural, undeveloped and inaccessible from major highways, which all adds up to some epic and uncrowded paddling. Thinking about kayak camping in Northern California? This might be the place to do it.
Mendocino is also where you’ll find the Noyo River—a calm stretch of water frequented by sea lions, harbor seals and river otters.
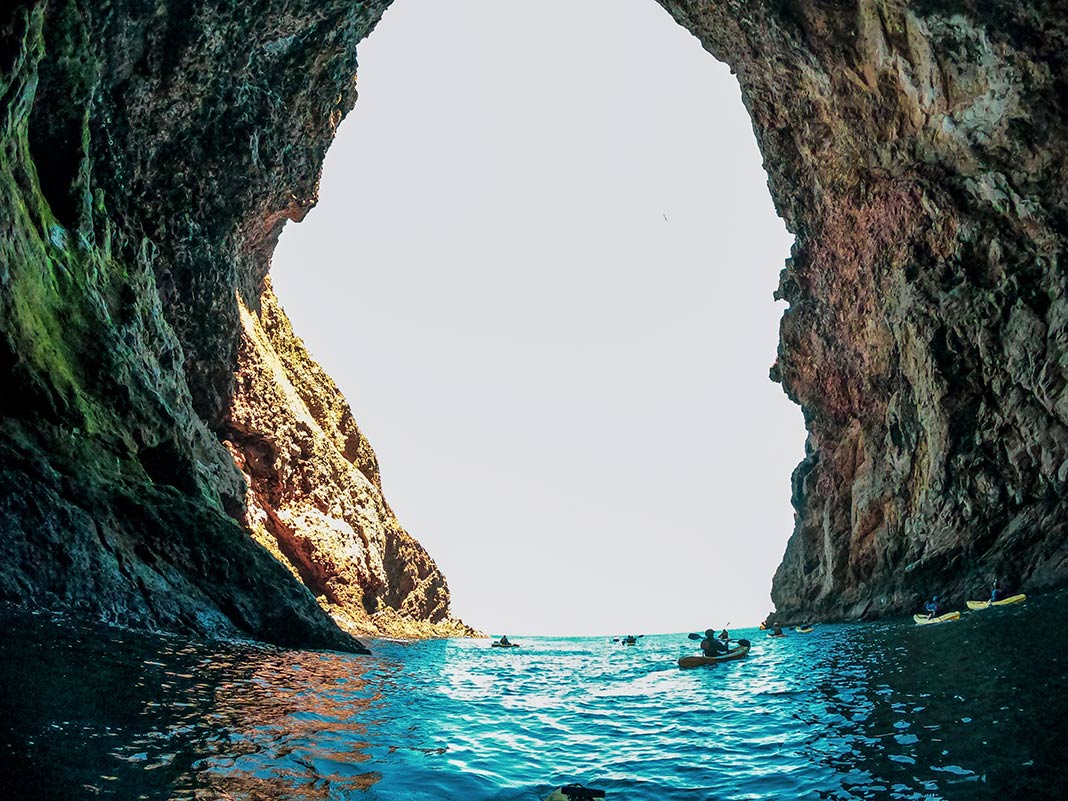
Taking a kayak trip gives you special access to sea caves. | Photo: Courtesy Ventura County Coast
Mendocino kayak rentals & tours
Based in Fort Bragg, Liquid Fusion Kayaking is well-placed to offer rentals and tours of the Noyo River, as well as sea kayaking excursions.
Kayak in San Francisco
San Francisco Bay is probably best known for the iconic Golden Gate Bridge, but it’s also a family-friendly kayaking destination. Highlights include seal and sea lion sightings, as well as opportunities to admire Sausalito’s eclectic houseboat community from the water.
In addition to offering sit-on-top and sea kayak rentals, SeaTrek runs half-day, full-day, full starlight and overnight tours of the Bay Area, including underneath the Golden Gate Bridge.
Sausalito is also home to Environmental Traveling Companions, an organization dedicated to making the outdoors accessible. It offers regular scheduled guided trips for people with disabilities, including a San Francisco Bay tour and bioluminescence paddle on Tomales Bay. Check its website for upcoming trips.
Kayak at Point Reyes & Tomales Bay
Tomales Bay offers one of the most epic kayak trips in Northern California, even though it’s not particularly long or difficult. That’s because it’s one of the most reliable spots in Cali to find bioluminescent waters.
Although phytoplankton—the organisms responsible for turning waves neon blue—have been reported everywhere from Monterey to San Diego, their presence and intensity depends on environmental factors like swell and wind conditions. That means bioluminescence isn’t guaranteed anywhere on any given night.
Tomales Bay is the possible exception to this rule. With its own colony of phytoplankton, the narrow inlet is more sheltered than other spots, making for an ethereal experience nearly any night of the year.
Choose from guided and self-guided tours. | Photo: Courtesy Wild Blue Adventures
Point Reyes kayak rentals & tours
Tomales Bay Expeditions and Blue Waters Kayaking both offer rentals and guided nighttime bioluminescence tours on Tomales Bay. Blue Waters Kayaking also offers a private overnight camping adventure (for groups of six or more). Visiting on either side of the new moon in summer and fall is recommended.
Kayak at Monterey Bay
A renowned whale-watching destination, the waters of Monterey Bay are frequented by humpbacks (several hundred spend their feeding season here from April until November), orcas, grey whales, blue whales and dolphins.
For this reason, sea kayaking tours in the Marine Sanctuary might get all the glory, but the area is also where you’ll find the kid-friendly Elkhorn Slough Estuary, a tidal estuary with diverse marine life and a chance to see bioluminescence after-dark.
Monterey Bay kayak rentals & tours
The family-owned Monterey Bay Kayaks are Certified Wildlife Stewards who guide trips through Monterey Bay and the Elkhorn Slough Estuary. Bioluminescence tours must be booked 48 hours in advance and are only offered during the new moon. Kayak fishing trips for halibut, lingcod and rockfish in the bay are also on offer.
For rentals, contact Adventures by the Sea, which hires out single and tandem kayaks.
Best kayaking in Southern California
Kayak at La Jolla Beach
La Jolla is only 15 minutes from San Diego’s downtown, but it might as well be a world away. Known for its crystal-clear waters, the area is home to the La Jolla Underwater Park—a 6,000-acre area of protected ocean featuring submarine canyons, kelp beds, sand flats and even artificial reefs designed to attract marine life.
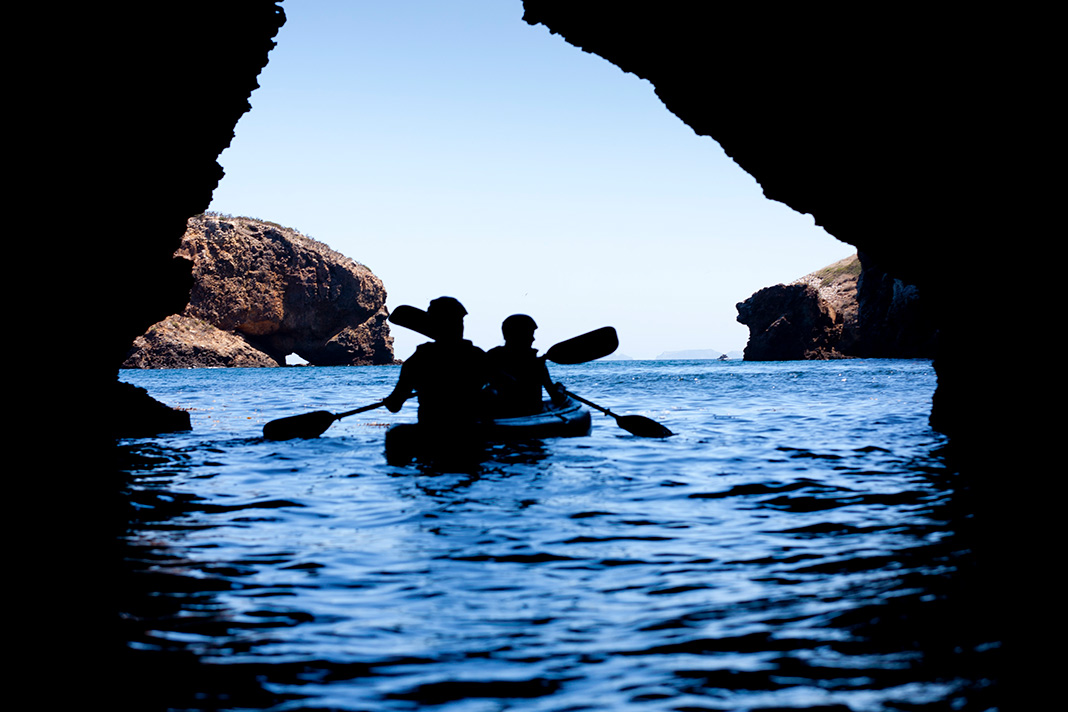
This is your chance to see leopard sharks, shovelnose guitarfish and sea lions, as well as to explore the area’s seven sea caves—including one that you can paddle into. Simply put, La Jolla offers some of the best kayaking in Northern California.
La Jolla kayak rentals & tours
As its name implies, La Jolla Sea Cave Kayaks specializes in tours of the area’s sea caves. In addition to the sea caves, Bike and Kayak Tours and La Jolla Kayak both offer a kayaking and snorkeling combo through the Underwater Park. All three operators offer kayak rentals.
Kayak at Central Coast
Stretching from Monterey Bay in the north to the Ventura region in the south, the Central Coast is home to wine regions, beach and college towns, and miles of stunning coastline.
Its adventure epicenter is arguably Santa Barbara, which is one of the entry points to the Channel Islands. But just north of the city is an untapped treasure; the Gaviota Coast is the largest stretch of undeveloped coastline remaining in Southern California.
Explore the popular tourist attraction the Painted Cave when touring the Channel Islands by kayak. | Photo: Courtesy Santa Barbara Adventure Company
Central Coast kayak rentals & tours
Based out of Pismo Beach (halfway between Los Angeles and San Francisco), Central Coast Kayaks does it all: rentals, sea cave tours, Morro Bay wildlife tours (perfect for families) and guided kayak fishing.
The Santa Barbara Adventure Company offers guided adventures around the Santa Barbara coastline, as well as to the nearby Channel Islands. For kayak rentals in Santa Barbara, contact Calcoast Adventures. In addition to guided tours of the waterfront, it hires out single and tandem models.
Kayak in Channel Islands
When it comes to kayaking in Southern California, there’s no destination more iconic than the Channel Islands, which are only accessible by plane or boat. The archipelago has eight islands, five of which belong to Channel Islands National Park. Two of the most popular islands for paddling are Anacapa and Santa Cruz, owing to their large sea caves (the latter’s vibrantly colored Painted Cave is the fourth largest sea cave in the world). Meanwhile, Catalina Island, while outside of the national park boundaries, is where you might spot bat rays, leopard sharks, flying fish or garibaldis.
Tour operators depart for the Channel Islands from Santa Barbara and Ventura, but Oxnard (just south of Ventura) is the closest access point.
Channel Islands kayak rentals & tours
Channel Islands Adventure Company has a range of kayaking excursions, including to the perennially popular Painted Cave and a kayak-snorkel combo tour.
Channel Islands Kayak Center leads a tour that explores the unique history of the islands. Kayak rentals are also available from both the center and from Hopper Boat Rentals in Oxnard.
For those with less experience, Wild Blue Adventures takes guests by boat to prime kayaking locations, from which they explore by tandem kayak.
Finally, for Catalina Island rentals and tours, reach out to Catalina Island Expeditions.
You don’t have to venture far to find outdoor adventure. | Photo: Courtesy LA River Kayak Safari
Kayak in Los Angeles
Yes, the name “Los Angeles” might conjure up images of a streaming flow of traffic on a freeway, but that’s not the only thing that flows through the city—so does the Los Angeles River. An entirely unexpected take on a familiar destination, it’s where urban life and wildlife meet.
Los Angeles kayak rentals & tours
LA River Kayak Safari’s three-hour tour combines a bike ride with a leisurely downstream paddle that makes for a great afternoon out.
If the LA River isn’t your thing, OEX Sunset Beach specializes in rentals for exploring the canals of Huntington Harbor, and can also fully outfit keen kayakers for the 35-km crossing to Catalina Island.
Best kayaking in California’s interior
While this article has mainly covered sea kayaking, we can’t dismiss the thousands of lakes, rivers and reservoirs that can be found statewide, making the interior one of the best places to kayak in California.
Below we’ve highlighted a few tours and rentals, but whether you’re looking for family-friendly lakes or more challenging whitewater, there’s no shortage of outfitters and tour operators state-wide.
California interior kayak rentals & tours
Known for its whitewater instruction, California Watersport Collective is a community-building organization that runs kayaking classes, custom trips, coaching and regular clinics, including on the American River. Current Adventures Kayak School, based in Lotus, are the experts on the American River; in addition to workshops and organizing multi-day trips, they also offer kayak rentals.
Outside San Bernardino is Big Bear Lake, where Paddles and Pedals rents single, tandem and even triple kayaks.
Paddle beautiful June Lake. | Photo: Courtesy Mono County Tourism
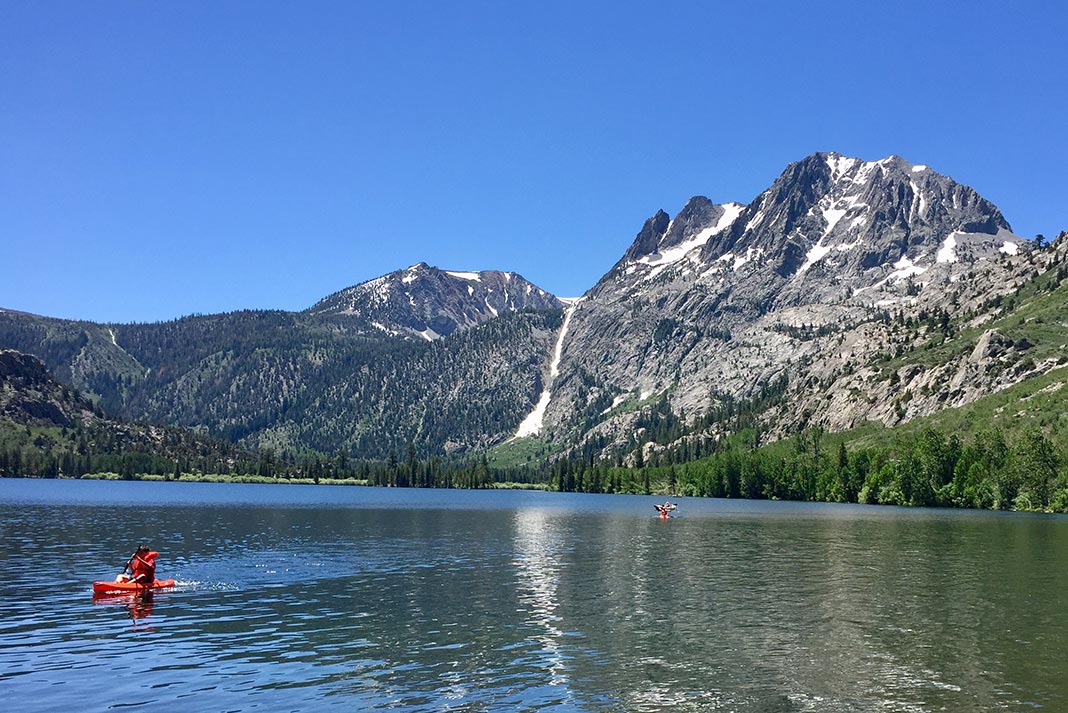
Nestled in the mountains near Yosemite National Park, the subalpine June Lake might be one of the most pristine places to paddle in Cali. Mammoth Kayaks and Paddleboards (open seasonally) will set you up with a rental.
California kayak laws
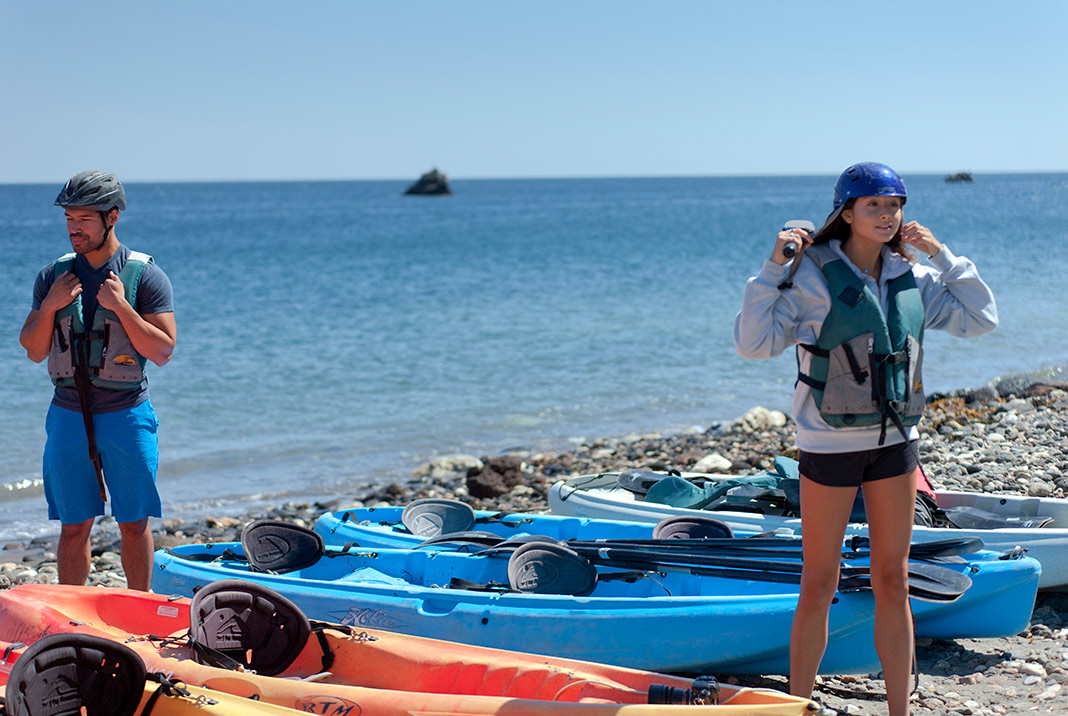
According to California State Parks’ Division of Boating at Waterways, the regulations surrounding canoes, kayaks and other manually propelled vessels less than 16 feet are as follows. Vessels must carry one wearable Coast Guard-approved life jacket of a type and size appropriate for the conditions and the boat activity being engaged in for each person on board. Life jackets must be readily accessible and fit the intended wearer properly. Children under 13 must wear a life jacket at all times.
All vessels are required to display navigation lights between sunset and sunrise and during times of restricted visibility. A vessel less than 39 feet, 4 inches is not required to carry a whistle or bell, but must be able to provide some other means of making an efficient sound signal.
If you’re wondering, “Can I get a DUI on a kayak in California since it’s a vessel?” the answer is a resounding yes. You can get a BUI (boating under the influence) for being impaired or having a blood alcohol level of 0.08 percent or more.
Finally, kayaking along the Californian coast means you might encounter otters, sea lions, whales, dolphins and other marine mammals. As you’re in a vessel, you’re required to keep your distance—about 100 meters is recommended.
Rental companies and tours usually supply everything you need—just bring your sense of adventure. | Photo: Courtesy Ventura County Coast
Do great white sharks attack kayaks in California?
Cases of great white sharks attacking kayakers—particularly those kayak fishing—regularly make headlines. But given the hundreds of thousands of people who kayak off the coast of California every year, these incidents are an exception to the rule; the last fatality of a kayaker by shark was in 1989. Here’s how to avoid shark encounters.
When to kayak in California
California offers excellent year-round kayaking conditions. However, if you want to see a particular type of marine wildlife (such as humpback whales) check with the tour operators to determine when they’ll be in the area.
Similarly, bioluminescence is most visible on the darkest nights, close to the new moon.
Finally, keep in mind that some operators—particularly in California’s interior—may only operate on a seasonal summer basis.
What to wear kayaking in California
Although California’s weather is beautiful—expect slightly rainy winters and dry summers—you’ll still want to follow the best principles for what to wear kayaking. Layer-up, avoid cotton fabrics, wear sun protection (including polarized sunglasses so you can see all the fish, sharks and underwater life) and dress for the temperature of the water, not the air.
Whether you choose to paddle inland or coastal waters in California, you won’t be disappointed. | Feature photo: Courtesy Mono County Tourism
Laval, Québec, Canada, May 19, 2022 – Pelican International Inc, a world leader in paddle sports, acquires a majority stake in GSI Outdoors, a leader in the outdoor equipment industry. This transaction marks a major step in the growth of Pelican, which is building on a solid foundation to diversify its offering in the North American and international outdoor market.
“The acquisition of GSI Outdoors, our third since 2019, allows us to pursue our ambition to be an eco-friendly leader in the outdoor equipment sector by investing in a portfolio of renowned brands that respond to the growing desire of the population to connect more with nature. While our last acquisitions consolidated our leading position in the paddle sports, fishing boats and nautical accessories sector, the integration of GSI Outdoors into our fold allows us to diversify our activities and makes a remarkable entry into a sector that has shown sustained growth for several years which is expected to be maintained for the years to come,” said Danick Lavoie, President and CEO of Pelican International.
[ Discover the best gear of the year in the Paddling Buyer’s Guide ]
Focus on growth and diversification
With a rich 50-year history, the Quebec-based family business has carved out a special place in the hearts of outdoor and water sports enthusiasts. Today, Pelican International has met its desire to expand its offer to nature lovers by getting out of the water and accompanying them around the picnic table thanks to another family business, GSI Outdoors, and its innovative camping equipment and accessories.
Based in Spokane, Washington, USA, GSI Outdoors has been designing and distributing quality outdoor cooking and hydration products for the outdoors for over 37 years.
“It was our love of the outdoors and our desire to provide quality products that motivated us to found GSI Outdoors in 1985. Today, our commitment remains the same and in Pelican International we have found the perfect partner to take the company to the next level,” said Don, Ian, and Kathy Scott, co-founders. Ian and Don will remain at the helm of the company for the next cycle of growth for GSI Outdoors.
A booming sector
According to the North American Camping Report 2021, the growth prospects for the outdoor and camping market were excellent, long before the pandemic which has caused an unprecedented craze for outdoor activities and products. In 2021, the global market was estimated at US$15 billion and is expected to reach US$21 billion by 2026, boding well for steady demand for camping products in general.
“Pelican intends to quickly leverage the reputation, distribution channels as well as the supply and innovation capabilities of both companies to offer more to our retailers, and meet the expectations and aspirations of camping, fishing and paddling enthusiasts,” concluded Pelican President and CEO Danick Lavoie.
As GSI Outdoors joins the Pelican Group of companies, the Laval-based company will now have more than 1,100 employees in North America, revenues in the hundreds of millions of dollars, and a portfolio of well-established companies and brands.
[ Plan your next paddling adventure with the Paddling Trip Guide ]
About Pelican International
Pelican International is a world leader within the paddle and nautical sports industry. Renowned for exceptional quality, innovation and expertise, Pelican has become the foremost global authority in the design and manufacture of kayaks, canoes, pedal boats, stand-up paddle boards (SUPs), fishing boats, and watersport accessories.
As an international driving force within the industry, Pelican and its group of companies offer to both paddle sports and everyday outdoor enthusiasts a diverse array of products through its portfolio of well-known brands: Pelican®, Wilderness Systems®, Perception®, Dagger®, Mad River Canoe®, Harmony Gear®, Advanced Elements, Adventure technology and Boardworks®.
Pelican International has three manufacturing sites in North America—this strategically located distribution footprint allows our clientele to easily procure kayaks, paddle boards and boats anywhere they choose to enjoy the water.
About GSI Outdoors
A small, family-owned company, GSI Outdoors makes hydration, cookware and dining products that bring the comfort of home cooking practices to the great outdoors. Since 1985, GSI Outdoors has produced innovative dining gear for use at the campsite, on the trail, and everywhere in between.
Book your stay: A cozy wood cabin in the woods of Vancouver Island. | Photo courtesy of: Tourism Vancouver Island // Ben Giesbrecht
With its sea and sand, towering old-growth forests and snow-capped mountains, Vancouver Island is one of Canada’s top vacation destinations. It’s also great for a staycation if you’re fortunate enough to live there. For the rest of us, planning a trip to Vancouver Island is easy: Accommodation options include drive-in campgrounds, wilderness camping and also cabin rentals.
If you’re looking for a more permanent home base for your paddling adventures, check out a Vancouver Island cabin rental. The options are nearly endless, including family- and pet-friendly cottages, unique treehouse stays, and glamping accommodations that bridge the gap between cabin and tent. Best of all, many cabins on Vancouver Island are perfect for paddlers, with easy water access to some of the most spectacular places on earth.
Book your stay: A cozy wooden cabin in the forests of Vancouver Island. | Photo courtesy of: Tourism Vancouver Island // Ben Giesbrecht
Best Cabins with Hot Tubs
What’s better than a long soak in a hot tub after an adventure-filled day? Some of the best cabins on Vancouver Island feature hot tubs for your pleasure.
Secluded Oceanfront Cabin in Sooke
Secluded, oceanfront, hot tub—this private Vancouver Island cabin rental located just 40 minutes west of Victoria has it all. The Covehouse sleeps four adults comfortably, with one bathroom. You’ll find cozy indoor space and sweeping views from the deck. There’s great access to sheltered water for kayaking and paddleboarding.
Soak in a hot tub in your own private Vancouver Island cabin, set in the majestic rainforest near the trendy West Coast town of Ucluelet. This Vancouver Island cabin rental features modern accoutrements like cell service and wireless Internet, as well as a luxurious bathroom—choose between soaking indoor or out! Of course, you’ll also get easy access to some of the best beaches of Vancouver Island for paddling, sunbathing and long oceanside walks.
Great for outdoors-loving couples, this cozy one-bedroom Ucluelet cabin with a hot tub is set on a private beach. Indoor features include a gas fireplace and luxurious king-size bed. Paddlers can cross the cove to visit the town of Ucluelet.
[ Plan your next paddling adventure with the Paddling Trip Guide ]
Nature’s Edge in Tofino
This Tofino cottage rental is set on nature’s edge—and literally perched on the rocky shore of the Pacific Ocean. Soak in a luxurious outdoor hot tub and gaze across saltwater to the stunning mountainous skyline of Clayoquot Sound. With three bedrooms and two baths, this gorgeous timber frame Vancouver Island cabin will accommodate up to six people.
You can’t get much closer to the ocean than this Vancouver Island rental cabin set on the famous West Coast beaches of Tofino. This cabin sleeps four—with a luxurious hot tub and a unique outdoor shower. World-class paddling and surfing is within steps (60, to be exact) from the door.
You may desire something more than a tent, but less than a cabin. Look no further for the best camping cabins on Vancouver Island—featuring great glamping accommodations for paddling enthusiasts.
Clayoquot Wilderness Lodge
This luxurious resort near Tofino offers 25 glamping tents for adventurous Vancouver Island travellers looking to blend cabins with camping. Bright and spacious canvas tents are available for couples and families, with indoor bathrooms and showers. Interiors were refreshed in 2021 with the goal of achieving “refined luxury.” Make these unique accommodations your perfect Vancouver Island retreat for day paddling and comfortable overnight stays. Reserve online.
Wya Point is a private oceanfront campground near Ucluelet on the west coast of Vancouver Island, with accommodations ranging from tent campsites to RV parks, yurts and luxury cabins. Fourteen yurts are located right next to a secluded beach, with several sizes available. Wya Point is dog friendly and provides surf lessons, whale-watching tours and more. WiFi, showers and flush toilets are available. Book online.
Stay in a unique geodesic dome at WILDPOD Glamping, located in Tofino. Six oceanfront cabin domes are available for a luxury Vancouver Island camping experience. You’ll go to sleep to the sound of the tide and wake up refreshed, ready for adventure in one of Vancouver Island’s greatest outdoor destinations.
Of course, Vancouver Island’s Pacific Ocean beaches are renowned. But you’ll also findcabin rentals on spectacular mountain-fringed freshwater lakes. Here are a few of the best choices available.
Lake Cowichan Cabin
This cabin rental is set on the shore of Lake Cowichan, a freshwater jewel on southern Vancouver Island, a short drive from Victoria and the town of Duncan. Crystal-clear water is great for paddling; the cabin sleeps five comfortably with two bathrooms. This sun-soaked region is noted to have the warmest climate in all of Canada.
You’ll enjoy spectacular sunsets at this Vancouver Island cottage rental on McIvor Lake, located minutes from Campbell River. Explore the islands of McIvor Lake by canoe or kayak (included with the property) while taking in the glorious mountain views. Plenty of windows bathe the spacious cabin in natural light. Sleeps six.
This private lakefront cabin on Vancouver Island is located on Sproat Lake, just west of Port Alberni. You’ll find inspiring outdoor spaces with amazing views and a bright, modern interior that sleeps six guests. Launch your kayak from the dock and trace the shores of Sproat Lake, soaking in the mountain views.
Looking for a unique Vancouver Island cabin rental? Live the life aquatic with a rental from Island Houseboats on scenic Lake Cowichan, near Victoria. Several sizes of fully equipped, floating cottages are available to accommodate groups of up to 14. Rental kayaks are available.
Close to Campbell River, this lakefront cabin is your quintessential Vancouver Island mountain retreat—with great paddling opportunities for kayakers and paddleboarders on Upper Campbell Lake. Two kayaks are included with the rental; launch from a private beach. The cabin is located on the edge of Vancouver Island’s famous Strathcona Park and is perfect for couples or a small family.
Paradise need not cost a fortune. We pared down the best Vancouver Island cabin rentals under $150 per night.
Studio at French Beach
This cozy cabin is a real bargain for couples, located near Sooke on a large, private property with quick access to great Vancouver Island beaches and hiking trails. The 240-sq-ft cabin includes a full bathroom and all you need to prepare your own meals. Make this your home base for exploring the southwest corner of Vancouver Island.
This small yet well-appointed cabin is located on the ocean’s edge, between Parksville and Campbell River on Vancouver Island’s east coast. You’ll find a compact kitchen with a fridge and microwave, as well as an indoor sink and shower with a heated outdoor shower. The cabin is nestled in the woods, with a sweeping deck and a short trail to the Pacific Ocean, where you can launch a kayak or paddleboard.
This seaside, B&B-style private guest suite is located on Malcolm Island, home to the quaint village of Sointula. You have 500 square feet to yourself, with a self-contained kitchen, full bathroom and a hot tub. The paddling here is outstanding, with opportunities to explore Johnstone Strait (a prime whale-watching and kayak fishing destination) right from your door. Drive to the northern Vancouver Island town of Port McNeil and take a 20-minute ferry ride to visit this idyllic retreat on a near-forgotten island.
Fido is welcome to join the family for vacation fun at these pet-friendly Vancouver Island cabins.
Courtenay Beach House
This Vancouver Island cabin rental is pet-friendly and located on the ocean in Courtenay. With two bedrooms and one bath, it’s comfortably rustic with plenty of large windows for natural light. But the real attraction is the waterfront, which is perfect for dogs and paddling enthusiasts alike.
Saltspring Island is noted for its laidback vibe and rich artisan scene. Get a taste of Saltspring and bring your pet to this two-bedroom cabin rental in the woods, with easy access to a freshwater lake or the Salish Sea. Saltspring Island is a short ferry ride from Vancouver Island.
This pet-friendly cabin rental is located on a freshwater lake near Victoria in southern Vancouver Island. Revel in relaxing privacy, with your own waterfront that’s perfect for launching a kayak or SUP. The cottage is perfect for a family of four and features a fenced backyard for pets, as well as direct access to walking and hiking on the Cowichan Valley Trail.
Looking for something whimsical and totally unique? Check out these great Vancouver Island tree cabin rentals.
Free Spirit Spheres
Looking for “the most remarkable accommodation in the world”? You may find it at Free Spirit Spheres, in Qualicum Beach. This Vancouver Island tree cabin rental provides three unique treetop globes, with designs in Douglas fir and fiberglass and connected by elevated forest walkways. Perfect for couples and those looking for creative inspiration. Check availability and book online.
Bird’s Eye Views of the Salish Sea
This Vancouver Island treehouse rental is located five minutes from Sooke. The stunning wooden tree cabin features a sleeping loft and plenty of deck space to enjoy the views. It’s located on Sooke’s Galloping Goose Trail and close to some of the region’s best beaches, with plenty of options for launching a kayak or paddleboard nearby.
This treehouse rental overlooks French Beach and the Juan de Fuca Strait, with easy access to some of the best beaches on Vancouver Island. With one queen-size bed this tree cabin is ideal for couples looking for a unique getaway. It is located between Sooke and Jordan River, off of Highway 14.
Sand and sea are Vancouver Island staples. Here are some examples of fantastic West Coast cabin rentals set on the Pacific Ocean’s edge.
Gulf Islands Oceanfront
Kayak and SUP rentals are available with this luxurious waterfront cottage rental on Pender Island, an easy ferry ride from Victoria. You’ll experience a laidback lifestyle including a great Saturday market for fresh fruit, vegetables, breads and more. This Vancouver Island cottage rental also gives you access to swimming pools and yoga classes.
Famous among landscape photographers and storm watchers, the legendary Wickaninnish Inn is one of Tofino’s greatest luxury resorts, with guest rooms and suites on Chesterman Beach. Experiences include kayak day-tripping in Clayoquot Sound, surfing and ocean fishing. Check availability and book a suite online.