Home Blog Page 491

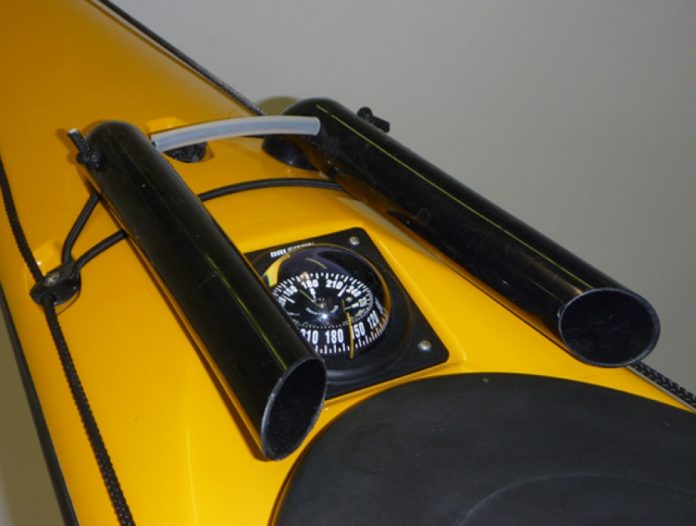
Bluewater Holster Gear Review

Photo: Bluewater
Bluewater Holster Gear Review

This gear review was originally published in Adventure Kayak magazine.

This clever setup is designed to keep your spare paddle where it belongs—on your deck, within easy reach of the cockpit. Attached via the decklines, Bluewater Kayak Work’s Stick Holster’s low profile design is secure and fits both Greenland and Euro-style two-piece paddles. The kit also includes a sheet of yak armor to protect your deck’s finish from abrasion. 

This article originally appeared in Adventure Kayak, Fall 2011. Download our free iPad/iPhone/iPod Touch App or Android App or read it here.

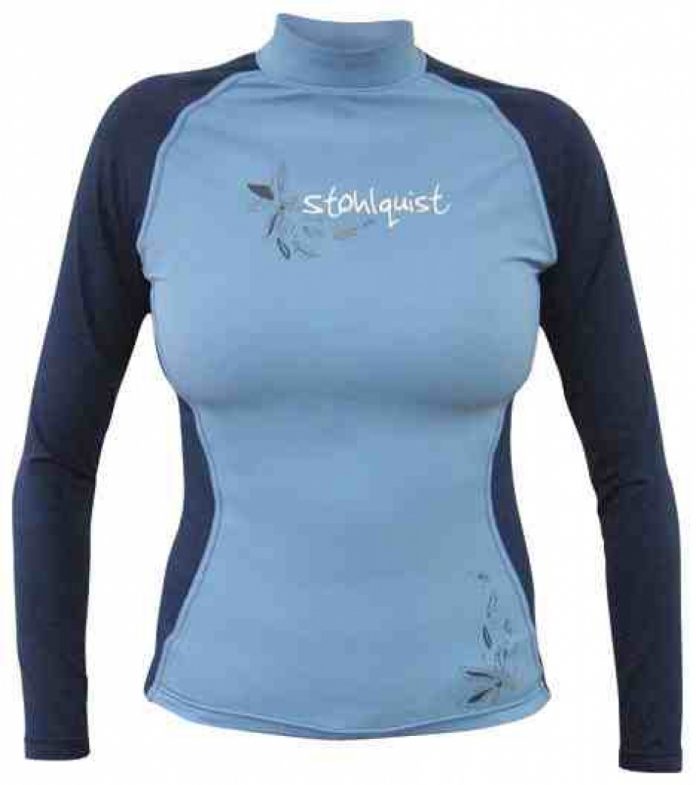
Stohlquist Rashguard Gear Review

Photo: Stohlquist
Rashguard

This gear review was originally published in Adventure Kayak magazine.

New for the 2011 paddling season, Stohlquist has released a line of stylish rashguards. The Burnout is available in long- and short-sleeved options with an athletic fit and funky graphics— flowers for the ladies, tribal inspired designs for the gents. The tops are rated UPF 50+ for maximum sun protection and feature durable stitch construction to avoid premature wear at the seams. Heads, arms and legs sold separately. 

$35–$40 | www.stohlquist.com 

This article originally appeared in Adventure Kayak, Fall 2011. Download our free iPad/iPhone/iPod Touch App or Android App or read it here.

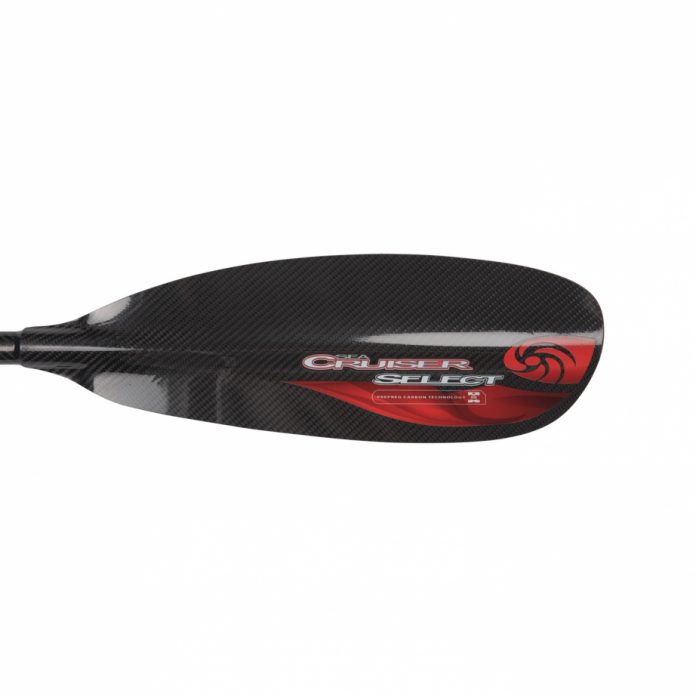
Select Paddles Seacruiser Gear Review

Photo: Select Paddles
Select Paddles Seacruiser Gear Review

This gear review was originally published in Adventure Kayak magazine.

The seacruiser is a lightweight, carbon fiber paddle designed for low angle touring. We tested the bent shaft, full carbon version with select’s Vario S-Lock adjustment system. The adaptable ferrule allows users to customize the paddle’s length within a 10-centimeter range and select their preferred feather angle. we passed our 210–220-centimeter demo around the Adventure Kayak offices and found it fit every paddler and boat. Despite the added weight of the hex key-operated adjustment system, the seacruiser paddles comfortably and efficiently.

$449 | www.select-kayaks.com

This article originally appeared in Adventure Kayak, Fall 2011. Download our free iPad/iPhone/iPod Touch App or Android App or read it here.

Top Summer Class III Creeks

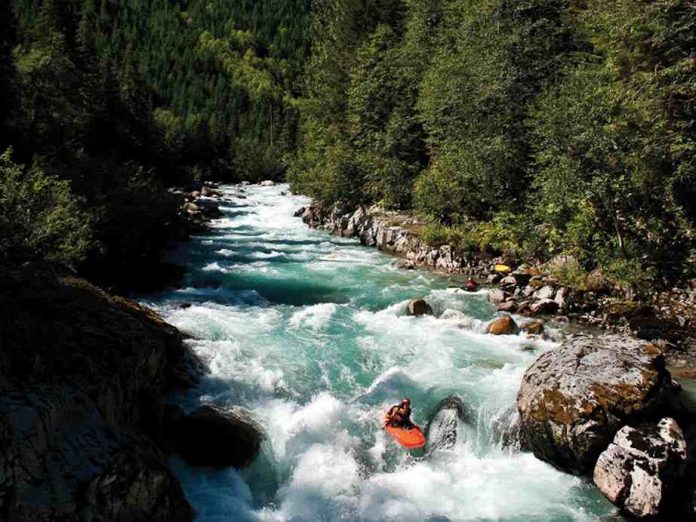
Ashlu Play Run, BC. Photo: Maxi Kniewasser

Paddle late into the season with Rapid magazine’s top picks for summer creek runs. 


BZ CORNER
TO BUCK CREEK, White Salmon River, WA

Pacific Northwest paddlers know this to be among the best intermediate runs in the region. Continuous ac- tion offers opportunities to boof, run falls and negotiate boulders and fallen logs. The White Salmon is fed by snowmelt from Mt. Adams and boasts consistent icy- cold flows all season.

The run is about seven miles long, dropping at 45 feet per mile. Check flow levels at the USGS gauge near Underwood—ideal levels fall between 700 and 1,700 cfs.

YOUR RIDE

Esquif Taureau

SHUTTLE ROUTE

Travel north on Alt Hwy 141 off Hwy 14, just west of the Hood River Bridge over the Columbia. Turn west onto Northwestern Lake Rd. and follow it for a half-mile to the take-out at the park. To access the put-in, return to the 141 and head north to the Forest Service launch site

in the village of BZ Corner, just after the turn-off for Glenwood Rd.


RODGERS FLAT, North Fork of the Feather, CA

This section of the Feather flows between the Rock Creek dam and the Tobin Vista access. It’s runnable one weekend monthly, July to October, during sched- uled dam releases. Fun chutes, boofs and boulder heaps define this stretch of pool-drop rapids.

The Rodgers Flat section runs 3.3 miles, dropping
an average of 35 feet per mile. Because of controlled releases, volume runs consistently between 1,000 and 1,600 cfs. This run has hairier section downstream so be sure you don’t miss the take-out.

YOUR RIDE

Dagger Mamba

SHUTTLE ROUTE

Take Hwy 70 north out of Sacramento for about 110 miles. Find the take-out along the 70 at the Tobin Vista parking lot past the double bridge. The put-in is up the road four miles at a pullout below Rock Creek dam.


ASHLU PLAY RUN, Ashlu River, BC

Despite its name, this short section of the Ashlu is all creek. It has the wildlife, scenery, punishing shuttle roads, milky jade water, continuous whitewater and boulder gardens of the rest of the Ashlu without the class V rapids.

The four-mile-long Play Run drops at 78 feet per mile. It’s runnable at levels of 100-plus cms on the Elaho gauge near Squamish. Walk down the trail at the take-out so you recognize it from the water—immediately below is the class V Mine Section.

YOUR RIDE

Bliss-Stick Mystic

SHUTTLE ROUTE

Travel north out of Squamish on Hwy 99 and turn left onto Squamish Valley Rd., which becomes Squamish River Rd. At mile 21, turn left onto the side road. At mile-marker 28, you’ll find parking

at the take-out trail. Travel another four miles beyond the take-out and park at the bridge that marks the put-in.


This article originally appeared in Rapid, Fall 2011. Download our free iPad/iPhone/iPod Touch App or Android App or read it here.

Sculling Brace Kayak Technique

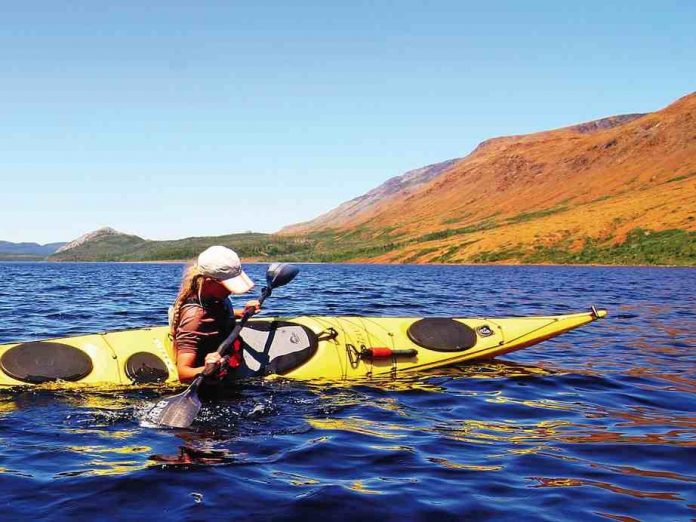
Photo: Virginia Marshall
Practising the sculling brace.

This article offers tips and techniques for performing a high sculling brace from a kayak and was originally published in Adventure Kayak magazine.

Two points of stability allow you to balance more effectively than one. Sculling braces help you stay upright in tippy situations by acting as a second point of stability to your kayak. Practice the sculling brace by breaking it down into these three elements: body, boat and paddle.


Peer review

The scull should be about as long as
your cockpit with the blade just under the surface. Done properly, there should be very little aeration of the water. Your inward hand is just an anchor; it is your outward hand that does all the work changing the angle of the blade. » Michael Pardy, Paddle Canada level 3 instructor trainer, Victoria, BC

The angle of the blade will give more turn propulsion if it is closer to vertical, like a sweep, and more support if it is flatter to the water. This is useful for learning how flat an angle you want for a graceful sculling brace, and also how to put some support in your sweep stroke for confident edged turns in lumpy water. Blade angle is controlled by raising or lowering the elbow relative to the wrist, keeping the wrist neutral to prevent injury. » Ginni Callahan, ACA level 5 instructor and BCU level 4 coach, Cathlamet, WA

To be biomechanically friendlier as you edge further into the water, rotate your chest to the sky and roll the boat off your body, lessening the load on the paddle. This is similar to a Greenland static brace position. » Shawna Franklin & Leon Sommé, BCU level 4 coaches, Orcas Island, WA

I tend not to look at sculling for support as a stand-alone skill, instead it is a way to en- hance or add confidence to other skills and maneuvers. For example, when performing sweep strokes on the move, finishing a roll, or to perform braces on the move and prevent the blade diving. » Doug Cooper, BCU level 5 coach, Aviemore, Scotland


Body

For a high sculling brace, your elbows should be low with the paddle held horizontally near your shoulders. For a low sculling brace, your elbows should be high, directly over the paddle shaft, which is held horizontal above the cock- pit of your kayak. Use torso rotation to move your blade through the stroke.

Your lower body controls the position of your kayak. use your hips and knees to either hold your boat on edge, or to right the boat as with other bracing strokes.


Boat

Transferring some of your weight onto your sculling paddle will allow you to hold your boat on edge or recover from a near capsize on the sculling side. With a high sculling brace, your kayak can be held on almost any degree of edge, including nearly upside down.


Paddle

Skim your paddle back and forth across the water beside your kayak, maintaining pressure on the power face (high sculling brace), or the non-power face (low sculling brace). Keep the paddle on the surface by slightly lifting the leading edge of your blade.

To get a feel for this, swish your hand back and forth across the water, feeling the water pressure on your palm. As your thumb leads the way through the water, angle it slightly towards the sky. As your pinky leads, angle it towards the sky.

The transition points of the stroke—the points where you change your paddle’s direction of movement—offer little stability. There- fore, move the paddle at a slow to moderate pace and use longer strokes to reduce the number of transitions.


Sculling for Support

Use a high or low sculling brace to salvage a sloppy roll, to stabilize yourself when working your legs back into your kayak during a rodeo re-entry, or in any other situation where you need consistent extra stability.

Practice your sculling technique by moving your kayak in multiple directions using a sculling draw (sculling with a vertical paddle). Then bring the paddle back to horizontal and begin adding a little weight to the paddle as you scull back and forth. Finally, work on holding your boat further and further on edge while sculling for support. This gradual progression will help develop both your muscle memory and your confidence.

Meaghan Hennessy is a Paddle Canada Level 2 instructor trainer and BCU Level 3 sea coach based in Vancouver, British Columbia. She currently teaches for SKILS.


This article originally appeared in Adventure Kayak, Summer/Fall 2011. Download our freeiPad/iPhone/iPod Touch App or Android App or read it here.

Canoe Poling Tips and Technique

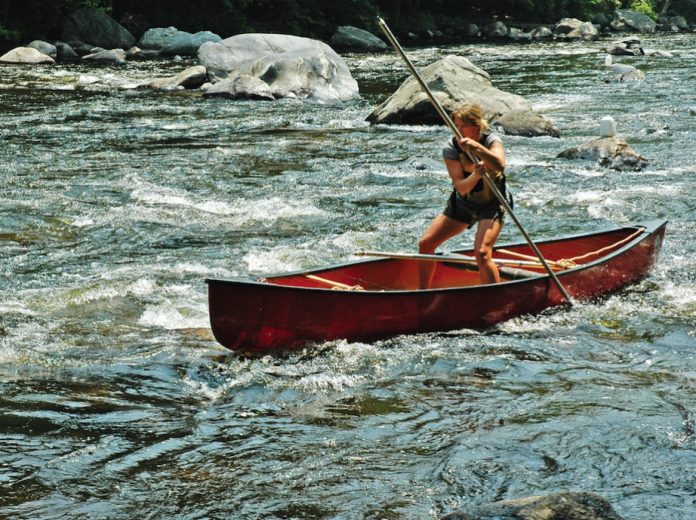
Different sort of pole dancing. Photo: Sean Carapella
Canoe poling technique.

If you have discovered the power of canoe poling, you know that streams can be two-way streets and a canoe can be pushed upstream far beyond what is possible with a paddle. Rivers can be enjoyed in a simple up-and-back trip from the put-in, eliminating the need for a car shuttle.

Poking upstream in calm water is a great place to start, but as you progress, you may wish to confront stronger current. This is where poling gets technical.


Get in Position

Facing upstream in the eddy, stand with your feet square, one or two feet behind the center thwart to lighten the bow. A good rule of thumb for all upstream work is to keep the bow sitting higher in the water than the stern. Position the canoe very close to the eddyline and almost parallel to it, with the bow pointed slightly into the current.


Plant the Pole

Plant the pole on the eddy side of the boat. That is, the side away from the current you’re entering.


Push and Tilt

As you push across the eddyline and enter the current, tilt the boat away from the side where your pole is planted. This will carve a turn and counteract the tendency to get flushed down- stream. Tilt the boat, don’t lean your body— stand up straight and tilt the hull by weighting one foot.


Recover and Plant the Pole
 behind you

As you muscle your way into the current, be sure to plant the pole well behind your body. In fast water, by the time you recover and plant again, your boat may have lost its forward momentum and begun drifting backward.

It’s typical to find that by the time you start pushing, the pole is now planted right beside your body and you’re just pushing yourself sideways. The common beginner scenario is a series of these sideways pushes on alternate sides of the boat, resulting in some flailing around and finally washing out the bottom of the rapid. Get in the habit of planting the pole well behind you to set up the proper angle, even if it means drifting back a little in order to find good purchase on the bottom.

These four basic tips apply in virtually all situations. Start poling in gentle current and work towards more advanced techniques for steeper drops.

Matt Swift is an American Canoe Association poling champion living in Blacksburg, VA. He discovered canoe poling in 1988 as a way to explore the shallow streams of Southwest Virginia without having to set up car shuttles.


This article originally appeared in Canoeroots & Family Camping, Fall 2011. Download our freeiPad/iPhone/iPod Touch App or Android App or read it here.
Emergency Communication Tips

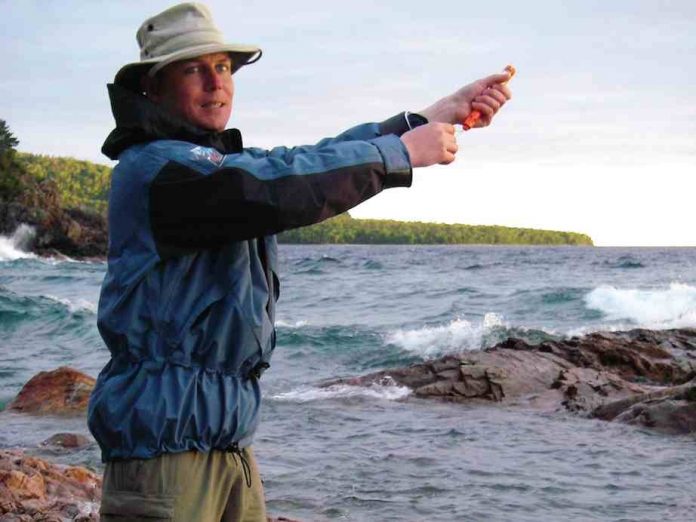
Flares are an option for wilderness communication. Photo: Virginia Marshall
Staying safe in the woods.

This article about emergency communication tips in the wilderness was originally published in Canoeroots and Family Camping magazine.

On a remote portage you come upon a group carrying a teenage girl on a stretcher. She has appendicitis and needs immediate evacuation. You spot a Forest Service floatplane overhead, whip out your Silva compass and aim the mirror at the airplane. Miraculously, the glint of reflected sunlight catches the pilot’s eye. He flies the girl to Grand Marais, Minnesota, where her appendix is removed.

You’re probably thinking, “Good story, Cliff,” but this actually happened to me in 1967 on my first trip to the Boundary Waters.

It’s smart to carry signal gear on any canoe trip, even one close to home. Here are some options.


Heliograph Mirror

The chance of reflecting sunlight onto a moving airplane with a standard mirror is almost zero. Much better is a genuine military heliograph mirror with a sighting hole in the center. With practice, a CD will also work.


Smoke

Floatplane pick-ups and search and rescue operations are usually daytime affairs so smoke creates better visible contrast than flares. Best bang is the Orion handheld orange smoke signal, available at any marina. It ignites like a rail- road flare and pours out thick orange smoke for 50 seconds.


VHF Aircraft radio

An airplane you can see is probably close enough to be reached on a handheld VHF air- craft transceiver. A VHF radio with a 15-mile range allows about five minutes of talk time at typical floatplane speeds. As a courtesy, most bush pilots will circle to keep you in range. But high-flying jets won’t change course, so you better talk fast.

In a life-threatening situation, you may broadcast on the restricted emergency frequency (121.5 megahertz) monitored by all pilots. For other concerns, you must stick with the frequencies that are assigned to the charter companies—ask your pilot and program it into your radio. Transmitting without an FCC license is technically illegal, but in the bush— and given the short range of handheld transceivers—everyone looks the other way. Note that a VHF marine-band radio cannot be used to contact airplanes.


Spot

SPOT Communicator is a palm-sized, one-way satellite communication device. Push a button to activate a global 911 network and initiate search and rescue. You can also send two pre- written messages to your contacts via email. Recently, the unit has been paired with the Delorme Earthmate PN-60 GPS, which provides a type-and-send keyboard and GPS fix. SPOT is sure to evolve considerably by the time you read this.


Satellite Phone

Globalstar and Iridium are the most popular brands. Iridium has worldwide coverage; Globalstar has some blackout areas. Be advised that rental units see considerable use and batteries may be old and not hold a full charge. It’s wise to bring a solar charger if you rent a satellite phone.


Whistle

You may not hear a whistle above the roar of rapids—that’s why you should know the inter- national safety hand/paddle signals. Whistles work well on land, if you wander off a bushwhacked portage trail and become con- fused, for example. Best are pea-less designs like the Fox 40 that still sound when flooded.


Color Counts

Brightly colored canoes, packs, tents and clothing make you easier to spot and can be arranged in threes to create the international signal for distress.


This article originally appeared in Canoeroots & Family Camping, Spring 2012. Download our freeiPad/iPhone/iPod Touch App or Android App or read it here.

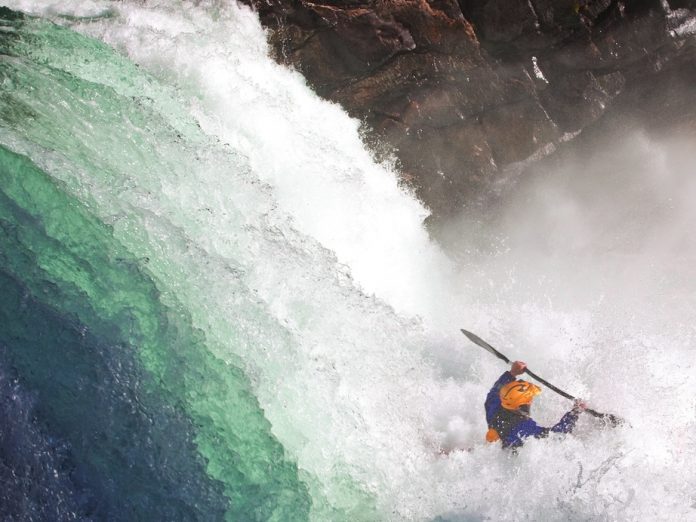
Techniques for Sticky Hydraulics

Photo: Ryan Creary
Tactics for sticky hydraulics

This techniques article featuring tips for escaping sticky hydraulics was originally published in Rapid magazine.

At some point in your paddling career you’ll find yourself stuck in a hole. Once there, you need to know how to get out, ideally while staying in your boat. If you’re upside down, start by using the re-circulating water to your advantage to roll upright. A small paddle motion and hip flick on your downstream side should be enough—a large and violent attempt is both unnecessary and undesirable.

Now that you can breathe, here’s how to escape the hole:

SURF IT SIDEWAYS

After rolling, tilt and brace downstream to keep the current from flipping you over again. Use a forward or reverse stroke with the brace and your body weight to move your boat forwards or backwards to the sides of the hole—often its weakest points. If you get to the side of the hole, reach for the water outside the hole with your paddle blade—this may help pull you out.

RODEO AWAY

If you can’t surf out the side of the hole, try using the subsurface water. Force one end of your boat underwater as deep as possible, ideally getting your boat into a vertical position. A vertical boat will often stick deep enough into the water to catch the downstream current and flush you out of the hole.

REACH FOR IT

If your boat doesn’t reach down deep enough, try to grab the downstream current with your paddle. Flip upside down in a tucked position and slowly reach a paddle blade towards the bottom of the river. Try to keep your elbows as close to your body as possible to protect yourself. The bigger the hole, the farther you’ll have to extend your arms. Once the downstream-flowing water grabs your blade, hang on and let it pull you and your boat out of the hole.

GET WET

Sometimes, the downstream current is too deep to reach. After all, your boat is designed to stay on the surface. If you’re still stuck, pull your skirt, allowing the boat to fill with water and sink below the surface. If you can, stay in your boat, catch the deep water flowing downstream and ride it out of the hole.

SWIM UNDER

If you do exit your boat and find yourself still in the hole, you’ll need to swim beneath the surface into the downstream-flowing current. As the hole pushes you underwater, tuck into a ball to go as deep as possible and let the water carry you out of the hole where you can resurface in relative safety.

Keep your wits about you and do your best to remain in your boat. Staying calm will help you think clearly and choose the right tactic to make your escape.

Bryant Burkhardt is an ACA Instructor Trainer in both whitewater and coastal kayaking for California Canoe & Kayak, based in Sacramento.


This article originally appeared in Rapid, Fall 2011. Download our free iPad/iPhone/iPod Touch App or Android App or read it here.
Wenonah Canak Canoe Review

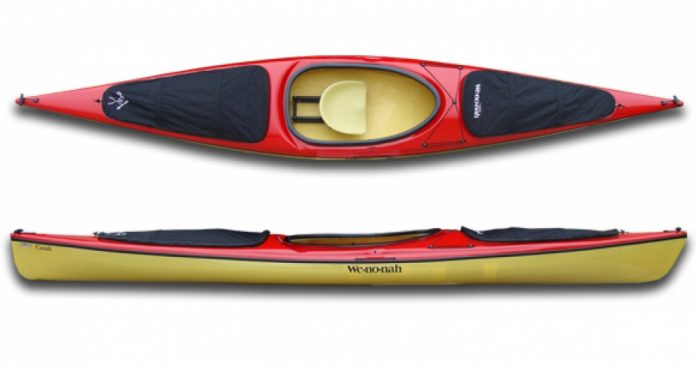
Photo: Wenonah Canoe
Wenonah Canak Canoe Review

A review of the Wenonah Canak from Canoeroots and Family Camping magazine.

The Canak is ideal for solo lake camping when the capacity and portability of a canoe are needed, and the touring ability of a kayak is desired. The unique bow and stern storage compartments are spacious and accessible for easy loading and unloading of canoe camping-sized packs. Slipover covers provide a dry ride no matter the weather conditions. Equipped with floor-mounted sliding seat and adjustable kayak-style foot braces.


Length: 16’6″
Width: 30″
Hull Material: Kevlar
Weight: 38 lbs
MSRP: $2,699
Optional removeable yoke: $125


This article originally appeared in Canoeroots & Family Camping, Early Summer 2011. Download our freeiPad/iPhone/iPod Touch App or Android App or read it here.
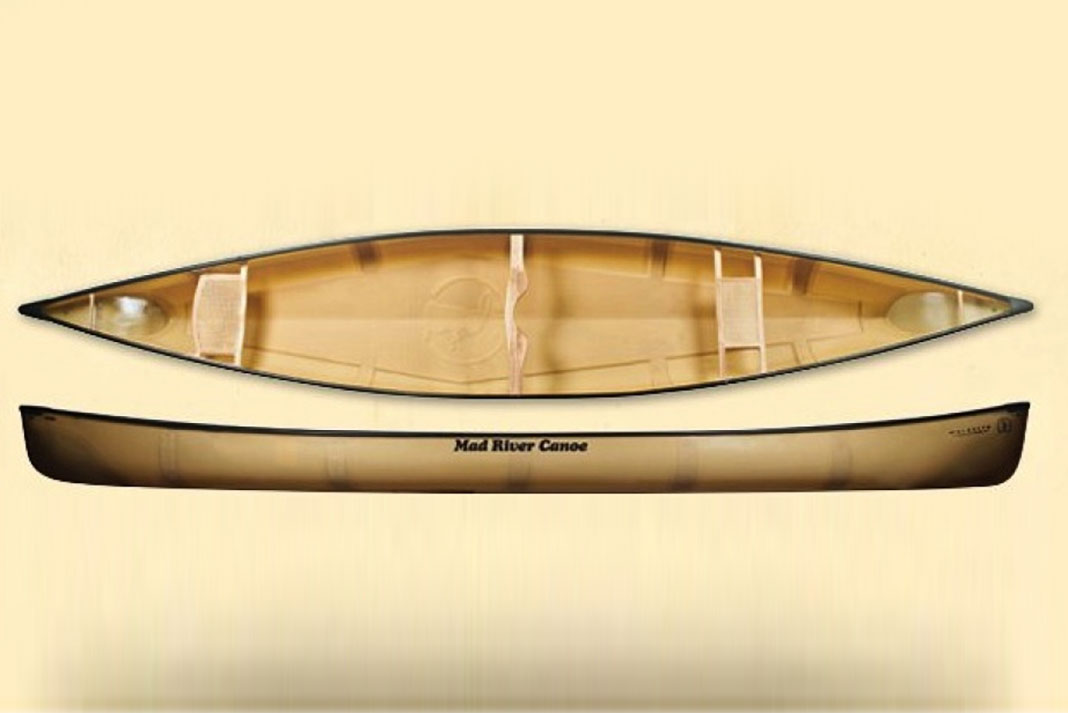
Mad River Malecite Ultralite Canoe Review

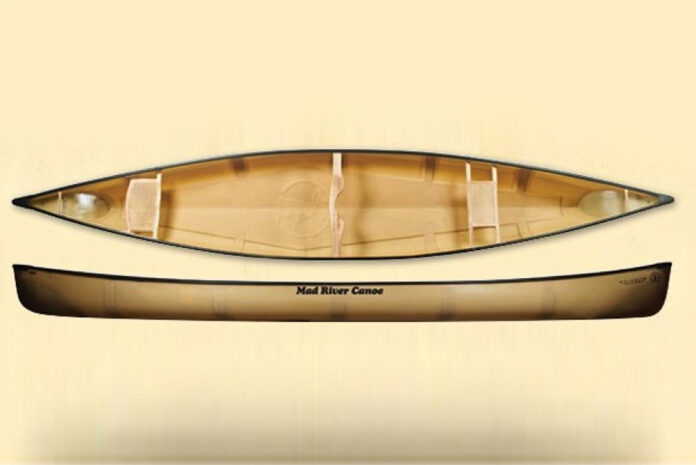
Mad River Canoe Company Malecite Ultralite
Feature photo: Courtesy Mad River Canoe

Mad River Canoe and Jim Henry’s original and timeless design meets state-of-the-art composite materials. Its new lightweight Kevlar/foam core layup adds enhanced acceleration capabilities and paddling efficiency to the impressive responsiveness and seaworthiness of the original Malecite design. Paddle solo or tandem on flatwater with the ability to handle tight, twisty waterways with confidence and style.

Mad River Canoe Company Malecite Ultralite
Feature photo: Courtesy Mad River Canoe

Mad River Canoe Malecite Ultralite Specs

Length: 16’5″
Width: 34.5″
Materials: Kevlar/Foam core
Weight: 43 lbs
Max capacity: 850 lbs

MSRP: $2,889 USD

www.madrivercanoe.com


This article originally appeared in Canoeroots & Family Camping, Summer/Fall 2011. Download our freeiPad/iPhone/iPod Touch App or Android App or read it here.