Home Blog Page 500

Games: Always Leave ‘Em Laughing

Photo: Katie Vegvary
Games: Always Leave 'Em Laughing

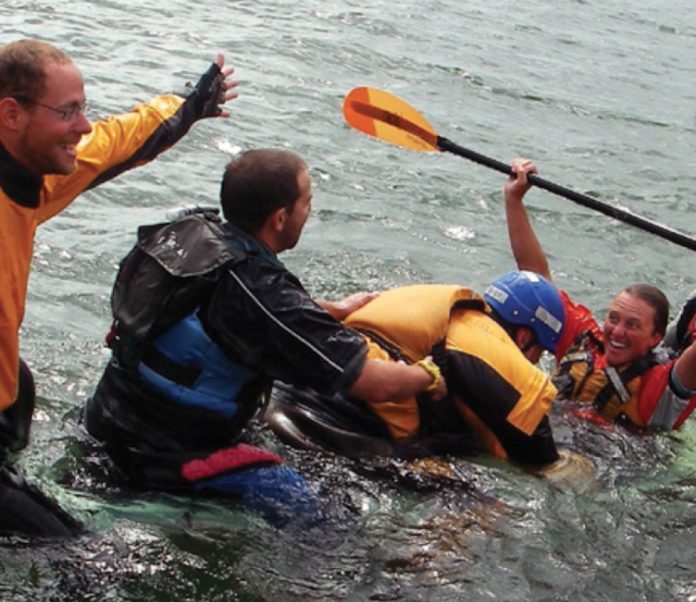
Kayaking was once about survival. Hunting. Transportation. Now we mostly kayak for recreation. Yet how vital that recreation can feel to our structured modern lives. Games, competitive and cooperative, can enhance that sense of satisfaction.

Traditional paddlers have long competed in various events that kept them fit and honed their skills. Play does that—makes you practice often overlooked skills without realizing you’re doing your homework. In addition to developing physical skill and mental sharpness, it also provides social interaction and exercises the laugh muscles.

The games listed below are infinitely adaptable to fit the venue and the paddlers. 

SUBMARINE

IDEA: See how many people can sit on one kayak
PLAYERS: Best with five to 10 per kayak
PROPS: One sturdy kayak
REQUIRED SKILLS: Swimming
HOW TO: Add swampers (players) to the kayak until it submerges. Alternate option—flip the kayak over and try it on the hull.
VALUE: It’s all about balance and teamwork. This is a favorite game at kids’ summer camps.
BONUS: Bracing practice for the player seated in the kayak 

PREPOSTEROUS PROPULSION

IDEA: Move the kayak with a variety of unconventional tools
PLAYERS: Minimum four, six to 18 is ideal, in two or three teams
PROPS: One or two buoys, one kayak per team (or each player in his/her own kayak), one to four preposterous items per person, such as: a stick, football, beach ball, inflatable shark, broom, trowel, lawn chair, pool noodle, Frisbee, cup, kayak pump, helmet, bootie, PFD… 
REQUIRED SKILLS: Moving forward, turning
HOW TO: First person from each team grabs a preposterous item from the pile. Team members help him into the kayak and push. Paddler rounds buoy and returns, tags hand of next team member who grabs another item and takes her turn in the kayak. Discard each item after use. Competitive version counts the winning team as the first one that cycles through all its members once, twice or three times. Cooperative version sees how fast the teams can go through all the items.
CAUTIONARY NOTE: If Leon Sommé shows up to your Preposterous Propulsion game wearing helmet and body armor, brace yourself for a full-contact version, including flying kayak tackles off the dock!
VALUE: It’s cool to see which items work well and which are surprisingly lame. It’s not always what you expect. 

NOODLE JOUSTING

IDEA: Stand in or on your kayak while knocking your opponent off hers
PLAYERS: Two and up; make tournaments with more players
PROPS: Two foam pool noodles
REQUIRED SKILLS: Willingness to try standing in or on a kayak
HOW TO: Position two kayaks near each other but away from docks or other kayaks. Have both opponents stand and wallop each other with foam noodles until one or both fall in. Pick up the pieces.
VALUE: Just standing on the deck (or seat) of a kayak opens new horizons. It’s the epitome of balance. If you have the inner focus to stand up and wave a pool noodle about, then sitting in waves will be a piece of cake.
BONUS: Reentry practice.
This article on games to play with your sea kayak was published in the Summer/Fall 2011 issue of Adventure Kayak magazine.This article first appeared in the Summer/Fall 2011 issue of Adventure Kayak Magazine. For more great content, subscribe to Adventure Kayak’s print and digital editions here.

Rock the Boat: Kayaker, Interrupted

Illustration: Lorenzo Del Bianco
Rock the Boat: Kayaker, Interrupted

I rarely see my friend Jon any more. We’ve sea kayaked together for years, and he’s been a fixture in the open-ocean paddling community. But he’s disappeared. Disappeared into a canoe, and it’s all the fault of the Brits.

The new requirements of the British Canoe Union—in which Jon and many of my other sea kayaking buddies are coaches—require competency in multiple paddling craft and environments. Longtime sea kayakers had to cut their paddles in half and start kneeling in open boats on rivers.

Jon loves it, he’s addicted to half a paddle and boats that fill up with water when you crash through waves. He now has six canoes outnum- bering his kayak fleet.

So I did what anyone would in my situation—complain. Why does coaching sea kayaking require knowing how to canoe?

Of course, there are plenty of good reasons. Coaching means working with other sports in a student’s history, and canoeing is a common one. Coaches employ a variety of techniques to provide feedback to learners: using half a paddle is very effective. I’ve been in tight rock gardens where

I could only paddle on one side of my kayak anyway.

I stopped whining about my lack of partners for sea kayak adventures, dusted off my ancient whitewater kayak (two knee surgeries make kneeling in a canoe impossible), and joined them on the river.

“For every kayaker who starts canoeing, a canoeist must start kayaking.”

Soon I was hooked. Half an hour from home, the water was clear and clean, and the current pushed us along from one play spot to another. I upgraded my whitewater kayak and went on a seven-day river trip with my now kayaker-canoeist buddies. We didn’t once have to wake up at 5 a.m. to catch an inconveniently scheduled tidal current.

Then something even cooler happened. Suddenly, new river-rat friends wanted to go sea kayaking. Diehards from the single blade scene bought NDK Explorers and asked me about trips in British Columbia and Alaska. It was as if there was some Newtonian Law of Conservation of Paddlesports Disciplines I’d missed in high school physics, where for every kayaker who starts canoeing, a canoeist must start kayaking.

That also makes sense. When sea kayak coaches started canoeing, whitewater open boaters suddenly found themselves sharing eddies and shuttles with sponsored, 5-star kayakers with some hefty trips under their belts. The allure was irresistible. The sea kayaking industry couldn’t have come up with a better way to expand their sport.

Now I sea kayak with people who tell stories about open boating down the Grand Canyon. I recently watched a canoeist-turned-sea kayaker pull off a back ferry across Canoe Pass that his instructor couldn’t mimic. As the saying goes, “Advanced sea kayak strokes (like cross-bow jams) are basic canoe strokes.”

I see my old sea kayaking friends again. It’s anyone’s guess what kind of boats we’ll be paddling.

But these days Jon is really into poling—pushing his way upstream in a canoe with a 12-foot-long stick. I doubt that will catch on. It sounds kind of silly. 

Neil Schulman lives, writes, paddles, photographs and works in environmental conservation in Portland, Oregon. He owns four kayaks and no canoes…yet. 

This article on kayakers turning into canoeists was published in the Summer/Fall 2011 issue of Adventure Kayak magazine.This article first appeared in the Summer/Fall 2011 issue of Adventure Kayak Magazine. For more great content, subscribe to Adventure Kayak’s print and digital editions here.

Manhattan: Gaining Perspective in NYC

Photo: Dave Caldwell
Manhattan: Gaining Perspective in NYC

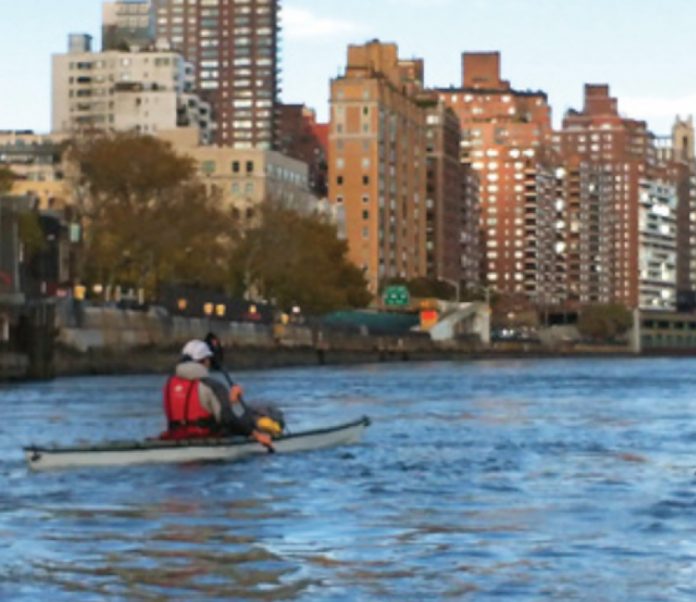
Sometimes, you need to step back from the battlefield to get perspective on the bigger picture. The picture I’m looking at encompasses an overflowing island metropolis in the foreground and, in the background, a river. It’s framed in red tape and hangs wearily. Should it fall, it will shatter into a million pieces, lost forever. That picture came to me last October as I headed to the Big Apple to paddle and ride around Manhattan Island.

With three folding kayaks and three folding bikes, we were well equipped for our two-day venture. The goal of the trip was simple; to see Manhattan, its denseness and its grandeur, the clash of old industry and modern metropolitan life. None of us had been to New York City before.

Amidst the fury of downtown Manhattan, we anxiously unloaded our rides—three guys unfolding extra-small bikes with chrome fenders and oversized springy seats.

From Pier 66 we toured southwest to Ground Zero, grabbed a coffee, rambled through the maze of skyscrapers on Broadway Avenue amidst a rush of yellow cabs and pigeons, grabbed another coffee, continued to Times Square, grabbed a third coffee, and then ripped around Central Park. We finished our ride along the shore of the Hudson River, pedaling in darkness, the odd streetlight casting an amber glow on the endless backdrop of cityscape.

Viewing the chaos from its periphery

As our day came to an end, we felt a need to step back from the flashy lights, car fumes and crowds. To truly see the big picture that was Manhattan Island, it was necessary to view the chaos from its periphery.

The Manhattan Kayak Company, located at Pier 66, is well suited as a starting point for island paddlers. Even though the center was closed for the season, the staff was happy to provide local beta, such as this pearl: “Staten Island Ferries—the big orange ones—do not stop for anything.”

For paddlers, the relationship between a community and its natural environment is a no-brainer. Yes, I’m talking about river conservancy and the fact that the lives of not only river dwellers, but also entire communities, suffer from the ongoing degradation of their natural resources. Our eight-hour circumnavigation put the island into focus as a community, like so many other communities, which has overlooked its long-term dependence on the health of its ecosystems.

We paddlers slip neatly, and sometimes blindly, into our own communities of paddlers who understand this notion of preserving what we use to play and relax for the greater good. The picture painted by our paddle reflects the urgency that now, more than ever, is the time to help other communities understand.

Even urban islands of 1.6 million people, even centers of culture and finance, even Manhattan.

Cameron Dube is an outdoor educator and avid paddler based near the Ottawa River. He loves Starbucks. 

This article on big city perspective was published in the Summer/Fall 2011 issue of Adventure Kayak magazine.This article first appeared in the Summer/Fall 2011 issue of Adventure Kayak Magazine. For more great content, subscribe to Adventure Kayak’s print and digital editions here.

Editorial: Dating Secrets for Sea Kayakers

Photo: Vince Paquot
Editorial: Dating Secrets for Sea Kayakers

My first kayaking mentor called them Dates from the Dock.

Paddling moves so eye-catching, so linger-and-watch-awhile eccentric that some didn’t even involve paddling. Skills that were strange, but in a good way, like Ellen Page’s deadpan quips in Juno or Reese Witherspoon’s legal methodology in Legally Blonde.

Preoccupied with the only relationship that mattered just then—between the kayak and myself—waterfront seduction was furthest from my mind. Still, I practiced diligently.

Awkward, one-armed high brace turns eventually transformed into gracefully edged parabolas while I waved coquettishly to imaginary suitors. I sculled ever closer to the water until I could dip all the way down for a drink and then, lips pursed and cheeks puffed, squirt it skyward like a Roman fountain. My angel roll approached something almost angelic. Venus de Milo riding a kayak instead of a seashell.

Since those early revelations, I’ve heard messing around like this in your kayak called many different things, and seen it taught and practiced by some of the best instructors and paddlers.

{loadposition PTG_AK_Midcontent}

“I realize now that Dates from the Dock was just a ploy to divert my attention.”

BCU Senior Coach Derek Hutchinson is a proponent of moves like the aforementioned, one-armed high brace turn (a.k.a. Hutchinson Turn) because, he says, they get paddlers “beyond the cockpit” and experimenting with greater boat lean and edging. The legendarily dogmatic Hutchinson should know—he penned the first book on sea kayak education (The Complete Book of Sea Kayaking, now in its 5th edition), has designed over a dozen kayaks (maybe even yours—paddle a Current Designs Gulfstream, Sirocco or Andromeda?) and is regarded by many as the Father of Modern Sea Kayaking.

Sea Kayak Baja Mexico and Columbia River Kayaking owner/operator Ginni Callahan advocates jousting with pool noodles whilst standing in cockpits.“Games are a great way to practice skills and get more comfortable with the water,” she says, “as well as good exercise for the paddling and laugh muscles.”

Case in point: For the better part of a decade, Michigan-based instructor, kayak impresario and occasional stand-up comedian Kelly Blades’ kayak play workshops have drawn euphoric crowds at symposiums across the country. Participants take a break from bracing drills, video analyses and stroke improvement clinics to clamber around on the decks of their kayaks, spin around in their cockpits and—a move too often shunned by serious sea kayakers—splash frequently and spectacularly into the water.

I realize now that Dates from the Dock was just a ploy to divert my attention while the practical skills underlying each party trick developed unbidden.

Perhaps the only thing such shows of panache haven’t succeeded at (in my experience, at least) is seducing an actual date off the dock.

Virginia Marshall is Adventure Kayak’s senior editor. 

This article on learning skills in unique ways was published in the Summer/Fall 2011 issue of Adventure Kayak magazine.This article first appeared in the Summer/Fall 2011 issue of Adventure Kayak Magazine. For more great content, subscribe to Adventure Kayak’s print and digital editions here.


Bluewater Holster Gear Review

Photo: Bluewater
Bluewater Holster Gear Review

This gear review was originally published in Adventure Kayak magazine.

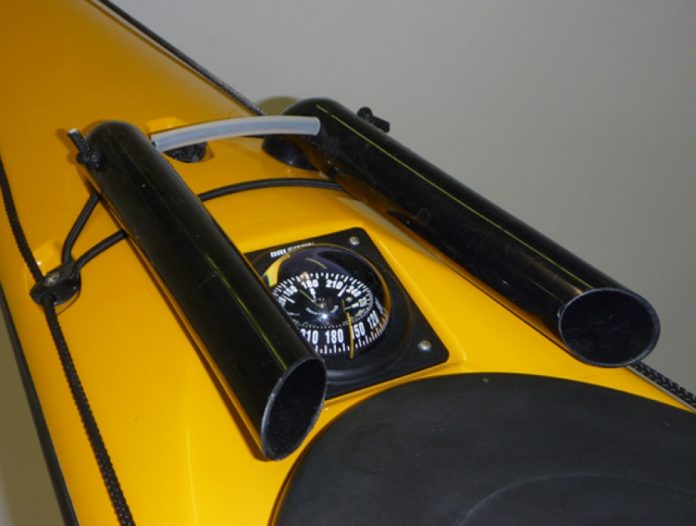
This clever setup is designed to keep your spare paddle where it belongs—on your deck, within easy reach of the cockpit. Attached via the decklines, Bluewater Kayak Work’s Stick Holster’s low profile design is secure and fits both Greenland and Euro-style two-piece paddles. The kit also includes a sheet of yak armor to protect your deck’s finish from abrasion. 

This article originally appeared in Adventure Kayak, Fall 2011. Download our free iPad/iPhone/iPod Touch App or Android App or read it here.

Stohlquist Rashguard Gear Review

Photo: Stohlquist
Rashguard

This gear review was originally published in Adventure Kayak magazine.

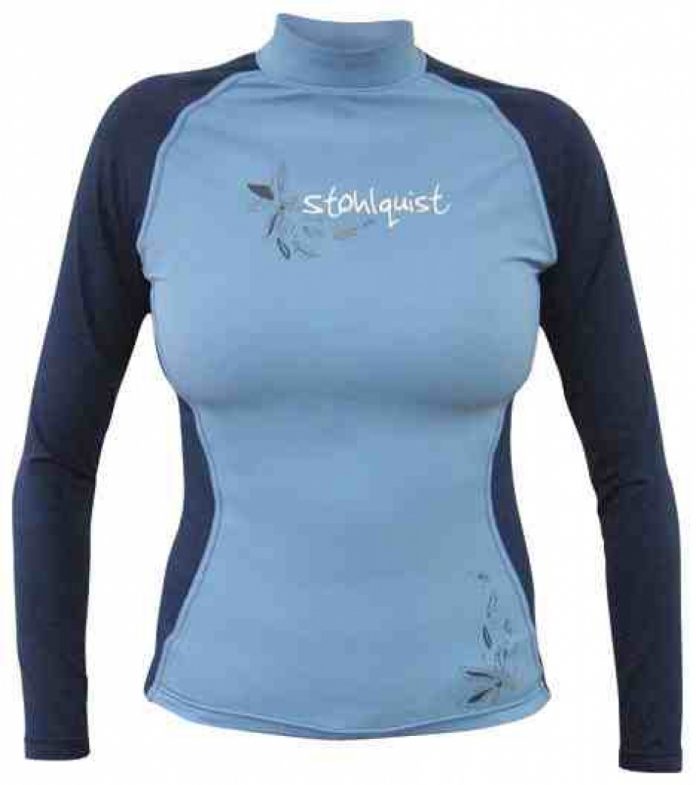
New for the 2011 paddling season, Stohlquist has released a line of stylish rashguards. The Burnout is available in long- and short-sleeved options with an athletic fit and funky graphics— flowers for the ladies, tribal inspired designs for the gents. The tops are rated UPF 50+ for maximum sun protection and feature durable stitch construction to avoid premature wear at the seams. Heads, arms and legs sold separately. 

$35–$40 | www.stohlquist.com 

This article originally appeared in Adventure Kayak, Fall 2011. Download our free iPad/iPhone/iPod Touch App or Android App or read it here.

Select Paddles Seacruiser Gear Review

Photo: Select Paddles
Select Paddles Seacruiser Gear Review

This gear review was originally published in Adventure Kayak magazine.

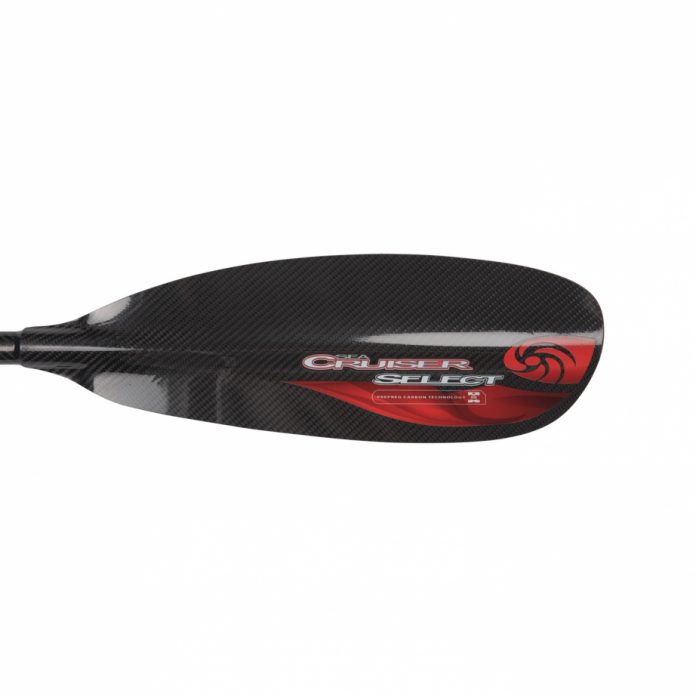
The seacruiser is a lightweight, carbon fiber paddle designed for low angle touring. We tested the bent shaft, full carbon version with select’s Vario S-Lock adjustment system. The adaptable ferrule allows users to customize the paddle’s length within a 10-centimeter range and select their preferred feather angle. we passed our 210–220-centimeter demo around the Adventure Kayak offices and found it fit every paddler and boat. Despite the added weight of the hex key-operated adjustment system, the seacruiser paddles comfortably and efficiently.

$449 | www.select-kayaks.com

This article originally appeared in Adventure Kayak, Fall 2011. Download our free iPad/iPhone/iPod Touch App or Android App or read it here.

Top Summer Class III Creeks

Ashlu Play Run, BC. Photo: Maxi Kniewasser

Paddle late into the season with Rapid magazine’s top picks for summer creek runs. 


BZ CORNER
TO BUCK CREEK, White Salmon River, WA

Pacific Northwest paddlers know this to be among the best intermediate runs in the region. Continuous ac- tion offers opportunities to boof, run falls and negotiate boulders and fallen logs. The White Salmon is fed by snowmelt from Mt. Adams and boasts consistent icy- cold flows all season.

The run is about seven miles long, dropping at 45 feet per mile. Check flow levels at the USGS gauge near Underwood—ideal levels fall between 700 and 1,700 cfs.

YOUR RIDE

Esquif Taureau

SHUTTLE ROUTE

Travel north on Alt Hwy 141 off Hwy 14, just west of the Hood River Bridge over the Columbia. Turn west onto Northwestern Lake Rd. and follow it for a half-mile to the take-out at the park. To access the put-in, return to the 141 and head north to the Forest Service launch site

in the village of BZ Corner, just after the turn-off for Glenwood Rd.


RODGERS FLAT, North Fork of the Feather, CA

This section of the Feather flows between the Rock Creek dam and the Tobin Vista access. It’s runnable one weekend monthly, July to October, during sched- uled dam releases. Fun chutes, boofs and boulder heaps define this stretch of pool-drop rapids.

The Rodgers Flat section runs 3.3 miles, dropping
an average of 35 feet per mile. Because of controlled releases, volume runs consistently between 1,000 and 1,600 cfs. This run has hairier section downstream so be sure you don’t miss the take-out.

YOUR RIDE

Dagger Mamba

SHUTTLE ROUTE

Take Hwy 70 north out of Sacramento for about 110 miles. Find the take-out along the 70 at the Tobin Vista parking lot past the double bridge. The put-in is up the road four miles at a pullout below Rock Creek dam.


ASHLU PLAY RUN, Ashlu River, BC

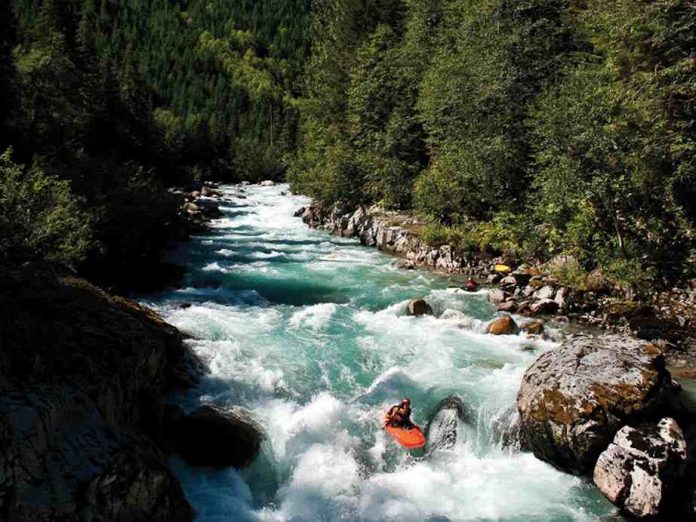
Despite its name, this short section of the Ashlu is all creek. It has the wildlife, scenery, punishing shuttle roads, milky jade water, continuous whitewater and boulder gardens of the rest of the Ashlu without the class V rapids.

The four-mile-long Play Run drops at 78 feet per mile. It’s runnable at levels of 100-plus cms on the Elaho gauge near Squamish. Walk down the trail at the take-out so you recognize it from the water—immediately below is the class V Mine Section.

YOUR RIDE

Bliss-Stick Mystic

SHUTTLE ROUTE

Travel north out of Squamish on Hwy 99 and turn left onto Squamish Valley Rd., which becomes Squamish River Rd. At mile 21, turn left onto the side road. At mile-marker 28, you’ll find parking

at the take-out trail. Travel another four miles beyond the take-out and park at the bridge that marks the put-in.


This article originally appeared in Rapid, Fall 2011. Download our free iPad/iPhone/iPod Touch App or Android App or read it here.

Sculling Brace Kayak Technique

Photo: Virginia Marshall
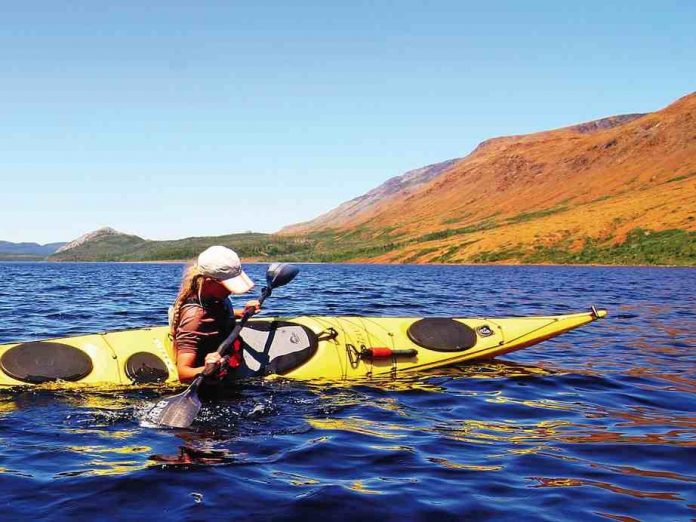
Practising the sculling brace.

This article offers tips and techniques for performing a high sculling brace from a kayak and was originally published in Adventure Kayak magazine.

Two points of stability allow you to balance more effectively than one. Sculling braces help you stay upright in tippy situations by acting as a second point of stability to your kayak. Practice the sculling brace by breaking it down into these three elements: body, boat and paddle.


Peer review

The scull should be about as long as
your cockpit with the blade just under the surface. Done properly, there should be very little aeration of the water. Your inward hand is just an anchor; it is your outward hand that does all the work changing the angle of the blade. » Michael Pardy, Paddle Canada level 3 instructor trainer, Victoria, BC

The angle of the blade will give more turn propulsion if it is closer to vertical, like a sweep, and more support if it is flatter to the water. This is useful for learning how flat an angle you want for a graceful sculling brace, and also how to put some support in your sweep stroke for confident edged turns in lumpy water. Blade angle is controlled by raising or lowering the elbow relative to the wrist, keeping the wrist neutral to prevent injury. » Ginni Callahan, ACA level 5 instructor and BCU level 4 coach, Cathlamet, WA

To be biomechanically friendlier as you edge further into the water, rotate your chest to the sky and roll the boat off your body, lessening the load on the paddle. This is similar to a Greenland static brace position. » Shawna Franklin & Leon Sommé, BCU level 4 coaches, Orcas Island, WA

I tend not to look at sculling for support as a stand-alone skill, instead it is a way to en- hance or add confidence to other skills and maneuvers. For example, when performing sweep strokes on the move, finishing a roll, or to perform braces on the move and prevent the blade diving. » Doug Cooper, BCU level 5 coach, Aviemore, Scotland


Body

For a high sculling brace, your elbows should be low with the paddle held horizontally near your shoulders. For a low sculling brace, your elbows should be high, directly over the paddle shaft, which is held horizontal above the cock- pit of your kayak. Use torso rotation to move your blade through the stroke.

Your lower body controls the position of your kayak. use your hips and knees to either hold your boat on edge, or to right the boat as with other bracing strokes.


Boat

Transferring some of your weight onto your sculling paddle will allow you to hold your boat on edge or recover from a near capsize on the sculling side. With a high sculling brace, your kayak can be held on almost any degree of edge, including nearly upside down.


Paddle

Skim your paddle back and forth across the water beside your kayak, maintaining pressure on the power face (high sculling brace), or the non-power face (low sculling brace). Keep the paddle on the surface by slightly lifting the leading edge of your blade.

To get a feel for this, swish your hand back and forth across the water, feeling the water pressure on your palm. As your thumb leads the way through the water, angle it slightly towards the sky. As your pinky leads, angle it towards the sky.

The transition points of the stroke—the points where you change your paddle’s direction of movement—offer little stability. There- fore, move the paddle at a slow to moderate pace and use longer strokes to reduce the number of transitions.


Sculling for Support

Use a high or low sculling brace to salvage a sloppy roll, to stabilize yourself when working your legs back into your kayak during a rodeo re-entry, or in any other situation where you need consistent extra stability.

Practice your sculling technique by moving your kayak in multiple directions using a sculling draw (sculling with a vertical paddle). Then bring the paddle back to horizontal and begin adding a little weight to the paddle as you scull back and forth. Finally, work on holding your boat further and further on edge while sculling for support. This gradual progression will help develop both your muscle memory and your confidence.

Meaghan Hennessy is a Paddle Canada Level 2 instructor trainer and BCU Level 3 sea coach based in Vancouver, British Columbia. She currently teaches for SKILS.


This article originally appeared in Adventure Kayak, Summer/Fall 2011. Download our freeiPad/iPhone/iPod Touch App or Android App or read it here.

Canoe Poling Tips and Technique

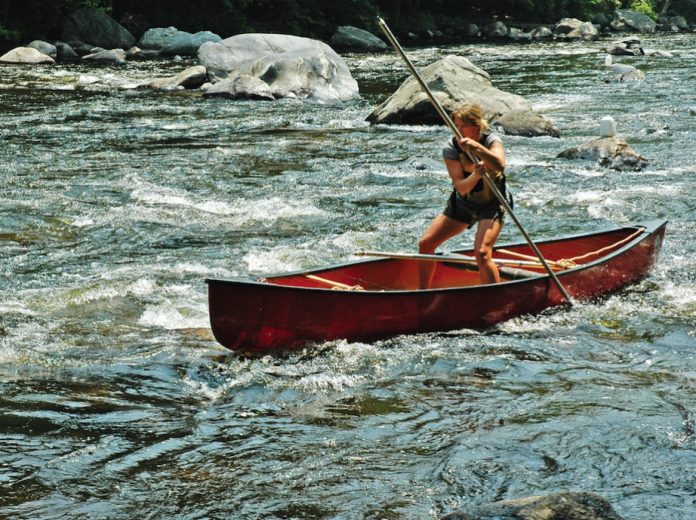
Different sort of pole dancing. Photo: Sean Carapella
Canoe poling technique.

If you have discovered the power of canoe poling, you know that streams can be two-way streets and a canoe can be pushed upstream far beyond what is possible with a paddle. Rivers can be enjoyed in a simple up-and-back trip from the put-in, eliminating the need for a car shuttle.

Poking upstream in calm water is a great place to start, but as you progress, you may wish to confront stronger current. This is where poling gets technical.


Get in Position

Facing upstream in the eddy, stand with your feet square, one or two feet behind the center thwart to lighten the bow. A good rule of thumb for all upstream work is to keep the bow sitting higher in the water than the stern. Position the canoe very close to the eddyline and almost parallel to it, with the bow pointed slightly into the current.


Plant the Pole

Plant the pole on the eddy side of the boat. That is, the side away from the current you’re entering.


Push and Tilt

As you push across the eddyline and enter the current, tilt the boat away from the side where your pole is planted. This will carve a turn and counteract the tendency to get flushed down- stream. Tilt the boat, don’t lean your body— stand up straight and tilt the hull by weighting one foot.


Recover and Plant the Pole
 behind you

As you muscle your way into the current, be sure to plant the pole well behind your body. In fast water, by the time you recover and plant again, your boat may have lost its forward momentum and begun drifting backward.

It’s typical to find that by the time you start pushing, the pole is now planted right beside your body and you’re just pushing yourself sideways. The common beginner scenario is a series of these sideways pushes on alternate sides of the boat, resulting in some flailing around and finally washing out the bottom of the rapid. Get in the habit of planting the pole well behind you to set up the proper angle, even if it means drifting back a little in order to find good purchase on the bottom.

These four basic tips apply in virtually all situations. Start poling in gentle current and work towards more advanced techniques for steeper drops.

Matt Swift is an American Canoe Association poling champion living in Blacksburg, VA. He discovered canoe poling in 1988 as a way to explore the shallow streams of Southwest Virginia without having to set up car shuttles.


This article originally appeared in Canoeroots & Family Camping, Fall 2011. Download our freeiPad/iPhone/iPod Touch App or Android App or read it here.