Home Blog Page 508

Desolation Sound Kayak Trip

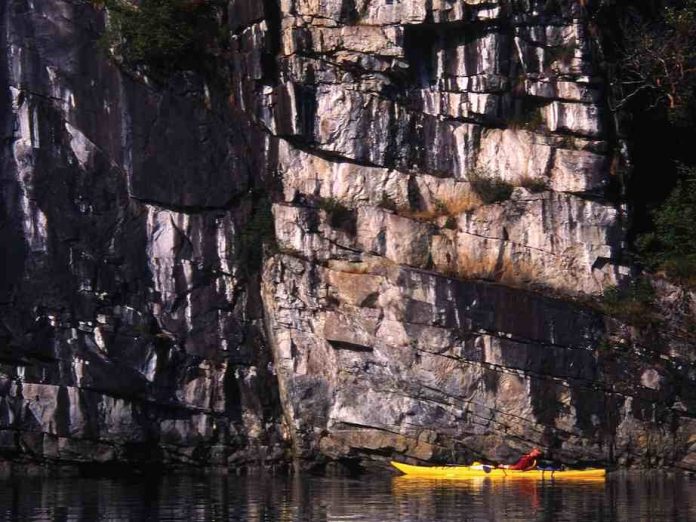
Towering cliffs of Desolation Sound. Photo: Dave Quinn
Towering cliffs of Desolation Sound.

This kayak trip destination information is excerpted from “Best of the West” in Adventure Kayak magazine. 

Desolation Sound, Sunshine Coast, British Columbia

5 days

This labyrinth of passages and islands is
the perfect recipe for easy-access paddling. Anything but desolate, this protected sound provides safe paddling options for almost any weather, plus tidal rapids and exposed waters for the more adventurous. Aprés-paddling adventures abound, with hikes to nearby summits and lakes, and incredible warm water snorkelling beneath towering cliff gardens of red-barked arbutus trees. In fact, the sound is home to some of the warmest Pacific waters north of California, with sea temperatures reaching a positively tropical 72°F (22°C).

Find more information about routes in this area at www.bcseakayak.com and www.britishcolumbia.com.

This article originally appeared in Adventure Kayak, Spring 2011. Download our free iPad/iPhone/iPod Touch App or Android App or read it here.

Hakai Pass Kayak Trip

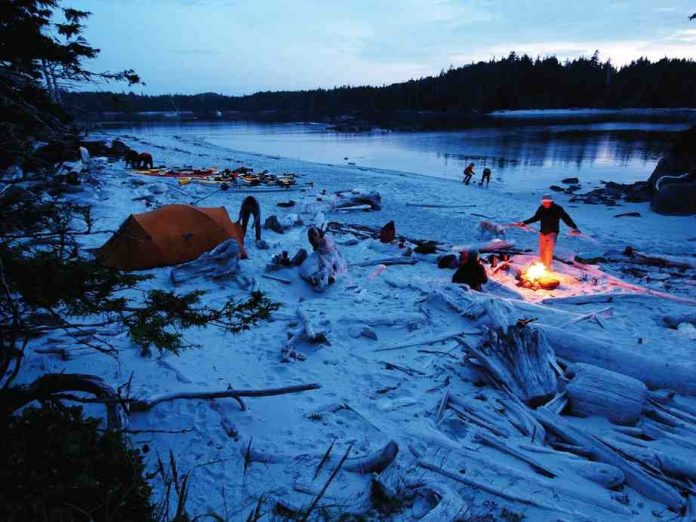
Hakai Pass. Photo: Dave Quinn
Hakai Pass kayak trip.

This kayak trip destination information is excerpted from “Best of the West” in Adventure Kayak magazine. 

Hakai Pass, Central Coast, British Columbia

5 to 10 days

The Hakai region is a paddler’s Shangri-la. For those with the right mindset, Hakai Pass is a secret passage into a mystical island chain where anything is possible. Although the experience of a BC Ferries car deck wet-launch is reason enough to visit Hakai, it is merely the appetizer to the adventure main course to come. Daily encounters with orca, grilled fresh-caught salmon on a driftwood beach fire, sea otters galore and memory-engraving Pacific sunsets are all found in the Hakai, in the heart of the Hieltsuk Nation.

Find more information about this area at www.batstar.com and www.britishcolumbia.com.

This article originally appeared in Adventure Kayak, Spring 2011. Download our free iPad/iPhone/iPod Touch App or Android App or read it here.

Haida Gwaii Kayak Trip

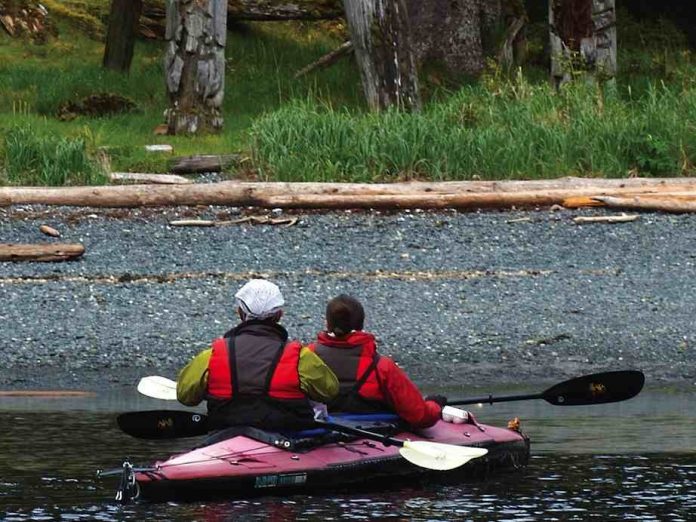
Gwaii Hanaas. Photo: Dave Quinn
Haida Gwaii

This kayak trip destination information is excerpted from “Best of the West” in Adventure Kayak magazine. 


Haida Gwaii, Queen Charlotte Islands, British Columbia


14 days

If Haida Gwaii is not near the top of your Pacific paddling list, it should be. The “Galapagos of the North” boasts some of the last, best remnants of the Pacific Northwest’s wild raincoasts. Gwaii Hanaas National Park’s unparalleled Eden-like mix of ancient rainforest and vibrant marine life offers a window into what the Pacific Northwest used to be. The tangible and authentic history and current genuine hospitality of the Haida Nation complete the picture.

Learn more about this amazing destination at www.gohaidagwaii.ca or www.butterflytours.bc.ca.


This article originally appeared in Adventure Kayak, Spring 2011. Download our free iPad/iPhone/iPod Touch App or Android App or read it here.

Best Alpine Lake Canoe Trips

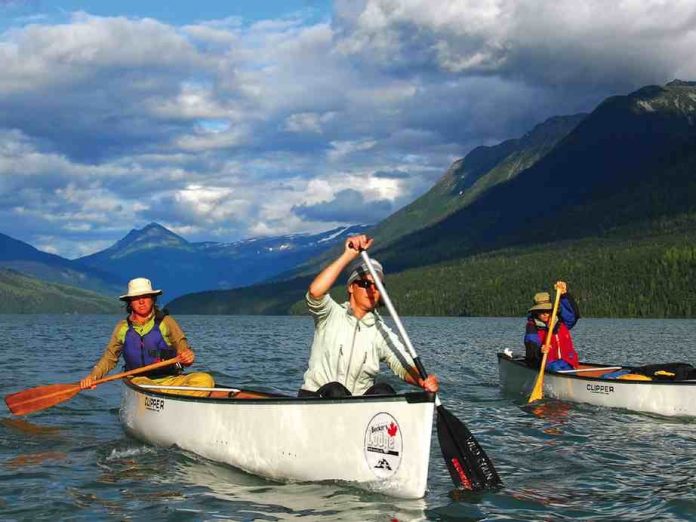
Bowron Lake beauty. Photo: Tim Shuff.
Bowron Lake beauty.

This canoe trip destinations article was originally published in Canoeroots and Family Camping magazine.

Imagine watching the first warm rays of dawn blush the frozen summits above your camp, or floating spellbound beneath steep ranks of silent forest. Backpackers have long bartered for a taste of priceless mountain beauty with heavy packs, tiny tents and crummy food. But mountain lakes oblige canoeists with a leisurely, pampered route into sublime scenery. Don’t forget the Dutch oven for fresh brownies.


YELLOWSTONE LAKE, Wyoming

At 20 miles long and 14 miles across, and perched nearly 8,000 feet above sea level, Yellowstone Lake in the famous park of the same name is large and high enough to create its own weather, quickly transforming the lake from mirror-smooth to meringue- choppy. With a healthy respect for change-able conditions—figure on one day in every three as an onshore wind/hiking day—canoeists can escape the motorized main-stream and penetrate into the wild heart of the park. The motorboat-restricted South-east Arm makes a fine weeklong, out-and- back trip from Sedge Bay. Watch for moose, elk, osprey, bald eagles, bear and even bison. www.nps.gov/yell


MALIGNE LAKE, Alberta

Ringed by snow-capped peaks and three ice fields, Jasper National Park’s Maligne Lake is the largest natural water body in the Canadian Rockies. Solitude seekers should visit in September and head for two canoe access only campsites at Fisherman’s Bay and Coronet Creek. Fisherman’s Bay boasts nearby vistas of iconic Spirit Island floating on jade green waters, while Coronet Creek lies 22 kilometers from the parking area, beyond the reach of most tour boats. Both are great places to dip a line for record-sized rainbow and brook trout. www.pc.gc.ca/eng/pn-np/ab/jasper/visit.aspx


BOWRIN LAKE CHAIN, British Columbia

The Bowron Lake Canoe Circuit is a justifiably popular weeklong trip in central British Columbia’s Cariboo Mountains. Traveling 116 kilometers through 10 lakes, circuit paddlers can expect back-to-back two-kilometer portages, swiftly flowing rivers and sudden squalls of thermal winds in the steep-walled valleys. Bowron Lake Provincial Park’s excellent sandy beach swimming, waterfalls and plethora of alpine scenery are ample rewards. Wet your hull in late May, June or September for the choicest campsites and fewest portage trail pile-ups. www.env.gov.bc.ca/bcparks/explore/parkpgs/bowron_lk


HENDERSON LAKE, New York

Nestled in the mountainous embrace of the Adirondack Forest Preserve’s marquee High Peaks Wilderness lies little known Henderson Lake. As the crow flies, Henderson is just 15 miles south of the crowded Saranac Lakes, but in between is a roadless tract of 3,500-foot summits and steep, shadowy river valleys. Privately owned for over 175 years, this deep, clear lake is now open to the public, allowing paddlers to explore its many secluded arms. For an adventurous weekend of solitude even in mid-summer, brave the two-mile carry from the lake’s northwest end to the Preston Ponds and Duck Hole—14 miles roundtrip. www.visitadirondacks.com


This article originally appeared in Canoeroots & Family Camping, Spring 2011. Download our freeiPad/iPhone/iPod Touch App or Android App or read it here.

Top Spring Whitewater Park and Play

Crowe Bridge, Crowe River, ON. Photo: Cale Reeder
Crowe Bridge on the Crowe River, Ontario.

Rapid magazine’s top picks for class III Spring park and play rivers, perfect for practicing your freestyle moves. 

BLADDER WAVE, Main Payette, ID

Found at the bottom of the Gutter section of the Main Payette, Bladder Wave has multiple personalities. It gets its name from the inflatable dam that creates the wave. When the volume of air in the dam changes or shifts, Bladder Wave can morph from an easy-to-catch, glassy smooth wave to a burly hole in seconds. It’s in during spring runoff and at high water levels—10,000 plus cfs. Keep an eye on local flow info and an ear out for rumors of when this shy wave will show its face.

YOUR RIDE

Bliss-Stick Smoothy

SHUTTLE ROUTE

The wave is only a half-hour outside of Boise. Take State Highway 55 north out of town. Hang a right on Pioneer Avenue before crossing the bridge over the Payette that takes you into Horse- shoe Bend. Drive for about two miles; when you see the access on the left, turn towards the water and park.

HELL HOLE, Middle Ocoee, TN

Pay homage to rodeo boating’s roots at Hell Hole,
the birthplace of freestyle kayaking. There are access eddies on either side of the wave and boaters confidently push the limits knowing they will be flushed out if they misread. Tons of pros practice here so you’ll have plenty of chances to get pointers from seasoned freestylers. Getting a ride is well worth the wait in line. It’s runnable at levels between 900 and 2,500 cfs. Check with the Tennessee Valley Authority for dam release info.

YOUR RIDE

Jackson Rock Star

SHUTTLE ROUTE

Take the I-75 north from Chattanooga, and then head east on Route 64 until you can see the Ocoee on your right. Hell Hole is next to the powerhouse. Park along the road or at the take-out a half-mile or so down the 64.

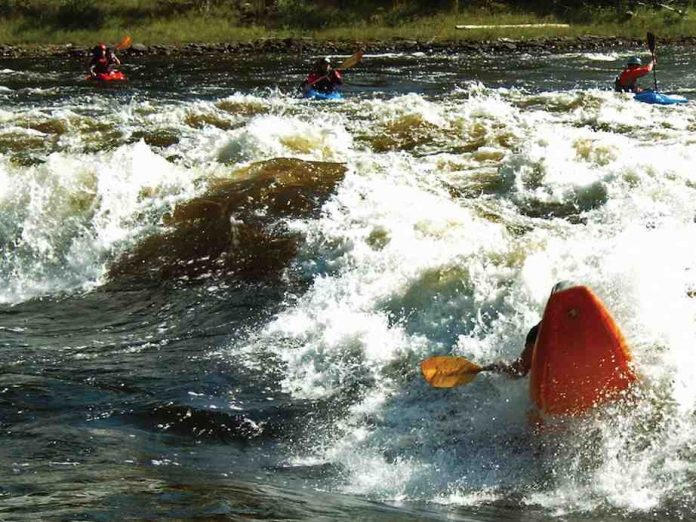
CROWE BRIDGE, Crowe River, ON

This play spot in the heart
of eastern Ontario’s spring creek playground has a feature for everyone. At spring highs, the wave train is just right for surfing with short boats. First in the lineup is
a 40-foot-wide, flat, glassy wave with room for multiple riders. The next feature is
a foamy hole followed by
a third wave that steepens during runoff. Look for gauge readings of 100 cms or higher for prime conditions. Bring your camera and a friend to take your picture—the bridge overhead offers a perfect view.

YOUR RIDE

Wave Sport Fuse

SHUTTLE ROUTE

From Highway 7 between Havelock and Marmora, head south on County Road 50. Hang a left on 13th Line and then a right on Crowe River Road. Stop when you get to the bridge—mind the no parking signs.


This article originally appeared in Rapid, Spring 2011. Download our free iPad/iPhone/iPod Touch App or Android App or read it here.

Leg Drop Roll Kayak Technique

Photo: Shawna Franklin
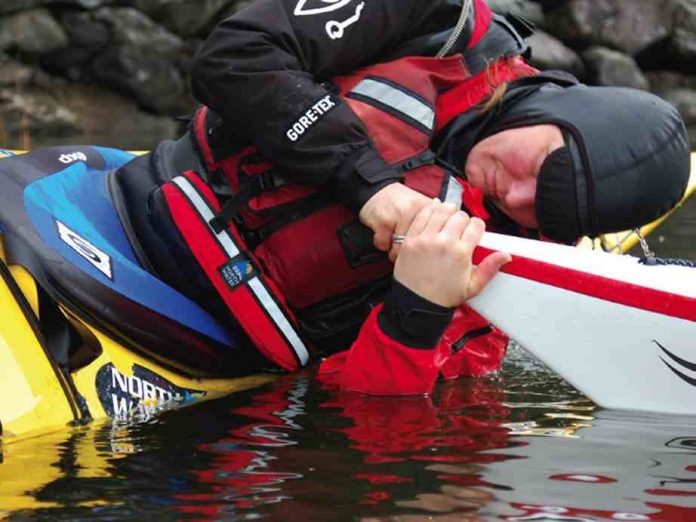
A sea kayaker uses the bow of another sea kayak to practice a kayak roll.

Add reliability and ease to your roll by incorporating an active leg drop. The active leg drop better uses your body to roll the kayak and moves you away from relying too heavily on your paddle.

The quick, powerful action of rolling a kayak with the hips—a hip snap/flick—is widely described as getting the upper body near the surface and supported by the water, while righting the boat with a rolling action of the hips. Most people are told to lock their knees under the deck and concentrate on the upward action of one knee.

Both legs pushing up against the deck creates resistance to the rolling action. A paddler will often compensate by pulling harder on his paddle. He is essentially trying to lift his body up underneath the still overturned kayak, resulting in a cumbersome or failed roll and additional stress on the upper body. Avoid these problems with an active leg drop.

Start your roll by actively driving your leg closest to the paddle down, transferring con- tact from the thigh brace to the hull. Roll that hip and sit bone down while lifting with your opposite knee, bringing the kayak underneath your body.

This opposition of forces results in the kayak rolling almost upright before your body lifts out of the water, which reduces the need to pull on the paddle. As the kayak rolls up, your lowered leg and hip create a solid platform to help prevent it from tipping back over.

Watch another roller who is incorporating an active leg drop and you will notice that the boat moves before she starts to move her paddle.

Practice the action with this exercise. Hold onto a fixed object—a pool side or a friend’s bow or hand—and lower yourself into the water by rotating onto your back and bringing your shoulders parallel to the side of your kayak. Keep your arms bent in a strong position. Roll the boat over on top of your body while keeping your head on the surface.

Drive the leg closest to your hands to the bottom of the kayak while increasing pressure against the thigh brace on the opposite leg. Arc your spine and leave your head on the water. You will feel the kayak roll easily into a more upright position. This is similar to what Greenland paddlers refer to as a static brace position.

Repeat until you start to feel the coordination of your opposing leg actions, and then incorporate it into your roll.

In addition to rolling your kayak more efficiently, the active leg drop can also be incorporated into edging and bracing to the same advantage.

Shawna Franklin is the co-founder of Body Boat Blade International, an award-winning kayak school located on Orcas Island, Wa. A BCU coach Level 5 aspirant, Shawna was the first woman in North America to achieve the BCU 5 Star Sea award.


Peer review

“Shawna’s article is a great isolation and description of an important component to the roll. The connection to using downward pressure is key.
” » Ginni Callahan, ACA level 5 instructor and BCU level 4 coach, Cathlamet, WA

“It is great to see a coach moving paddlers away from the hip flick technique. Instead, think of your hips as a relaxed and flexible joint separating upper and lower body. Remember the mantra “Boat first, body second, head last” for the timing of a successful roll.” » Doug Cooper, BCU level 5 coach, Aviemore, Scotland

“Try backward learning to reinforce the leg drop. Holding onto a solid object, use one leg to actively pull the kayak upside down. Use the other leg to right the kayak. As you build confidence and skill, try Shawna’s drill holding onto a paddle float or flutter board. This will force you to drive the roll with your legs. If you use your arms, you will sink.” » Michael Pardy, Paddle Canada level 3 instructor trainer, Victoria, BC

“Many Greenland kayak designs [have] a wooden bar that holds both legs flat. [In] whitewater kayak designs, the limited space forces knees up and out- ward. So there’s a group of paddlers rolling with both legs straight and another rolling with both legs bent. Conceptually, I welcome Shawna’s instruction to prevent adverse pressure against the deck, although it’s not always possible.
” » Nigel Foster, BCU level 5 coach, St. Petersburg, FL

“Make sure your boat fits you correctly so you don’t fall out when using this technique. A keyhole cockpit offers a much better fit than a more open style.
” » Christopher Lockyer, BCU level 4 coach and Paddle Canada level 3 instructor, Halifax, NS

This article originally appeared in Adventure Kayak, Spring 2011. Download our freeiPad/iPhone/iPod Touch App or Android App or read it here.

Open Crossing Kayak Technique

Photo: Virginia Marshall
Open water crossing by kayak.

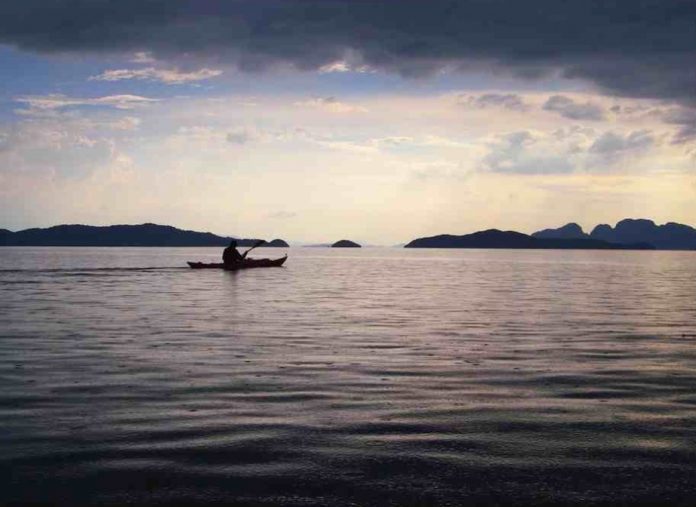
Put simply, a crossing occurs anytime you cannot safely return to land virtually instantaneously. This includes shortcutting across the mouths of bays or fiords, island hopping and paddling around cliffs or rocky capes where you may be close to shore but still vulnerable with no safe exit.

There are three dangers inherent in any crossing: general fatigue, capsizing and drifting off course.

When Dr. Hannes Lindemann prepared for his solo kayak crossing of the Atlantic in 1957, he trained to stay awake and alert for long periods of time. Fatigue can affect judgment and decision-making ability as well as paddling ability.

To gauge your personal limits, start with short crossings and gradually work your way towards covering longer distances. You’ll find strength and joy as you tickle the borders of exhaustion, but don’t get halfway out on a 20-mile crossing and realize that it’s too much.

Kayaking books teach techniques for getting back in your boat after you’ve capsized. The best advice: Don’t tip over in the first place. Practice bracing and righting skills in rivers or surf—any place with complex hydraulics. If you don’t enjoy the chaos of rough water, limit your exposure to crossings. As with training for fatigue, match your risk to your skill level and personality, leaving leeway for the situation to become more intense than you initially envisioned.

In order to avoid drifting off course, careful calculation and planning for a number of scenarios are necessary.

Catabatic winds can occur any time high, cold peaks border warmer shorelines. Cool air may spill down the mountains, creating intense offshore winds that can push you off course.

They usually intensify in the afternoons, so plan accordingly.

Tidal currents are most intense where there is a large tidal range and where narrow straits connect two bodies of water of different sizes and depths. For example, tides would race through a channel connecting a shallow bay and the ocean, creating shears and eddies where speeding water interacts with calmer water. To avoid the impacts of tidal currents, travel at slack tide or take potential drift into consideration.

The most exciting crossings involve passages to small islands where, if you miscalculate, you may find yourself adrift on the open sea. Deepsea waves, winds and currents require that you study pilot charts, talk to local sailors and fishermen, and always err on the upwind side. It’s much easier to drift downwind at the end of a long day than to battle against wind or current in the fading light.

When taking on a crossing, be sure to bring lots of food and water, and have your navigation gear and extra clothes in an easily accessible, waterproof deck bag.

Jon Turk’s book, In the Wake of the Jomon, chronicles his two-year crossing from Japan to Alaska.

This article originally appeared in Adventure Kayak, Spring 2011. Download our freeiPad/iPhone/iPod Touch App or Android App or read it here.

Lining Rapids Canoe Technique

Photo: Jamie Orfald-Clarke
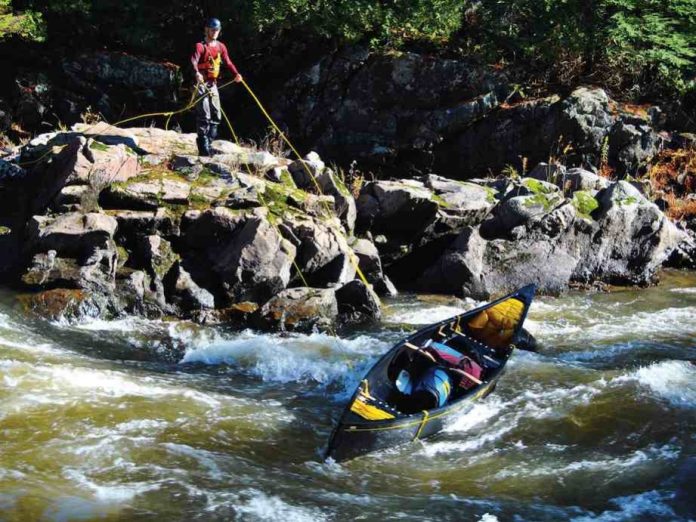
Lining down rapids.

This article on how to line your canoe down rapids was originally published in Canoeroots and Family Camping magazine.

After you line a canoe the first time around that usual portage, your watch and back will thank you for the discovery of what is actually an age-old alternative to more cumbersome options. Using guide lines to control the descent of a canoe through moving water is an age-old art that can provide a welcome alternative to portaging. Once you’ve come to recognize its potential, you may find yourself lining rapids that you would normally have carried around.

First, you’ll need a pair of lines. The rope diameter should be large enough to afford good grip: 1⁄4- to 1⁄2-inch braided floating rope works well. The length of the lines is dependent on the river and personal preference. Shorter lines are easier to manage but may leave you grasping for a runaway canoe. Longer lines allow you to move the canoe further into the current but may result in tangles if you only use a fraction of their length. Thirty-to forty-foot lines are a good compromise. Storing them in throw bags will keep them free of tangles when not in use.

When confronted with shallow or slow moving sections of river, simply tie the lines to the grab loops at each end of the canoe. Be careful not to let the canoe slip broadside into the main current or it will capsize. Tying the lines high above the waterline like this makes the boat easier to drag over rocks but more susceptible to flipping over.

For deeper, more powerful rapids, the best way to tie onto the canoe is with a bridle system. This positions the lines’ attachment point underneath the canoe, helping to prevent capsizing. Here’s a simple way to tie a bridle: start by folding back eight feet of rope on the end of your line. Next, tie a double overhand knot halfway up the folded section of rope so that you have a big ‘Y’. Then, tie each of the short ends of the ‘Y’ to either side of the canoe’s seat, positioning the center knot under the canoe at the keel line. With a bridle at both the bow and stern, and the load slightly rearranged so that the downstream end of your canoe is heavier, you will have a very stable setup.

Much like paddling rapids, lining is a mental game. Practising in light current with only a few obstacles present, you can learn with how the canoe interacts with the lines and the water. You need to work with the river rather than against it. The same can be said of lining with a partner—effective communication is essential. To read more on the subtleties of this technique, check out Garrett Conover’s comprehensive book Beyond the Paddle and Bill Mason’s classic Path of the Paddle.

Johno Foster is a seasoned Black Feather guide who would rather paddle through most rapids but knows when to toe the party line.


This article originally appeared in Canoeroots & Family Camping, Spring 2011. Download our freeiPad/iPhone/iPod Touch App or Android App or read it here.

Considerate Camping: How To Build A Low-Impact Fire

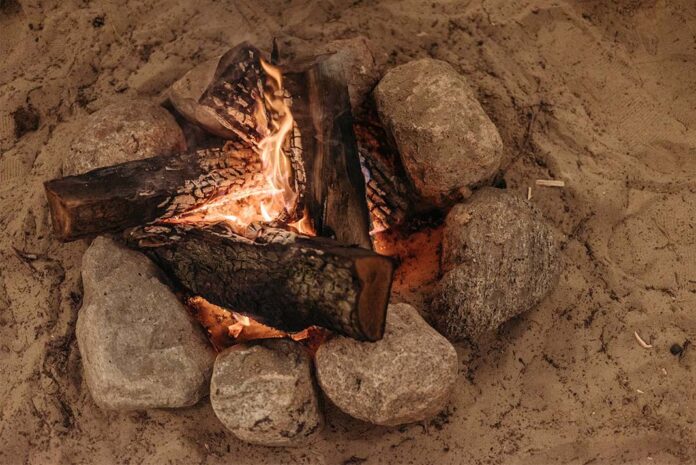
Photo by Pavel Danilyuk: Pexels.com

Camping is synonymous with campfires. There is some atavistic aspect of staring into the dancing flames over a bed of embers that is primitively satisfying and deeply comforting.

Campfires are not, however, without their drawbacks. The scarring of land, harvesting of firewood and the residual trash not consumed by flames are apparent at nearly every campsite that sees even moderate use. So how can campfire impact be reduced?

Here are some tips for building a low-impact fire that will still allow you to partake in this timeless tradition.

Consider your foundation

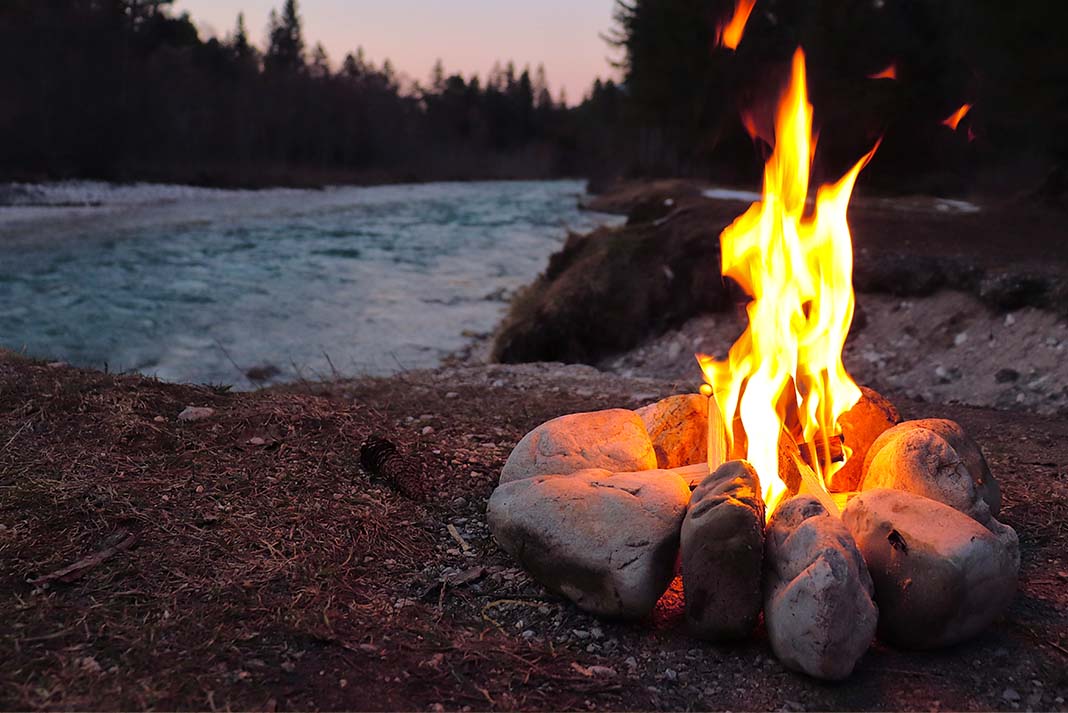
Where is the best place to build a fire? Use an existing pit where available. Make sure the fire is contained in a fire ring, or—even better—carry and use a metal fire pan or fire box to prevent ground scarring. You can also make a fire on a mound of sand or earth, and then scatter the mound and cooled grey ash so that you cannot tell a fire was ever burned there.

Build a small fire using small pieces of wood

Ideally, you should be able to break the wood with your bare hands. For most people, this means using sticks that are wrist-size or smaller. Small pieces of wood burn to grey ash more readily, leaving behind fewer unsightly pieces of charcoal and half-burned wood.

Photo by Florian Hillmann | pexels.com

Collect wood from the ground, not from standing trees

At most campsites there is an abundance of fallen small wood overlooked by campers who scavenge for larger pieces. It is easy to gather and will keep even the most obsessive fire-pokers busy feeding it to the flames.

Keep trash out of your fire

Metal will not be consumed, lumps of uneaten dinner will not burn to ash and no one wants to sit around a campfire smelling the fumes from melting plastic.

Don’t leave your fire unattended

If you are not going to be close enough—or awake enough—to control it, put it out.

Don’t have a fire

At least, not every night. Make having a campfire a special treat.

Enjoy your fire, but don’t take it for granted. Keep it clean and small and don’t use all the wood. The next campers will thank you.

This article originally appeared in Canoeroots & Family Camping‘s Spring 2011 issue. Subscribe to Paddling Magazine’s print and digital editions here, or browse the archives here.


No scorched-earth policy. | Photo: Marissa Evans

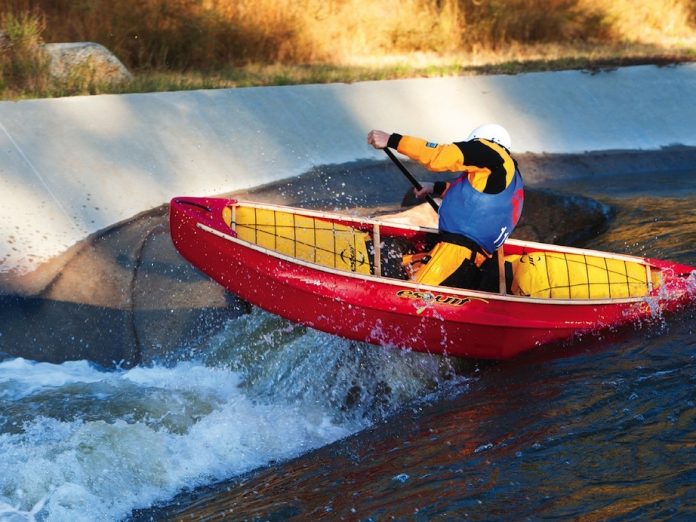
Esquif L’Edge Canoe Review

Photo: Dan Caldwell
Review of the Esquif L'Edge whitewater canoe.

The new Esquif L’Edge was in the concept and development phase for an unbelievable eight years. Designer Craig Smerda was originally inspired by the design innovations of the late Frankie Hubbard’s Spanish Fly—a freestyle boat much loved by southern creekers.

Smerda began building on this benchmark in 2002 and in the years that followed he designed and tested and eventually teamed with Jacques Chasse at Esquif Canoes to produce just two prototypes. One bounced around the 2009 Open Canoe Slalom Nationals and the other was shipped to the Ottawa River for renowned open boaters Paul Mason and Andrew Westwood. The feedback allowed Smerda, design collaborators Mark Scriver and Dave Proulx, and Chasse to dial in final specs for the long-awaited production boat.

The L’Edge is the first canoe available in both open and decked versions. We had the chance to paddle both and preferred the open one. Call us old fashioned, but we like our open boats…well…open. Eight pounds lighter than its decked counterpart and with ash gunwales, the open version feels and looks more like a canoe. The decked model is drier, but both are so much drier than anything we’ve ever paddled that it’s of little advantage.

When OC creeking, the wobbles should be the last thing on your mind. The L’Edge is very, very stable. While faster than the Spanish Fly, the L’Edge is definitely slower than the Prelude and Zoom. With so much stability, we’re inclined to monkey around with the L’Edge’s width to gain a little speed. With the open model, you can chop thwarts and suck it in. Smerda himself recommends cutting off one to one-and-a-half inches if you’re looking to make the boat snappier.

A foam bulkhead is the simplest, most universal outfitting system, though not the most precise. It fits more like athletic support than dentures. In the case of the L’Edge this outfitting is out of sheer necessity. The patch anchors needed for thigh straps don’t stick well to polyethylene. Also, the L’Edge is a creeker at heart. Emptying my boat in a micro eddy with only a few feet of water before the next drop, I’d rather slide quickly back into a bulkhead than wiggle around, cinching thigh straps.

The extreme rocker of the L’Edge allows it to boof anything. It rides high over reactionaries and pops over holes. The boat’s poly construction also makes it super durable if you’re into shallow slides and concrete rivers like the U.S. National Whitewater Center.

Eight years later, Smerda finally pulled it off—he designed a canoe that should swat the Fly. The L’Edge is our new favorite creek boat, but we’re not giving up our Zephyrs, Ocoees and Sparks as longer, lighter, big-river boats. The secret is to match the L’Edge with the two-stroke technical rivers and play spots for which it was designed.

ESQUIF L’EDGE DECKED/OPEN

Material: Polyethylene

Length: 9’2”

Width: 29.8”

Depth: 16”

Weight: 56/64 lbs

MSRP: $1,729 US / $1,900 Cdn

$2,033 US / $2,233 Cdn

www.esquif.com


This article originally appeared in Rapid, Spring 2011. Download our free iPad/iPhone/iPod Touch App or Android App or read it here.