Home Blog Page 494

Rock the Boat: Understanding Risk

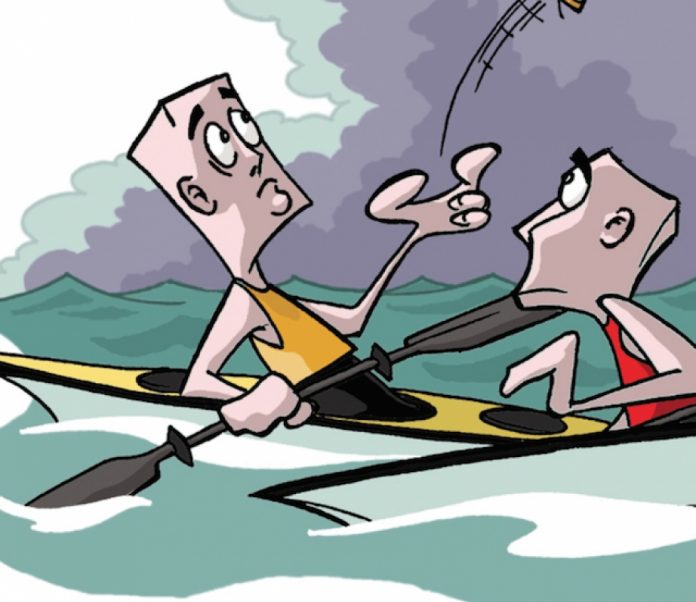
Illustration: Lorenzo Del Bianco
Rock the Boat: Understanding Risk

In 1994, cab drivers in Munich were given cars with new safety equipment: anti-lock brakes. Surprisingly, their crash rate stayed the same. Nothing was wrong with the new brakes. The cabbies simply drove more aggressively, knowing that they had better brakes.

This phenomenon is called risk homeostasis. It also applies to skiers, skydivers, cyclists and, yes, kayakers.

Risk homeostasis states that people have a target level of risk they’re willing to tolerate. Above that risk level, things are scary; below it, they are boring. Give a cabbie better brakes and he’ll drive faster. Give a kayaker a drysuit and she’ll paddle in bigger seas.

This might not seem like a problem, since that kayaker gets more challenging paddling for the same level of risk. However, paddlers often assume that safety equipment provides more safety—or different kinds of safety— than it does.

The U.S. Coast Guard and American Whitewater Association recently published 2010 statistics on boating accidents. The single greatest cause of sea kayak accidents was, for the eleventh year running, “Unexpected changes in weather conditions.” A New Zealand study of near-misses agreed. Of course, “unexpected” is a loaded word.

Most weather changes can be anticipated through forecasts, weather knowledge and seamanship. But relatively few kayakers have honed these skills. It’s quicker and easier, if more expensive, to buy a drysuit.

The best approach is to make risk more apparent

In Sea Kayaking Safety and Rescue, John Lull describes a four-level safety hierarchy. The first is judgment and decision-making. Second, paddling skills and boat control keep kayakers upright and away from hazards. It’s not until the third level—rescues—when that $800 drysuit actually helps. At level four— outside assistance—we’re reliant on a VHF radio, SPOT messenger or cell phone to call in the cavalry. If we’re really worried about safety, we should focus on the top two levels.

Unfortunately, it’s not that simple. Risk homeostasis applies to skill as well as equipment. Kayakers who feel safe in big waves will simply head for bigger waves. Therefore safety education shouldn’t try to make kayaking less risky, since paddlers will just compensate. Nor should it try to lower the appetite for risk, since there’s evidence of a genetic con- nection. Headed into Okisollo Rapid? You probably have an elongated DRD4 gene.

The best approach is to make risk more apparent. In sea kayaking, unlike whitewater paddling, the dangers are mostly invisible. The weather systems, tides and currents that lead to those “unexpected” weather and sea changes are usually hours or miles away when critical decisions are made. Sea kayaker safety relies more on judgment, risk assessment, weather interpretation and the ability to accurately assess skills, rather than boat handling.

Karl Andersson, a BCU coach, assessor and 5-star paddler, notes that removing equipment often increases diligence and safety.

“When students show me their trip plan, I also inspect their kit,” Anderson says. “I then take away some of their kit and ask them if their plan stays the same. The students become nervous. They compensate for the missing kit with an improved launch list, formal assessment of group skills and crux points for plan reassessment. In other words, what the plan should have been all along.”

And there’s the built-in paradox. Tom Vanderbilt, who studies risk behavior at New York University, says,“When a situation feels dangerous to you, it’s probably more safe than you know; when a situation feels safe, that is precisely when you should be on guard.”

Neil Schulman writes, photographs and paddles from Portland, Oregon, where running out of coffee is considered an unacceptable level of risk. 
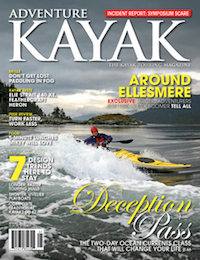
This article on understanding risk was published in the Spring 2012 issue of Adventure Kayak magazine.This article first appeared in the Spring 2012 issue of Adventure Kayak Magazine. For more great content, subscribe to Adventure Kayak’s print and digital editions here.

Live and Unplugged: Bringing Along Your Guitar

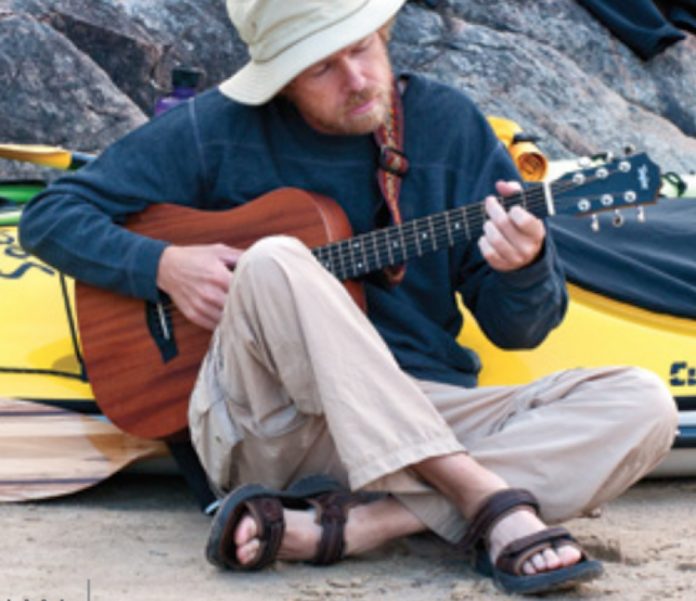
Photo: Mike Monaghan
Live and Unplugged: Bringing Along Your Guitar

Several years ago, the desire to paddle big water found me giving my canoe a rest in favor of a kayak. With the new boat and the related equipment ready for Lake Superior, the search was on to find a way to bring my other passion—the guitar—along on my adventure.

For over 30 years I’ve been pickin’ the old six-string. I’ve played in basements and backyards, in cafés and on couches, but there is something about the accompanying hiss and pop of the campfire and the silent glow of the moon that sweetens the hum of wood and steel.

Campfires themselves, quiet and contemplative, seem to blend into one another in the memories of trips past. But a campfire graced with music becomes a milestone, an event that sets that night apart from any other. On some nights the guitar elicits the lending of voices, of harmonies and laughter, while on others it sings alone as faces entranced gently sway in time.

“I can barely fit my usual gear into my kayak, where am I going to put a guitar?”

While a kayak can’t accommodate a full-sized guitar, there are many options out there for those who feel that playing some music of their own is the perfect ending to a day of paddling.

Though guitars come in all shapes and sizes, a true travel guitar measures about 33 by 13 inches or smaller, with a depth of no more than three inches. At the more affordable end of the spectrum are the Baby Taylor and the similar sized Little Martin. Both are compact, fun to play and will only set you back about $300. They’ll also double as great starter guitars for young kids. For those in search of an even smaller option, the Martin Backpacker guitar, while low on tone, is high on portability.

On the higher end are the carbon fiber offerings. Unaffected by humidity, heat or cold, guitars like the Rider by Blackbird or the Cargo by Composite Acoustics are suited to the most demanding pickers and paddlers alike. With one of these sleek little axes in your gear locker, there’s no excuse to go tripping without a guitar again.

I know what you’re thinking: “I can barely fit my usual gear into my kayak, where am I going to put a guitar?”

My solution was to place my guitar in a tall SealLine 35L Kodiak drybag and slip it under the bungees on my stern deck. The setup is waterproof and keeps a low enough profile that it is virtually unaffected by wind or waves. I also had a nylon handle sewn onto the side of the bag to make it convenient to carry around camp or down the beach.

My two-week solo trip through Pukaskwa Park on Lake Superior was a success. I brought my carbon fiber travel guitar. It was great to have on wind- and fog-bound days, not to mention relaxing around the fire at Cascade Falls. Making the transition from canoeing to kayaking has been exciting, and knowing that I can bring my music with me, I have no regrets.

Mike Monaghan is a professional photographer, lifelong paddler and fingerstyle guitarist living in Waterloo, Ontario. You can check out some of his photographic work at mikemonaghan.ca

This article on bringing your guitar on your kayaking trip was published in the Spring 2012 issue of Adventure Kayak magazine.This article first appeared in the Spring 2012 issue of Adventure Kayak Magazine. For more great content, subscribe to Adventure Kayak’s print and digital editions here.

Editorial: Lessons From Dorothy Gale

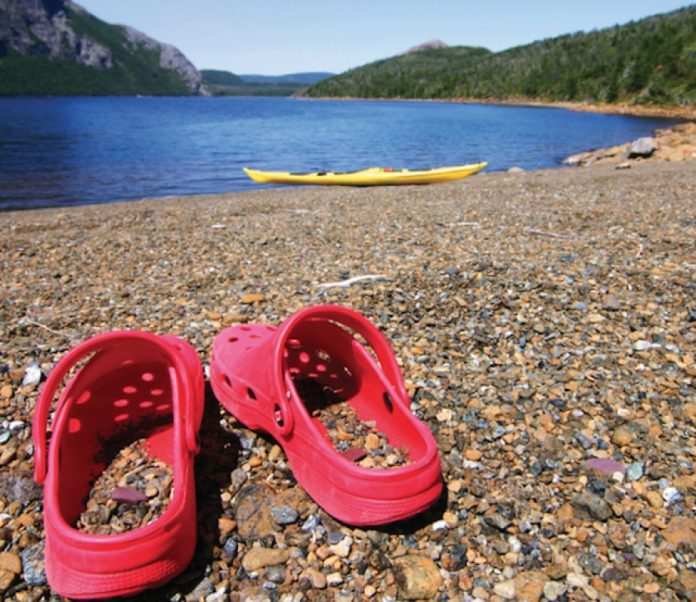
Photo: Virginia Marshall
Editorial: Lessons From Dorothy Gale

There are adventurers who roam to all the far-flung ends of the earth seeking adventure, and there are those who find a lifetime of the stuff right on their doorsteps.

I confess I’ve spent much of my paddling career looking over the rainbow and beyond the horizon for bluer waters. With a paddle and a pair of trusty red clogs rather than sequined ruby slippers, I’ve hunted for Oz on the East Coast and out West, in the South Pacific and on the North Shore.

Much of my time now is spent absorbing other peoples’ adventure stories—emails, blog posts and photo CDs recounting exotic expeditions in Baja, Australia, Fiji, Chile, Italy, Alaska and the like. Some drift through my consciousness like clouds, while others snag on the yellow brick road of imagination, lingering and becoming tangible, almost personal, through their storytelling. Jon Turk and Erik Boomer’s Ellesmere Island expedition (found in our Spring 2012 issue) is one such example. Don Starkell’s storied career is another.

Dreaming is important – but so is paddling

When the stories accumulate in such numbers that I have to struggle against the compulsion to do something wickedly ad- venturous, some would say (they’re probably right) wickedly foolish, of my own—book a flight, sublet my apartment, quit my job, buy a Feathercraft, and turn my back on land—I know it’s time to get out. Not on a summer-long expedition or a record-setting circumnavigation. Just somewhere I can leave log prints in the sand and let the waves wash away the funk of self-pity.

Most recently, I tied my boat to the roof and drove two hours for a hastily planned, packed-on-my-lunch-break overnight. On a forgotten coast less than a day’s drive from two of the country’s most populous cities, I watched the sun set and rise over open water. After just 24 hours with my kayak and the coast, I felt infinitely satisfied. Like Dorothy in the Land of Oz, I had been transported to a secret, magical kingdom.

I’m learning that even a brief trip is more rewarding than throwing a tantrum at what might be if not for the constraints of time, money, career obligations and family responsibilities. With a pair of lucky red shoes, a paddle and a fresh perspective on my own backyard, I can transcend these realities.

So be inspired by the achievements of Turk, Boomer, Starkell and others—I know I am. But don’t discount the adventures close to home, the ones you can do on the weekend, after work, or even on a loosely enforced lunch hour. Dreaming is important, but so is paddling.

Virginia Marshall is Adventure Kayak’s senior editor and a fan of old movies. 

This article on dreaming and paddling was published in the Spring 2012 issue of Adventure Kayak magazine.This article first appeared in the Spring 2012 issue of Adventure Kayak Magazine. For more great content, subscribe to Adventure Kayak’s print and digital editions here.

Whitewater Rescue: Learn How To Set Up A Z-Drag System In 60 Seconds

Rope and pulley system
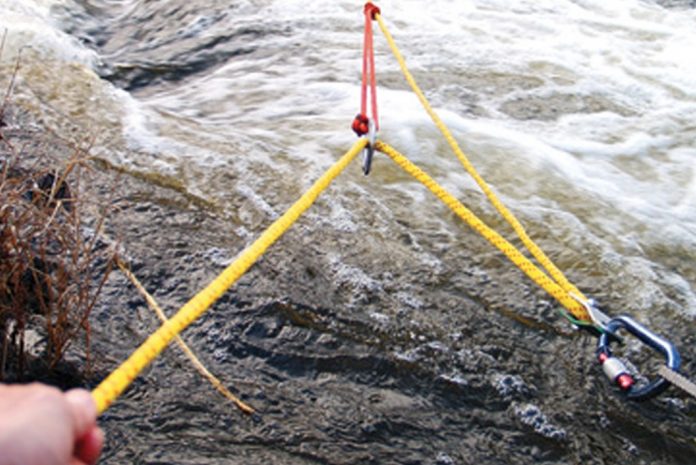
A skill worth mastering. | Photo by: Dan Caldwell

Just like any other rescue skill, it’s essential that you’ve practiced it before you get into a high-pressure situation. You can watch as many videos and read as many articles as you want—but there’s no better teacher than working through it with your own two hands.

Of equal importance is staying in practice. It’s a good idea to refresh your (muscle) memory every so often, especially when it involves setting up gear you don’t often use. All this advice applies to using a Z-drag setup to haul a boat that has been pinned or wrapped.

In this article we’ll go over how to set up and use a Z-drag system, but don’t leave it there. Gather the gear and get practicing.

How the Z-drag works

The Z-drag is a 3:1 mechanical advantage system, which will enable you to move a heavy boat through the water with less exertion. Let me explain it like this: imagine you have a 100-pound bucket of cement. When you grab the handle you will struggle to lift it, as your arm is lifting all 100 pounds. But if a friend grabs onto the handle too, you will each be lifting 50 pounds. Add another arm and you each lift a third, or 33 pounds. Three arms split the work in three, or create a 3:1 system. Flip this logic around: three arms can do three times the work of one; more arms multiply the force.

The physics are the same for the Z-drag. Even though there is only one handle on the boat, the three parallel lines are like three arms pulling, splitting the load and multiplying the force.

The Z-shape is what matters, as it gets three lines working together. The other parts of the system—the sliding prusik and pulleys—just keep the arms equalized so they can all do their third of the job.

How to set up a Z-drag in 60 seconds

You will need a 50- to 75-foot throw rope, a prusik, two carabiners, two pulleys and a sling.

Step 1: Build an anchor by wrapping the sling around a sturdy tree or rock. Clip a carabiner and pulley through the sling.

Step 2: Secure the bag end of your rope to the load. Run the tail end through the anchor pulley.

Step 3: Wrap the prusik loop as far back down the rope toward the load as possible. Clip the second carabiner and pulley through the prusik.

Step 4: Run the tail end of the rope through the prusik pulley and back toward the anchor. Pull on the tail end of the rope in the same direction as the main line is pulling on the boat. You now have a Z-drag.

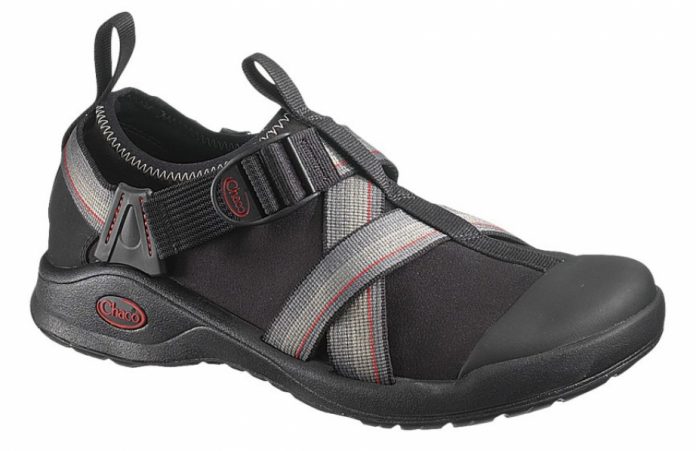
Chaco Ponsul Bulloo Review

Photo: Chaco
Chaco review

This gear review was originally published in Rapid magazine.

Sport sandals hit the mainstream in the early ’90s. Twenty years on, workplace fashion police still shudder when they make it into the office—another reason why paddlers can’t hack it in the nine-to-five world. The Ponsul offers Chaco’s renowned arch support, Vibram outsole and familiar strap adjustment system. The capable hybrid also has a Lycra upper that allows water to flow but keeps river debris out, and closed toes so you’re protected against unwanted exposure on the river or at the office.

High Sign: Water-ready, slip-resistant soles. No more sand and pebbles wearing through dry suit booties.

Low Sign: Doesn’t score any more points for off-river fashion.

www.chacos.com 

This article originally appeared in Rapid, Spring 2012. Download our free iPad/iPhone/iPod Touch App or Android App or read it here.

H20 Sharpshooter Gear Review

Photo: H20
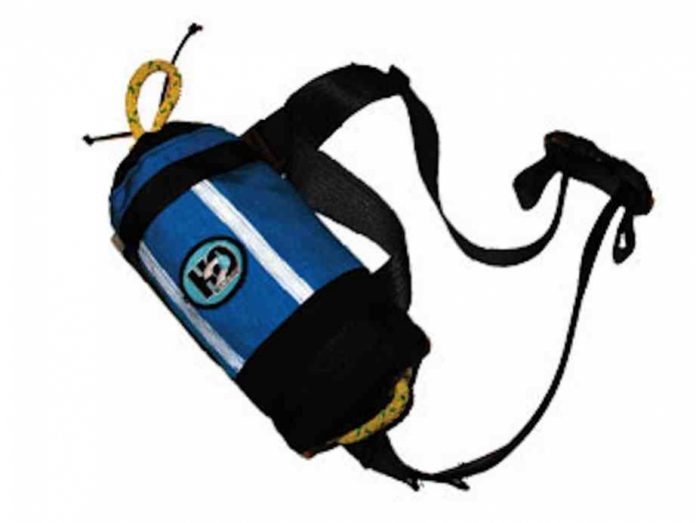
H20 Sharpshooter

This gear review was originally published in Rapid magazine.

Stuffed with 75 feet of 1,600-pound tensile strength, 5/16-inch WaterLine, the Sharpshooter had us feeling confident on the river. A great choice for guides and rescue professionals, H2O’s double-stitched heavy-duty Cordura throw bag also comes with a quick-release belt for waist-wearing, reflective taping and a luminary pouch for glow sticks. No second- guessing needed—all of H2O’s kit is designed by whitewater rescue pros and stitched and stuffed in America.

High Sign: Built for real life rescues, not just to satisfy legal boating requirements.

Low Sign: The blue bag we demoed isn’t super high visibility—the orange option is the better bet.

www.h2orescuegear.com | $80

This article originally appeared in Rapid, Spring 2012. Download our free iPad/iPhone/iPod Touch App or Android App or read it here.

NRS Captain Rescue Knife Review

Photo: NRS
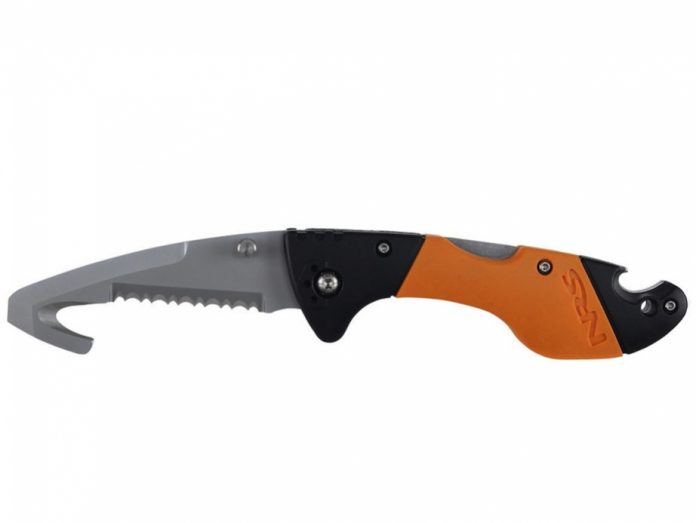
NRS Rescue Knife

This gear review was originally published in Rapid magazine.

The hooked tip is what really sets the Captain apart—no sweat slicing snagged line in a panic. The folding serrated blade opens singlehandedly and you’ll never have to worry about acciden-
tal stabs or loose screws again—its blunt tip doubles as a slot screwdriver. The butt also houses a built-in glass-breaker. And, because NRS knows every captain deserves a beer after a hard day’s paddle, there’s an integrated bottle-opener in this Captain’s softgrip handle.

High Sign: Enough functionality to satisfy MacGyver (too bad he didn’t care for alcohol). The glass-breaking tool makes us want to buy one for the glove compartment too.

Low Sign: The folding blade is not as robust as a fixed blade and requires one more step in a rescue.
www.nrsweb.com | $40

This article originally appeared in Rapid, Spring 2012. Download our free iPad/iPhone/iPod Touch App or Android App or read it here.

Salus Ungava PFD Review

Photo: Salus
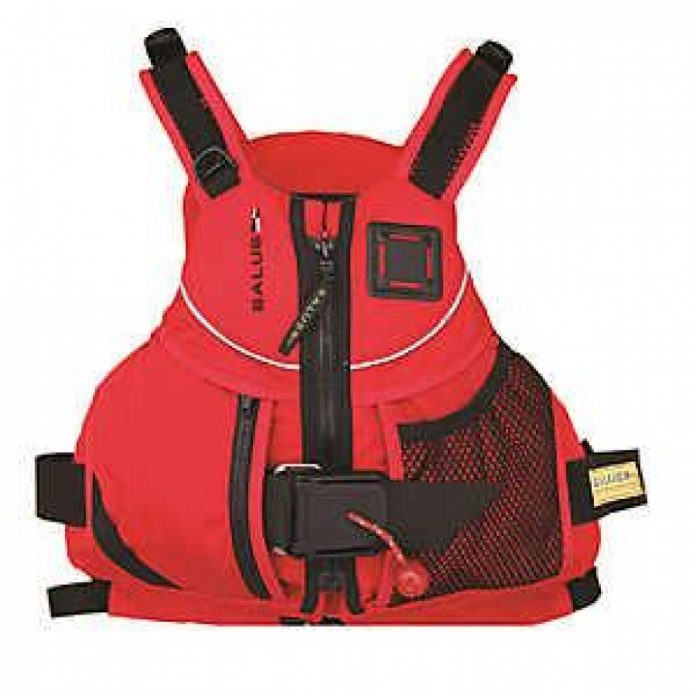
Salus Ungava PFD

This gear review of Salus’ Ungava PFD was originally published in Adventure Kayak magazine.

Ungava is an inuit term meaning “towards the open water”—a fitting name for Salus’ new, full-featured touring vest. The ungava has a traditional center front zip entry, a Dry-lex breathable liner and roomy upper body for a comfortable fit. Look closely and find plenty of small details that make a big difference in performance—reflective trim and accessory loops improve visibility; a left-hand drop mesh pocket and right-hand zippered pocket provide storage; and its carabiner attachment point, lash tab and quick-release belt make it rescue ready. Fleece-lined hand warmer pockets are perfect for defrosting hands that have been exposed to too much open water. Plus, like all Salus PFDs, it’s made in Canada.

www.salusmarine.com • $149 CAD


This article originally appeared in Adventure Kayak, Spring 2012. Download our free iPad/iPhone/iPod Touch App or Android App or read it here.

Kokatat WoolCore Gear Review

Photo: Kokatat
Kokatat Woolcore.

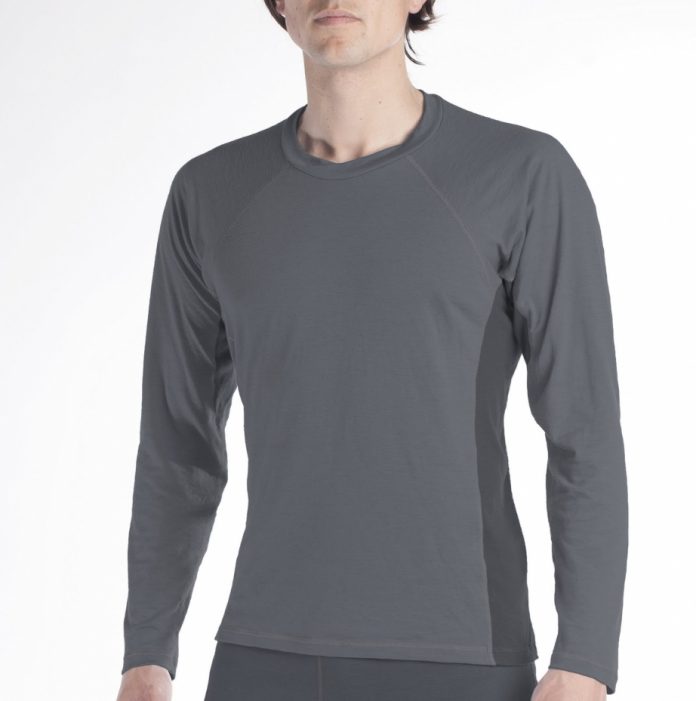
All-round has its place, but Kokatat knows that sport-specific gear allows for better paddling performance. Cut and sewn with paddler ergonomics in mind, these base layers aren’t run-of-the-mill long johns. The bottoms feature a gusseted crotch for comfort while seated and added height in the rise so your lower back stays covered when you lean forward. The tops have slightly shortened arms to accommodate wrist gaskets and a collar that won’t interfere with a neck gasket. A short-sleeved version will also be available. New for 2012, WoolCore base layers are made from a blend of 100 percent recycled polyester for moisture wicking and durability, and rocky Mountain grown, extra-soft wool for comfort and warmth. 

www.kokatat.com 


This article originally appeared in Adventure Kayak, Spring 2012. Download our free iPad/iPhone/iPod Touch App or Android App or read it here.

Seals Athena Sprayskirt Gear Review

Photo: SEALS
SEALS Athena sprayskirt.

This gear review was originally published in Adventure Kayak magazine. 

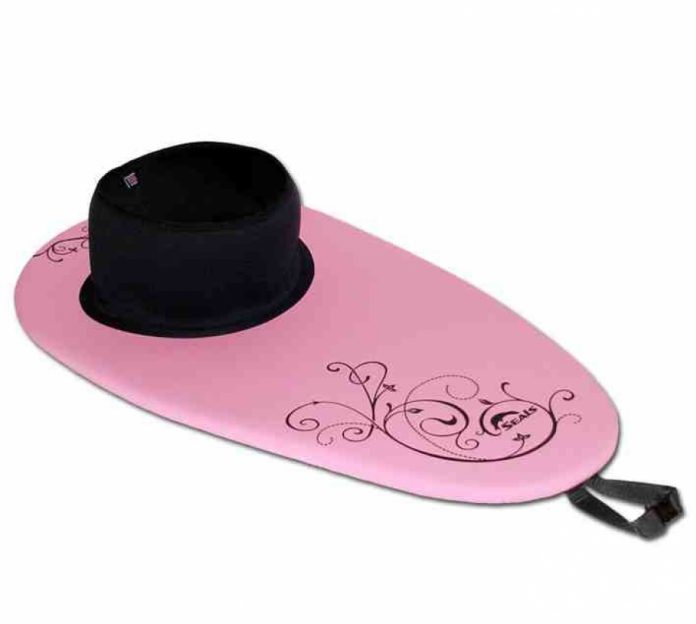
Hot on the heels of women’s-specific paddles, dry wear, PFDs and boats comes the Athena sprayskirt—another practical and pretty piece of gear paying homage to the greek goddess of wisdom, courage and heroic endeavor. Seals has offered custom-built skirts for nearly 30 years, but the Athena combines everything a woman wants in a ready-to-wear package. A floral print, 3.5- mm neoprene deck available in a range of attractive colors is mated with a watertight, easy-stretch bungee and a low-fit neoprene tunnel cut for a lady’s figure. The six-inch high tunnel is a full three inches shorter than a standard skirt, which means petite women can wear it around their midriffs as intended, rather than in an anaconda embrace around their busts. Chests everywhere will breath a sigh of relief.

www.sealsskirts.com • $100


This article originally appeared in Adventure Kayak, Spring 2012. Download our free iPad/iPhone/iPod Touch App or Android App or read it here.