Home Blog Page 502

NRS Ninja Review

nrsweb.com
NRS whitewater PFD

Like a ninja should be, this PFD is so low profile we barely knew it was there. Its side entry, compact design makes this a great vest for freestylers. PVC-free, gel foam panels allow the Ninja to contour to your body. Paddlers with shorter torsos will appreciate the cut and adjustability. We love this PFD most for its large hand-warming pocket that keeps you toasty while waiting for your turn in the hole.

nrsweb.com | $120

This article originally appeared in Rapid magazine, Early Summer, 2011. Download our free iPad/iPhone/iPod Touch App or Android App or read it here.

Freestyle Move: McNasty

Photos: Scott Sady
McNasty how-to

The venerable mcnasty has been around since 2002, when Eric Jackson invented the move—a bow pivot into a front loop—in his backyard rapids at Rock Island, Tennessee, and showcased it later that year at the IR Triple Crown.

For a long time, I studied footage of this move in awe, as the mechanics of it seemed way beyond me. I was finally able to demystify this trick by breaking it down into manageable parts.

1. Sidesurf in a hole with a foam pile. Rotate your body downstream to set up for a powerful reverse sweep.

2. Use the reverse sweep to push your bow into the foam pile so that your stern is upstream in a back blast. Your legs assist with the back blast: shift your weight slightly forward and push down on your heels, driving your feet under the foam pile. This will keep your stern from catching in the upstream flow.

3. It’s easiest to continue in the same direction started by your reverse sweep, using the spin momentum from that stroke. Look back upstream, rotate your torso and reach to your toes for a powerful forward sweep. This stroke pulls your bow deeper under the foam.

4. Drop your upstream edge slightly. This edge is going to catch, so there is a fine line between too much edge and just enough. The dropping of the edge allows you to pivot around your bow.

5. Hold the forward sweep as long as you can and keep pushing down on your heels.

6. When your boat pivots to where you are vertical and pointed upstream, jump forward to initiate a loop. If your loop lacks pop or your mcnastys are crooked, make sure you are facing all the way upstream before jumping.


This article originally appeared in Rapid, Early Summer 2011. Download our free iPad/iPhone/iPod Touch App or Android App or read it here.

Freestyle Move: Airscrew Clean Blunt

Photos: Patrick Camblin
Airscrew clean blunt

The wave won’t do you any favors on this trick. As with most combo wave moves, however, a well-defined shoulder helps, the steeper the better. Once you can do snappy hull-to-hull airscrews on small waves, you are ready to tackle this combo.

These steps outline a left airscrew to left clean blunt.

1. Get high on the wave.

2. Start down the wave, put in a paddle stroke and bounce. Tilt the boat with your hips to land on your right edge.

3. As you land, start rotating your shoulders to the left so your paddle is in line with your boat. Keep the boat on edge and look down at the water—this will start your rotation.

4. As your boat releases, keep looking down at the water between your arms. Fix your eyes on this spot until the moment just before you go upside down.

5. Okay, here’s the key to a snappy airscrew and landing flat and ready for the next trick: Right before you go inverted, look over your left shoulder and PUNCH out with your right hand.

6. Use your right paddle blade as a rudder to keep your boat straight for the landing.

7. Tighten up your right side abdominal muscles as if you’re trying to touch your left elbow to your right knee. Do that now. Feel that? This is what will finish your rotation and get you ready for the landing.

8. Touch down. Now, in one quick motion let go of the rudder, rotate 
to the left and smoothly transfer your weight from your right edge to your left. Initiating this release is the hardest part because you won’t feel like you have a good enough bounce to throw a clean blunt.

9. Pop up and hit the water with your feet as you throw your arms away from your body. Be really aggressive—even if you have no bounce, throw your arms into the trick and look downstream. You may wipe out or just flat spin 180, or you might throw a stylin’ clean blunt.


This article originally appeared in Rapid, Early Summer 2011. Download our free iPad/iPhone/iPod Touch App or Android App or read it here.

North Water Regulation Micro Tow Review

Photo: North Water
Regulation Micro Tow

This gear review was originally published in Adventure Kayak magazine.

Half the size of north water’s steadfast and proven sea tec, the waist-worn Micro tow system allows for a pre-set, adjustable short or long tow. Unclip one of the two wide gate, stainless steel, keyhole-eye carabiners for a short tow or both for a long tow. This configuration also allows you to tow with a partner or tow two boats simultaneously should the need arise. Rope is 55 feet long, 5/32-inch floating polypropylene.

www.northwater.com  » $70 US

This article originally appeared in Adventure Kayak, Early Summer 2011. Download our free iPad/iPhone/iPod Touch App or Android App or read it here.


MEC Fulcrum Tour PFD Review

Photo: Mountain Equipment Co-op
MEC Fulcrum Tour PFD Review

This gear review was originally published in Adventure Kayak magazine.

MeC’s new side-entry touring PFD fits a wide variety of body types. Women and barrel-chested men benefit from horizontally split, expandable front floatation panels and everyone can appreciate the high waist back that minimizes ride-up. Rescue belt ready, the vest also includes safety features like reflective piping, knife and strobe attachment points and a carabiner quick-release point. Three pockets, a key clip and plenty of adjustment points round out this well equipped, reasonably priced PFD.

www.mec.ca  » $120 CDN

This article originally appeared in Adventure Kayak, Early Summer 2011. Download our free iPad/iPhone/iPod Touch App or Android App or read it here.

Sperry Top-Sider SON-R Ping Review

Photo: Sperry Top-Sider
Sperry Top-Sider SON-R Ping Review

This gear review was originally published in Adventure Kayak magazine.

Known for inventing the first boat shoe in 1935, sperry top-sider has released a new line of rugged, performance-oriented shoes that look great while protecting your feet. Available for both men and women, the SON-R Ping is flexible enough to fit comfortably in even the snuggest sea kayak. the quick-drying mesh upper allows for continuous drainage. outsoles are designed to provide excellent traction on slippery surfaces and reinforced toes and heels limit premature wear from rubbing inside the boat. One of our testers (we won’t say who) was especially pleased to find that the beefy strapping system kept the shoes secure even while swimming from his boat.

www.sperrytopsider.com » $90 US

This article originally appeared in Adventure Kayak, Early Summer 2011. Download our free iPad/iPhone/iPod Touch App or Android App or read it here.

Best Scenic Whitewater Canyons

Split Canyon Mountain, Green River, Utah. Photo: Jeff Jackson
Scenic canyons.

These top scenic whitewater canyon picks from Rapid magazine will keep you wondering what’s around the next bend. 

 LOWER CANYONS, Rio Grande, TX

This run forms a rugged 140-mile section of the Texas-Mexico border. Filled with large standing waves, whirlpools, boulder gardens and drops, the Lower Canyons are sure to test any paddler’s nerve.

Plan for six to 10 days, allowing time for off-river exploration of limestone side canyons with towering, 2,000-foot walls. Spring and fall offer the highest levels but bring risk of flash flooding. For more predictable levels, a winter trip is recommended. Look for a USGS gauge reading of 3.0- 4.5 feet.

YOUR RIDE

Liquidlogic Remix XP

SHUTTLE ROUTE

Take U.S. 90 west out of Del Rio. Turn left onto U.S. 385 at Marathon, then left again onto Ranch Road 2627 and look for signs for the Heath Canyon Ranch access. The take-out is in Langtry—take U.S. 90 west out of Del Rio, exit at State Loop 25 and turn left onto Torres Rd. River access info can be found at the Judge Roy Bean Visitor’s Center in Langtry.

KICKING HORSE CANYON, Kicking Horse River, BC

This technical run has some of the most accessible action-packed, glacier-fed whitewater in Canada’s Central Rockies. Combine a run of the Upper Kicking Horse and the more demanding lower canyon section for a full day of paddling.

The water is a stunning milky blue making it tricky
to see the features—pushy currents, large holes and boiling eddylines—that make this an iconic mountain passage. Paddle it anytime from May until September. If you prefer easier-to-read rapids, look for lower flow levels around 50 cms.

YOUR RIDE

AIRE 143 D

SHUTTLE ROUTE


Head east on the Trans- Canada Highway out of Golden. Turn right on Beaverfoot Road and follow it down to the river. There
is an access point at the Kicking Horse Rest Area on the Trans-Canada if you do not wish to tackle the lower section. Otherwise, you can take out at the Golden Rec- reation Center on 9th St., right downtown Golden.

SPLIT MOUNTAIN CANYON, 
Green River, UT

The Green River carves
its way through Dinosaur National Monument in northeastern Utah, forming towering sandstone formations. A day trip into the1,500-foot- deep Split Mountain Canyon will float you down crystal clear rapids through desert scenery and past spectacu- lar geology.

Multi-day, class III options can be found upriver through Lodore Canyon
and a series of some of
the deepest gorges in the southwest. The canyon is best run from April to October with flows peaking from late May to early June. A National Park Service permit may be required for some sections so be sure to plan well ahead or consider using a guide.

YOUR RIDE

Pyranha Everest

SHUTTLE ROUTE

To access Split Mountain Campground, Take U.S. 40 east out of Vernal. Turn left onto Highway 149 at Jensen and follow the signage 10-miles to the campground.


This article originally appeared in Rapid, Early Summer 2011. Download our free iPad/iPhone/iPod Touch App or Android App or read it here.

4 Types Of Clouds To Help You Predict The Weather

person holding up a glass orb to reflect the setting sun and some types of cloud
Use these tips on cloud types for a quick DIY weather forecast. | Feature photo: Guy Kimola

Using cloud identification to forecast weather is a skill that mariners have used for hundreds of years. Watching clouds is simple and easy, yet it has been empirically proven that cloud observation as a means to predict the weather yields an accuracy of 60–75 percent. Not bad for just looking up. See illustrations of the different types of clouds—and what they mean—below.

4 types of cloud to help you predict the weather

Seasonal weather follows fairly predictable patterns in each part of the world. Different types of clouds form in very different ways in the atmosphere, depending on pressure and the moisture available. Since certain weather produces certain cloud types, observing clouds can tell you how and when the weather will change.

The key here is learning the basic cloud groups. Clouds are classified by shape and height, with names derived from Latin words describing their form. There are three basic categories you should commit to memory, as well as a fourth variation that deserves special notice.

cirrus clouds over a seaside mountain
Photo: Simon Fitall/Unsplash

1 Cirrus

Appearance (above): White, feathery looking patches and strands; usually spreading across the sky.

Prediction: Cirrus are high level clouds. These thin wisps are often the forerunner of approaching bad or unsettled weather. A gradually increasing cover shows that an approaching weather system will bring wind and possible precipitation. By observing their movement, you can tell from which direction the weather is coming.

In much of North America, cirrus clouds in the west or southwest quadrant of the sky usually indicate that the weather will change for the worse within 24 hours.

6583986639 d006655ae9 b
Photo: Wisconsin Department of Natural Resources

2 Stratus

Appearance: Uniform pale gray or white layer, looks like cheese cloth spread across the sky; can be translucent so that the sun or moon shows through as a hazy disk.

Prediction: High or mid-level stratus usually follow cirrus clouds. When they cover the entire sky, weather change is 12–18 hours away.

cumulus clouds over a lake
Photo: Neda Astani/Unsplash

3 Cumulus

Appearance: Puffy white cotton balls; if they begin to tower—become taller than they are broad—with flat bases and tops that look hard like the head of a cauliflower, they are called cumulus congestus.

Prediction: When cumulus remain the same size and shape and do not show signs of vertical growth, they are called fair-weather cumulus, meaning the weather will remain the same for at least 24 hours. If towering cumulus continue to grow, they can develop into cumulonimbus clouds with showers or thunderstorms within the next few hours.

cumulonimbus clouds at sunset
Photo: Raquel Pedrotti/Unsplash

4 Cumulonimbus

Appearance: Large cloud mass with very dark base and bright top that may flatten into an anvil-head.

Prediction: The rapid vertical growth and anvil-like shape of cumulonimbus indicate high winds within and above the clouds. These clouds can forecast some of the most extreme weather on the planet including very strong wind gusts, heavy rain, hail and lightning.

In North America, when you see these on the western or southwestern horizon, get off the water and seek shelter. The storm is often as little as one hour away, particularly when you hear thunder as well.

Cover of the Early Summer 2011 issue of Adventure Kayak magazine
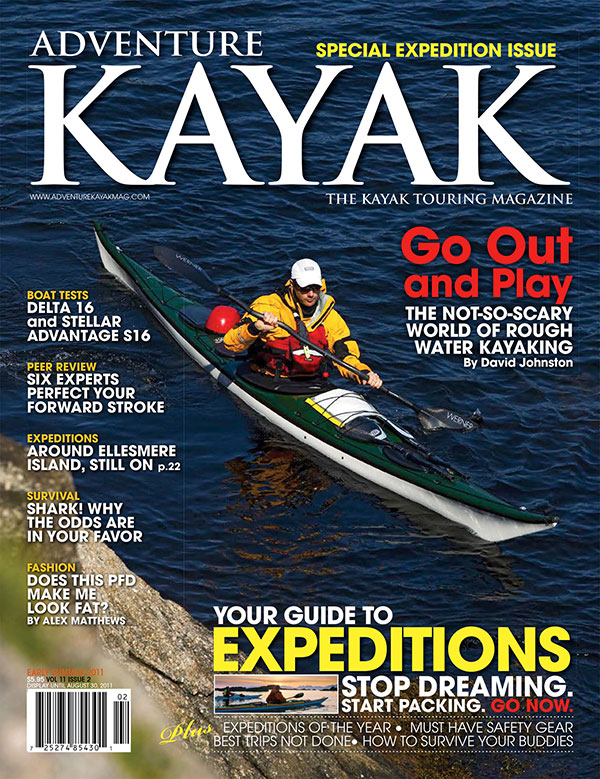
This article was first published in the Early Summer 2011 issue of Adventure Kayak Magazine. Subscribe to Paddling Magazine’s print and digital editions, or browse the archives.


Use these tips on cloud types for a quick DIY weather forecast. | Feature photo: Guy Kimola


Wanigan Packing Tips

Illustration: Lorenzo del Bianco
How do you pack your wanigan?

This article on how to pack your wanigan and what to put in it was originally published in Canoeroots and Family Camping magazine.

While the traditional wanigan—that bulky wooden box, custom-built to fit snugly within a canoe’s contours—has largely been replaced by plastic tubs or barrels, its purpose has remained true: to cram as much kitchen stuff as possible. But one portager’s perfect stash is another’s albatross. Wanigans reveal trippers’ traits, classifying them as one of three wanigan personalities: extremist, minimalist or middle-malist. And there’s wisdom—and warning—to be dished from each camp.

“Most paddlers want to eat like they do at home,” says Andrew Rafton, an extreme tripper and waniganer who won’t compromise on meals. It’s why he invested in a food dehydrator and vacuum bag sealer, which allow him to fill his wanigan with all the fixings for everything from shepherd’s pie to pizza to cobbler. He won’t scrimp on his eco-friendly clean-up, either; he makes room for three—yes, three—folding sinks.

“That’s not gonna happen on any trip I take,” says Jason Picard. “Not even a luxury one.” A self-proclaimed minimalist tripper, Picard uses his cook pots as sinks, eschewing anything that only has one use.

In Eugene Mohareb’s barrel-cum-wanigan you’ll find plenty of lightweight just-add-water meals. Whereas Rafton needs his full assortment of spices, minimalist Mohareb is happy with his tiny vial of hot sauce. Picard does one better by loading up on individual packets of condiments when he’s at a deli counter.

Your wanigan’s contents may also depend on your camping skills. Take Barb Russell, who describes herself as a middle-malist and worked as a guide and chief cook for a tripping company. “A percolator takes up too much room in my wanigan,” she says, before describing how to make cowboy coffee by literally swinging a pot of hot water above your head. “So my kit always includes a billycan.”


The Minimalist

Swiss Army Knife
Butane canister stove
Folding bowls

One pot, its lid doubling as a pan
Instant oatmeal
Instant coffee, enjoyed black
Instant rice
Mac and cheese
Hot sauce

No utensils—a carved stick for stirring and shovelling food


The Extremist

Dehydrated veggies and meat

Fresh apples

Vacuum packed food

Three foldable sinks—wash, sterilize, rinse
Spice rack
Outback oven with thermometer
Double-burner stove with tins of extra fuel
Dutch oven with charcoal

Titanium utensils—full set

Spatula, ladle and whisk

Plates, bowls, cups and mugs

Percolator and fresh ground gourmet coffee
Tetra-pak milk and cream
Mixing bowls

Flour

Biodegradable dish soap
Dish towel

This article originally appeared in Canoeroots & Family Camping, Early Summer 2011. Download our freeiPad/iPhone/iPod Touch App or Android App or read it here.

Perfect Your Pry Canoe Technique

Photo: Joannie and Gary McGuffin.
Pry technique demonstrated.

This article on how to perfect your pry stroke was originally published in Canoeroots and Family Camping magazine.

All pries use the paddle shaft as a lever against the gunwale to move the canoe away from the paddle. The resulting action of the canoe differs depending on the placement of the pry, whether the canoe is moving (dynamic) or not moving (static), and whether the pry is used in a solo or tandem situation. These four useful solo maneuvers are performed using variations of this adaptable stroke.


Solo Offside Abeam

STROKE Dynamic pry


WHEN Use to move the canoe directly sideways away from the side you are paddling on.

HOW This pry uses short, quick motions to lever against the gunwale. Rotate your upper body toward the onside gunwale and place the paddle at your hip with the shaft vertical and the powerface of the blade against the hull. Pull the paddle grip across your chest. Once your control hand reaches the canoe’s center- line, turn your control thumb out and slice the blade back under the canoe to repeat.

TIP Think of your shaft hand as an oarlock, and keep the paddle shaft anchored to the gun- wale throughout. Avoid rocking the canoe back and forth as you pull.


Solo Offside Sideslip

STROKE Stationary pry


WHEN Use to sideslip the canoe around an obstacle without having to turn, change direction or sacrifice speed.

HOW Get some speed paddling forward. At the end of a forward stroke, turn your control thumb back and slice the blade into the hull at your hip. The powerface is facing the hull. the blade should be slightly angled in the direction you want to go. Keep the blade in this static position. Weight your onside knee so the canoe meets the least amount of water resistance as it moves sideways.

TIP: Adjust the paddle shaft slightly forward or backward of your hip to ensure that the canoe does not turn as it moves sideways.


Solo Offside U-turn

STROKE Sliding pry

WHEN Use to turn the canoe around 180 degrees without switching paddling sides. This elegant, exciting offside turn requires good boat control and balance.

HOW Initiate the turn with a forward sweep, edging the canoe to the outside of the turn. Following the sweep, knife the leading edge of the paddle blade to meet the hull. The paddle shaft is vertical and the force of the water is on the back of the blade. Smoothly slide the vertical paddle shaft along the gunwale toward the bow as far as you can comfortably reach, rotating your onside shoulder forward.

TIP Maintaining an upright body position (j-lean) is essential for keeping your balance.


Offside Capsize Recovery

STROKE Righting pry


WHEN Use to recover your balance and prevent a capsize to the offside. if you are tipping away from the side you are paddling on, the righting pry is a very effective and powerful correction that takes guts and commitment.

HOW Slice the paddle toward your hip, keep- ing the paddle shaft vertical. set the shaft against the gunwale and turn your control thumb back so the blade is parallel with the canoe. push down on the grip to submerge the blade deep in the water. pull the grip toward you, past the centerline.

TIP Push down on the grip and choke up your shaft hand to submerge the blade deep in the water for a successful pry.

—Words and photos adapted from Gary and Joanie McGuffin’s Paddle Your Own Canoe.


This article originally appeared in Canoeroots & Family Camping, Early Summer 2011. Download our freeiPad/iPhone/iPod Touch App or Android App or read it here.