When I discovered the SUP racing scene, I thought, “This is going to be a breeze.” I figured most racers wouldn’t be experienced paddlers, with decades of recreational canoeing and kayaking under their belts like me. Add to that my cardio fitness as a marathoner and Ironman and I assumed I’d pretty much own the podium.
I’m ashamed now to have approached the sport with such hubris. I got my ass whupped, and wounded pride had me wondering, “What is the secret to winning a SUP race?”
Learn How to Win at SUP Racing
Standup paddleboarding is widely considered relaxing, but it didn’t start out that way for me. Being naturally competitive, it wasn’t long after I started before I wanted to see how fast I could go.
At my last SUP race, I stormed off the finish line and threw my paddle on the ground.
“How’d it go?” my wife asked.
“Terrible,” I said. “I don’t know why I even bother. I’m never doing this again.”
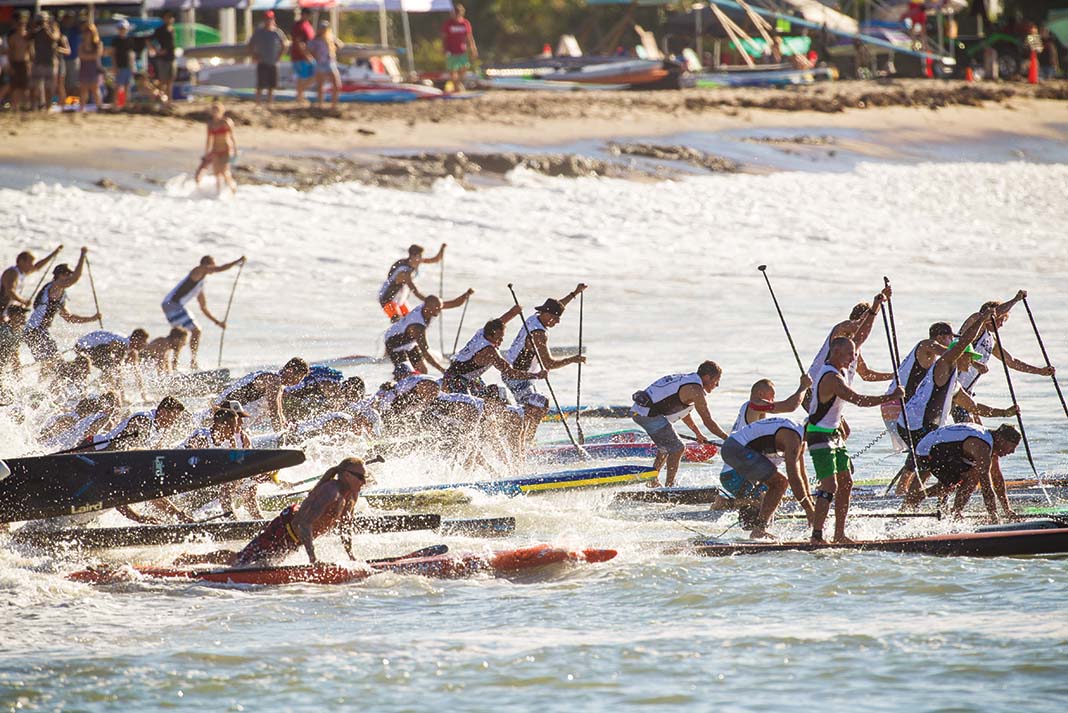
SUP’s unique challenges befit a ninja warrior: Being stable enough to stand on due to relatively wide and flat hulls, SUPs are inherently slow and inefficient as racing craft. The hull speed limit of a paddleboard is governed by a law of rapidly diminishing returns that sees you enduring a long and painful race, expending 100-percent effort and rarely gaining or losing much ground against other racers once the starting sprint has shaken out. To be a good paddleboard racer, you need the musculature of an MMA fighter, the balance of a gymnast and the mental fortitude of a yogi.
Then there’s me.
“Come on in, the water’s fine!”
Many SUP racers are boardsports veterans who’ve spent more years balancing on a surfboard or windsurfer. When the water gets rough, or you need to nimbly walk to the back of your board to kick it around a buoy turn, these guys and gals dance on water while I straggle in like a wet rat after multiple dunkings.
I’ve had a race announcer introduce me as “the official water quality tester.” Truly.
The good paddleboard racers who didn’t grow up surfing generally come out of competitive paddlesports; sprint canoe and kayak jocks who spent decades hitting the gym and learning how to really paddle fast. Altogether different than my lollygagging around quiet bays on backcountry trips.
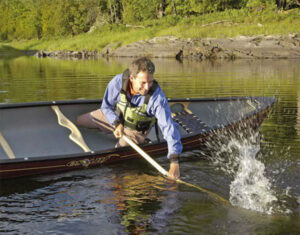
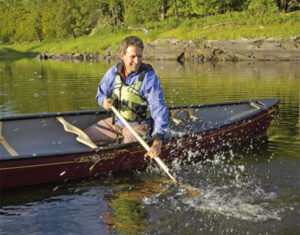
Most of the races I go to are dominated by honest-to-God Olympians. One Olympian in particular, Larry Cain, is the 1984 Olympic gold medalist in sprint canoeing. He lives in my neck of the woods and is today one of the world’s top SUP racers, despite being in his fifties. He’s instantly identifiable at local races as the speck ahead in the distance.
Seeking help from a SUP racing master
Sick of SUP racing driving me to tears, childlike temper tantrums and various phases of self-flagellation—blaming myself, blaming my equipment, blaming the wind, blaming everything—I decided to eat some humble pie, put my head down and train with a little help from the master himself.
I joined Larry’s online coaching service through which he dispenses not only challenging weekly training plans, but also valuable advice with insight into his phenomenal success and longevity as a competitive paddler. It boils down to a zen-like paradox: you can only be fast if you don’t care about being fast. Thanks, Buddha.
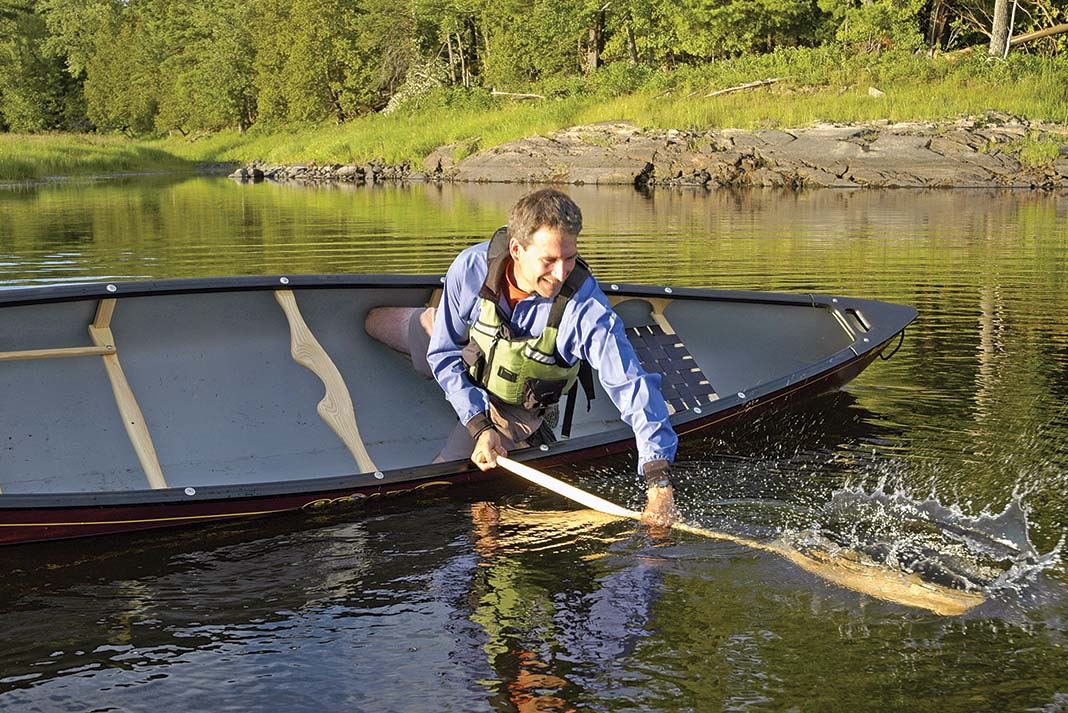
Larry has had his share of setbacks. Among his friends he was the slowest to master the racing canoe as a teenager. He would routinely push off the dock and endure the embarrassment of testing the water quality himself. He hasn’t won or placed in every race, yet something else has kept him competing for four decades. A pure love of paddling.
“There’s no place I’d rather be than out on the water,” he said. “I’ve had some amazing days out there this past year. I’ve paddled up the river until it was frozen and I was out on Lake Ontario all winter. I’ve been out there every day in the spring. I’ve seen the seasons change and ice form on my board and then my board gets so hot I could fry an egg. Every single day is different and every single day it’s a gift to be out there.”
What matters is attitude—on the board, and in life, something I have a lot to learn about. It’s no surprise Larry is a much more positive person than me in general. Nor does he have time for people who want to throw a hissy fit because things didn’t go their way on race day.
SUP racing is a privilege to participate in
In a post on his PaddleMonster coaching forum, he writes, “I am a firm believer that as adults we should all be mature enough to leave the medals and ribbons to kids’ races. We shouldn’t need something like that to tell us when we’ve done a good job or make us feel recognized for our accomplishments. It pains me to see grown adults behave like little kids when they don’t get a medal or a ribbon for placing. I have to turn away.”
“It pains me to see grown adults behave like little kids
when they don’t get a medal or a ribbon for placing.”
I felt a burning shame reading this, imagining that he was picturing my finish line antics. I’m embarrassed to admit to my expectations of podium glory, when guys like Larry have truly earned it by grinding out miles every day, in all seasons, for years, motivated more by the joys of being on the water than by the hope of some hardware bling at the finish line.
“Sport is such a wonderful thing and, especially as adults, a true privilege to participate in,” writes Larry. “We should be doing it for how it makes us feel, how it helps our health, because it’s fun and because it helps us meet and hang out with great, like-minded people. We should be able to set our own deeply personal goals and strive to accomplish them; goals that are based on performance and not placing, and derive personal satisfaction from the journey we take towards achieving those goals, without the need for outside recognition and a trophy we can put on our mantle.”
I have no better words to express the life lessons the frustrations of paddleboard racing have taught me. I’ve copied them into my journal and highlighted them, as something to remember when I wake up in the morning and head to the water.
Yes, paddleboard racing is tough, and I may never win a medal. But I’ll keep doing it at least until these lessons fully sink in, and probably much longer, just for the love of it.
This article originally appeared in Paddling Magazine Issue 65. Subscribe to Paddling Magazine’s print and digital editions here, or download the Paddling Magazine app and browse the digital archives here.
SUP yoda says, fast if you don’t care about being fast you can only be. Hrmmm. | Feature photo: Michael Yoshida