
Home Blog Page 157

How To Edit Paddlesports Videos In 5 Easy Steps

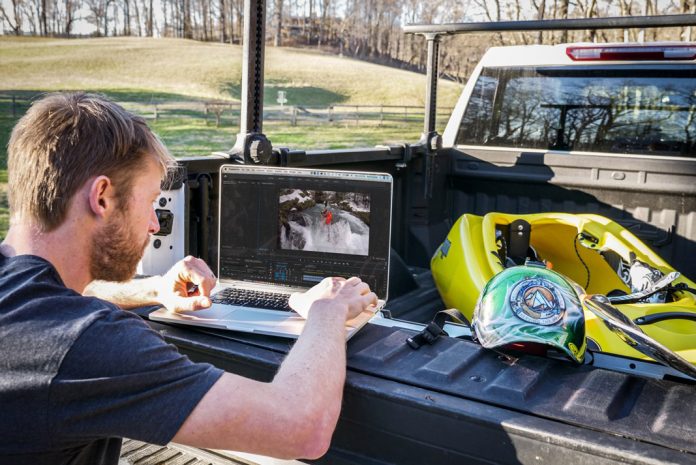
Nick Troutman explains how to edit paddlesports videos
That’s a wrap. | Feature Photo: Nick Troutman

Want to capture your best moments on the water, then come home and create a video that your friends, family and the entire world of social media will actually want to watch? Videographer Nick Troutman is here to help you learn how to edit paddlesports videos. Use this quick and dirty guide to get started.

How to edit paddlesports videos

Step 1: The Gear

A good kayak video is about showing heart and story. Unless you’re trying to get the attention of National Geographic, you don’t need top-of-the-line equipment to make a good video. Instead, use the best gear you have available.

There are four essentials to any kit. Your camera could be anything from a single GoPro to a production-quality RED camera—though if you’re using a RED camera, you’re definitely reading the wrong guide.

Today’s budget cameras produce image quality filmmakers would have killed for just a decade ago, so use what’s in your budget. You’ll also need a tripod. Cheap or expensive, this is an investment in capturing hands-free and shake-free angles.

I love drones. The new DJI Mavic Mini costs just $399, or you can drop thousands on high-end gear. Either way, a drone clip pulls together a story and a few big-picture perspectives guarantee a wow from the audience. Don’t forget a drybag or case, an essential for any paddlesports filming so you don’t lose your entire investment with a single splash.

Step 2: The Story

The key to an excellent kayak video and cohesive storyline is planning out your film before you start shooting. Create a shot list, so you know what you want to capture in advance and what you want to say.

This will help piece together the edit later. Skipping this step is the biggest mistake I sometimes still make—I think I can press record and put it all together in the editing room.

I always regret this decision. Not sure where to start? Go back to your favorite kayaking videos—what made them so good, and what shots and narration did they include?

Shoot for the platform you’re posting on—if creating a video for Instagram stories, you are better off filming vertically with short audio bits. If you’re shooting a 15-minute documentary for Vimeo, then you are probably filming a 16:9 ratio.

Step 3: The Shots

It doesn’t matter how great your camera is if all your footage is shaky or your GoPro has water drops all over the lens. To shoot the best footage you can, use a camera mount or a tripod to minimize shaky shots. I like to keep a microfiber cloth handy, but if all else fails, you can lick your lens to clean off your GoPro and keep it water-droplet free. Endless POV footage gets old, so change up your perspective. Poor sound quality is distracting, and the river’s edge can be noisy—move to a quiet location if you’re recording interviews or narrating.

Step 4: Editing Software

There are many editing platforms available. Some are quick and intuitive, and others more complex and capable. The right software depends on how deep you want to go down the editing rabbit hole.

Adobe Premiere ($240 yearly subscription) is my top pick, and it’s the benchmark pro video editor of creative pros. However, this versatile software has a learning curve, and the price is out of range for many paddlers, especially if you’re only making a video just for friends and family.

Final Cut Pro ($300) is a capable and more middle-of-the-river software for user-friendliness and price.

If you are looking for quick and easy, forget iMovie (free)—by far, the best is the GoPro app (free), which allows you to drop some clips into the software and it will pop out a rad edit for you. I use the GoPro app if I am trying to edit while waiting for a shuttle and want to get something online ASAP.

Step 5: Export & Upload

The final step is to export and upload. Many editing programs will allow the user to select the platform the video is destined for and augment the dimensions to suit. I run most of my exports through user-friendly Adobe Media Encoder, which compresses the edit into a smaller size without losing much quality.

This article was first published in Issue 60 of Paddling Magazine. Subscribe to Paddling Magazine’s print and digital editions, or browse the archives.


Professional kayaker Nick Troutman is stoked to check out your edits. Find him on Instagram at @nicktroutmankayak.

That’s a wrap. | Feature photo: Nick Troutman
 

River Rescue Essentials: Build Your Own Super Compact Rescue Kit

River Rescue essentials

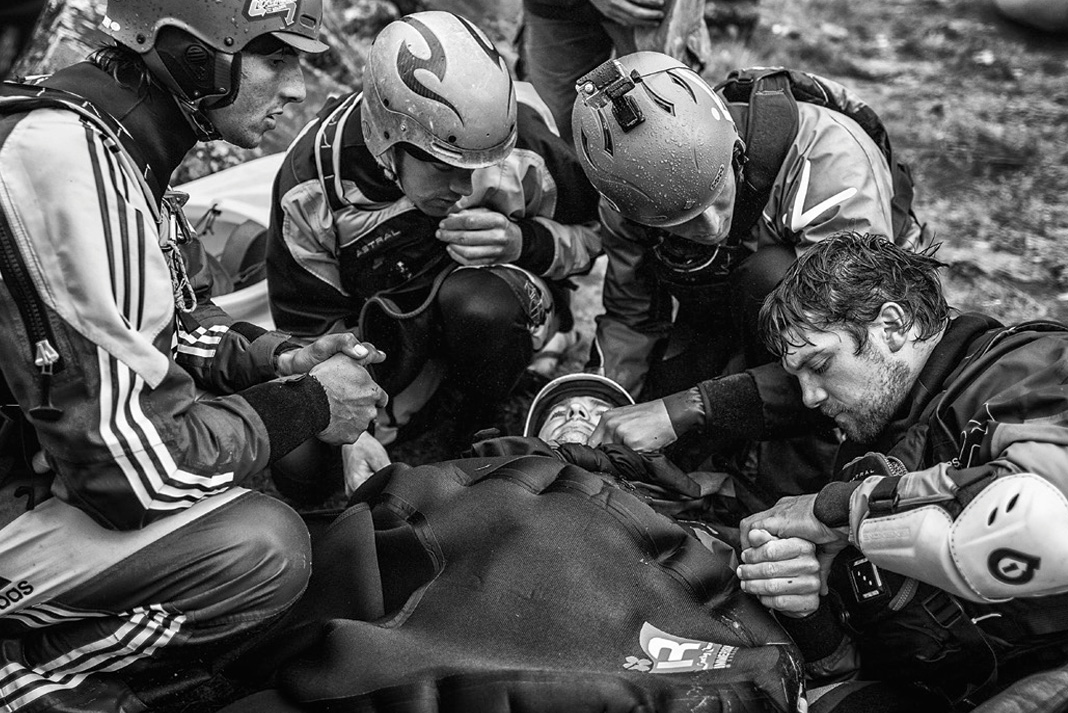
It is important to be rescue ready. Any river run or surf session may include time out of your boat scouting, setting safety or, inevitably, swimming. Rescue ready means having your personal rescue equipment available at all times.

Heeding that premise, the goal of assembling my paddling rescue kit is to make it wearable. Equipment size and weight matters. My frame—a 29-inch waist and 130 pounds soaking wet—means I need a compact and light, yet fully functional, rescue set-up.

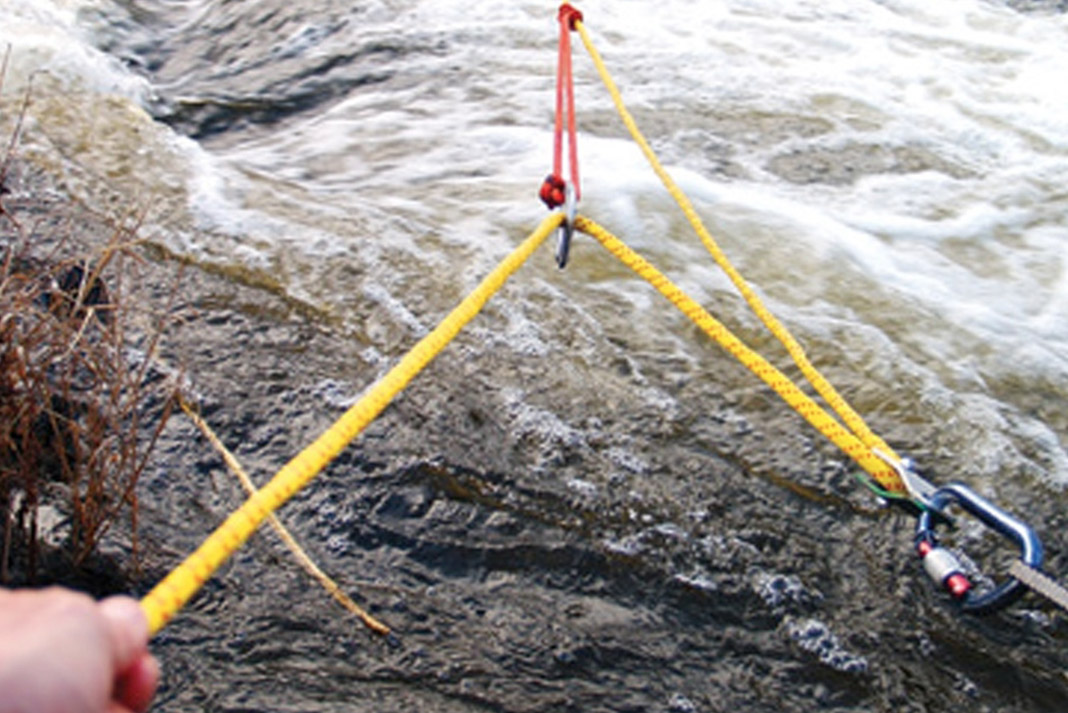
The ubiquitous rescue phrase used by paddlers and organizations is 4:3:2:1-1. The mnemonic, coined by Jim Coffey, is the minimum equipment for a safe and simple 3:1 mechanical advantage finishing with a change in direction. The ratio details four locking carabiners, three pulleys, two prusiks, one piece of webbing and one static throw rope.

River rescue essentials: Build your own super compact rescue kit

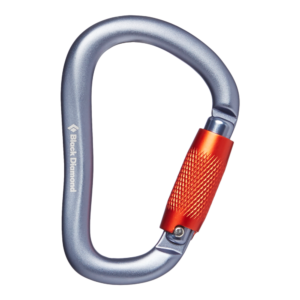
Black Diamond RockLock carabiner.
Black Diamond RockLock locking carabiner. | Image: Black Diamond

What you need to know about carabiners

Carry four carabiners. Nearly all rescue lifejackets come with a quick-release (QR) pigtail harness. If the carabiner is not locking, swap it out for a locking carabiner. If you are already wearing a webbing loop, ensure it features a locking carabiner. I carry the remaining third and fourth locking carabiners in my lifejacket. The carabiners should be large enough to accommodate a multiple of hardware, for instance, an anchor and progress capture device/prusik loop. Furthermore, larger pear-shaped carabiners facilitate belay hitches or passing a knot through when joining two lines together.

My largest carabiner is on the end of my QR harness. When rescuing a paddle from a decked boat, I can clip around the paddle shaft. I carry two Rollclip Zs by Petzl because they serve dual purpose—locking carabiner and pulley. Find locking carabiners that work for you. Remember: Cold decreases your dexterity and sand or silt may hinder locking mechanisms. Auto-locking carabiners are safest.

Buy Black Diamond RockLock from:

BLACK DIAMOND AMAZON REI SCHEELS

Buy Petzl Rollclip Z from:

AMAZON CAMPSAVER

compact rescue kit
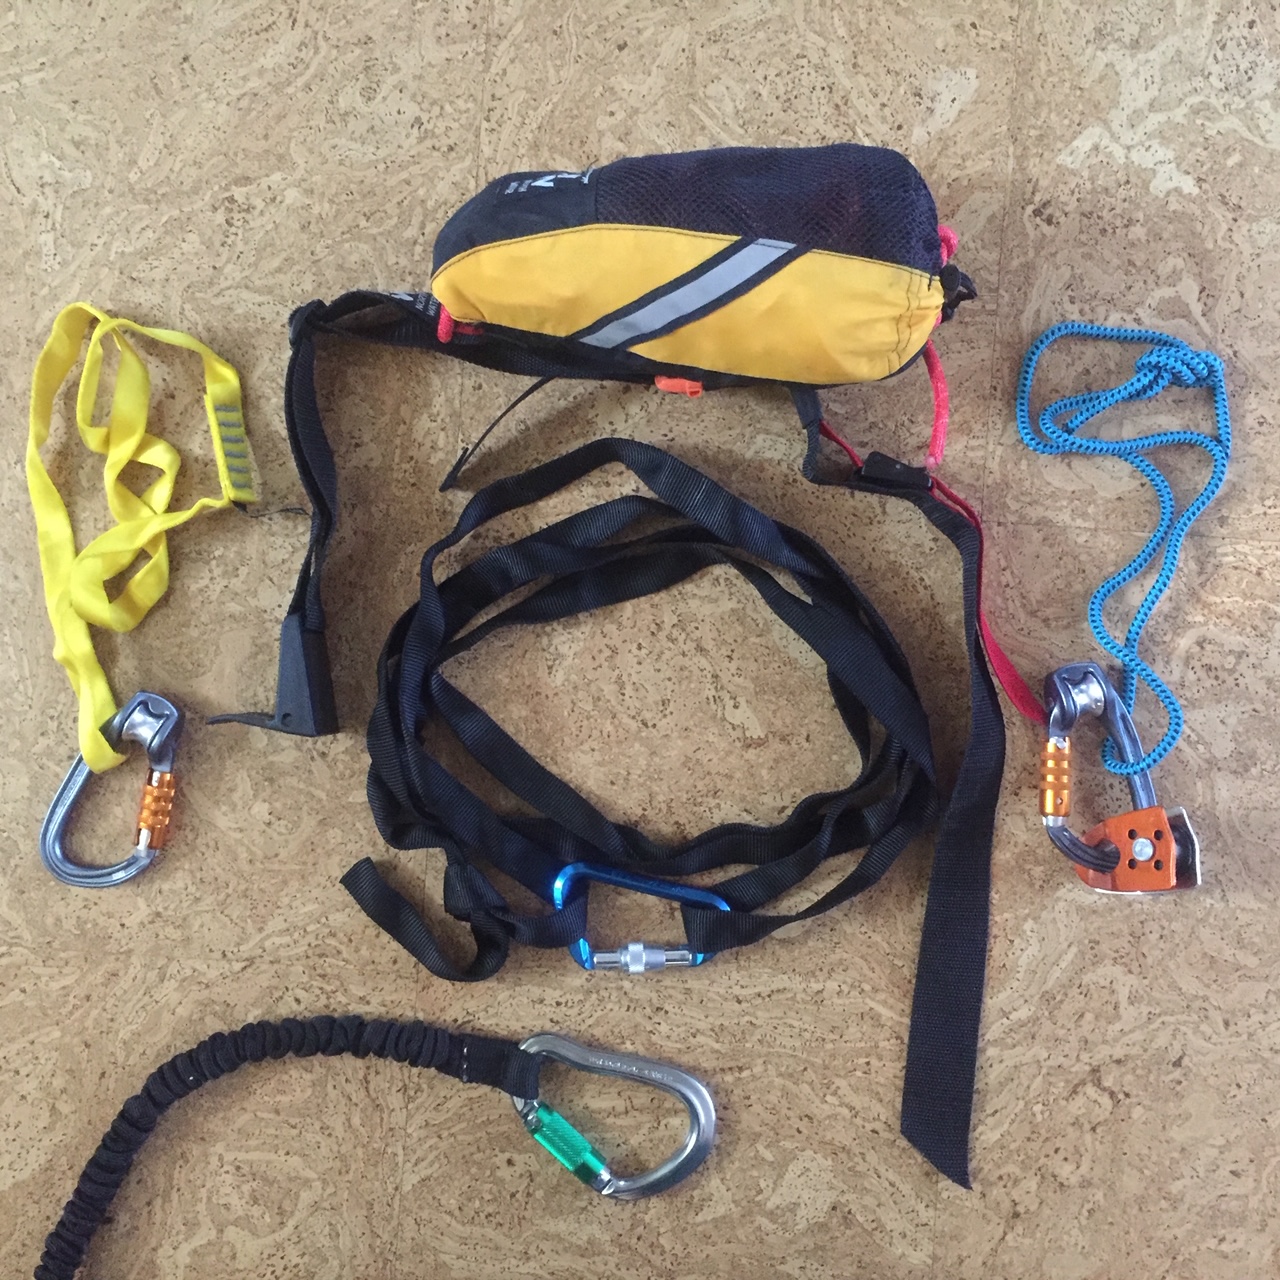
Updating and downsizing your river rescue kit means there’s no excuse not to have it on hand. | Photo: Brian Johnston
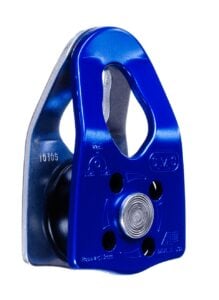
SMC Crevasse Pulley.
Image: Seattle Manufacturing Company

What you need to know about pulleys

Having three pulleys is standard and safe, while two pulleys is the minimalist approach. Two pulleys allow for a 3:1 mechanical advantage and the third pulley is for changing the direction, which is proactive for paddlers because it gets rescuers out of the impact zone.

In my lifejacket, I stow the two previously mentioned Rollclips locking carabiners that feature built-in pulleys. Rollclips are useful on the load and haul line and for the change in direction, as they are not prusik minding. They perform two-fold duty thus reducing bulk, weight and the number of devices. With two Rollclips serving as two carabiners and two pulleys, my third pulley is prusik minding to use with a progress capture device. The smallest such device easily sourced is the SMC Mini CRx Prusik Pulley. The three-pulley standard is achievable while minimizing weight and bulk.

Buy SMC Crevasse Pulley from:

AMAZON REI

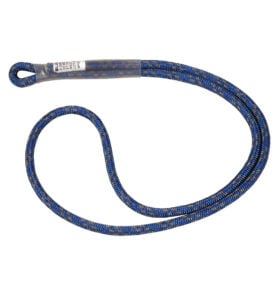
BlueWater 6.5 mm prusik
BlueWater 6.5 mm prusik. | Image: BlueWater

What you need to know about prusiks

Two prusiks are easy to stuff into a life jacket pocket. The simple approach is carrying a couple of prusik cords. I decided on one prusik cord and one sewn sling. The sewn webbing sling has advantages over having a second prusik cord. A webbing friction knot grabs easier and more reliably to a range of rope diameters. The sling is not as affected by the difference in diameters of haul rope to prusik cord nor the construction of the ropes or cords. Benefits to prusik cords are that they have more testing and they slip at a known tensile strength. This acts as a fuse in the system for safety. I prefer brightly colored prusiks because they are harder to misplace.

Buy prusik cord from:

AMAZON BACKCOUNTRY REI WALMART

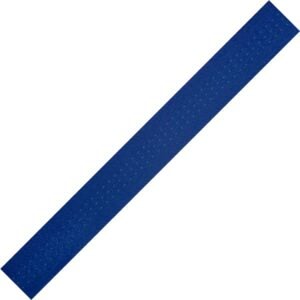
one inch tubular webbing.
one-inch tubular webbing. | Image: BlueWater

What you need to know about webbing

Wrapped around and around my waist is one piece of webbing. The tradition of wearing a webbing loop around your waist has generated recent discussion in many paddling and rescue circles. Anything you wear needs to be snug to avoid accidental snagging on objects, including all exposed carabiners attached to your body. Positioning your webbing loop with locking carabiner around your waist but tucked under your drysuit tunnel protects it from catching on objects, while keeping it accessible. Also, at my waist is a long high-tensile floating throw rope kept at the ready on a QR waist belt.

My 4:3:2:1-1 paddling rescue kit is not the most minimal. For example, I could have opted for a bare-bones throw bag. But it is fully functional while being small and light. By opting for wearing equipment on my waist and in my lifejacket, when I get out of a boat, I am always rescue ready without having to remember to grab gear. The products and dimensions mentioned are not as critical as having the equipment readily available and the training to use it.

Buy Bluewater one-inch tubular webbing from:

AMAZON BACKCOUNTRY REI

Brian Johnston a Paddle Canada volunteer and instructor, symposium presenter and paddler who prefers a single blade, wilderness and whitewater. He also orienteers, trail runs, adventure races, hikes and Nordic skis.


Feature photo: Jacob Colvin/Pexels


6 Essential Rules for Kayaking Near Whales

Man has close encounter with whale while kayak whale watching
Feature Photo: Dave Quinn

Close encounters with whales can give you moments of lifelong inspiration, but kayak whale watching is not without risk to both parties. One flick of a three-meter fluke can capsize a kayaker before you can say, “Blowhole!” And pressure from curious kayakers can push shy whales from critical habitats.

With these hazards in mind, experienced whale watchers and seasoned kayak guides have developed some agreed-upon kayak whale watching guidelines. Follow these rules when approaching any species—from greys and orcas on our West Coast to Tongan humpbacks.

Photo by Rudy Kirchner

Kayak Whale Watching Guidelines

1) Take an indirect approach

Never paddle directly towards whales, especially from behind or nose-on. Always approach slowly at a tangent that will keep at least 100 metres between you and the whales. Remember to factor in wind and currents.

2) Stay out of the nursery

Avoid mothers with calves when kayak whale watching. Think 40-tonne angry mamma bear.

Photo by Dianne Maddox

3) Beware rowdy kids

Be wary of juveniles, identifiable by their shorter length and smaller fin size. Like any young, curious animal, they’re tempted to touch everything, including whale watchers!

4) Announce your presence

Don’t surprise whales. Tap gently on the deck of your kayak to let them know you’re there.

5) Mind the shore

Unless whales are near shore, try to keep your whale watching group between them and the shore so they don’t feel trapped. However, when whales are close to shore they’re likely using it for shelter or feeding, so move off  shore to allow them a wide passage.

6) Allow an exit

Never block a whale’s escape. You don’t ever want the only way out to be through you!


View this post on Instagram


A post shared by Xavier (@angalalluarina)

Remember these rules for kayak whale watching

Remember that whales have had enough stress from humans. Not only did we nearly wipe out these gentle giants through overhunting; we overfish and pollute their habitat, pressure them with boat traffic and trap them in abandoned fishing gear. So when kayak whale watching, remember the golden rule: if any wild animal changes its behavior due to your presence, you are too close.

Two additional resources helpful to paddling in whale waters are NOAA’s guidelines to viewing marine life and the Kayak Educational Leadership Program from Be Whale Wise.


How To Shoot An Epic Whitewater Kayaking Movie

Justine Curgenven filming a whitewater kayaking movie
Paparazzi in gore-tex. | Feature Photo: Justine Curgenven

High-quality video cameras are cheaper than a kayak paddle these days, and everyone is filming their own adventures. Unfortunately, few paddlers ever wade through the hours of monotonous footage to create a film anyone other than their mothers would enjoy. Multi-award winning filmmaker Justine Curgenven shares these simple tips on how to shoot a whitewater kayaking movie that will have your friends looking over your shoulder.

Create a great whitewater kayaking movie

1) Study up on your paddling adventure

Before you leave the house know what you want to shoot. Watch lots of kayaking films—shorts, feature-length films, amateur attempts, and professional jobs. What do you like about those films, and what just drags on? Create a shot list and storyboard so you have a solid plan when you actually get on the water.

2) Tell a story

Gorgeous scenery is lovely but a human element will connect viewers with your film. Tell the story of what you are doing to the camera. Film yourself and others describing where you are, what you are doing and how you feel.

People love to see emotions on film—especially nerves, stress, and excitement. Unless someone is doing a front loop on the beach, you can film the action or scenery afterward.

3) Manage your filming kit

Nothing is more frustrating than missing a fantastic shot because of a dead battery or a full SD card. Double-check everything is ready to go before you arrive at the action.

On every expedition, I take four spare batteries for each camera. If I will be away from power for two weeks or more then I take a solar panel to charge batteries. Beware of water on your lens—it will ruin your shot. Use a lens cloth to wipe off any drops before shooting.

4) Get different angles

POV footage from a camera mounted on your kayak is great but only in doses of 10 to 20 seconds. Your shot list should include a variety of angles and perspectives to hold interest longer. Get shots of people paddling towards you, side on and away.

Film a mix of wide shots, which show the surrounding landscape, close-ups of action and mid-shots in between. Climb a hill, put your camera on the beach and get low in the water for interesting perspectives. A tripod will go a long way to making your whitewater kayaking movie look pro.

5) Hold the shot

Compose a shot where the action happens within the frame, hit record and hold the camera still for 10 seconds. Cut too soon and you’ll create a headache for yourself in the editing suite. If you analyze film and television, you’ll be amazed at how many static shots there are. Mix in some stable, slow panning for good measure.

6) Get quality sound

Poor sound is an instant turn-off. Get close to the person talking and choose a quiet location. Even small waves on a beach are very, very loud on a camera.

Put your back to the wind and get as far away as possible from the sea. Use earphones to hear what you are recording. Best yet: Buy a cheap microphone that plugs into the camera and will improve your sound immensely.

7) Be brutal when editing

When it comes to editing, remember that longer isn’t better. In fact, the average attention span on YouTube lasts just seconds. For my most recent film, Kayaking the Aleutians, I pared 50 hours of footage into a 55-minute film. That’s 95 percent left on the cutting room floor. If the clip isn’t crucial to your whitewater kayaking movie—or if you’ve asked yourself, “Will people be interested in this?”—there’s no doubt. Cut it.

Justine Curgenven has been awarded top prizes at the Reel Paddling Film Festival multiple times. Find her online at www.cackletv.com.


Paparazzi in Gore-Tex. | Feature Photo: Justine Curgenven


Modern Greenland Kayaking: How Traditional Became Trendy

Man demonstrates modern Greenland kayaking
Feature Photo: Becky and Mark Molina

The origins of Greenland-style paddling are lost in the folds of oral history, sepia-toned photographs and the minds of modern-day theorists, but the renaissance of modern Greenland kayaking is as tangible as the thousands of toothpick-wielding paddlers churning north American waters today.

Greenland-style kayaking has grown remarkably in recent years. Every major kayak symposium now includes a Greenland rolling demonstration or paddling workshop. This February, Florida’s Sweetwater Kayaks organized its first Greenland-only symposium, while Qajaq USA’s training camp, held in Michigan every August since 2002, puts names on a waiting list a month in advance.

Greenland-style is time-tested

A Texan is responsible for popularizing Greenland-style paddling in North America. John Heath began his mission to reaffirm the design attributes of traditional Arctic kayaks in the 1950s. He travelled from Siberia to Greenland, interviewing the last kayak-hunters and measuring their boats. Until he passed away in 2003, Heath argued for the merits of the Inuit designs, figuring that in a time when the price of poor kayak performance was drowning or starvation, the boats had to be well thought-out.

The launch of modern Greenland kayaking

In 1998, Heath brought Maligiaq Padilla, a 16-year-old Greenland national kayaking champion, to the United States for a year-long circuit of symposiums. For Mark Molina, an American paddler who has competed twice and won multiple gold medals in the Greenland National Kayaking Championships, it was Padilla’s demonstrations of traditional paddling techniques that kindled the Greenland-style renaissance.

“I never liked anything about kayaking until I saw what Maligiaq could do,” Molina says.

Padilla’s visit brought what was then a small but dedicated community of Greenland-style paddlers into the mainstream.

Man demonstrates modern Greenland kayaking
Feature Photo: Becky and Mark Molina

Greg Stamer, who began using a Greenland paddle in the early 1990s, founded Qajaq USA, the American chapter of the Greenland Kayaking Association, shortly thereafter. And in the Great Lakes, veteran skinny-bladed roller Doug Van Doren’s demonstrations became less of a symposium freak show and more of an inspiration for other modern Greenland-style kayakers.

A cult-like group of prodigies flourished in number and skill. Since the Greenland National Kayaking Championships first allowed non-Greenlanders to participate in 2000, an increasing number of North Americans like Molina—no doubt inspired by tales and gossip on Stamer’s qajaqusa.org website—have attended, and won.

“I never liked anything about kayaking until I saw what Maligiaq could do.”

Industry jumps on board

Sea kayak manufacturers have climbed on board, flooding the market with “Greenland-style” boats. British manufacturers—who’ve claimed to be riding the Greenland wave all along—saw a spike in sales of classic models like Valley Canoe Products’ Anas Acuta and up-start designs like Nigel Dennis’ Greenlander. In North America, modern Greenland kayaks include the Caribou by Current Designs, the Ellesmere by Boréal Design, and a composite version of Jay Babina’s Outer Island design produced by Impex.

Even as skin-on-frame boats and wooden Greenland paddles get made over in contemporary materials, modern Greenland kayaking remains compelling as an antidote to carbon fiber, Kevlar and polymer plastic. The sport is cheap and easy to pick up. A Greenland-style paddle costs 20 bucks and a weekend of labour; a new boat, $500 and a couple weeks in the shop. Traditional paddling techniques can be developed over the course of a summer on the water or a winter in the pool.

Perhaps the greatest attraction of the Greenland style is that its vast repertoire of braces and rolls promises kayakers complete mastery of their medium.

Greenland-style kayaking has undeniable appeal

The neophyte—like Mark Molina watching Maligiaq Padilla for the first time in 1998—sees the Greenland-style guru perform an oxygen-defying dance along the edge of danger, rolling in contorted poses with and without a paddle. It has the snake-charmer’s appeal of taking every beginning kayaker’s biggest fear—flipping over—and literally turning it on its head.

Who wouldn’t be captivated by the possibilities of modern Greenland kayaking?


Boat Review: Liquidlogic Big Wheel and Scooter Kayaks

Man whitewater kayaking in a Liquidlogic Big Wheel kayak
Feature Photo: Rapid Staff

Take the air ability of Liquidlogic’s Space Series and add a little extra speed and paddleability to the mix. What do you end up with? Meet the new Liquidlogic Big Wheel and Scooter kayaks.

Liquidlogic Scooter / Big Wheel Specs
Length: 5’11” / 6’1”
Width: 24.5” / 25.5”
Cockpit: 18.75” × 33.25” / 18.75” × 33.25”
Volume: 50 / 57 U.S. gal
Weight: 29 / 31 lbs
MSRP: $1,049 USD or $1,400 CAD
[ Paddling Buyer’s Guide: See all Liquidlogic kayaks ]

Liquidlogic’s Big Wheel and Scooter get big air

A narrow waterline bow to stern gives powerful edge-to-edge transitions for huge air off waves, and a more streamlined volume distribution makes cartwheels and large loops easy.

Try this innovative idea on for size

Stuffed down at your feet is a bean-filled drybag that you mash until you have the proper fit. Most testers under 5’8” agreed this is an innovative idea; the rest had to watch the action from shore. The seat, thigh braces and backband combo is “sweet.” Elaborated, “sweet” means functional and light, and, off the rack, shaped to fit most Goldilockses.

To achieve greater speed in the Big Wheel and Scooter, Liquidlogic elongated the planing surface toward the stern. Pro boater Patrick Camblin explains: “This boat needs to be bounced differently to realize its potential. Having a lower-rocker stern means that, while faster, when butt bounced and the bow goes in the air, the stern begins to drag in the green water, not allowing it to release.”

Man whitewater kayaking in a Liquidlogic Big Wheel kayak
Feature Photo: Rapid Staff
[ Plan your next whitewater kayak adventure with the Paddling Trip Guide ]

To Helix or not to Helix

The Big Wheel is all about edge-to-edge transition for aerial moves. Get backwards however and the bow rocker releases unmatched aerial backstabs. The narrow waterline, crisp edges and negligible stern allow for quick, clean Helix rotations and landings.

Can’t Helix yet? The Big Wheel is fun carving steep, fast waves but loses some luster when the bitty stern squats into a small foam pile—sort of blasting the wave face. In little pourovers and meaty holes the new slicier ends snap through at lightning speed.

Pros and cons of the Liquidlogic Big Wheel and Scooter

Pro: Light. Faster than last year’s Liquidlogic boat. Snappy edge-to-edge. Huge aerial backstabs.

Con: Sticky spinning on small features. Quirky sizing.

This article was first published in the Summer 2004 issue of Rapid Magazine. Subscribe to Paddling Magazine’s print and digital editions, or browse the archives.


Boat Review: Pyranha S6F Kayak

man paddles in Pyranha S6F freestyle kayak
Feature Photo: Rapid Staff

The Pyranha S6F kayak is one of the new generation of high-performance, easy-to-paddle freestyle boats.  It delivers high performance features and the ability to progress your freestyle paddling past your current boundaries, all in a fun Pyranha package.

Pyranha S6F Specs
(191 / 192 / 193)
Length: 6’2” / 6’3” / 6’4”
Width: 25.2” / 26.4” / 26.4”
Volume: 40.9 / 51.5 / 57.1 U.S. gal
Weight: 31.9 / 33 / 35.2 lbs
Weight Range: 88-154 / 132-198 / 180-270 lbs
MSRP: $1,099 USD or $1,610 CAD
[ Paddling Buyer’s Guide: See all Pyranha kayaks ]

S6F stands for Freestyle

Pyranha has been tweaking their S6 for a couple years, offering the classic S6, tricked out S6X and the S6F, “F” being freestyle.

Pyranha’s cockpit layout is top shelf, but carry a toolbox if you want to do on-river tweaks. It’s the thigh braces that offer the most tweaking—sliding, pivoting angle, and arcing over. Super custom, but even the American Chopper dudes (without the use of their blowtorch) couldn’t find tall testers any more knee and foot room.

Keep your boat tilting

The S6F is perhaps the most under-hyped freestyle boat. Everyone was blown away by how unbelievably fast you surfed around.

On steep, bouncy waves the speed was almost overwhelming and perhaps wasted, but on two-to three-foot slower waves the speed is the difference between fun carves, spins and blunts and flushing bye-bye. On small features, the wide, full stern (compared to say the Big Wheel) stayed on the surface of the pile, keeping your boat tilting and surfing down the face.

man paddles in Pyranha S6F freestyle kayak
Feature Photo: Rapid Staff

The S6F has a one-track mind

The great thing about the V-stern is that it keeps bringing you back straight into a frontsurf. The very same thing can be its downfall, however, as the boat keeps wanting to bring you back straight into a frontsurf.

The S6F is a great pour-over boat: short, slicey, with lots of midship pop volume. The concave bow and stern do lock in your loops.

Pros and cons of the Pyranha S6F

Pro: Super fast, greasy loose. Fun on all features big and small.

Con: Limited knee and especially foot room. Trippy stern. Price.


Boat Review: Mad River Caption Canoe

Two people paddle through whitewater in a Mad River Caption canoe
Feature Photo: Robert Faubert

In the very earliest years of this century Dagger abandoned its canoe business. And with that decision the mould for their Caption went to rest with the pigeons in a dusty storage warehouse. Open boaters with Caption dreams were left to sift and sort through the private market. Mad River Canoe changes all that with their release of the updated Mad River Caption canoe.

Mad River Caption Specs
Length: 14’
Width: 32”
Depth: 15.5”
Weight: 58 lbs
Gunwale System: IQ2 / ash
Capacity: 850 lbs
MSRP:
$1,200 USD or $1,299 CAD (with vinyl)
$1,350 USD or $1,449 (with ash)
[ Paddling Buyer’s Guide: See all Mad River canoes ]

Whitewater canoeing for you and ME

Back in 1993 when Dagger released this sporty, Steve Scarborough–designed tandem boat, paddlers embraced this versatile hull that did so many things so well. But it was not as if the design for the Caption fell from heaven onto Scarborough’s drafting table. Its precursor was the Millbrook Boat by John Berry known simply as the ME. The ME has the distinction of being the first mass-produced Royalex tandem boat that you could race in, and it was manufactured under license by Mad River.

All the cognoscenti paddled that now-ancient rockered tandem and the ME itself had its origins in a slew of composite slalom race boats. It could be argued now with the benefit of hindsight that the Caption was either a revolution or a giant evolutionary step in popularizing the growing sport of whitewater canoeing.

[ Plan your next whitewater canoe adventure with the Paddling Trip Guide ]

The Caption had a fine balance of stability, speed and manoeuvrability with its soft chines and aggressive rocker. And best of all, a Caption paddled by good boaters was dry, or at least a great measure drier than the old ME. It was a very competitive slalom tandem that was tough to beat, as well as a solo big-water boat for the larger and stronger paddlers, and a solo whitewater tripper that you could fill with gear.

Man and woman paddle through whitewater in a Mad River Caption canoe
Feature Photo: Robert Faubert

The Caption comes to Mad River

When Mad River Canoe announced a year ago that it was depriving the pigeons of their perch and resuming Caption production, the orders started rolling in.

Production problems with the quality of the Royalex sheets held up deliveries until late last summer. But the Mad River version of the Caption is now available, in brilliant cherry red, with vinyl or ash gunwales.

The reincarnation is several inches wider and more stable than the original Dagger version; you can shorten both thwarts to bring it back to the old Dagger specs if you wish.

IQ system is great but for weight

The vinyl trim option is Mad River’s IQ gunwale system, and to call it robust would be an understatement. The IQ system has a slot on the in-wale, which allows the attachment of accessories like spray covers, removable yoke, and gunwale bags.

Weighing in at 14 pounds, the IQ gunwales are often unscrewed and replaced with ash for a weight saving of eight pounds. If you do upgrade to wood, you’ll have to part with Mad River’s hilarious sliding plant pot cup holder—the most useless whitewater accessory imaginable. Someone at the Mad River factory in South Carolina has a great sense of humour.

An outfitted Mad River Caption canoe with wood trim only weighs 57 pounds and is effortlessly manoeuvrable when the seats are placed as far apart as the thwart positions will allow. For very aggressive paddling and racing, highly skilled paddlers can set the seats closer together for an even drier ride.

Get back into a Mad River Caption

It should be mentioned that the Caption’s tight-carving turns are hard to break out of (not to mention wildly addictive), but otherwise the Mad River Caption can be enjoyed by paddlers of almost any skill level. Don’t let its performance on the racecourse scare you: this is a really fun boat that is sure to take your paddling up a notch.

This article was first published in the Summer 2008 issue of Rapid Magazine. Subscribe to Paddling Magazine’s print and digital editions, or browse the archives.


When Kayaker Meets Polar Bear

The average male polar bear weighs between 775 to 1,200 pounds (351 to 544 kilograms). See more of Paul Nicklen's limited edition fine art collection at paulnicklen.com/fine-art. | Photo: Paul Nicklen

My two main passions are paddling and the North. Over the last four years, the North has been my main focus while working on a book about polar bears. Paddling has taken a back seat—if you don’t count daily toots around the lake with the dogs at home—but there’s one story connecting bears and boats still keeping me up at night.

Five of us were on an exploratory sea kayak journey in Wager Bay, high up on the western shore of Hudson Bay. We were investigating the recreational potential of what would become Ukkusiksalik National Park in Nunavut. In addition to its sheltered waters and rich cultural, historical, geological and geographical heritage, it is captivating for its big white bears. When the ice of Hudson Bay melts, Nanook heads to the shores of Wager Bay for the summer fast. On average, scientists estimated something like 80 bears per 100 kilometers of shoreline—which is a lot of bears.

We traveled with a group of Inuit from Arviat and Repulse Bay, led by the late Louis Pilakapsi, who was there to site a naturalist’s lodge he and others were looking to start in conjunction with the creation of the national park. Louis and company traveled in open motorized canoes, camped in wall tents and were actively hunting as we made our way around the coast. As long as we camped near them, the bear threat was low.

The average male polar bear weighs between 775 to 1,200 pounds (351 to 544 kilograms). See more of Paul Nicklen's limited edition fine art collection at paulnicklen.com/fine-art. | Photo: Paul Nicklen
The average male polar bear weighs between 775 to 1,200 pounds (351 to 544 kilograms). See more of Paul Nicklen’s limited edition fine art collection at paulnicklen.com/fine-art. | Photo: Paul Nicklen

When we split the group and went our separate ways for days at a time, things got interesting. Heading out onto the treeless Arctic tundra to answer nature’s call required two people—one with TP, one with a gun. As long as we stayed together on and off the water, we were reasonably safe. It was when the togetherness of a small herd of kayaks and kayakers fell apart, things turned scary.

I happened to be in a solo Feathercraft kayak the day the others pulled out their parasails to take advantage of a brisk following wind. They had sail assist, I did not. Within minutes, I was alone. All was going swimmingly—I was contemplating life in general, daydreaming and admiring the colors of the other two boats under sail against the blue of the Arctic sky as they got smaller and smaller. Life, I eventually concluded, was perfect.

It was about then everything clicked into slow motion. Paddling a few hundred feet offshore, I turned left and spied a big male polar bear paralleling me along the shore, step for stroke, stroke for step.

The first shot of adrenalin perfused every muscle in my body. My first instinct was to turn away and increase the distance between us. Until I shot a furtive glance over my shoulder just in time to see the bear drop into the water and start to swim.

My next instinct was to pick up the pace, but details from papers I read at school reminded me polar bears have been sighted 50 miles from land. They can swim at six miles an hour almost indefinitely, certainly for far longer than I could paddle at top speed.

Bear in the water. Paddler on the water. Distance between them diminishing. Me flailing, inside and out.

In the next moments, which stretch to eternity in the memory of this encounter, many things flashed over and through my brain. This bear has likely not eaten anything substantial since it came ashore, maybe a month ago. This is a hungry bear. What kind of personality does this bear have? Do bears even have personalities? Has Myers Briggs even thought of that? Has this bear seen other kayakers? Certainly, this being Inuit territory. Has it eaten other kayakers?

“Polar bears can swim at six miles an hour almost indefinitely,
certainly for far longer than I could paddle at top speed.”

My kayak’s skin was soft and drum-like over its frame. Not a great armor to fend off a hungry bear. If I honked on the Fox 40 whistle on my PFD zipper, would the others even catch a sound on the wind? Would they even be interested in paddling upwind to see why I wasn’t coming along?

What a spectacular place to die. Or something like that.

It was like the totality of a feature-length movie starring me and a big male polar bear ripped through my consciousness in a few fluttering beats of my adventuring heart.

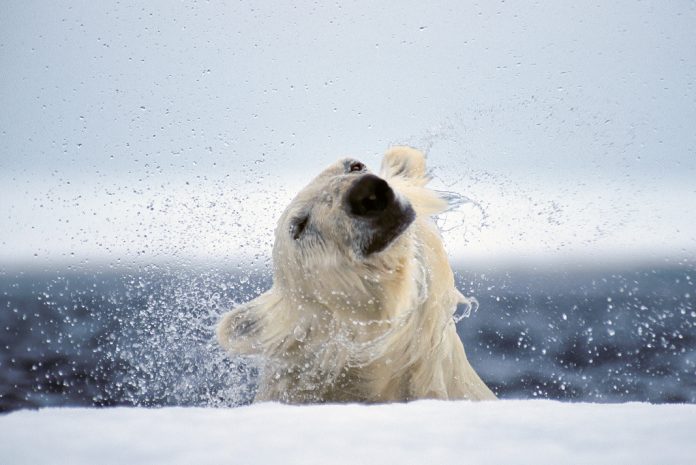
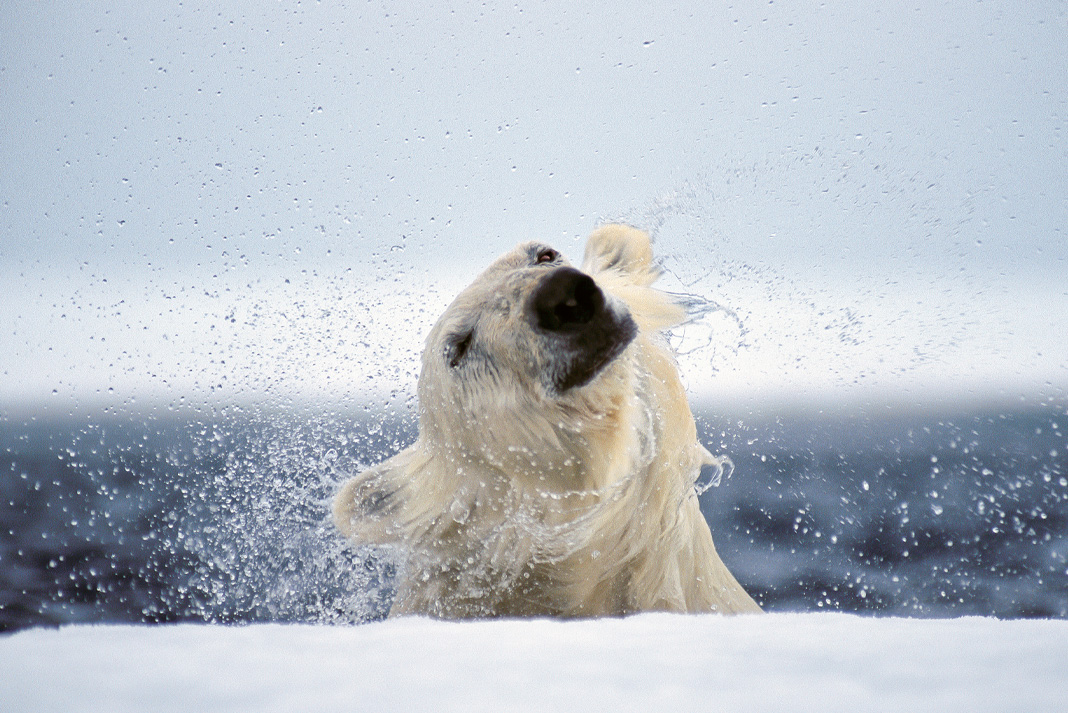
Then, just as effortlessly as it had slid into the water, the bear turned back toward shore, hauled itself out onto the rocks with practiced ease, shook in a magnificent cascade of spray, and trundled on up the bank.

Today was not the last day of my natural life.

With a fuzzy and electric post-car-crash adrenalin hangover ebbing every joule of energy from my body, I sat in the kayak. Breathing. Just breathing. And watching, as the whiteness of the moving, shrinking bear contrasted the tundra summer greens. Scanning back along the shore, where this crazy vignette had begun, I noticed a small cliff rising out of the water. And with it—ding!—crystallized a completely different scenario.

The bear is ambling along the beach. It comes upon the little cliff. Instead of wasting energy on lumbering up to higher ground and working his way over the cliff and dropping back down to the beach, he simply flopped into the water. He swam around the obstacle before continuing along the shore. In Latin, polar bears are Ursus maritimus, sea bears, bears who are as comfortable in the water as on land or ice—duh. Whether he knew or cared I was there at all, that bear had no interest in the drama going on in my head. The bear was just doing his bear thing.

We humans aren’t the center of anything except our own reflections. We don’t figure at all in the universe of the polar bear, until of course, we stroll into their home territories or alter the climate to the point the bear’s winter seal hunt gets critically shortened because the sea ice is melting. Coming ashore with less fat to sustain polar bears through the summer fast, that’s an increasing problem too.

All kinds of other changes and shifting circumstances are happening for all living beings, in the North, particularly, as a result of climate change. What’s a bear to do? Kayakers as an emergency energy source could be on the table.

James Raffan is the former executive director of the Canadian Canoe Museum. His new book, Ice Walker, from Simon and Schuster, launches September 29, 2020.

This article was first published inPaddling MagazineIssue 62. Subscribe toPaddling Magazine’s print and digital editions here , or browse the archives here.


The average male polar bear weighs between 775 to 1,200 pounds (351 to 544 kilograms). See more of Paul Nicklen’s limited edition fine art collection at paulnicklen.com/fine-art. | Photo: Paul Nicklen

Review: Mad River Canoe Explorer 16

Mad River Canoe Explorer 16 reviewed by Paddling Magazine
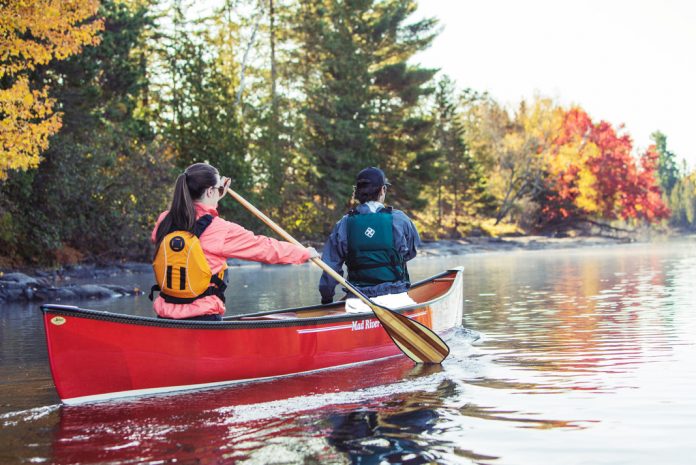
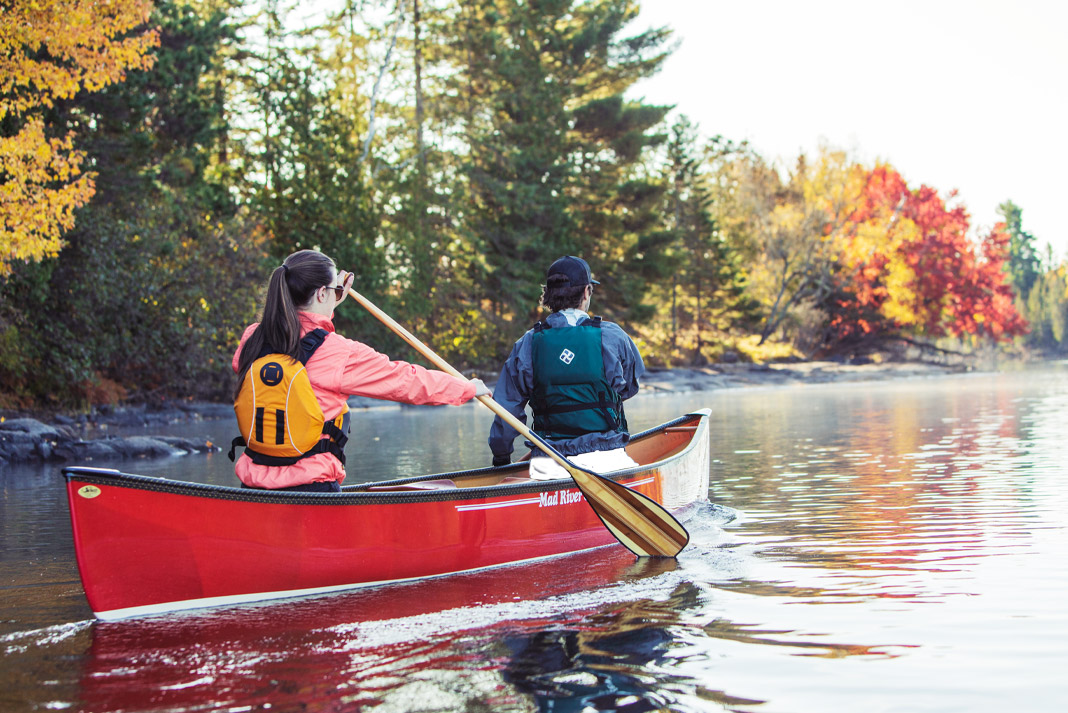
A canoe for all occasions. Even Fancy ones. | Photo: Alex Traynor

In October 2020, Canadian boatbuilder Swift Canoe and Kayaks will take over manufacturing Mad River Canoe’s bestselling design, the Explorer 16, in two composite layups.

Mad River Canoe’s  Explorer 16
Length: 16 ft 3 in
Width:  35 in
Depth: 15 in
Weight:  44 lbs
Capacity: 1,100 lbs
MSRP: $3,399 USD / $4,349 CAD
madrivercanoe.com
The announcement of the partnership was made at industry tradeshow Paddlesports Retailer last August in Oklahoma City. The Paddling Magazine crew was there to get a first-hand look at the sleek new Kevlar and carbon prototypes in the Swift Canoe and Kayak booth. The eye-catching designs were the talk of the show. The Explorer 16 in a carbon layup even won the Best New Canoe award at the 2019 Paddling Magazine Industry Awards, which recognizes new product innovation in the industry (paddlingmag.com/0071).

“We’ve been making boats in-house for a long time, and we wanted to expand capabilities in terms of construction. We’ve done ultralight layups in the past, but Swift is the best in the business at building boats right now,” says Adam Ott, project manager at Confluence Outdoors, Mad River’s parent company.

“I have always been a big fan of Mad River, and I’m very fond of the original owners, Jim and Kay Henry. When Mad River asked us to build the boats, it was an honor,” adds Bill Swift, owner of Swift Canoe and Kayak.

Mad River Canoe Explorer 16 reviewed by Paddling Magazine
A canoe for all occasions. Even Fancy ones. | Photo: Alex Traynor

Starting in October, Swift will be building all of Mad River’s composite Explorer and Serenade models and delivering them across North America. Production at Swift’s South River, Ontario factory will expand to include 500 to 1,000 composite Mad River builds a year. This means the Swift operation will need more manufacturing help and warehouse space, which will be sorted out as restrictions around the pandemic lift, says Swift. The boats will be Mad River canoes in every way, except each will have a Swift serial number.

[Paddling Buyer’s Guide: View All Mad River Canoe Boats]

Back at Paddling Magazine headquarters, we picked up a prototype of the Explorer last fall. Thanks to its two-tone look—a distinctive feature of many Swift canoes—the Explorer has never looked better. In a ruby-red-and-white finish, it’s a real head-turner.

Our tester Explorer paddles like the other Mad River Explorers we’ve reviewed. Its symmetrical, shallow-V hull has smooth, predictable handling and excellent stability. With two inches of rocker in the bow and stern, we might not win races, but the easy-paddling Explorer makes up for it with an ideal balance between tracking and maneuverability. It’s a boat we could take almost anywhere. Mad River is right when they deem it a “canoe for all occasions.”

Canoe seat close up
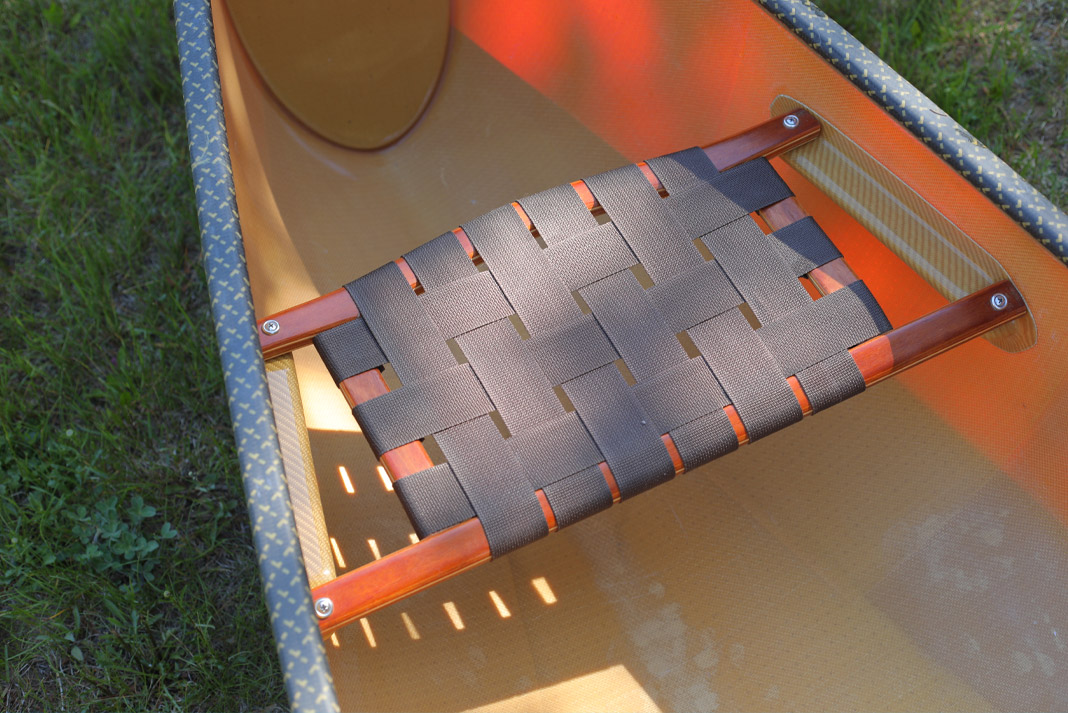
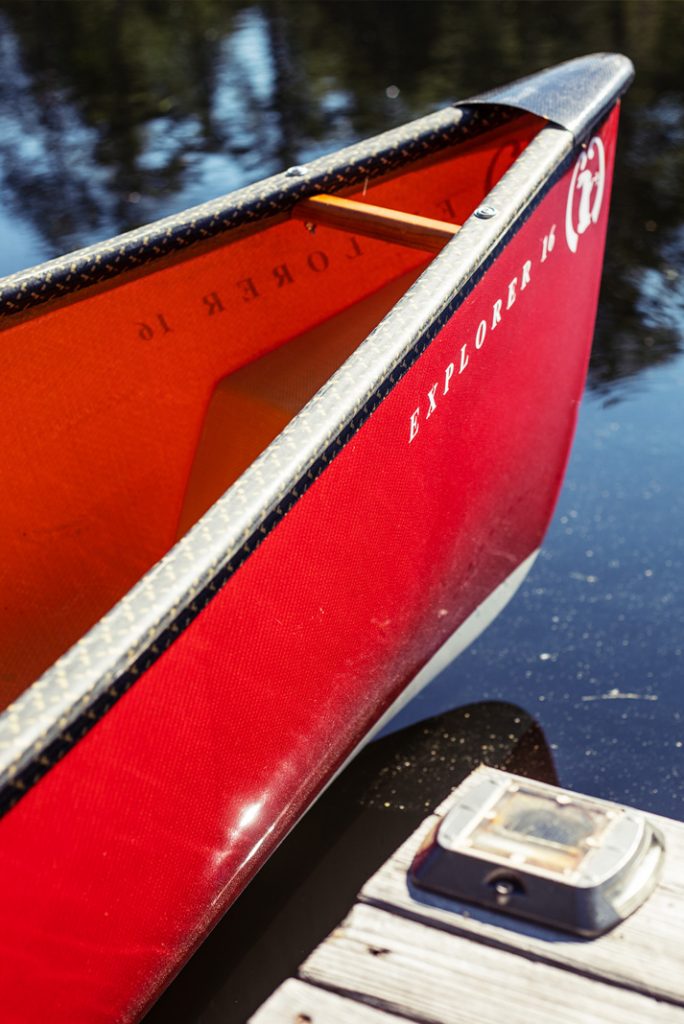
Contoured cherry webbed seats also come standard. The carbon Kevlar trim fuses canoe hull and gunwales into one. | Photo: Michael Hewis

Part of the Mad River lineup for 45 years, the Explorer is Mad River’s bestselling design by far. The key to its success is its versatility, says Ott. “People often ask about the best choice if they want to buy one boat to do everything—it’s always the Explorer,” he says.

Mad River debuted the Explorer in 1975 in fiberglass. It was the second design released by Mad River founder, Jim Henry, coming four years after the company’s very first canoe , the Malecite. Over the past four decades, Mad River has manufactured it in 17 different layups. The Explorer earned its whitewater cred in the ‘70s when it was the first open canoe to run the Colorado River through the Grand Canyon successfully. Yet, it’s equally at home loaded to the gunwales with gear and kids on flatwater family camping adventures.

In addition to the Kevlar and carbon Explorers Swift is manufacturing, the Explorer is also available in a T-Formex layup. The Esquif factory in Frampton, Quebec, is manufacturing the T-Formex model. (Mad River will continue to make the Journey and Adventure in polyethylene at their Greenville, South Carolina factory.)

Mad River Canoe Explorer 16 bow
Swift’s Kevlar Fusion layup is built with urethane acrylate resin that does not incorporate exterior gel coat. Swift claims this infusion process produces the highest strength to weight ratio and inter-laminate shear strength of any composite hull in the industry. | Photo: Michael Hewis

The three Explorer layups represent multiple uses, says Ott. “Because of its versatility, we looked at the three main ways to use it. The T-Formex version is the rocky river runner, which will stand up to the punishment of running rivers. With the AR, we were looking for an in-between version, a truly versatile layup that could do rivers but be lighter for lakes and portaging—one boat to do it all. And the carbon version is a heavy hauler but very lightweight.”

Our loaner is the Explorer AR, manufactured by Swift in Kevlar Fusion. This is Swift’s most popular canoe laminate, with the highest strength-to-weight ratio. Kevlar Fusion canoes are built with an outside layer of a clear marine-grade gel coat with polyester, S-glass and Kevlar cloth layers sandwiching a durable foam core and rib system. The laminate is fused with a high impact, flexible epoxy vinylester resin system.

Canoe yoke close up
Contoured cherry yoke comes standard. | Photo: Michael Hewis

Special to Swift’s composites are the snazzy integrated gunwales. This process fuses canoe hull and gunwales into one, creating a bond between the hull and trim. They’re lightweight, attractive and maintenance-free. Composite Explorers come standard with cherry yoke, handles and bench seats.

Our 44-pound tester retails for $3,399 USD. For $300 more, you can get the sleek and sexy carbon model and save four pounds. Regardless of your choice, don’t let all the fancy accouterments and elegant look of the new composite Explorers fool you. This discerning explorer has 45 years of adventures behind its lines. And it’s only gotten better with age.

This article was first published inPaddling MagazineIssue 62. Subscribe toPaddling Magazine’s print and digital editions here , or browse the archives here.


A canoe for all occasions. Even Fancy ones. | Photo: Alex Traynor