Costco has a good reputation as a place to buy everything, including kayaks. The kayaks sold at Costco are all meant for beginners and include open deck, sit-on-top models that are safe and easy to enter and exit, as well as fishing kayaks with features specific for anglers. Costco also sells inflatable kayaks that are perfect for those who want to experience recreational kayaking but lack storage space.
The makes and models of Costco kayaks vary based on your location, with different offerings in Canada and the United States. In general, if you want to buy a kayak at Costco you’ll find less variety than at sporting good stores and other large box stores, such as Walmart. Costco kayaks are cheaper than those found in dedicated paddling stores and are usually meant for beginner conditions only: flatwater with minimal exposure to wind and waves. If you’re planning to buy a kayak at Costco it’s important that you recognize this limitation.
Check The Weather
Plan for changing weather conditions. Prepare for the worst case.
Don’t forget to check tide, currents, or river levels.
Like other inexpensive kayaks, Costco kayaks are a tradeoff between a great price and paddling performance and comfort. Don’t expect to get a refined paddling experience in terms of the kayak’s paddling speed, maneuverability, handling and safety features, as well as comfort elements like seating, from kayaks sold at Costco. At the same time, don’t expect any expertise in Costco sales associates when it comes to answering questions and providing guidance on a kayak purchase.
If you want to invest in paddling, shop somewhere else. But if you’re looking for a casual-use kayak that is easy on the wallet, Costco is a great choice. Our review of Costco kayaks will provide you with the essential knowledge to find the best kayak for your paddling needs.
Depending on your location, you’ll find a limited selection of kayaks sold at Costco—especially compared to the offerings at other box store retailers, such as Walmart. On the plus side, this makes your decision far easier. You’ll be less overwhelmed by choices of recreational kayaks—all of which generally do the same thing.
The general categories of kayaks sold at Costco include inflatable kayaks (which deflate to allow storage in small spaces); tandem kayaks to enjoy with your partner, child or friend; and fishing kayaks, which include angler-specific features like rod holders and tackle storage areas.
Shopping for a used Costco kayak?
Are you searching websites like Craigslist, Kijiji and Facebook Marketplace for a pre-owned kayak? You may come across a used kayak sold at Costco. Your first step in making a good investment is to research the specific attributes of the make and model Costco kayak you’re considering. If it looks like you’ve found a contender, consider the following advice to make a good purchase:
Overall condition
Examine the overall condition of the Costco kayak, taking note of fading due to excessive sun exposure. Apply firm pressure to all parts of the kayak to test for stiffness (it shouldn’t feel spongy). Examine the deck (top) and hull (bottom) of the kayak for damage including deep gouges (more than 3 mm or 1/8th of an inch deep); obvious abrasion (especially if the worn areas are a different color from the rest of the kayak); and deformities (which will make the kayak paddle less efficiently). Costco kayaks are made of durable plastic that’s meant to withstand plenty of abuse; some damage is fine, so long as the shape of the kayak remains intact.
For inflatable kayaks sold at Costco take a close look at the condition of the valves to make sure they function as they should and hold air. Examine the fabric skin of the kayak for any worn spots, feeling and listening for air leaks.
Outfitting
Consider the kayak’s outfitting, including comfort features like the seat—is it padded and supportive for your body type? Outfitting is the critical interface between the paddler and kayak. It includes the seat, back support, thigh rests and foot rests. Examine each of these parts individually—do they function as designed, are they jammed with grit or sand? Then consider how well the outfitting works together as a whole. The easiest way to achieve this is by sitting in the boat (and ideally paddling it) to make sure it feels comfortable. A good fit is not only more comfortable, it also enables you to paddle more efficiently.
Outfitting often comes down to personal preference; there’s no one-size-fits-all. One of the drawbacks of cheaper, mass-produced Costco kayaks is substandard outfitting. Take a close look and consider investing in a more expensive kayak if you plan on more serious paddling. If you’re handy, outfitting is easily modified with some glue, foam and DIY time; consider any upgrades you could make to save a few bucks and get a custom fit.
On the water
The only way to fully appreciate the comfort and performance of a kayak is to try it before committing to a purchase. Arrange a meeting place with the seller that allows you to take a few moments on the water. Bring your usual paddle and dress in what you plan to wear while paddling. With a sit-inside kayak be sure to assess how easy the boat is to enter and exit.
Carry A Waterproof VHF Radio, Use Your Phone Only As A Backup
A handheld VHF marine band radio allows you to communicate with the Coast Guard and other boat traffic. Use Channel 16 only for hailing and emergencies. The radio should be waterproof, because it is virtually certain to get wet.
A cell phone, even if in a waterproof case or sealable bag, might not work, so don’t rely on it as the primary means of emergency communication.
Make a deal
In general (that is, before Covid-19 put a premium on outdoor equipment) the typical starting point for a used Costco kayak in moderate condition was about half its retail price. All that’s changed in the wake of boat shortages brought on by the pandemic, but you can use it as a starting point in haggling a fair price.
Add some accessories
Specialized accessories are key elements of fishing kayaks; if you want to do some kayak angling make sure you examine features like rod holders and live wells.
If you’re offered a PFD with your used kayak purchase, make sure it’s in good shape, fits properly and is Coast Guard-approved for the location you’ll be paddling.
For more tips on what to look for when selecting a used kayak, read our article on How To Buy A Used Kayak.
Costco kayak buying guide
The best advice we can offer to any prospective kayak buyers is to try before you buy. Unfortunately, this advice is difficult to apply if you’re shopping for a Costco kayak, since these massive stores are typically located in urban areas, far from the water. Instead, ask your friends if they have any Costco kayaks you could take for a spin. Not only will this give you a sense of what’s available, on-the-water experience will allow you to appreciate how different kayak design elements fit your body and perform.
The important thing to remember when you buy a kayak at Costco is that you’re not going to find any high-end, performance kayaks at this store—and that may be perfectly in line with your recreational paddling and kayak fishing needs. Costco kayaks can make a lot of sense for occasional paddlers looking for an economical choice. However, box store sales associates at places like Costco will never offer the same expertise as the informed professionals at a dedicated paddlesports retailer.
If you’re serious about paddling and want to develop your skills, you will be better off avoiding Costco in favor of a smaller paddling or outdoor shop, and making a more substantial investment in a specialized day touring or sea kayak. Still have questions? Here are expert answers to some of the most common questions about Costco kayaks.
Are Costco kayaks any good?
Costco kayaks are good for entry level paddlers who want a cheap kayak for occasional use in calm, sheltered water conditions. Like any cheap kayak, Costco kayaks are limited in their performance and can be hazardous to use in open water conditions on large lakes or exposed coastlines.
However, Costco kayaks are great if you’re looking for a new toy for the cottage or you want to try paddling with your family at the beach. Costco offers a limited selection of kayaks, most with similar paddling, handling and comfort characteristics, which makes your choice a bit less overwhelming than at some other box stores.
Kayak prices Costco
If you’re in the market for a recreational kayak, you’re probably wondering how much are kayaks at Costco. In the U.S. Costco stores sell a variety of kayaks—including inflatable kayaks, fishing kayaks and sit-on-top hybrid SUP kayaks, for single and tandem use—ranging in price from $219.99 to $579.99. Costco stores in Canada have a more limited selection of kayaks, with prices ranging from $259.99 to $759.99.
When do kayaks go on sale at Costco?
Costco brands itself as a wholesaler, meaning that its products rarely go on sale. Don’t expect to find kayaks on sale at Costco; however, you may get lucky and find overstock kayaks at discounted prices, especially as paddling season winds down in late summer and early autumn and Costco warehouses start replacing kayaks with other seasonal items. Our suggestion is don’t wait for a sale; buy a Costco kayak when it’s available and get paddling as soon as you can.
Wear A Life Jacket
Everyone, even strong swimmers, needs to wear a life jacket at all times when on the water. It is extremely difficult to put a life jacket on once you fall into the water. Even a light wind can blow any paddlecraft away from you, faster than you can swim.
Always wear a USCG-approved Level 70 or Type III life jacket designed for paddling.
Costco kayak reviews
Unable to find a Costco kayak you can paddle before you venture to the store to make your purchase? Your next best bet is to read reviews of these kayaks to figure out which one suits your planned paddling pursuits. You’ll find our expert reviews below.
The size of a kayak plays a huge role in determining its performance characteristics, and whether it’s the right kayak for you. If you’re wondering, “What size kayak do I need?”, you’re definitely on the right track in finding the perfect boat. Kayak shapes and sizes come in many varieties; the two main variables are length (which determines the overall speed of a kayak, longer is faster) and width (which determines the stability of a kayak, wider is more stable).
Analyzing kayaks from the perspective of these simple values is the goal in choosing the right size kayak for your body type and paddling aspirations. This kayak size guide article provides all you need to know for how to buy the right size kayak.
Many first-time paddlers wonder, Do kayaks come in different sizes? And if so, how do I know what size kayak I need? Kayak shapes and sizes are the best way to distinguish between individual boats—and broader categories of kayak styles based on the type of paddling you wish to do. Here is a kayak size guide for the boats most commonly purchased by beginner and novice paddlers.
Recreational kayaks are distinguished by short and wide dimensions, which meet the needs of beginner and casual paddlers in sheltered water conditions. The average kayak size in this popular category of kayaks is 10 feet long by 28 inches wide. These specifications contribute to the stable feel and easy handling of a recreational kayak; while these boats won’t win any races, they’re meant to be maneuverable for beginners with minimal paddling skills.
The smallest kayak size in the recreational kayak category is about six feet; several manufacturers offer cheap sit-on-top models at this length which are meant for children under 12 years of age.
Day touring kayaks
Day touring kayaks are somewhat longer and narrower than recreational kayaks, with an average kayak size of 12 to 14 feet long and 24 to 28 inches wide. If you’re looking for a boat that’s faster and glides more efficiently through the water, as well as feeling somewhat sportier and less like a bathtub, a day touring kayak might be the right size of kayak for you.
Not only do these dimensions create a more efficient boat to paddle, they’re more responsive and better for paddlers who want to develop their skills and progress to more challenging water conditions, or use their kayak for day trips and overnighters.
Touring kayaks, also known as sea kayaks, are best described as long and narrow—the nearest match to the original Inuit kayaks of the Arctic. The average size of a sea kayak is 16 to 17 feet long and 22 to 24 inches wide. Sea kayaks are extremely fast and efficient compared to recreational and day touring kayaks. However, they’re also tippier and require some paddling skills to handle safely.
If you’re a smaller person consider the smallest kayak size in this category, which would be about 15 feet by 22 or 23 inches wide, for most efficient paddling. As their name implies, touring kayaks are meant for multi-day trips in more exposed water conditions, including use on the ocean. Investing in a touring kayak should also mean taking certified training to learn efficient paddling and rescue techniques.
Kayak length
Before you ask the question “What length kayak do I need?” you should consider your goals in paddling. Kayak length is directly proportional to speed and handling: A long kayak will be faster and travel straighter than a short kayak; that’s the first thing to remember in choosing kayak length. So, if you’re a novice kayaker wishing to paddle short distances, a short kayak will be easier to handle. But if you want to progress your skills and travel long distances, a longer kayak will be better for you.
Paddling location also matters: smaller bodies of water, especially twisty rivers, demand shorter, more maneuverable kayaks. On the other hand, you will paddle more efficiently over longer shorelines in a longer kayak. A kayak length guide wouldn’t be complete without considering the size of the paddler. Obviously, taller paddlers should choose a longer boat, regardless of the type of kayak, for comfort. Meanwhile, shorter paddlers should choose below-average kayak length to improve fit and comfort in the boat as well as making it easier to handle.
Kayak width
Just like length, the average width of a kayak varies depending on the style of kayak. The width of a kayak is also a good measure of its stability: in general, the wider the kayak, the more stable it will be. So if you’re a first-time kayaker, you will benefit from a wider kayak. However, as your skills progress you may find a wide kayak is cumbersome and less efficient to paddle.
Extremely wide kayaks are actually harder to paddle because it’s more difficult to reach the water with your paddle blades. So choose kayak width carefully, with a mind for your goals in paddling. A wide, stable kayak may be all you need if your aspiration is to paddle casually around the cottage or sheltered bay. However, a narrow kayak will feel sportier as your skills progress if you wish to take the sport more seriously.
Kayak weight limit
The common question, “How much weight can a kayak hold?” is relevant in many ways. To take a step backwards, the weight limit of a kayak is determined by its volume. The larger the volume in the kayak, the greater the weight capacity. Width is a critical dimension in determining weight capacity. Typical weight limits range from 250 to 350 pounds for most average sized kayaks in all categories. While the upper weight limit is obviously important for larger paddlers, it’s also relevant to smaller people.
If you’re small, consider buying a kayak with a lower weight limit; less volume means the kayak will be more efficient to paddle and feel more comfortable for you on the water. Similarly, it’s important to think about whether or not you plan to carry gear for a day trip or overnight trip when considering the weight limit of a kayak.
Kayak weight
Kayak weight is important for two reasons: a heavy kayak feels less nimble on the water and is slower to accelerate and harder to keep moving at a steady pace; and a heavy kayak is harder to lift and carry. The second point is especially relevant to paddlers who want to car-top their kayak or anyone who faces a longer distance from where the kayak is stored to the launch site. The task of lugging a heavy kayak could be an annoyance or an injury waiting to happen.
Like any outdoor equipment, everything else being equal a light kayak costs far more than a heavy one. The average weight of a kayak ranges from 30 to 70 pounds, depending on the style and construction. Recreational kayaks are commonly made of tough—and heavy—rotomolded plastic; this style of kayak frequently has an average weight of 50 to 60 pounds (a light recreational kayak would fall in the 40-pound range).
Similarly, a plastic sea kayak will weigh slightly more, say 60 to 70 pounds for the average length. If you want to get the lightest boat possible consider composite (fiberglass or Kevlar) construction; a day touring kayak of this style would have an average weight of 35 to 40 pounds, whereas a longer composite sea kayak tips the scales between 40 and 50 pounds.
Composite recreational kayaks are harder to find, but one lightweight option is Oru Kayak, which manufactures folding (think origami) kayaks in lengths of 10, 12 and 16 feet from ultralight corrugated plastic.
What size kayak for my height?
Though the vast majority of kayaks will fit a wide range of users, if you’re particularly small (say, below 5’2”) or really tall (above 6’3”) you must be careful in choosing the right kayak size for your height. Obviously, a tall person requires more space in a kayak for their legs and feet. Since a tall person also (likely) has long arms, they will have more control with the paddle and find it easier to use a wider kayak than someone with a shorter torso and arms.
Similarly, a shorter person will benefit from a shorter kayak—something that’s scaled more appropriately to their body dimensions. Higher performance sea kayaks often come in several sizes per model; consider a “low volume” version if you are short.
What size kayak do I need for my weight?
Adding weight to the calculation of kayak size further confounds selection, especially if you’re short but heavy or tall and light. This is where volume (and weight capacity) comes into play. Choose a kayak that fits your body and has a maximum weight capacity that reflects slightly more than your typical payload.
Kayak deck sizes
Kayak deck sizes range from open-deck sit-on-top to partially decked recreational kayaks to fully enclosed sea kayaks. Decks provide shelter from the environment (waves, spray, precipitation and hot sun) but can make a kayak more difficult to enter and exit. Often, your style of paddling will determine the best type of deck to choose. Are you looking for casual paddles in warm water on sunny days? An open-deck sit-on-top kayak is probably best for you. This style of recreational kayak is also preferred for fishing since it gives an angler easy access to their tackle and gear.
A partially decked recreational kayak offers some protection but remains easy to enter and exit. Meanwhile, sea kayaks feature full decks and smaller cockpit openings, which offer the best protection from waves and wind but require some skill to enter and exit. Since this style of kayak is meant for paddling open water, a deck is a critical safety feature in exposed conditions.
Kayak cockpit size guide
Kayak cockpit size varies based on the type of kayak. If you’re wondering how to measure kayak cockpit size, the basic rule considers length and width. A small cockpit would measure about 24 inches long and 18 inches wide (typical of an old-school sea kayak). Nowadays, most modern sea kayaks have more ergonomic, keyhole-shaped cockpits measuring about 30 inches long by 18 to 20 inches wide. Meanwhile, a very large cockpit—the norm on most recreational kayaks—measures 50 or so inches long by 22 to 23 inches wide.
Kayak cockpit size influences two things: how easy it is to enter and exit the kayak; and how much water can come into the boat from waves and spray. Of course, a larger cockpit will be easier to enter and exit; such a feature may be necessary for those who are larger or less flexible.
But on the other hand, that large cockpit will also allow more spray to enter the kayak—or it will require a larger sprayskirt to seal. (A sprayskirt is a nylon or neoprene “apron” that forms a connection between the paddler and the kayak cockpit and keeps waves and spray out of the boat). The smaller the sprayskirt necessary, the better the seal between paddler and kayak.
Every new paddler asks the same question, “What size kayak should I get?” Beginners will feel most comfortable in wider kayaks, which are more stable, with widths of about 26 to 32 inches in recreational kayaks or 24 to 26 inches in day touring kayaks.
A shorter length (say 10 feet for a recreational kayak or 13 to 14 feet for a day touring kayak) will be the easiest to handle for those with limited paddling skills. However, if you plan to develop your skills beyond the beginner level you may want a narrower kayak and to make a more significant investment in a day touring kayak.
Best size kayak for a 6 ft person
A person of average height, say 5’8” to six feet, will find they fit properly in most average sized kayaks. It’s hard to pinpoint an exact kayak size for this size of person. The typical average length kayaks—8 to 12 feet for a recreational kayak or 12 to 14 feet for a day touring kayak—will work well for a 6-foot-tall person.
The decision ultimately comes down to personal preference so try out as many options as you can—in the conditions you’re mostly likely to be paddling in—to find what’s right for you.
Wondering how to choose a kayak size for fishing? The best size of fishing kayak is often determined by the environment in which you wish to fish. For example, big water locations, where waves are more likely, require a larger kayak. Shallow water or twisty-turny rivers demand a shorter, more maneuverable kayak.
Choose something in between, say 9 to 10 feet in length with a 28-inch width, if you’re looking for a general purpose fishing kayak.
Best size kayak for rivers
Maneuverability is often the main characteristic of a good kayak for rivers, so choose a model with length in mind. Shorter is better when it comes to easy handling and maneuverability. Specialized whitewater kayaks, for example, often measure seven feet or less in length. For a more general-purpose recreational kayak look for something in the eight- to 10-foot range for rivers.
Best size kayak for lakes
Because lakes vary in size, from small inland bodies of water to the massive Great Lakes, it’s hard to narrow down a specific “best size kayak for lakes.” However, a good rule of thumb is the smaller the body of water, the smaller the kayak. Or, more appropriately, recreational kayaks are best for small, sheltered lakes; and longer sea kayaks are best for large, exposed bodies of water, such as the Great Lakes.
With appropriate training, day touring kayaks are a versatile option for lakes both small and large, provided they’re used in modest conditions with light winds and small waves.
What size kayak for ocean
By definition, a sea kayak is most appropriate for the ocean. These kayaks range from 15 to 18 feet in length and are defined by advanced safety features, such as watertight bulkheads and smaller cockpits to shelter the paddler from adverse weather conditions and wind and waves.
However, a smaller, beginner-friendly recreational kayak may also be suitable for the ocean—provided that the location is sheltered from wind and waves and offers easy access to safe landing sites.
What size kayak for child
A six-foot kid’s kayak is a great option for introducing your child to kayaking. However, as your child grows they will require something larger. Often, smaller adult-sized recreational kayaks are perfect for larger children and youth. Consider your child’s weight and choose a kayak according to its weight capacity.
For example, popular six-foot kid’s kayaks have an upper weight limit of just over 100 pounds. If your child is larger (or you want something that your kid can grow into), consider a recreational kayak with modest dimensions, such as 8 feet long and 26 inches wide.
Kayak length for kids is tricky because it all depends on the size of the child. Several kayak manufacturers produce cheap, six-foot-long kids kayaks that work great for children under 5 feet tall and less than 100 pounds in weight.
What size kayak for 11-year-old kid
If your 11-year-old is taller than 5’4”, they may be able to handle a smaller adult kayak. However, if they’re smaller and lighter they may still prefer the easy handling of a six-foot-long youth kayak.
Learn how to surf kayak and you can really catch a wave. | Feature photo: Image Ontario
Being able to kayak surf can change even the simplest of rivers into a new playground, even one that you may have run many times before. Front surfing is something that most paddlers can do quite quickly, thanks in large part to great boat designs. In particular, short boat lengths and considerable rocker let you surf on any part of all but the steepest waves without having to worry about your upstream end pearling. But the design characteristics of your boat will only get you so far. Then you need to develop sound surfing skills that allow you take advantage of the steeper and trickier waves.
VIEW ALL SURF KAYAKS
Learn the basics of surf kayaking
First of all, most of your surf time should be spent on the face of a wave—where you can move about and set up other play moves. On mellow waves, you can often surf on the face without any effort whatsoever. In these cases, all you need to do is maintain control of your boat with rudders. On steeper, or breaking waves, you need to get more aggressive with your surfing in order to stay on the face. This involves carving back and forth from one ferry angle to the next. The steeper the wave is, the more aggressively you have to carve.
When it comes to learning how to kayak surf, the first step is learning the terminology. From there we’ll move onto the skills you’ll need to work on.
When it comes to surf kayaking, the first step is learning the terminology. | Illustration: Paul Mason
Anatomy of the surf zone
Shoulder
The edges of a breaking wave will often stay green and glassy longer than the top-heavy middle section, making longer, smoother rides possible.
Spilling surf
The safest place to learn to surf is off of a gently sloping beach where the swells release their energy gradually.
Dumping surf
Swells break explosively at the edge of a sharp drop-off like a shoal or a steep beach, or at a river mouth. Dumping surf offers the potential for tube rides, but it’s also the most challenging.
Soup
A quiet field of foamy water forms at the end of the surf zone.
Rip current
Wave energy can reflect off of the beach and create a strong offshore current, which can be used to your advantage when launching but creates a hazard for swimmers. To escape a rip current, swim perpendicular to the current to reach waves that will wash you ashore.
First and foremost, you need to keep your weight centred as much as possible when you’re surfing. Sitting upright puts you in the most stable position and affords you the most control over your boat. This doesn’t mean you can’t lean back if you need to. Feel free to be active with your forward and backward leans. Just return to a centred body position as quickly as possible.
Paddle position
Your paddle should be acting as a rudder at all possible times, because it’s the steering wheel for your kayak. You’ll use it to hold your ferry angle as you carve across the face of the wave and then you’ll pry with it to cut back and ferry in the other direction.
The ideal rudder gets planted with your paddle parallel to your kayak, and with your elbows down and your front hand held between shoulder and eye level. Keeping this front hand high buries your active blade deeply in the water. Having your paddle parallel to the kayak ensures that your rudder is not acting as a brake pulling you off the wave. Your upper body should also be rotated to face your paddle when it’s in this position, because it gives your rudder the most power and helps keep your shoulders safe.
Your boat will be in one of two positions when front surfing. It will either face directly upstream, or it will be on a ferry angle to one side or the other. When pointed to 12 o’clock, your kayak will want to shoot down into the trough of a wave, so unless you’re on a fairly flat wave, you’re going to want to be alternating from one ferry angle to the other.
Learn how to surf kayak and you can really catch a wave. | Feature photo: Image Ontario
Essential surf zone skills
1 Paddling out
You don’t have the option of duck-diving in a kayak, so choose your exit route carefully. Scout the beach beforehand, looking for deep-water channels where breaking waves are less common. If you must punch through a breaking wave, paddle like hell, knife your paddle through the wave and reach for the green water on the other side. Keep your deck free of gear.
2 Catching a wave
Position yourself beyond the line of breakers. Faster boats such as sea kayaks can catch non-breaking swells offshore or on the shoulder of the surf zone—far less intimidating places to start out. Look over your shoulder as you paddle with the waves. When you see a wave you want to catch, sit upright and paddle forward aggressively with powerful, rapid-fire strokes as the wave lifts your stern. If your timing is right, your kayak will accelerate as it slides down the face of the wave. If you don’t quite have the speed, you might find yourself perched on the crest. Throw your weight forward and be prepared for a thrilling ride.
As you rocket down the wave’s face, lean back slightly and perform a stern rudder with your paddle to slow down and wait for the crest of the wave to catch up. Shorter, more rockered sea kayaks and surf kayaks can carve turns on the face of a wave just like board surfers. Steer with your hips and your paddle: Edge your boat into the wave while performing a stern rudder on the down-wave (opposite) side.
Shorter, more rockered sea kayaks and surf kayaks can carve turns on the face of a wave just like board surfers. When it comes to edging your kayak, most paddlers’ instincts tell them they should tilt their boats into each turn when they plant their rudders. On flatter, smooth waves this works quite well, and you can carve some great turns like this, just like board surfers. However, on steeper waves that are breaking, it is more important to keep your kayak tilted downstream to prevent your upstream edge from getting caught. In these cases you’ll hold a downstream tilt on your boat as you pry your bow around from one ferry angle to the next. As your boat passes 12 o’clock, you’ll need to tilt your boat onto its other edge and switch the side on which you’re ruddering.
4 Broaching and side-surfing
Broaching occurs when your kayak’s bow digs into the trough and gets the stern pushed broadside by the wave’s breaking crest. The longer the kayak, the more prone it is to broaching. If you catch it early, it’s possible to avoid a broach by leaning back to unbury the bow and aggressively edging and ruddering with your paddle blade tocarve back on course. Failing that, lean hard into the wave, tuck your elbows in close to your ribcage and side-surf with your paddle braced into the foam pile, using a low brace or high brace depending on wave height.
5 Spins
To spin out of a broach, tilt into the wave and turn your brace into a forward sweep. Don’t expect to spin more than 90 degrees in a sea kayak, just enough to regain your front surf; you may need to coax your boat into the spin by leaning back to free the bow. Flat-hulled whitewater and surf kayaks spin more easily—even on the green face of a wave. Alternate between forward and reverse sweeps, remembering to shift your weight from edge to edge, keeping the boat tilted into the wave.
Big, steep waves can toss sea kayaks end over end. To perform a loop, sit perpendicular on the crest of a wave and throw your weight forward, burying the bow in the trough. If the wave is big enough, your stern will be thrown skyward, leaving you standing on the foot pegs, well above the whitewater. From here, it’s possible to pirouette by planting a sweep stroke in the wave crest; otherwise, get ready for a high-speed crash landing. Hold your breath, wait for the wave to pass, and roll up.
This article originally appeared in Paddling Magazine Issue 65. Subscribe to Paddling Magazine’s print and digital editions here, or download the Paddling Magazine app and browse the digital archives here.
Learn how to surf kayak and you can really catch a wave. | Feature photo: Image Ontario
The Old Town Canoe Company began building wood-canvas canoes in 1898, making Old Town one of America’s original canoe and kayak manufacturers. Their factory in Old Town, Maine, has shipped tens of thousands of boats out of its doors. Today, you’ll find Old Town paddle craft across the country.
Old Town introduced its first kayaks in 1995 and continues to make a range of durable and affordable rotomolded polyethylene kayaks, with both sit-on-top and sit-inside styles available. In 2004, Old Town was acquired by Johnson Outdoors, which also owns Ocean Kayak (along with other popular outdoor brands like Eureka and JetBoil).
New paddlers appreciate the ease and comfort of Old Town’s 10- and 12-foot recreational kayaks. These shorter boats are stable and easy to handle, ideal for casual outings on calm waters. Avid paddlers planning longer tours can also choose from sleeker 13- and 14-foot kayaks made for light touring, and one tandem sea kayak, the Looksha.
Old Town kayak’s angler-specific sit-on-top and sit-inside models have all the features to make kayak fishing fun and accessible, and their pedal-drive option frees your hands for even more fishing action.
All Old Town kayaks are made from high-density polyethylene (HDPE), keeping costs, maintenance and the likelihood of damage low. Many models are offered in a variety of dimensions to suit paddlers of all different sizes. If you are looking for a reasonably-priced kayak for recreation, light touring or fishing, Old Town has a match for you.
This article will help you decide on the best Old Town kayak for your needs. Here, we’ll give an overview of the types of Old Town kayaks available, as well as some tips for buying new and used. Along the way, you’ll find links to specific models with detailed information and user reviews. Read on to learn more.
Recently, the most challenging part of shopping for a kayak is often finding one. Supply chain issues and increased demand for recreation equipment have emptied shop floors of new models. If you choose to buy a used Old Town kayak, you’ll save some money that can go towards purchasing quality paddling equipment like a comfortable PFD and lightweight paddle.
Once you do find a promising-looking boat, you’ll want to give the kayak a thorough once-over (and ideally a test paddle) before committing to buying it.
Where can you find used boats?
If you’re looking for a used Old Town kayak, Craigslist, Kijiji or other online classifieds are good starting points. You’ll need to be diligent as boats often sell a few days after they’re posted. Cast a broad net when you search, as sellers may not name the specific model. Set up an email alert for the keywords “Old Town Kayak” or even just “Plastic Kayak” to ensure you don’t miss any postings.
If any outfitters near you use Old Town kayaks in their rental fleet, they may periodically sell off older boats to upgrade. Politely inquire about this, and see if you can arrange to buy one at the end of the season. Renting the kayak is an excellent way to test its comfort, fit and performance before you commit to buying it.
What should you look for?
Old Town kayaks are made with single- or triple-layer polyethylene. This resilient material can withstand repeated scrapes and bumps. You may see scratches on the hull (bottom) of the kayak, but as long as they don’t penetrate the hull, these are just superficial. One of the benefits of high-density polyethylene is that you can make minor repairs by welding new material to it. You can buy polyethylene repair kits from Old Town for touch-ups.
Photo: Courtesy Old Town Canoes & Kayaks
The most common damage to polyethylene kayaks happens from improper storage. Plastic kayaks warp over time if they are stored in a way that doesn’t support their weight equally. This can occur if they are stored upright on the ground or hanging from their handles. If a kayak is left exposed to direct sunlight for long periods, UV rays from the sun can soften the plastic further.
Improper transport can also damage kayaks. In particular, using ratchet straps tempts the kayak owner to overtighten the straps—listening for their satisfying click, click, clicking—until the plastic hull has bent. Commonly called “oil-canning,” significant dents in a hull will result in reduced efficiency and performance. Check the hull for substantial deformities that are likely caused by this.
Older models
Old Town has been building kayaks for nearly 30 years, and some of the boats you find on the used market may have been discontinued. Don’t shy away from these “legacy” kayaks just because they are no longer made. Models are often discontinued to reflect changes in overall demand or market trends. It doesn’t mean that the kayak in question is not a good one.
Johnson Outdoors, Old Town’s parent company, also acquired Necky Kayaks. When the Necky brand was discontinued, their popular Looksha model continued production under the Old Town name. If you find a used Necky Looksha for sale, many parts are compatible with today’s Old Town kayaks.
The main disadvantage to older models is they may have less refined outfitting (seats, seat backs, thigh braces and foot pegs) than the latest models. If you’re handy, you can replace old, uncomfortable or damaged outfitting with new replacement parts from Old Town. You can also shape and glue closed-cell foam to enhance the padding and comfort of an old kayak. You can source the necessary equipment and supplies for other repairs like resealing bulkheads or replacing bungees at a hardware store.
Old Town’s current range focuses mainly on recreational kayaks and fishing kayaks shorter than 12 feet, with a few longer light touring models also available. Models in the Old Town lineup encompass recreational kayaks, fishing kayaks, day touring and touring kayaks. Kayaks in each of these categories have different dimensions and designs to excel in specific environments. To find the best fit for your needs, match these categories to the type of paddling you do most of the time.
Recreational kayaks
Recreational kayaks make up the majority of Old Town kayaks. They are designed for stability and maneuverability, making them ideal for beginners or casual paddlers. Most Old Town recreational kayaks are “sit-in” style, where the deck covers the paddler’s legs. The wide cockpits are easy to enter and exit, but are somewhat more confining than a sit-on-top style.
Recreational kayaks are 12.5 feet or less; their shorter length allows them to turn easily without the need for a rudder (foot-controlled steering aid). With wide, flat bottoms, these boats are very stable in calm waters. They are perfect for exploring sheltered waterways like cottage lakes and slow-moving rivers. Unlike the cheaper recreational kayaks you’ll find at discount box stores, many Old Town rec boats feature a rear bulkhead for added safety.
Bulkheads are sealed compartments at the ends of the kayak (a rear bulkhead only is common in shorter kayaks), which prevent the kayak from sinking if the cockpit fills with water. Without bulkheads, it’s inadvisable to kayak in cold waters or further from shore than you can swim.
Old Town makes six different recreational kayaks models, which are available in various lengths to suit different-sized paddlers. The Heron and Vapor models are the least expensive; they appear quite similar with one important difference—the Herons have a rear bulkhead while the Vapors do not. The ‘XT’ versions of these kayaks also have a back hatch. Choose these kayaks if you only intend to paddle casually and want a boat at a low price. They are made from single-layer polyethylene, which is durable but less so than other models.
Three-layer polyethylene is used on the premium Dirigo and Loon models. This three-layer material is more resilient to abrasions and sun damage. It costs a bit more and is a few pounds heavier, but will last longer. These kayaks also have cushier seats and more adjustable outfitting. The innovative Loon even includes a removable cockpit workdeck, supplying space for cameras, gear, water and dry storage, with a USB port to keep your gadgets charged.
Old Town’s crossover Sorrento model mimics a touring kayak with a drop-down skeg. This is essentially a retractable keel that helps the kayak keep on a straight course.
If you’re looking to partner up, check out the two-person Twin Heron or Dirigo Tandem Plus. A tandem is a 2-for-1 deal, but you will always need two paddlers to control the boat. This is a great option for couples or parents of children who want to kayak but aren’t big enough to paddle their own boat yet. For youths ready to captain their own vessel, the Heron Junior is a scaled-down rec kayak for pint-sized paddlers.
If you prefer the unrestricted open deck of a sit-on-top kayak, check out the simple and affordable Twister, or look at Old Town’s extensive line of sit-on-top fishing kayaks (see below). These are basically souped-up recreational kayaks with fishing-specific features.
Deciding which length of recreational kayak to choose should be dictated by your paddling goals rather than your budget. Shorter kayaks cost less as there isn’t as much material used, but the length affects performance. If you compare the same kayak model in two different sizes, the longer kayak will be faster. It will also have a higher weight capacity. If you’re buying a kayak to paddle with friends, see what lengths their boats are. You’ll want to choose one that’s a similar size so you aren’t falling behind on the water.
Photos: Courtesy Old Town Canoes & Kayaks
Fishing kayaks
Old Town’s fishing kayaks are a mix of sit-inside and sit-on-top style kayaks. The sit-in kayaks are “Angler” versions of their recreational Vapor and Loon models. Like the rec boats, the Vapor Angler is single-layer polyethylene, and the Loon Angler is three-layer. Fishing-specific features include molded-in rod holders and an anchor trolley system, which allows the user to adjust the anchor length when it is deployed.
Old Town offers a wider selection of sit-on-top style fishing kayaks. The wide, pontoon hull design of these boats gives them lots of stability and a higher weight capacity for bringing along extra gear. The different sit-on-top models available are the Topwater, Predator and Sportsman, but there are many different options to choose from beyond the model.
Entry-level Topwater and Sportsman models are nearly identical, with minimal outfitting to keep the prices low. They still feature the basics needed to enjoy a day of fishing, like rod holders, frame seats and enough stability to stand and cast.
The award-winning Old Town Sportsman series of kayaks are the most diverse, mainly because of the different drive options. Anglers can opt for paddle, pedal propulsion or motor power. Pedal propulsion with Old Town’s PDL system uses a cycling motion connected to a prop under the hull.
The PDL drive allows you to move forwards and backward by pedaling, freeing your hands to fish or take photos. The Sportsman 106 Powered by Minn Kota has a standard electric 12V trolling motor. The high-end Sportsman AutoPilot uses Bluetooth to control the motor and has a “Spot-Lock” feature which keeps the boat set in a specific position, accounting for current and drift.
Old Town makes 10.5-, 12- and 13-foot fishing kayaks. Aside from the higher price of a longer kayak, also think about the area you’ll be fishing. The 13-foot kayaks are more suited to open water, as they move more efficiently and can handle swells easily. Shorter 10.5-foot kayaks perform well in sheltered waters where maneuverability is a priority. Finally, 12-foot kayaks are a compromise between the two.
Touring kayaks
The Old Town Castine and Looksha series touring kayaks have sealed bow and stern bulkheads. These watertight compartments prevent the kayak from sinking if the cockpit fills with water in a capsize. This essential safety feature makes these kayaks suitable for exploring coastal and offshore waters. Paired with deck hatches, bulkheads also function as dry storage compartments for gear. If you want to take overnight or multi-day trips, this style is the type of kayak you need.
The Castine is made in three different sizes, 135 (13’ 5”), 140 (14’) and 145 (14’5”). The design is the same across each kayak. Larger paddlers will have more leg space and a roomier cockpit in the longer boats. That isn’t to say that these are small-medium-large sizes. With the optional rudder, petite paddlers will still find it easy to control the longer kayak. The added volume increases storage capacity, and these kayaks are suitable for short one- or two-night trips. Read an in-depth review of the Castine 140.
For longer expedition-style paddling, the Looksha 17 is the best option from Old Town. This is a reiteration of a classic kayak produced by the now discontinued Necky brand. The Looksha is stable for a sea kayak and has a high volume to store ample camping gear and food. The rotomolded polyethylene construction is strong enough to handle rough landings on cobble beaches. If you’re looking to take that long trip with a trusted partner, consider the tandem Looksha T, another legacy Necky design reborn under the Old Town label.
Still wondering if Old Town kayaks are right for you? Here are answers to some of the most common online questions about Old Town kayaks.
Are Old Town kayaks good?
Old Town kayaks are good quality kayaks at reasonable prices. Old Town recreational kayaks are stable, durable and affordable; while their pedal-drive and motorized fishing kayaks use cutting-edge technology to navigate waterways.
All Old Town kayaks are made with single- or triple-layer polyethylene. This material is very durable and inexpensive. If lightweight kayaks are a priority, you may want to look at companies that build their kayaks with thermoformed plastics or composites like fiberglass and Kevlar.
Old Town kayak models
Old Town has a range of different kayak models for recreational paddling, fishing and touring. Within these categories, there are various models, which come in at different price points. See “Buying Advice” for a breakdown of each category.
Most stable Old Town kayak
The most stable Old Town kayaks are fishing models like the Sportsman and Topwater. These sit-on-tops feature pontoon-hull designs, making them steady enough to stand up on. Another good metric for determining stability is to look at the weight capacity of each kayak; generally those with higher capacities are more stable.
Old Town kayak weight limit
Weight limit varies by model. Check the manufacturer’s specifications to determine a specific Old Town kayak weight capacity. The usable weight capacity accounts for the weight that can be added after all the options are included.
This mainly applies to fishing kayaks that have heavy add-ons like pedal-drive systems or electric motors. The usable weight capacity includes paddler(s), gear, dogs, or anything else that you might want to carry.
How much does an Old Town kayak weigh?
Old Town kayaks’ weight depends on their length and outfitting. All Old Town kayaks are made with polyethylene. Some are single-layer, while others have a heavier duty triple-layer build. The advantage of triple-layer polyethylene is that it’s more durable and resistant to wear.
Among other polyethylene kayaks, Old Town boats are of average weight. Expect them to be anywhere from 50 to 90 pounds. Fishing kayaks with pedal drives or electric motors weigh over 90 pounds when fully outfitted.
Old Town kayak material
Old Town kayaks use high-density polyethylene (HDPE) to make their kayaks. This plastic is shaped using rotational molding (rotomolding), where plastic pellets are poured into a mold that is heated and rotated to evenly distribute the material, producing a durable, inexpensive kayak.
Some Old Town kayaks are made with single-layer polyethylene, while others have a heavier duty triple-layer build. The advantage of triple-layer polyethylene is that it’s more durable and resistant to wear (but marginally heavier).
Why did Old Town stop using Royalex?
Royalex material was discontinued by the producer in 2013. It was the premier material for bombproof whitewater canoes of nearly every brand. Old Town and other canoe builders who used this resilient plastic had to look for (or develop) alternatives materials when Royalex production ceased. Old Town now makes its canoes with three-layer polyethylene.
What plastic are Old Town kayaks made from?
Old Town kayaks are made from high-density polyethylene (HDPE). This is a commonly used plastic for kayaks. HDPE is durable and inexpensive. It can withstand abrasions and impacts quite well as it bends rather than breaks under all but the most extreme conditions.
Some Old Town kayaks are made with single-layer polyethylene, while others have a heavier duty triple-layer build. The advantage of triple-layer polyethylene is that it’s more durable and resistant to wear (but marginally heavier).
Old Town kayak prices
How much does an Old Town kayak cost? It depends on the model and outfitting. Old Town kayaks range from under $600 for their basic recreational models to over $4,000 for their motorized angler kayaks.
Old Town kayak warranty
A limited lifetime warranty covers Old Town kayak hulls. The pedal (PDL) drive systems are covered under a limited five-year warranty. You’ll need to keep your proof of purchase to qualify for the warranty.
Old Town kayak dealers
Old Town kayaks are distributed through online retailers or traditional brick-and-mortar paddle shops. If there’s a shop near you that sells Old Town kayaks, but they don’t have the one you want, you may be able to order it through them.
Another resource if you’re wondering who sells Old Town kayaks is the dealer locator on the brand’s website.
Where are Old Town kayaks made?
Old Town kayaks are made in a facility beside the Penobscot River in Old Town, Maine.
Is Ocean Kayak made by Old Town?
Ocean Kayak and Old Town are part of the Johnson Outdoors brand family. Kayaks for both of these brands are made in the same Old Town, Maine, factory.
Compare Old Town kayaks
Old Town kayak vs Hobie
Hobie recreational and fishing kayaks are all sit-on-top models available exclusively with their Mirage pedal-drive system. Old Town makes both sit-inside and sit-on-top kayaks, with a variety of paddle-propelled recreational and touring kayaks. If you are looking for an inexpensive starter kayak, or a sit-inside and/or non-pedal-driven kayak, Old Town is a great brand to choose.
If you are keen on a pedal drive kayak, both brands offer solid choices. Old Town pedal kayaks focus on kayak fishing, while Hobie also has options for recreational paddling and even sailing. Some Old Town pedal fishing kayaks also feature advanced electric motor options.
On the other hand, Old Town presently does not make inflatables, and if storage space is tight, look at Hobie’s inflatable iTrek line.
Old Town vs Jackson Kayak
Both Old Town and Jackson make beginner-friendly recreational kayaks and tricked-out fishing kayaks at comparable prices. Like Old Town, some Jackson fishing kayaks have pedal drives or the option to use an electric motor. Jackson’s FlexDrive pedal system has a convenient feature where the propeller retracts on impact with underwater obstacles. This protects the FlexDrive and gives some peace of mind when exploring shallow waters.
Also like Old Town, Jackson’s recreational line has some basic sit-on-top kayaks that you can purchase for under $900. Additionally, Jackson’s whitewater-specific kayaks are some of the best on the market. If you’re shopping for a fishing kayak, choose Old Town for a great selection of high-end flatwater fishing rigs; look at Jackson’s line for more challenging open-water conditions.
The choice between each company’s sit-inside recreational kayaks comes down to personal preference or availability. If you need a whitewater kayak, Jackson is the de facto choice.
Old Town vs Wilderness Systems kayak
Wilderness Systems is another popular U.S.-based brand that is comparable to Old Town. Like Old Town, they also offer recreational, fishing and touring kayaks made of polyethylene. Wilderness Systems sit-inside kayaks are slightly more expensive, starting at around $1,000 USD. Their recreational kayaks have stern hatches and bulkheads and roomy cockpits like Old Town’s rec boats.
The Wilderness Systems Pungo is an immensely popular recreational kayak, loved for its stability and comfort. Also like Old Town, some Wilderness Systems fishing kayaks are compatible with pedal and power drives, but the drive systems need to be purchased separately. Old Town’s prepackaged Sportsman kayaks are the better choice if you are an angler looking for a one-stop shop.
Touring kayakers should look at Wilderness Systems for a greater variety of designs, including two full-size sea kayaks, the Tsunami and the sporty Tempest.
Old Town vs Perception kayaks
Perception Kayaks are part of the Confluence Outdoors brand family, along with Wilderness Systems. They make a variety of entry-level recreational kayaks, similar to Old Town’s single-layer polyethylene models. The Perception Drift 9.5 is a good kayak for less than $500.
Perception also makes more sit-on-tops than Old Town, who leave that category to their sister company, Ocean Kayak. Perception’s Conduit and Old Town’s Castine are both good day-touring options for paddlers transitioning from recreational kayaks to longer touring boats.
If you’re looking for a kayak under $1,000, both Old Town and Perception offer reasonable choices. Decide between the two by trying them out, or choosing whichever is available.
Old Town vs Pelican kayaks
Recreational kayak giant Pelican produces kayaks that are found on cottage lakes, campgrounds and waterfronts across North America. They are distributed through large retailers like Costco, Canadian Tire and Walmart. Pelican makes sit-in and sit-on-top kayaks for casual users, as well as fishing kayaks that, like Old Town, can be rigged with pedal and motor power.
Pelican’s stubby, flat-bottomed rec kayaks are extremely stable, and many are priced under $600, cheaper than most Old Town kayaks. If you’re looking for a boat on a budget, these are good options. Most of their mid-range kayaks are lighter than Old Town thanks to Pelican’s proprietary RAM-X polyethylene material. If you only plan to paddle for an hour or two at a time, a Pelican kayak is fine.
For spending more time on the water, especially for longer tours, Old Town kayaks offer more efficient designs and more comfortable outfitting.
Ascend vs Old Town kayak
Ascend is Bass Pro Shops/Cabela’s in-house brand. They offer a small selection of sit-in and sit-on-top recreational fishing kayaks. For more committed anglers, Old Town’s line of fishing kayaks is much more appropriate. Only Old Town offers pedal drive kayaks, favored by anglers because they leave your hands free for casting and catching fish.
Subtle features also make a difference, like Old Town’s anchor trolley system. For a reasonable price, an Ascend can get you casting a line on the water. You won’t get the same degree of thoughtful features or propulsion options, but you will have an inexpensive, durable kayak.
Choose an Old Town if you’re willing to spend more money for a more versatile fishing kayak, or if you have your heart set on a pedal drive kayak.
Photo: Courtesy Old Town Canoes & Kayaks
Old Town kayak reviews
Reviews are helpful tools to understand the kayak beyond the information given by the manufacturer. Our expert reviews will help you decide whether this is a kayak worth considering, or if you should move on to other options. If there are any criticisms of the kayak, consider whether they would be deal-breakers for you or not.
The Intex Challenger K2 is a versatile inflatable kayak that’s fun to paddle for one or two paddlers. That’s good news if you’re among those asking, can one person use the Intex Challenger K2 kayak? Larger paddlers who max out the limited weight capacity of the smaller Intex Challenger K1 kayak will find more buoyancy in the larger Challenger K2. It’s also an ideal choice for an adult looking to get out on the water with a child or youth.
Like other inflatable kayaks, the Intex Challenger K2 sets up easily and packs small, making it great for those with limited storage. It’s also among the cheapest kayaks on the market, making it a great choice for those wishing to try kayaking without making a huge investment in a boat or a place to store it.
The Intex Challenger K2 inflatable kayak is sold with two aluminum paddles and pump. The design features of this inflatable kayak make it suited to paddling on calm lakes and mild rivers. This Intex Challenger K2 review will cover the boat’s main features, along with its strengths and weaknesses to help you decide if it’s the right kayak for you.
The Intex Challenger K2 is the bigger brother of the Intex Challenger K1. It has similar performance characteristics. Most notable is its great stability. Like other inflatable kayaks, the Challenger K2 feels slow and sluggish—especially compared to a hardshell kayak. At 11.5 feet long it’s faster and straighter tracking than the Challenger K1, yet also quite maneuverable and easy to handle in calm conditions.
Can’t decide between the Intex Challenger K1 or the Intex Challenger K2? Choose the K1 if you’re a smaller person and primarily intend to paddle solo. The Challenger K2 has much greater volume and a maximum weight capacity of 400 pounds.
Market and demographics
Like its smaller sister ship, the Intex Challenger K2 is a general purpose inflatable kayak for beginners at a bargain price. It’s best for recreational paddlers who are looking to have fun on the water, solo or tandem, for an hour or two at a time. If you’re looking to develop your skills or spend more time in the kayak, look at a higher performance (pricier) inflatable kayak to meet your needs.
The Intex Challenger K2 is versatile and can be used for many applications—just bear in mind that this cheap inflatable kayak will never match the performance and comfort of more expensive boats.
Intex Challenger K2 fishing is extremely popular. Compared to the shorter K1 model, the added length of the Challenger K2 provides more space for storing rods and tackle and greater comfort in casting and landing fish. Like the K1, the 11.5-foot K2 is stable and nimble, and provides anglers with access to the shallowest backwaters. It’s also a great option for adults who wish to enjoy kayak fishing with a young angler.
Of course, the bargain-price Intex Challenger K2 kayak lacks the specialized outfitting of more expensive fishing kayaks. But if you’re handy it’s easy to make some quick modifications, such as adding tackle storage boxes and rod holders, to improve its fishability.
Intex Challenger K2 ocean kayaking is not advised, except in sheltered bays. This kayak has a low profile in the water, allowing chop and waves to enter the cockpit. The lightweight inflatable hull can also be difficult to handle in wind and waves, so inland lakes and gentle rivers are best.
Check The Weather
Plan for changing weather conditions. Prepare for the worst case.
Don’t forget to check tide, currents, or river levels.
Comfort
The Intex Challenger K2 comes with two inflatable seats, which score high points for comfort. The seat back wraps around your ribs for a secure fit and plenty of back support. Straps allow you to fine-tune the fit. The seats are aligned so that the stern paddler’s legs extend on either side of the bow paddler’s seat, making the Challenger K2 kayak suitable for two six-foot-tall paddlers (just be mindful of the kayak’s maximum weight capacity of 400 pounds).
About the Intex Challenger K2
Design
Design features and details
The Intex Challenger K2 kayak is essentially a kayak-shaped rubber raft, like the type you will find at discount prices at any big-box department store. It has two large air chambers running the perimeter of the boat and a flat bottom made up of smaller tubes (known as “I-beams”). The Intex Challenger K2 has minimal rocker, or upsweep from bow to stern, because its air construction causes the hull to take on the shape of the water it floats upon. This is a great attribute for stability, but far less desirable if you’re interested in paddling for longer distances.
A removable skeg (or fin, which attaches to the stern of the kayak) aids in keeping travel in a straight line. The large, open cockpit of the Intex Challenger K2 kayak is easy to enter and exit, and combined with the boat’s exceptional stability, makes this model ideal for first-time paddlers. Along with the boat’s shallow depth, an open cockpit increases the risk of swamping in rough water. The Challenger K2 should only be used in sheltered, calm conditions.
Material and construction
Like other inflatable kayaks, the Intex Challenger K2 kayak is constructed of vinyl plastic with welded seams. This construction is quite durable and resistant to impacts with blunt objects and abrasions. Inflatable kayaks like the Challenger K2 aren’t as stiff as hardshell kayaks, which allows them to flex in the water. This makes the hull durable, but also less efficient to paddle. Narrow, high-pressure air tubes in the floor of the kayak (known as “I-beams”) add rigidity and larger chambers around the perimeter of the hull provide buoyancy.
The vinyl hull can be damaged by punctures, so it’s important to be careful with sharp fishing hooks and cutting tools around the kayak. A punctured tube won’t sink the Intex Challenger K2, but it will affect performance and buoyancy and should be paddled to shore and repaired as soon as possible. Holes are easy to patch using contact adhesive—a repair patch kit is included. Cheap kayaks like the Challenger K2 don’t have the same UV-resistant qualities as more expensive boats, and therefore should be stored out of the sun.
Outfitting and accessories
As mentioned earlier, the seats in the Intex Challenger K2 kayak provide air-ride comfort and adjustable back support that wraps around your sides. It’s worth investing in a high-back PFD specifically designed for recreational kayaks to dial in a more comfortable fit.
The Intex Challenger K2 kayak skeg is a key accessory that improves tracking; this removable fin attaches to the stern of the kayak to make it easier to paddle in a straight line. A convenient mesh cargo area provides plenty of storage on the front deck for items like water bottles, waterproof cameras and snacks. You’ll also find grab lines on the bow and stern of the Challenger K2 kayak for carrying the boat with a partner to and from the water.
Wear A Life Jacket
Everyone, even strong swimmers, needs to wear a life jacket at all times when on the water. It is extremely difficult to put a life jacket on once you fall into the water. Even a light wind can blow any paddlecraft away from you, faster than you can swim.
Always wear a USCG-approved Level 70 or Type III life jacket designed for paddling.
Intex Challenger K2 kayak modifications
Kayak anglers love to modify their kayaks and there are many possibilities with the bare-bones Intex Challenger K2. Browsing the Internet reveals many options for upgrades, including adding rod holders, action camera mounts and installing tackle and drink holders. The vinyl hull material is compatible with PVC pipe cement, making it easy to attach various accessories.
Make sure your Intex Challenger K2 modifications don’t impede your ability to enter or exit the kayak. Similarly, avoid modifications that may make the kayak more difficult to handle in wind and waves. Test out any modifications on dry land and critically assess how the changes will affect the kayak’s safety and performance.
Setup and assembly
Intex Challenger K2 kayak inflation is easy and takes a typical paddler less than 10 minutes. The boat features two one-way Boston valves, one to inflate the hull and the other for the deck. The seats inflate with two smaller valves, which must be sealed quickly to keep air from escaping. An inflatable footrest is slid into the bow of the kayak for the bow paddler to brace their feet. Intex Challenger K2 kayak skeg removal and installation is easy; simply slide the plastic fin into the track on the stern of the kayak.
After a day on the water you may ask, how do I collapse my Intex Challenger K2 kayak? The process is easy, just open up the valves to deflate. Make sure you rinse your kayak and allow it to dry thoroughly before long-term storage.
How it compares
Intex Challenger K2 kayak vs Explorer K2
The Intex Explorer K2 is a tandem inflatable kayak that’s comparable in price and performance to the Intex Challenger K2. The main difference is that the Explorer K2 features more rocker (or lift in the bow and stern) to improve maneuverability; it’s also a foot shorter, further contributing to ease of handling and making the Explorer K2 a good choice if you like paddling on meandering rivers.
The shorter length makes the Explorer K2 somewhat slower than the Challenger K2, but the difference is negligible. The biggest difference in the designs is the Explorer K2’s more open cockpit, which is easier to enter and exit. Both kayaks are constructed of welded vinyl and have upper weight limits of 400 pounds.
Intex Challenger K2 vs K1
The Intex Challenger K2 is a larger kayak with capacity for two paddlers. It has the same outfitting and accessories as the K1. The main difference with the Intex Challenger K2 is that it can be paddled with a partner or solo (a good option for larger, heavier people), making it more versatile than the Intex Challenger K1. The Intex Challenger K2 is faster and tracks better than the K1, however it’s also less easy to handle in wind—especially for smaller solo paddlers.
Choose the Intex Challenger K1 if you’re a smaller or average-sized paddler (under 6’2” and 220 pounds) and if you have no intentions of paddling with a partner. The K2 is a great choice if you’re larger or if you’d like the option of paddling tandem.
Intex Challenger K2 vs Excursion Pro
The Intex Excursion Pro is a step up from the Challenger K2 in terms of performance and outfitting, but the upgrades come at about double the price. Serious anglers will appreciate integrated rod holders and a mounting bracket for a fish finder or other accessories.
The Excursion Pro is constructed with a more durable, lightweight laminated PVC plastic and comes with two skeg options for good tracking in shallow or deep water. Comfort upgrades include greater adjustability in the seats and molded grab handles. The open deck of the Excursion Pro is easier to enter and exit than the more confined, partially decked cockpit of the Intex Challenger K2.
Dress For Immersion, Not Air Temperature
Your body loses heat much faster when immersed in cold water than it does when dry.
Avoid cotton clothing like t-shirts and jeans; they retain water and accelerate cooling when wet. Synthetic fabrics, or wool, are generally a better choice. If the water is very cold (60° fahrenheit or less), you should wear a wetsuit or drysuit.
Where to buy the Challenger K2
The bargain-priced Intex Challenger K2 kayak is available online and in various big-box stores. Amazon’s Intex Challenger K2 prices are among the best you’ll find. You can also buy an Intex Challenger K2 kayak at Walmart.
Pros and cons
Pros
Price: The Intex Challenger K2 is one of the cheapest kayaks you’ll find, often available for under $200 US.
Versatility: A cheap price gets you a versatile kayak that’s suitable for one or two paddlers, and perfect for an adult and child.
Portability: The Intex Challenger K2 kayak rolls up and fits in a large gym bag, even with paddles, and weighs under 40 pounds.
Easy set up: The Intex Challenger K2 kayak goes from bag to the water in less than 10 minutes. Take down is even faster.
Super stable: The Intex Challenger K2 kayak is wide and features a flat bottom for ultimate stability. The large cockpit is easy to enter and exit.
Beginner friendly: You don’t need any paddling experience to get out on calm, sheltered water in the Intex Challenger K2, whether you’re looking for a quick outing or an angler looking to try kayak fishing.
Cons
Limited seaworthiness: While the Intex Challenger K2 inflatable kayak won’t sink, its large cockpit and low profile allows waves to enter the boat. This design is meant for use on flatwater lakes and gentle rivers only.
Slow and sluggish: The inflatable hull flexes and doesn’t cut through the water smoothly. Combined with a short 11.5-foot length, the Intex Challenger K2 kayak won’t win any races and is difficult to paddle for long distances.
Difficult to handle in the wind: The Intex Challenger K2 is light and floats high in the water, making it prone to getting blown around by the wind, especially for beginners.
Vibe’s Shearwater 125 enters the full-feature kayak race like a boss. | Feature photo: Roberto Westbrook
I first caught sightof Vibe’s Shearwater 125 with X-Drive at the last face-to-face ICAST tradeshow. At a three-o’clock meet and greet in the Vibe Kayaks booth, I set my beverage in the Shearwater’s cup holder while company chief Josh Thomas took me on a tour of his latest creation.
It was hard to hear with the music and chatter, but Thomas described a do-it-all boat that would be adaptable to any type of fishing. The prototype holding my beverage was an open-hull concept with an open bow, wide, flat deck and large tankwell. Thomas had the boat mocked up with pods, motors and pedals, but I was anxious to see the finished product.
That didn’t happen until this spring. With ICAST cancelled and the world in a panic, I didn’t receive a Shearwater until the first leaves were on the trees. Turns out the timing was perfect; a kayak fishing craze has swept the country and the Shearwater is poised to be everyman’s boat.
Vibe Kayaks rounds out its lineup
Vibe Kayaks splashed onto the scene a few years ago with line of smart, utilitarian fishing kayaks at a great price. From the simple Yellowfin to the performance-oriented Sea Ghost, Vibe had the bases covered. But the missing link was a full-feature sled that is at home on a farm pond or the tournament trail. This was the inspiration for the Shearwater 125.
But if you’re going to play with the big boys (think Wilderness Systems ATAK, Bonafide SS127, Old Town Topwater and other pro-level boats) then you better bring your A game.
Which is exactly what Thomas did with the Shearwater. Improving on popular features from other boats in the class, the Shearwater checks all the boxes for a serious fishing platform. But does the new boat keep up with the rest of the pack?
By today’s standards, a padded deck, multiple flush mount and horizontal rod holders, tackle storage, electronics pods and gear tracks come standard on the best kayaks. Vibe had to step it up to stand out. Here’s where they hit the ball out of the park.
The Shearwater’s rudder can be rigged for pedaling or paddling and is pre-drilled to mount a Bixpy motor. | Photo: Roberto Westbrook
The seat, for one. As if to answer the challenge of redesigning the wheel, Vibe took the versatile frame seat serious anglers demand and moved it up a notch. Literally. The high-low seat also reclines and is easy to remove for a completely open deck. To create the ultimate standup kayak, fold the seat forward and add a standing platform.
Moving the seat through the different positions was easy. Perched on top the platform, I could see into the water further and deeper than standing on the deck. Also, the elevated angle makes it easier to pitch a jig and hold my rod tip low to work a twitch bait.
Motor or pedal with the Shearwater 125
From the factory, the Shearwater is ready to fish with quality components and construction. To take the game to the next level, the boat is available with pedal or motor power.
I received the Shearwater with Vibe’s X-Drive Pedal Kit. Rigging was easy and quick, but I’d like to see a more solid rudder connection. It took some time to dial in the cables and get both systems working properly. The rudder can be rigged to operate with foot pedals when I’m paddling. Or, when I’m pedaling the X-Drive, a control dial next to the seat turns the boat.
Vibe’s Shearwater 125 enters the full-feature kayak race like a boss. | Feature photo: Roberto Westbrook
To use the pedal kit, I removed the flat center panel and installed the pedal well. The X-Drive is similar to Hobie’s original MirageDrive, kicking the pedals forward and back make flippers flap below the boat. Fans of the MirageDrive claim the system is easier on the legs and moves more water than a propeller. I would say the advantages of propellers and flippers even out and it comes down to personal choice.
In our Pedal Boat Shootout, we found that flipper systems tend to have more torque but slightly less top-end speed. The advantage is Vibe’s pedal well accepts any Hobie MirageDrive system (except the MD360). During my tour of the prototype at ICAST, Thomas told me he hopes to offer more pedal well options so anglers can pair the Shearwater with other systems.
While the X-Drive is simple and sturdy and will provide many happy hours of pedaling, the system is not the most advanced or powerful. And, it doesn’t have reverse. If those are dealbreakers, then plan to upgrade to a Hobie MirageDrive 180. If not, the X-Drive is a reliable pedal system at a fraction of the cost.
Same goes with the factory available motor option. Vibe partnered with Bixpy to offer an electric motor option to the Shearwater platform. The Bixpy system is a football-sized, torpedo-shaped propeller powered by a waterproof lithium-ion battery and handheld remote control.
The Shearwater is a perfect match for the Bixpy motor. The mounting bracket fits on the rudder and the battery tucks into the tankwell. To add more power, the Shearwater has plenty of room for an electric outboard or trolling motor. Again, Vibe offers the reliable and functional Bixpy to get the job done with the option to upgrade to a more powerful electric outboard or trolling motor.
The X-Drive is a solid pedal system at a great value. | Photo: Roberto Westbrook
On the water, the Shearwater performed as expected for a standup kayak. It’s super stable with plenty of deck space. The frame seat, wide beam and flat hull are not friendly for straight-line performance or heavy seas, but that’s not what the Shearwater is about. As a paddle kayak, the Shearwater is best for standup fishing in backwaters and flats, farm ponds and lakes.
Adding the X-Drive gives the capable kayak a wider range than would be available with a paddle. With pedals, the Shearwater turns into a serious fishing boat that can cover miles of water and unpredictable conditions.
Shearwater 125 has great Vibes
While I was pedaling the Vibe Shearwater to my favorite spring trout hole, I couldn’t help recalling my conversation with Josh Thomas on the ICAST floor. His vision of a full-feature fishing kayak satisfying serious anglers and still serving a casual audience was now covered in saltwater and fish slime.
After a season testing the Shearwater, I certify the new boat as a standup paddle kayak or formidable pedal kayak. Comparing the Shearwater to similar boats in the class, I couldn’t find anywhere Vibe fell short, except the low price. Whether you’re looking for a reliable fishing platform or a tournament-ready plastic bass boat, the Shearwater is a capable platform to realize your kayak fishing goals.
This article was first published in Kayak Angler Issue 45. Subscribe to Kayak Angler and get the magazine delivered to your front door. Download the Kayak Angler Magazine+ app to seamlessly glide between the digital archives, the latest articles and videos.
Vibe’s Shearwater 125 enters the full-feature kayak race like a boss. | Feature photo: Roberto Westbrook
First Aid Tools | Photo by Roger Brown from Pexels
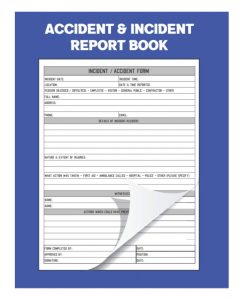
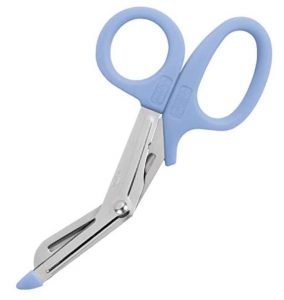
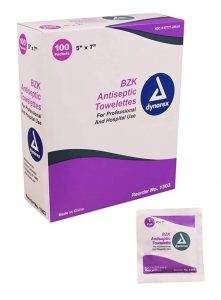
Paddlers who spend enough time on the water see injuries. Cuts and scratches are frequent while, fortunately, more serious injuries are rare.However, even management of small injuries requires basic first aid materials. Cover the most common contingencies with this DIY first aid kit, perfectly sized and sourced to fit your canoe or kayak.
If it weren’t for Boy Scout leaders and open boaters (is there a difference?) you’d be hard pressed to find a first aid kit on the river. Off-the-shelf wilderness first aid kits are simply too cumbersome and get left behind. Designing a first aid kit for small group day trips in the river environment is a challenging task. However, so is managing even the smallest of injuries without basic first aid materials.
If you spend enough time in a canoe or kayak you’ll see some injuries, so be prepared with this DIY first aid kit. | Feature photo: Matt Cruchet
This kit contains most of the essential supplies for likely first aid scenarios on a single day canoe or kayak trip and reflects the unique challenge of first aid in an aquatic environment. Every item has its purpose. Store in a Nalgene water bottle, which is waterproof, durable and easily packed.
[ Paddling Buyer’s Guide: See all safety & rescue accessories ]
3M
Steri-Strip Reinforced Skin Closures
SALE $25.99 $29.95 | Box of 20
6 strips per pack, each ½”×4” in size. Topical sutures used to close small lacerations.
These 5.5” EMT shears will cut almost anything (even pennies). Low profile handle so they fit in the first aid kit and high-quality stainless steel construction.
Aqueous based burn dressing is great for cushioning nasty blisters. Adhesive knits offer pliable and water-resistant dressing thinner than moleskin, the best way to deal with paddling thumb blisters. Pack two sets of dressings.
[ Plan your next paddling rescue & first aid training with the Paddling Trip Guide ]
This article originally appeared in Fall 2004 issue of Rapid Magazineand Paddling Magazine Issue 65. Subscribe to Paddling Magazine’s print and digital editions here, or download the Paddling Magazine app and browse the digital archives here.
First Aid Tools | Photo by Roger Brown from Pexels
When a box about the size of a cooler with a kayak pictured on it was dropped off at my doorstep, I was intrigued. Pulling the Intex Explorer K2 out of the box, I could see this inflatable was a significant step up from cheap, pool toy-type boats.
The Intex Explorer K2 isn’t as robust as the inflatable kayaks I’ve used for paddling demanding whitewater rapids; instead, it’s right in the affordable sweet spot for exploring calm lakes and mild rivers. The Intex Explorer K2 inflatable kayak is ideal for beginner to intermediate paddlers who need a kayak that doesn’t take up too much space at home, and that can get one or two people out on gentle waters for a leisurely paddle.
The Intex Explorer K2 comes packed up with most of the things you need to hit the water, including two aluminum paddles and a pump. Like other inflatable kayaks, the Explorer K2 sets up easily and packs small, making it great for those with limited storage. It’s also among the most affordable kayaks on the market, so it’s a great choice for those wishing to try kayaking without making a huge investment in a boat or a place to store it.
This Intex Explorer K2 review will cover the boat’s main features, along with its strengths and weaknesses to help you decide if it’s the right kayak for you.
Like other inflatable kayaks, the Intex Explorer K2 feels very stable and predictable. Even without the skeg, I found it easy to control and get up to cruising speed. If you are used to paddling hardshell kayaks, the Explorer K2 is noticeably slower, but its acceleration and glide are typical for an inflatable of its size.
The bow and stern have enough rocker—upsweep from the center of the hull through the ends—to ride up and over smaller choppy waves, keeping the paddlers nice and dry. The vinyl-covered decks also deflect smaller splashes out of the ends of the kayak, and my beagle Ellie found the bow deck provided a fairly stable platform for her to scan for wildlife!
The Intex Explorer K2 weight capacity is 400 lbs (180 kg). I never loaded it to the maximum capacity, but with over 300 lbs it handled well and didn’t give me that sinking feeling.
Comfort
The Intex Explorer K2 comes with two inflatable seats that are comfortable and provide ample support once you get them fitted properly. It’s worth taking the extra minute or so to adjust the attachment straps to ensure the seats are positioned correctly; with plenty of legroom, you can move them around in a variety of ways to accommodate one or two paddlers.
Market and demographics
So who should buy the Intex Explorer K2? If you’re looking for an inflatable kayak that can seat one or two paddlers and should last most weekend warriors several seasons on sheltered waters, the Explorer K2 is a solid choice at a budget price.
If you’re looking to develop your skills or spend more time in the kayak, look at a higher performance inflatable kayak to meet your needs. But for many beginner paddlers, the versatile Explorer K2 is a great way to enjoy an hour or two on the water without all the equipment taking over the spare room.
Carry A Whistle (And A Light For Night Use)
Every paddler should have a whistle attached to his/her life jacket.
Carry a light at night. Consider carrying a distress signal device.
About the Intex Explorer K2
Design
Design features and details
The Intex Explorer K2 kayak is essentially a kayak-shaped rubber raft, like the type you will find at discount prices at any big-box department store. It has two large air chambers running the perimeter of the boat and a flat bottom made up of smaller tubes, known as “I-beams.” This is a great attribute for stability, but far less desirable if you’re interested in paddling for longer distances.
A removable skeg—or fin, which attaches to the stern of the kayak— aids in keeping travel in a straight line. The large, open cockpit of the Intex Explorer K2 kayak is easy to enter and exit, and combined with the boat’s exceptional stability, makes this model ideal for first-time paddlers. Along with the boat’s shallow depth, an open cockpit increases the risk of swamping in rough water. The Explorer K2 should only be used in sheltered, calm conditions.
Material and construction
When it comes to the material and durability of the Intex Explorer K2, the vinyl construction feels quite robust. The floor has an inflatable I-beam system, which is basically a flat bottom made up of smaller air tubes, that helps give it some stiffness. A drop-stitch floor—like those found on high-end inflatable boats designed for whitewater use—would increase the cost and weight, making an I-beam floor a good compromise between cost, weight and rigidity.
One of the biggest concerns with any inflatable kayak is its durability. The Intex Explorer K2’s vinyl hull is resistant to impacts with blunt objects and abrasions. My canine companion isn’t the calmest paddling partner, but she didn’t make any scratch marks, scuffs or punctures on our outings. I’ve also pulled the Explorer K2 up on sandy beaches with no issues, although I wouldn’t get into the habit of dragging it around on shore.
With three separate air chambers, a single punctured tube won’t sink the Intex Explorer K2, but it will affect performance and buoyancy and should be repaired as soon as possible. The kayak comes with a few small patches for straightforward repairs.
Bargain kayaks like the Intex Explorer K2 don’t have the same UV-resistant qualities as more expensive boats, and therefore should be stored out of the sun. I also recommend rinsing thoroughly to remove any sand or grit and drying completely before storage.
Intex Explorer K2 kayak accessories and outfitting
Intex Explorer K2 accessories and outfitting include two inflatable seats with back rests, two aluminum kayak paddles, bow and stern lines, air pump and skeg. The Intex Explorer K2 kayak skeg is a key accessory that improves tracking; this removable fin attaches to the stern of the kayak to make it easier to paddle in a straight line.
The two-piece paddles break down for transport and blade angle, A.K.A. feather, can be adjusted to suit most paddlers’ preferences. The paddle drip rings and rubberized grip area give the paddle a comfortable feel in the hands and help keep your hands dry. The included high-output pump allows for easy inflation and deflation of the Intex Explorer K2 in just a few minutes.
You’ll also find handles and grab lines on the bow and stern of the Intex Explorer K2 kayak for carrying the boat with a partner to and from the water. The lines can also be used to clip on anything you don’t want to lose, or secure the kayak to a dock or shoreline.
Warranty
The Intex Explorer K2 kayak warranty is 90 days. You can find warranty details on the Intex website, but basically if the product is found defective you have 90 days to make a claim. This doesn’t mean that if your Explorer K2 gets bitten by an ornery snapping turtle, Intex will send you a new one.
Intex Explorer K2 setup
Intex Explorer K2 kayak assembly using the included pump is easy and takes a typical paddler less than 10 minutes. The Explorer K2 has five valves to inflate the different chambers of the boat, each clearly labeled in the order of inflation. The pump also comes with three different tips, depending on which valve type and size you are inflating.
The floor, bow and stern use valves similar to what you would find on a beach ball; the sides of the kayak use Boston valves, which have a double valve cap that is designed for quick one-way inflating and deflating. Be sure the valve is screwed in and seated next to the kayak, and then take the cap off to inflate.
From box to boat, Intex Explorer K2 kayak assembly is less than 10 minutes—or about the same time that it takes most paddlers to tie and untie a boat from their roof rack. You could likely cut that time in half with a larger or electric pump, however the manual warns, many times: do not over inflate and do not use high pressure compressor.
Intex includes an inflation measurement card, but realistically after you inflate the boat a few times you will probably have a good idea just based on feel. Keep in mind that things in the cold shrink and in the heat expand so depending on where you are paddling you may need to add or let out air to keep the kayak at the optimum inflation.
Once you’ve inflated the main chambers, inflate and install the seats. These Velcro to the floor with a bit of room to adjust forward or back for optimum comfort. Finally, install the skeg. This will help with tracking—essentially, keep you going straight—especially in windy conditions. The skeg easily slides into the molded-in slot on the bottom of the hull. Remove the skeg if you are looking for a bit more maneuverability or paddling in really shallow or weedy waters.
Dress For Immersion, Not Air Temperature
Your body loses heat much faster when immersed in cold water than it does when dry.
Avoid cotton clothing like t-shirts and jeans; they retain water and accelerate cooling when wet. Synthetic fabrics, or wool, are generally a better choice. If the water is very cold (60° fahrenheit or less), you should wear a wetsuit or drysuit.
Portability
Packed into its included travel bag, the Intex Explorer K2 dimensions are about 16” x 13.5” x 23”—compact enough to toss in your trunk or check as standard luggage for a flight to somewhere exotic. Assembled, the Intex Explorer K2 weight is just over 30 pounds and it has comfortable handles built into the bow and stern, making carrying it from the parking area to the put-in easy for two paddlers. It’s also manageable to carry solo on your shoulder.
One slight annoyance was that I found the Velcro doesn’t really hold the seats in that securely. They tended to topple out when lifting the boat on my shoulder for a solo carry. Certainly not a deal-breaker, but a bit of a nuisance.
Storage
Perhaps my favorite feature of the Intex Explorer K2 is how quickly I was able to go from paddling to driving home. After hitting shore, I was packed up in my car in less time than it would take me to tie a hard boat on the roof. Follow the instructions on how to fold and deflate, or simply open all the valves—the big Boston valves deflate super fast—and fold it so it’s small enough to toss in the trunk.
To avoid moisture damage, punctures and mildew, make sure the kayak is clean and dry before storing away for any length of time. The manual also goes over proper storage, including taking all accessories out, deflating completely and avoiding shape bends, corners and creases that can damage the kayak.
Once properly put away, the Explorer K2 takes up about the same space as a microwave or medium-sized cooler.
How it compares
With so many similar inflatable kayak models, it can be overwhelming to choose which might be the best for you. Here’s a look at some comparable models to help narrow down your search.
Intex Challenger K2 kayak vs Intex Explorer K2
The Intex Challenger K2 is a tandem inflatable kayak that’s comparable in price and performance to the Intex Explorer K2. The main difference is that the Explorer K2 features more rocker—lift in the bow and stern—to improve maneuverability; it’s also a foot shorter, further contributing to ease of handling and making the Explorer K2 a good choice if you like paddling on meandering rivers.
The shorter length also makes the Explorer K2 somewhat slower than the Challenger K2, but the difference is negligible. The biggest difference in the designs is the Explorer K2’s more open cockpit, which is easier to enter and exit. Both kayaks are constructed of welded vinyl and have upper weight limits of 400 pounds.
Intex Excursion Pro kayak vs Explorer K2
The Intex Excursion Pro K2 is a step up from the Explorer K2 in terms of performance and outfitting, but the upgrades come at double the price. Serious anglers will appreciate integrated rod holders and a mounting bracket for a fish finder or other accessories. The Excursion Pro is constructed with a more durable, lightweight laminated PVC plastic for greater rigidity and UV-resistance.
At 12.5 feet long, the Excursion Pro is also faster and comes with two skeg options for good tracking in shallow or deep water. Comfort upgrades include greater adjustability in the seats, built-in foot rests and molded grab handles. Both kayaks have a 400-pound max capacity.
Intex Explorer K2 vs Itiwit
The Itiwit inflatable kayak is another option for paddlers considering an Intex Explorer K2. The Itiwit two-person kayak is about a foot longer than the Explorer K2, with slightly higher volume tubes for even greater stability. The Itiwit packs into a sleek backpack for easy transportation to and from the water. Three molded-in keels on the hull improve tracking on flatwater and, like the Explorer K2, the Itiwit’s seats can be arranged for solo or tandem paddling.
The Itiwit has a capacity rating of 330 pounds, significantly less than the 400-pound capacity of the Explorer K2. Value-wise the Itiwit is about the same price, but does not include a pump or paddles. If you need greater weight capacity for two adult paddlers, the Explorer K2 is the obvious choice.
Intex Explorer K2 vs Sea Eagle 330
The 11-foot Sea Eagle 330 inflatable kayak has space for two paddlers and a maximum capacity of 500 pounds, or 100 pounds more than the Explorer K2. The added volume combined with the Sea Eagle 330’s more rugged PVC construction and covered bow and stern decks makes it a better choice if you’re looking to paddle moderate whitewater (up to class III with experienced paddlers).
The Sea Eagle 330 is somewhat more expensive than the Explorer K2, but is 10 pounds lighter and includes an impressive 5-year warranty (versus the Explorer K2’s 90-day guarantee). If you are looking for a sturdy, lightweight craft that will last for years, the Sea Eagle is a great value.
Where to buy the Explorer K2
You can buy Intex Explorer K2 kayaks from lots of online stores including Amazon, Ebay and direct from Intex. They can also be found in a number of brick-and-mortar stores, many of which offer free shipping, such as Cabela’s, Bass Pro Shops, Walmart and Academy. It’s impossible to list all of the potential Intex Explorer K2 stores; it shouldn’t be hard to find one in most larger cities.
Intex Explorer K2 pros and cons
Pros
Higher quality than many inflatables found in big box stores.
Great value—the kayak package includes a pump and paddles for just $250 USD.
It’s supremely portable—the Intex Explorer K2 rolls up and fits in a large gym bag, even with paddles, and weighs well under 40 pounds.
Adjustable seats and generous 400-pound capacity, so it’s able to be paddled tandem or solo.
Easy set up—the Intex Explorer K2 kayak goes from bag to the water in less than 10 minutes; take-down is even faster.
Super stable and the large cockpit is easy to enter and exit.
Beginner-friendly—you don’t need any paddling experience to get out on calm, sheltered water in the Intex Explorer K2.
Cons
Not as durable, UV-resistant or suitable for saltwater environments as more rugged (and pricier) PVC inflatables.
Limited seaworthiness: While the Intex Explorer K2 inflatable kayak won’t sink, its large cockpit and low profile allows waves to enter the boat. This design is meant for use on flatwater lakes and gentle rivers only.
Doesn’t inflate as rigid as higher end boats, which makes it slower and difficult to paddle for longer distances.
Like all inflatables, the Intex Explorer K2 is prone to getting blown around by the wind, especially for beginners.
Only 90-day warranty.
As with any kayak purchase, it comes down to finding something that suits your needs and your budget. The Intex Explorer K2 is a great option for those looking to spend shorter amounts of time on the water paddling in calm conditions, and don’t want, or need, to invest in more rugged equipment. It’s a budget-friendly starter package that is easy to own and transport if you’re a casual paddler with limited storage space.
Check The Weather
Plan for changing weather conditions. Prepare for the worst case.
Don’t forget to check tide, currents, or river levels.
Whether you’ve spent your life on the water or are just beginning to explore the blue spaces around you, jumping on a paddleboard provides a unique perspective, easy learning curve and a great workout. It’s also easy to get started; standup paddleboarding requires only a few pieces of equipment—just a board, paddle, personal flotation device (PFD) and ankle leash.
Paddleboarding is appealing for paddlers looking for a full-body workout, and for others who want to experience paddling without sitting or kneeling for extended periods as they would in a canoe or kayak. Also known as SUP, standup paddleboarding can be enjoyed anywhere there’s water to paddle, with board designs ranging from versatile all-rounders to specialized shapes for surfing, SUP yoga, touring, racing and even whitewater. Many anglers are also discovering the allure of fishing from a standup paddleboard.
The selection of standup paddleboards can seem overwhelming to a first-time shopper. Nearly all paddlesports and outdoor shops carry boards. Inexpensive, entry-level boards are also available from many big-box stores, as well as online marketplaces. For those who don’t have the space or means to store and transport a rigid SUP paddleboard, inflatable boards are a great option for unrivaled portability and compact storage. This comprehensive guide will help you choose the best standup paddleboard for your needs, and answer questions that arise when shopping for a board.
With so many SUP paddleboard options, use our picks of the most popular boards to begin your search. If you know what type of paddleboard you are looking for, then filtering by the brand is also helpful. Trust the companies with a longer history of making paddleboards to have better performing designs and reliable quality control measures in place.
Certain things are essential to consider when looking for a used paddleboard. First and foremost, keep in mind that board design can vary a lot depending on the type of paddling for which the board is intended. Don’t cave to the pressure of buying a board that may be a good deal but isn’t the right fit. If you’re just starting out on your paddleboarding journey, or you want to do a bit of everything, a beginner all-rounder board is the best choice.
To help you better understand how to buy a paddleboard on the used market, heed the following advice:
1 Pick a design
Start simple: What do you want to do with the board? Paddleboards are generally divided into surf, all-around and touring categories. From there, some boards carve more specific niches, such as racing or yoga-specific paddling.
2 Consider materials
As a general rule with rigid paddleboards, the lighter the materials, the more expensive the board will be. Inflatables are the opposite—with more expensive boards having heavier-duty dual-construction layups, adding durability and outfitting options. The savings from buying used may mean you can upgrade to better materials while staying in the same budget range.
3 Know the brands
In the age of shipping direct from factories to consumers, unfamiliar brands that are available only online can appear in targeted advertisements. These companies may have nailed the search engine optimization, but they might lack the quality control that comes with companies with a longer track record of producing boards. We’re not saying don’t trust new companies, but do some thorough research from third-party reviewers before committing to a purchase.
4 Try before you buy
This is the absolute best way to know if the paddleboard you are looking at is right for you. Ideally, use the board in the conditions in which you would typically paddle. Demo sessions at symposiums or races are an excellent opportunity to test-paddle a variety of boards, and hopefully, as pandemic restrictions ease, more of these events are planned. If you are buying privately, ask to meet the seller at a location where you can try the board on the water. Bring a SUP paddle and a PFD (unless these are included with the sale), and wear the clothing you would normally paddle in.
5 Find a source
Events are a great way to meet people in the paddling community, and often local paddlesports shops or dealers are the hubs of these communities. Buying local also means you can talk to an experienced person who can answer any questions that may arise or address any issues you have. Should you upgrade your paddleboard down the road, they may take the board as a trade-in or help you find a buyer for it. Specialized online classifieds such as PaddleMonster.com are another great source for mid- to high-end used paddleboards.
6 Ask questions first
Find out how the previous owner used their paddleboard and see if it matches your intended paddling style. This may also be a good way to gauge how heavily the board was used. If any important information—like dimensions, material and condition—is missing from the ad description, ask for clarification before looking at the board.
7 Meet in person
This goes without saying. Unless you personally know the seller, shipping paddleboards is a costly and risky endeavor. It’s much better to physically see the board you are going to buy, and know you aren’t going to get scammed. Even with the supply of used paddleboards as limited as it is, the risk is not worth it.
8 Check for damage
Thoroughly inspect the board for dents, dings and signs of UV damage, such as fading or loss of luster from the board’s shiny surface. Minor scratches aren’t a big deal, but avoid any boards with cracks, punctures or deep gouges exposing the fiber weave (for composite boards). If you are inspecting an inflatable, blow the board up to its recommended PSI and examine the seams and valves, listening and feeling for air leaks. Seeing how/where the board was stored also helps to anticipate any other damage that may have occurred from UV or moisture.
9 Agree on price
Fair value of a used paddleboard may be difficult to gauge, but consider the level of use and condition the board is in when making an offer. Remember that a used board purchased from a private seller has no warranty, reason alone that new boards command a higher price.
If you are wondering how to choose a standup paddleboard, you are in the right place. Remember, the most important factor in selecting the best paddleboard to suit your needs is deciding how and where you’ll use the board. Not all SUP paddleboards are created equal, and different boards do different things well. If you’re just starting out on your paddleboarding journey, or you want to do a bit of everything, a beginner all-rounder board is the best choice.
Don’t forget to leave room in your budget for other necessities when buying a paddleboard. You’ll also need a SUP paddle and two essential safety items: a properly fitting PFD (personal flotation device) and ankle leash. Getting the best quality paddle you can afford is arguably just as important as a good board. A lightweight, comfortable paddle plays a far bigger role in how much you’ll enjoy your paddleboarding experience than a slightly lighter or flashier board.
Discover the different styles and purposes of paddleboards in Buying a SUP: The Ultimate Guide. For a deep-dive into paddleboard design, construction, materials, weight, dimensions, price and more, find the answers to all your questions below. These will help you better understand how to pick a paddleboard that matches your needs.
What does SUP stand for paddleboard?
SUP stands for “standup paddleboard”. These boards are paddled with a long, single-bladed paddle from a standing position. Inflatable paddleboards are sometimes referred to as iSUPs, and the “i” at the front of a board’s name is a good indicator it is an inflatable.
What is SUP paddleboard?
At first glance, a SUP board looks much like a large surfboard, but there are some key differences. A paddleboard is wider and thicker than a traditional surfboard so the paddler can balance easier while standing. Paddleboards can be used on all types of water, while a surfboard is designed expressly for catching and surfing waves. Many different paddleboard designs are available, with boards catered to touring, surfing, yoga, fishing or all-around paddling.
Is a paddleboard a boat?
This is a trickier question to answer than you might think. In most circumstances, a paddleboard is considered a boat (or vessel) in the eyes of the law. In Canada and the United States, Coast Guard regulations treat paddleboards the same as kayaks and canoes. This means that paddlers are required to wear a personal flotation device (PFD) and have a sound-signaling device with them (i.e., a whistle). If paddling after sunset or before sunrise, a water-tight flashlight or headlamp is also required. The only exemptions to these regulations are if the paddleboard is used for “non-navigational” activities, such as using the board within a designated swim area, or for SUP yoga or surfing.
Paddleboard vs kayak
Should you buy a paddleboard or a kayak? This can be a tough question, but considering the differences may help you decide. A primary difference is the paddler’s perspective. Paddleboarders stand above the water (although they can sit or kneel as well) while kayakers are seated at water level. Read more about how stability, speed and exercise differ when comparing Paddleboard vs. Kayak.
How are paddleboards made?
Paddleboard manufacturing methods can vary depending on the materials used. One of the most common methods is the same process used to make surfboards, in which a foam core is encased with epoxy and fiberglass or other high-strength materials.
Thermoforming is another common paddleboard manufacturing process. To create a thermoformed board, plastic sheets are heated and then shaped over a mold. This process is used on both low- and high-end boards, and the materials and manufacturer play a critical role in the end quality of the board.
Inflatable paddleboards are constructed with PVC using a technique called drop-stitching. Thousands of tiny fibers are sewn between two pieces of PVC material, enabling this flexible material to maintain a durable, rigid shape once inflated. Drop-stitching creates a flat, rigid shape, so these inflatable paddleboards can rival hardboards for efficient paddling performance.
Types of paddleboards
At the most simplistic level, paddleboards are designed for one of three purposes: surf, recreation or touring and racing. In other words: playing on waves, hanging out and having fun on the water, or hustling from A to B. What you want to do on the water determines the right board style for you.
The all-around board or recreational SUP is the most popular category on the market. It blends characteristics from both surf and touring designs. All-around boards are built like a surfboard but longer, thicker and wider, between nine and 11.5 feet long and over 30 inches wide. Like a surfboard, they have planing hulls—flat bottoms that curve up at the nose (front) to skim across the water, rather than slice through it, for easier turning and wave-riding.
Niche categories of all-around boards have become more common as the sport develops and have specialized characteristics of their own. These include extra-stable yoga SUPs with generously cushioned decks for comfort; fishing-specific boards with lots of tie-down points for gear, attachment points for rod holders and extra width to provide a stable platform; and whitewater paddleboards, most of which use durable inflatable construction to bounce off rocks without damage.
Surf SUPs are narrower and shorter, about 10 feet or less, than all-around boards for quick responsiveness and maneuverability. While nimble on a wave, on flatwater you’ll likely find these boards slow and unstable.
Racing and touring paddleboards are for going places—either extended day trips, overnight expeditions or as fast as possible on race courses. What boards in this category all have in common is their greater length, usually 12 feet or more, and displacement hulls with V-shaped bottoms and pointed noses for cutting through the water more efficiently.
How long is a paddleboard? The length of your board will largely be decided for you by how you’re planning to use it and how big you are. Generally, surf SUPs are nine feet or shorter to allow for easier turns, recreational all-around paddleboards are 10 to 12 feet, and touring SUPs are 12 feet and up for enhanced speed and glide.
Narrow down the model of board based on how you’re going to use it and then fine-tune the length based on your size. For example, the same all-around board may be available in a 10’6” or an 11’6” length, with the longer one designed for riders over 200 pounds.
Generally, wider boards will be more stable. Wider boards suit less experienced riders and activities that favor stability over speed, like fishing, yoga, all-around recreational use and learning to surf. Wide boards also suit larger riders. Most recreational and beginner boards are 28 to 36 inches wide.
How thick is a paddleboard? Paddleboard thickness relates to volume, with a thicker board having a higher volume and more buoyancy and stability. In general, beginner boards will be thicker than boards aimed at intermediate and advanced paddlers. Many manufacturers also offer a range of sizes with varying thicknesses that correspond to different rider weights. This is because taller and heavier paddlers will need a higher volume board for float and stability. Touring and racing boards may have thick rails and a thin deck, so the paddler stands lower on the board, increasing stability. Materials can also play a role in paddleboard thickness; inflatable boards are thicker due to their blow-up construction.
How much does a paddleboard weigh?
Paddleboard weight varies greatly depending on dimensions, material and outfitting of the board. The lightest paddleboards weigh around 15 pounds, while heavier ones weigh over 40 pounds.
How much weight can a paddleboard hold?
Paddleboard weight limit varies depending on the board and can usually be found in the “specs” listed by the manufacturer. Board volume—often expressed in liters, and calculated by multiplying the length x width x thickness—is a good indicator of weight limit. Higher volume paddleboards have higher weight limits. The buoyancy and strength of the materials also plays a part in a paddleboard’s weight limit to some degree. For specific information about how much weight a paddleboard can hold, consult the manufacturer’s website.
What size paddleboard should I get?
The ideal size of paddleboard will be determined by the type of paddling you want to do, and your body size. After first settling on the type of SUP (surf, all-around or racing/touring), the size of the board relates to the paddler’s size. If a specific board model is available in multiple sizes, the brand will provide a sizing guide. Taller and heavier paddlers will want a higher volume board for buoyancy, while smaller paddlers can paddle a lower volume board. Board length is more dependent on activity, and a shorter board does not always suit shorter paddlers. Learn why this is the case, and find more board sizing tips, in our article What Size Paddleboard?
What are paddleboards made of?
Paddleboards are made from a variety of materials. The most common materials for rigid boards are fiberglass and epoxy or other composites. Most entry-level boards use plastics, often through thermoforming processes. Others are made with bamboo or other wood combinations. Inflatable paddleboards are made with flexible synthetic materials like PVC. For paddler comfort, most paddleboards are equipped with a foam pad area to stand on.
Why are paddleboards so expensive?
Although a paddleboard may just seem like a slab of material that you stand on, a lot of design and engineering has gone towards making a board that is fun and easy to paddle. Quality boards come at a higher price, but they also perform better and will last longer. Higher cost boards often come with significant reductions in weight and more functional outfitting. The saying, “You get what you pay for”, rings true and spending a bit more money upfront results in a high-performing board.
Why are paddleboards more expensive than kayaks?
Paddleboards made with high-quality materials are more expensive than entry-level kayaks. Entry-level boats and boards generally cost the same, but the pandemic paddlesports boom has also changed the prices. Increased demand for paddleboards and recreational kayaks has raised prices significantly, and in some places, paddleboards may be in even greater demand than kayaks.
How much are paddleboards?
Depending on their design, the materials used and the brand producing them, paddleboards can range from $400 to upwards of $2,000. With patience and a keen eye, buying used can help to maximize your dollar value. We break down the costs of different boards and brands in our article How Much Are Paddleboards?
When do paddleboards go on sale?
Paddleboards, like most paddlesports equipment, go on sale in the shoulder seasons, fall and spring. At the end of the summer, shops may be looking to clear out their stock to make room for next year’s deals. Before the paddling season, used paddleboards are easier to find as people upgrade their current setups or clear out their garages.
How long do paddleboards last?
A paddleboard that is properly cared for will last many years. It is essential to store the board properly: this includes away from direct sunlight and moisture. Storing the paddleboard indoors is the ideal location, but outdoors on a shaded rack works as well. It is tempting to wrap the board in a tarp in the winter, but this may trap moisture inside. It is better to have a tarp spread above the board with space for airflow.
Always rinse and fully dry inflatable paddleboards before packing them away. Inflatable boards should not be stored in their duffel for too long; ideally, once a month, pull the board out and repack it. This prevents creasing that can lead to weakness over time.
What is a hybrid paddleboard?
A hybrid paddleboard is a board designed to be paddled standing or sitting—think of it as a kayak/paddleboard combo. These are good crafts for those who want versatility and may not be comfortable standing the entire time they are out paddling. Hybrid paddleboards are especially ideal for fishing; with chair mounting options, the angler can both sit or stand. As hybrids borrow aspects of both kayaks and paddleboards, don’t expect them to ‘”do it all” perfectly, but instead consider them a compromise of both.
What is a soft standup paddleboard?
The most common type of soft standup paddleboard is a “soft-top”, which refers to the foam construction of the board. These entry-level boards are great for learning and casual use. The foam is comfortable to stand on and, more importantly, forgiving to fall on. Some may also call inflatable paddleboards “soft” paddleboards. Inflatables offer exceptional portability and easy storage along with a more forgiving, cushiony deck than a rigid board.
Do all paddleboards have fins?
Fins are an essential component of a paddleboard to help it move in a straight line, also known as tracking. Paddleboard fins come in different styles, with a single fin or tri-fin—a deep center fin with two smaller “thruster” fins—being the most common configurations. Thruster setups are mostly found on river and surf paddleboards, as well as some all-around boards, while a single fin is the standard on touring boards.
Where to buy paddleboards
You can buy paddleboards anywhere paddling equipment is sold. Dedicated paddlesports outfitters and outdoor stores such as MEC and REI sell boards, leashes, PFDs and other essential items. Knowledgeable staff are also able to answer any questions that you may have, and help you find the best paddleboard for your needs.
Paddleboards can also be bought at big-box stores and through online retailers like Amazon. These are typically entry-level boards suited for beginners and casual recreational use.
Used paddleboards are found through online classifieds like Craigslist or Kijiji. Specialized paddling classifieds like PaddleMonster.com are a great place to find higher-end racing and touring boards. As pandemic restrictions ease, SUP races and events will hopefully make a resurgence. At these events, dealers often bring boards for people to try, and the demo boards are often for sale at great prices.
Paddleboard reviews
Reviews can be a useful tool to help find the best standup paddleboard for your needs. You’ll get a sense of where each paddleboard excels or where it may not. See if the type of paddling the reviewers do matches your style and if the board matches your budget.
And one more thing—don’t call it rodeo. | Feature photo: Nick Troutman
It’s easy for freestyle paddlers to get stuck in a hole of mediocrity, flailing awkwardly in a recirculating repertoire of chronic bad habits. Don’t let yourself flounder on freestyle’s skid row of delayed development. Our experts point out freestyle’s six most common bad habits, misconceptions and mistakes and tell you how to avoid them.
“If you are rigid in your boat, you’ll have to tilt your head over the side to engage its edges,” says Dave Tiedje, an instructor with the Ottawa Kayak School. If your body tilts with your boat you’ll need to use your paddle for braces rather than for maneuvering.
The secret, says Tiedje, is separating your upper and lower body. When putting your boat on edge, keep your upper body perpendicular to the water and overtop of your boat by bending at the hips. This keeps you balanced when the boat’s edge is engaged and lets you use your paddle for effective strokes.
Keep your upper body balanced and bend at the hips for more maneuverability. | Photo: Brett Sayles/Pexels
2 Wrong boat blues
Too many people end up paddling a freestyle boat that’s too small or too big for them. Matt Hamilton, an instructor and three-time member of the Canadian national freestyle team says, “If your kayak is too small, it will ride too low in the water and won’t come up on a plane as easily while surfing.”
[ Paddling Buyer’s Guide: See all freestyle boats ]
The result: you’ll feel like you’re trying to spin and bounce a bathtub. And, says Hamilton, the edges that are so good for carving in a properly sized boat will always be in the water making for a grabby ride.
Boats that are too big have their own set of problems. First off, you’ll be swimming in the cockpit and won’t have the boat control to do advanced or even beginner freestyle moves. Secondly, you’ll never physically be able to cartwheel a beastly kayak that has too much volume for you in the ends.
When choosing a freestyle boat, Hamilton suggests beginning with the manufacturers’ suggested weight ranges and then experimenting on the river.
“You can only learn so much from your buddies,” says Anna Levesque, creator of the Girls at Play instructional tour and video series for women. While your paddling buddy, boyfriend or husband may be your best friend off the river, they seldom give you as much attention when they’re queued up for surf a wave.
Instructors are paid to sit in eddies and study and critique your technique. And a good instructor will offer tips to help with the finer details—like how to balance your weight in the boat and where to look—that make a big difference and take time to teach, says Levesque. Take a course at the beginning of the paddling season and remember to practice what you learned.
4 Backseat driving
“The classic La-Z-Boy pose is a sign of defensive paddling,” says Chad Hitchins, the general manager of Liquid Skills. You can’t paddle powerfully if you’re not sitting tall and engaging your abdominal muscles. And, says Hitchens, your kayak wasn’t designed to ride ass-heavy.
Sitting in the backseat fails to effectively engage the kayak’s edges beneath your seat, so you’ll be slip-slidin’ away on green waves. “Sit-ups or crunches will strengthen your abdominal muscles,” suggests Hitchens. “You’ll be less reliant on your backband and more likely to sit properly with your head above your pelvis.”
And don’t call it rodeo. | Photo: Nick Troutman
5 Forgetting the fundamentals
“A surprising number of paddlers can’t perform a proper forward stroke,” says Mariann Saether, an instructor at Sjoa Kajakksenter in Norway. Getting on a wave or learning playboating moves require precise, powerful forward strokes.
“Many paddlers neglect the large core muscles of the body and instead rely only on their arms,” says Saether. To ensure you’re using your stronger torso muscles, she suggests visualizing yourself rotating your torso as you reach for your stroke and unwinding it as you pull your paddle blade through the water to your hips.
6 Staring at the bow
“If you’re having a hard time staying in the sweet spot while trying to spin or cartwheel, you’re probably staring at your bow rather than into the hole,” says Patricia Fraser, a Paddler Co-op instructor and former dance instructor.
It’s hard to anchor yourself on the most playable part of the feature without a visual point of reference. “When a dancer or figure skater jumps and spins she keeps an eye on her landing as long as possible and then snaps her head around to spot her landing,” says Fraser. The same is true for spinning a kayak—the landing is the sweet spot of the wave or hole.
Instead of staring at the bow of your kayak or off into space look upstream where you want to be until the boat has spun so far around you can no longer look upstream, then quickly rotate your head over your other shoulder to spot your landing. Your body and boat will follow your head around.
This article first appeared in the Early Summer 2006 issue or Rapid Magazine and in Paddling Magazine Issue 65. Subscribe to Paddling Magazine’s print and digital editions here, or download the Paddling Magazine app and browse the digital archives here.
And one more thing—don’t call it rodeo. | Feature photo: Nick Troutman


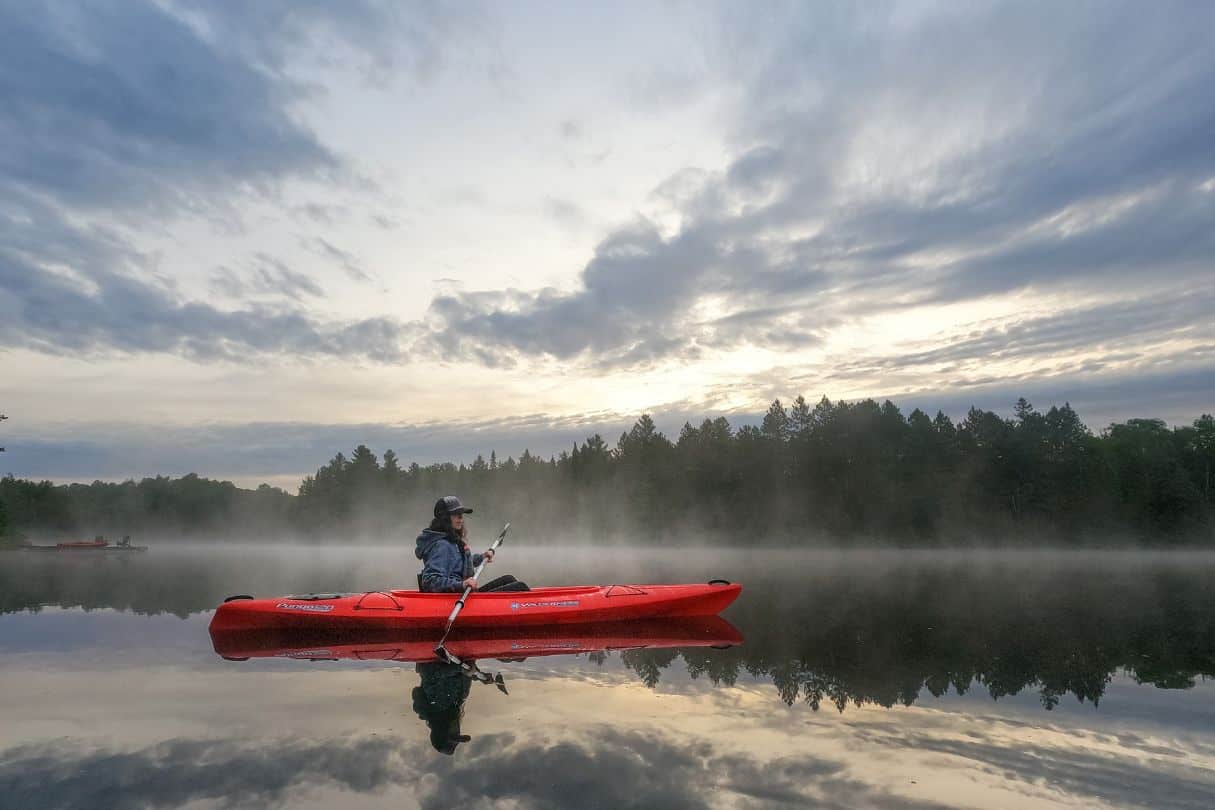

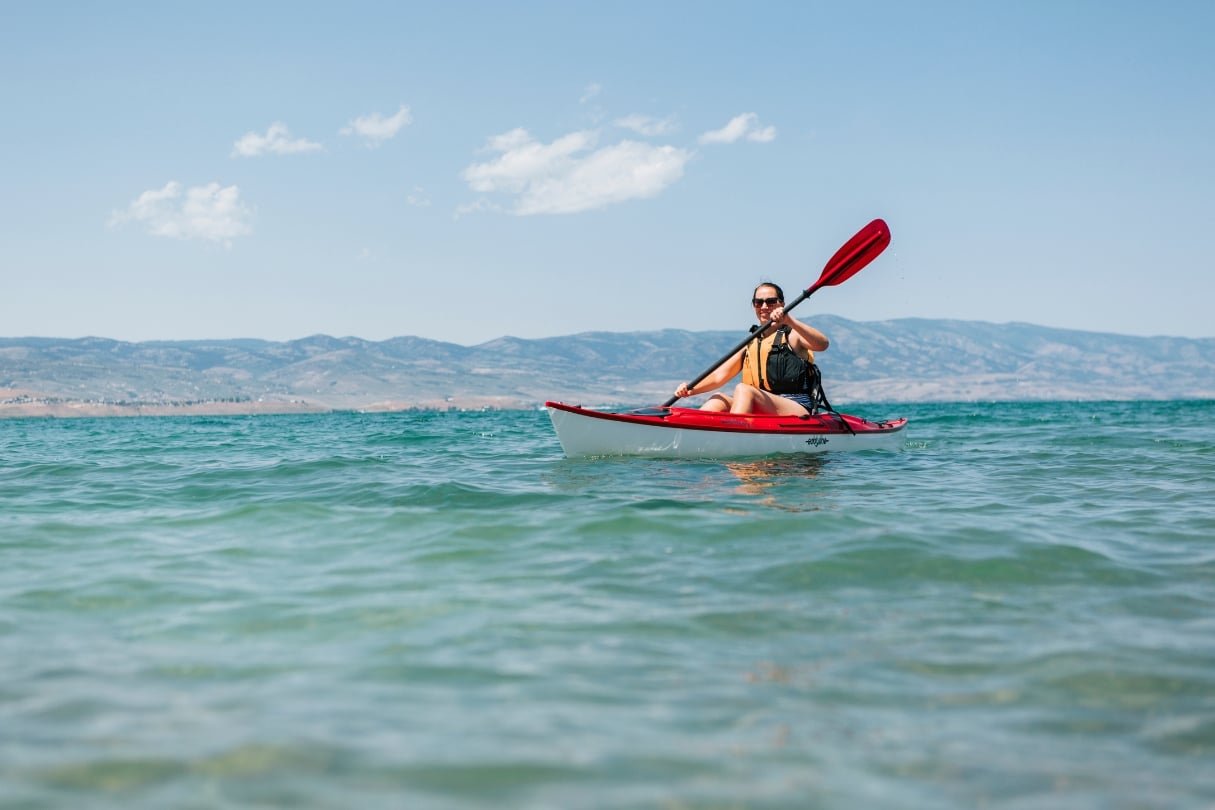
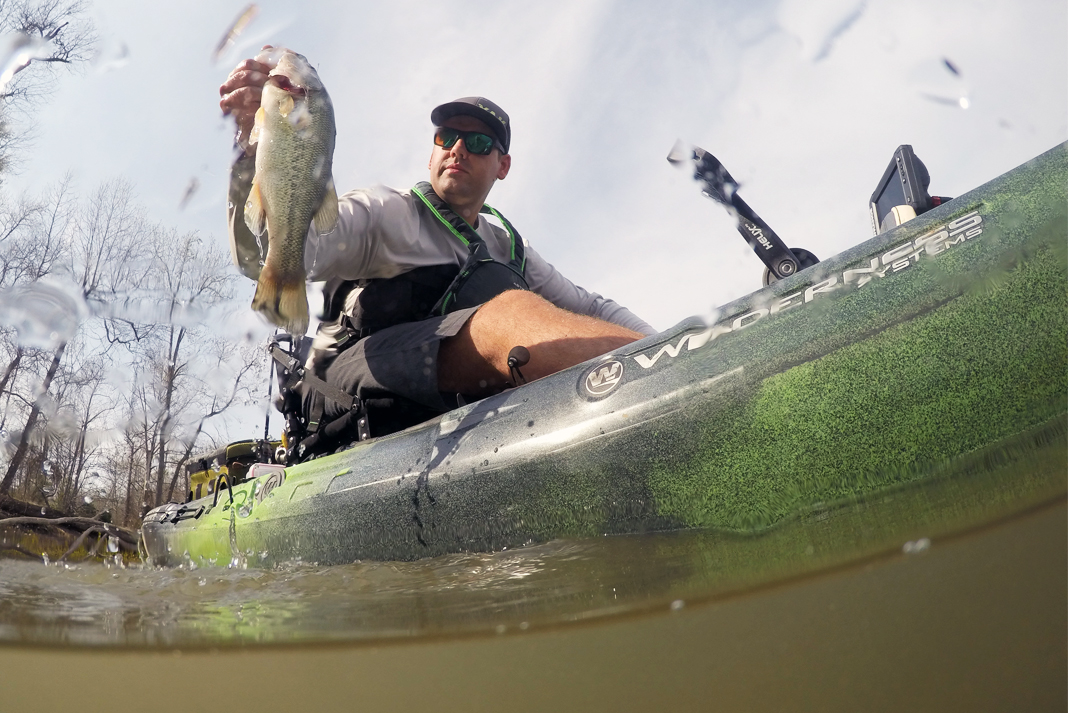
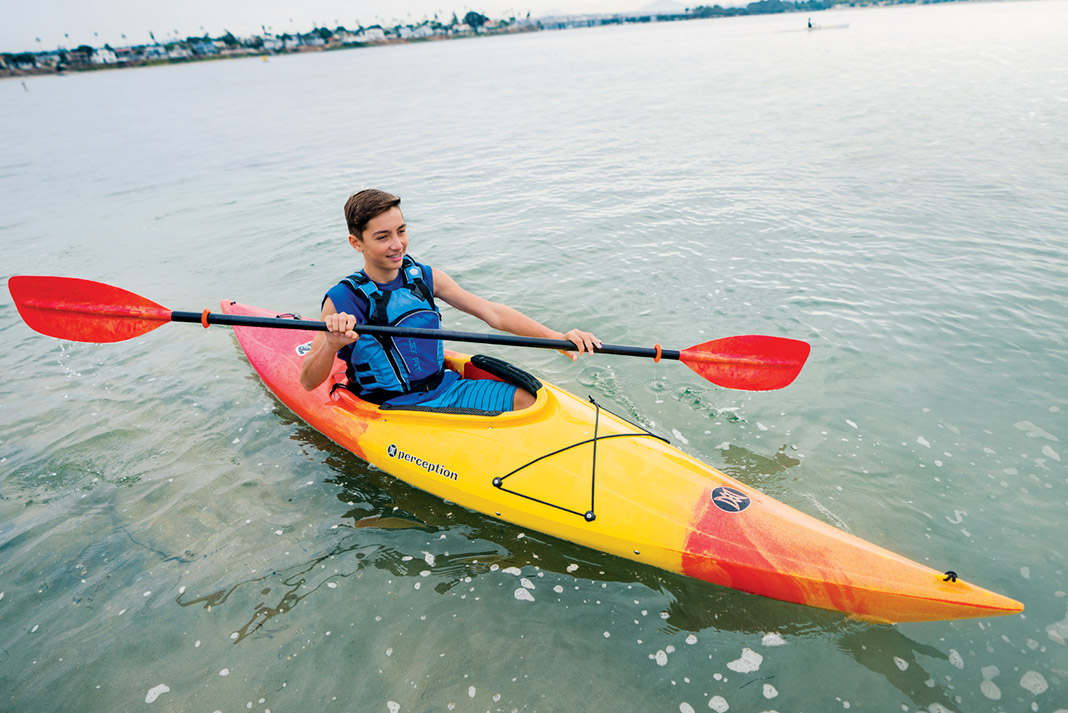

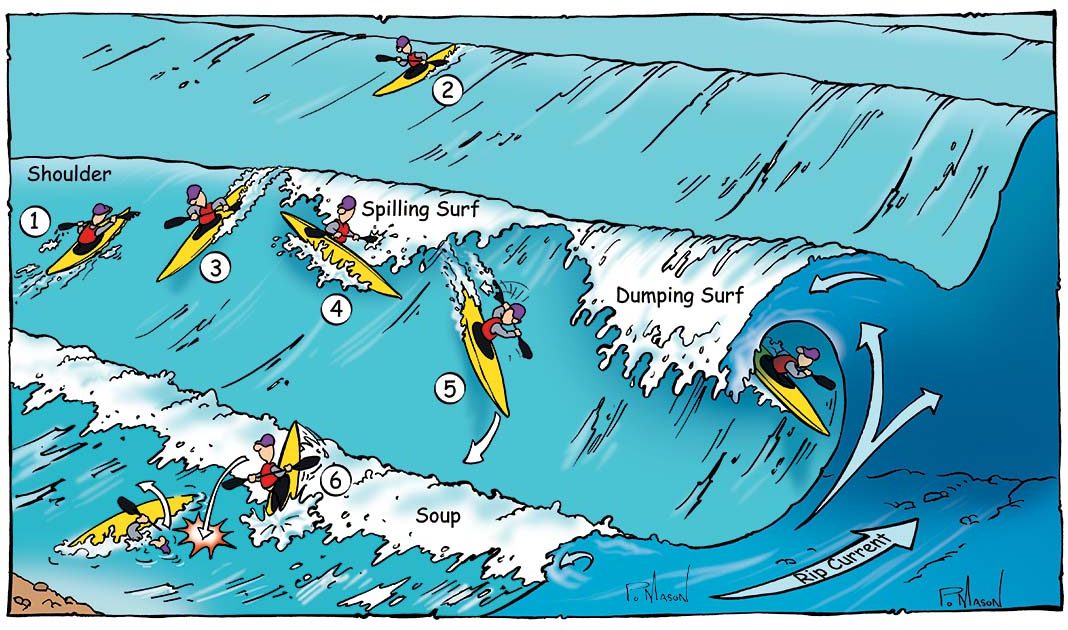
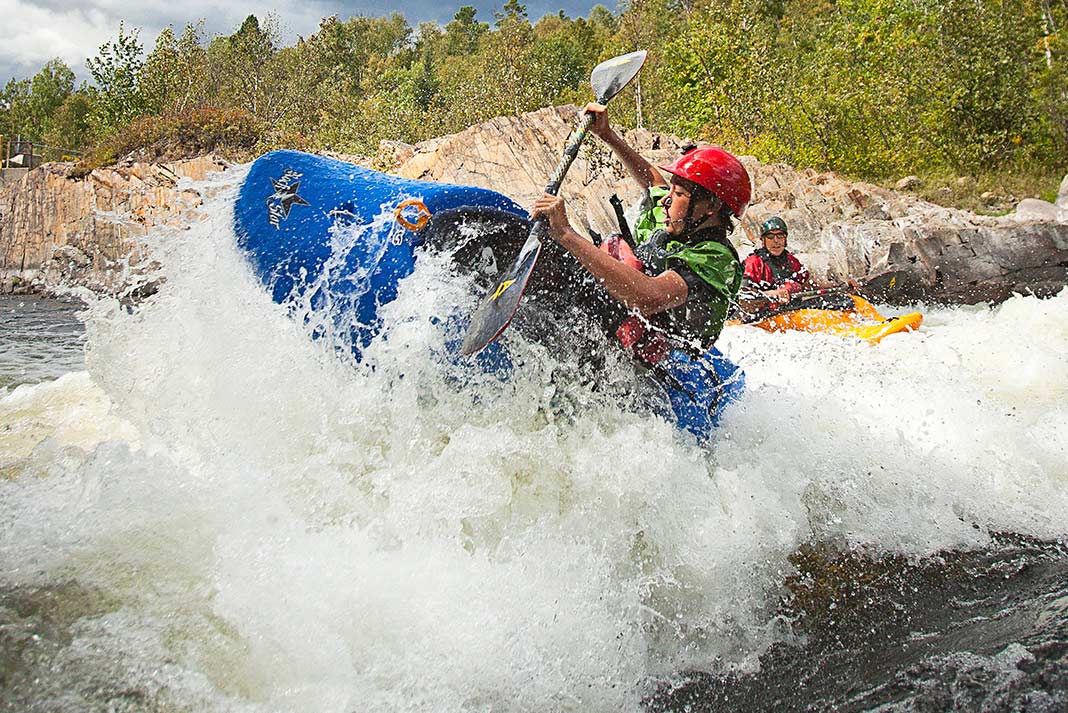

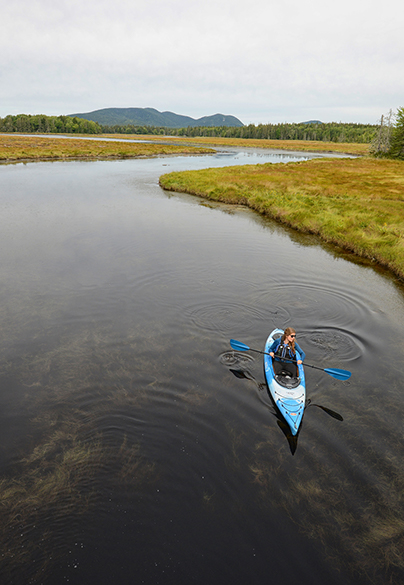

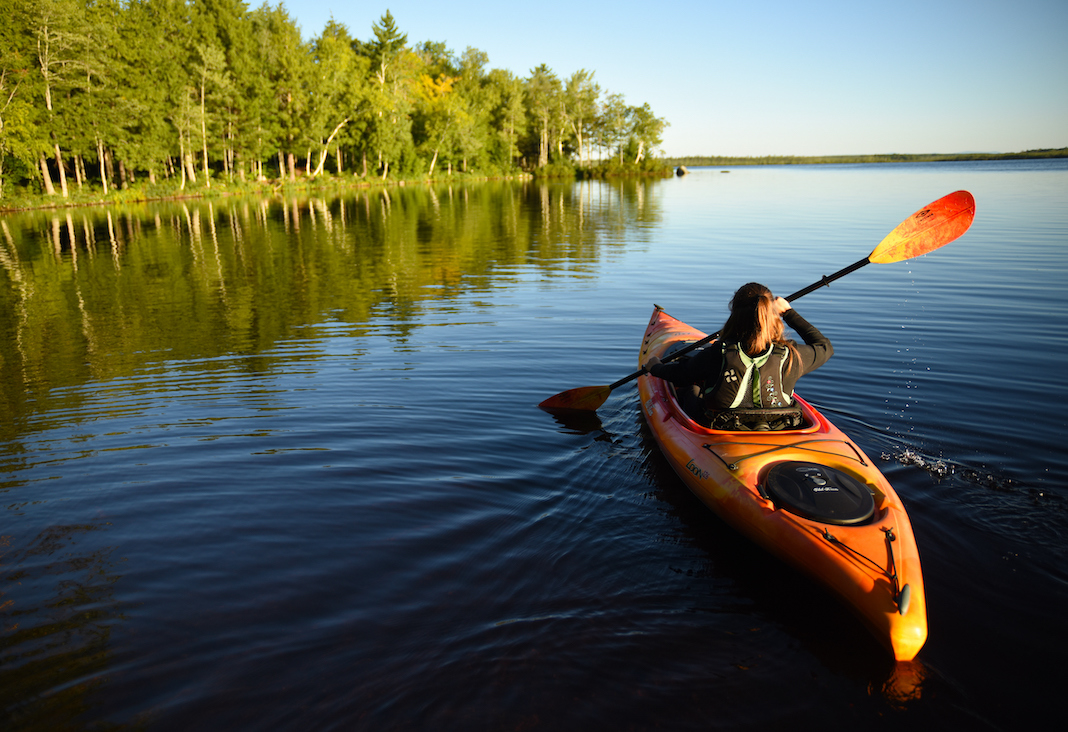
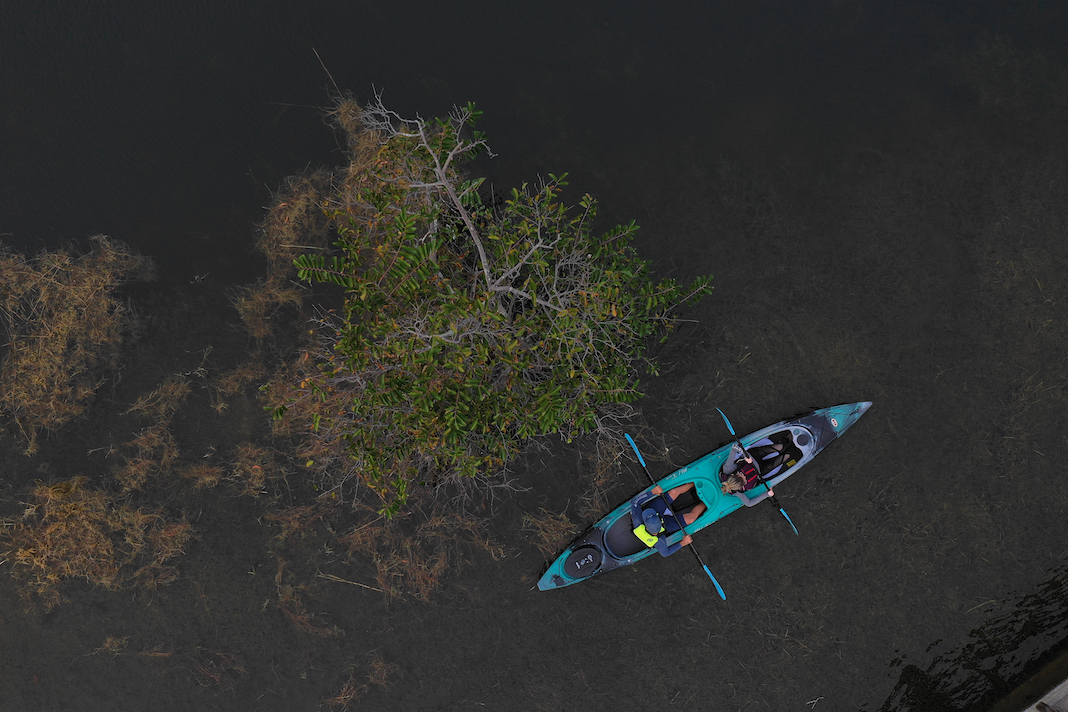

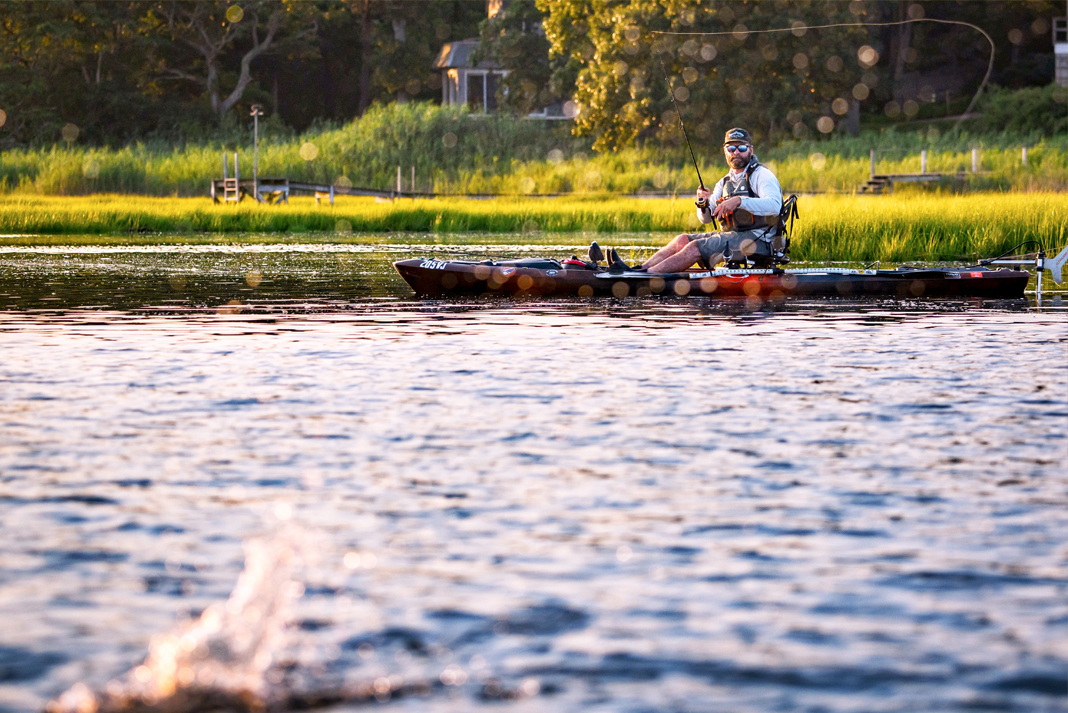
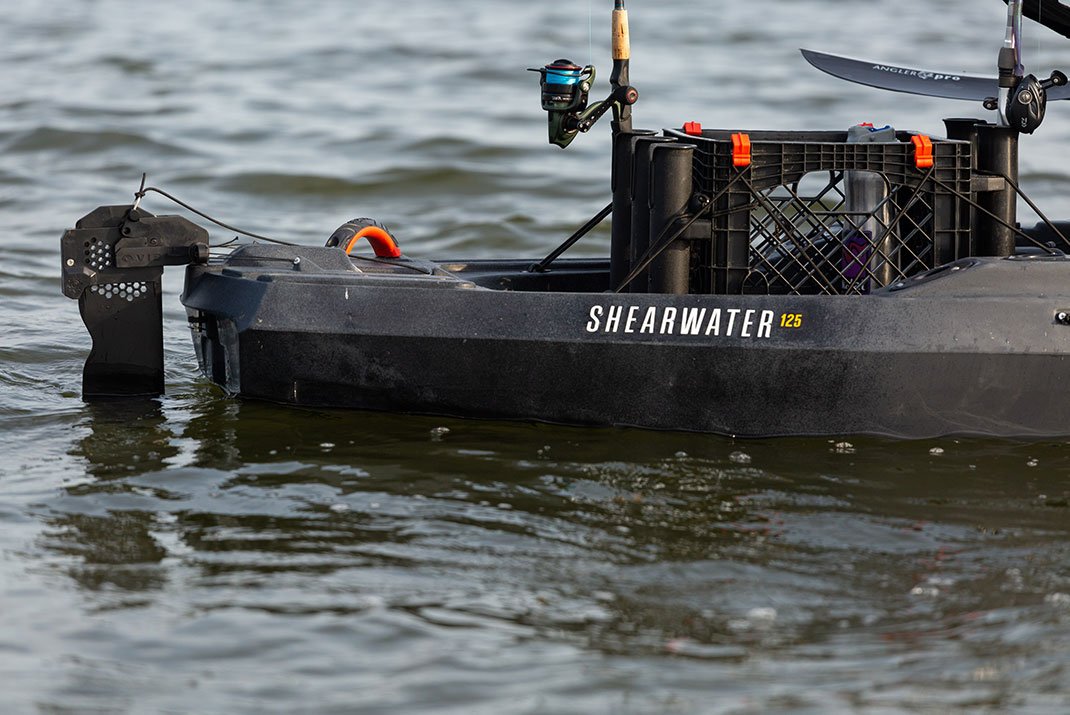
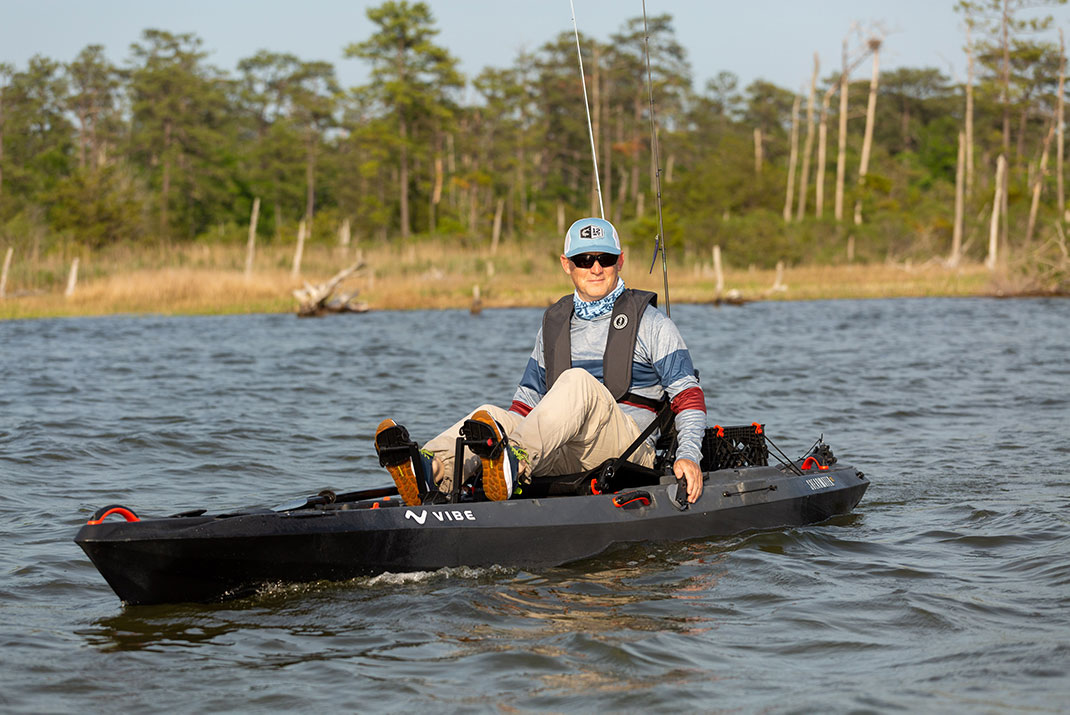
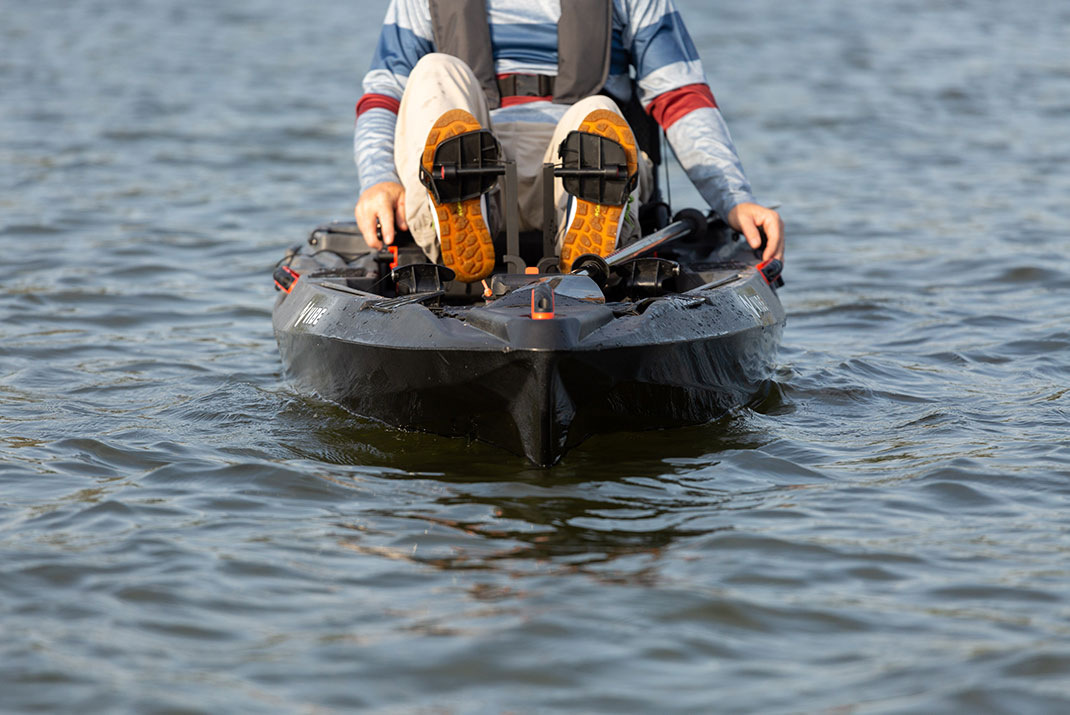
 This article was first published in Kayak Angler Issue 45.